

Transitions, titles, and video effects enhance your videos not only by helping to advance the story or message, but also by providing a look and feel for the entire presentation. This chapter shows you how to apply and adjust transitions in iMovie and Adobe Premiere Elements as well as create titles and popular video effects that will take your videos to the next level. You also are given some tools for expanding the effects capabilities of your video editing application and shown how to export movies and archive finished projects.
Explore Elements of Video Look and Feel 242
Learn About Software Plug-ins 244
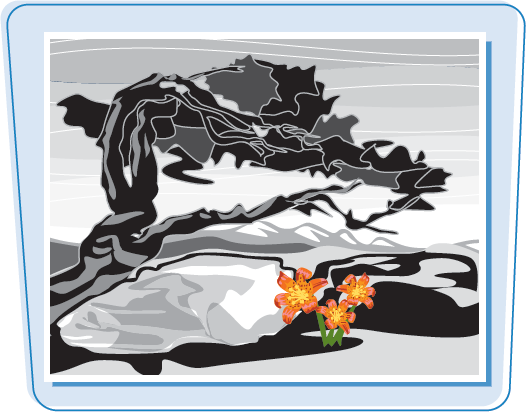
Explore Lens Filters for Effects 246
Create Titles for Video in iMovie 248
Add and Replace Video Transitions in iMovie 250
Create Video Transitions in Adobe Premiere Elements 252
Create Titles for Video in Adobe Premiere Elements 254
Make Your Video Look Like Film 256
Export a QuickTime Movie from iMovie 258
Export a Movie to iTunes 259
Archive a Project in Adobe Premiere Elements 260
Explore Color Correction Possibilities 262
Learn the Basics of Shooting for Green Screen Effects 264
Replace Backgrounds in iMovie with Green Screen Effects 266
Replace Backgrounds in Adobe Premiere Elements with Green Screen Effects 268
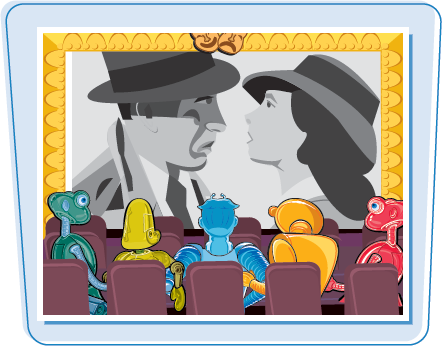
At the end of the day, people are going to judge your video by how it looks as well as how well you conveyed your message. Camerawork, music, sound, lighting, and effects are elements that you can use to carefully craft a unique look and feel for your video work. Consider the impact of each of these elements before you begin.
Evaluating Camerawork Shabby camerawork can ruin a good video presentation, but great, creative, well-choreographed camera movements can make for great video. Smooth camera movement makes your video appear polished and professional. Consider using a dolly to get those smooth tracking shots as your on-screen talent walks across the set. If you are mechanically inclined, the Internet is full of "Do It Yourself" blueprints for constructing homemade dollies and other camera stabilizing devices. You can also consider using a chair with wheels or a cart you can find at your local hardware store for short tracking shots. You will have to be on a very smooth surface to pull it off. 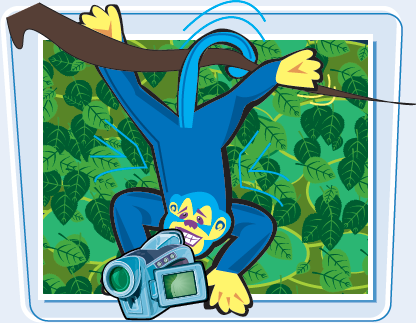 | Consider the Music Use royalty-free music to help set the feel for your video work. Prerecorded loop-based software applications like GarageBand and the Adobe plug-in SmartSound can enable you to make your own sinister, hip, or sorrow-filled soundtrack to match the creative aim of your movie. The right music can help you create suspense for your independent movie or provide that extra kick for a highlight reel. The next time you create a home video, try using music to help complement what your audience is viewing on-screen.  |
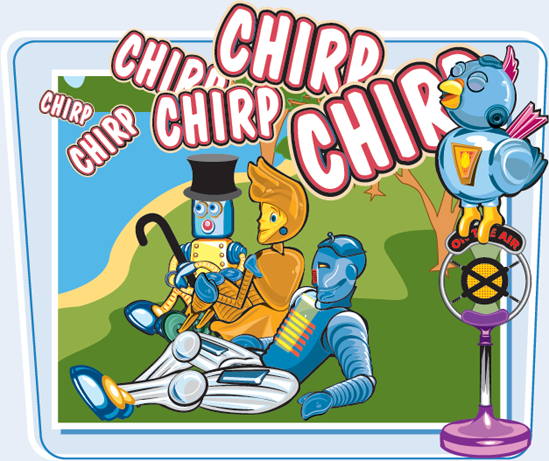
People are more likely to remain engaged in a movie that has no picture than one with no sound. Solid audio is a key component to any video production, and the skillful use of sound effects can make for some very interesting video. Look for opportunities to supplement the ambient audio in your video. Try enhancing the ambience to a scene by using a sound effect of birds chirping softly in the background as you shoot in the park. Birds may already be chirping on your audio track, but you can make them more profound. People want to watch your video for the experience.
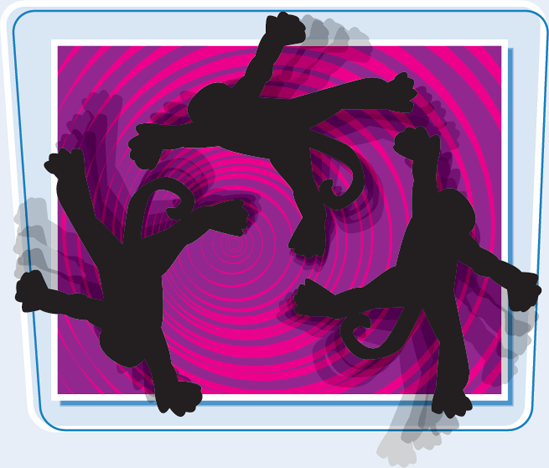
Take It Easy on the Effects
Too many effects can turn your video production into a graveyard for special effects. Be mindful of how many fancy transitions, artistic color corrections, and other software effects you use in your video. Many times, the excessive use of effects is used as a coverup for bad video work or the absence of a good story. Make sure that the video effects you use complement your movie and do not become the movie.
Some intermediate and nearly all professional video editing applications use what are referred to as plug-ins to increase their available toolsets. Many software developers create plug-ins for specific video editing applications to expand the capabilities of that program. Plug-ins can provide you flexibility as an editor and keep your video editing application relevant for a longer period of time.
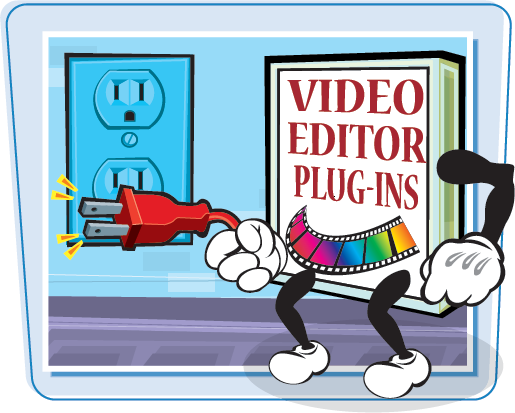
What Are Plug-ins?
Plug-ins are supplementary software programs that interact with a host software application, usually to extend the functionality of the host application. These programs are often accessible through the main interface of the host software application by way of a button or tab, or appear under a category such as Effects. Many of the plug-ins for video editing applications function as video filter effects for creating unique visual effects such as a pencil sketch or watercolor. Some plug-ins expand your transitions library, or the titling capabilities of the editor.
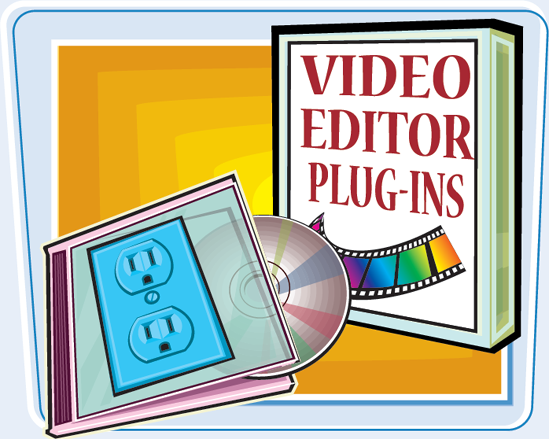
Use Plug-ins for Video Effects
You can use plug-ins to expand the effects library of your video editing application. Some third-party developers create collections of plug-ins that mimic classic film looks used in Hollywood. Other plug-ins can make your video appear to be an animated cartoon, provide 3-D text, create particles such as rain and snow, and simulate lens flares. Plug-ins also offer controls so that you can tweak the parameters of the effect. When shopping for effects plug-ins, make sure that they are compatible with the video editing application you are using. Higher-end video editing applications have the most plug-in options.
Explore Practical Plug-ins
Some plug-ins are used for practical purposes such as standards conversion from NTSC to PAL, or vice versa, and for upconverting SD to HD or converting interlaced video to non-interlaced video. You can also find plug-ins that are meant to fix video problems that occurred during the acquisition, such as noise reduction, color correction, and the removal of interlace flicker from imported graphics. Adobe Premiere Elements utilizes a plug-in by the name of SmartSound that enables you to add a soundtrack to your movie which you can then match to the duration of your video project.

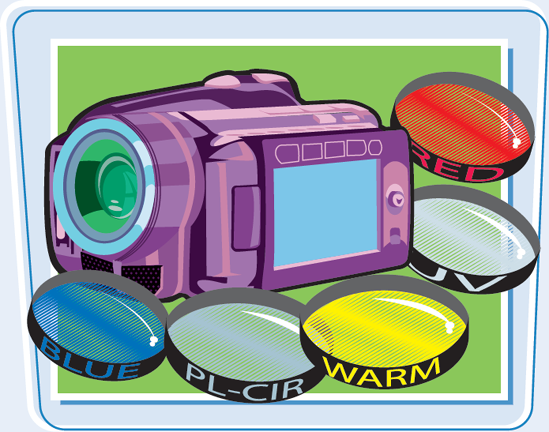
Lens filters are specially crafted glass that attach directly to the camera lens and are used to manipulate light as it enters the camcorder lens. Effects filters are creative tools to help you set the look and feel for your video work. Before purchasing effects filters consider the positives and negatives of using them in your videos and what filters are available for your camera.
Examine the Benefit of Lens Filters
Before effects plug-ins, videographers relied much more heavily on lens filters to achieve a desired aesthetic for their video. Now, most of these effects can be achieved in postproduction with a video editing application. The real benefit to using lens filters is to avoid further compression of the video. When you add an effect to your video within a video editing program, it has to be rendered, or recompressed, to join the video and the audio with the effects. Because video is already highly compressed, recompression can greatly decrease the quality of the video. If the effect is achieved upon acquisition, you can avoid some compression later.

Understand the Negatives of Lens Filters
Just about any effect you can achieve by placing a lens filter on your camera, you can achieve with effects filters within a video editing program. The issue with using lens filters is that the effect becomes a permanent part of your video. Say that you used a Star Effect lens filter, which creates twinkling star patterns in the highlighted areas of your video, for an artsy video that you created. Later, you discover that you need that same piece of video as part of an industrial training DVD. The original video may no longer be of any use to you. Consider using effects filters in post for the same effect so you can repurpose that video at a later time.
Exploring Lens Filters and Video Cameras
Due to the discerning tastes and needs of professional videographers, there are a greater variety of effects lens filters made for larger, higher-end digital video cameras. When you look to purchase a filter kit, take note of the filter size of your camera because most filters screw onto the front of the camera lens. The majority of lens filters advertised for consumer cameras are ones considered essential or practical such as Ultraviolet (UV), Polarizing, and Neutral Density (ND).
You can add titles to your videos in iMovie with relative ease. Adding titles to your video enables you to set up your movie as well as provide important information to your viewing audience.

Create Titles for Video in iMovie
Note
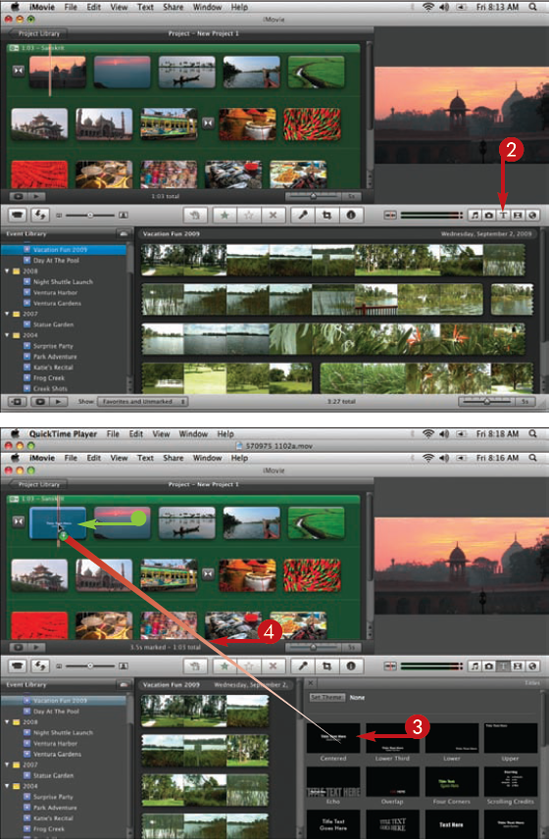
Some of the titles are animated. You can hold the mouse pointer (
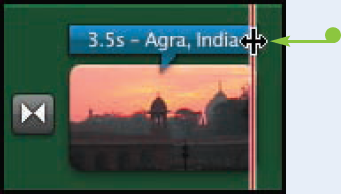
A blue title bar appears over the video where the title was placed and the title appears in the viewer window.
Note
As you hold the title over the video a purple overlay appears, showing you the frames of video over which the title will be placed.
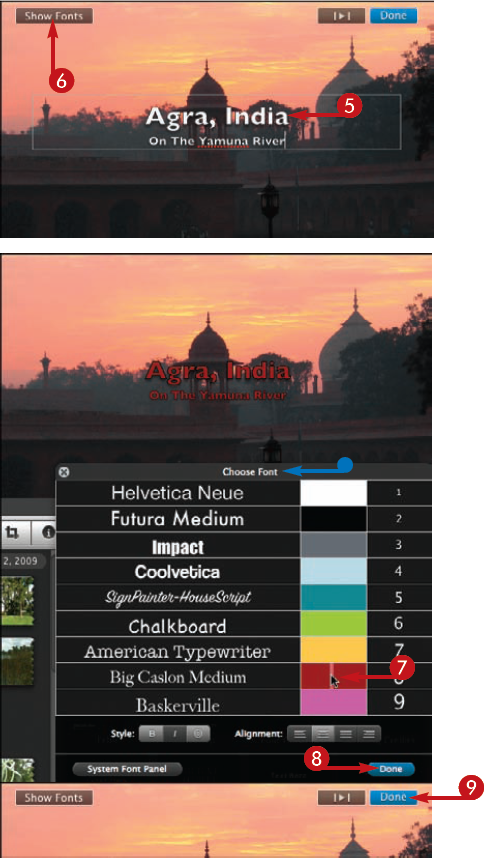
The Choose Font option opens.
Note
You cannot change the font type for certain themed-styled font selections.
Note
You can see a preview of the font change in the viewer window by simply positioning the
Tip
How do I make a title appear over a solid background and not over video?
When dragging the title from the Title browser to the project window, drop the title in between two clips or at the very beginning or end to have it appear over a solid background. When you drop the title selection, the Choose Background box opens. You can preview a background in the viewer window by positioning the
How do I change the duration of my titles?
You can drag on the ends of the blue title icons in the project window to make them longer or shorter (
Video transitions complement the flow of your movie by providing you a unique way to move from one scene to the next. Adobe Premiere Elements offers an extensive library of transition effects ranging from basic to ostentatious.
Add and Replace Video Transitions in iMovie
The Transitions browser opens.
A transition icon appears in between the two clips.
Note
A green overlay appears as you hold the transition over the project window, signifying where the transition will be placed. Use this overlay to place the transition exactly where you want it.
Note
You can preview the transition in the viewer window by positioning the
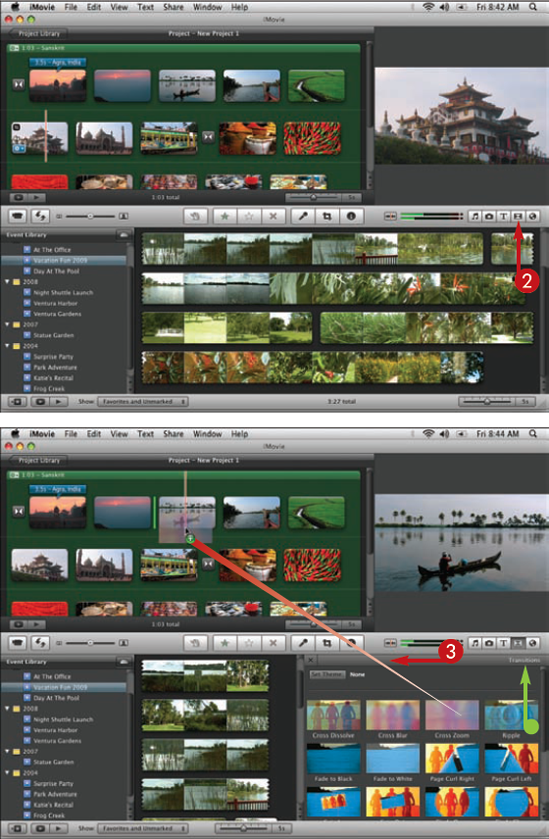
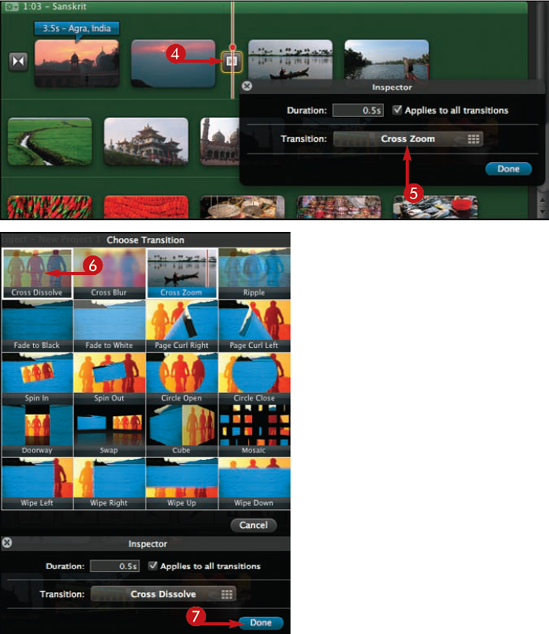
The Inspector controls for the transition open.
The Choose Transition box opens.
The Choose Transition box closes and the new transition is applied.
Tip
Can I set iMovie to automatically place a transition?
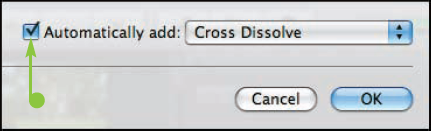
Yes. You can go into the Project Properties and configure iMovie to automatically insert transitions each time you edit a video clip into the project window. You can access the Project Properties by going to the main menu, clicking File, and choosing Project Settings from the menu. Select Automatically add (
Can I apply a different transition other than the one that I chose to insert automatically?
Yes. But you have to turn off automatic transitions. You can turn off automatic transitions by going into Project Properties and deselecting the Automatically add option. Or, you can simply drag a different transition to the project window. A warning opens, giving you the opportunity to turn off automatic transitions.
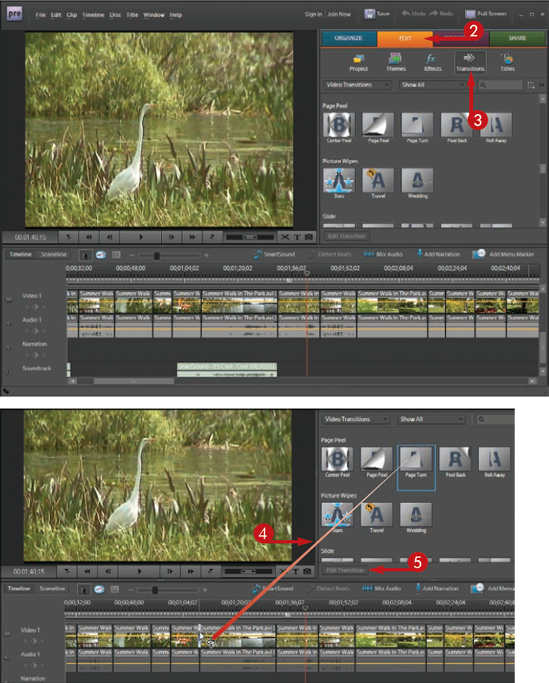
Video transitions offer a unique way to progress from one video scene to the next. You can use transition effects for many creative purposes, including softening what would otherwise be an abrupt change from one clip to another, and to set a mood by slowing down the pace with a soft fade. Adobe Premiere Elements has a large library of transitions that range from basic to flashy.
Create Video Transitions in Adobe Premiere Elements
The Transitions library opens displaying Video Transitions.
Note
Adobe Premiere Elements also contains Audio Transitions that can be accessed from a drop-down menu in the Task panel.
The transition is applied between the two clips and appears as a purple icon in the timeline.
Note
You can preview each transition by positioning the
Note
A red line appearing above the transition in the timeline indicates that the effect needs to be rendered before it will play back properly. You can go to Timeline in the main menu and choose Render Work Area to render the timeline.
Note
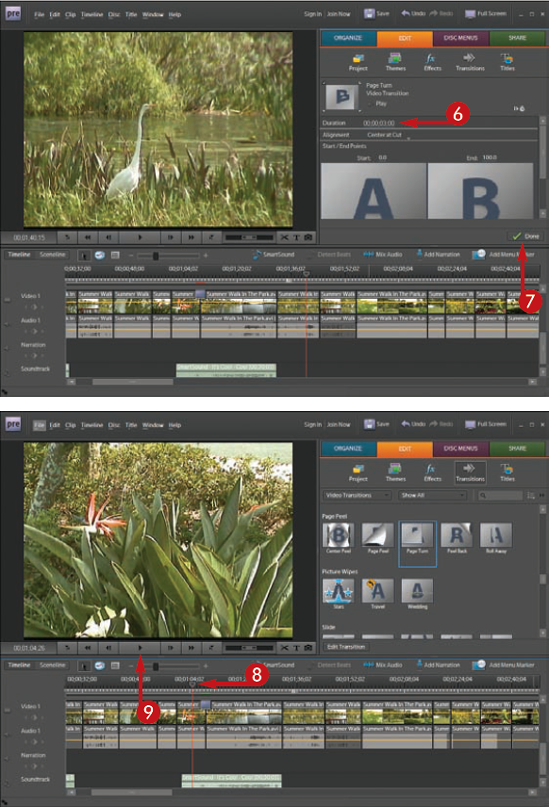
The transition has to be selected in the timeline, or the Edit Transition option is grayed out. You can also double-click any transition in the timeline to edit it.
The purple transition icon lengthens in the timeline.
Note
Each transition has its own unique controls that enable you to customize it.
Tip
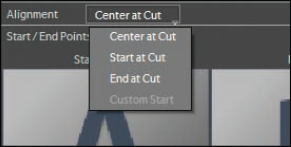
Can I change the position of the transition so that it starts at a different time?
Yes. When you double-click the transition in the timeline, you change the alignment of the transition between the clips. Your choices are Center at Cut, Start at Cut, End at Cut, and some transitions offer a Custom Start option. Where you choose to align the transition depends completely on how you want the edit to look. If there are not enough video frames at the head and tail of each clip to perform a transition, you may have only one alignment option.
Can I save my favorite transitions?
Yes. You can right-click the transition in the library and choose Add to Favorites from the menu. You can then filter the results in the transition view to access your favorite transitions. Saving your favorite transitions enables you to quickly access your most-used ones.
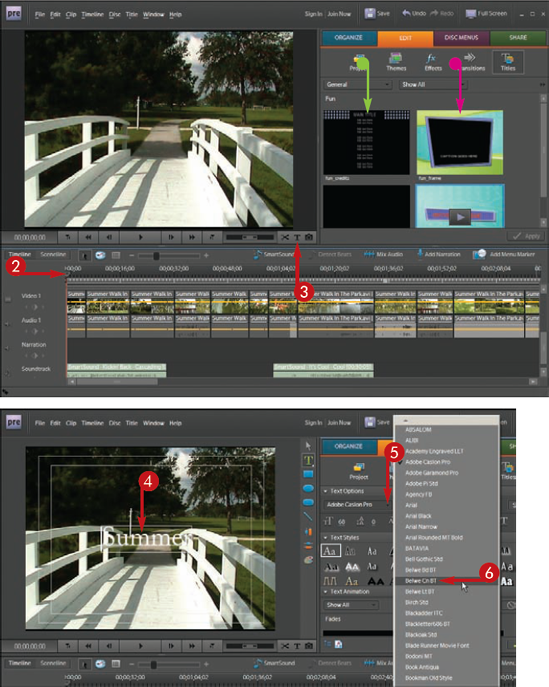
You can add titles to your videos in Adobe Premiere Elements with relative ease. Adding titles to your video enables you to set up your movie as well as provide important information to your viewing audience.

Create Titles for Video in Adobe Premiere Elements
The Text Options open in the Tasks panel.
The safe margins appear in the Monitor panel.
Note
A clip representing the text appears in the timeline. You can drag the clip in the timeline to have the title occur at another point in the movie.
The list of fonts stored on your computer appears in a list.
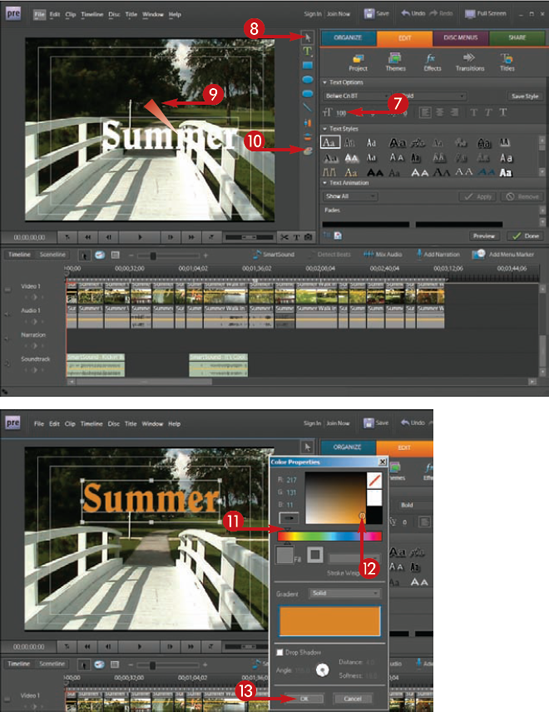
The old font type is replaced with the new font in the Monitor panel.
The Color Properties box opens.
Note
You can also add a drop shadow by checking Drop Shadow in the Color Properties box.
The color of the text is the specified color.
Tip
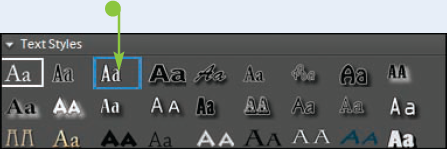
How do I change the outline of my text?
By default, you can only change the fill of the text and not the stroke until you pick a new text style. The fill is the color on the inside of the font, and the stroke is the color for the outline of the font. Pick a new text style in the Tasks panel (
Can I animate my text to crawl across screen?
Yes. A quick way to animate your text is to access the Roll and Crawl option. Select the title in the timeline and click the Roll/Crawl icon (
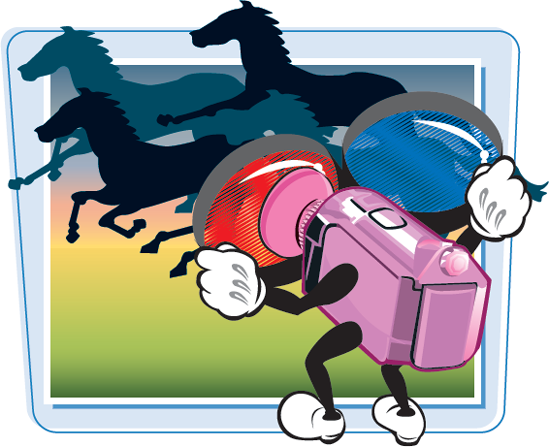
Achieving the look of cinematic film for video is one of the most sought-after aesthetics for independent filmmakers. The "film look" has many aspects, such as depth of field, lighting, camera movement, and composition. There are a few things that you can do to get your video to look like it was shot on film.
Explore 24p and Cinema Mode Camera Features By default, most video cameras are set to record at a frame rate of 60 interlaced fields (60i) per second, and provide an aesthetic quality for your video that is similar to what you see on the local news channels. Video cameras that record in the 24p progressive frame rate can provide more filmic images, because they are able to capture video in a way that provides a similar motion as feature films. Some digital video cameras also offer a cinema mode that enables you to achieve color and tonal characteristics similar to film. Purchasing a camera with 24p recording capability and cinema mode features helps you achieve a film aesthetic. 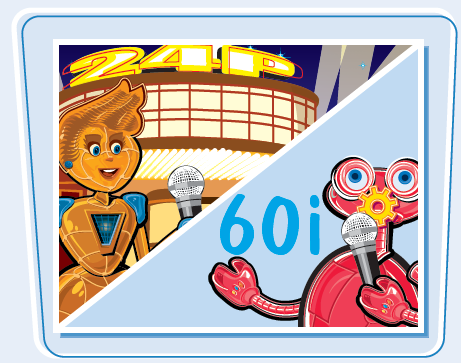 | Purchase a 35mm Lens Adapter The depth of field achieved with a film camera is vastly different than that achieved with a conventional video camera and is a defining characteristic of the "film look." A few companies offer adapters that enable you to use a 35mm single lens reflex (SLR) still camera lens with your video camera for a more shallow (filmic) depth of field. Not all 35mm lens adapters are created equal, so make sure that you do your research. Using these adapters also involves a learning curve, so make sure you know what you are signing up for. 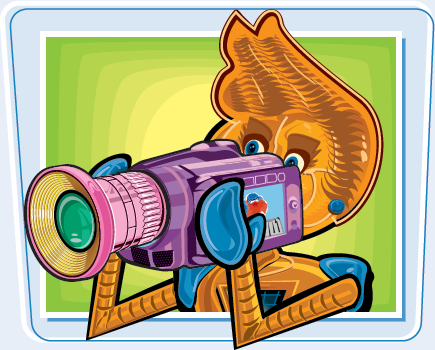 |
Lighting is a huge factor in the film experience. Most independent filmmakers do not possess the resources to achieve cinematic lighting, as you are accustomed to on the big screen. What you do have are the principles of three point lighting and volumes of books written on the subject. Purchase a lighting kit with three lights and practice lighting for depth by alternating the light and dark parts of a scene. Be an active observer and take note of the lighting used in the movies you watch and on primetime TV. You are operating on a much smaller scale, but you can learn a lot from the pros.

Examine Camera Movement
Smooth camera movements, particularly tracking shots, are another characteristic of film. These shots are achieved by placing the camera on a track, which allows the camera to follow actors as they walk, or to simply provide motion to an otherwise stationary subject. Consider using skateboards, shopping carts, chairs with wheels, or a dolly from a home improvement store on a smooth surface to get your camera moving. Lack of zoom is also a cinematic look.
Use Effect Filters in Postproduction
Plug-ins that convert your 60i video to 24 frames per second and alter the tonality of the image can help you achieve a film aesthetic in post. Several companies offer excellent solutions for making video footage look less like video. Red Giant Software (www.redgiantsoftware.com) and Digital Film Tools (www.digitalfilmtools.com) offer high-quality solutions for video.
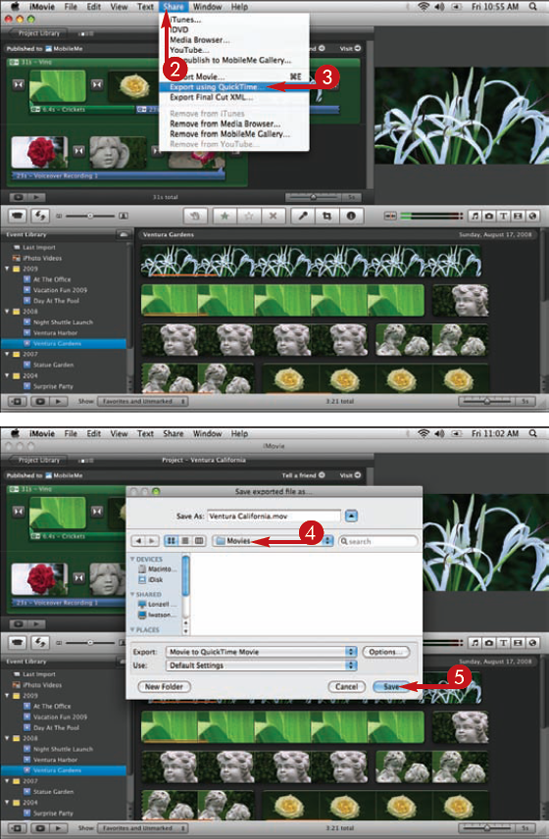
You can export a project in the form of a QuickTime movie to your computer hard drive. Each movie you export from iMovie has to compress, so depending on the size of the movie file, it could take a few minutes to complete. Exporting a QuickTime movie of your video is a convenient way to let others receive a preview of your work.
Export a QuickTime Movie from iMovie
The Save exported file as dialog box opens.
The file is saved in the specified location.
Note
You can burn a CD of the movie file to show to those you may be collaborating with on a project.
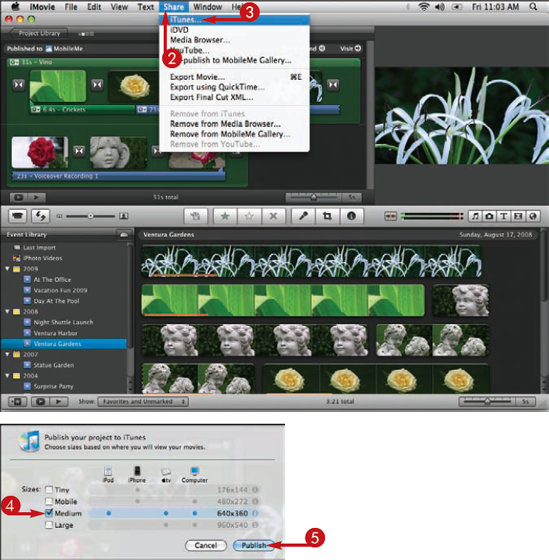
You can export a movie from iMovie to iTunes with just a few simple clicks. Exporting your movie to iTunes is a great way to share your finished movies with others and also provides a centralized place to store previews of your movies.
Export a Movie to iTunes
The Publish your project to iTunes options open.
Note
Depending on the original resolution of your video, some of the size options may be grayed out. For example, if resolution of the footage was less than 960x540, the Large option may be grayed out.
Note
You can choose multiple sizes for export.
iTunes opens and the movie is now listed under Movies in the iTunes Library.
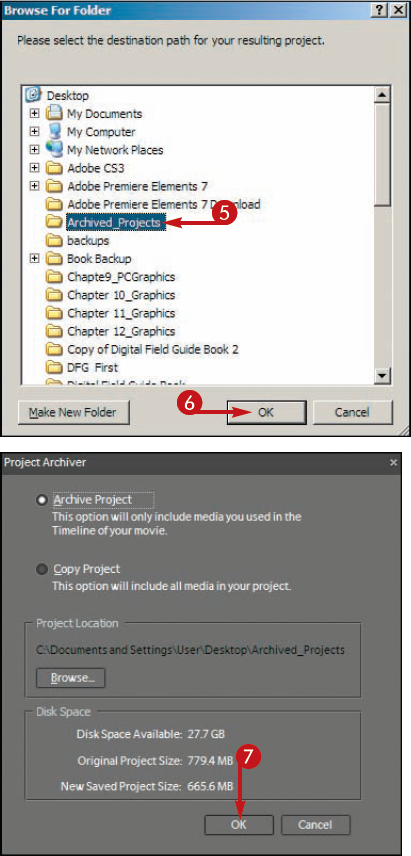
After you have completed a project and have shared it, it is a good idea to archive your movies. Adobe Premiere archives only the video footage that was used in the movie and stores it in a location of your choosing. Archiving your projects enables you to return to them later and perform future edits.
Archive a Project in Adobe Premiere Elements
Note
By default the option to archive only the footage used in the actual project is selected. You can also choose to copy the unused media you captured to the project along with the used video footage by selecting Copy Project.
Note
In the section labeled Disk Space you can view the original project size, including all captured files, and the new saved project size, with only the video used in the actual movie.

Tip
Do you have any advice on storing archived projects?
Archived projects can be large and take a significant amount of hard drive space on a computer. If you create a lot of projects you should consider archiving your projects to an external drive. You can also burn archived projects to DVDs or Blu-ray Disc.

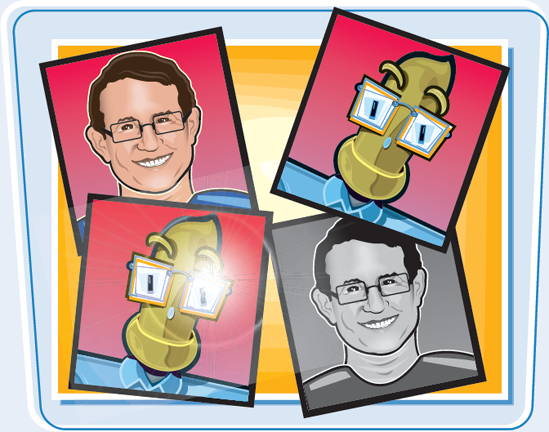
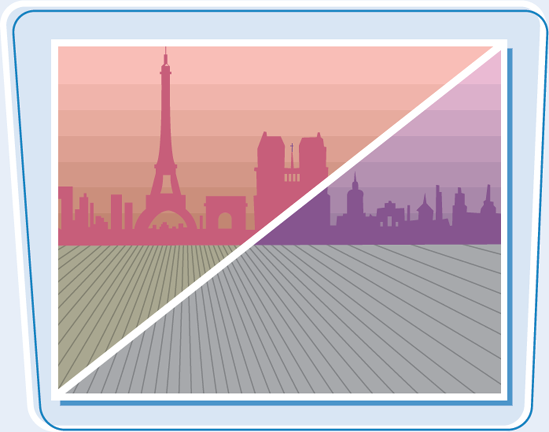
Nearly every shot could benefit from some sort of color correction. Your goal may be to add warmth and vibrancy to a scene by increasing the color saturation, lower saturation to add a hint of blue for a cooler scene, or for the more practical purposes of fixing problems that occurred during the acquisition of the footage. Higher-end video editing applications provide a more in-depth array of color correcting tools. Color correction can help your footage be the best it can be.
Discover Image Controls
Many video editing applications are equipped with tools such as filters, sliders, and color wheels that can help you improve the images you have recorded in the field. Brightness controls can help you adjust video where the exposure was less than perfect. Contrast, hue, and saturation controls enable you to adjust images until they are the best that they can be. Some applications utilize filters that can be applied to a clip for an instant effect such as black and white and sepia, while offering more practical options that optimize your video for broadcasting on TV.
Correcting an Improper White Balance
Nothing trumps getting the white balance right as you acquire the footage, but color balancing tools can help you minimize the effects of an imperfect white balance. Some video editing programs have a fast color corrector that involves a selection tool called an eyedropper. The eyedropper enables you to click a spot in the video that represents white or neutral gray so that the color can automatically be adjusted for a proper white balance. More advanced video editing applications allow you to correct white balance for shadows, midtones, and highlights separately for more accuracy.

Be Creative
You can use color correcting tools for arresting effects such as creating stylized looks and turning day into night. You can lower the saturation and add a hint of blue to create a cooler, desaturated look, to emphasize the hardness of the city, or to create a post-sunset twilight for a quiet, little town. Creative color correcting can give your video a look that is entirely unique, which could prove to be your signature look. Keep in mind when shopping for a video editing program that the higher-end applications provide you with more options by way of a more robust toolset and the ability to utilize third-party effects filters.
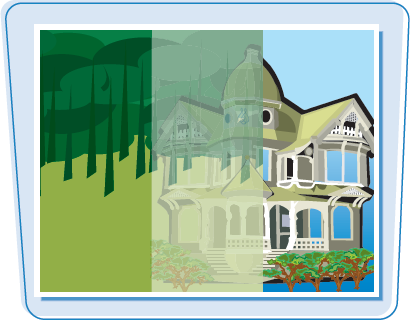
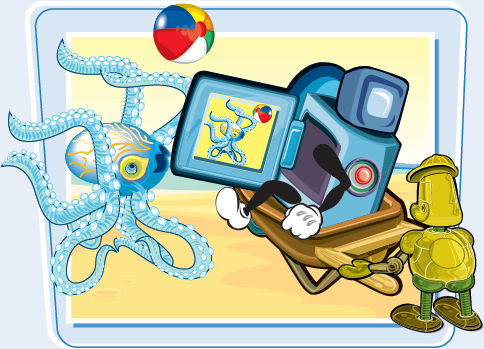
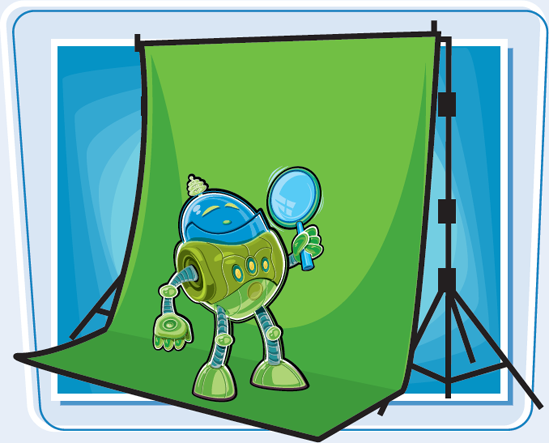
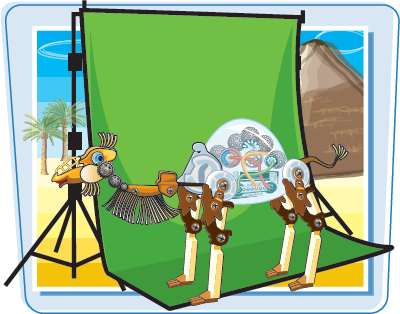
Placing your on-screen talent in front of a green screen, so you can later composite that image with a different background, is a very popular effect. Many video editing applications ranging from basic to professional have included chroma keying as part of their toolset. Understanding the basics of setting up a green screen shoot helps you achieve the highest-quality effect.
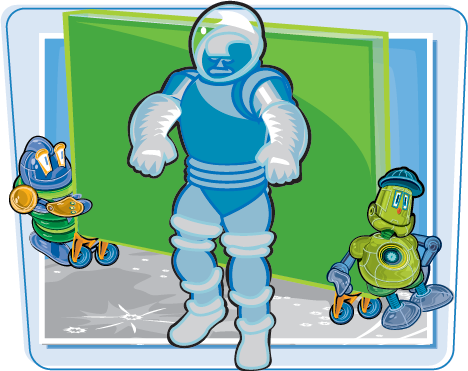
What Is Keying Keying is a technique used in video editing software or compositing software for mixing two images or frames in which a color, typically green or blue, is removed or made transparent, revealing another image. This technique is used in film as well as in your local meteorological forecast to display the weather map behind the on-air talent.  | Purchasing a Backdrop When you shop for backdrops on which to record your actors, your choices are mainly broken down into paint, paper, or cloth. Green or blue screen colors are specifically used because they are opposite colors to skin tones, making it easier for a video editing program to later isolate the background color and remove it. Although debatable, the color green has some technical advantages over blue for video. When purchasing a green screen, make sure that you purchase a pure, highly saturated color green to achieve the best results. Look for backdrops labeled as "chroma key green." Get the biggest backdrop you can afford. 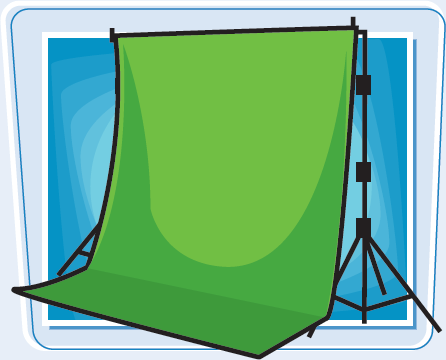 |
When using a green screen, make sure that your talent does not wear the color key (the color of the background) and do not have any other green objects in the shot. Any green in the actors' clothing can make the talent appear ghostly, because part of their clothing is removed due to the effect.
Light the Subject and Background Evenly
To successfully key a subject, the backdrop must be evenly lit; this means no shadows must appear on the subject or on the backdrop. Make sure that the subject is placed far enough in front of the green screen fabric to prevent shadows or any green color spill, and the fabric itself must be wrinkle free. If possible, frame the subject so that the camera cannot see beyond the green screen; this saves you a few steps when creating the actual effect in the video editor.

After recording a subject against a green screen backdrop, you can use what is referred to as a "green screen" effect to cut out the backdrop and replace it with another background. You can place the green screen clip over a solid background, animated graphic, or another video clip to give the appearance of a new environment for the subject. iMovie offers a quick and easy way to achieve this popular effect.
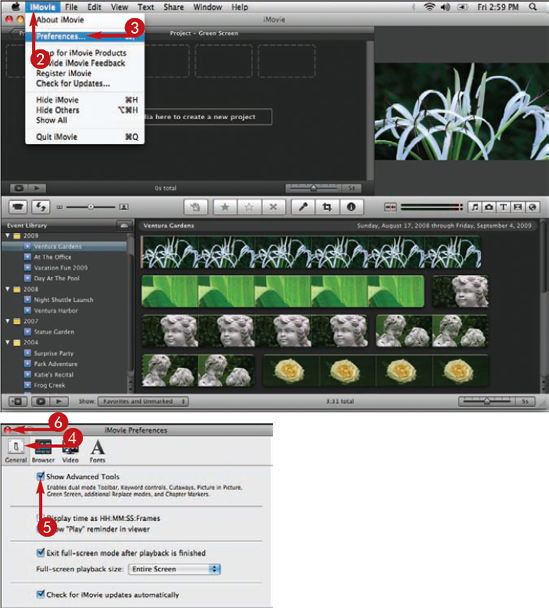
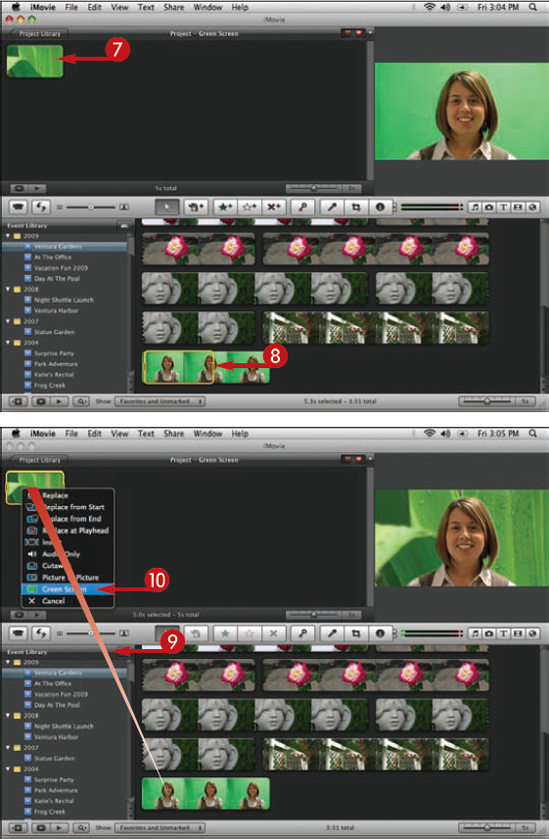
Replace Backgrounds in iMovie with Green Screen Effects
Note
If Show Advanced Tools has not been selected, you will not get the option to key out the green screen when you drop one clip over another in the project window.
The edit options appear.
The green screen clip appears above the background clip.
Note
If both the green screen clip and the background clip have audio, they both play simultaneously in the project. You can use the Action pop-up menu (
Note
If you place the green screen clip over a transition effect, the transition does not play.
Tip
Can I crop my green screen clip?
Yes. You can crop out extraneous space around the subject. This is particularly useful if there is an unwanted object in the shot or if your background is not big enough. You can click the green screen clip in the project window to reveal the crop tools. Then drag handles located at the top of the clip to crop a tighter shot.
Any other tips for keying in iMovie?
Yes. When recording your subject on green screen, consider shooting a frame at the end of just the green backdrop, without the subject. iMovie has a Subtract Last Frame function that enables you to produce a higher-quality effect by using the information in the last frame to determine which color to isolate. Double-click the green screen clip to select the Subtract last frame option in the Inspector.
After recording a subject against a green screen backdrop, you can use what is referred to as a green screen or keying effect to make the backdrop transparent so that another clip shows through as the background. You can replace the green backdrop of a clip with a solid color, animated graphic, or another video clip to give the appearance of a new environment for the subject.
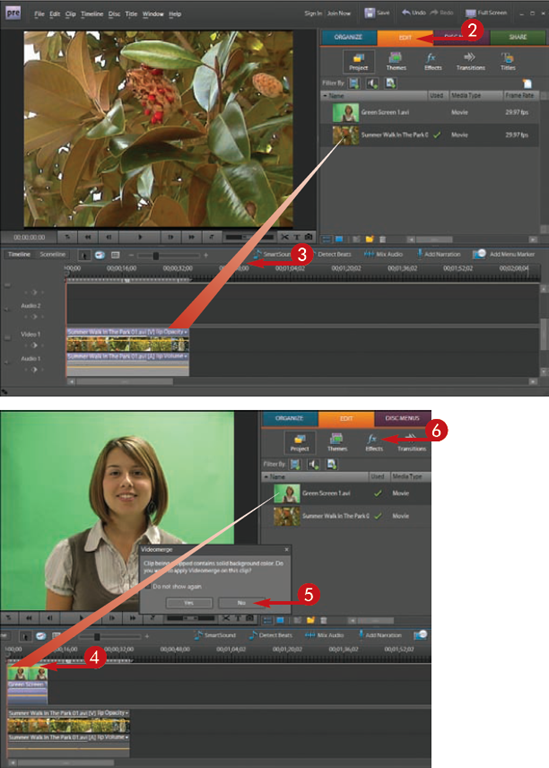
Replace Backgrounds in Adobe Premiere Elements with Green Screen Effects
The Videomerge dialog box opens.
Note
The Green Screen Key effect gives you more control over the effect than does the Videomerge option.
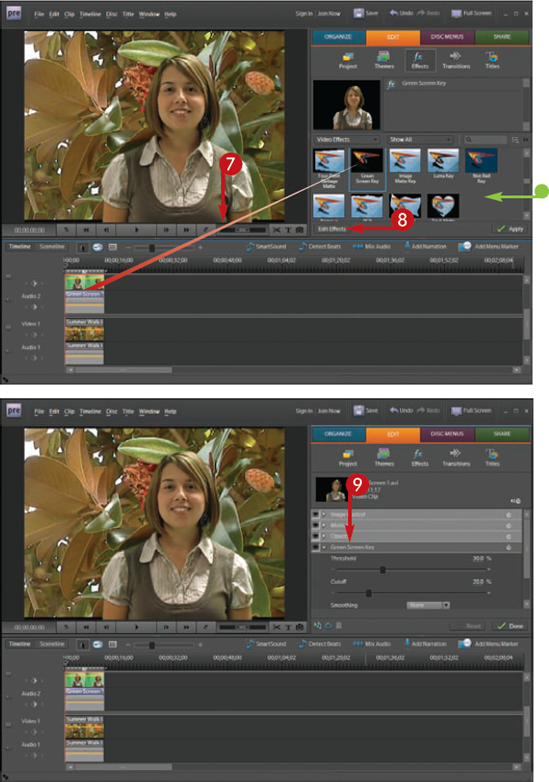
• The clip on track 1 becomes the background of the clip in track 2.
Note
It may be quicker to locate the green screen effect by typing green screen in the search field rather than scrolling.
The Properties view opens.
Tip
Is there another quick way to make my backdrop transparent?
Yes. You can use the Videomerge feature. When you edit the second clip into Video track 2, the Videomerge dialog box opens asking if you want to apply Videomerge on this clip. Choose Yes. Premiere Elements then analyzes the clip for a dominant color and automatically makes that color transparent. The Green Screen Key effect gives you more control over the effect.

Can I crop out an object that appears toward the edges of my green screen video after I performed a key effect?
Yes. You can use what is called a Garbage Matte to remove extraneous objects in the key. The Garbage Matte options can be found under Effects. Your choices are Eight-Point Garbage Matte, Four-Point Garbage Matte, and Sixteen-Point Garbage Matte. The more points in the matte, the more handles and control you have to crop out unwanted parts of the green screen video.