A digital video camera has many settings that affect the appearance of the footage it records. The camera automatically controls many of these settings as it adjusts to the amount of light in a scene and for the distance between the subject and camera. Some video cameras give you more control over the image by enabling you to make manual adjustments to settings such as shutter speed and aperture value. By using a combination of automatic and manual adjustments, and with an understanding of the basic elements of videography, you can produce high-quality digital video.
Examine Types of Light 82
Understanding Exposure 84
Discover Exposure Settings 86
Solve Exposure Issues 88
Learn About Aperture 90
Learn About Shutter Speed 92
Use Focus Modes 94
Discover Focus Tips 96
The abundance of light or lack thereof has a direct impact on the quality of your video. As a videographer, you should always be aware of light and how it interacts with your camera. Understanding various lighting situations and how to adjust your camera to them helps you record the highest-quality video possible.

Understand How the Camera Sees The eye of the digital video camera does not work as well as your eyes; it needs extra help to see things the way you do. Through the lens of the camera, a dimly lit room might appear completely black. Recording a subject at the beach with the sun in front of the camera may make the subject appear very dark as the camera compensates for the sun. You are the brain of your camera, helping it to respond to various lighting situations. 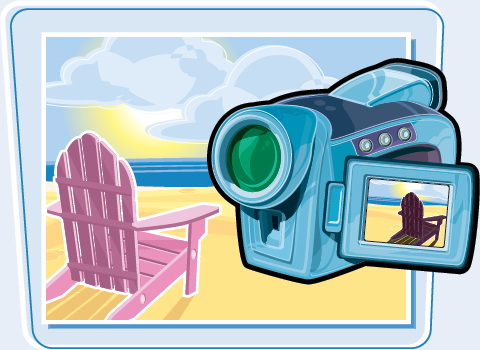 | Diffused Light An evenly lit subject devoid of hard shadows denotes the presence of diffused, or soft light. Diffused light is not concentrated, but scattered, appearing to come from many different directions. A great example of diffused light is the sun shining through clouds on an overcast day, softening the rays before they reach the subject on the ground. Diffused or soft light makes for a very good shooting environment free of hard shadows and blown-out highlights.  |
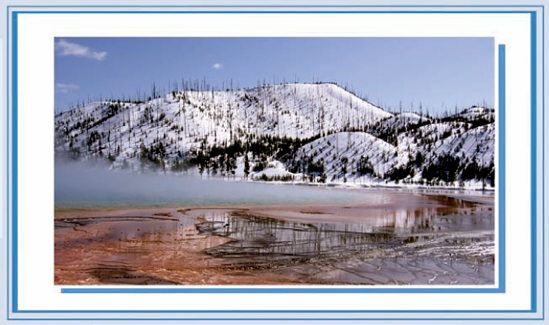
A scene containing sharp shadows and a high contrast between the lightest and darkest areas denotes the presence of a concentrated light source aimed in a specific direction. A good example of this type of lighting is a spotlight aimed at a subject, casting a shadow against a wall. This can also occur when shooting outdoors on a bright, sunny day. High-contrast images such as these prove very difficult for a camera's sensor to balance the light in the scene automatically.
Backlighting
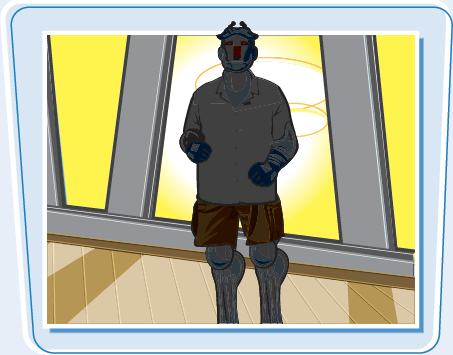
The intensity of the light source behind your subject can be unappealing if the light source is too strong. This issue is very apparent if you shoot someone indoors who is standing in front of a window with bright sunlight pouring through. You may only be able to see a dark silhouette of the subject if the camera is set to adjust exposure automatically as it compensates for the bright window.
Anticipate Lighting Situations
Before you go on a shoot, ask yourself a few questions to help you better prepare for that particular lighting situation. Will I be shooting indoors or outdoors? Will it be sunny, overcast, or a night shoot? If it is indoors, what is the lighting setup? Will the room have a combination of artificial light and natural light pouring in through a window? You can gauge whether you need to bring extra lighting equipment and anticipate problems by knowing the answers to these questions.
The amount of light allowed to reach the camera's image sensor plays a large role in the quality of video recorded. A too-bright or too-dark image has an adverse effect on the appearance of your video. To get the most out of your digital video camera, you need to understand the importance of achieving the right exposure for various lighting situations.
Underexposed and Overexposed Video
Under- and overexposed video is one of the most common video problems and is the true mark of an amateur. A scene that appears too dark on account of too little light reaching the camera sensor is said to the underexposed. A scene that appears too light on account of too much light reaching the camera sensor is overexposed. If the image is too dark or too light, precious image data is lost in the darkest and lightest areas of the scene, as shown in these videos.
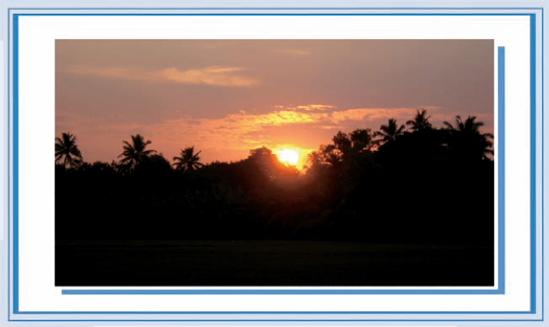
Shooting in very bright conditions such as on a sunny day at the beach requires lower light sensitivity due to the overabundance of light. On the other hand, shooting at sunset requires a higher light sensitivity due to the lack of light, as shown in this video. A digital video camera can adapt to these various lighting situations by adjusting the shutter speed and the aperture, both of which are responsible for regulating light reaching the image sensor.
Fix Exposure Problems in Post-Production
Many video editing programs are equipped with color-correcting tools that enable you to fix exposure problems in post-production. If the image is too dark or too light, making adjustments with the software can provide some help, but does not completely fix the problem. By lighting your scenes properly and making the proper camera adjustments, you can prevent most exposure problems. Prevention is the best option.

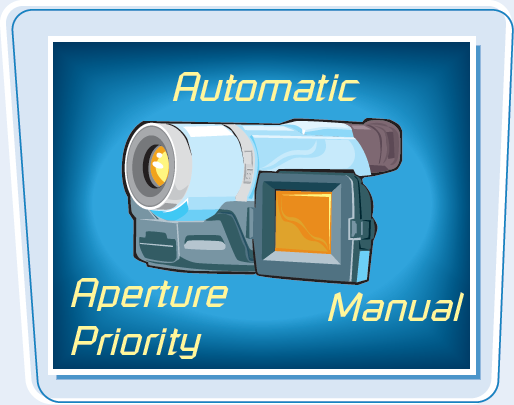
Digital video cameras offer several ways to control exposure settings. These options range from fully automatic special recording programs to options that enable you to set either the shutter or aperture value manually, while the camcorder adjusts the other automatically. Each option has its advantages and disadvantages, but all are capable of producing great video. Understanding exposure options helps you to make better decisions regarding exposure in the field.
Auto Mode By default the camera is set to auto mode, or program mode, where the aperture and shutter settings are optimized for the best exposure for the scene. This option enables you to simply point and shoot and is great for quickly capturing a shot. Sometimes auto exposure can overcompensate when faced with an abrupt change in light, but it can yield fantastic results in general shooting situations. 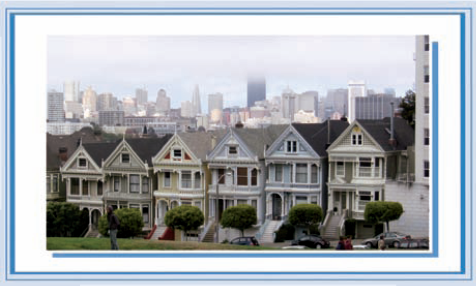 | Shutter Priority Mode Some digital video cameras have a shutter priority mode that enables you to manually set the shutter speed value, while the camera automatically sets the proper aperture value for you. Shutter priority mode works well when you want to control the appearance of fast-moving objects. A faster shutter speed results in sharper, more-detailed images when recording motion, with less blur. A slower shutter speed shows motion blur, as shown in the waterfall. 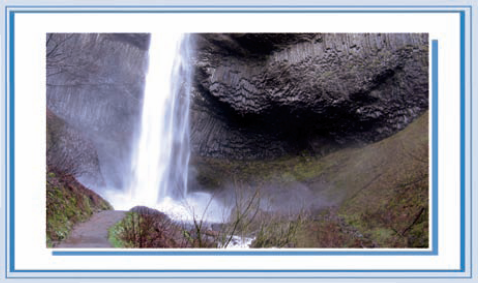 |
Some digital video cameras have an aperture priority mode that enables you to manually set the aperture value, while the camera automatically adjusts the shutter speed. Aperture priority mode is a great option for controlling depth of field, the area of the image that remains in focus. Higher aperture values result in deeper depth of field, whereas lower aperture values result in a more shallow depth of field, as shown.
Scene Modes
You can use preprogrammed automatic exposure settings, or what are sometimes called special scene modes, for optimizing both the shutter and aperture to your advantage for various lighting situations. Some of the most common modes available are portrait, sports, night, fireworks, beach, sunset, spotlight, and snow, as shown. The quality of these modes is fantastic, but like the other automatic modes, the extra convenience comes with some compromise.
Automatic exposure settings are convenient and perform very well in ordinary shooting situations where the lighting is diffused and even, but no automatic system can get it right every time. Certain lighting situations can cause the automatic exposure to perform less than admirably, and you will need to use a manual exposure to get the best video.
Examine High-Contrast Scenes
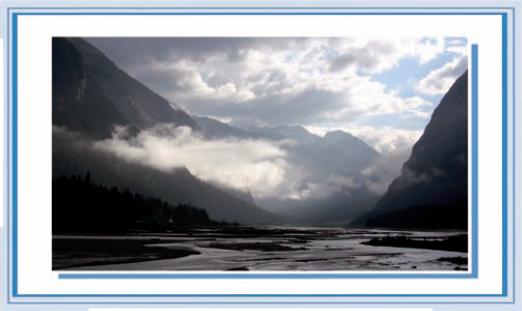
Images with a wide dynamic range, meaning they have a large disparity between light and dark areas, pose all sorts of problems for the automatic exposure. Depending on how the scene is composed, the camera overcompensates either for the darkest areas of the image or the lightest, as it attempts to expose the image properly. This overcompensation can lead to either an over- or underexposed image. Go into the camera's menu system and adjust the exposure manually until the scene appears acceptable within the viewfinder.
When set to automatic exposure, the camera constantly calculates exposure settings in response to the changing lighting situation, and can overcompensate when faced with an abrupt change. Be mindful of shots where you are tracking a subject from a dimly lit area to a brightly lit area, because the picture may jump to a bright white or pitch black as the camera adjusts. The adjustment will be quick, but the transition may not be aesthetically pleasing when playing back the video. Also, limit tilting (rotating the camera in a vertical plane) and panning (rotating the camera in a horizontal plane) to avoid extremely light and dark areas from coming into view while using the automatic exposure.
Compromising Backlight
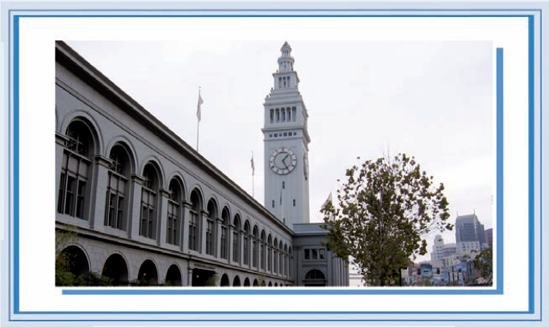
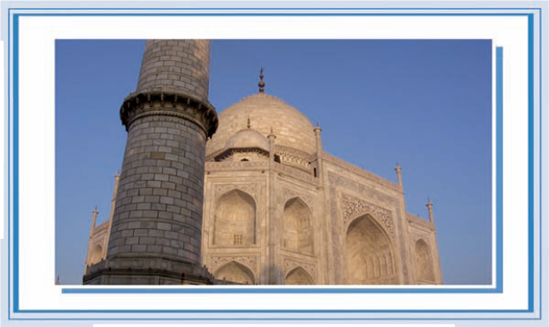
Automatic and manual exposure adjustments provide flexibility for navigating tricky shooting situations, but there are times when you will have to sacrifice not having perfect exposure for part of the image so that the subject is not neglected. If you are faced with a situation where part of the image will be less than perfect, always make sure that your subject looks the best. As shown in this video, the main subject, the building and tower, are properly exposed, whereas detail is lost in the sky. No matter the advancements in digital video camera technology, let your eyes cast the final verdict.
The aperture is the opening and closing diaphragm behind the lens and controls the amount of light that passes through. Its function is much like the pupil of the eye. In low light conditions, it needs to be opened wider, and in bright conditions, it needs to contract.

Set the F-Stop
The relative size of the opening/aperture is called the f-stop, and the way f-stops are numbered can be a little confusing. It helps to think of them as denominators of fractions where 1.2 is larger than 1.8. The larger the number, the smaller the aperture opening, meaning less light passes through the lens to the image sensor, and vice versa. If you set the aperture value to 4.0 and then adjust it to 2.8, you effectively cut the amount of light entering the lens by half.

Out of the box, the default mode for most digital video cameras is to automatically adjust the aperture. Some video cameras have an aperture priority mode, which enables you to manually set the aperture value in a menu, while the shutter speed is automatically adjusted for you to achieve the highest quality video.
Manipulate Depth of Field
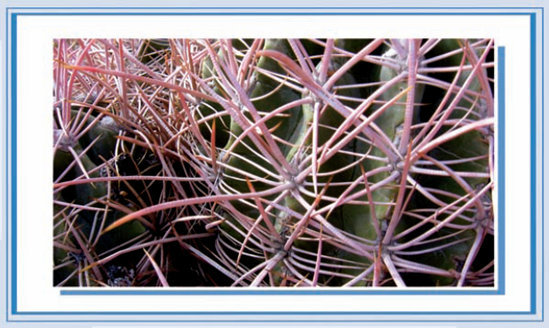
Using a larger or smaller aperture value affects the depth of field in a scene, the area in a scene from the foreground to background that remains in focus. A larger lens opening, meaning a lower aperture value like f/2.8, creates a more shallow depth of field. This can create a soft blur on the background for a portrait. A smaller lens opening, meaning a higher aperture value like f/8, provides a deeper depth of field where the overall image is in sharp focus. A deeper depth of field can prove beneficial for shooting scenery that contains multiple subjects, as shown.

In consumer cameras, the shutter speed governs the interval of the off and on state of the image sensor as it is exposed to light. Some advanced camcorders have an actual shutter mechanism that opens and closes. Speeding up and slowing down the shutter speed has a direct effect on the look of your digital video. On fully automatic digital video cameras, the camera dictates the shutter speed, whereas some cameras let you adjust shutter manually. Understanding how shutter speed affects your video enables you take more control over the image.
Shutter Speed
Shutter speed is measured in fractions of a second on how long the image sensor gathers light. Shutter speeds can range from slow — 1/8, 1/15, or 1/30 — to fast — 1/500, 1/1000, or 1/2000. You can use various shutter speeds to control the appearance of fast-moving subjects in your videos.

The lower you set the shutter speed, the more light you gather. Lower shutter speeds, such as 1/8, 1/15, and 1/30, are great for recording in dimly lit places or at night, but you will definitely want to use a tripod to keep a steady shot. These videos of holiday lights in the park show the effect that a slow shutter speed and camera shake can do to a night shoot. The slower speeds add motion blur to fast-moving objects. A shutter speed of 1/60 is a great speed for smooth motion in general shooting conditions.

Explore High Shutter Speeds
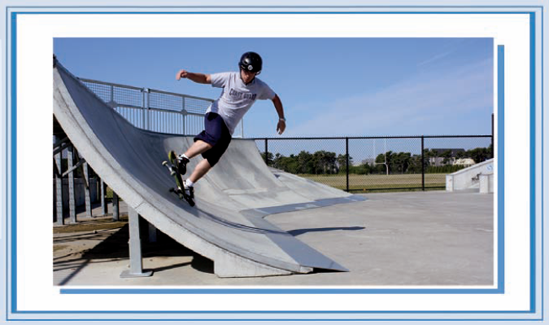
The higher you set the shutter speed, the less light you gather; this results in sharper, more detailed, fast-moving subjects with less motion blur. High shutter speeds are great for shooting scenes that contain an abundance of light, such as a sunny day at the beach. For outdoor sporting events such as bicycling, or shooting from within a moving vehicle, use high shutter speeds such as 1/250, 1/500, 1/1000, or 1/2000. Use a high shutter speed to freeze a subject's motion, as shown.
The lens of the camera is either adjusted automatically or manually to bend incoming light rays so that they form a sharp image. All digital video cameras have autofocus built in, whereas some possess manual options. Understanding the focus options of your camera is very important to the quality of your images, because a slightly out-of-focus, or soft, subject is very noticeable.

Automatic Focus (AF)
Automatic is usually the default setting for digital video cameras and performs very well in most circumstances. When you use automatic focus, the camera utilizes an external sensor to determine the distance between the camcorder and the subject, and quickly adjusts the lens so that the image is in sharp detail. Automatic focus can quickly shift to a new subject without your intervention, letting you focus strictly on the composition of the shot. Some cameras give you the ability to dictate the speed at which your camcorder can acquire an automatic focus.

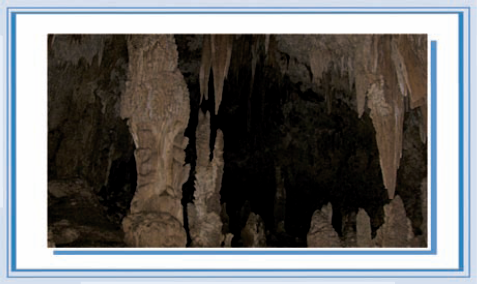
In some instances, automatic focus can prove more bothersome than effective; that is why some digital video cameras give you the ability to adjust focus manually. Shooting at night, or shooting fast-moving objects or reflective surfaces, can sometimes make the automatic focus indecisive as to what it should keep in focus in the shot. You can set the focus manually to pinpoint the area of interest in the scene, and make sure it is in sharp focus. Manual focus was used to shoot this video through a window and focus on the inside of this historical landmark.

Infinity Focus
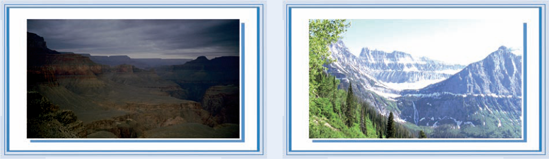
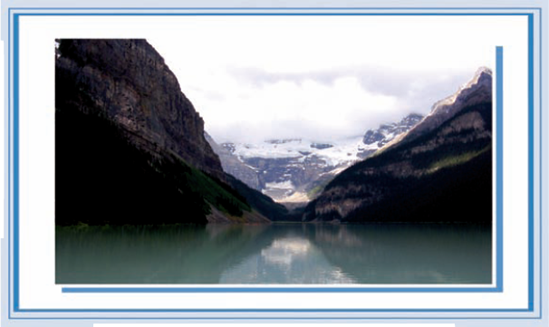
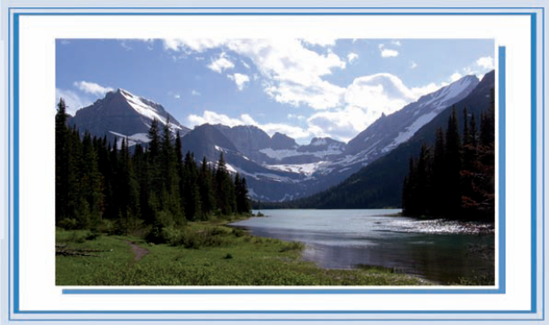
Focusing on faraway objects can also be a challenge, so some digital video cameras are equipped with a focus assist option called infinity focus. Use the infinity focus feature to focus on faraway objects such as a mountain range or fireworks. The infinity focus setting utilizes a wide depth of field, so that everything is in focus. The infinity focus option can usually be found with the manual focus functions of the camcorder menu.
The conveniences of using the auto focus features are not without their shortcomings in certain shooting situations. Understanding when to set focus manually instead of using the auto focus is key in capturing the best image possible. Whether you are using auto focus or adjusting focus manually, there are a few practices that can help you shoot better video.
Take Advantage of Auto Focus Although professional videographers often talk about their misadventures using auto focus, there are times where it just makes sense. When filming social events, gatherings, or just real-world events in general, where there is no script, auto focus can make your life a whole lot easier. Especially if your camera is small and without a focus ring where you can manipulate the actual lens with your free hand. Automatic exposure frees you up from having to stop and adjust your focus. 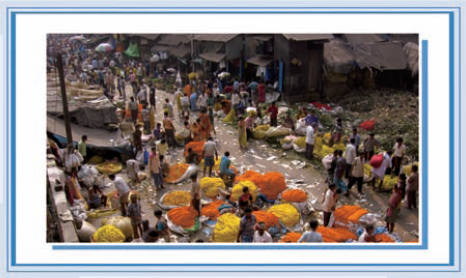 | Avoid Distractions during Automatic Focusing One of the inherent drawbacks of automatic focus is that it can be distracted. If another object passes between you and the shot, the focus may shift. If you are recording a wide shot of a building, and a person walks between you and the camera, and appears large in the frame, the camera may think that the person is the subject. The focus may shift between the building and the pedestrian. When using automatic exposure, avoid composing shots where many objects are between you and the subject. This also goes for people walking through your shot.  |
If you are using a camera that does not have a focus ring, it may be more practical to perform a manual focus only on static shots. Always have your shot lined up and your zoom adjusted before you perform a manual focus. For a sharp focus, zoom into a tight shot of the subject and adjust the focus until its detail is sharp. Some video cameras actually enlarge the image during a manual focus adjustment to assist in focusing.
Mind Low Light Situations
Low light situations can confuse the automatic focus system and slow the reaction time as it attempts to readjust to a new subject. Low light can also cause the automatic focus to choose improper focus points, leaving the subject slightly out of focus. In low light situations, consider finding a stationary target and zoom in to the subject to perform a manual focus adjustment and zoom back out. Physically set up close to the subject with a tripod and limit how much you zoom in. When you zoom in, it reduces the amount of light entering into the lens, making the subject even darker.