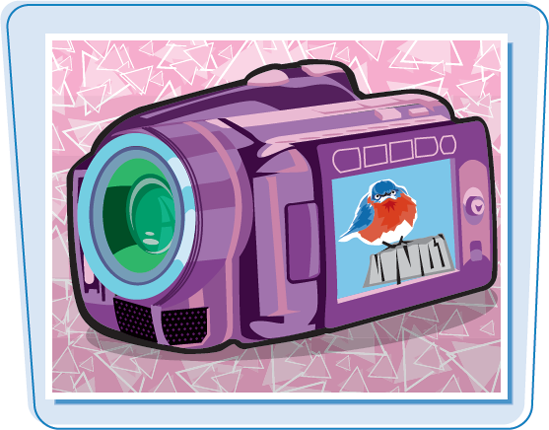
It is very easy to focus solely on the video and let the audio fend for itself. However, the video is only part of the equation that makes up the special moments you record. The ability to acquire clear, understandable audio is essential for the success of your videos. There is no single solution for every audio situation, so you must understand how to adapt to various recording environments and know what to listen for.

Understanding the Importance of Sound 62
Monitor the Sound 64
Adjust In-Camera Audio Settings 66
Use the Built-In Microphone Properly 68
Explore External Microphone Options 70
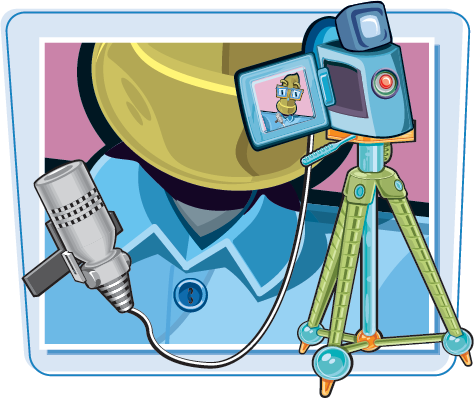
Learn to Use Lavaliere and Lapel Microphones 72
Get the Most out of Hand-Held Microphones 74
Operate Camera-Mounted Microphones 76
Operate a Boom Microphone 78
Quality sound is essential to your video — the overall audio quality can be just as important as what is shown on-screen. You will be working with essentially four important elements of audio as you record your video and edit them into a movie: speech, ambient sound, sound effects, and music. Understanding the importance of these four elements can help you produce solid audio for video.

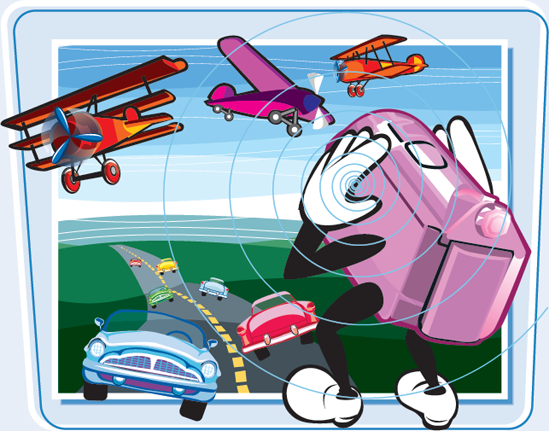
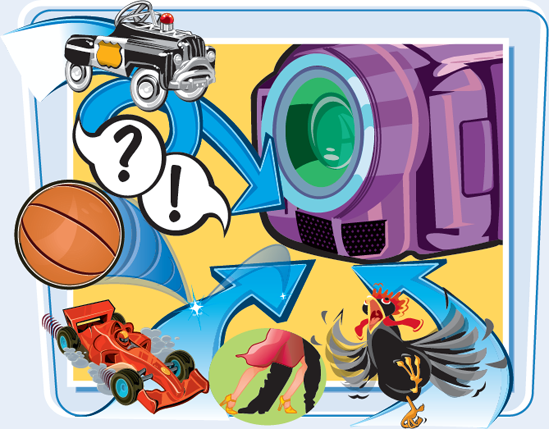
Acquire Clear Dialogue Dialogue and speech help to define the moment and provide the emotional impact that you want to relive through your videos. Hearing the bride and groom recite their wedding vows and capturing every word of the graduation speech is crucial to the success of your video. If the audience is unable to hear what is being spoken, the entire meaning can be lost. A well-produced voiceover can also help the audience understand what is going on in the video.  | Understand the Power of Ambient Sound The ambient sounds of chirping birds in the park, five o'clock traffic, or the roar of the fans in the stadium can complement your video by providing depth. But, they can also compete with your primary audio, which may be the human voice, or the music at a summer concert. Make sure that you properly use the appropriate sound equipment to ensure ambient sound is a complement, and not a distraction.  |
Some video editing programs come equipped with their own sound effects libraries. These effects are really handy for some of your more creative work. If you need a door knock, dog bark, or the whiz of a passing car, a video editing program with a sound effects library can help you create a very believable soundscape.

Utilize Music
Music can establish both a rhythm and emotion for your video. Some video editing programs enable you to create your own personal soundtrack for a video project, using prerecorded samples of musical instruments. The appropriate background music can make your video a hit.

Bring It All Together
You will use a video editing program to bring all of these audio elements together into a clear and coherent presentation. The care you took during the acquisition of the audio proves key at this stage. Although there are some audio processing techniques that can help you tweak less than perfect audio, the phrase "Garbage In, Garbage Out" remains true.
When you sit down to edit your video, what you acquired in the field is what you will have to use. If the recording levels were too low, too high, or a combination of both, that is simply what you have to work with. You must monitor your audio in the field as you are shooting to get the best audio possible.
Visit the Location Beforehand
Whenever possible, and this cannot be stressed enough, visit the location before the shoot to assess the audio situation. Stand in the area where you will be shooting, close your eyes, and just listen. Listen for any noises and sounds that may compete with your main subject. Listening for competing sounds gives you the opportunity to configure your camera settings for the best sound prior to the shoot.
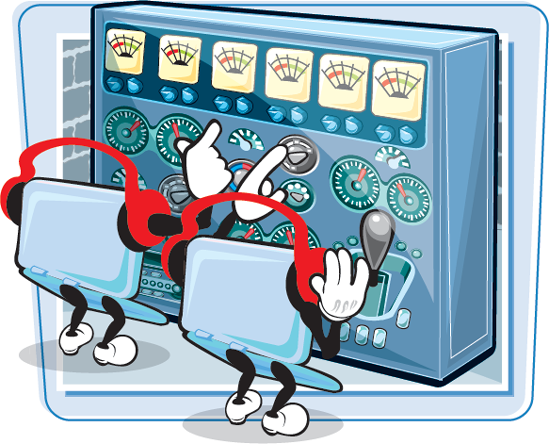
In order to ensure the quality of your audio, you need to hear what the camera hears as it records. Invest in a quality pair of headphones with padded cushions that fit over the entire ear for better sound quality. You have a better chance of avoiding an audio nightmare during the editing process by being able to make audio adjustments in real time while you are shooting.

Monitor the Recording Levels
Many digital video cameras come equipped with an audio level indicator that lets you monitor the levels of your recorded audio while shooting. This indicator can normally be found in the Audio Video menu of your camera. The indicator is viewed either in the viewfinder or in the LCD window when flipped open. The ability to monitor the audio as you record enables you to make audio adjustments in the field, to ensure the audio is at optimal levels.

Understand Recording Levels
Optimal audio levels for your digital video camera are at an average of −12 decibels (dB) on the digital audio scale, with the occasional peak above and below. Anything around 0dB on the meter is way too loud and will probably be distorted. Some video cameras allow you to adjust audio recording levels manually.

Some digital video cameras enable you to manually adjust the audio recording levels. You can learn how to adjust the audio levels for your particular digital video camera to ensure that you acquire optimal audio levels. Understanding your camcorder's audio recording options, and performing test runs, can help you acquire the best sound.
Manual Audio Adjustments
Monitoring audio by using a set of headphones and watching the audio indicator levels gives you the ability to see if you are recording at optimal levels while in the field. Some digital video cameras allow you to perform manual audio level adjustments by accessing a Microphone (MIC) option in a setup menu. Whether you are using the built-in microphone or an external microphone, you can turn the audio up or down.

Some digital video cameras have a Microphone Attenuator (Mic Att.) option that prevents loud sounds from becoming distorted during recording. You can set this option to ON before recording fireworks, sporting events, and concerts. This option can usually be found in the Set Up menu under the Record In options of the camera.

Test the Volume
Doing a test run to preview how the audio will actually be recorded is good practice. This is especially true if you are using talent with speaking roles. You can perform a manual audio level adjustment with your camera by having the person begin talking at the level he or she plans to speak and see if it averages around −12 dB. A test run that involves recording and actual playback of the audio can help you work out any problems before you begin the primary recording.

Digital video cameras are all equipped with an external microphone; some of them can record Dolby Digital Sound right out of the box. Built-in microphones have inherent limitations that you need to be aware of before you begin recording. Understanding the limitations of built-in microphones and how to address those limits can help you acquire better audio.
Keep It Close to the Subject
Built-in microphones perform better when the subject is very close, and lose their effectiveness the farther away the subject is. Recordings are fuller when sound is projected toward the camera, so when possible, make sure that the subjects speak toward the camera.

Built-in microphones are difficult to shield when shooting in windy conditions and are very likely to pick up the sound of wind. Some built-in microphones come equipped with windscreen features that automatically reduce some low-frequency noises and background noises caused by wind, but the best option is to avoid recording in windy conditions.

Pick Up Multi directional Sound
The built-in camera microphone is usually omnidirectional, which means it picks up sound from all directions, including camera handling noises. Be aware that the microphone picks up sounds that originate from behind the camera as well as those in front and on the sides. For the best audio results, shoot in a controlled environment whenever possible, where there is minimal competition between extraneous sounds and your subject.
The built-in camera microphone supplies acceptable audio for general shooting purposes but can quickly become inadequate. You can use audio accessories, such as external microphones, to improve your camera's audio recording capabilities. Think of audio accessories as tools. Knowing what tool to use for a given audio situation helps you achieve higher-quality sound acquisition.
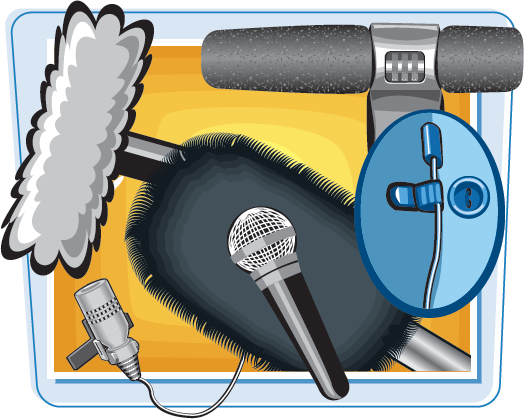
Getting Connected Digital video cameras can offer a couple of ways to connect audio accessories. Most consumer cameras have a 3.5mm Mic terminal that enables you to connect external audio equipment. Some have what is referred to as a hot shoe on the top of the camera, where external sources can be directly attached and controlled. Professional-level cameras possess XLR inputs for higher-end audio sources. 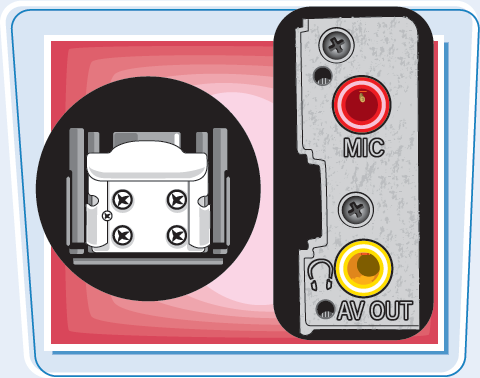 | Lavaliere and Lapel Microphones Lavaliere and lapel microphones are mostly used for seated interviews, such as those on "talking head" news shows. A wire runs from the microphone down a suit coat or blouse, leading back into the camera's 3.5mm Microphone terminal. When placed properly on the subject, lavaliere and lapel microphones record the human voice clearly while minimizing room noise.  |
Hand-held microphones can be used for on-the-go interviews and are widely used by news reporters out in the field. These microphones can come in handy if you plan on having more than one person on camera at a time, because the speakers can just pass the microphone down the line. You can also attach a hand-held mic to a podium for a public speaker. Most hand-held microphones are unidirectional, meaning they pick up sound from one direction. Hand-held microphones attach to the 3.5mm microphone terminal of the camera and require batteries.

Camera-Mounted Microphones
You can firmly attach a directional, stereo microphone to the top of a camcorder equipped with a compatible hot shoe. This microphone is sometimes referred to as a "shotgun microphone" and is a hands-free alternative to the lavaliere and hand-held microphones. These microphones are usually equipped with a windscreen (a small sock covering the microphone) to shield it from wind noise. Consider this microphone for documentary-style shoots such as birthday parties, family reunions, or sporting events.

Boom Microphones
A boom microphone is a directional microphone mounted on a pole or arm and is used to capture clean dialog. These types of microphones are very popular in television and film production. The boom microphone requires a second operator to keep the arm out of the shot and for positioning it for the best sound. Consider this type of microphone for film production.

Lavaliere and lapel microphones are great for achieving high-quality dialog for seated interviews. Understanding the proper use of your audio accessories enables you to record the best audio available.
Attach the Microphone Properly Make sure that the wire of the microphone is hidden as much as possible before you begin recording. If needed, ask the interviewee to run the wire down his shirt so that there are no exposed, dangling wires. Do not conceal the actual microphone itself. Concealing the microphone with a suit coat or collar muffles the voice of the speaker, and the subtlest of movements will create noise during the interview. 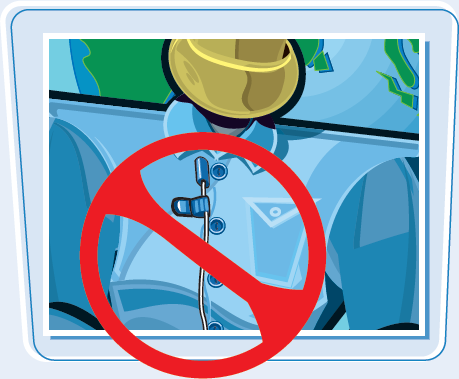 | Minimize Movements It is important that your subject remains relatively still during the interview. Because the microphone is attached to his or her clothing, it is very easy for it to pick up the sound of rustling clothes. Properly attaching the microphone to the subject and not concealing the actual microphone can minimize this issue. Excessive movement of the subject during the interview can shift the position of the microphone. If you know the person will be moving her head during the interview — possibly to face the interviewer — you should place the microphone on the side of the person's body in the direction she will be turning.  |
Do a test run before you begin recording. Instruct the speaker to talk at the same level he or she will be speaking during the actual interview, and then make a manual audio level adjustment so that the levels average around −12 dB. Performing a test run can help you target and anticipate sound issues before the actual recording begins.

Monitor the Audio During Recording
Wear headphones and monitor the audio level indicator during the interview. Many times subjects can become nervous and actually speak more loudly or softly during the interview than they did in the sound check. If you can hear the audio and see the levels, you can make the appropriate manual audio adjustments to ensure you get the best audio. If an unforeseen issue occurs, you can reshoot the video, if necessary.
Hand-held microphones are popular for on-the-go interviews and are widely used by news reporters in the field. Their use is quite simple, but there are some notes to keep in mind when using them in the field. Understanding the proper use of hand-held microphones enables you to acquire higher-quality recordings.
Turn It On and Off Hand-held microphones and many lavaliere microphones are battery powered and need to be turned on before using them. In the excitement of the moment, it can be very easy to forget to turn the microphone on, especially when you are not accustomed to powering on your camera accessories. Remember to turn off the mic between uses to conserve battery power. Always use a fully charged battery when recording. As the battery reaches a low level, audio quality diminishes. Keep in mind that a power indicator light does not necessarily mean that a battery has enough power; it generally means that there is some power, which may not be an adequate amount.  | Hold It Close The most widely used hand-held microphones are unidirectional, meaning that they pick up sound from one direction. Make sure that you hold the microphone close to the mouth of the speaker. Sometimes even the professionals forget this and subsequently the first two words get dropped before the microphone is in place. These microphones also pick up some ambient noises.  |
Do not give up the microphone when conducting the interview. It is very common for a person to reach for the microphone as you move it toward their mouth. You know what should and should not be done with the microphone during the recording, and he or she probably does not. The interview will go more smoothly if you control the microphone.

Secure the Cord
Be mindful of the placement of the cord if you are conducting an interview in an area that has a lot of foot traffic. Avoid extending the cord in an area where people will have to step over it. The last thing you want to happen is for someone to trip over the cord and hurt himself while the camera and the microphone go crashing to the floor.
The camera-mounted microphone is often referred to as a shotgun microphone and can be attached to the top of a compatible camera for directional pickup. This particular microphone is a hands-free alternative to the lavaliere and hand-held microphones and is great for guerrilla-style, unscripted shooting. Understanding the proper use of camera-mounted microphones improves the quality of the audio in your recordings.
Check Compatibility
Make sure that the camera-mounted microphone you are looking to buy is compatible with your camcorder hot shoe before you spend your money. Digital video cameras can also utilize different-sized hot shoes and require microphones of compatible sizes. Some cameras use specialized advanced hot shoe technology that powers compatible microphones without the use of wires or batteries.
Cover the Microphone with the Windscreen
Make sure that the microphone is completely covered by the windscreen, or sock, that shields it from wind noise. The windscreen feature that some cameras utilize for the built-in microphone can automatically be deactivated when you attach a camera-mounted microphone. The actual covering on the microphone may be your only line of defense in protecting your videos from howling wind in a windy shooting situation.
Find the Range
Position the camera-mounted microphone close to the subject for the best sound. The best way to find an acceptable recording range for the camera and the subject is to do a test. See how far away you can get before the quality diminishes. The camera-mounted microphone is not an ideal fix, but it can give you higher-quality audio than the built-in microphone. Camera-mounted microphones are directional, mostly picking up what is in front of them and diminishing ambient noise from the back and sides of the camera.

The boom microphone is a directional/shotgun microphone placed on a boom pole and is largely used in film and television for high-quality dialogue recording. This particular microphone is a good choice for freeing up subjects from a microphone, and for when you do not want a visible microphone in the shot. Being able to identify the proper boom microphone for your digital video camera and knowing how to properly use one can help you achieve some of the highest-quality audio possible.

Get the Right Connector A consumer camera has a 3.5mm (1/8) stereo or mono microphone jack to accommodate external audio accessories. Most of the boom microphones on the market are geared toward prosumers and use an XLR connector for more-professional cameras. If you are using a consumer camera, make sure that the microphone you buy has a 3.5mm (1/8) connector. Some companies such as BeachTek offer adapters that attach to the camera and can be connected to the 3.5mm (1/8) jack. You can then plug the XLR connector of the microphone into the adapter. 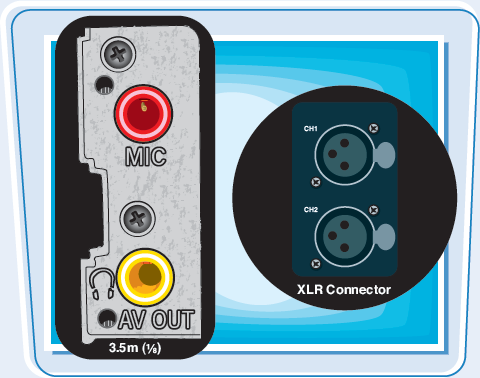 | Keep It Out of the Shot You need to find someone to operate the boom microphone while you operate the camera, and communication between the both of you is crucial. Not only does the boom operator need to keep the boom out of the shot, but shadows that the boom creates also need to be kept out of the shot. A shot where the boom pole dips in and out of the frame or where a shadow appears across the subject looks amateurish and is distracting to the viewer.  |
The boom microphone and pole can be heavy when held for extended periods. Many boom operators hold the boom over their shoulders for leverage, but this can vary due to the composition of the shot. Sometimes you may need to hold the microphone just below the bottom of the frame to keep shadows out of the shot.

Control the Distance
Remember that a boom microphone is not necessarily good at picking up sound from a great distance; it is just a directional mic on a pole. Make sure that you get as close as you can to the subject and point the microphone toward whomever is speaking. Whether the subject is standing or walking, keep the microphone at a consistent distance from the subject to avoid fluctuations in audio levels.

Monitor the Audio
Always wear headphones to monitor the audio to ensure that the microphone is truly picking up what you are pointing it toward. Monitoring the audio also lets you know if you need to make any adjustments while you are recording. You do not want to sit down and edit your video only to discover that the audio was not as clean or as high or low as anticipated.