
2
Creating your first tests
- Writing basic unit tests using Jasmine
- Using
beforeEach,afterEach,it,describe, and matcher functions - Testing classes
Now that you understand the basics of Angular testing, you’ll get started writing tests. Before you continue, follow the project setup instructions in appendix A to install the sample project along with the necessary tools: the Angular CLI, Jasmine, Protractor, and Karma. You’ll use the sample project throughout the book.
After you get the sample project up and running, you’ll start writing basic tests using Jasmine, the behavior-driven JavaScript testing framework that you’ll use throughout the book. We won’t talk about any of the testing modules that come with Angular in this chapter. We’ll save those for chapter 3 and the rest of the book.
We want to cover testing without the Angular test modules because at times you won’t need help from Angular itself. For example, you might have a pipe that transforms dates or a function that performs a calculation that needs to be tested, and you could test them without any help from the Angular test modules. If you aren’t familiar with pipes, don’t fret. All you need to know for this example is that it’s an Angular utility that can be used to transform data. Chapter 5 is dedicated to pipes.
In this chapter, we’ll discuss testing classes without the help of the Angular framework. If you’re comfortable with writing basic unit tests, you may want to skip this section and start on chapter 3, “Testing components.” Otherwise, let’s get started!
2.1 Writing tests using Jasmine
As we discussed in chapter 1, Jasmine is a behavior-driven development (BDD) framework that’s a popular choice when testing JavaScript applications. BDD is a great methodology because you can use it to explain the why of things. The advantage of writing tests using BDD is that the test code you’ll write will read close to plain English, as you’ll see in the examples.
Though you can write Jasmine tests in JavaScript, you’ll write all your tests (and all code in this book) using TypeScript to maintain consistency.
2.1.1 Writing basic tests
To write the first test, you’ll create a sanity test like the one in chapter 1.
In the first test, you'll use the describe function to group tests together into a test suite and use the it function to separate individual tests. All you’re doing in this test is checking to see that the Boolean value true is equal to the Boolean value true. The expect function is where you want to prove your assertion, and you’ll chain it together with a matcher, which in this case is toBe(true).
This test serves primarily as a sanity check and nothing more. You may recall from chapter 1 that a sanity check is a test to see if all the parts of your testing environment are set up correctly.
You’ll use the following naming convention for all your unit tests: <name of file tested>.spec.ts. Navigate to website/src/app and create a file named first-jasmine-test.spec.ts. You’ll use this generic name here because this is a one-off test and you aren’t testing a file. In the future, you’ll include the name of the file that you’re testing in the file name for your unit test.
You may have noticed that the file name includes the word spec, which stands for specifying. This means that the test is verifying that a specific part of the code base works as described in the test file. Generally, you’ll see this format used for unit tests with Angular.
In your first-jasmine-test.spec.ts file, add the code shown in the following listing.
Listing 2.1 First Jasmine test
describe('Chapter 2 tests', () => {    ①
  it('Our first Jasmine test', () => {    ②
    expect(true).toBe(true);    ③
  });
});
To execute the unit tests in this book, you’ll use the Angular CLI command ng test. If you enter ng test in the terminal, any file that ends in .spec.ts will run. Now, go ahead and enter ng test in the terminal window that you’ve been using for navigation.
A browser should open automatically, and you should see something similar to figure 2.1.

Figure 2.1 Your first passing test, confirming that true really is true
Now that your first test has passed, try an exercise to practice what you just learned.
Exercise
Write a test that proves that 2 + 2 equals 4 inside your previous describe function, but in a new it function.
Solution
Now you should have two basic tests. Your test should look similar to the code in bold in the following listing.
Listing 2.2 Adding a second Jasmine test
describe('Chapter 2 tests', () => {
  it('Our first Jasmine test', () => {
    expect(true).toBe(true);
  });

  it('2 + 2 equals 4', () => {  ①
expect(2 + 2).toBe(4);
  });
});
Run ng test. When the browser window opens, you should see something like figure 2.2.
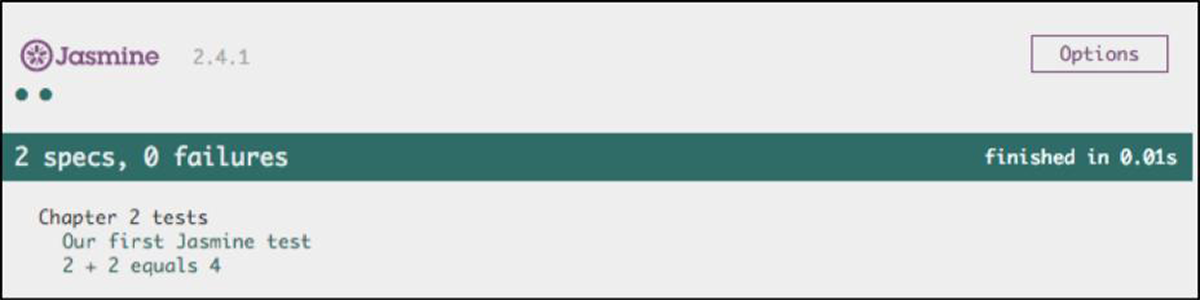
Figure 2.2 Your second passing test, proving that 2 + 2 = 4
Now that you have two passing tests, let’s see what happens when you have a failing test. Change the toBe part of your assertion to something other than 4. After you change the value, run ng test, and you should see something like the screenshot in figure 2.3.

Figure 2.3 A failing test showing what happens when the value is not what’s expected
As you can see, when you come across a failing test, it’ll be obvious that you have an error. You’ll see the failing test along with a stack trace below the test. You can go through the stack trace line by line to debug the error. Each line in the stack trace will have a line number that you can visit to find the error. The last line of the stack trace is usually the line closest to the issue, so starting from the bottom up is a good way to debug the test. Change the toBe back to 4. Your result should again look like figure 2.2.
You won’t be using this first test going forward, so you can delete it by running the following command:
rm first-jasmine-test.spec.ts
Now that you understand the basics behind writing tests using Jasmine, let’s move on to testing classes.
2.2 Testing classes
Writing tests for a class is the easiest and quickest way to level up your testing skills without getting mired in some of the Angular framework’s complexity. As we mentioned in the introduction, at times you’ll need to test a normal class. Let’s say you have a class that validates inputs from a form, and you want to check the inputs client-side before passing them along to the server. For that sort of check, you can write your tests as if the class was any other TypeScript code, without using Angular at all. In this section, you’ll learn how to do that.
The first class you’ll write tests for is named ContactClass. ContactClass will hold a person’s contact information, which you’ll be able to use with the sample application. You can use ContactClass to get and set a person’s ID, name, email, phone number, country, and whether they are a favorite.
First, navigate to website/src/app/shared/models/. The code of the class that you’ll write the test for, ContactClass, is in this directory in the contact.ts file, if you want to have a peek. In the same directory, create a file called contact.spec.ts. It’s generally a good idea to keep your tests in the same directory as the module you’ll be testing.
In test files, the first thing you typically want to do is import your dependencies. Because you’ll be testing the ContactClass class from the contact module, add the following code at the top of the file:
import ContactClass from './contact';
Notice that although the module’s file name is contact.ts, you can leave off the ts file extension in the code because it’s optional in import statements.
Next, you'll create a test suite using the describe method. Call this test suite Contact class tests. Add a blank line after the import statement, and then the following lines of code:
describe('Contact class tests', () => {
});
Inside the describe function, you need to create a variable to hold your instance of the ContactClass and set it to null. Add this code inside the describe block:
let contact: ContactClass = null;
Now you need to initialize the contact variable. You often need to reset a variable every time you run a test. Resetting variables that have been manipulated inside a test helps make sure that each test runs independently and that previously manipulated variables don’t interfere with any subsequent tests. Preventing such interference helps to avoid unwanted side effects. An example of a side effect could be changing a variable in one test and then accidently using the changed variable in another test.
The part of the tests where you set variables like this is known as the setup. In your setup, you’ll use the beforeEach method to initialize your contact variable every time a test runs. Add a new line and the following code directly beneath the contact variable declaration that you previously added:
beforeEach(() => {
  contact = new ContactClass();
});
You’ll use the beforeEach functions to set up your tests and to execute expressions before each one of your tests runs. In this case, you’re setting the contact variable to a new instance of the ContactClass class each time you run your test.
Now you can write your test. If the test creates an instance of ContactClass successfully, it will use the class’s constructor to do so. You’ll test this by seeing if the contact is not null. Add a new line directly below the beforeEach method that you previously added, and then add the following test case:
it('should have a valid constructor', () => {
  expect(contact).not.toBeNull();
});
Based on the test description part of your it function, should have a valid constructor, you can see that you’re trying to test the ContactClass constructor. You do so by evaluating the expression expect(contact).not.toBeNull(). Because the ContactClass class does have a valid constructor, the matcher, not.toBeNull(), will evaluate to true, and the test will pass.
Finally, tests commonly have a teardown part in addition to the setup part. You can use the teardown part of the test to make sure instances of variables get destroyed, which helps you avoid memory leaks. In this case, you’ll use the afterEach function to set the contact variable to null.
After the test you added, add a new line, and then add this code:
afterEach(() => {
  contact = null;
});
Your contact.spec.ts file should look like the code in the following listing.
Listing 2.3 contact.spec.ts—constructor test
import ContactClass from './contact';    ①

describe('Contact class tests', () => {
  let contact: ContactClass = null;    ②

  beforeEach(() => {    ③
    contact = new ContactClass();
  });

  it('should have a valid constructor', () => {    ④
    expect(contact).not.toBeNull();
  });

  afterEach(() => {    ⑤
    contact = null;
  });
});
Run the new test by running the following command in your terminal window inside the testing-angular-applications/website directory:
ng test
In the Chrome window that’s running your test runner, you should see something like figure 2.4.

Figure 2.4 Chrome window showing that the ContactClass constructor works
You've tested to see that creating an empty constructor works in an instance of the ContactClass. Let’s see what happens when you try to test creating an instance of the ContactClass by passing a name to it. To see if the name property is set correctly, you’ll also have to test the get method for the name properties. Add the new test in bold in the following listing to the contact.spec.ts file directly below the constructor test.
Listing 2.4 contact.spec.ts—constructor setter and getter name test
import ContactClass from './contact';

describe('ContactClass tests', () => {
  let contact: ContactClass = null;

  beforeEach(() => {
    contact = new ContactClass();
  });

  it('should have a valid constructor', () => {
    expect(contact).not.toBeNull();
  });

  it('should set name correctly through constructor', () => {    ①
    contact = new ContactClass('Liz');
    expect(contact.name).toEqual('Liz');
  });

afterEach(() => {
    contact = null;
  });
});
If you left the test server running when you used ng test, the tests should update automatically after you add this code. If you need to restart the test server, run ng test again. You can check to see if the tests ran successfully by either looking at the test runner in the Chrome browser, as you've been doing so far, or by checking the terminal window you’ve been using to input commands. You should see two successfully run tests (figure 2.5).

Figure 2.5 Two successfully run tests in a terminal window
2.2.1 Adding the rest of the tests
Next, you can test out the getters and setters for the id and name properties in your class. Add the two tests that are in bold in the following listing.
Listing 2.5 contact.spec.ts—adding getters and setters tests for id and name tests
import ContactClass from './contact';

describe('ContactClass tests', () => {
  let contact: ContactClass = null;

  beforeEach(() => {
    contact = new ContactClass();
  });

  it('should have a valid constructor', () => {
    expect(contact).not.toBeNull();
  });

  it('should set name correctly through constructor', () => {
    contact = new ContactClass('Liz');
    expect(contact.name).toEqual('Liz');
  });

  it('should get and set id correctly, () => {    ①
    contact.id = 1;
    expect(contact.id).toEqual(1);
  });

  it('should get and set name correctly, () => {    ②
    contact.name = 'Liz';
    expect(contact.name).toEqual('Liz');
  });

  afterEach(() => {
    contact = null;
  });
});
You should now see four passing tests in your terminal or in your browser.
If you want to strive for 100% test coverage for a given module, you should have tests to cover every line in the module. To do this for the ContactClass, you need to complete an exercise.
Exercise
For this exercise, write the rest of the tests for ContactClass in the contact.ts file in the same directory as your test. These tests should be similar to the ones you’ve already written.
Solution
Your final contact.spec.ts should look something like the bold code in the following listing.
Listing 2.6 contact.spec.ts—complete
import ContactClass from './contact';

describe('ContactClass tests', () => {
  let contact: ContactClass = null;

  beforeEach(() => {
    contact = new ContactClass();
  });

  it('should have a valid constructor', () => {
    expect(contact).not.toBeNull();
  });

  it('should set name correctly through constructor', () => {
    contact = new ContactClass('Liz');
    expect(contact.name).toEqual('Liz');
  });

  it('should get and set id correctly', () => {
    contact.id = 1;
    expect(contact.id).toEqual(1);
  });

  it('should get and set name correctly', () => {
    contact.name = 'Liz';
    expect(contact.name).toEqual('Liz');
  });

  it('should get and set email correctly', () => {     ①
    contact.email = '[email protected]';
    expect(contact.email).toEqual('[email protected]');
  });

  it('should get and set number correctly', () => {     ②
    contact.number = '1234567890';
    expect(contact.number).toEqual('1234567890');
  });

  it('should get and set country correctly', () => {     ③
    contact.country = 'United States';
    expect(contact.country).toEqual('United States');
  });

  it('should get and set favorite correctly', () => {     ④
    contact.favorite = true;
    expect(contact.favorite).toEqual(true);
  });

afterEach(() => {
    contact = null;
  });
});
Make sure that all your tests pass; you should have eight passing tests in total. At this point you should have a pretty good understanding of how to test classes in TypeScript using the Jasmine testing framework. We covered a lot in this chapter. You should feel confident that the information you’ve learned here will help you immensely on your journey to becoming an Angular testing master.
Summary
- Writing basic unit tests can come in handy when you don’t need to use any of the Angular testing modules. Writing tests for simple functions, classes, and pipes doesn’t require any testing dependencies outside of Jasmine, the behavior-driven development (BDD) framework. You can use Jasmine to write tests that read close to plain English.
- Most unit tests you’ll write or see in production applications will cover a similar pattern. You usually have a section at the top for importing dependencies, a section to create the test suite, a section for setting up the tests, a section for the tests themselves, and a section to tear down the tests.