
CHAPTER 9
Writing an Add-On Product
In the preceding chapters, you have seen what Plone is, what you can do with it, and how to modify its default behavior without writing a single line of code on the file system (e.g., adding content types, manipulating workflow schemas, modifying default page templates, etc.).
So, where do developers come in? They come in whenever you need to change Plone's underlying structure, and a simple reconfiguration of its services isn't enough.
Everything you have to do to configure a Plone instance can be easily distributed among many Zope services using a so-called product, which is a Zope synonym for an extension or plug-in. Besides that, working together on the same instance of a Plone site can be a nightmare for a developing team, with everyone risking breaking each other's code without the ability to automatically discover it, as a simple versioning repository could do. Finally, customizing Plone through the web will never let us own the real wheels spinning round at the application server level: you cannot manipulate content, objects, attributes, and schemas as you may with, you cannot create your own viewlets or portlets, you cannot implement any truly distributable extension that adds functionality to Plone itself, and so on.
In the following sections, we'll try to make you understand the anatomy of a typical Plone product, walking through a series of tasks that will take you into the deeper workings of Plone and Zope. In detail, we will create a Regional News object for our site that will allow users to create news specific to their locations. This will let us examine the basic structure of a Plone add-on package and how to define custom content types using Archetypes. Also, we will set up a stand-alone CSS file to style the Regional News view, building a Regional News search form, and even creating a configuration panel so that the Plone site manager can configure and maintain the regional news location metadata without needing to read a single line of Python.
Structure of a Plone Product
As we've mentioned, Plone is built on top of the Zope application server, so basically any Plone extension is a Zope extension. Zope is a long-running project, beginning in the 1990s, and it has gone through many different application development approaches. Plone itself is a long-running project in Zope, and besides including different Zope-level development techniques, Plone has introduced and maintains its own techniques.
In the last few years, the Zope 3 framework has been adopted in the Zope 2 environment because of the component architecture. Both the powerful new developing patterns introduced by Zope 3 and the backporting of many Zope 3 technologies have motivated Plone core developers to adopt Zope 3 technologies in Plone development.
Note Zope is the name shared by two different big projects. As described on the Zope.org site, Zope 2 was first released in September 1999, based on Zope 1 libraries that were being developed since 1996 by Zope Corporation, previously known as Digital Creation (see www.zope.org/Products/Zope/swpackage_releases).
Zope 2 is great in what it offers to its users, and Plone is proving that, but some "un-agile" development patterns were quickly discovered, and Jim Fulton himself, the Zope concept's technical father, proposed a way to overcome them, by adopting component development as a paradigm and thus founding Zope 3 as a completely new application server environment.
For various unforgivable reasons, Zope 3 is still missing its own site. Although it continues on the path tracked by Zope 2, it deserves much more emphasis on what is different and how. It has been developed to be easily split into independent, reusable components, and thanks to that farsighted feature, it's been able to be incorporated into Zope 2 application server as a library for years. The Five project (http://codespeak.net/z3/five/) has built the binding layer that integrates the Zope 3 framework into Zope 2 quite naturally, and that is why Plone has been leveraging the powerful Zope 3 technologies for years.
The most important innovation in Zope 3 is the component architecture, which is outside of our documenting scopes. We strongly suggest taking a look at the free "Comprehensive Guide to Zope Component Architecture" (www.muthukadan.net/docs/zca.html), or Web Component Development with Zope 3, by Philipp von Weitershausen (Springer, 2005).
The most common way of extending Plone is by implementing a Zope product. A Zope product is a Python package located in a special folder called Products on the file system, where Zope looks for extensions to load.
There are no particular rules for building a Plone (and thus necessarily a Zope) product, except it must be a Python package and it must use Zope product registration strategy. Of course, as a Python package, it would be best to use a versioning tool like Subversion to establish a development review process, but that is beyond the scope of this discussion.
Note As stated previously, there are some good online documents about the Zope 2 development paradigm and how to extend it. Have a look at the "Zope Products" chapter of the Zope Developer's Guide (www.zope.org/Documentation/Books/ZDG/current/Products.stx).
As mentioned in Chapter 1, Plone is built on top of the CMF (content management framework). The core concepts implemented by Plone are established by the CMF, and so are the content types. Each content type object implements various contracts to reach the final effect we can enjoy using Plone: we want to interact with it through UI view and edit forms, we want its information and metadata to be persistent, we want it to obey to our security configuration, we want it to be indexed and allow fine searches to work, we want it to be workflowed, and a lot more. So let's look at what "extending a CMS" in this manner means for Plone. In order to manage your own content types in Plone, you need to understand the paradigm that Plone uses to implement content types. As mentioned, Plone lets you manage content using content types. Thus, the most important Python objects in the Plone world are those that relate to content types.
Note Zope 2 is a general purpose application server, thus not exceptionally good at solving content management hitches. That's why the CMF (formerly named the Portal Toolkit) was born. The CMF was released around 2001 as a bundle of Zope products that specialized Zope to let it build new portals in a rush with all the bells and whistles. It established a series of new concepts and services that are still used to boost Zope's content management ability. Moreover, it included in the bundle a completely working example, CMFDefault, which implements a client-ready portal, but lacks of usability and appeal to the end user. That is where Plone is coming from: its primary aim was to just skin CMFDefault. The online home of the CMF is on Zope.org, at www.zope.org/Products/CMF.
Some of the functionality of Plone content types comes directly from Zope, such as security and storage concerns, because content types are Zope objects, too.
Note While we won't go deeply into detail, a brief explanation of Zope objects is required. Actually, Zope stands for Z-Object Publishing Environment, which implies that a Zope object is something that Zope can publish; that is, Zope lets a user access code object information and functions in a network application environment, using protocols such as HTTP or FTP. For a deeper look into this, read the "Object Orientation" chapter in the Zope Book, at www.zope.org/Documentation/Books/ZopeBook/2_6Edition/ObjectOrientation.stx.
CMF-level services add some other functionality, like indexing capability (which is based on the portal_catalog tool) and workflow service (which is based on portal_workflow tool). Adopting the CMF as a basic layer, all we need to build a product containing a new content type object class is a proper usage of the CMF's Python mix-in classes, registration functions for our Python classes, and a few lines of code implementing the methods needed by CMF services.
Clearly, prior to getting productive, you should understand some peculiar Zope and CMF development patterns.
In the following section, we will show you how to create a new content type in Plone, and let it act just like the native Plone content types.
This is easy because Plone minimized all the complexity: you can accomplish the mission just by providing an existing content type class as a base and an attribute schema of the new content type!
Building a Regional News Reader: Requirements and Discussion
For the purposes of this chapter, let's imagine you need something like a Plone news content type but with a new attribute such as location. Let's call it the Regional News content type. For this content type, in the next section we will create a new product containing an Archetypes class, put a new field in it named Location, and base the class on the News class. Then everything you need will be in place. Just restart the service, install your new product, and start adding regional news content everywhere in your Plone portal.
If you're wondering about "Archetypes" in the last paragraph, that is the name of the technology responsible for letting our schemas live as Plone content types. You describe how your content type schema is shaped, and Archetypes takes care of rendering its default view and edit form, persists the corresponding information in the safest way possible, indexes what you ask for, and displays it in your searches.
Note As mentioned previously, Plone's primary objective was to rearrange the CMFDefault skin in order to increase accessibility and usability for the end user. And it succeeded. Plone's secondary objective then became to improve the way you can create and add content types to Plone. To this purpose, after some months of buzz, Archetypes was created by Ben Saller (see http://dev.plone.org/archetypes/browser/Products.Archetypes/trunk/Products/Archetypes/AUTHORS). He was able to build the required infrastructure around the core idea of requiring just content type attribute schemas and hiding all the technical issues from the developer. Have a look at Archetypes Developer Manual (http://plone.org/documentation/manual/archetypes-developer-manual) for more information about what you can do with Archetypes. Despite the fact that Archetypes is showing its age and some newcomer technologies, such as Devilstick (http://devilstick.info) and Dexterity (http://martinaspeli.net/articles/dexterity), are getting close to taking its place, lots of Plone projects still base their code on Archetypes, and we will use it to build our content types.
Our Regional News content type will need to follow a workflow schema different from the default one, because we want to differentiate normal regional published items from the ones we need to publish directly on the home page. Thanks to DC workflow, the workflow engine implemented by the portal_workflow tool we'll cover later in the "Plone Configuration" section of the chapter, that just means that we'll have to create our own workflow schema and associate it with our content type. Plone will immediately show our new transitions and states in the contextual state menu, and we will be able to filter the new regional_published state for regional news lists.
Of course, it is easy to perform all these workflow configurations through the Web, using the DC workflow configuration panel. At the same time, we need to keep them in our product so that the workflow for our content type will be automatically configured in every site where we'll install the product. To do this, we need some configuration import/export utility to extract our workflow policy and distribute it within our product. Fortunately, this is exactly what the portal_setup tool does! We will have a closer look at the portal_setup tool in the "Plone Configuration" section.
So, our first Plone product is almost there, at least conceptually. But something is missing before we can consider it complete: a Regional News search form and a portlet to show the latest news by location. To accomplish this, we could use some page templates and Python scripts in out portal_skin tool, but thanks to Zope 3 technologies, we can do better.
In the "Forms" section of the chapter, which follows, you will see in detail how to create a custom search page with a browser view to render both the web form and the results.
You might ask, "Why not just register a couple of page templates and a Python script to produce search results in the portal_skin tool?" Well, because in the way that we propose, we will separate much better logic from presentation, and we will also avoid the dirty work of web form implementation.
Note While Archetypes can render very specialized web forms based on their attribute schemas, for a long time Plone has been missing a technology able to render web forms out of attribute schemas without any correlated Zope object. This is one of the benefits that comes from the Zope 3 world, which has at least a couple of pure form-rendering libraries: zope.formlib (http://pypi.python.org/pypi/zope.formlib) and z3c.form (http://pypi.python.org/pypi/z3c.form). Both of them are based on Zope 3 component concepts, and are able to render powerful and flexible web form machinery out of pure interfaces, which in component terminology are the equivalent of Archetypes attribute schemas.
After we create the Regional News content type, we'll build a Regional News portlet as well, taking advantage of the Plone portlet machinery. But first, we'll give you an introduction to this machinery in the "Viewlets and Portlets" section of the chapter. You should now have a good base of knowledge as to what a typical Plone product should do. But before we start putting our hands on some code, let's just sum up what a typical product package should contain.
First of all, it will be a Python package, placed in the Zope Products folder. It will have some registration instructions to let the Zope and Plone layers know that it exists, and some Python modules to describe our Archetypes schemas representing our content classes. Besides this, it will also have some page templates to define our user interface skin, and some modules for our browser views and portlets. Finally, it will probably have a folder containing our configuration policies for workflow schemas and all the rest.
Stay tuned—we will get through all these matters before the end of this chapter.
Building a Plone Product the Easy Way
We promised in the preceding section to start building our own Plone product, so let's do it! As we remarked, our product will live on the file system, so let's open a terminal and prepare our development environment to host our code. All these examples are in Linux, so we will assume some basic familiarity with file system operations in Linux.
As examined in Chapter 2, we use Paster commands to build and configure our system. Paster is a powerful Python library that comes from Ian Bicking's Python Paste project (http://pythonpaste.org). It lets us define templates and then reuse them in order to build our products.
Before getting our hands dirty, we'll need one more piece of knowledge: how to let Zope safely know about our product. Zope 2 establishes that products are placed in the Products folder, without checking what packages you put there or which dependencies the packages have. Just start the Zope server after you have put a package in, and see what happens.
Fortunately, Python now has effective machinery to build and distribute Python packages, taking care of versions and dependencies too, thanks to distutils and Peak setuptools. Version, author, dependencies, and everything useful to classify a package are bundled around the package itself in a structure known as a Python egg. setuptools provides a shell script named EasyInstall, which is able to find an egg in egg web repositories and download and install it on your local machine with all the requested dependencies.
Note Python.org offers the most popular of the online packages repositories, PyPI (Python Package Index). You can browse the index online at http://pypi.python.org/pypi, searching by free text or browsing it at http://pypi.python.org/pypi?action=browse. With PyPI, developers can submit their packages automatically to the repository by running a simple command in the terminal; PyPI will make sure to hide all previous releases and give proper visibility to the new one. Nowadays, more and more Zope and Plone packages are published to PyPI, which is why the Products section of Plone.org was recently bound to PyPI in an automatic way, so that developers may update a single site and have the other site remain up to date.
Zope 2 is not aware of Python eggs. That is why, to take advantage of all this, Zope and Plone use buildout technology to define and build a working Zope instance. As a consequence, we need to provide a Python egg wrapping our product, and Paster help us write the code for the egg by providing some boilerplate code. All the templates we need are provided by ZopeSkel, a collection of skeletons for quickly starting Zope projects.
Note At this point, we need to state some assumptions about your development environment: all the examples in this chapter have been developed on a UNIX machine, using Python version 2.4.4, the version recommended for Plone 3 (see http://plone.org/documentation/faq/plone-versions). Please use this version of Python for the following exercises.
Furthermore, Plone makes use of the Python Imaging Library (PIL—www.pythonware.com/products/pil) to manage image files. At the time of this writing, PIL is not available as an egg for automatic installation, so you will need to install it on your machine manually, using the same Python version you will use for Plone.
For any specific trouble you may encounter, have a look at the "Installation" section on Plone.org (http://plone.org/documentation/phc_topic_area?topic=Installation).
So, let's start. Download ez_setup.py and launch it:
$ wget peak.telecommunity.com/dist/ez_setup.py

$ python ez_setup.py
Using easy_install, install ZopeSkel and all its dependencies:
$ easy_install -U ZopeSkel
When finished, you should have a new command available in your shell: paster. You can try it out with the following command:
$ paster create --list-templates
It should answer with a list of all the available templates (e.g., plone3_portlet, which you can use for creating a new portlet product, and archetype, which creates a generic Plone project).
If you don't already have a working instance to create your product in, just execute the following lines in a terminal:
$ cd ~

$ paster create -t plone3_buildout plonebook
and answer all the questions the script will ask with their default values. Then enter this:
$ cd plonebook

$ python bootstrap.py
You will see your new buildout instance almost ready to be run. Be sure you have an active Internet connection and execute the following:
$ ./bin/buildout -v
At the end of this process, you should have a new ready-to-run Zope instance correctly configured with the last Plone bundle.
We will assume you are using a Plone buildout named plonebook located in your home directory to run your new package in. Just go to the src folder and create a new Archetype project:
$ cd ~/plonebook/src

$ paster create -t archetype plonebook.regional_news
Answer the questions to create a regional_news package in the plonebook namespace. Have a look at what your src folder contains now—you should find a plonebook.regional_news folder. Let's explore what is inside.
The Paster template has prepared a brand new egg for us, with a README.txt file to fill in and a setup.py file to eventually edit. The actual extension code is placed in the plonebook/regional_news folder, which contains the following files and folders:
- __init__.py: This file makes the folder a Python package and contains the initialize function, which is launched by Zope at startup to register the product into the framework.
- browser: This folder contains Zope 3 browser views defined by the product.
- config.py: This file contains common configuration constants for the project.
- configure.zcml: This file contains Zope 3 configurations for this product.
- content: This folder contains Python modules defining content types.
- interfaces.py: This file contains Zope 3 interfaces for this product.
- portlets: This folder contains portlets defined in this product.
- profiles: This folder contains GenericSetup profiles (see the "Plone Configuration" section of the chapter).
- README.txt: This is a text file in which you can add generic information about the product.
- tests: This folder contains test modules for the product.
- tests.py: This file contains a basic test infrastructure for the product.
As it is, this package does nothing. Additionally, Zope doesn't recognize it yet, because it is not a normal Python package in the Zope Products folder, but a generic Python egg in the buildout src folder. Let's tell the buildout about it, adding these lines to the buildout.cfg file:
[buildout]

...

eggs =

    ...

    plonebook.regional_news


develop =

    src/plonebook.regional_news


...

[instance]

...

zcml =

    plonebook.regional_news
The last line lets Zope know that we want the package to be loaded at startup, and that we need it unless some other package includes it.
As usual, after this modification, run the buildout script:
$ cd ~/plonebook

$ ./bin/buildout -v
If everything went right, we should start our Zope instance and find plonebook.regional_news in the Products section of the Zope control panel. Check it by starting the service:
$ ./bin/instance fg
and then pointing your web browser to http://localhost:8080/Control_Panel/Products/manage.
Obviously, installing the product into a Plone instance at this moment would not produce any extension to Plone itself. We just have a very advanced boilerplate!
Let's have a look at how Paster is still useful to us: thanks to its local commands concept, we will add to the package the boilerplate for creating content types. Just run the following in your terminal:
$ cd ~/plonebook/src/plonebook.regional_news

$ paster addcontent -l
This will produce a list of further available templates that are useful in this project context. We will use them soon to create our first content type, Regional News, and its Plone news–based schema. Just execute the following in your terminal:
$ paster addcontent contenttype
Then answer the questions the script will ask you, using RegionalNews as the content type name and the defaults for all the rest. At the end of this process, you should notice some updates in your regional_news package: config.py has a new specific add permission, interfaces.py lists an IRegionalNews interface, and, most interesting, the content folder has a new Python module, regionalnews.py, filled in with all that's required to register our new generic content type into Plone.
Here is the interesting part of regionalnews.py:
...

RegionalNewsSchema = schemata.ATContentTypeSchema.copy() + atapi.Schema((


    # -*- Your Archetypes field definitions here ... -*-


))


...

schemata.finalizeATCTSchema(RegionalNewsSchema, moveDiscussion=False)


class RegionalNews(base.ATCTContent):

    """Description of the Example Type"""

    implements(IRegionalNews)


    portal_type = "RegionalNews"

    schema = RegionalNewsSchema


...

atapi.registerType(RegionalNews, PROJECTNAME)
Notice that the RegionalNews class inherits from the ATContentTypes ATCTContent class. It declares that it implements the IRegionalNews interface, and its schema is based on ATContentTypeSchema. Finally, the class is registered as an Archetypes content type, as needed by Archetypes framework.
Let's try using our product now. Run the Zope service in a terminal:
$ cd ~/plonebook/

$ ./bin/instance fg
Now the Zope service will remain attached to the terminal process, and, after a long series of log lines, you should see a nice "Zope Ready to handle requests" message. Don't close that window; open a browser, pointing it to http://localhost:8080/manage. After you have signed in, the ZMI should appear. Create a new Plone site, selecting the proper "Plone site" item in the Add select box. Name the site plone, click the confirm button to add it, and wait just a few seconds. At the end of this process, you should find a new object, named plone, in the ZMI root list. Point your browser to http://localhost:8080/plone and you should see the encouraging Plone welcome page.
As soon as you sign into Plone with your admin user, click the Site Setup link at the top of the page, and then go to the Add-on Products panel. Select the Regional News 1.0 item and click the Install button. Next, click the Plone logo to return to the welcome page, and select your new Regional News content type from the "Add new" menu in the green bar. Our content type is as simple as possible, without any special attributes, but nonetheless it exists in Plone and has all the standard metadata, indexing features, the default workflow schema, and so on (see Figure 9-1).
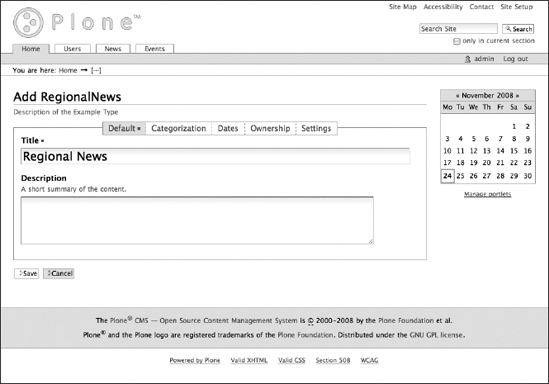
Figure 9-1. Our simple Regional News object
Reviewing what we did, we effectively launched a couple of Paster commands—paster create -t archetype plonebook.regional_news and paster addcontent contenttype—and that was all!
Note The Archetypes framework was a big step forward in simplifying developing patterns in Plone. But it did not come with Paster templates. Paster is quite a bit younger than Archetypes. The Archetypes developers still had to start up their projects by hand and correctly plug in some mandatory Archetypes registration details before becoming productive.
Philipp Auersperg and Jens Klein were two developers who were not happy with all that early copy'n'pasting. Moreover, they were great UML fans and dreamed of a tool able to translate UML class diagrams into Archetypes projects. They developed a new open source project: a code generator called ArchGenXML (http://plone.org/products/archgenxml), which achieved widespread success and is widely used for developing Plone projects. This is due to its flexibility and ease of use, and because it lets the developer maintain a standard way of building products.
While ArchGenXML is a powerful and reliable tool, an in-depth description of it is outside the scope of this book. If you're interested in using it, it has a nice developer's manual at http://plone.org/documentation/manual/archgenxml2, and some good tutorials at http://plone.org/products/archgenxml/documentation.
In the next section, we will take a deeper look at Archetypes and what you should know about its framework to be able to customize the Regional News content type.
Writing a Custom Content Type
In this section, we will continue to build the custom content type that we started in the last section. At this point, we need to make our Regional News content type more like the Plone news content type, providing the location attribute. We have to build a user interface for our new content type, taking into account the location information, and we have to provide a specialized search form. Finally, we will set up and keep in our package some configuration information useful to our content type, such as the Regional News workflow schema.
First of all, we need it to act as a normal Plone news content item, with all the attributes we need, such as a body and a picture. We'll do this right now.
Thanks to the ATContentTypes product, which implements all the default Plone content types as Archetypes classes, fulfilling that as is easy as changing our RegionalNews base class to use the Plone news one. Here are the interesting lines in regionalnews.py after our adjustments:
...

from Products.ATContentTypes.content import newsitem


...

RegionalNewsSchema = newsitem.ATNewsItemSchema.copy() + atapi.Schema((


    # -*- Your Archetypes field definitions here ... -*-


))

...

class RegionalNews(newsitem.ATNewsItem):

    """Description of the Example Type"""


...
To check our modifications, let's restart our Zope service that's been running in the terminal window since last section: first stop the terminal-attached Zope service by pressing Ctrl+C, and then just start it in normal mode:
$ ./bin/instance start
Now point your web browser back to http://localhost:8080/plone and try to add a new Regional News item in the portal root. You should now find the same attributes that you find on a standard Plone news item. You should also notice another funny detail: when you save your Regional News item, the template in use is not the same as the standard News content one, as you can see in Figure 9-2. We will explain why in the following paragraphs.

Figure 9-2. Our Regional News item's template is different from a normal news item.
We next need to add our first Archetypes schema to Regional News, to store location information. But what is an Archetypes schema?
As you probably expect, a schema is a list of fields used by Archetypes to activate our content type. Each field is responsible of storing and retrieving information associated with an Archetypes object.
There is a complete set of provided fields; these include the widely used StringField and TextField, suited for storing content's title and body, as well as more Plone-specific ones, such as ReferenceField, through which we can set relations between Plone contents.
Each field lets the developer set a series of properties to modify its behavior. For instance, we can specify whether a certain field is required or not, and we can specify the read_permission the user needs to have to access the field's information. A complete reference on the standard Archetypes fields and their common properties is available at http://plone.org/documentation/manual/archetypes-developer-manual/fields/fields-reference.
Obviously, if the standard set of fields don't meet your needs, you can implement and register your own, as is already done by some well-known Plone products. (One such example is DataGridField, which offers a table-input component for Plone—see http://plone.org/products/datagridfield). We won't create a custom field here—a StringField will be enough to start with (we'll get more advanced later in this chapter). Using Archetypes, let's add our new field to the Regional News schema. Remembering that Paster is our friend, go back to the terminal and run the following:
$ cd ~/plonebook/src/plonebook.regional_news

$ paster addcontent atschema
The Paster script will ask you to provide some parameters: enter regionalnews as the module (file) name of your content class, enter region as the name of this field, and leave String as the default both for the field and widget entries.
Note We use "region" as the field's name because "location" is already in use by the base class as one of the Dublin Core metadata standard fields, and we don't want to override this.
We'll go into details about widgets in a while; for now, just keep on and restart the Zope service:
$ cd ~/plonebook

$ ./bin/instance restart
Finally, point your web browser back to http://localhost:8080/plone and try to add a new Regional News item. Archetypes automatically renders standard view and edit templates for its schema fields, which is why we obtain the same form as for editing a Plone news item, along with a plain text input to enter the region we want to classify the news in.
Let's have a look at the most notable part that Paster added to our regionalnews.py module:
...

RegionalNewsSchema = newsitem.ATNewsItemSchema.copy() + atapi.Schema((


    # -*- Your Archetypes field definitions here ... -*-

atapi.StringField(

    name='region',

    storage = atapi.AnnotationStorage(),

    required=False,

    #searchable=1,

    #default='',

    #schemata ='default',

    widget=atapi.StringWidget(

        label=_(u"region"),

        description=_(u"Description of region"),

                ),

            ),

        ))
Notice that the code contains a series of common field attributes, some of which are commented. It also contains a widget attribute set to StringWidget, in which Paster has specified label and description properties. This is how Archetypes decides how to render a field: each field is linked to a widget, which knows how to render the information stored by the field itself in view, edit, and search modes.
According to what each field admits, we can choose between many enabling widgets. For instance, in our case, a select box with a list of predefined regions to choose from would be the best choice.
Let's go back to our terminal and ask Paster to create a Selection widget instead of a String one for our region field:
$ cd ~/plonebook/src/plonebook.regional_news

$ paster addcontent atschema
Open the regionalnews.py module in a text editor, delete the old field part, and add a vocabulary attribute like this to the new one:
atapi.StringField(

    name='region',

    storage = atapi.AnnotationStorage(),

    required=False,

    #searchable=1,

    #default='',

    #schemata ='default',

    vocabulary = ('Italy', 'France', 'England'),

    widget=atapi.SelectionWidget(

        label=_(u"region"),

        description=_(u"Description of region"),

    ),

),
As usual, restart the service, point your web browser to http://localhost:8080/plone, and add a new Regional News item. You should see a list of radio buttons that lets the user choose the region for the news, as you can see in Figure 9-3. If you're a webmaster, of course, you'll probably prefer to manage the region's vocabulary without having to touch any Python code (or better yet, manage it directly through the Web). This will be covered later in the chapter in the "Tools and Utilities" section.

Figure 9-3. The user can now choose the region for the Regional News item.
Of course, Archetypes is a great automator for creating new content types in Plone. It does well at assisting the developer at everything from field storage to widget-rendering problems. For the automatic user interface, it uses our schema order to list the fields, and for the edit form, it offers a grouping feature through the field's schemata attribute. When we need more control over how information is presented to the user, we can modify the Archetypes default user interface as we want. Let's explore how.
Archetypes has a standard set of page templates used to generate standard view and edit user interface for our contents. Every content type looks the same, but changing this is as easy as defining a page template named according to our content type, which contains standard name macros to override the default one.
Note If you need a deeper understanding of how to modify the user interfaces Archetypes produces for you, see the "Customizing AT View Templates" tutorial on the Plone.org site (http://plone.org/documentation/tutorial/customizing-at-view-templates).
For this example, assume that we want a view template for Regional News that is similar to the standard Plone news template, with some emphasis on the selected region information. To allow for this, we need to implement a browser view named regionalnews_view, containing a ZPT macro named body. Go back to your terminal window and type the following:
$ cd ~/plonebook/src/plonebook.regional_news

$ paster addcontent view
After asking for a view named regionalnews, Paster will create all that is needed to register a browser view named regionalnews_view in the browser folder of our package: a regionalnewsview.py module and a regionalnewsview.pt page template. We will go deeper into explaining what a browser view is in the "Theming" section of the chapter; just trust what Paster built for us by now.
Note We won't use Plone's portal_skin tool for our skinning needs, but it is still possible to register a skin folder in our product and create a regionalnews_view.pt file there, in which we could write our body macro for the Regional News view template.
We won't need the Python module part of our browser view; we will just use the page template to implement a macro named body that contains the string Hello World!, just to see what happens. Here is our regionalnewsview.pt file as it is before restarting the Zope service:
<html xmlns="http://www.w3.org/1999/xhtml" xml:lang="en"

      lang="en"

      i18n:domain="plonebook.regional_news">

<body>

    <div metal:define-macro="body">

       <p>Hello World!</p>

    </div>

</body>

</html>
Restart Zope, create a new Regional News item in your Plone site, and see what Archetypes shows you by default: all the fields previously listed below the content title have been replaced with our Hello World! string, formatted in the default body text style. We won't go into details about how this technology works here, but you can take a look at Chapter 6 for a refresher.
Archetypes implements the base_view template, which is every content type's default view template, through four principal macros: header, body, folderlisting, and footer. At rendering time, it looks for a template named after the content type's name (i.e., regionalnews_view) and replaces its own macros with the one defined in the most specific template (i.e., regionalnews_view in this case). That's why our template removed all Regional News attributes except the title, replacing them with just "Hello World!"—we weren't specific about the header, folderlisting, and footer macros, so Archetypes picked the default ones for these sections.
That easily, just defining a metal macro with the ID body in a template named regionalnews_view, we can render each single field in the place we want within a more complex page template, still keeping in mind that this way we customize our content type's base_view template. For instance, let's try this other version of our content's base_view template:
<html xmlns="http://www.w3.org/1999/xhtml" xml:lang="en"

      lang="en"

      i18n:domain="plonebook.regional_news">

<body>

  <tal:macro metal:define-macro="header">

    <h1 class="documentFirstHeading">

      <tal:field metal:use-macro="python:here.widget('title', mode='view')">

        Title

      </tal:field>

    </h1>

    <h3>Region:

    <tal:field metal:use-macro="python:here.widget('region', mode='view')" />

    </h3>

  </tal:macro>


  <tal:main-macro metal:define-macro="body">

    <div class="newsImageContainer"

         tal:condition="here/image_mini|nothing">

         <img src="" alt=""

              tal:replace="structure python:here.tag(scale='mini',

css_class='newsImage')"/>

    </div>

    <tal:field metal:use-macro="python:here.widget('text', mode='view')">

       Body

    </tal:field>

  </tal:main-macro>

</body>

</html>
In this template, we override both the header and body macros, leaving the default behavior for the folderlisting and footer macros, and ask the widgets to render their own fields in the proper way. However, since this is a base_view template, it completely forgets about any field not manually listed. So, it would be better not to touch the entire base_view mechanism, and instead prepare a completely new regionalnews_view template based on the original newsitem_view template, and assign it to our content type's default view method. We will leave this as an exercise for you; you can mix what you learned in Chapter 5 about configuration of CMF portal types, and what you will learn in the "Plone Configuration" section of the chapter about how to export those configurations through GenericSetup profiles.
Note As already stated, despite the fact that it is still widely used, Archetypes is slowly getting older. Its monolithic approach to content management issues is quite outdated compared to the Zope 3 techniques we describe throughout this chapter. Martin Aspeli's Dexterity project (http://martinaspeli.net/articles/dexterity) is beginning to be used instead of Archetypes these days because it capitalizes on Zope 3 techniques in a more proper way. Also, Dexterity aims at making it easy to declare new content types, even for nondevelopers.
Through this section, you have seen how easy it is to build new rich content types in Plone using Archetypes. We will discuss the wonders of Archetypes further in the "Forms" section of this chapter, in which we'll focus on customizing our RegionalNews schema attributes. For a more in-depth look at Archetypes, check out the online documentation on Plone.org (http://plone.org/documentation/phc_topic_area?topic=Developing+for+Plone#archetypes).
Theming
In the last section, we stole some visual style magic from the standard Plone news item's template, avoiding having to define our own CSS rules—but let's imagine that we need to do it. For instance, let's create an info box showing the region information at the top-right of the Regional News template. To accomplish this task, we will first register a CSS file of our own as a Zope 3 resource and use the portal_css registry to include it in the standard Plone CSS file. Then we will create a new Zope browser view and register it as the default view method for our content type.
This requires that we discuss theming, which relates to everything in Plone connected with presentation. Plone can be skinned quite easily without compromising the application. Thanks to this, it is simple to separate all the files and templates defining our skin into Plone products. Since there are beautiful online tutorials on Plone.org (http://plone.org/documentation/phc_topic_area?topic=Visual+Design#creating-theme-products), we will leave these tutorials as an exercise for you.
For sure, developing a product very often requires some user interface tweaking, and that can be interpreted as theming, because we use the same tools and techniques implemented for core skinning.
The easy part is to modify our regionalnews_view template, separating style rules from content information: we will implement our own CSS file, containing our style rules. Here are the adjustments to the regionalnewsview.pt file:
...

<div tal:replace="structure provider:plone.abovecontenttitle" />


<div id="regionalnews_info_box">

    <h3> Region:

        <metal:field use-macro="python:here.widget('region', mode='view')">

        Region

        </metal:field>

    </h3>

</div>


<div class="rnewsImageContainer"

     tal:condition="here/image_mini|nothing">

    ...


</div>
Essentially, we moved the region widget into a regionalnews_info_box id div element and changed the newsImageContainer class to rnewsImageContainer to control its style rules.
We now need to publish our static CSS file. We do this by registering it in a Zope 3 browser resource directory. So, let's create a new folder into the browser folder of our regional_news package, name it resources, and create a new file in it, named regionalnews.css. Our simple regionalnews.css content is
#regionalnews_info_box {

    float: right;

    width: 202px;

    border: 1px solid lightgrey;

    background-color: white;

    padding: 0.5em;

}


.rnewsImageContainer {

    float: right;

    width: 202px;

    margin: 0.5em 0 0.5em 1em;

    padding: 0.5em;

    clear: right;

}
Then we open the browser/configure.zcml file and add to it our new resources directory:
...

<browser:resourceDirectory

     name="rn-resources"

     directory="resources"

     permission="zope2.Public"

     />


...
Note A web user interface is normally implemented using static resources, such as images and CSS files. Zope 3 uses the "browser resource" concept to publish static resources. It is possible to register both single browser resource files and whole browser resource directories. To let us access a browser resource, Zope 3 uses a special namespace named ++resource++. For a deeper understanding of this matter, have a look at the "Customization for Developers" tutorial on Plone.org (http://plone.org/documentation/tutorial/customization-for-developers).
Let's recap what we've done: we modified our template to implement an info box showing the region attribute of our Regional News content type, we created a Zope 3 resource directory to publish static files, and we added the regionalnews.css file to this new resource directory.
What are we missing? Of course, binding the CSS file to our Regional News view template. We could just put an HTML import directive there, but Plone offers something more versatile—a special portal_css registry for our CSS import needs, which lets us register a new CSS file to be used by Plone.
So, go back to your terminal and restart the Zope service:
$ cd ~/plonebook

$ ./bin/instance restart
Then point your web browser to http://localhost:8080/plone and add a new Regional News item. It should work, but notice that the info box on top of it doesn't look like a box. You just need to add your style sheet to portal_css: to do so, go to http://localhost:8080/plone/portal_css/manage_cssForm. On this page, you will be presented with the manage view of the Plone Stylesheets Registry, where you have the current configuration for your Plone site. On top you have a couple of check boxes, among which is the "Debug/development mode" option. (Keep it in mind, since it is very important; we'll switch to this topic in just a moment.) Then you have a long list of registered style sheets, each with a series of properties to manipulate.
Let's go to the bottom of this page and add our style sheet, giving it the ID ++resource++rn-resources/regionalnews.css and leaving all the rest as suggested. Then point your web browser back to your Regional News item and refresh the page. If nothing changes, just go back to portal_css and set "Debug/development mode" to "true"; it should finally make your box appear, as you can see in Figure 9-4.
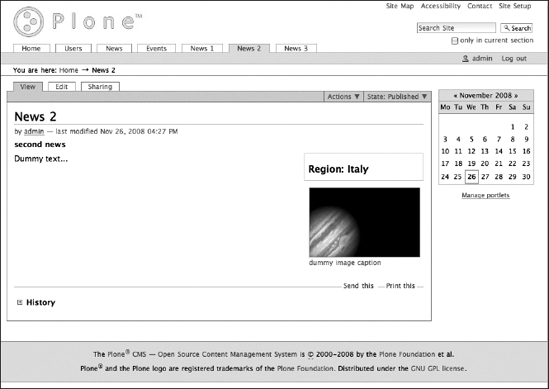
Figure 9-4. The region for Regional News items is now shown in a box on top of the screen.
You could complain that, again, we used a web registry while we were supposed to make it a product, but be confident—we will set this up into a distributable package before the end of the chapter. Skip ahead to the "Plone Configuration" section if you'd like to see how to do this.
The Plone Stylesheets Registry is quite powerful and easy to use. There is also a similar tool for JavaScript resources, named portal_javascript, and another for KSS style sheets, portal_kss. We'll use both of these in the "Viewlets and Portlets" section later in the chapter.
Note For the sake of completeness, thinking about all the possibilities Paster offers in theming Plone, we must mention the ZopeSkel plone3_theme template. If you need to heavily or completely skin a Plone site, consider using this Paster boilerplate to start up your skin product. After launching the command paster create -t plone3_theme in a terminal, answer all the questions the script will ask. At the end of the process, you will have a complete theming product, with a series of goodies, such as a new browser view folder with resource directories for images and style sheets, and much more.
Let's now recall how we built our regionalnews view, as it is another main aspect of theming from a developer's point of view. In the "Writing a Custom Content Type" section, we asked Paster to create a view named regionalnews.
But what does that mean? With the command paster addcontent view, Paster creates a Zope 3 browser view, which is one of the standard Zope 3 components for creating user interfaces. A browser view is a convenient way of binding together a page template carrying the presentation layout and a Python class containing the business logic, thus resulting in a clear, easy, reusable development pattern. No more mazy Python expressions and if...then conditions merged into tricky page templates; just clear, simple page templates and easy-to-manage Python modules and classes.
If you go back and visit your regional_news package browser folder, you will find regionalnewsview.pt containing your page template for regionalnews_view and regionalnewsview.py with a basic interface class and your main BrowserView class, named regionalnewsView. But what links the two is in configure.zcml, which contains a browser namespace directive like this:
<browser:page

  for="*"

  name="regionalnews_view"

  class=".regionalnewsview.regionalnewsView"

  template="regionalnewsview.pt"

  allowed_interface=".regionalnewsview.IregionalnewsView"

  permission="zope.Public"

/>
This piece of ZCML is what Zope needs to register a browser view with the name regionalnews_view, using regionalnewsview.pt as a template and the Python class regionalnewsView contained in regionalnewsview.py as the business logic code.
So far, we've used the regionalnewsView class very little in our template, and we could get rid of it—a browser view can degenerate into a lonely Python class or a lonely page template. But we want to evaluate this browser view pattern, so let's imagine we need to show in the Regional News info box the last two published Regional News items for the specific region, except the one we are visiting.
The template will only need to render a list of dictionaries with the keys title and URL, provided by the view class, to which we will add a new method, get_other_news_items:
...

<div id="regionalnews_info_box">

    ...


    <tal:block tal:define="other_news view/get_other_news_items"

            tal:condition="other_news">

    <h3>Other Regional News</h3>

    <ul>

        <li tal:repeat="item other_news">

            <a href="" tal:attributes="href item/url"

               tal:content="item/title">Other News</a>

        </li>

    </ul>

    </tal:block>


</div>


...
The view class defined in browser/regionalnewsview.py file will have a new method, get_other_news_items, as well as an interface class:
class IregionalnewsView(Interface):

    """


    regionalnews view interface

    """


    def get_other_news_items():

        """ return other last published regional news items

        for the region of the contextual regional news.

        """


class regionalnewsView(BrowserView):

    """

    regionalnews browser view

    """

    implements(IregionalnewsView)


    def __init__(self, context, request):

        self.context = context

        self.request = request


    @property

    def portal_catalog(self):

        return getToolByName(self.context, 'portal_catalog')

    @property

    def portal(self):

        return getToolByName(self.context, 'portal_url').getPortalObject()


    def get_other_news_items(self):

        context = self.context

        context_path = '/'.join(context.getPhysicalPath())

        query = {'portal_type': 'RegionalNews',

                 'review_state': 'published',

                 'region': context.getRegion(),

                 'sort_on': 'effective',

                 'sort_order': 'descending',

                 'show_inactive': False}

        brains = self.portal_catalog.searchResults(**query)[:3]


        items = []

        for brain in brains:

            if brain.getPath() <> context_path:

                items.append({'title': brain.Title,

                              'url': brain.getURL()})

        return items[:2]
The page template namespace is improved by the "view" term, because it gives access to the view class methods and attributes, according to the allowed_interface specified in the ZCML configuration.
To point at the contextual object, the view class stores in its context attribute the context for which the view has been instantiated—that is, the specific RegionalNews object itself. Notice that you can also access the corresponding request as an attribute on the browser view instance.
Also, we need to state that the class implements the IregionalnewsView interface. In fact, the configure.zcml file requires the .regionalnewsview.IregionalnewsView interface through the allowed_interface attribute.
Finally—the essence of our aim—in the get_other_news_items method, we ask the portal_catalog tool for the Regional News items we want to show, published for the same region as context, ordered according to their effective date, which is the publication date set on the context. At this point, our method will just fail, because portal_catalog doesn't know what the region attribute is supposed to be. So, we need to register this new index before testing our recent efforts. Point your web browser to http://localhost:8080/plone/portal_catalog/manage_catalogIndexes, choose to add a new KeywordIndex, and then enter region as the ID and getRegion as the Indexed attribute. Don't worry if you don't understand this just now—we will go into further details very soon.
Note The portal_catalog tool is a central service in Plone—not only for the normal search requests from users, but for building every object's listing request. We will take a closer look at it next, in the "Forms" section of the chapter.
To test your new info box details and obtain the result shown in Figure 9-5, you need a few more Regional News items published for the same region. Have a good time with browser views!
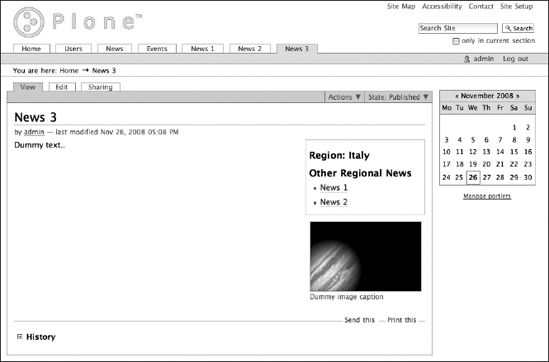
Figure 9-5. We arranged a specialized Regional News view that shows contextual details.
So, after having very quickly built a content type of our own, we also put a classification mechanism on it through a content region attribute, and a corresponding index in the catalog. Finally, we arranged a specialized Regional News view, able to show some interesting contextual details.
In the next section, we will build a specialized search form with a "region" parameter—stay tuned!
Forms
Going further with a simple web form useful to our Regional News product, we could imagine implementing a specialized search form, with generic text search using the Plone SearchableText index and region index as possible criteria. To do this, we will adopt the z3c.form library, and use it to build our form browser view, and we will also create a regions vocabulary. Additionally in this section, you will get a good understanding of how to query the portal_catalog tool and present its results. Let's do it!
Until now, we have considered Archetypes our best friend in Plone development. But here is where we miss something: managing web forms without any content object behind them. For instance, sometimes we just use web forms to collect information, not to manage content.
Archetypes web form generation is quite powerful, rich in widgets and validation hooks, and easy to manage, since it's integrated with the fields schema describing our content type.
Unfortunately, we need a fields schema to make it work, which implies instantiating an existing content type object into our database. In fact, every line of code in Archetypes makes the assumption that there is an existing content type object as the context to use.
For some time, this issue could not be solved in any elegant way, but Zope 3 technologies came to help us with a couple of good solutions, both enabling us to manage web forms using Python classes and interfaces: zope.formlib and z3c.form.
The latter seems a bit more flexible and used, so in this section we will look over its development patterns.
Note z3c.form is an advanced HTML form and widget framework for Zope 3—that is, a way to generate and control forms and widgets from Python code. With a pattern similar to Archetypes, it renders a form and its widgets starting from a schema (not a fields schema, but a Zope 3 interface). For a deeper understanding of how z3c.form works, please have a look at http://pypi.python.org/pypi/z3c.form.
Getting and Using z3c.form
First of all, we need to obtain the plone.z3cform package and all of its dependencies for Plone. We can get the eggified package simply by adding plone.z3cform to the eggs option of the buildout section of our buildout.cfg file:
[buildout]

parts =

    plone

    productdistros

    instance

    zopepy

    fakezope2eggs


...


eggs =

    elementtree

    plonebook.regional_news

    plone.z3cform


...

[instance]

zcml =

    plonebook.regional_news

    plone.z3cform


...

[fakezope2eggs]

recipe = affinitic.recipe.fakezope2eggs

zope2-part = instance

zope2-location = ${instance:zope2-location}

additional-fake-eggs =

    zope.testing

    zope.i18n

   zope.component
Actually, it is a bit more complicated: plone.z3cform depends on z3c.form, which is an original Zope 3 package. Look at the last section of code: because of the dependencies set on the z3c.form egg, the buildout process would end up getting the wrong dependencies for our Zope 2 environment, which is why we need to use the [fakezope2eggs] section.
After having modified the buildout.cfg file, run the buildout script again:
$ cd ~/plonebook

$ ./bin/instance stop

$ ./bin/buildout -v
At the end of this process, we should be able to implement our new search view using plone.z3cform. Go to the browser folder of the package and add a new file named regionalnewssearch.py, containing this code:
from zope import interface, schema

from z3c.form import form, field, button

from plone.z3cform.layout import wrap_form


class IRegionalNewsSearch(interface.Interface):


    SearchableText = schema.TextLine(title=u"Text")

    region = schema.TextLine(title=u"Region")


class RegionalNewsSearchForm(form.Form):

    fields = field.Fields(IRegionalNewsSearch)

    ignoreContext = True # don't use context to get widget data

    label = u"Search Regional News"


    @button.buttonAndHandler(u'Search')

    def handleSearch(self, action):

        data, errors = self.extractData()

        self.status = data


RegionalNewsSearchView = wrap_form(RegionalNewsSearchForm)
Finally, open browser/configure.zcml in your editor and add the registration for the new search view:
<browser:page

  for="*"

  name="rn_search"

  class=".regionalnewssearch.RegionalNewsSearchView"

  permission="zope.Public"

/>
Note that we did not specify any template for this view. In fact, the wrap_form function we got from plone.z3cform does the magic, binding the RegionalNewsSearchForm class—which is responsible for the web form mechanism—to the RegionalNewsSearchView class, the actual browser view class.
So, let's go back to the terminal and start our Zope service:
$ cd ~/plonebook

$ ./bin/instance start
Then point your browser to http://localhost:8080/plone/rn_search and enjoy your first z3c.form view (see Figure 9-6). It doesn't do much yet, but it was easy to implement with very little effort, and includes validation on required fields and a working submit button.

Figure 9-6. The Regional News search form.
To accomplish our mission, we still need a couple of important things: implementing the search logic and making it easy to choose the desired region.
Let's start with the latter. When we introduced the region attribute for our content type in the "Writing a Custom Content Type" section, we did not build any web-configurable vocabulary. Remember, we need this so that our portal administrators won't have to mess with any Python code to update the available regions for news items on the site. We won't do it now either, but let's implement a Zope 3 vocabulary to use both for our content type attribute and the search view interface.
Go to the root folder of your package and add a new file named vocabularies.py, containing this code:
from zope.interface import implements

from zope.app.schema.vocabulary import IVocabularyFactory

from zope.schema.vocabulary import SimpleTerm

from zope.schema.vocabulary import SimpleVocabulary


REGIONS = (('Italy', 'Italy'),

           ('France', 'France'),

           ('England', 'England'),

          )


class RegionsVocabulary(object):

    """Vocabulary factory for regional news regions.

    """


    implements(IVocabularyFactory)


    def __call__(self, context):

        items = [SimpleTerm(value, title) for

                        value, title in REGIONS]

        return SimpleVocabulary(items)


RegionsVocabularyFactory = RegionsVocabulary()
Then open configure.zcml in the root folder of the package and register your new vocabulary as a Zope 3 utility:
...

<!-- -*- extra stuff goes here -*- -->

<utility

  component=".vocabularies.RegionsVocabularyFactory"

  name="plonebook.regional_news.vocabularies.regions"

  />


...
We now have a new vocabulary to use. Let's modify the IRegionalNewsSearch interface in browser/regionalnewssearch.py like this:
class IRegionalNewsSearch(interface.Interface):


    SearchableText = schema.TextLine(title=u"Text")

    region = schema.Choice(title=u"Region",

            vocabulary="plonebook.regional_news.vocabularies.regions")
As you can see, we changed the region attribute to be a Choice attribute, and then used our new vocabulary to fill it.
If you want to know what the results of this are, just restart your Zope service by typing in the following commands:
$ cd ~/plonebook

$ ./bin/instance restart
Pointing your browser back to http://localhost:8080/plone/rn_search, the region attribute will let you select just the regions you specified in your vocabulary.
You still need to change your content type schema so that it can use your vocabulary, too. Open the content/regionalnews.py module in your package and change the region attribute definition as follows:
atapi.StringField(

    name='region',

    storage = atapi.AnnotationStorage(),

    required=False,

    #searchable=1,

    #default='',

    #schemata ='default',

    vocabulary_factory = "plonebook.regional_news.vocabularies.regions",

    widget=atapi.SelectionWidget(

        label=_(u"region"),

        description=_(u"Description of region"),

    ),

),
Archetypes is clever enough to use a Zope 3 vocabulary just by passing its name through the vocabulary_factory property.
Now let's try to make our form more interesting by implementing what is missing to let it run the actual search.
Without any further work, we can just redirect what the user is asking for to the standard Plone search view. To do so, edit the regionalnewssearch.py module like this:
...
from Products.CMFCore.utils import getToolByName
...
class RegionalNewsSearchForm(form.Form):
fields = field.Fields(IRegionalNewsSearch)
ignoreContext = True # don't use context to get widget data
label = u"Search Regional News"
@property
def portal(self):
return getToolByName(self.context,
'portal_url').getPortalObject()
@button.buttonAndHandler(u'Search')
def handleSearch(self, action):
data, errors = self.extractData()
if errors:
return
base_url = "%s/search" % self.portal.absolute_url()
qstring = "?portal_type=RegionalNews"
qstring += "&SearchableText=%s" % data['SearchableText']
qstring += "®ion=%s" % data['region']
qstring += "&sort_on=effective&sort_order=descending"
self.request.response.redirect(base_url + qstring)
RegionalNewsSearchView = wrap_form(RegionalNewsSearchForm)
Here, we just enabled the handleSearch method of our RegionalNewsSearchForm class to remap the provided criteria into a correct query string and properly redirect to the portal search view. It's that simple, if the standard search view is enough for you.
However, we're going to complicate it a bit: remember from the "Structure of a Plone Product" section at the beginning of the chapter, one of our requirements is that we create our own specialized results view.
Go back to your terminal window and ask Paster to build us a new browser view:
$ cd ~/plonebook/src/plonebook.regional_news

$ paster addcontent view
Enter rn_search_results as the view_name, and then open browser/configure.zcml to change the predefined view name in rn_search_results. We want the template to render the criteria used for the search and the corresponding results: it will render a dictionary containing the chosen criteria and a list of dictionaries corresponding to the actual resulting news, both created by the rn_search_resultsView view class. So let's edit the browser/rn_search_resultsview.pt file like this:
<html xmlns="http://www.w3.org/1999/xhtml" xml:lang="en"

      lang="en"

      metal:use-macro="here/main_template/macros/master"

      i18n:domain="plonebook.regional_news">

<body>

    <div metal:fill-slot="main">

        <tal:main-macro metal:define-macro="main">

            <h1>Regional News Search Results</h1>

            <p tal:define="criteria view/criteria">

                Selected Keys:<br />

                <tal:block tal:repeat="key criteria/keys">

                    <strong tal:content="key">key</strong>:

                    <span tal:replace="criteria/key">value</span>

                    <span tal:condition="not:repeat/key/end">, </span>

                </tal:block>

            </p>

            <ul tal:define="results view/get_results">

                <li tal:repeat="item results">

                    [<span tal:replace="item/region">]

                    <a href="" tal:attributes="href item/url"

                        tal:content="item/title"> item </a>

                </li>

            </ul>

        </tal:main-macro>

    </div>

</body>

</html>
Now for the interesting part—open browser/rn_search_resultsview.py and enter the following code:
from zope.interface import implements, Interface


from Products.Five import BrowserView

from Products.CMFCore.utils import getToolByName


from plonebook.regional_news import regional_newsMessageFactory as _


class Irn_search_resultsView(Interface):

    """

    rn_search_results view interface

    """


def criteria():

    """ return the criteria for our search as a python dict.

    """


def get_results():

    """ return a list of dicts corresponding to the requested criteria.

    """


class rn_search_resultsView(BrowserView):

    """

    rn_search_results browser view

    """

    implements(Irn_search_resultsView)


    def __init__(self, context, request):

        self.context = context

        self.request = request


    @property

    def portal_catalog(self):

        return getToolByName(self.context, 'portal_catalog')


    @property

    def portal(self):

        return getToolByName(self.context, 'portal_url').getPortalObject()


    def criteria(self):

        request = self.request

        criteria = {}

        criteria['SearchableText'] = request.get('SearchableText', ' ')

        criteria['region'] = request.get('region', ' ')

        return criteria


    def get_results(self):

        request = self.request

        query = {'portal_type': 'RegionalNews',

                 'SearchableText': request.get('SearchableText'),

                 'region': request.get('region'),

                 'sort_on': 'effective',

                 'sort_order': 'descending'}

        brains = self.portal_catalog.searchResults(**query)


        items = []

        for brain in brains:

            items.append({'title': brain.Title,

                          'url': brain.getURL(),

                          'region': brain.getRegion})


        return items
The criteria method is quite simple: we ask the request object for our specific names, and if they're not present, we return an escaped space character.
As for the get_results method, notice that we are using the same pattern we used earlier in the "Theming" section of the chapter. We'll clarify it better in the following section. In Figure 9-7, you can see the rn_search_results view in action.
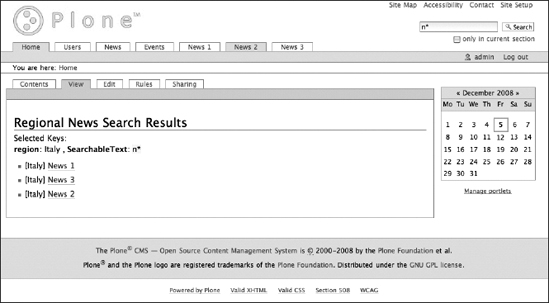
Figure 9-7. The Regional News search engine works!
Understanding the Plone Catalog
As you know from the preceding chapters, the portal_catalog tool is one of the most useful services in Plone. It is used for standard searches as well as folder listings.
The ZODB doesn't offer any native indexing service on the objects it stores. That is where Zope catalogs come in. Basically, a catalog indexes an object's information on demand, according to a list of desired indexes, and stores that information for every single object, using a sort of placeholder called a brain, which is by itself an object.
Different kinds of indexes are available, dedicated to specific types of data and queries; for example, we can define a simple field index to store plain string data, a date index to query date fields, a path index to query objects on a position basis, and so on.
Of course, brains store index information in their specific formats to simplify query algorithms. Thus, to show the results of a query in a human-readable format, we would need to look for the real objects corresponding to the resulting brains; but that is quite a heavy operation, especially when we just need to know the real object is there, and are not going to use it.
That's why with indexes, Zope catalogs also store real object metadata into brains: object information annotated into the brain at indexing time, which is useful for building search result pages without awakening the real objects.
Note For a deeper understanding of Zope catalogs, please read the "Searching and Categorizing Content" chapter of the Zope Book (www.zope.org/Documentation/Books/ZopeBook/2_6Edition/SearchingZCatalog.stx).
So far, it's quite easy to understand that the basic Zope catalog service has no clue about the security disposition of the real object, and that it allows full access to any role admitted to query the catalog. But the CMF and Plone have a specialized Zope catalog, able to take into account security settings, and thus it all acts as expected.
As a final caveat, remember that brains are not real objects. So, in some cases, you could encounter a corrupted catalog that is inconsistent with respect to the real objects. Don't worry: as with relational databases, you will probably be able to quite easily rebuild your catalog using the real objects' information.
Now that you've seen the theory, let's go back to the real world, recalling our view's get_results method and figuring out its code. As a pattern, we compose a dictionary with all our query attributes, and pass it to portal_catalog's searchResults method, which brings out all the brains visible to the user making the search. Then we iterate over the results to build the list of dictionaries that the view's page template will show to the user.
As you can see, we want to show the region attribute information, which is not present in the portal_catalog tool as basic Plone metadata. So we need to register it as new metadata, pointing the web browser to http://localhost:8080/plone/portal_catalog/manage_catalogSchema, going to the bottom of the page, and adding the getRegion metadata. To make this work, we need to provide the name corresponding to the region attribute accessor method: getRegion.
This quick demonstration of z3c.form has left out a lot of powerful features. For a deeper comprehension of z3c.form use in Plone, please read Daniel Nouri's tutorial on Plone.org, at http://plone.org/documentation/how-to/easy-forms-with-plone3.
Viewlets and Portlets
In the last section, we enhanced our Regional News product: we created a nice specific search interface, completing the most common interaction use cases for our content type—making it editable, viewable, and searchable.
We will now concentrate a bit on improving the user interaction. In this section, we'll move our region data from the Regional News info box into a info viewlet, registered to the plone.belowcontenttitle viewlet manager. We will also add a link in order to search all the news from that region through the Regional News search form. Finally, we will implement a portlet to show the latest published news in a specific region.
Thanks to Zope 3 technologies, this is possible without messing with Plone default templates. Since version 3.0, Plone has been widely adopting Zope 3 technologies, and the original template is split up into various viewlet managers, to which any product can register its own viewlets. Point your web browser to http://localhost:8080/plone/@@manage-viewlets and you will see evidence of this.
Note A viewlet manager is a Zope 3 component that acts as a placeholder, collecting various viewlets and rendering them where the templates ask for them. To look more deeply into viewlets and the other Zope 3 technologies adopted by Plone to build its user interface, please read the Plone Theme Reference at Plone.org, and in particular look over the section about what a viewlet is, at http://plone.org/documentation/manual/theme-reference/buildingblocks/components/viewletsandportlets.
To accomplish our mission, we will register a simple Regional News info viewlet, which is basically a browser view with a special registration policy.
Create a new file named viewlet.py in the browser folder of your package, and then type in the following lines:
from zope.interface import implements, Interface

from zope.viewlet.interfaces import IViewlet


from Products.Five import BrowserView

from Products.CMFCore.utils import getToolByName

from Products.CMFPlone.utils import safe_unicode


from plonebook.regional_news.interfaces import IRegionalNews

from plonebook.regional_news import regional_newsMessageFactory as _


INFO_SNIPPET = """

    <p><strong>region: %s </strong>(<a href='%s'>search other news</a>)</p>

"""


class InfoViewlet(BrowserView):

    """

    regionalnews info viewlet

    """

    implements(IViewlet)


    def __init__(self, context, request, view, manager):

        super(InfoViewlet, self).__init__(context, request)

        self.__parent__ = view

        self.context = context

        self.request = request

        self.view = view

        self.manager = manager


    def render(self):

        """render the regionalnews info snippet"""

        snippet = ""

        if IRegionalNews.providedBy(self.context):

            region = self.context.getRegion()

            portal_url = getToolByName(self.context, 'portal_url')

            search_url = portal_url() + '/rn_search'

            snippet = safe_unicode(INFO_SNIPPET % (region, search_url))

        return snippet
Now edit the browser/configure.zcml file to register your new viewlet, adding these lines:
<browser:viewlet

   name="regionalnews.info"

   manager="plone.app.layout.viewlets.interfaces.IBelowContentTitle"

   class=".viewlet.InfoViewlet"

   permission="zope2.View"

   />
Notice that the InfoViewlet class just inherits from the standard BrowserView class, and declares that it implements the IViewlet interface, providing a render method. We have no need to use a page template to render our simple viewlet for now—just render the region attribute, if it is available on the viewlet context.
Go back to the terminal window and type in
$ cd ~/plonebook

$ ./bin/instance restart
Then point your web browser to http://localhost:8080/plone and create a new Regional News item. Save the page, and you should find your new viewlet under the News title.
We obtained what we wanted, but it would be nicer to have the region info just under the title, not behind the "about" line. Remembering the manage-viewlets view, it should be very easy to reorder our viewlets just to match what we are looking for (see Figure 9-8).

Figure 9-8. Regional News viewlets
So visit http://localhost:8080/plone/@@manage-viewlets and look for the regionalnews.info viewlet; then click its up arrow icon, and you are done.
Again, you may wonder how to register into our product package that the viewlets have to appear in a certain order. We'll describe this shortly: exporting your configuration and storing it in your product using your GenericSetup profile will be quite easy.
As for viewlets, it is quite simple to perform this task—just remember that if you need to manipulate the Plone user interface, you probably won't need to mess with templates: just hide the default viewlet, register your own, and that is it.
To complete our visual refactoring, let's move the other part of the former info box into a portlet of our own. Again, we will need to implement a Zope 3 component and register it, but this time it will be a bit more of a Plone-centric component.
Plone version 3.0 implements its own portlet infrastructure, thanks to the prolific Martin Aspeli. We can register portlets to appear in a specific context according to various rules: in our case, we want our portlet to appear just in the Regional News item context.
So, let's ask for some help from Paster, which provides some boilerplate code for creating a new portlet in our package. Open the terminal window and type in the following:
$ cd ~/plonebook

$ ./bin/instance stop

$ cd ~/plonebook/src/plonebook.regional_news

$ paster addcontent portlet
Then answer the questions the script will ask you, using Regional News portlet as the portlet name and regional_news as the portlet type. You can keep the defaults for all the rest. As usual, Paster updates various parts of your package to make the new portlet work: it creates some new files in the portlets folder, as well as a portlets.xml file in the profiles/default folder, to register the portlet in the GenericSetup profile of the package.
Now we need to edit regional_news.py and regional_news.pt in the portlets folder to make them implement a portlet showing the Other Regional News section of the current info box we have on the regionalnews_view template.
Paster produces a rich regional_news.py module, providing several class placeholders to fill in. But first, we need to understand what is going on.
Consider how you can manage a portlet in Plone since version 3.0. You can easily add a portlet wherever you want: if you have the needed permissions, you can bind it to a group or a content type through the Plone control panel, or you can place it on any Plone object you like, using the @@manage-portlets view.
Besides, according to the kind of portlet you add, you can access a list of portlet attributes to decide how the specific portlet should act (e.g., showing a footer link, searching for a certain kind of content type, etc.).
Note To improve your comprehension of portlet infrastructure, you might want to read the portlet-related chapters in the Plone Theme Reference at Plone.org—in particular the "Portlet Manager" section, at http://plone.org/documentation/manual/theme-reference/elements/portletmanager, and the "Anatomy of a Portlet" section, at http://plone.org/documentation/manual/theme-reference/elements/portlet/anatomy on portlets.
We will need to implement a couple of forms to add and edit our portlet, and we will need a page template and some business logic to render it.
With this in mind, let's discover what Paster has produced for us. The regional_news.py module uses formlib as its form generation library, which shares a very similar pattern with z3c.form.
The first class we need to fill in is an interface class, inheriting from IPortletDataProvider. If we look over the module, we discover that both the AddForm and EditForm classes will render this interface. So let's change it as follows:
class Iregional_news(IPortletDataProvider):

    """A portlet


    It inherits from IPortletDataProvider because for this portlet, the

    data that is being rendered and the portlet assignment itself are the

    same.

    """


    # TODO: Add any zope.schema fields here to capture portlet configuration

    # information. Alternatively, if there are no settings, leave this as an

    # empty interface - see also notes around the add form and edit form

    # below.


    more_url = schema.Bool(title=_(u"All News for this region link"),

                  description=_(u"Tick this box if you want to render "

                                 "a link which shows all the Regional News "

                                 "for the context region."),

                                 required=False)
The Paster template's comments invite us to declare the fields we need in order to define our portlet configuration. As an exercise, we will just let the user choose whether he wants to render a region's All News link or not.
We then have an Assignment class, which essentially offers the logic used by the add and edit forms. This class consists of the following code:
class Assignment(base.Assignment):


    implements(Iregional_news)


    more_url = False


    def __init__(self, show_search_url=False, more_url=False):

        self.more_url = more_url

    ...
Base.Assignment comes directly from the plone.app.portlets.portlets package, which hides the portlet's storing and assigning infrastructure.
The Assignment class teams up with AddForm and EditForm at the end of the module, which derive from the basic plone.app.portlets AddForm and EditForm classes and do not need our intervention.
The most important points here involve the Renderer class. Basically, it acts like a browser view with a few more bindings, and allows us to render the regional_news.pt template properly.
In our case, substantially reusing some code from our regionalnews_view browser view, the following code should suffice:
class Renderer(base.Renderer):
render = ViewPageTemplateFile('regional_news.pt')
@property
def is_regional_news(self):
if IRegionalNews.providedBy(self.context):
return True
return False
@property
def region(self):
if self.is_regional_news:
return self.context.getRegion()
return ''
@property
def all_news_url(self):
portal_url = getToolByName(self.context, 'portal_url')
base_url = portal_url() + '/rn_search_results'
return '%s?SearchableText=®ion=%s' % (base_url, self.region)
@property
def get_other_news_items(self):
if not self.is_regional_news:
return ()
context = self.context
context_path = '/'.join(context.getPhysicalPath())
query = {'portal_type': 'RegionalNews',
'review_state': 'published',
'region': self.region,
'sort_on': 'effective',
'sort_order': 'descending',
'show_inactive': False}
portal_catalog = getToolByName(context, 'portal_catalog')
brains = portal_catalog.searchResults(**query)[:3]
items = []
for brain in brains:
if brain.getPath() <> context_path:
items.append({'title': brain.Title,
'url': brain.getURL()})
return items[:2]
That is it for the regionalnews.py module.
Have a look now at regionalnews.pt template. Paster offers a good starting point, and we just need to fill in the information from the Renderer class, as follows:
<dl class="portlet portletregional_news"

    i18n:domain="plonebook.regional_news.portlets">


    <dt class="portletHeader">

        <span class="portletTopLeft"></span>

        <span>

            <a tal:omit-tag="not:view/data/more_url"

               tal:attributes="href view/data/more_url"

               >More from <span tal:replace="view/region"

                 >region</span></a>

        </span>

        <span class="portletTopRight"></span>

    </dt>


    <dd class="portletItem odd">

        <tal:block tal:define="other_news view/get_other_news_items">

        <p tal:condition="not: other_news"> No other news by now..</p>

        <ul tal:condition="other_news">

            <li tal:repeat="item other_news">

                <a href="" tal:attributes="href item/url"

                   tal:content="item/title">Other News</a>

            </li>

        </ul>

        </tal:block>

        <tal:corners condition="not: view/data/more_url">

            <span class="portletBottomLeft"></span>

            <span class="portletBottomRight"></span>

        </tal:corners>

    </dd>


    <dd class="portletFooter" tal:condition="view/data/more_url">

        <span class="portletBottomLeft"></span>

        <span>

            <a tal:attributes="href view/all_news_url"

                 >All News from <span tal:content="view/region"

                  >region</span></a>

        </span>

        <span class="portletBottomRight"></span>

    </dd>


</dl>
Again, thanks to Zope 3 technologies, separation of visual structure and business logic is quite evident, and we gain quite a simple and comprehensible template.
Now that we have all the pieces in place, we should have a look at the portlets/configure.zcml file:
<plone:portlet

    name="plonebook.regional_news.portlets.regional_news"

    interface=".regional_news.Iregional_news"

    assignment=".regional_news.Assignment"

    view_permission="zope2.View"

    edit_permission="cmf.ManagePortal"

    renderer=".regional_news.Renderer"

    addview=".regional_news.AddForm"

    editview=".regional_news.EditForm"

    />
Just edit the browser/regionalnewsview.pt template to delete the info box part we refactored into our new viewlet and portlet, and finally restart the Zope service to have a look at what we have now:
$ cd ~/plonebook

$ ./bin/instance start
Then point your web browser to http://localhost:8080/plone and add another news item. Notice that your new viewlet has no more in-context info box, but the portlet does not appear yet.
So, if we want to associate our portlet with every Regional News item, let's go to the Plone control panel, select the Types panel, select our Regional News content type, and then choose the link to access the view for managing portlets assigned to it, at http://localhost:8080/plone/@@manage-content-type-portlets?key=RegionalNews.
Finally, from the "Add portlet" drop-down box, select the Regional News portlet. But, wait . . . there is no "Regional News portlet" item in that box!
What's going on here? Well, the answer is linked to the GenericSetup profile portlets.xml file that Paster produced for us.
In the next section, we will take a deeper look at what GenericSetup is. For now, just consider it a service able to import/export Plone configurations using specialized XML files. Unfortunately, GenericSetup must be triggered to import the portlets.xml file you prepared, otherwise, the Plone portlet machinery will not register your portlet.
So, in a final effort to register the new Regional News portlet in our Plone portal (whose function we will explain more fully in the next section), go to the portal_setup Import tab at http://localhost:8080/plone/portal_setup/manage_importSteps, choose Regional News from the Select Profile or Snapshot drop-down box, select the Portlets check box, and finally click the Import Selected Steps button at the bottom of the page.
The service should process our portlets.xml file and answer with a confirmation message. Return to http://localhost:8080/plone/@@manage-content-type-portlets?key=RegionalNews and try to add our Regional News portlet again. This time you will probably find it there. In Figure 9-9, you can see the new portlet in action.
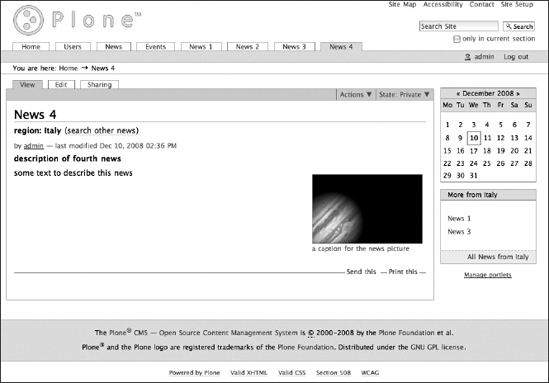
Figure 9-9. The new Regional News portlet
Using viewlets and portlets, we provide the webmaster with powerful and yet simple visual components to build the desired user interface in an easier and more flexible way. And with this, we can consider our work for the Regional News package almost done.
In the next section, we will add a specific publication workflow and take a deeper look into the GenericSetup concept.
Plone Configuration
Plone is a very flexible environment to configure, and has become more so since GenericSetup was introduced. Every Plone site has a portal_setup tool, accessible through the ZMI, able to manage configuration profiles in various ways. Plone flexibility comes in when you need to adjust properties to match your site's requirements (e.g., creating new content types by cloning the existing one in portal_types, adding custom indexes or metadata to your portal_catalog, or defining a whole new workflow schema).
Before GenericSetup, it was not possible to easily export to other Plone sites the configurations produced for one particular site. GenericSetup offers a simple way to convert site configurations to XML files and back.
Note For a deeper understanding of the GenericSetup machinery, please read the "Understanding and Using GenericSetup in Plone" tutorial on Plone.org, at http://plone.org/documentation/tutorial/genericsetup.
Let's have a look at it by providing a new workflow schema to our Regional News content type, using as a base the default simple_publication_workflow schema, and adding the regional_published state to it. For example, the new state could be useful to hide regional published news from the top level of our site. We leave it to you to eventually adjust your various views to the new state.
So, point your browser to the portal_workflow tool management interface, at http://localhost:8080/plone/portal_workflow/manage_main, select the simple_publication_workflow item, copy it, and then paste it in place.
You should see a new item named copy_of_simple_publication_workflow: select it and rename it to regional_publication_workflow.
Finally, visit http://localhost:8080/plone/portal_workflow/regional_publication_workflow/manage, and you will have quite an efficient web workflow configuration client. Use it to add the regional_published state, entering Regional Published as the title, and defining on it the role-permissions mapping you want through the permissions tab at http://localhost:8080/plone/portal_workflow/regional_publication_workflow/states/regional_published/manage_permissions. Then add the new regional_publish transition, entering Regional Publish as the title, and associate it with the various states for which you want it to be available.
All this can be done through the Web—content type association included—using the form at http://localhost:8080/plone/portal_workflow/manage_selectWorkflows. Just look for the RegionalNews text box and type in regional_publication_workflow. Your new configuration should look like in Figure 9-10.
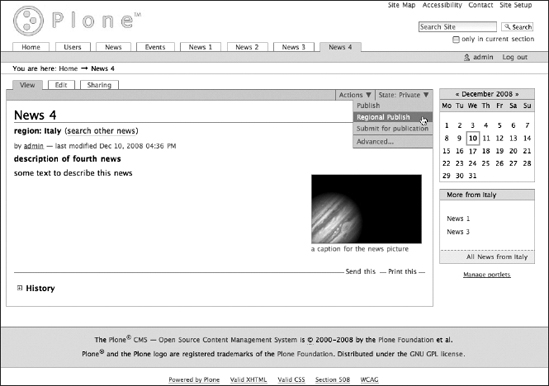
Figure 9-10. We added the Regional Publish transition to our Regional News workflow.
You should now be ready to use your new workflow in this site. But what about all the other Plone sites using your product?
You already know the answer is portal_setup, so point your browser to http://localhost:8080/plone/portal_setup/manage, and click the Export tab.
The portal_setup tool shows you a list of available export steps, each corresponding to a specific script able to extract its specific configuration information and turn it into a corresponding XML file or set of files.
We could simply select the check box corresponding to the workflow tool step and obtain its current configuration by clicking "Export selected steps" at the bottom of the page, but we would still be missing a few other configurations we changed during this chapter. So, instead, click the "Export all steps" button to obtain the whole set of the site's configuration information in a single compressed archive.
Unarchive the downloaded file and have a look at its content: each GenericSetup export step produces an easy-to-recognize XML file and, eventually, a folder in which to store other XML files, as in the case of the workflow step. Each export step is autonomous in deciding how to export its own configuration information, as far as the corresponding import step can use it. GenericSetup exports the site's configuration state at the precise moment we ask for it: in this case, we have to filter a whole slew of configurations we won't need in our product. To mitigate this, it is possible to create snapshots of the configuration state and compare them to obtain just the differences as a patch—but in this section we won't go deeper into this matter.
So, from our downloaded portal_setup file, let's take just the information we need for our product and store it into our package's profiles/default folder, starting with the workflow information.
Create the file profiles/default/workflows.xml, and put the following into it:
<?xml version="1.0"?>

<object name="portal_workflow" meta_type="Plone Workflow Tool">

 <object name="regional_publication_workflow" meta_type="Workflow"/>

 <bindings>

  <type type_id="RegionalNews">

   <bound-workflow workflow_id="regional_publication_workflow"/>

  </type>

 </bindings>

</object>
Then create the folder profiles/default/workflows, and copy in it the regional_publication_workflow folder you find in the configuration's downloaded archive.
Afterward, create the file profiles/default/catalog.xml, and type in the following lines:
<?xml version="1.0"?>

<object name="portal_catalog" meta_type="Plone Catalog Tool">

 <index name="region" meta_type="KeywordIndex">

  <indexed_attr value="getRegion"/>

 </index>

 <column value="getRegion"/>

</object>
These lines are responsible for the creation of the region index and the getRegion metadata in portal_catalog.
Then register our regionalnews_view browser view to be the default one for our content type, changing the profiles/default/types/RegionalNews.xml file as follows:
<?xml version="1.0"?>

<object name="RegionalNews"

   meta_type="Factory-based Type Information with dynamic views"

   i18n:domain="plonebook.regional_news"

   xmlns:i18n="http://xml.zope.org/namespaces/i18n">

   ...

 <property name="default_view">regionalnews_view</property>

 <property name="view_methods">

  <element value="regionalnews_view"/>

 </property>

   ...

</object>
Continue by adding the following content to the file profiles/default/cssregistry.xml to register our CSS resource:
<?xml version="1.0"?>

<object name="portal_css" meta_type="Stylesheets Registry" autogroup="False">

 <stylesheet title="" cacheable="True" compression="safe" cookable="True"

   enabled="on" expression="" id="++resource++rn-resources/regionalnews.css"

   media="" rel="stylesheet" rendering="import"/>

</object>
After that, create the file profiles/default/viewlets.xml, and put in the following lines to order your viewlet as you want:
<?xml version="1.0"?>

<object>

 <order manager="plone.belowcontenttitle" skinname="Plone Default">

  <viewlet name="regionalnews.info"/>

  <viewlet name="plone.belowcontenttitle.documentbyline"/>

  <viewlet name="plone.belowcontenttitle.keywords"/>

 </order>

</object>
Finally, register the portlet to be displayed in the Regional News context, editing profiles/default/portlets.xml as follows:
<?xml version="1.0"?>

<portlets>

   <portlet

     addview="plonebook.regional_news.portlets.regional_news"

     title="Regional News portlet"

     description=""

   />

   <assignment name="regional-news" category="content_type" key="RegionalNews"

      manager="plone.rightcolumn"

      type="plonebook.regional_news.portlets.regional_news">

     <property name="more_url">True</property>

   </assignment>

</portlets>
We should now be ready to restart our Zope service and create a new Plone site, to verify we don't need to mess with web configuration any more. Let's go to the terminal window and type:
$ cd ~/plonebook

$ ./bin/instance restart
Point your web browser to http://localhost:8080/manage, create a new Plone site named plone2, and install your Regional News product, just as you did in the "Building a Plone Product the Easy Way" section of this chapter.
Then open the http://localhost:8080/plone2 site's main page in your browser and try to create your first Regional News item for this portal. As in Figure 9-11, you should see a nicely formatted Regional News item with our viewlet and portlet in place, and a working "search other news" link pointing toward a working specialized search form for Regional News.

Figure 9-11. We were able to export our Regional News item to a new Plone site.
We have finally been able to fulfill all the promises we set forth, except one, which is letting a webmaster easily manage our region's vocabulary through the Web. We will discuss a couple of different ways to accomplish this last mission in the next section.
Tools and Utilities
Throughout this chapter, we have focused on extending Plone content types with our Regional News type. You have seen how to build this Plone extension using a file system product, but without having to understand too much to get up and running, thanks to Paster's aid. We followed quite a good development pattern using Zope 3 technologies, building web forms automatically from schemas, keeping templates and business logic as isolated as possible, and adopting portlets and viewlets to split user interface elements up. Finally, we used GenericSetup profiles to extract our web configurations and gather them into our product package.
Next, we need to solve a little point we left in the preceding sections: allowing a Plone webmaster to manage the regions vocabulary for our Regional News content type through the Web, without asking the developer to change the current items.
Solving this could be done following various approaches: for instance, we could easily build a property sheet of our own in the portal_properties tool, with a single lines property, able to store our regions one per line. Then we could build our vocabulary using that lines property as a source.
However, in this section we will be a bit more expansive, because we are still missing one major development pattern in Plone: building a tool.
A tool is a sort of service, usually unique in the site, that we rely on for something quite specific (e.g., to index our content, workflow our content, send e-mail, etc.).
As usual, we have two flavors of tools in Plone: one classic, belonging to the Zope 2 world, and the other coming from Zope 3 technologies, known as a utility.
Classic Zope 2 tools are implemented in Python classes registered in a specific way, and are acquired through the getToolByName function. Thus, they need to be instantiated in the portal before we can access their data and methods.
As for Zope 3 utilities, our regions vocabulary is already a Zope 3 named utility, but it lacks storage and a user interface to manage its items; in fact it is pure code. We could also adopt local utilities, which are instantiated in a way similar to classic tools and are able to persist the data they need while the Zope service is off.
Note To have a better look at Plone tools and how to implement them, please read the "Create a Custom Tool" tutorial on Plone.org, at http://plone.org/documentation/how-to/create-a-tool.
To take a deeper look into what a Zope 3 utility is, read the "Utility" section of "A Comprehensive Guide to Zope Component Architecture," at www.muthukadan.net/docs/zca.html#utility.
So, taking the newer development pattern, we will build a control panel configlet based on a formlib class that will store and retrieve configuration data using a local named utility. Of course, we will set up what is needed by working with our GenericSetup profile.
Note A configlet is a special component useful for building a configuration user interface in the Plone control panel.
At the end, we will update our regions vocabulary implementation to use this new local utility.
Let's start! First, define the configuration interface in the package's interfaces.py file, as follows:
class IRegionalNewsConfig(Interface):

    """Description of Regional News Configuration Panel"""


    regions = schema.List(

                    title = u"Available Regions",

                    default = [u'Italy', u'France', u'England'],

                    value_type = schema.TextLine(),

                    unique = True,

                    required = False,

                    )
We declare a regions field, which in fact is a list of TextLine fields, providing a convenient default value.
Then, we have to define our configlet component. To do this, let's create the browser/configlet.py file, and enter the following lines:
from zope.formlib import form

from zope.i18nmessageid import MessageFactory

from plone.app.controlpanel.form import ControlPanelForm


from plonebook.regional_news.interfaces import IRegionalNewsConfig

from plonebook.regional_news import regional_newsMessageFactory as _


class RegionalNewsConfigForm(ControlPanelForm):


    form_fields = form.Fields(IRegionalNewsConfig)


    label = _(u"Regional News Configuration Panel")

    description = _(u"define settings for Regional News content type")

    form_name = _(u"Regional News Config Panel")
The RegionalNewsConfigForm class inherits from plone.app.controlpanel.form.ControlPanelForm, so it is easily plugged into the Plone control panel user interface. It just needs to specify a few mandatory attributes, and also specify that it renders the IRegionalNewsConfig interface.
Of course, we need to register our new component, so add the following to browser/configure.zcml:
...

<browser:page

   for="Products.CMFPlone.Portal.PloneSite"

   name="regionalnews-config"

   class=".configlet.RegionalNewsConfigForm"

   permission="cmf.ManagePortal"

   />


...
Next, we need to provide the local utility in which to store our configuration; so, open the config.py file in the root of our package, and add the following code to the bottom:
from zope.interface import implements

from zope.schema.fieldproperty import FieldProperty

from zope.component import getUtility

from OFS.SimpleItem import SimpleItem


from plonebook.regional_news.interfaces import IRegionalNewsConfig


class RegionalNewsConfig(SimpleItem):

    implements(IRegionalNewsConfig)


    regions = FieldProperty(IRegionalNewsConfig['regions'])
As you can see, we just store our configurations in a Zope SimpleItem class, using zope.schema FieldProperty. This is a convenient way to easily annotate our instance with data coming from our interface.
Presently, you will see how to create our local utility at the product's installation time using GenericSetup, naming it regionalnews_config and instantiating it at the site root level.
Of course, we need to bind our configlet formlib class with this local utility; so, we register a function as an adapter, returning our local utility and providing IRegionalNewsConfig. So, at the bottom of the config.py file, add the following lines:
def rn_config_adapter(context):

    return getUtility(IRegionalNewsConfig,

                     name='regionalnews_config',

                     context=context)
Clearly, we'll have to register it in the package configure.zcml file as follows:
...

<adapter

  for="Products.CMFPlone.Portal.PloneSite"

  provides=".interfaces.IRegionalNewsConfig"

  factory=".config.rn_config_adapter" />


...
Everything we need is there! Let's add some XML configuration files to instruct Generic-Setup to install the configuration utility and our shiny new configlet for the Plone control panel.
So, to add the local utility to the site root at install time, create the profiles/default/componentregistry.xml file, and put the following code into it:
<?xml version="1.0"?>

<componentregistry>

 <utilities>

  <utility name="regionalnews_config"

     factory="plonebook.regional_news.config.RegionalNewsConfig"

     interface="plonebook.regional_news.interfaces.IRegionalNewsConfig"/>

 </utilities>

</componentregistry>
Then create the profiles/default/controlpanel.xml file, and fill it with the following lines:
<?xml version="1.0"?>

<object name="portal_controlpanel" meta_type="Plone Control Panel Tool">

 <configlet title="Regional News" action_id="RegionalNewsConfig"

    appId="RegionalNewsConfig" category="Products" condition_expr=""

    url_expr="string:${portal_url}/regionalnews-config"

    visible="True">

  <permission>Manage portal</permission>

 </configlet>

</object>
This will add our configlet to the Plone control panel.
Finally, let's restart the Zope service, going back to the terminal window and typing
$ cd ~/plonebook

$ ./bin/instance restart
Now, open the URL http://localhost:8080/manage in your web browser, create a new Plone site named plone3, and install the Regional News product.
If everything went fine, you should find a new Regional News item in the Add-on Products configuration section of the Plone control panel. Click the link, and enjoy your new web-managed list of regions (see Figure 9-12).
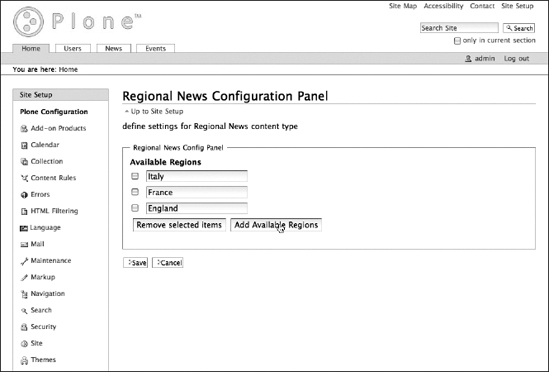
Figure 9-12. We now have a web-managed list of regions.
We'll leave it as an exercise for you to add a nice icon for the new Regional News configlet. Just remember GenericSetup is your friend!
So, now we have the configlet, but we haven't bound our regions vocabulary to the local utility data. Don't worry—nothing could be easier! Let's open the vocabularies.py file in the package root and change it to obtain what follows:
from zope.interface import implements

from zope.app.schema.vocabulary import IVocabularyFactory

from zope.schema.vocabulary import SimpleTerm

from zope.schema.vocabulary import SimpleVocabulary

from config import rn_config_adapter


class RegionsVocabulary(object):

    """Vocabulary factory for regional news regions.

    """

    implements(IVocabularyFactory)

def __call__(self, context):

    rn_config_utility = rn_config_adapter(context)

    items = rn_config_utility.regions

    if not items:

        items = (u"n.d.",)

    items = [SimpleTerm(el, el) for el in items]

    return SimpleVocabulary(items)


RegionsVocabularyFactory = RegionsVocabulary()
As you can see, we just get rid of the REGIONS constant to pick up the regions stored in our local utility. Also, our rn_config_utility function turned out to be useful to easily get the local utility in this module, too.
Just restart the Zope service, and add a new Regional News item in the site root. You will get the regions you specified through the configlet.
Summary
Well, we've finally reached our goal, which is clearly a simple goal as far as the Plone framework's possibilities go, but this should inspire you with many ideas for following up.
Along the way, we touched on some of the most common development patterns in Plone. We covered how you can build your own content type, the primary brick in Plone's structure. We investigated how to customize the default views on content types, as well as how to search manually for and automatically collect your content.
Plone is an evolving technology, based on actively developed frameworks. That is why we underlined the fact that, at present, Zope 3 techniques are on the way to completely replace the old-school patterns. Zope 3 is introducing amazing new technologies, such as browser views and z3c.form, as discussed in this chapter. Zope 2 is based on the concept of object orientation, which Zope 3 strengthens with the component architecture machinery, to allow developers to customize their applications and reuse code in easier and more effective and ways.
In the next chapter, we'll have a look at how to integrate Plone with other systems. In particular, if you're a developer, you may find the "Relational Databases" section interesting. Keep on reading!