
6. USE APERTURE PRIORITY EXPOSURE MODE
![]()
TO GAIN AS much control as possible over the design elements of your portraits, it’s best to use the creative exposure modes. These include Programmed Exposure, Shutter Speed Priority, Aperture Priority, and Manual. To be even more specific, I suggest sticking to only two of these for the majority of your portrait work: Aperture Priority and Manual (Figure 6.1).
Although it’s not in this book’s purview to go over how exposure is achieved, having a working knowledge of this concept is extremely helpful in order to adequately operate the camera in Aperture Priority and Manual exposure modes. The camera settings are in your complete control in Manual exposure mode, and as a result, the image that you produce will ideally be as close as possible to what you envisioned in your mind. In Manual exposure mode, you’ll be able to manipulate the camera’s functions along technical and visual lines to create the overall look of the image. Although Manual exposure mode seems intimidating (and it is, at first), mastering its use is the foundation for knowing how the other creative exposure modes work. Knowing how to operate in Manual allows you a more controllable experience when working with these other modes.
That being said, I work mostly in Aperture Priority, and I advise you to do the same. This exposure mode allows you to control the aperture setting manually, and the camera automatically sets the shutter speed for you.
As we’ll highlight later in this chapter, one of the first camera functions I consider when it comes to portraiture is the aperture setting, which controls the image’s depth of field. Depth of field is a crucial concept and characteristic of photography. My second consideration in portraiture is how much of the image I want in focus. With a quick turn of the dial, Aperture Priority exposure mode lets me manipulate the function of the camera that controls the depth of field in my image. If I need very little depth of field, I can quickly open the aperture to f/2.8 (Figure 6.2), or if I’m looking to have the entire environment of the portrait more in focus, I can shoot at f/8 (Figure 6.3). Since the camera sets the shutter speed automatically to complete the exposure equation, the Aperture Priority mode makes it easy to compensate for under- or overexposure with another flick of a dial. Having a foundation in Manual exposure makes translating exposure compensation to other exposure modes fairly painless.
As with all functions and practical processes of the camera, the more you use a certain exposure mode, the more you learn to control it technically and creatively. It’s of little wonder that many portrait photographers rely on the Manual or Aperture Priority exposure modes, and it makes sense for you to shift to one of these modes as soon as you feel comfortable with them. First, learn all you can about Manual exposure. Then negotiate those concepts over to using Aperture Priority, and you’ll set yourself up well for being a versatile photographer in many portrait scenarios.
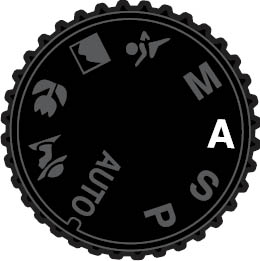
6.1 Aperture Priority mode, identified on Canon cameras as AV and on most other cameras as A, allows the photographer to manually select the aperture setting while the camera automatically sets the shutter speed—an extremely efficient mode for many portrait photographers.
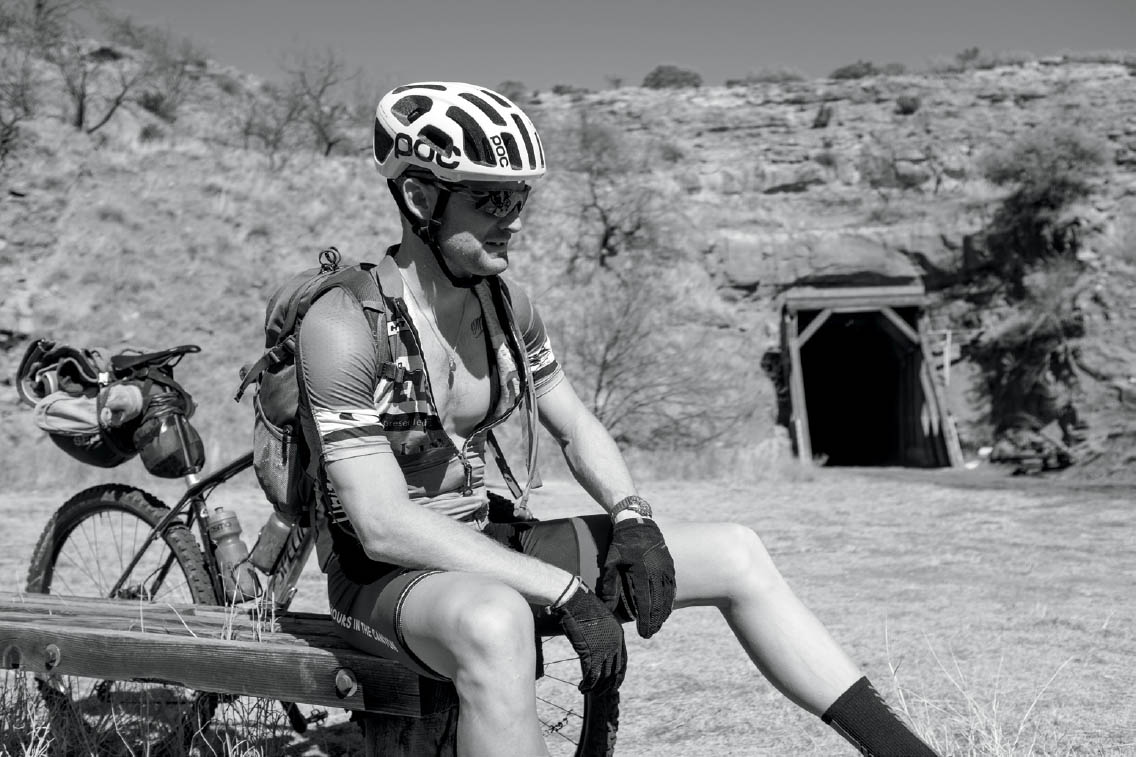
6.2 To ensure the background canyon wall did not run too much into my subject’s head, I used Aperture Priority and an aperture of f/2.8 to knock it sufficiently out of focus.
ISO 200; 1/1250 sec.; f/2.8; 23mm
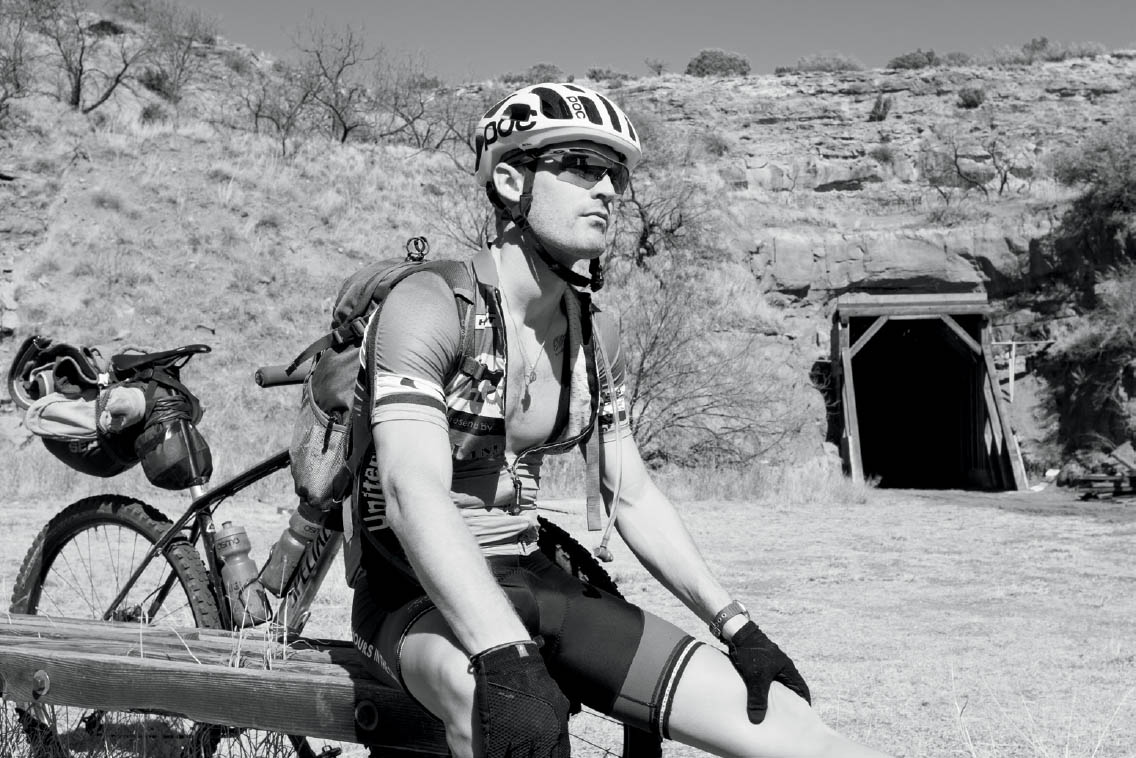
6.3 However, to provide myself some options for editing during post processing, I shot this portrait at f/8 to bring the canyon wall and old railway tunnel entrance into focus. This choice also emphasizes their narrative importance in the mountain biker’s journey.
ISO 200; 1/600 sec.; f/8; 23mm