
20. CREATE FILL LIGHT
![]()
REMEMBER THAT REFLECTOR I encouraged you to buy in the previous chapter? It’s one of the natural light photographer’s best friends. It’s certainly one of mine, and it always comes with me on my shoots. In fact, I usually have two reflectors in different sizes.
The reflector’s main purpose is to reflect light in a variety of ways. Three ways that come to mind are using the reflector to create fill light, using it to create primary (key) light, and using it as a backlight.
I imagine a reflector is used most frequently as a fill-light source. A fill light is simply a source of light that helps fill in the shadowed side of your portrait subject (Figure 20.1). With a reflector, this is accomplished by placing the shiny or white surface in a way that catches a bright source of light, such as the sun, and reflects it onto the subject. If you are using the sun as a primary light at a 45-degree angle to the right of your subject, a reflector can be used to fill in light when it is placed to the left of your subject at a 45-degree angle or more. Since a reflector is typically manageable by one person or placed on a stand, it can be easily moved on axis to reflect more or less light. A reflector placed at a more drastic angle to your subject, say, at 90 degrees, will reflect more light than one placed at 45 or 30 degrees.
Using a reflector as a fill light is a great way to reduce the dramatic effect of dark shadows on the unlit portions of your subject. Keep in mind that even though the reflector is being used as a fill, it is still considered a light source, albeit a less intense one. That means that all of the characteristics of light come with it. As you move a reflector closer to your subject’s shadowed side, the reflected light becomes more intense, creating less contrast between light and shadow. The opposite applies if you move it further away from your subject.
Of course, a reflector can be used in other ways. I often employ a reflector as a main or key light (Figure 20.2). This requires turning the subject more into the shade and reflecting the brighter light into one or both sides of her face. An example of this scenario has already been highlighted in the previous section, in which you turn your subject away from the sun, using it as a backlight. A reflector placed opposite the direction of the sun will reflect light back onto the face (Figure 20.3 and Figure 20.4).
Likewise, reversing your subject’s position and using the sun as your main light allows you to use the reflector to create a backlight (Figure 20.5 and Figure 20.6). Since most traditional reflectors are easily bent and physically contorted, the backlight can be manipulated quite a bit to hit your subject with varying amounts of intensity and coverage.
As you can see, reflectors are very valuable to the natural light portrait photographer due to their stylistic (and physical) flexibility. Although they have been around for a long time and come in many shapes and sizes, I’m always amazed at the innovative and creative ways some photographers use them. Reflectors are one of the first things I encourage photographers to have in their “toolbox.”
A stylistic word of caution: when using a reflector as a fill or key light source, don’t reflect from low angles unless you are going for a ghoulish look. It’s often our tendency to angle the reflector up when reflecting natural light because the sun is above us in many cases. However, this forces shadows upward, which can be quite distracting and unappealing, especially when creating a key light with the reflector (Figure 20.7). Certainly, there are times when reflecting from below helps, especially when we are not reflecting direct light. However, always be cognizant of the direction of the light source and the shadows it creates. Unless the image calls for under lighting, I suggest holding the reflector more perpendicular to the ground (parallel to your subject) (Figure 20.8 and Figure 20.9). This provides a more natural reflection and mitigates those pesky shadows that drift upward from the nose, eye-sockets, and other facial features.
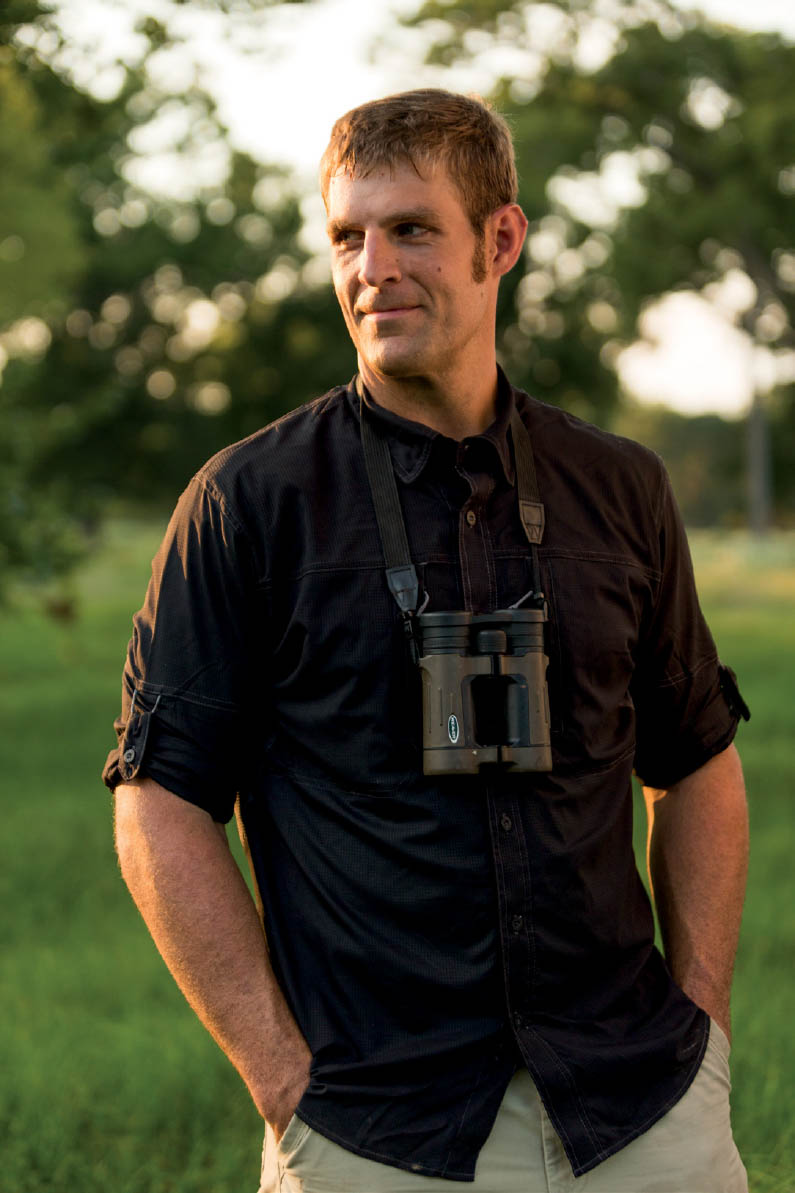
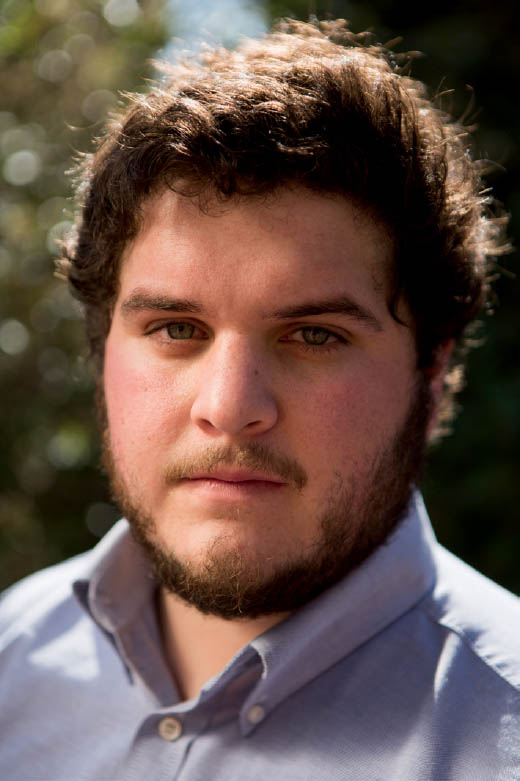
20.1 Since the subject was wearing a black shirt, and I was using the direct sunlight as a backlight, I used a white reflector to capture detail on the shadowed side of the subject’s face to ensure it was well lit and the binoculars were noticeable.
ISO 400; 1/640 sec.; f/2.8; 70mm

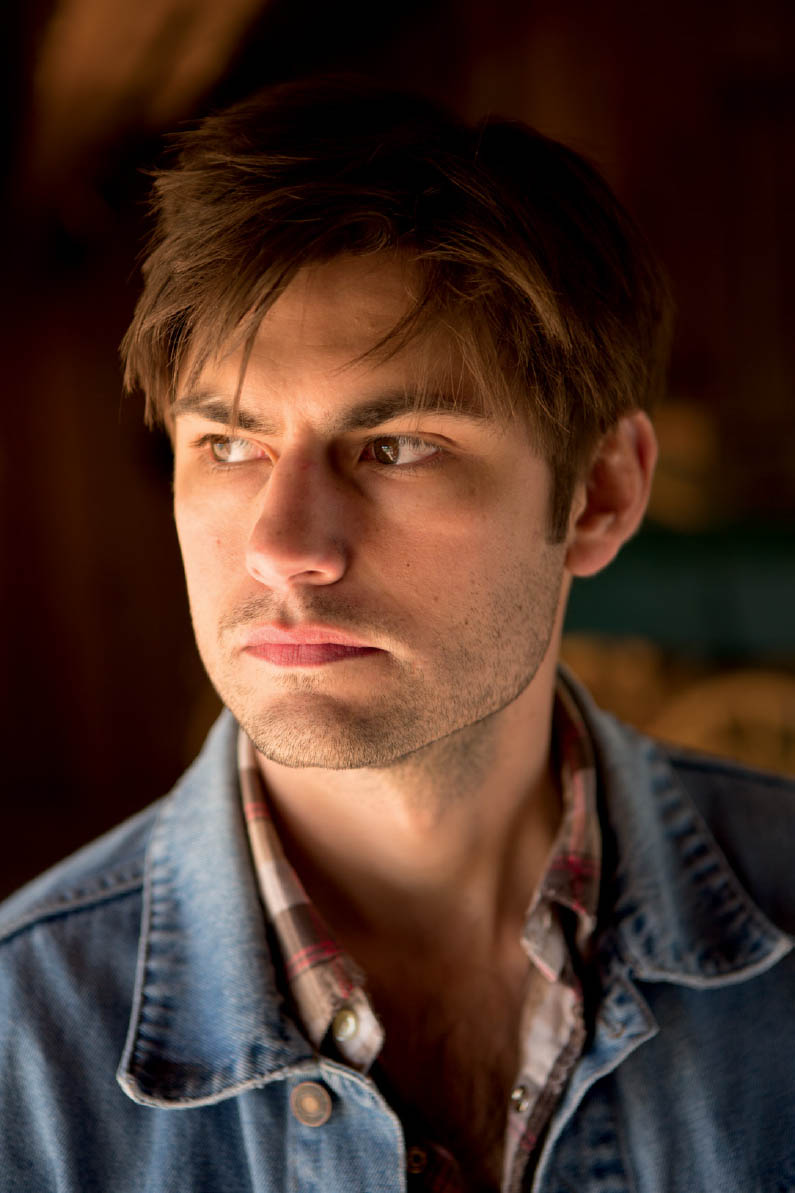
20.2 Although I could have used fairly diffused light on this subject, reflecting light onto the camera-left side of his face gives the image visual depth.
ISO 200; 1/800 sec.; f/2.8; 140mm
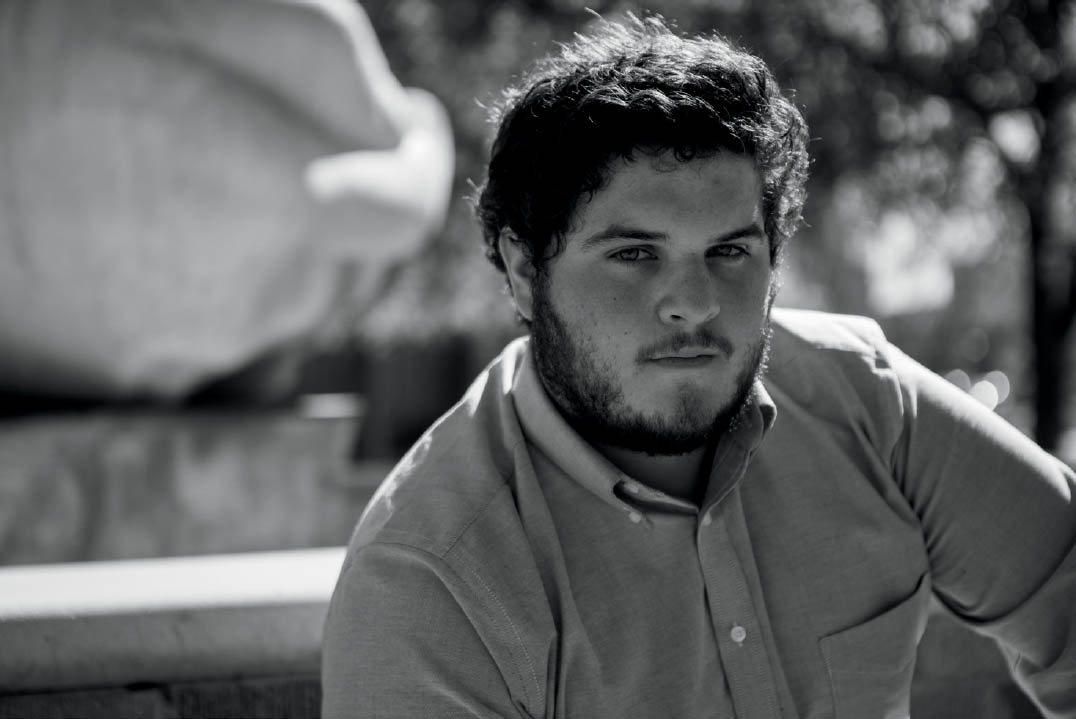
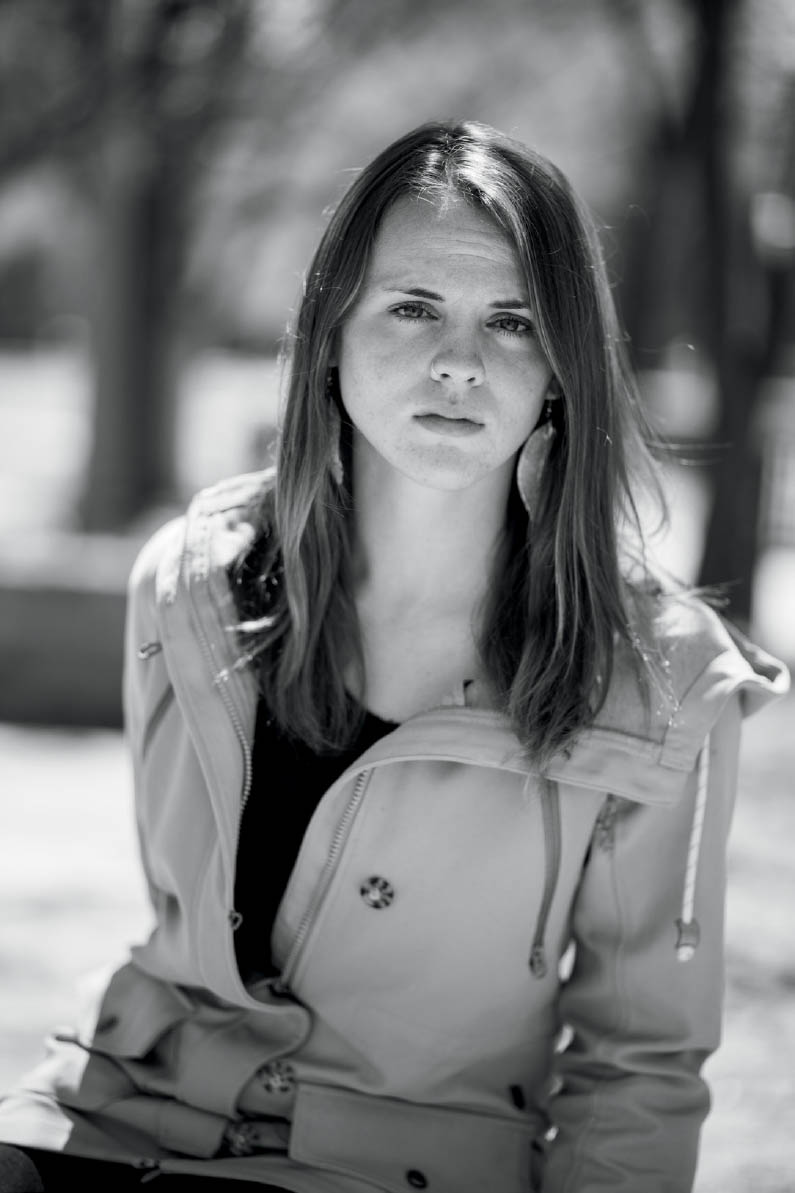
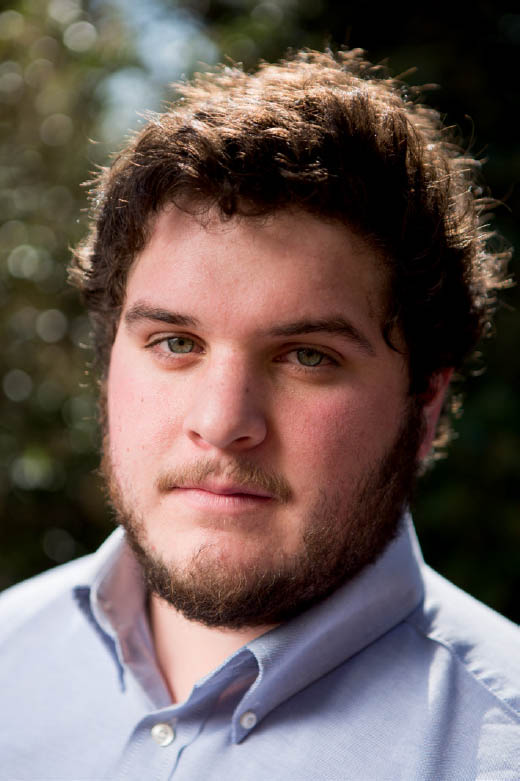
20.3 Turning the subject away from direct sunlight provides great backlight. However, the exposure on his face is fairly low due to the intensity of said backlight.
ISO 200; 1/1600 sec.; f/2.8; 70mm
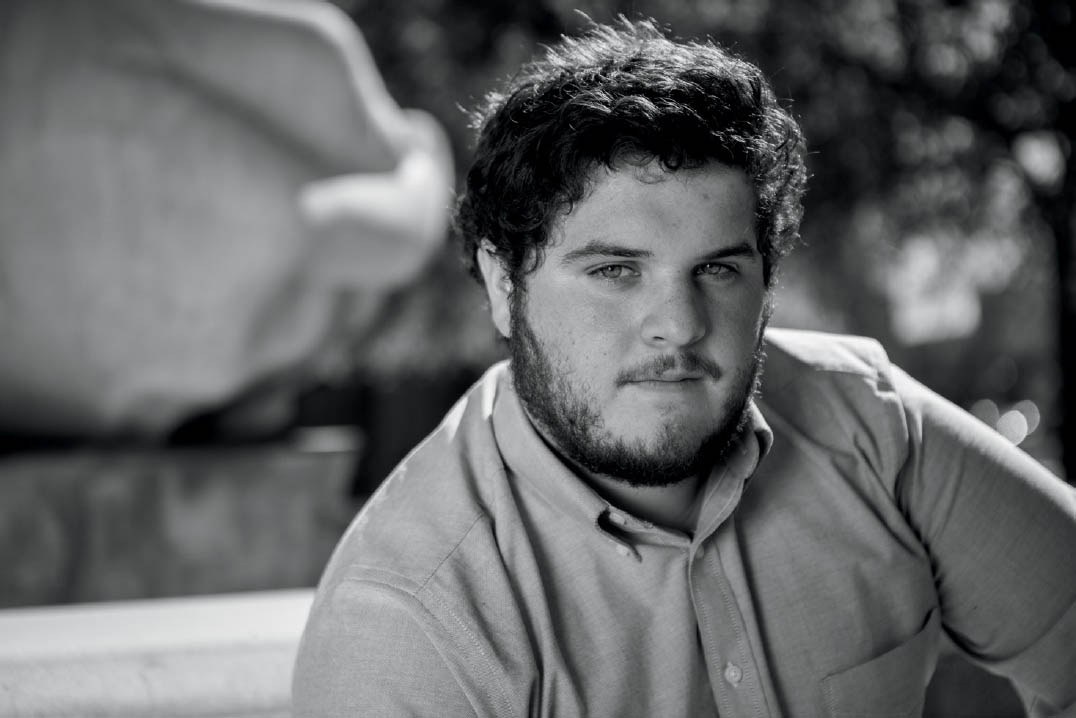
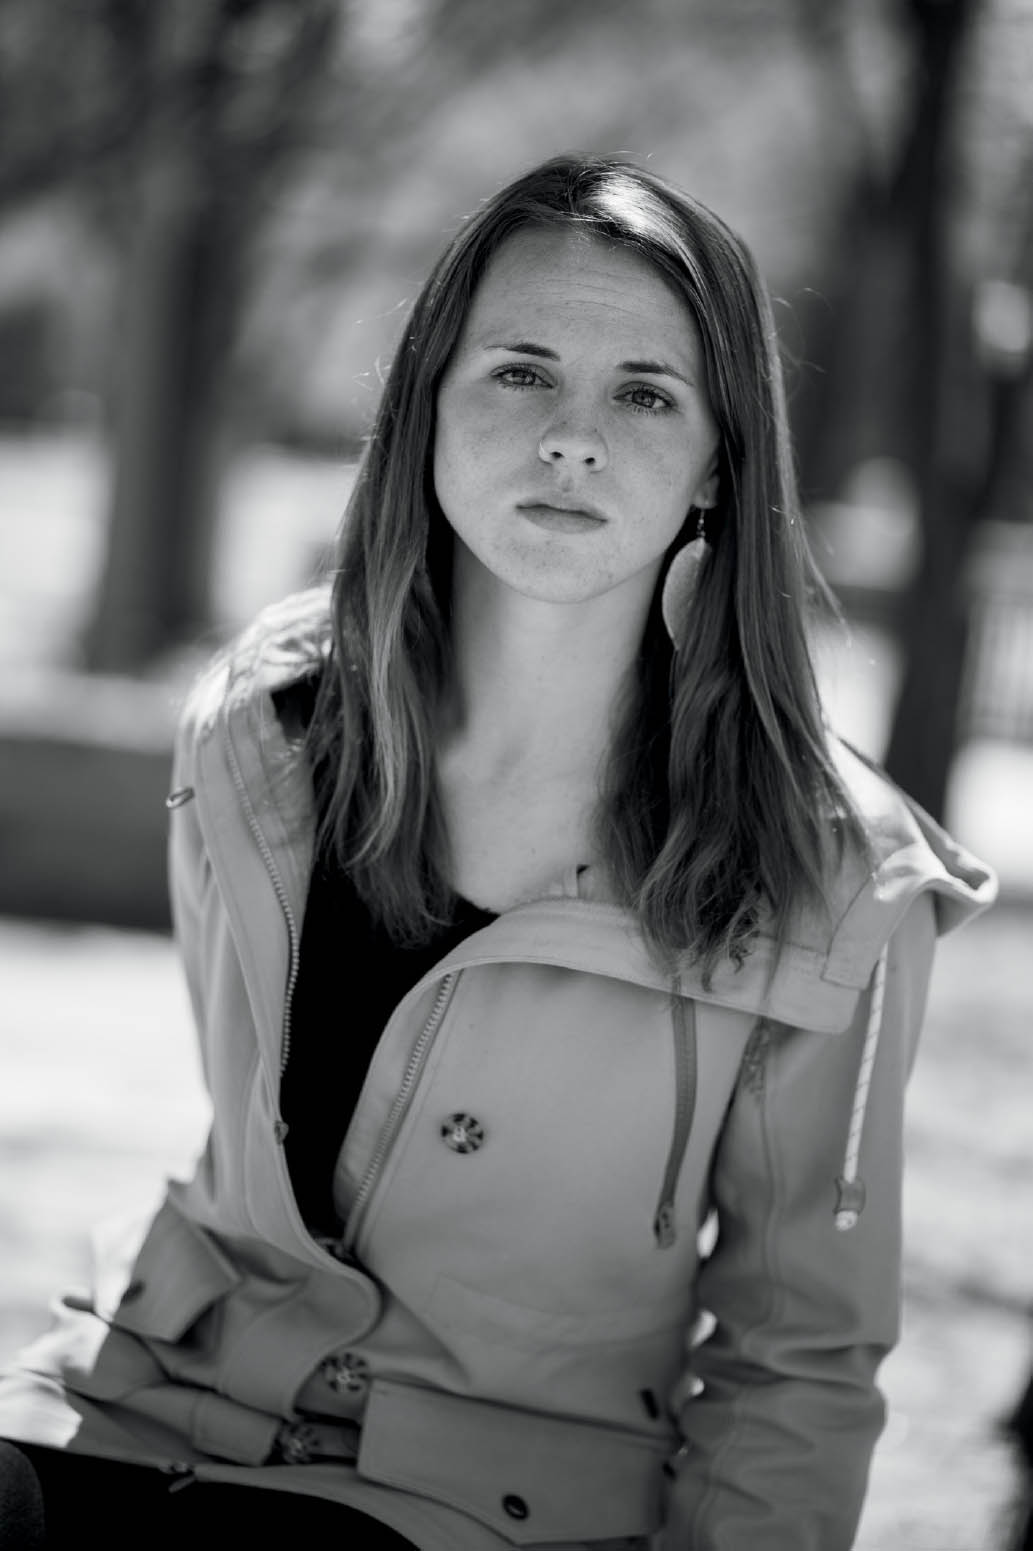
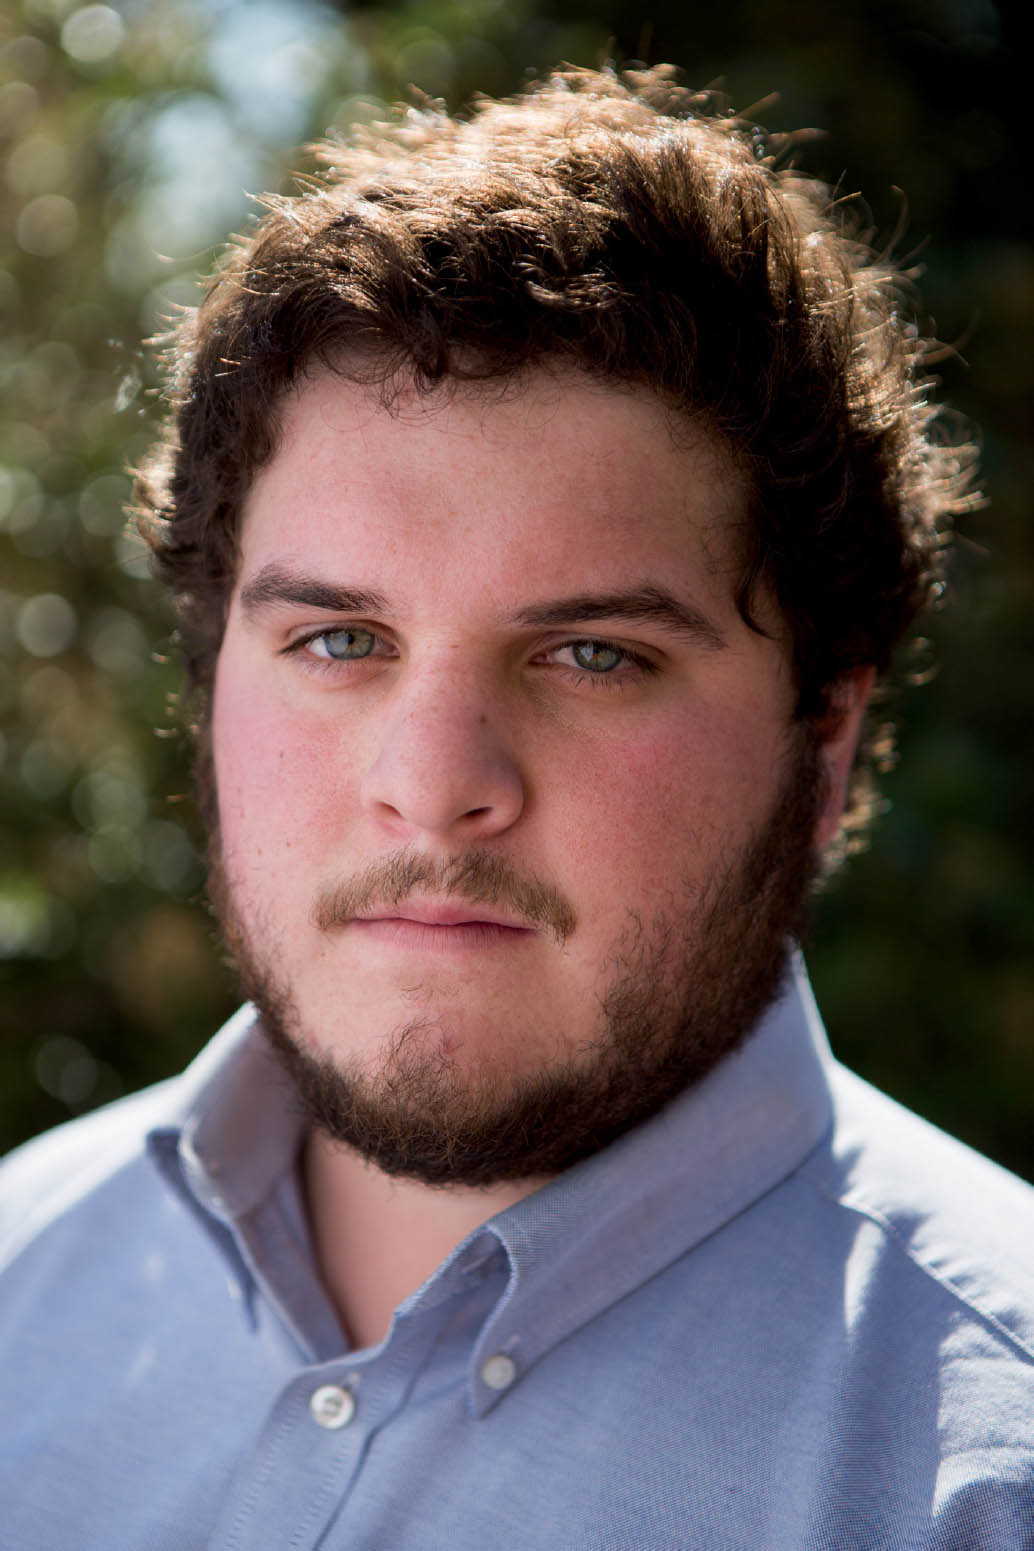
20.4 I used a reflector from camera left to increase the exposure and add contrast between light and shadow across the subject’s face. This adds a dynamic value to the portrait.
ISO 200; 1/4000 sec.; f/2.8; 70mm

20.5 When using harsh, direct light is appealing, a reflector is a great way to create backlight to separate the subject from the background (see Figure 20.6).
ISO 100; 1/5000 sec.; f/1.8; 85mm
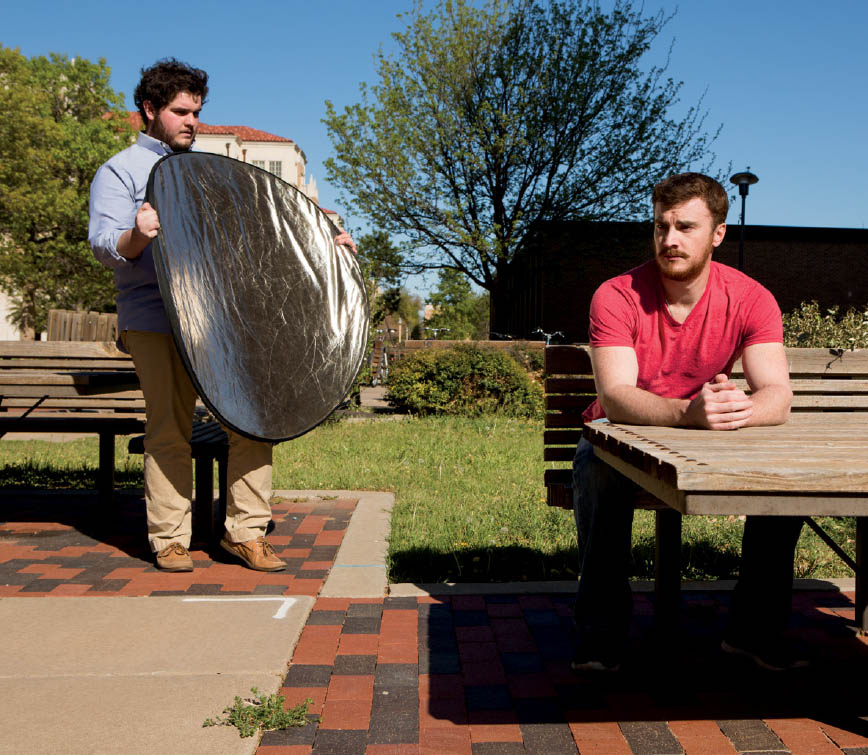
20.6 To create the backlight for this portrait, my assistant held a silver and gold reflector nearly opposite of the sun and bounced the majority of the reflected light onto the back of the subject.
20.7 Reflecting light from upward onto the subject can be distracting or unappealing when the reflected light is more intense than the rest of the light hitting the face, creating unnaturally dark shadows.
ISO 200; 1/125 sec.; f/2.8; 62mm
20.8 Although lit from below, the reflector was moved to a more parallel angle to the subject to reduce the light’s intensity, taking with it the distracting shadows under the eyes.
ISO 200; 1/4000 sec.; f/1.8; 85mm
20.9 To ensure the background canyon wall did not run into my subject’s head, I used aperture priority and an aperture of f/2.8 to knock it sufficiently out of focus.
ISO 200; 1/5000 sec.; f/1.8; 85mm
Which Reflector Do You Use?
Most reflector kits come with reflectors of several types of reflective surfaces. Typically, these include a gold and silver surface, a surface with a mixture of gold and silver, a white diffuser that can be used as a white surface, and a black surface (also known as an anti-fill, which we’ll talk about in the next section). With all of these options, it sometimes may be difficult to decide which one to use.
A gold surface will create a very warm reflection (Figure 20.10). It takes whatever light is hitting it and warms it up even more. So, if you are shooting with early morning or late evening golden hour light, a gold reflector will intensify that warmth in reflection. Although this might be desirable, it can also make your subject look a bit jaundiced. A silver reflector, on the other hand, provides a punchy reflection that is often the same color temperature as the light reflected in it (Figure 20.11). Some photographers don’t like the visual coolness of a silver reflector and decide to use the mixture of silver and gold. This mixed reflector is often referred to as a Daylight reflector.
Personally, I like the Daylight reflector more than either the gold or silver, especially as a background or kicker light. However, I most often use one of the diffusion panels as a white reflector for fill and main-light situations (Figure 20.12). It provides a more muted, less intense reflection since it is somewhat transparent. It cuts down on the “pop” of a reflector’s shiny surface, offering a softer, more natural reflection that doesn’t augment the color of the reflecting light source much.
20.10 The gold reflector in many kits is useful for warming up the light hitting your subject, but it can often be too warm (read: orange) when using late afternoon and golden hour light.
ISO 100; 1/1000 sec.; f/2.8; 67mm
20.11 Silver reflectors seem to reflect a more intense light compared to gold and daylight reflectors. They are great for retaining the color of the light source, and providing a more brisk light source if one is needed.
ISO 100; 1/1250 sec.; f/2.8; 70mm
20.12 My go-to reflector is actually the white diffuser that comes in many reflector kits. White provides a less intense reflection, and I use it for primary light rather than more reflective surfaces.
ISO 100; 1/1000 sec.; f/2.8; 70mm