
9. SETTING YOUR WHITE BALANCE
![]()
WHITE BALANCING (WB) simply refers to setting the camera’s white balance controls to ensure accurate coloration in an image. In essence, you are fixing the camera so that what is truly white in your frame appears truly white in the image.
Each light source, even the sun, has a color temperature. This is a fancy, scientific way of saying that each light source casts a color. If you study any light source, you’ll notice it. For example, incandescent, or tungsten, light bulbs cast a yellow-orange color, and fluorescent lights, depending on their generation, cast a green- or magenta-tinted color. The sun, which is the standard by which light coloration is practically measured, casts a light more white than the other source. Although our eyes have no problem adjusting to see white under any lighting coloration, the camera is not so capable. It’s up to the user to help it out by setting the white balance.
At this point you may be asking: what does all this talk about color temperature mean for portraiture, and why not just use the automatic white balance setting?
Much like the automatic portrait exposure mode, the automatic white balance setting takes a great deal of control away from the photographer in terms of making accurate or meaningful white balance choices. Automatic white balance works well, but it is not foolproof when it comes to accurately measuring the color temperature of the light source used in your portraits (Figure 9.1). Automatic white balance is always striving to interpret an accurate coloration of the light sources, which takes creative freedom from the photographer. Perhaps the photographer wants the image to be tinted in a strong blue, such as what an incandescent white balance setting offers. By moving away from the automatic setting and into the preset white balance settings, or even into fully custom white balance settings, the photographer gains both consistency in coloration and creative control.
Even though white balancing a photographic scenario technically refers to ensuring that anything white in your shot will appear white in the image, it ultimately means that any coloration from the light sources is neutralized. Whites appear truly white, and skin tones are absent of any inaccurate color tinting. For a large population of portrait photographers, being able to replicate accurate skin tones and colors in an image is paramount (Figure 9.2 and Figure 9.3). Nothing is more distracting than a slight green colorcast that makes the subject look sickly, or an overly warm colorcast that suggests the subject is jaundiced. Such examples are extreme, but they nevertheless highlight why setting the white balance on your camera prior to shooting is a key consideration.

9.1 Although the color is not that inaccurate, I feel the automatic white balance setting cooled the late evening light too much in this portrait of a ranching couple. I would have preferred the image to be warmer to reflect the golden hour light at the beginning and end of the day.
ISO 100; 1/250 sec.; f/4.5; 200mm
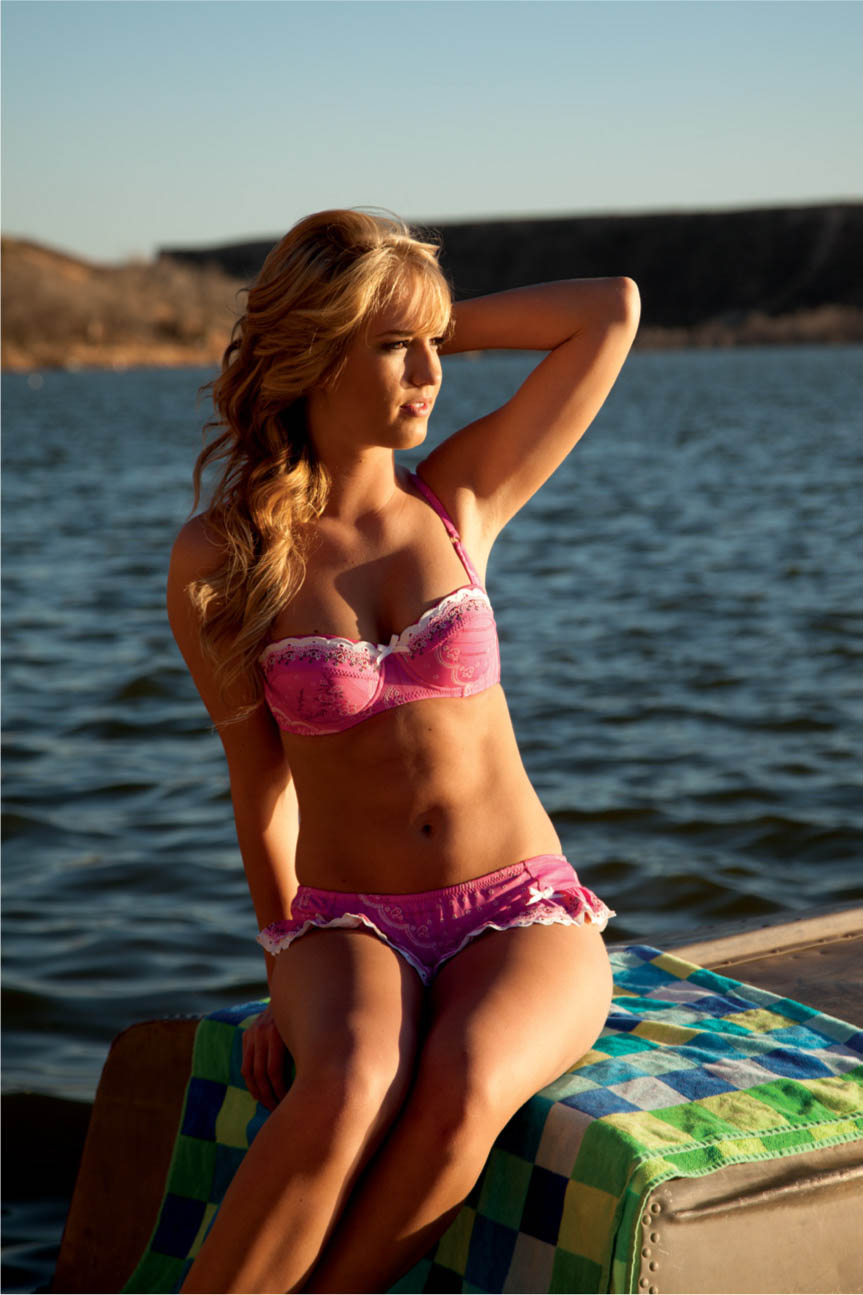
9.2 The automatic white balance setting used for this portrait warmed the tones too much. Although the subject doesn’t look all that bad, the blue of the water and the sky are reduced, making those elements look less natural and inviting.
ISO 50; 1/250 sec.; f/4.5; 88mm
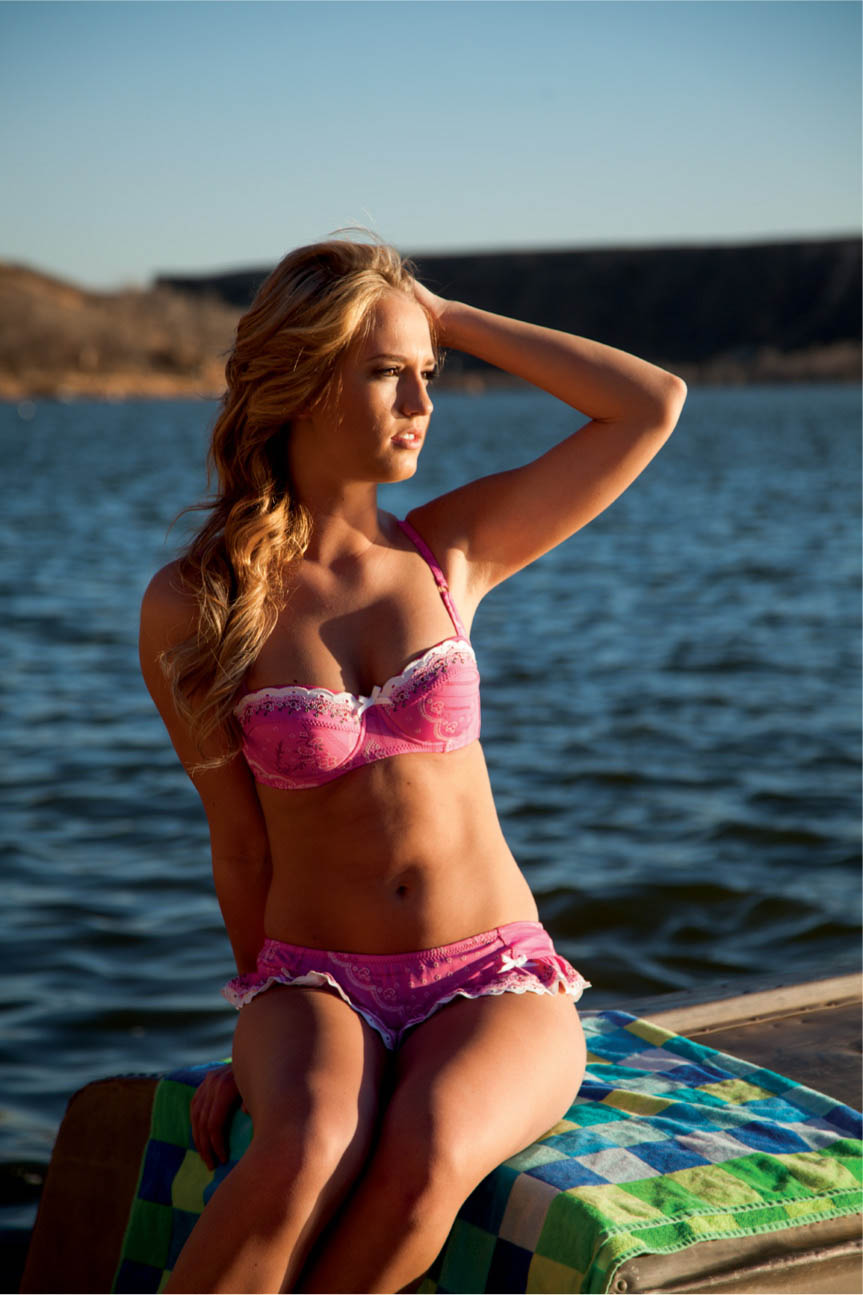
9.3 Moving the white balance setting from automatic to daylight reduced some of the warmth in subsequent images. The golden hour light was still warm enough for the subject, but the reduction in white balance helped the water and sky maintain their natural blue coloration.
ISO 50; 1/250 sec.; f/4.5; 105mm
When working with natural light portraits, setting the white balance can sometimes be tricky. Typically, natural light portraiture assumes that direct or indirect sunlight is the light source. Most, if not all, digital cameras capable of varying white balance settings have a preset for such light (often referred to as Daylight white balance). This setting, which is usually identified by an icon of a sun (Figure 9.4) is preconfigured to white balance the color temperature of direct sunlight, which is somewhere around 5200 degrees Kelvin, or 5200K. For the most part, this preset works well to accurately re-create skin tones and colors photographed in such light. If the sun’s rays are impeded by cloud coverage, the light’s color temperature will be cooler. Moving the white balance setting to the Cloudy preset will counteract this by warming up the scene in your image. It essentially adds a warm, yellow-orange filter on top of the shot to mitigate the cooling blues conveyed in cloudy scenarios. As long as you know the type of light source you are working with, you can most likely find a preset for it in the camera’s white balance menu.

9.4 Most camera manufacturers use an icon of a sun to denote Daylight white balance. For natural light photographers, this is an ideal white balance to maintain fairly accurate skin tones, especially in outdoor settings.
Of course, each photographer uses the camera’s white balance settings to his or her liking. Many natural light photographers use a warmer white balance setting because an intentionally warmer, slightly more orange coloration in an image can be flattering to the subject (Figure 9.5) by making it look like they were photographed in the golden hours of the day. Also, viewers tend to react positively to coloration that is more warm than cool, particularly when working to show off a portrait subject’s face and skin tones. This is simply a creative, stylistic choice made on the photographer’s part. I often favor setting my white balance to Cloudy for portraits, even if the lighting conditions technically call for Daylight.
To that end, anyone wishing to convey a certain message or mood about their portrait subject might choose to intentionally and drastically shift their white balance settings. For example, you might switch your white balance setting to Tungsten if you want everything else in the frame to appear more blue (Figure 9.6). The Tungsten preset is technically intended to counteract the intense warmth of incandescent bulbs, so it essentially layers a blue filter over the image. In this case, though, the setting is used as a creative effect rather than a tool to achieve accurate color.
Set your white balance to help you achieve the objective of your portrait. If your intention is to replicate accurate skin tones, I suggest setting your white balance to either a custom setting (each camera has a specific way of setting custom white balance values) or a preset that most closely matches the light source (direct or indirect sunlight, in the case of most natural light portraiture). If your intention is to create a more flattering coloration for skin tone or to stylistically imply meaning by making drastic shifts in white balance, then do so at the beginning of your shoot. It’s better to start with settings that are as close to what you want with your end result. If you are shooting in the RAW file format (and why wouldn’t you?), you can easily adjust the white balance later with post-processing software, such as Adobe Lightroom or Photoshop.
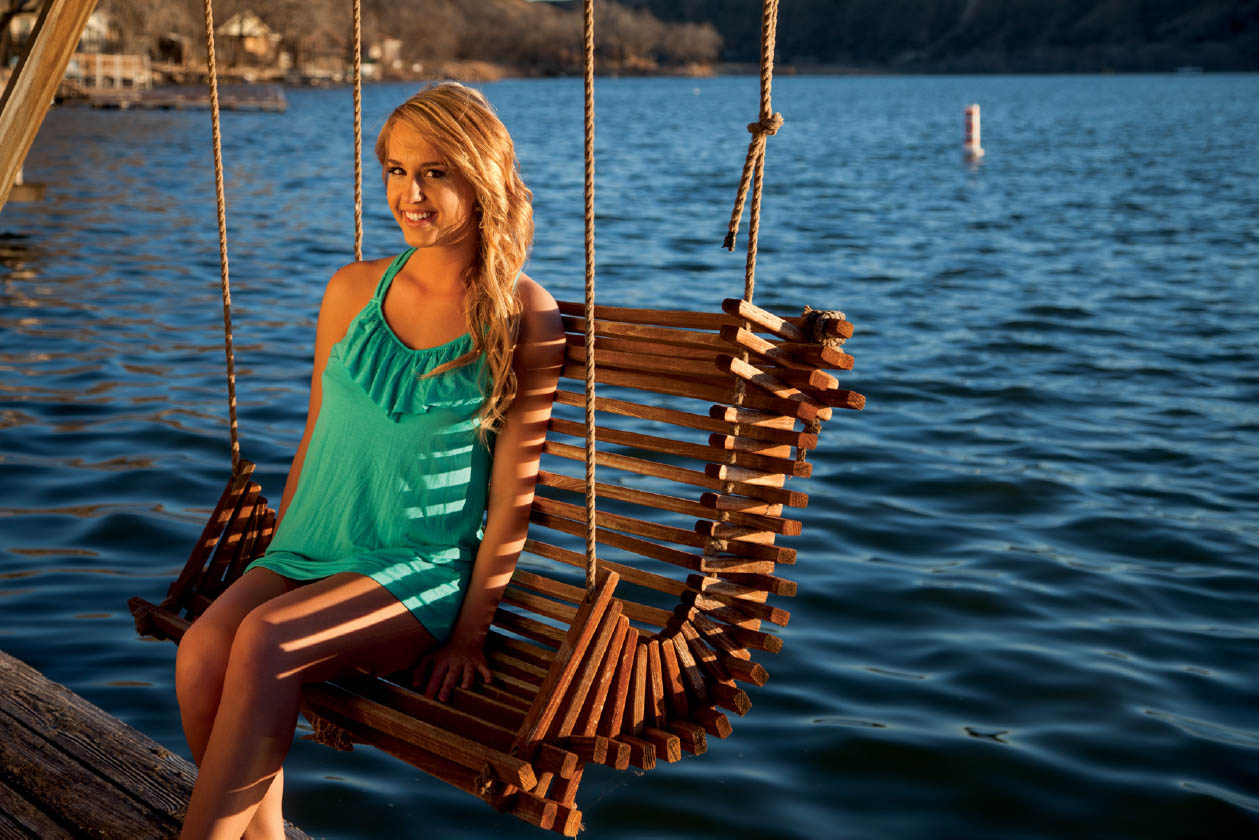
9.5 For this image, I used a custom white balance slightly higher than daylight white balance to add a hint of warmth, further conveying the mood set by the golden hour light. Additionally, I used a warmer reflector to bounce back sunlight into the model from camera left.
ISO 50; 1/125 sec.; f/4.5; 58mm

9.6 Using tungsten or incandescent white balance for natural light portraits is often done to create an image with more blue tones. Trying to convey sadness or loneliness? Cool off your white balance.
ISO 200; 1/25 sec.; f/4; 105mm