
27. CROSSING THE DESERT
![]()
I WAS SO excited to be able to squeeze in a day trip to White Sands National Monument during my solo travel project, America by Rail. I left El Paso early that morning, picked up my friend Mark in Las Cruces, and we continued on to White Sands, arriving around lunchtime. Our first stop was the visitor’s center to get some maps and information about the park. I chatted briefly with a park ranger who, seeing the camera on my shoulder, very pleasantly informed me that I was visiting at the wrong time of day. “You won’t get any good shots,” she insisted, “the light is too bright. It’s all wrong for photography. Come back at sunset.”
My first inclination was to trust her at her word. I wanted to kick myself. I had researched this trip like crazy but the only way I could fit White Sands into my itinerary was to visit in the midday sun. I left the visitor’s center deflated as we drove further into the park toward the iconic white dunes. Never one to give up without a fight, I grabbed my gear and decided to go for it and do my best with the time I had there.
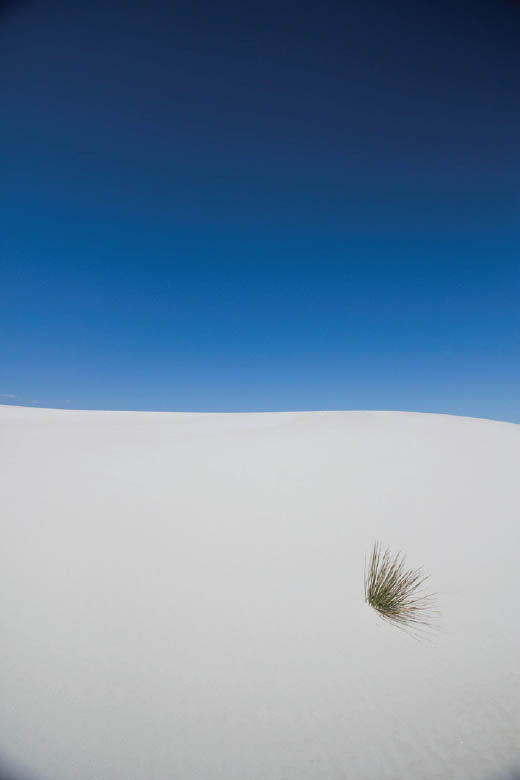
27.1 My absolute favorite photo from White Sands was taken at “the wrong time of day.” White Sands National Monument, New Mexico
ISO 160; 1/3200 sec.; f/4.5; 10mm
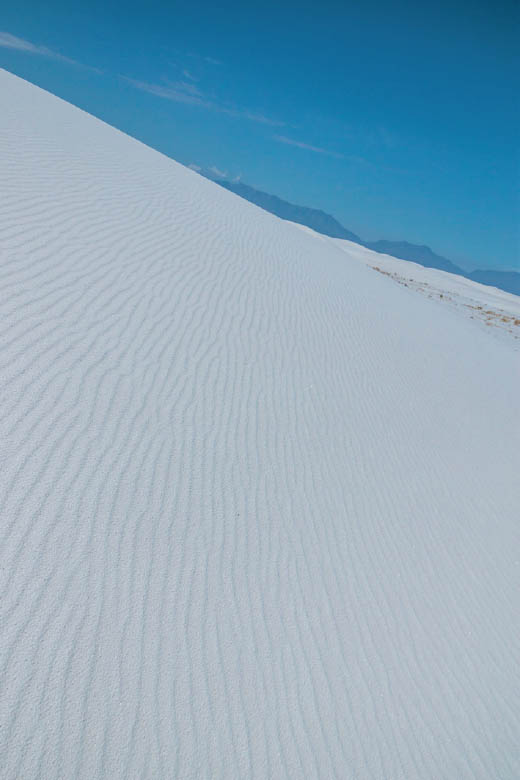
27.2 I’m glad I didn’t listen to the curmudgeon at the ranger station. White Sands National Monument, New Mexico
ISO 160; 1/5000 sec.; f/4.5; 10mm
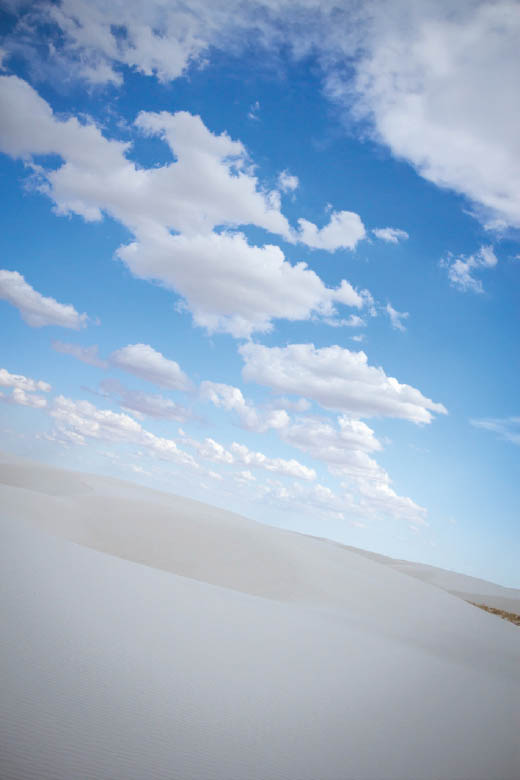
27.3 Taken during the “right time of day,” this shot is certainly cool, but not my favorite. White Sands National Monument, New Mexico
ISO 160; 1/1600 sec.; f/4.5; 22mm
I opted for a circular polarizer to help cut the strong reflections off the white sand and bring some color and contrast back into the landscape. After the first few minutes spent getting my settings dialed in, I came to realize that the park ranger was a monumental moron. Was the light harsh? Certainly. Did that preclude all photographic opportunities? Certainly not! Shooting with the sun directly overhead had its challenges, but it also reduced the landscape to more dramatic blocks of color, shape, and form (Figures 27.1 and 27.2). It was totally possible to create beautiful images under those conditions. In fact, when I rearranged some plans so that we could stay at the park through sunset, I found that I preferred shooting that landscape in the midday sun (Figure 27.3).
Deserts are full of challenges, but there’s no right or wrong way or time of day to photograph them. Explore and attune yourself to the landscape and you’ll find all kinds of photographic opportunities. More importantly, don’t let the haters get you down.
Gear Selection
As you approach photographing the desert, you’ll find that many of the same principles of shooting on the beach or in the snow apply. At midday, the sun will be harsh and reflective on any color of sand. As I just mentioned, my circular polarizer was indispensable for cutting through the glare and reflected light (Figure 27.4), but a graduated neutral density filter could also be very helpful—with one slight adjustment. Instead of placing the shaded portion of the filter above the horizon to darken the sky, try turning the filter 180 degrees to darken the bright sand. Depending on where the sun is in relation to your camera, you may want to experiment with stacking both filters to get the benefits of each. Just keep in mind that you will have to compensate toward overexposure with stacked filters, and some obvious vignetting will occur in the corners of your frame. You can counteract the vignetting by zooming in slightly (with a variable lens) or in post-processing.
Any lens can be used with great success in the desert, whether you shoot wide to capture the full scene or zoom in to focus on details (Figure 27.5).
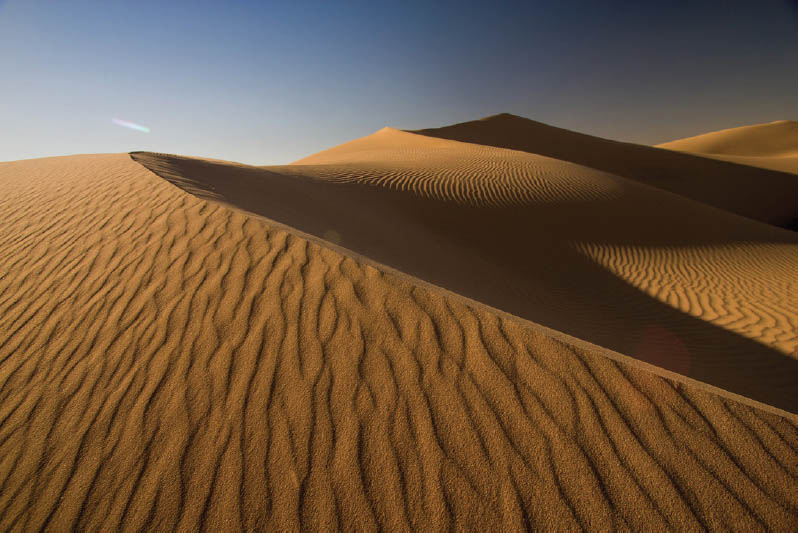
27.4 To get the intense colors and strong contrast in such a reflective setting, I relied on my circular polarizer. The angle of the sun caused some exaggerated color in the sky, which I adjusted in Lightroom. Imperial Sand Dunes, Niland, California
ISO 100; 1/250 sec.; f/6.3; 10mm
27.5 Details in the sandstone. Park Avenue Hiking Trail, Arches National Park, Moab, Utah
ISO 2000; 1/125 sec.; f/11; 30mm
Just remember that sand is your camera’s nemesis, so if you do change lenses in the field, be sure to do so carefully and quickly inside your bag.
Heat is likely to be an issue as well. Keep in mind that direct sun on your camera can lead to overheating and increased noise in your images. Leave the lens cap on and drape a lightly colored cloth or microfiber towel over the camera between shots to be safe. If you use a tripod, try to keep the legs fully extended until you’re in a less sandy area. Brush them off carefully before collapsing the tripod to avoid trapping sand in the joints.
Special Considerations
Even the slightest breeze can cause the sand to blow and the dunes to change shape. I visited California’s Imperial Sand Dunes on a very windy day and was totally enchanted with the way the way grains of sand caught the light as they blew from the crests of the dunes. I was determined to capture this effect in a still photograph, which I quickly discovered is not so easy. Unless you have a lot of movement from the wind (think sandstorm), a longer exposure will blur out the small wisps of movement and they won’t show up clearly in the image.
Instead of showing the motion with shutter speed, I positioned myself with the sun at my side so that the sand was blowing from a brightly lit crest of sand dune across the shadowy side of the dune (Figure 27.6). The strong sidelight caught the wisps of blowing sand, and they became more visible in contrast against the shadows below them.
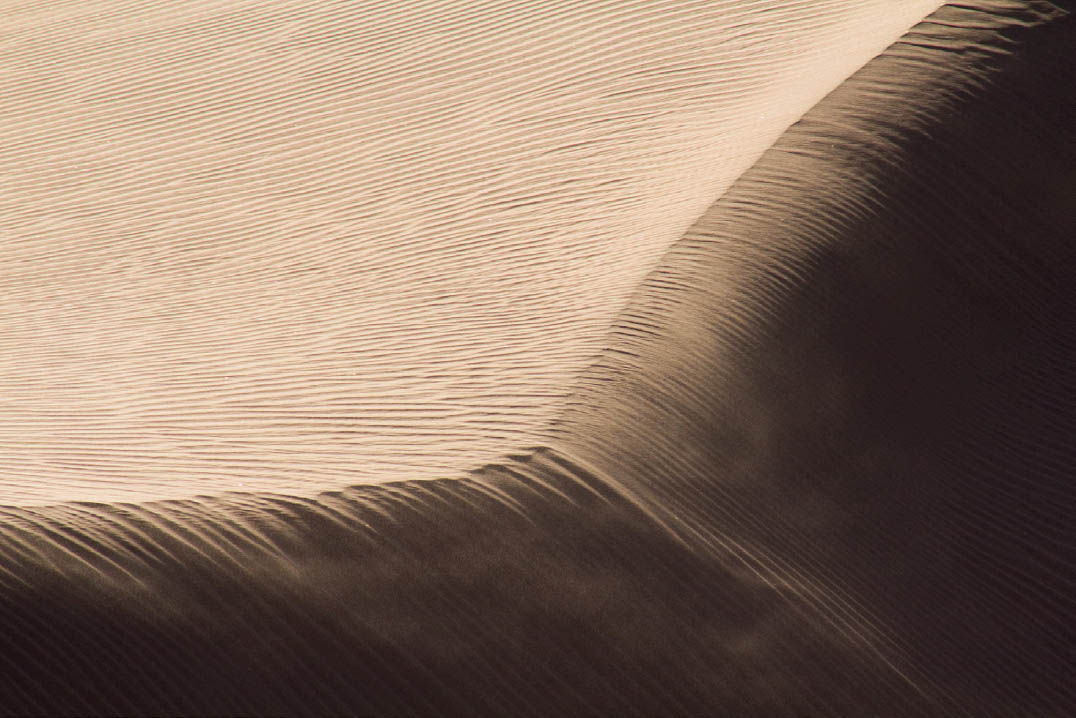
27.6 Imperial Sand Dunes, Niland, California
ISO 100; 1/160 sec.; f/14; 300mm
Heat Distortion
Heat distortion, which occurs when heated air rising from a hot surface meets the cooler ambient air, can wreak havoc on your photograph’s clarity and your camera’s ability to autofocus. The farther you are away from your subject, the more pronounced the heat distortion will be because you are literally shooting through more waves of hot air. If you’re shooting in the desert or another hot landscape and are having issues with image sharpness, heat distortion is the likely culprit. Try shooting earlier in the day when the surface of the road or ground is much cooler or move closer to your subject. Unless you like the exaggerated look of wavy vertical lines and soft focus, avoid shooting across hot surfaces like roads or the hood of your car whenever you can.
Strong sidelight is beautiful in the desert. It clearly defines the shapes of the dunes, patterns in the sand, and shadows from any scrubby trees or cacti. For that reason, golden hour is an ideal time to shoot in the desert, but with some creativity, you can make beautiful photographs in full sun. When shooting with the sun overhead, try shooting from a lower perspective toward the sun. Compose images of cacti with strong backlight to catch a fringe of light through the spines (Figure 27.7). Deliberately work lens flare into your shot to evoke a sense of heat and brightness (Figure 27.8). Want to push the sense of heat even farther? Shoot along a hot road or across a hot desert landscape with a telephoto lens and you’ll definitely capture some great atmospheric heat distortion.
Long stretches of deserted desert roads are great to photograph in full sun (Figure 27.9). Use a polarizer to cut the reflection off the hot asphalt and take the rare opportunity to stand in the middle of the road. Just keep an eye and ear out for traffic, use a spotter if possible, and please don’t get smashed because it would ruin your photograph.
Share Your Best Desert Photo!
Once you’ve captured your best image featuring the desert landscape, share it with the Enthusiast’s Guide community! Follow @EnthusiastsGuides and post your image to Instagram with the hashtag #EGDesertTravel. Don’t forget that you can also search that same hashtag to view all the posts and be inspired by what others are shooting.
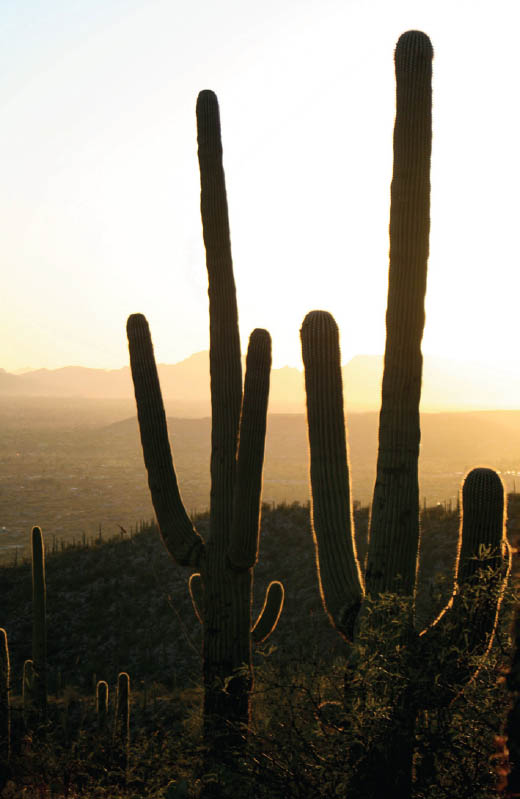
27.7 Saguaro National Park, Tucson, Arizona
ISO 100; 1/250 sec.; f/6.3; 10mm
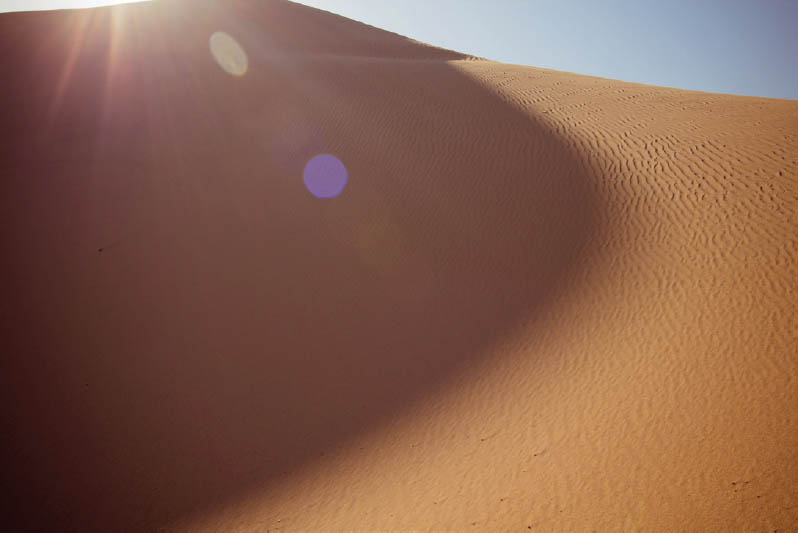
27.8 Imperial Sand Dunes, Niland, California
ISO 100; 1/200 sec.; f/6.3; 22mm
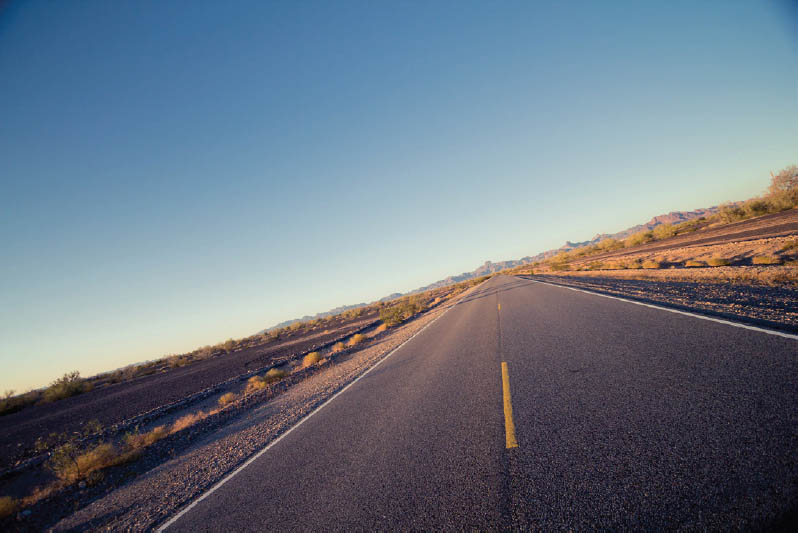
27.9 Kofa National Wildlife Refuge, Yuma, Arizona
ISO 100; 1/400 sec.; f/3.5; 10mm
Intentional Composition
If you crave gorgeous negative space, then the desert is the place for you. The desert’s lack of water often means an inherent lack of clouds, so the skies will be wide open for silhouettes, stark contrasts, and clear, blue negative space (Figure 27.10). Even if the focus of your image isn’t the negative space, the smooth openness of the sky will serve as a nice contrast against heavily textured sand dunes or a landscape filled with scrubby brush.
Pay careful attention to the details so you can use them to your advantage and avoid any potential pitfalls. For example, footprints show up just as clearly in sand dunes as they do in the snow. Think about your photographic ambitions at a site before you go tromping around marring an untouched surface. Stay off the most dramatic sand dunes so they remain intact for your shots (Figure 27.11). Though human footprints can look sloppy in an image, I always search the ground around me for signs of other visitors on a smaller scale—lizards and snakes leave very uniquely patterned tracks that can make a really interesting abstract shot (Figure 27.12).
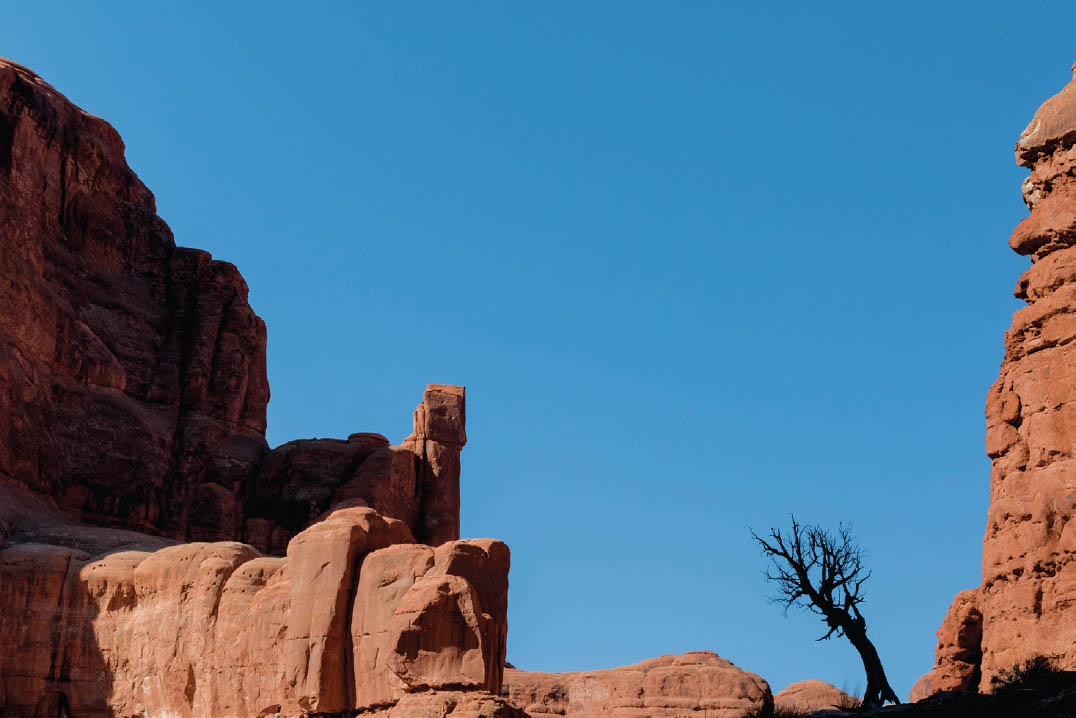
27.10 Park Avenue Hiking Trail, Arches National Park, Moab, Utah
ISO 400; 1/160 sec.; f/13; 53mm
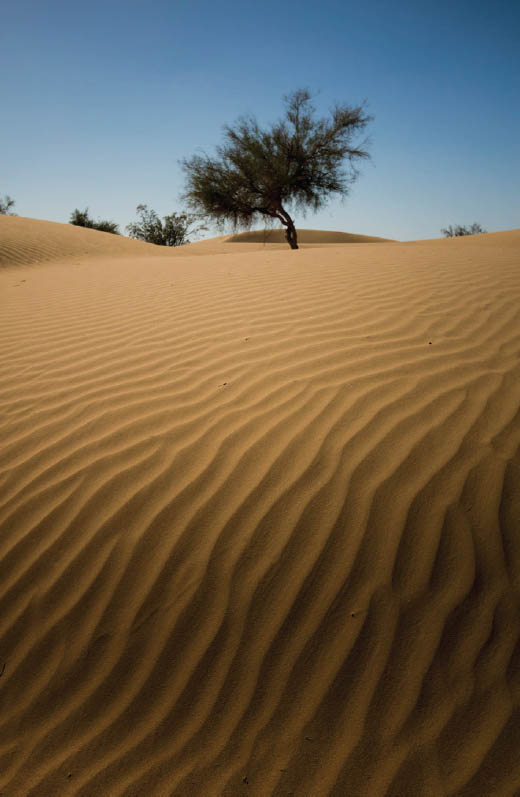
27.11 Behold, the glorious lack of footprints. Imperial Sand Dunes, Niland, California
ISO 400; 1/4000 sec.; f/4.5; 18mm
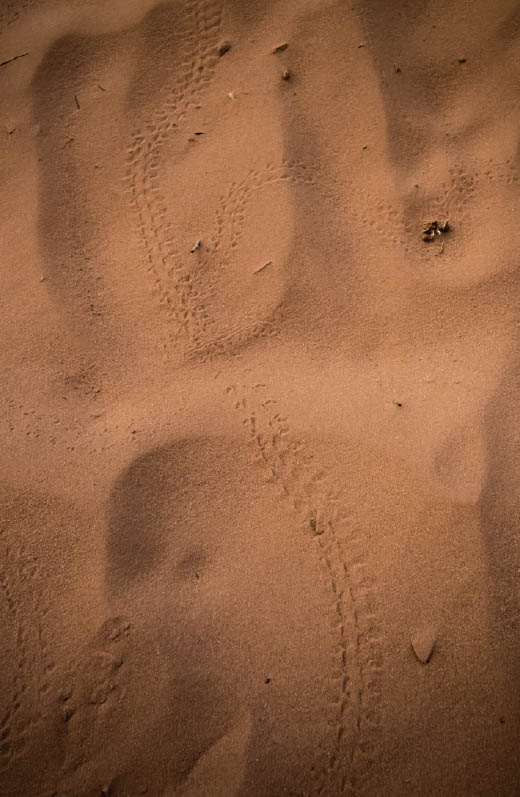
27.12 Mystery critter prints. Arches National Park, Moab, Utah
ISO 1600; 1/160 sec.; f/13; 22mm
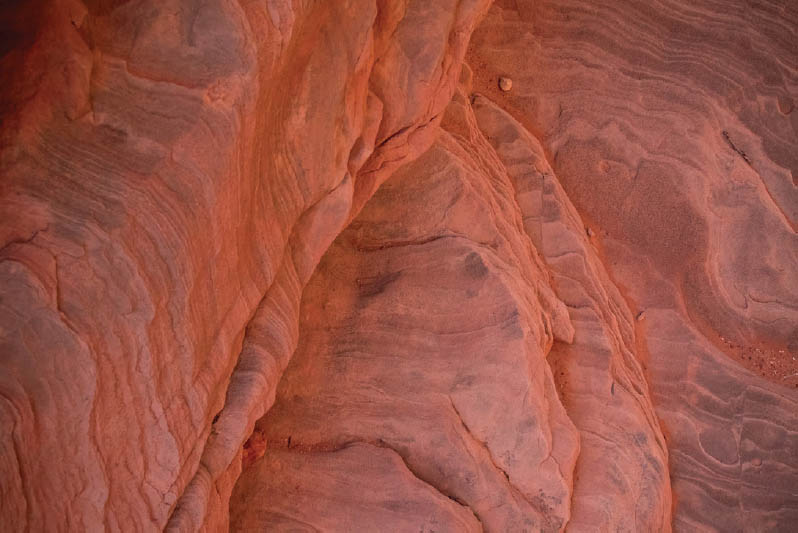
Other details to consider are the ripples in the sand and strata in rock around you. These can serve as wonderful leading lines (Figure 27.13) or as the subjects themselves (Figures 27.14 and 27.15). The cracked earth of a dried riverbed provides a totally different kind of desert texture opportunity (Figure 27.16). Keep your eyes open for the millions of small components that make up the scene, and your collection of images will be more representative of the full desert experience.
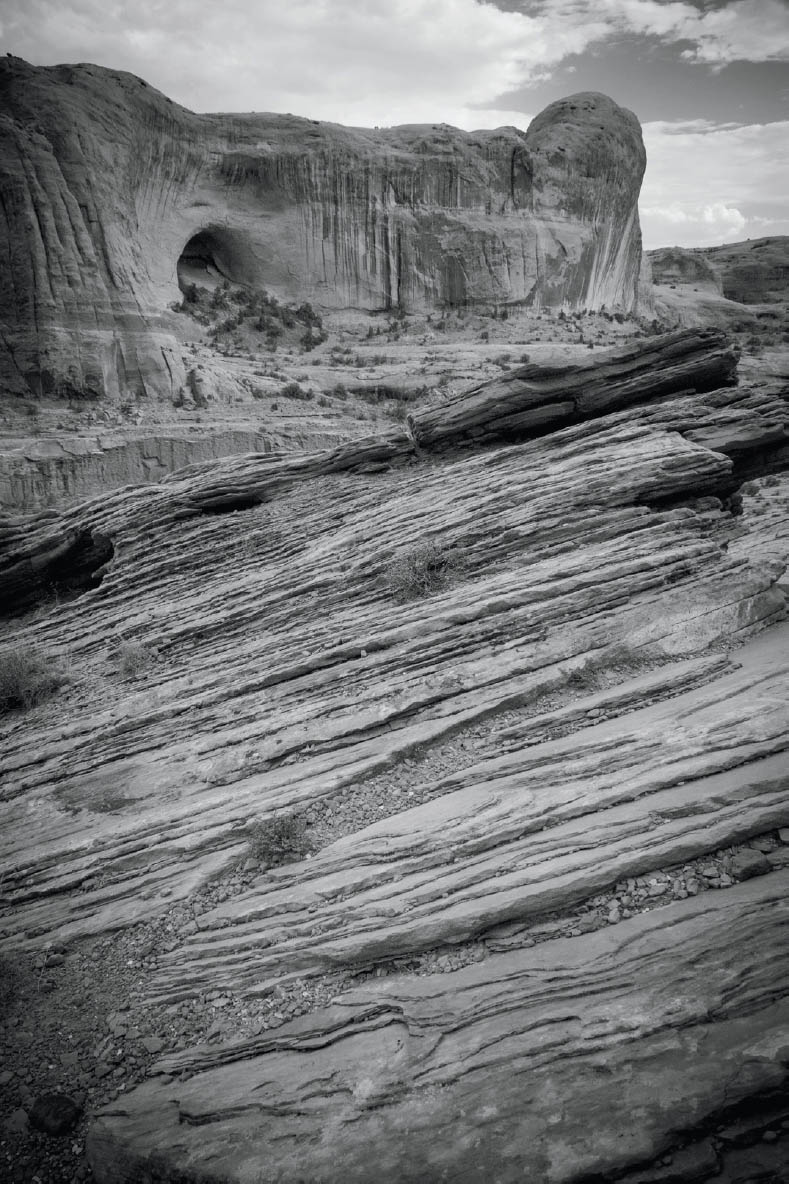
27.13 Sandstone strata. Corona Arch, Moab, Arizona
ISO 1250; 1/160 sec.; f/13; 18mm
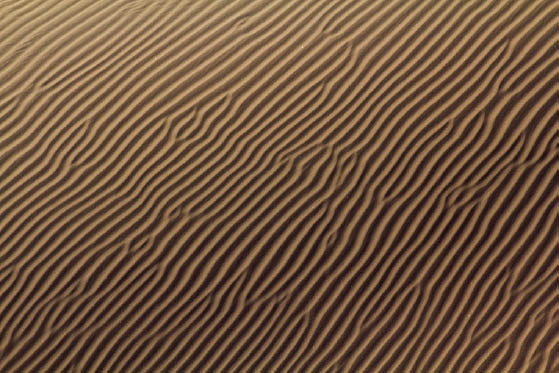
27.14 Imperial Sand Dunes, Niland, California
ISO 100; 1/100 sec.; f/14; 300mm

27.15 White Sands National Monument, New Mexico
ISO 160; 1/5000 sec.; f/4.5; 18mm
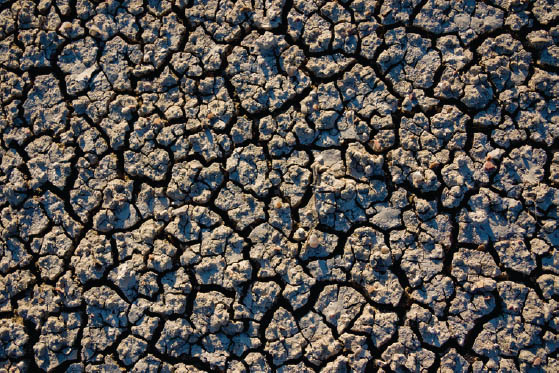
27.16 Badlands National Park, South Dakota
ISO 125; 1/400 sec.; f/5.6; 30mm