25. BY THE SEA
![]()
WHO DOESN’T LOVE a good seascape? It doesn’t matter if I’m shooting palm trees and pelicans or snow on the sand, I think a water view is pretty hard to beat. By the sea you’ll find amazing details, abundant patterns, beautiful light, and a constantly shifting landscape—a photographer’s dream! Don’t be daunted by the practical woes of potential sea spray, blinding reflections, and sand in places that should ideally remain sandless. Your efforts will be rewarded with some of travel photography’s most popular subject matter!
Gear Selection
Your first impulse upon arriving at a beautiful beachy vista may be to grab your widest lens and shoot the full expanse. The trouble is, without some fantastic atmospheric conditions or total solitude, the wide shot is the easy shot—the low-hanging fruit. Add to that the potential beach debris in the form of speedoed sunbathers (see additional low-hanging fruit) and you may have some serious Photoshopping in your future.
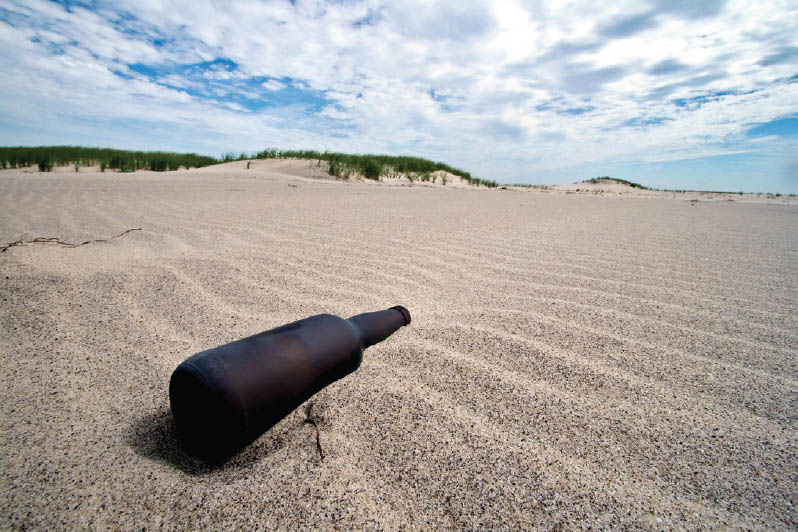
Before you fall into the more obvious vista captures, consider cropping in tighter to isolate smaller elements and scenes that reflect the depth and height of the view rather than just the width of it (Figure 25.1). Some of my favorite beach shots utilize a narrow and vertical orientation to better frame the available environmental elements (Figure 25.2). Practice narrowing your focus to be more selective and see what other photographers might not see. Explore the shells or the sand at your feet with a macro or zoom lens (Figure 25.3). Shoot the froth of the breaking waves or the shadows of the trees (Figures 25.4 and 25.5). Break the scene down into a series of smaller images that work together to tell a bigger story.

25.1 Mahoe Bay, Virgin Gorda, British Virgin Islands
ISO 100; 1/4000 sec.; f/3.5; 10mm

25.2 Spring Bay, Virgin Gorda, British Virgin Islands
ISO 400; 1/400 sec.; f/11; 85mm
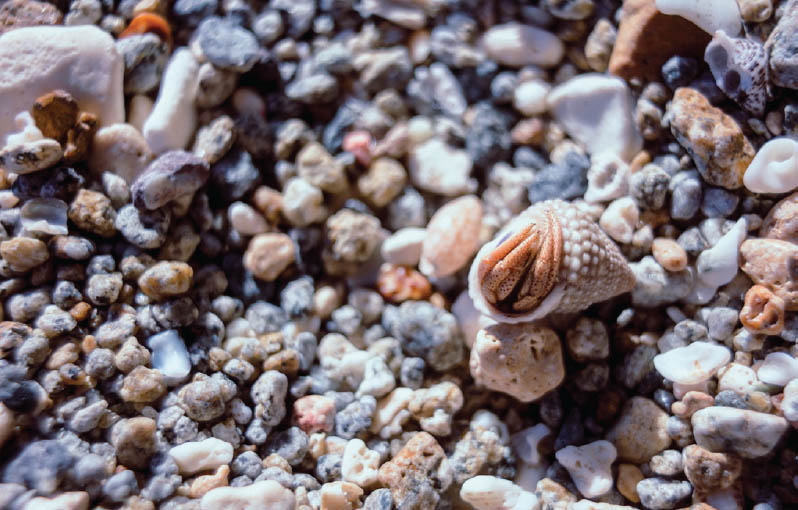
25.3 Nail Bay, Virgin Gorda, British Virgin Islands
ISO 160; 1/1000 sec.; f/3.5; 50mm

25.4 Dennis, Massachusetts
ISO 800; 1/800 sec.; f/10; 300mm

25.5 Nail Bay, Virgin Gorda, British Virgin Islands
ISO 160; 1/640 sec.; f/1.8; 50mm
Afterward, if you do decide to go wide, you’ll have more ability to do so with deliberate intention—to hone in on a more refined shot. When shooting the full wide-angle scene, make sure to engage with elements in the foreground (Figure 25.6) or shoot along the water line (Figure 25.7) to keep your photos from feeling like monotonous bands of sand, water, and sky.
Special Considerations
With the possible exception of a snowscape, there is no landscape more reflective and challenging than a bright, sunny beach. Light-colored sand and plenty of shiny water throw all kinds of glare at you and will likely trick your camera into underexposing your photos. Even if you use exposure compensation (deliberately overexposing to achieve what amounts to proper exposure), your camera is unlikely to be able to capture the full dynamic range of the highlights and the shadows.
Fortunately, you have a couple of options to help capture what your eyes see. If you want to go the fully automated route, you can use the Auto Lighting Optimizer (Canon) or Active D Lighting (Nikon) to help capture a greater dynamic range in camera. The results aren’t perfect—these settings basically push the highlights and the shadows more toward the middle tones—and will still require some adjustment in post-processing. For more complete exposure control and even more post-processing work, you can bracket shots and crank out an HDR photo later on. Or you can choose my somewhat snobby, purist preference and capture the correct exposure in camera by using filters.
At the beach my two favorite accessories are a circular polarizer and a graduated neutral density filter. Your polarizing filter will help cut glare by reducing reflections on atmospheric haze, allow you to get truer color from the water, and pop your skies like no one’s business (Figure 25.8).
25.6 Monomoy Island, Massachusetts
ISO 400; 1/800 sec.; f/16; 10mm

25.7 San Juan del Sur, Nicaragua
ISO 200; 1/160 sec.; f/4.5; 18mm

25.8 Mango Bay Resort, Virgin Gorda, British Virgin Islands
ISO 320; 1/640 sec.; f/5; 10mm

25.9 An example of poor usage of a polarizer—also, a super odd composition. Forgive me, I was young. Cape Cod National Seashore, Massachusetts
ISO 200; 1/500 sec.; f/5; 10mm
During harsh midday sun, a polarizer will allow you to photograph the tidal pools that are often teeming with life by cutting through the reflections and revealing all the crazy critters within.
Be aware, however, that a polarizing filter is not magic. There are caveats. For example, you shouldn’t use your polarizer with abandon when the sun is low in the sky or you will get weirdly dark patches of sky from many angles (Figure 25.9). You also will need to compensate in the direction of overexposing your images because a polarizing filter does cut the amount of light that reaches the sensor. If you buy a cheap polarizer, your image clarity may suffer from increased lens flare and ghosting. You wouldn’t wear Crocs with a tuxedo, so don’t combine good glass with bad filters.
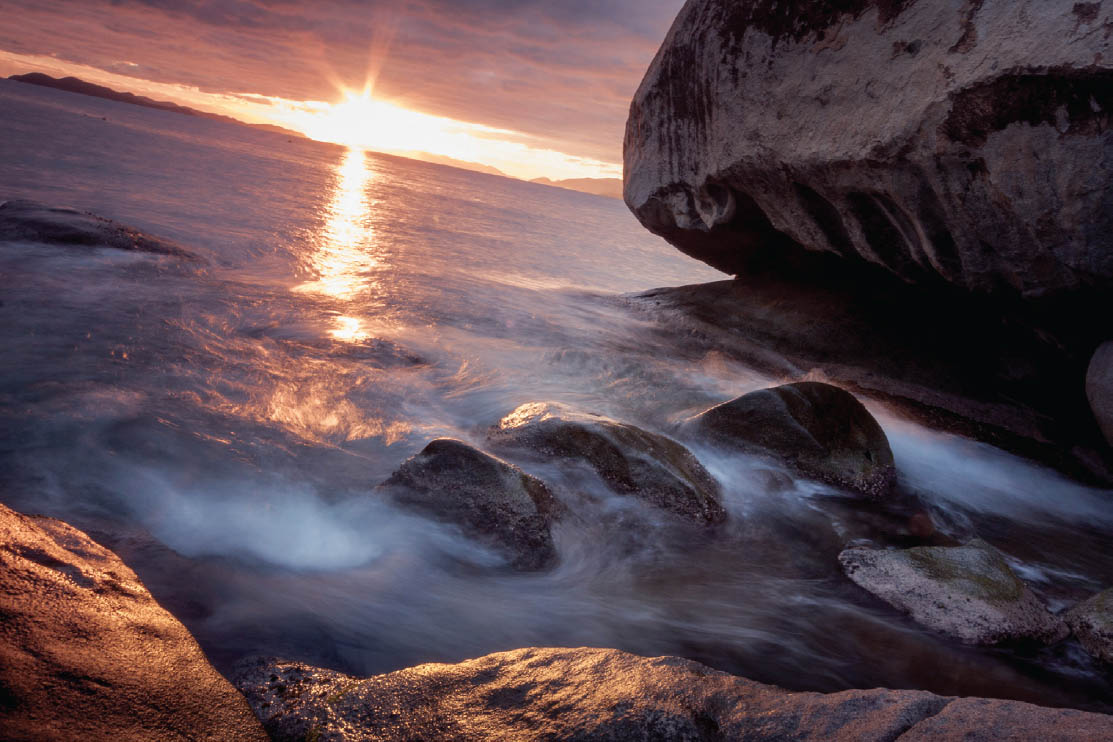
Sunset is my favorite time of day at the beach—especially if you’re facing west—the colors in the sky come alive and the water can reflect the colors beautifully. At sunset I always rely on my graduated neutral density filters. They are amazingly helpful at balancing the differences in brightness above and below the horizon. If you find yourself struggling to get those rich, sexy sunset colors in the sky without totally losing the detail to darkness on land or on the water, then do yourself a favor and experiment with a graduated neutral density filter (Figure 25.10). Game changer.

25.10 Mahoe Bay, Virgin Gorda, British Virgin Islands
ISO 500; 1/100 sec.; f/7.1; 17mm
Intentional Composition
Because so much of my travel photography has been beach-centric, I am always searching for new ways to create unique, impactful images. Once you’ve exhausted the details and classic wide shots from the shoreline, experiment with different perspectives.
I love the opportunity to wade into the water (keep an eye on the approaching waves lest you drown your gear) to shoot from a low angle across the water for a foreground filled with color, pattern, and reflection (Figure 25.11). Shooting from a boat can also achieve this perspective with the added difficulty of constant movement from sitting on top of the waves. When you’re shooting from a boat, the longer your lens, the more your composition will be affected by the motion from each wave. If you’re shooting over 50mm, use faster shutter speeds and try to anticipate the motion as you shoot (Figure 25.12).
When shooting from the shore, take advantage of the constant movement of the tides. Play with long shutter speeds to blur the waves for a sense of tranquility, or short ones to freeze the crashing waves and sea spray into an image that embodies power.
Unless you’re shooting in a chain of islands, many coastal scenes will feature a fairly flat, smooth horizon. Shake things up a bit—put the horizon at the very top of your frame, or, if you have dramatic skies, at the very bottom (Figure 25.13). It’s a big misconception that the horizon has to be horizontal in your photos. When carefully composed, an angled horizon can help draw the viewer through the frame (Figure 25.14). Push yourself to experiment and explore—your photographs will be stronger for the effort.

25.11 Nail Bay, Virgin Gorda, British Virgin Islands
ISO 100; 1/250 sec.; f/4; 75mm

25.12 Timing is everything when I photograph from a fast ferry in Sir Francis Drake Channel, British Virgin Islands.
ISO 125; 1/6400 sec.; f/5; 150mm

25.13 Sunset from Virgin Gorda, British Virgin Islands
ISO 160; 1/1600 sec.; f/4.5; 28mm
25.14 Spring Bay, Virgin Gorda, British Virgin Islands
ISO 100; 1.6 sec.; f/22; 17mm