30. TEXTURES AND PATTERNS
![]()
LOOK AT A photograph with an interesting texture and it might give you the impulse to touch it. Examine a photograph filled with pattern, and your brain may start to extrapolate that pattern or perceive movement in it. Both sensations are common and heighten the connection between photograph and viewer. We have an innate level of comfort with what we can touch and visually understand, so images with texture and pattern draw us in and make us pay attention.
Photographically, textures and patterns are one and the same. If I asked you to think of a distinct pattern, you might imagine plaid, checkerboard, or paisley. If I then asked you to think of a distinct texture, you might imagine sandpaper, tree bark, or velvet. You can imagine not only how each of those textures look, but how they would feel under your fingers because you’ve probably touched them before. Yet in a photograph, texture is relegated to a single flat dimension. You wouldn’t touch a photo of velvet and expect it to feel like velvet. You expect it to feel like a sheet of paper or the screen of your computer. Because of that lack of dimensionality, you can expect to photograph textures and patterns in much the same way—the only variations exist in scale and regularity. To that end, I would suggest that we move forward referring to textures and patterns as the combined term “pattexturns” (I just came up with that right now), but that feels a little ridiculous so I’m going to refer to them simply as Patterns (with a capital P) and you’ll know I mean both.
Regardless of where your journeys take you, you’ll find that Patterns are universal. They appear throughout history, across cultures, in religious and secular art, in the natural, and in the man-made. By building photographs around Patterns as the subject, you’ll add a new depth to your travel photography and engage your viewer in a new way.
The Ideal Lens
When photographing Patterns, gear is probably the least important part of the equation. Patterns as a subject won’t dictate what lens to use—instead you’ll find yourself choosing a lens based on the scale of that particular Pattern. If you wanted to photograph the Pattern of sandpaper, you’d need to use a macro lens or even a microscope to draw out the dimensionality of the grain. If you wanted to photograph the Pattern of a dry riverbed, you could use any lens from a wide angle to a telephoto depending on the scale you were trying to show (Figure 30.1).
If you wanted to photograph the Pattern of a mountain range, or the repeating Pattern of waves cresting across a coral formation from above (Figure 30.2), you would best isolate the landscape to the area of the Pattern with a longer focal length. Determine which lens to use by deciding what the boundaries of your frame should be to most effectively highlight the Pattern before you. Try out multiple options. See what works for you.

30.1 Toadstool Geologic Park, Harrison, Nebraska
ISO 125; 1/1600 sec.; f/7.1; 28mm
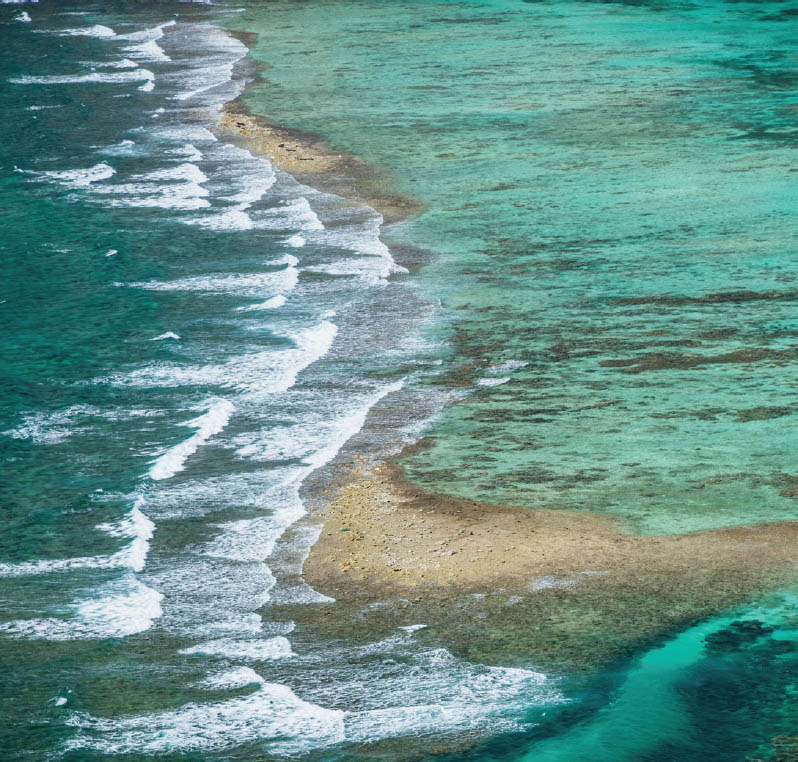
30.2 Virgin Gorda, British Virgin Islands
ISO 100; 1/250 sec.; f/5.6; 85mm
Angle and Perspective
Many times, the most obvious or comprehensive view of a Pattern is the overhead, or flat, frontal view. When photographing floor tiles, cobblestones, a brick wall, or peeling paint, you’ll get the best sense of the overall Pattern when the front of the lens is parallel to the Patterned surface (Figures 30.3 through 30.5). From this perspective, it should be relatively easy to get the full Pattern in crisp focus regardless of the aperture and resulting depth of field (DOF).
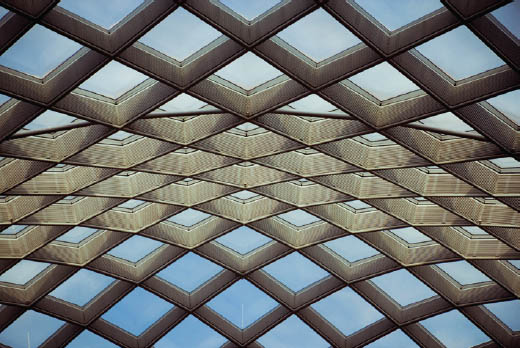
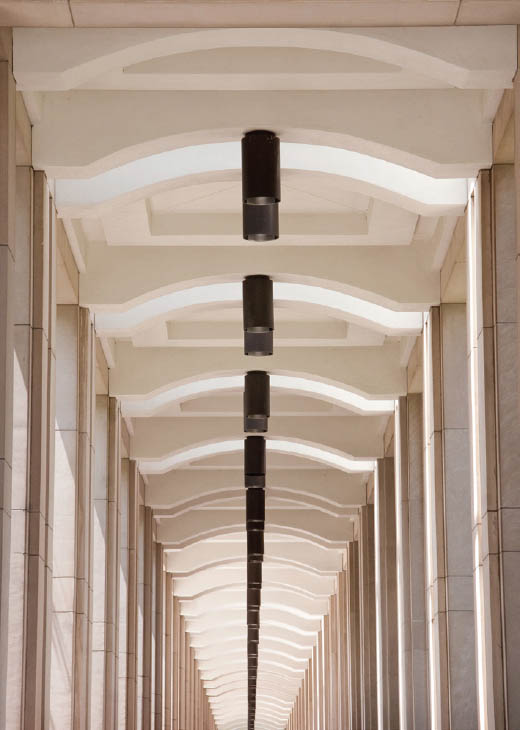
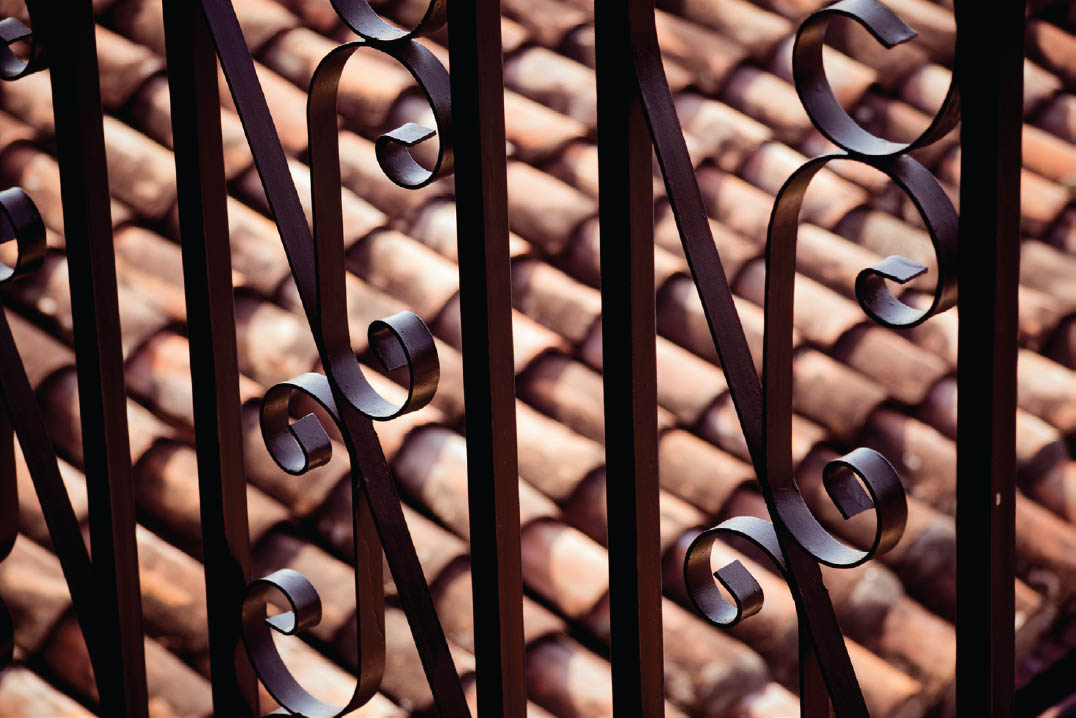
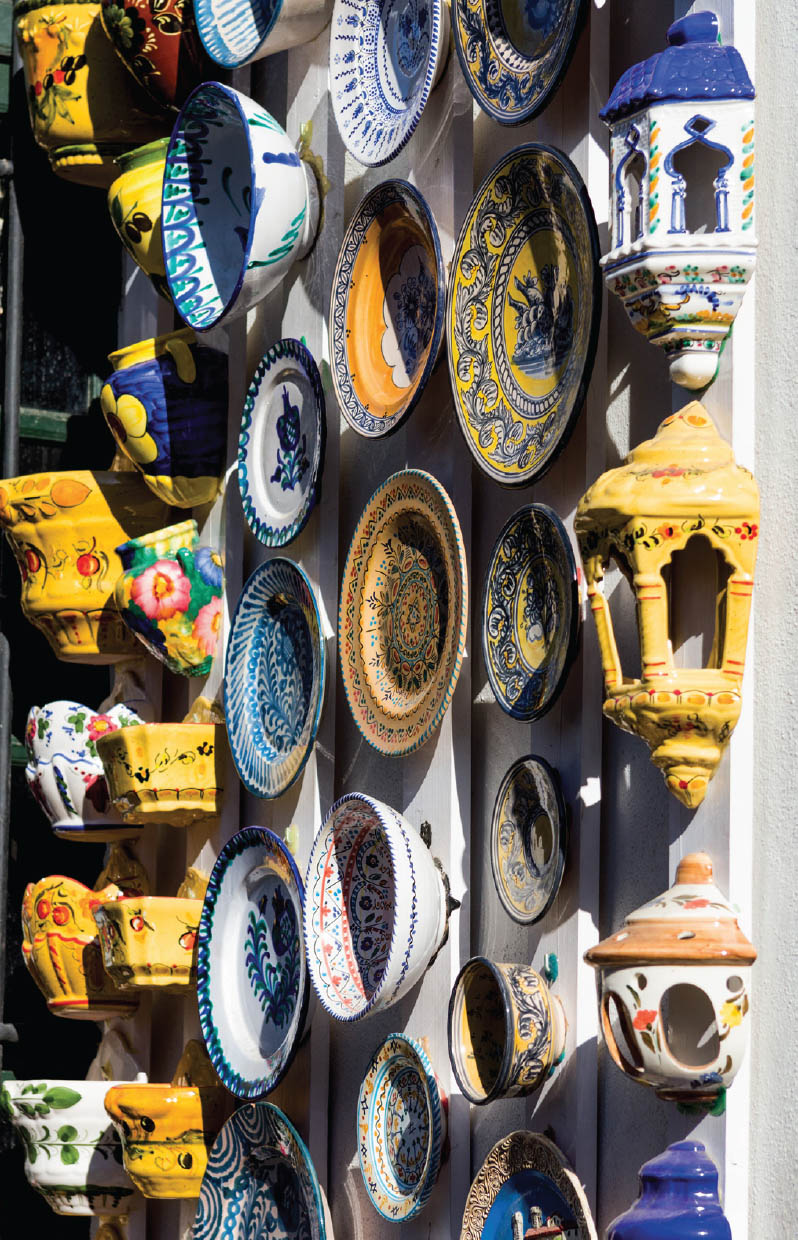
Things get considerably more interesting when you shoot a Patterned surface from an angle. Moving the front of the lens to a 45- or 90-degree angle from the surface can instantly produce a more dynamic image by creating greater perspective (Figure 30.6). Angled shots will help draw out dimensionality (Figure 30.7), a sense of endless repetition (Figure 30.8), and perspective through converging lines (Figure 30.9).
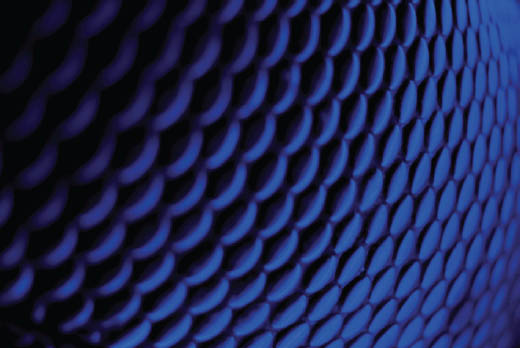
When shooting Patterns from an angle, you can either keep the full depth of the image and Pattern in focus using a narrower aperture in the range of f/8 to f/22 (Figure 30.10) or imply the continuation of Pattern through the depth of the image with a shallower depth of field by way of a wider aperture like f/1.4 or f/2.8 (Figure 30.11).
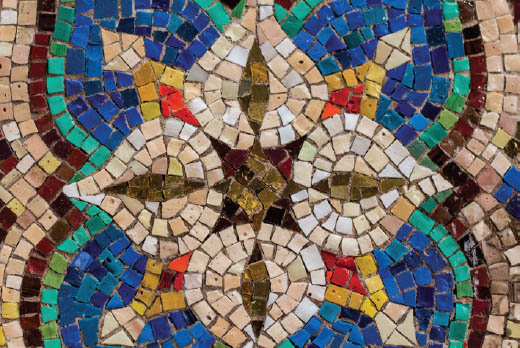
30.3 Mosaic Tiles, Temple Emanu-El, New York
ISO 640; 1/60 sec.; f/2.8; 50mm
30.4 Chicago, Illinois
ISO 400; 1/100 sec.; f/5.6; 79mm

30.5 New Orleans, Louisiana
ISO 100; 1/160 sec.; f/5; 41mm
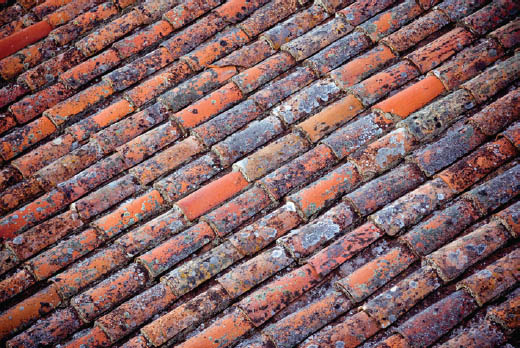
30.6 Marvao, Portugal
ISO 2000; 1/160 sec.; f/5.6; 85mm
30.7 National Portrait Gallery, Washington, DC
ISO 100; 1/125 sec.; f/5.6; 85mm
30.8 Forest Hills, New York
ISO 400; 1/60 sec.; f/1.7; 50mm
30.9 Met Breuer, New York, New York
ISO 2500; 1/125 sec.; f/7.1; 18mm
30.10 Indianapolis, Indiana
ISO 200; 1/100 sec.; f/10; 73mm
30.11 Minneapolis, Minnesota
ISO 100; 1/200 sec.; f/4.5; 22mm
Varieties of Pattern
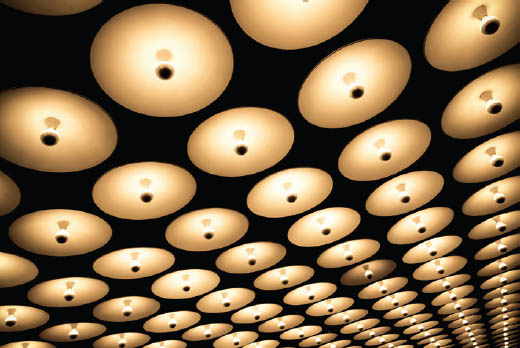
Mathematically, a Pattern is the exact replication of a value, or a formula. Patterns require rules and exactitude. In art, the concept of Pattern is much broader and encompasses three distinct categories: Repetition (one object repeated over and over), Motif (a recurrence of multiple objects or elements in a predictable order), and Rhythm (a recurrence of multiple objects or elements in a varied or unpredictable order). For artistic purposes, the key is to recognize that Repetition (Figure 30.12), Motif (Figure 30.13), and Rhythm (Figure 30.14) are equally important for creating compelling images.
Fortunately for me, the dropper of calculus and flunker of statistics, this isn’t math. We’re seeking beauty, not exactitude. Search for Repetition, Motif, and Rhythm in the world around you and you’ll certainly find beauty across any photographic genre from architecture to nature photography. Once you begin to see Pattern everywhere, experiment with interesting ways to frame and highlight it.

30.12 Santa Monica Pier, Santa Monica, California
ISO 100; 1/160 sec.; f/2.8; 50mm
30.13 Los Angeles, California
ISO 500; 1/30 sec.; f/3.5; 20mm

30.14 Michigan Avenue, Chicago, Illinois
ISO 160; 1/1000 sec.; f/3.5; 20mm
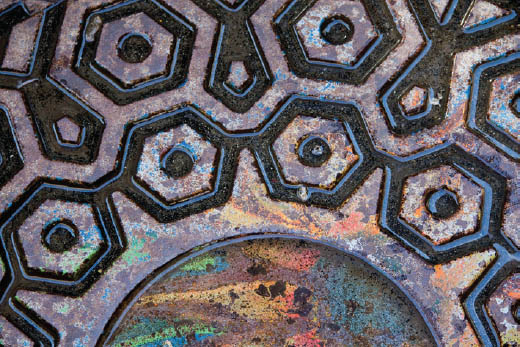
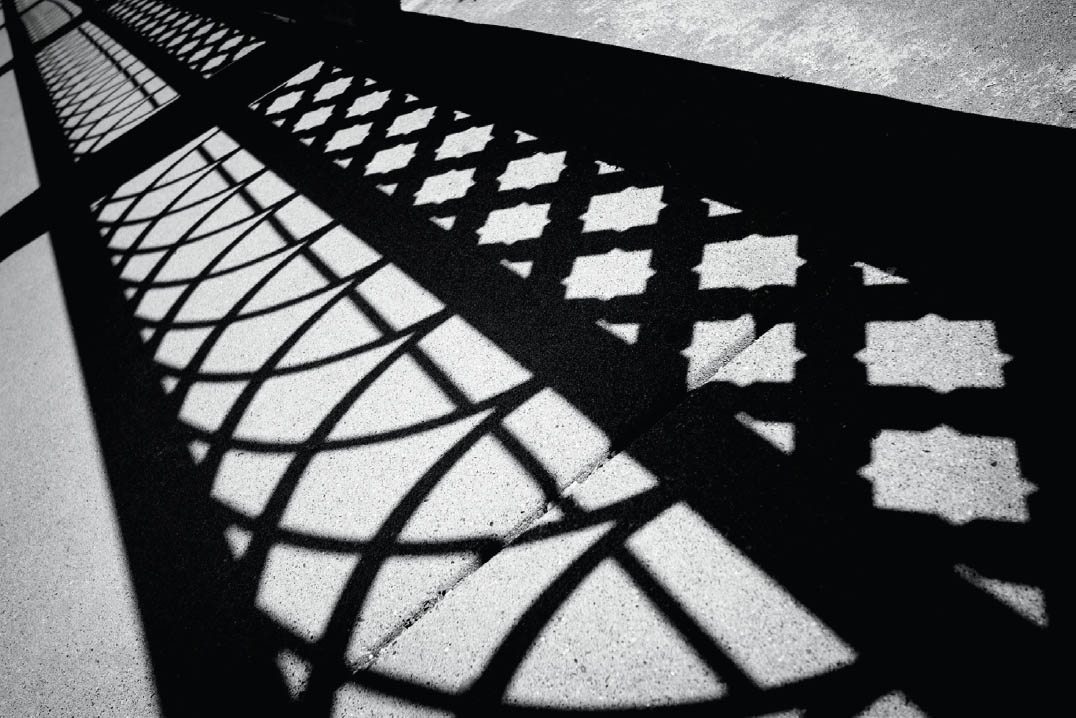
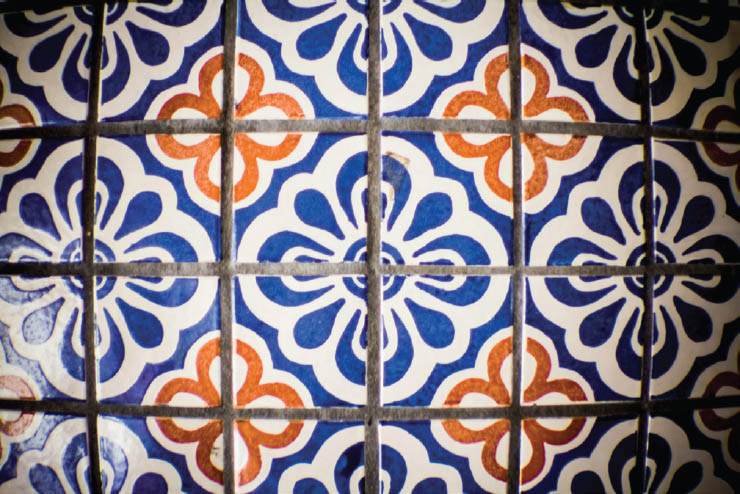
You can frame an image to highlight a break in Pattern (Figure 30.15), focus on Patterns or conflicting Patterns that seem to move, vibrate, or disorient (Figure 30.16), or utilize Pattern to create a sense of harmony or dissonance. Patterns with leading or converging lines can demonstrate to viewers how you want them to move through the image. Patterns can present a new way of looking at something that many would dismiss as ordinary (Figure 30.17). They exist in light and shadow (Figure 30.18) and often feature important cultural motifs that will help support a sense of place in your images (Figure 30.19).
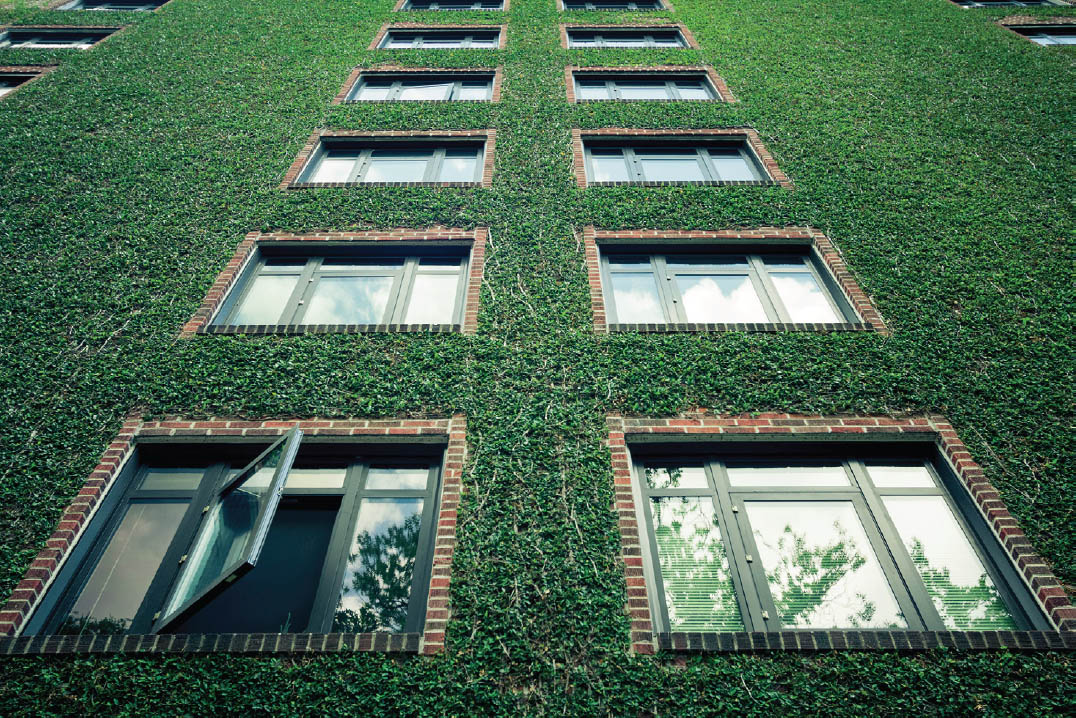
30.15 One open window breaks the repetition. New Orleans, Louisiana
ISO 400; 1/100 sec.; f/4.5; 20mm
30.16 Granada, Nicaragua
ISO 160; 1/125 sec.; f/5.6; 85mm
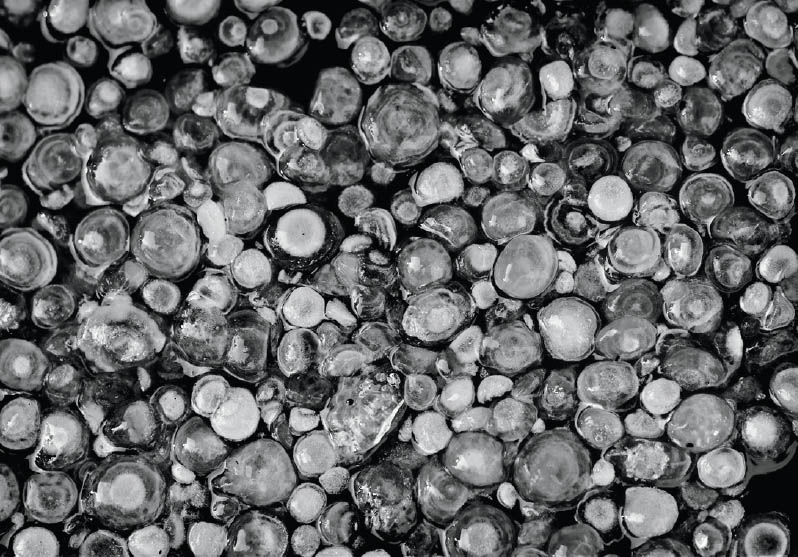
30.17 Hailstones on a glass table, Paris, Illinois
ISO 100; 1/250 sec.; f/3.5; 50mm
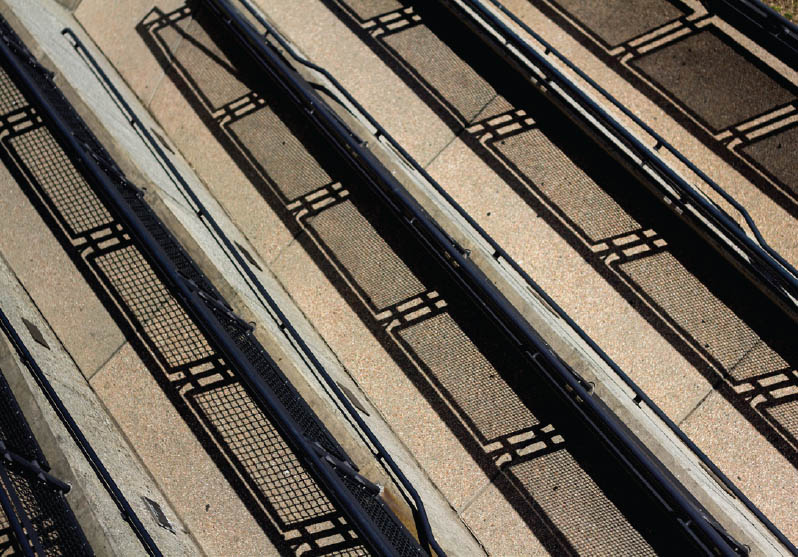
30.18 Santa Monica, California
ISO 125; 1/1600 sec.; f/7.1; 28mm
30.19 Ronda, Spain
ISO 100; 1/400 sec.; f/5.6; 85mm