52. SUCCESSFUL PROCESSING

MANY PHOTOGRAPHERS WILL spend anywhere from hours to days perfecting a single image. They’re painting in light rays, adjusting tiny wisps of color here and there, and looking at an image pixel by pixel. More power to you if you’re into that kind of thing. That’s a lot. I’m kind of a purist when it comes to photo editing. Usually the longer I look at an image, the more I manipulate it, the less I like it. If I couldn’t have done it in a darkroom, then I probably won’t do it in Lightroom.
At the end of a journey, I have so many images to review and process that I stick to more basic adjustments. I used to edit every image in Photoshop, but now that Lightroom is so powerful and user friendly, I’ll typically work entirely in Lightroom and only occasionally take a photo into Photoshop.
There is, of course, the potential of offending another photographer when you start to talk about opinions on processing. I love plenty of photography that has been heavily processed, but for most of my images, it doesn’t feel right. Above all else, I aim to keep my photos honest. Sure, I’ll clone out some trash from a beach or add a gradient layer to bring in more contrast and darken a sky, but I never swap out one sky for another. All of my editing is in pursuit of representing what that moment looked like to my eye.
That said, the obvious exception here is black-and-white conversion. I’m not colorblind, so, no, I’ve never seen the world in black and white. I like black-and-white photographs and that’s reason enough for me to veer off from reality in the occasional shot.
There’s nothing wrong with a heavier hand in post-processing. If you have found what works for you, then that’s fantastic. Go for it.
Work Those Lightroom Panels
- Basic panel (Figure 52.1): Go to town on exposure, contrast, tweaking highlights and shadows, whites and blacks, but pay attention to the subtleties. There is a real tendency to oversaturate or overcontrast to attempt to create more impact. Clarity is fine in tiny doses, but too much and things get crunchy, especially with portraits. Photographs shouldn’t have to punch you in the face to get your attention. In fact, if they do, you’re probably less likely to really explore them. Adjust as much as you want in the Basic panel, but keep it subtle.
- Tone Curve: This panel rarely comes into my processing. In Lightroom there are multiple ways to achieve the same effect and, for me, the Tone Curve panel is more of a last resort. The tiniest adjustments have big effects, so short of using this panel to make a slight S curve, I leave it alone.
- HSL/Color/B&W: I do adjust the HSL sliders for some photos. They are helpful to get more definition, or to replicate the intensity of some colors that may have been muted by your shooting settings or captured strangely in AWB. I never go beyond +/–10 on any slider. The farther you push a slider, the more likely you are to get super weird colors, crunchy borders, and weird ghosting.
If you’re still converting a photo to black-and-white by dropping saturation to zero in the Basic panel, then you need to play around with the B&W panel. You’ll get amazing specificity in your shades of gray (Figure 52.2). This panel makes it easier than ever to pull details and nuances out of your black-and-white photos.
- Split Toning: I use this panel so rarely and when I do, I barely use any saturation. Nothing will make your photographs look Instagrammy quicker than split toning. Use sparingly, then pull it back even further (Figure 52.3).
- Detail: I don’t generally sharpen, but I do use Noise Reduction as needed. Pay close attention to how the image changes as you adjust the slider. You want to use as little noise reduction as possible or the photo starts to look weirdly smooth (Figure 52.4).
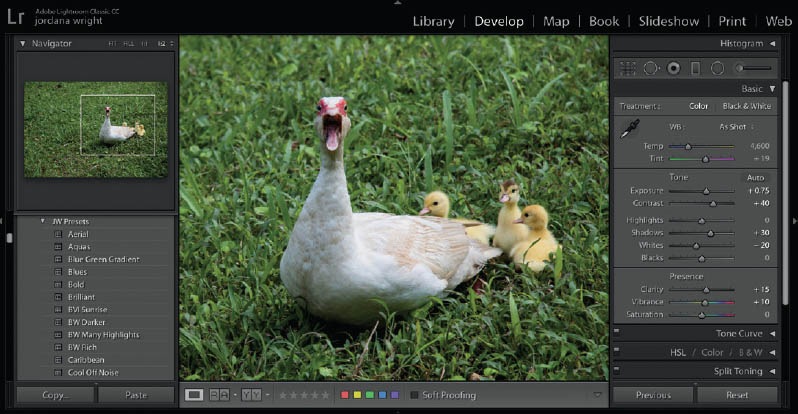
52.1 Adjustments in Lightroom’s Basic panel while I work on a photo of a furious Costa Rican duck.
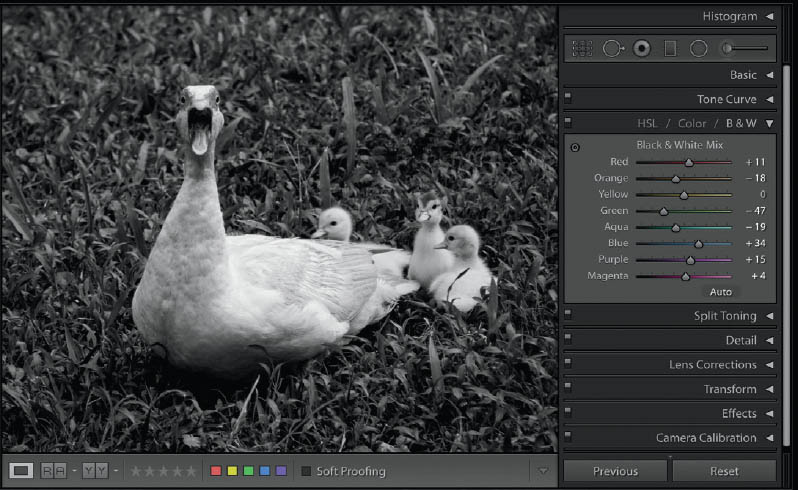
52.2 Lightroom’s B&W panel gives me so much specificity when converting my furious duck into a black-and-white image. I can change the luminance of each specific hue to craft the best possible photo.
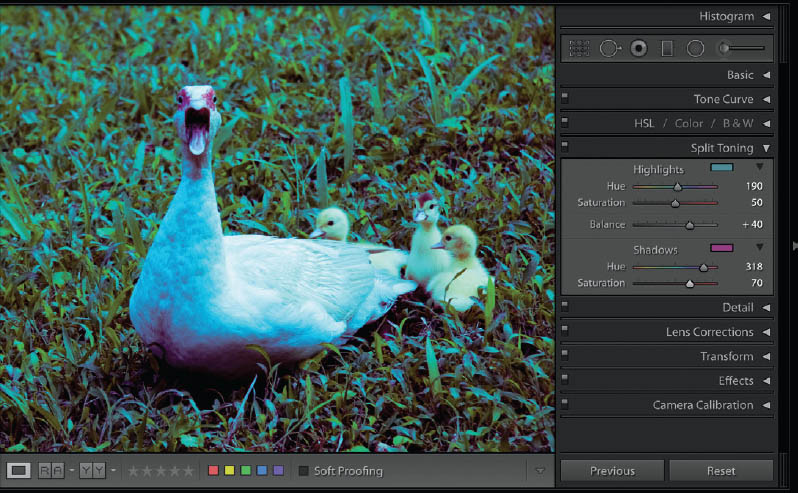
52.3 Making the furious duck infinitely more frightening using Lightroom’s Split Toning panel. This photo is now a psychedelic nightmare.
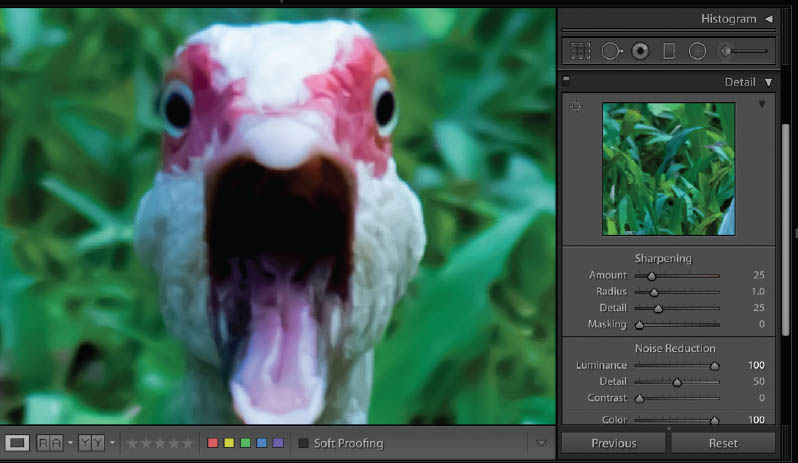
52.4 With the Noise Reduction sliders maxxed out, furious duck looks oddly cartoonish.
- Lens corrections: YES! WE LOVE THIS PANEL! Chromatic aberration is my number one pet peeve in images. When I import photos to Lightroom, I apply a preset on import and the preset both removes chromatic aberration and enables profile corrections. If you notice that your straight lines sometimes have a bit of a curve in your images, then be sure to check Enable Profile Corrections. This is a must especially with architecture photography (Figure 52.5).
- Transform: Use sparingly. When converging lines and forced perspective are an issue, this is a great tool to use. It’s also very helpful for quickly leveling your horizon. Just don’t fall down the straight line rabbit hole (Figure 52.6). Your lenses will naturally skew your angles a bit. If you’re not a commercial architecture photographer, then you don’t have to drive yourself crazy making sure every angle is perfect.
- Effects: Yeah, I’ll admit, I like a little vignette. I used to vignette the crap out of my photos in the darkroom, and I generally add a –15ish vignette to most images. A well-executed vignette will make a photo feel more polished, define the edges better, and help you focus on the subject.
Tools and Masks
- Crop & straighten: I mentioned earlier that I used to feel like it was cheating to change the crop on an image in post-processing. I placed a lot of pressure on myself to get the exact framing right in camera. Now I fully acknowledge that not every image is meant to exist in the same ratio. If your photo is going to benefit from a crop, then you should do it (Figure 52.7)!
The same goes for straightening. For the first three years of my career, every single image I took needed to be rotated by 1.5° counterclockwise. It was frustrating as hell and I think my left eye might be askew. I got tired of straightening pictures and paid more attention while shooting to level the horizon. Don’t judge yourself for your idiosyncrasies. Learn what they are and adjust accordingly.
- Spot removal: Lightroom’s Spot Removal tool is pretty epic. As someone who apparently sprinkles rocks and dirt on the front of my lens before shooting, I’m endlessly grateful for the Healing Brush when I edit my photos. If you’re worried about being able to find all of the little dust spots on an image, boost the Contrast and/or Clarity to +100. The spots will be more noticeable, and then you can put the sliders back to where you like them after all the spots are removed.
- Red-eye correction: I’ve never used this. Not once. Has anyone?
- Graduated filter: Best. Tool. Ever. Want to tone down the disproportionate brightness in the foreground? Graduated filter! Want to tweak the color temperature just in the sky? Graduated filter! I love graduated filters when I shoot and I love them when I edit.
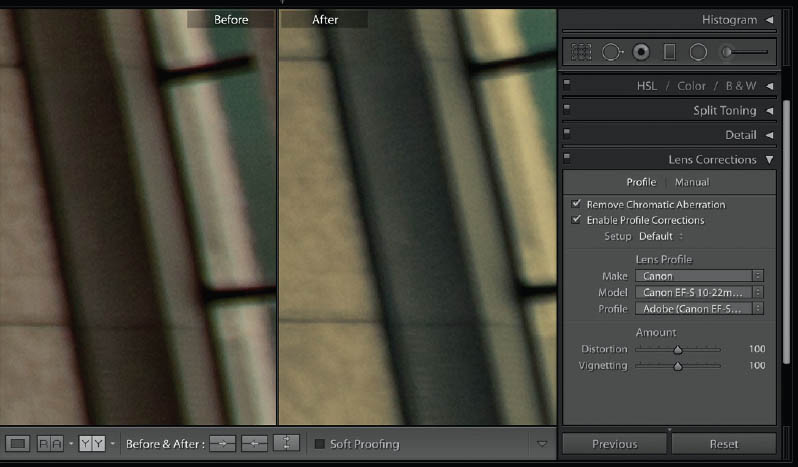
52.5 Get rid of chromatic aberration and curved lines easily with Lens Corrections.
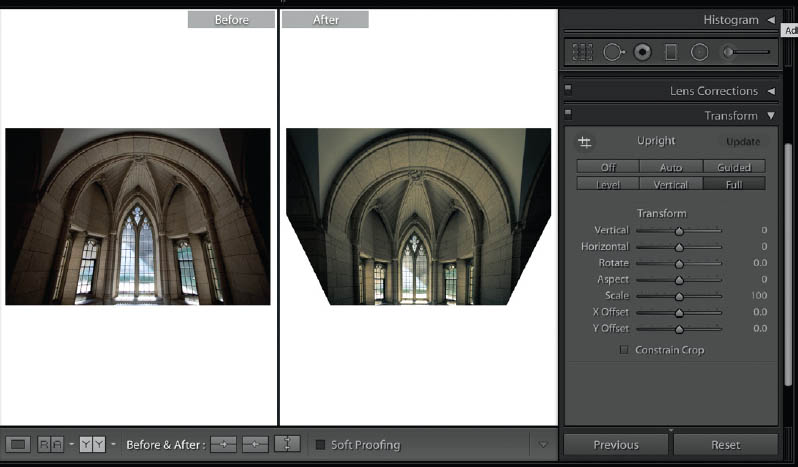
52.6 Wide-angle lenses definitely lead to distortion, but a little bit is usually okay. The Full Transform setting squares everything up, but the curves at the top of the image look weird and the ratio is totally different.
- Radial filter: See above, only now you can filter things roundly! Is the face just a teeny bit too dark in your portrait? Radial filter! Feel like the lens added a weird vignette that you want to counteract? Radial filter! Sweet!
- Adjustment brush: Winning at processing specificity. I love being able to make adjustments in very specific areas. The adjustment brush is fantastic—as long as you’re using a tablet to edit (more on this in a moment). If you’re using a mouse, you have some potentially frustrating times ahead.
Invest in a Tablet and Stylus
I’m willing to venture a guess that some of you are still using a mouse for post-processing. I used a mouse for the longest time and wondered why it took me so long to make small adjustments in Lightroom, but especially in Photoshop. Cloning, patching, shading, lassoing, dodging, burning—all were tedious and frustrating when done with a mouse. Enter Wacom. Life changed. Hours saved. Control improved. Frustration averted. I now look at my mouse with disdain.
I’ve heard it said that using a mouse for Photoshop is like painting with a brick (Figure 52.8). Think about it. As humans we’re trained from early on in life how to maneuver a pen with dexterity. Mice, sure we learn those in school (if you’re under a certain age), but it’s not like we’re trained or graded on penmanship with a mouse. It’s a sloppy, ineffectual tool.
I’m lucky because I can keep my stylus in my left hand and still use the mouse with my right for ambidextrous nonstop rocking. Even if you do have to switch from the mouse to the stylus for more specific tasks, it’s worth the effort. The specificity will floor you and you can get in the game for less than $100. If you want to get really fancy, go for a pressure-sensitive model and get ready for serious control.
On Presets
Presets are pretty sweet. I have about 50 presets that I regularly use. I made them all from scratch based on what I find visually appealing in my images, but there’s no shame in buying or downloading free presets.
Generally, presets are best used as a starting point. Try them on for size by hovering over the preset name and watch how they change the look of the photo in the Navigator window. Find whichever preset gets your image closest to what you like; then play with the panels and sliders to finalize and polish the way the photo looks.
Presets are made to enhance and adjust a solid image. They won’t save a throwaway shot, but they can help a good shot look great.
Don’t Push Too Hard
If you’re working on an image or a set of images and you’re getting frustrated, walk away for a while. Creativity ebbs and flows. It’s nearly impossible to force it. If you’re not feeling the editing spirit, don’t push yourself. You probably won’t love any of the work you do in an uninspired state anyway, and the work you put into shooting deserves your best efforts and enjoyment in editing.
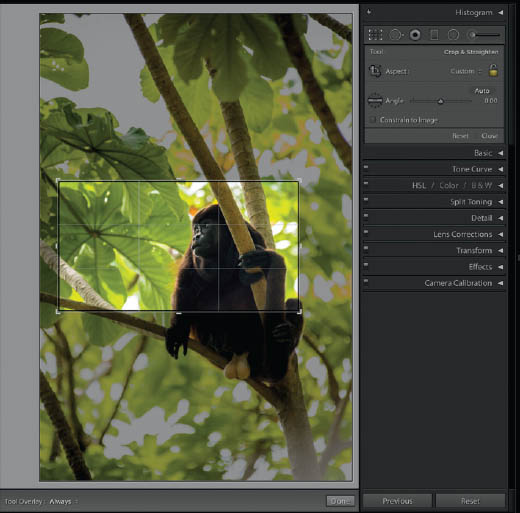
52.7 I decided to crop this image of a howler monkey after the fact because certain parts of the image were drawing focus away from his expressive face.
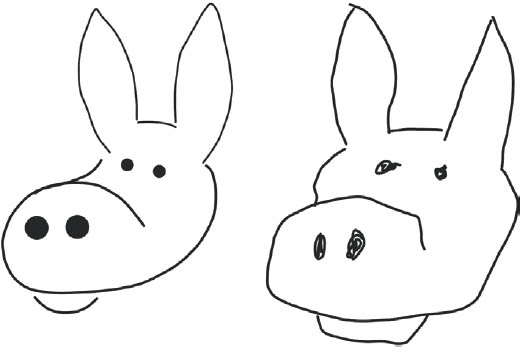
52.8 The donkey on the left was drawn (from memory) with a stylus. The donkey on the right was drawn with a mouse. Neither will win any awards, but the left donkey is significantly less deformed.