![[Chapter 2] Camera Settings](https://imgdetail.ebookreading.net/cover/cover/202311/EB9781681985800.jpg)
[CHAPTER 2]Camera Settings
One of the key elements to creating the perfect image is utilizing the appropriate camera settings for your vision. I won’t go too deep into explaining how to balance the exposure triangle, but there is some basic knowledge all photographers need to keep in mind during a shoot: aperture, shutter speed, and ISO. I capture most of my images in manual mode and configure the settings in the order mentioned. While it is not necessary to shoot in manual to photograph a lensball, it will save some headache to nail the shot.
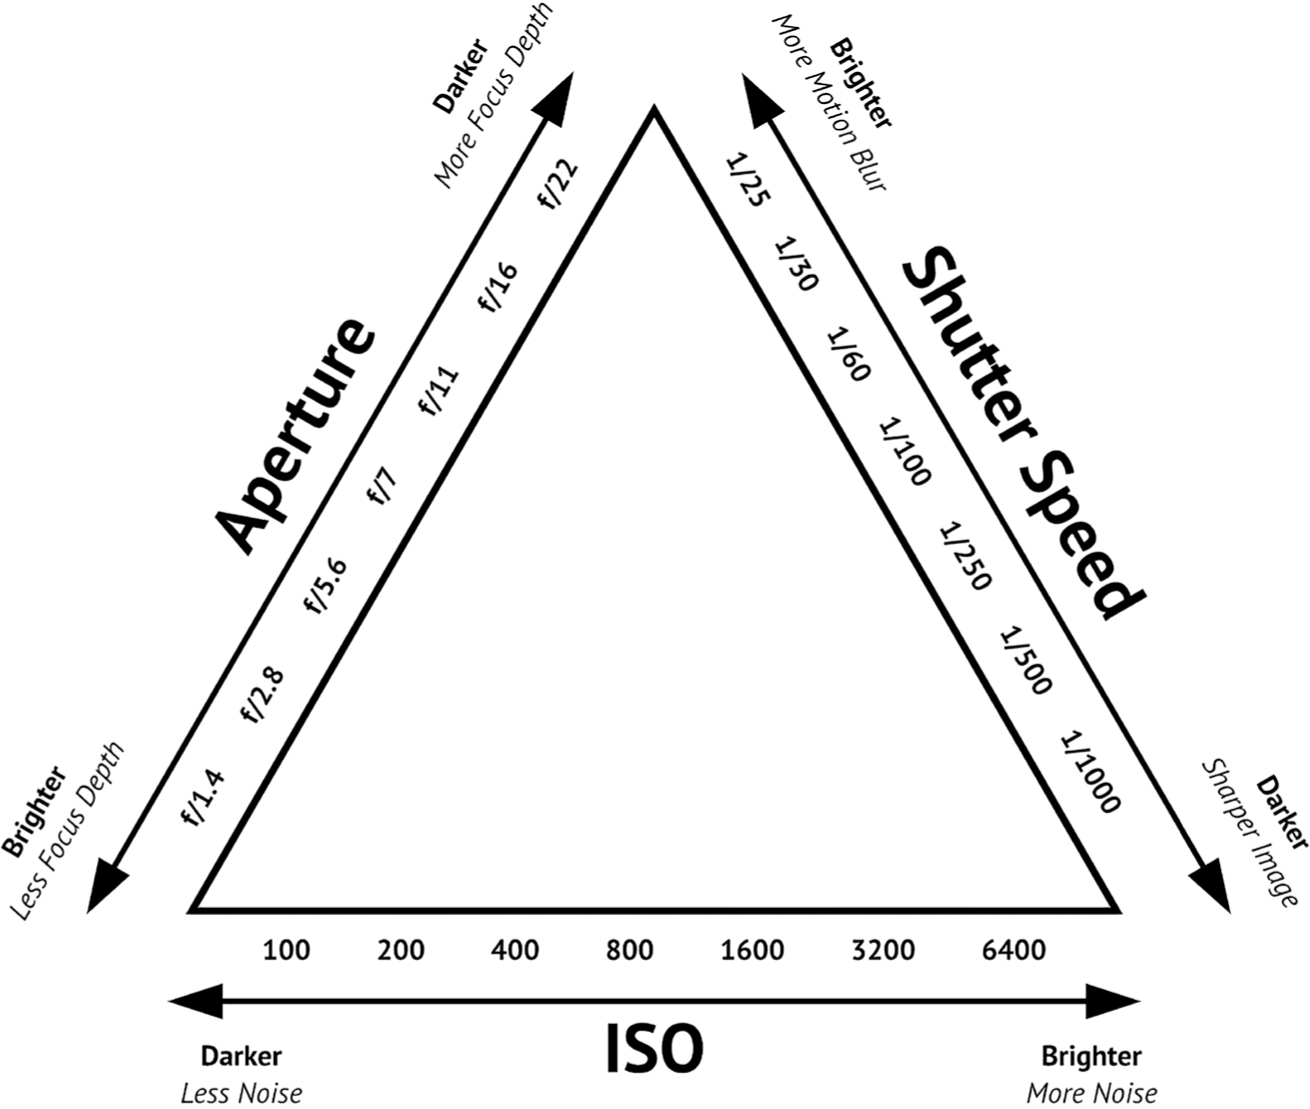
Figure 2.1
Visualizing the exposure triangle can help you achieve the correct combination of settings for your desired exposure given your lighting situation. The three values (aperture, shutter speed, and ISO) are dependent on one another, so be mindful of how changing one will affect the values of the other two.
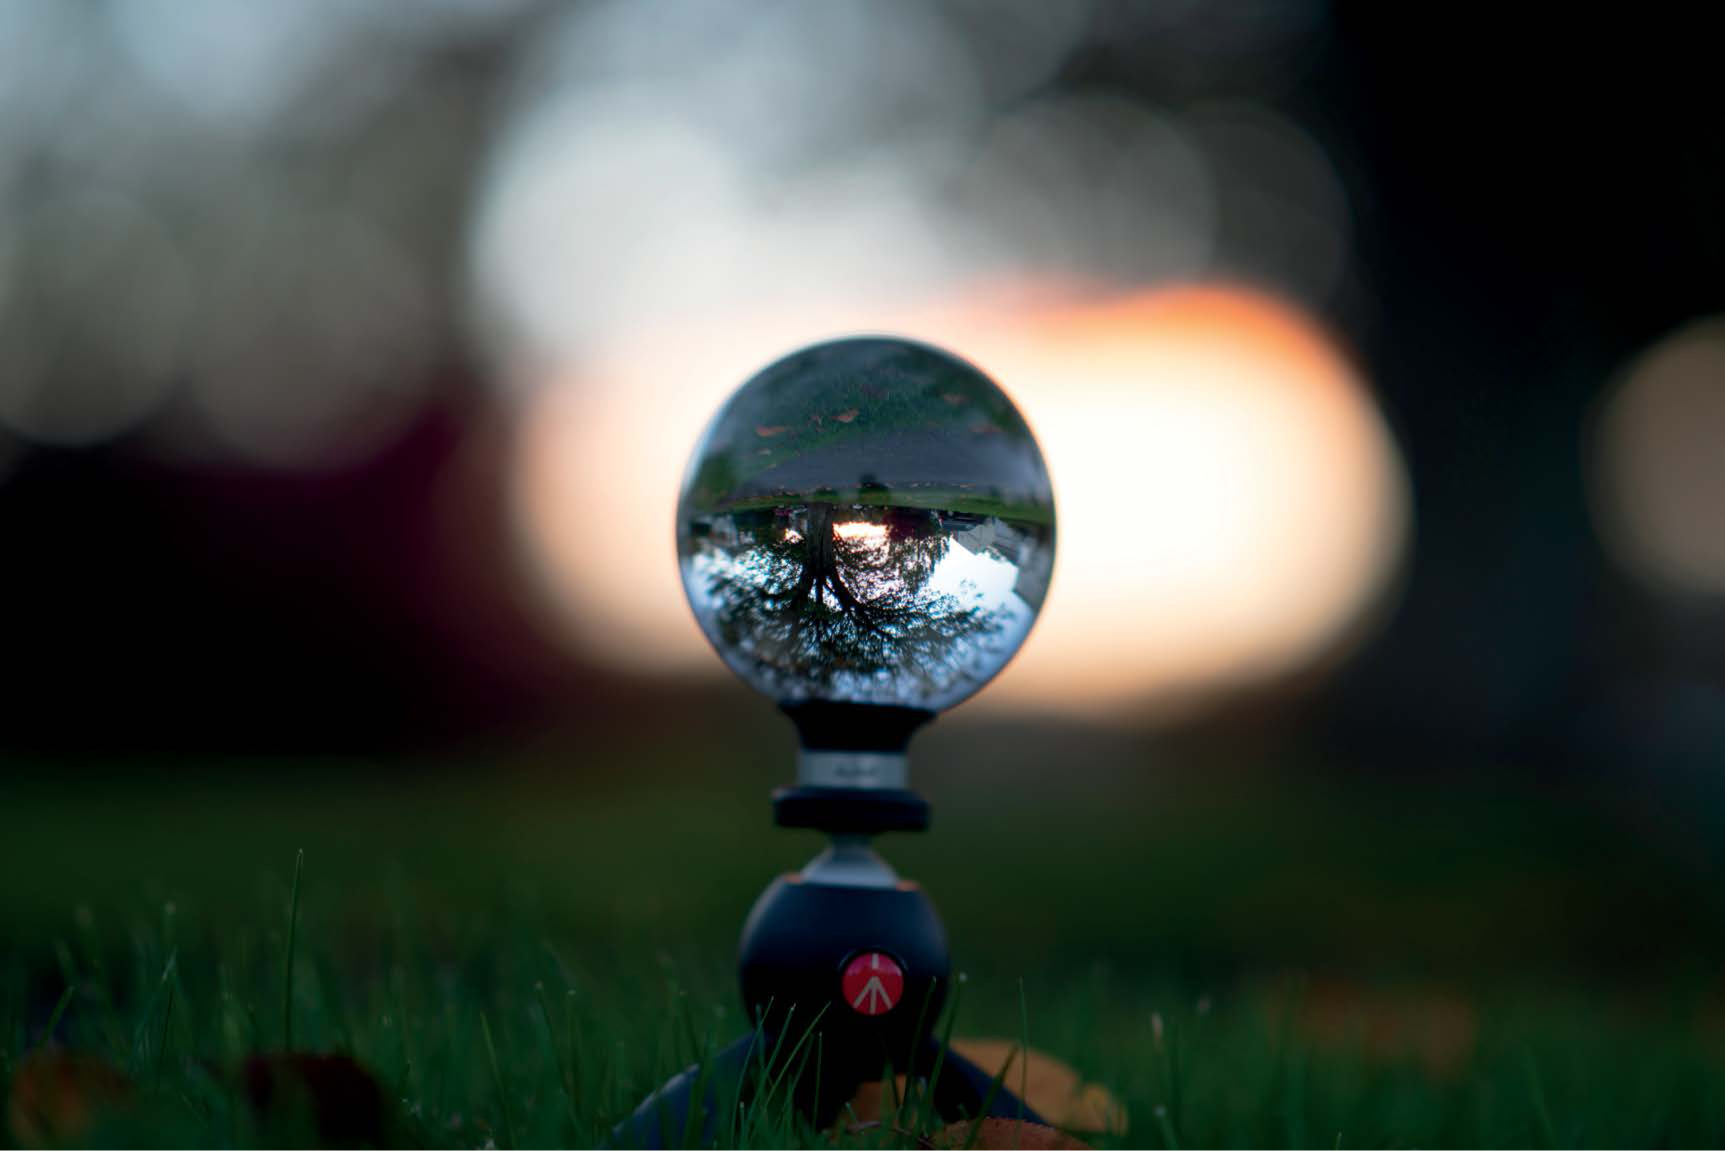
Figure 2.2a
85mm | f/1.4 | 1/200s | ISO 100
Too wide of an aperture can cause you to lose detail in the overall image. I would recommend setting the aperture to a focus depth that encapsulates at least 90% of the lensball. In this figure, only the center of the image is sharp.
Aperture
The aperture number, or f-stop, dictates the size of the lens opening, which in turns controls the amount of light hitting the camera sensor. The value works inversely with how much light gets through: the smaller the number, the larger the opening, and the larger the number, the smaller the opening. Aperture also affects the depth of field, where setting a low f-stop would capture a thin plane of focus and vice versa. I generally shoot at a very wide aperture to create separation between the lensball and the background. I recommend not going below an aperture of f/2.8, as the edges of the ball become too blurry and your image gets less defined. The goal when shooting a lensball is to get the center of the ball tack sharp while leaving the rest of the image more abstract. When dropping apertures to values like f/1.4, you run the risk of losing definition of the sphere, leading to an image that looks out of focus overall (figure 2.2a).
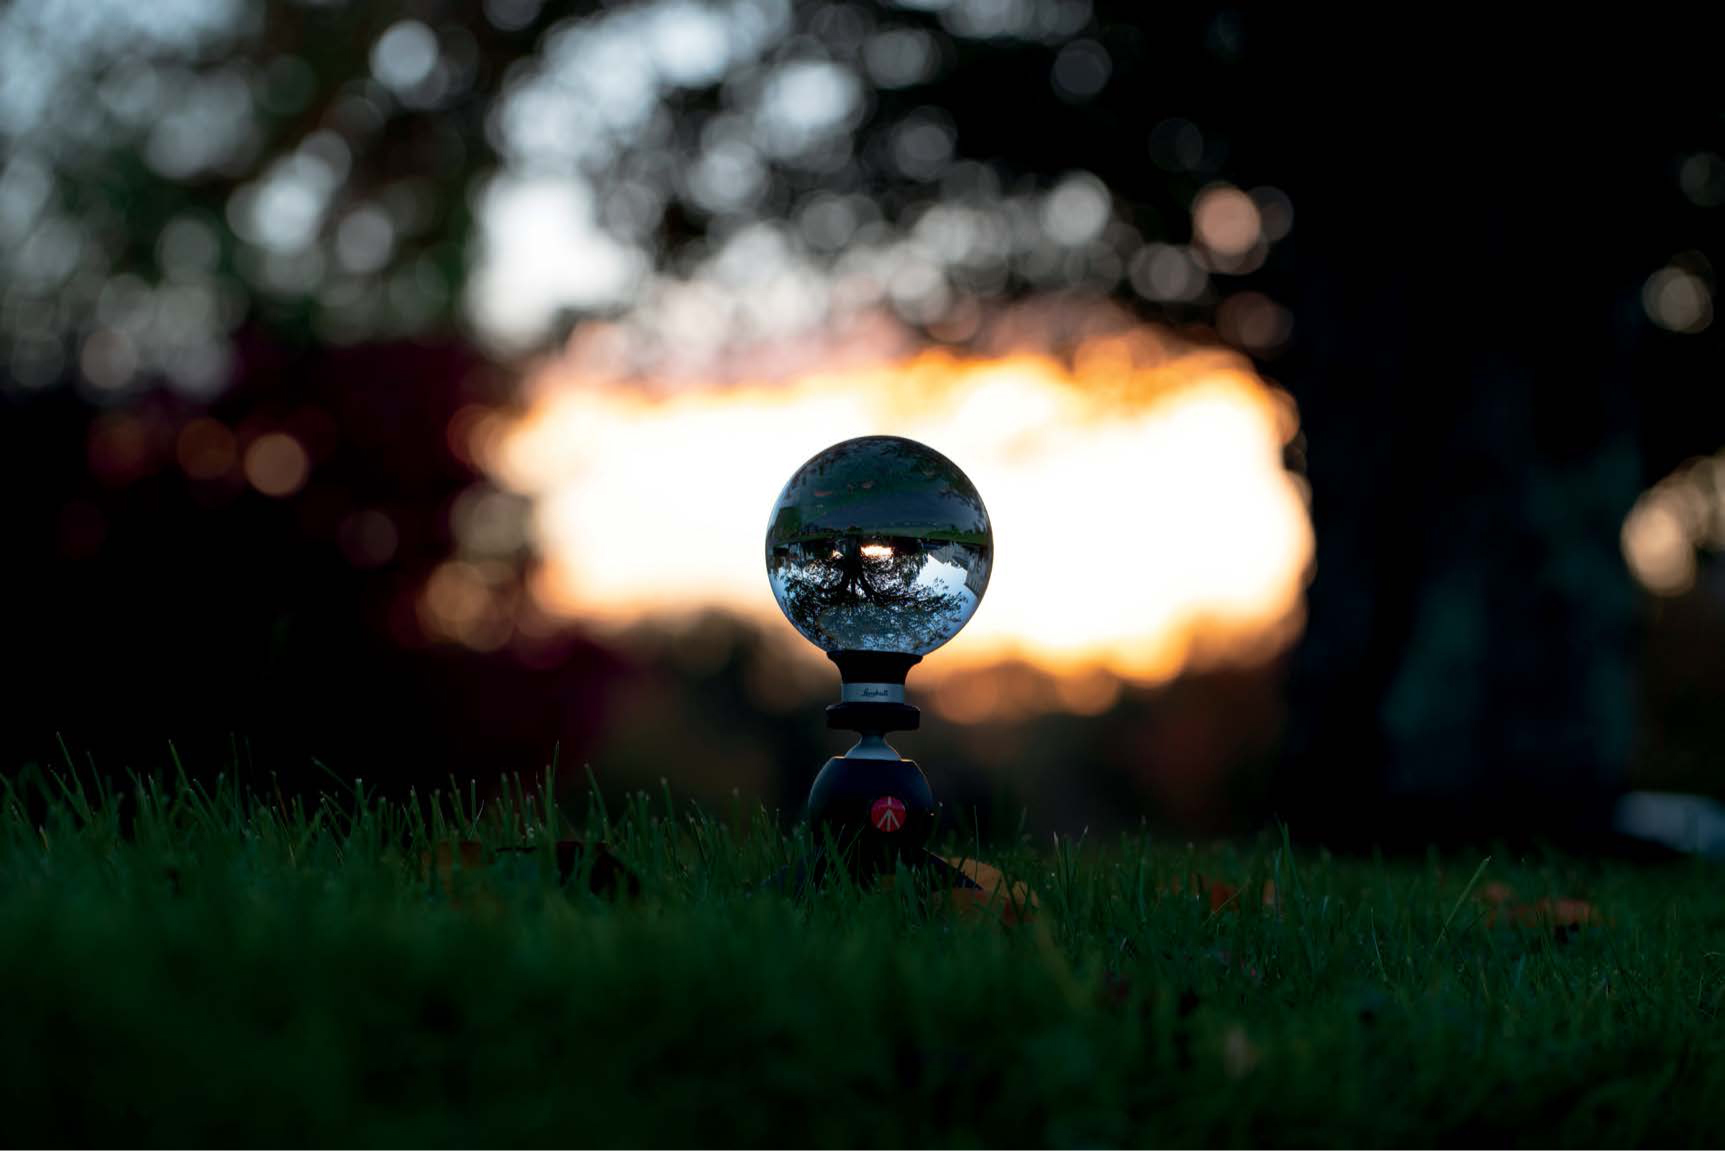
Figure 2.2b
100mm | f/5.0 | 1/200s | ISO 250
Generally, the highest aperture value I use for lensball shots is f/5.6. Depending on the focal length of the lens and the distance to the ball, it can still maintain a strong separation between the foreground and background. If set up correctly, you can acquire a very sharp-looking shot with smooth bokeh. The aperture should be the first thing you set, as it will determine the overall feel for the image. This is one of the settings that cannot be easily altered in post-processing. Another thing to understand is that increasing the aperture too much will lead to darker images because there will be less light hitting the sensor. To compensate for this, you can make adjustments to the shutter speed.
Shutter Speed
After setting the aperture, the next step is to set the shutter speed, which determines the amount of time the sensor is exposed to light. Depending on the environment, I typically expose my photos between +1 and –1 stop of light. Relying solely on metering is not always enough to obtain the best exposure. I recommend viewing your histogram when setting up the composition to confirm the highlights are not blown out and the shadows aren’t too dark. These details may be unrecoverable when you go to edit the image later on. If you are unsure, you can always shoot the same shot with three separate exposures and decide later what details are necessary for the final product.
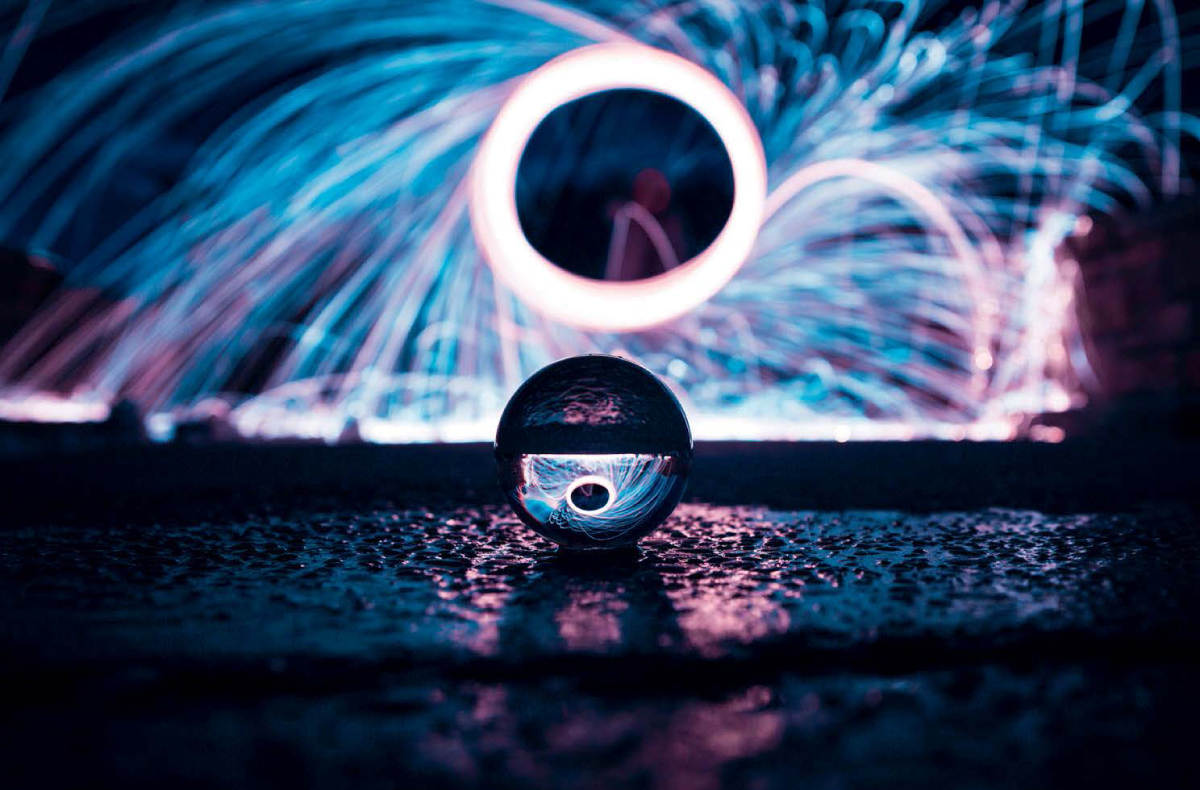
Figure 2.3
24mm | f/3.5 | 6s | ISO 100
This image illustrates the effect of using a long shutter speed of 6 seconds to capture a long-exposure shot of lit steel wool spun at night. The camera was placed a few inches away on the ground, with the focus manually adjusted for a clear shot of the inside of the ball. Shooting with a long exposure allowed me to keep my ISO at a minimum to reduce noise and preserve as much detail as I could.
In terms of setting shutter speed, I generally abide by the golden rule to keep the shutter speed no slower than 1/(the focal length). This is to ensure you do not get blurry images when shooting handheld. For example, if you are shooting at 50mm, your shutter speed should not dip below 1/50th of a second—e.g., you don’t want to use 1/40, 1/30, etc. I would even go as far as keeping it to 1/(2x the focal length), just to play it safe. There are times when using slower shutter speeds can help enhance your photos. A prime example is utilizing a tripod or stable surface to capture light trails or steel wool through a lensball.
ISO
Adjusting the ISO value should always be the last step of configuring your manual settings. This is only necessary when your images are too underexposed and need to be brightened up. The caveat here is that setting too high of an ISO will lead to unwanted noise in your image, which can be a pain to edit out. Basically, you are pushing your camera sensor to capture more light, which can introduce speckles on the image from the increased electrical charge. This is the reason I set my ISO last, as it is only meant to boost up the exposure when the other two settings are maxed out for the capture.
However, there are still alternatives to reduce grain in your photos when editing them. Astrophotographers use a technique called image stacking to help reduce noise by combining multiple captures and removing the random pixels that do not belong. But for our purposes I would just recommend shooting in a well-lit environment to maintain a comfortable ISO. Nowadays, most full-frame cameras can handle up to 1600 ISO fairly well without registering much noise. For my shoots, I try to keep the ISO between 100 and 400, and will max out at 1600 if shooting handheld indoors.
Autofocus Points
Things get tricky if you do not have the appropriate autofocusing configuration when shooting lensball photos. Leaving this decision to your camera’s discretion can give you a frustrating experience when attempting to nail sharp focus for your shot. I’ve seen a number of lensball photo submissions where the camera recognized the glare on the front surface as being in focus and left everything else blurry. This can occur if you use the Dynamic Area AutoFocus or 3D Tracking settings.
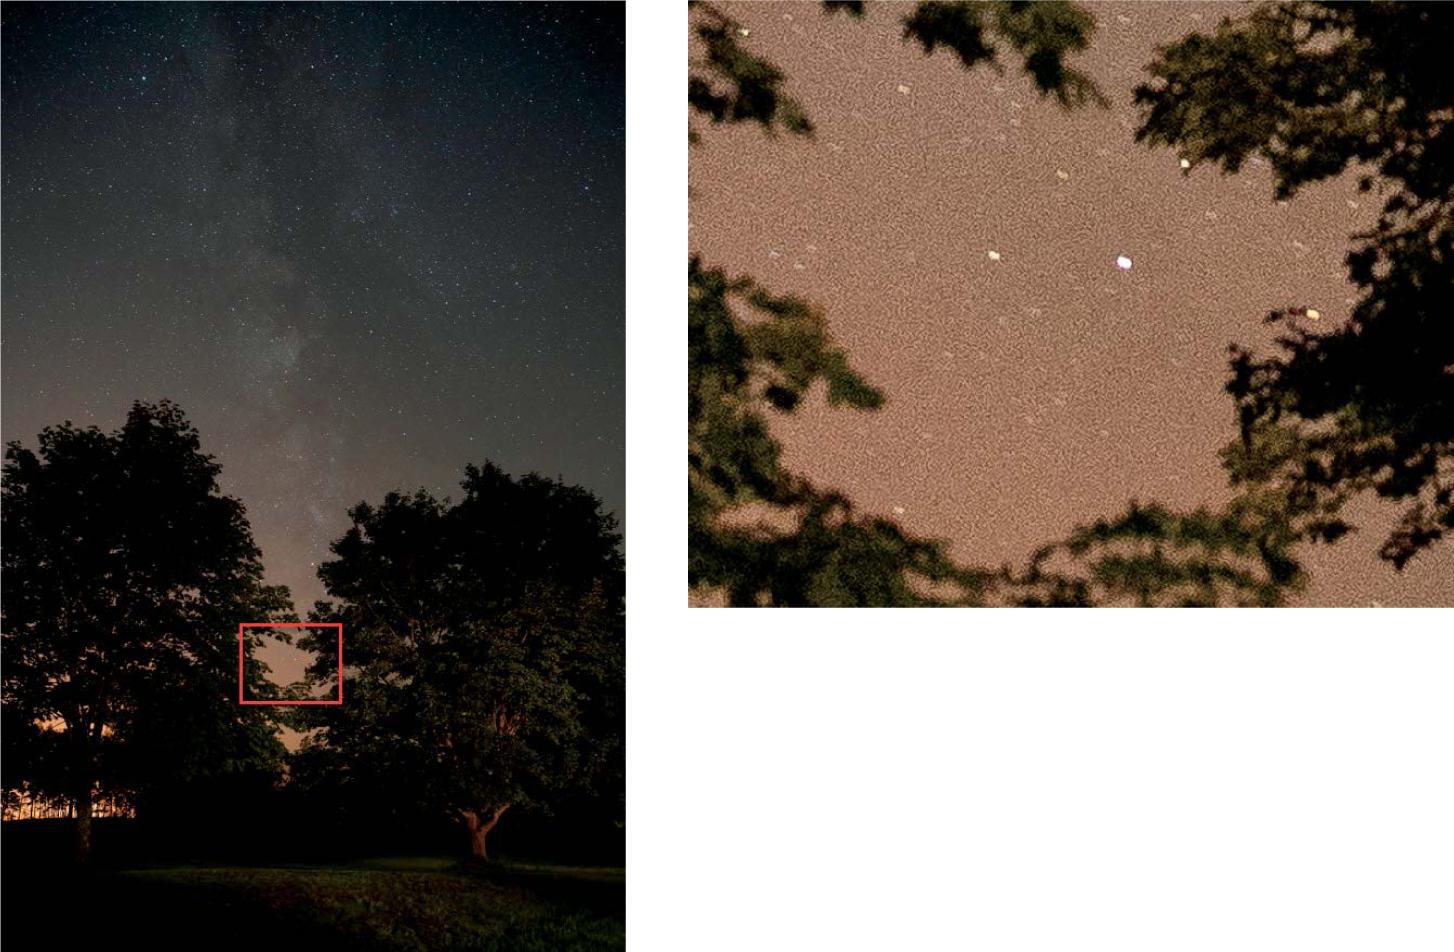
Figure 2.4
24mm | f/2.8 | 20s | ISO 4000
This image was shot at 4000 ISO, which introduced a good amount of noise into the image. Astrophotographers tend to shoot with higher sensitivity to bring out the details in the night sky. Luckily for them, noise blends well with stars. However, each camera performs differently with light sensitivity. There are camera bodies that are created to perform well in low-light situations at the expense of image resolution.
If you want more control over the focus area, I recommend shooting with Single Point AF so the camera will focus within a small user-designated area. This gives you the control to pinpoint exactly what part of the frame you want to be the sharpest, which in this case would be the center image within the ball. You will have eliminated all the “guessing” that the camera would have to do to choose between multiple autofocusing points.
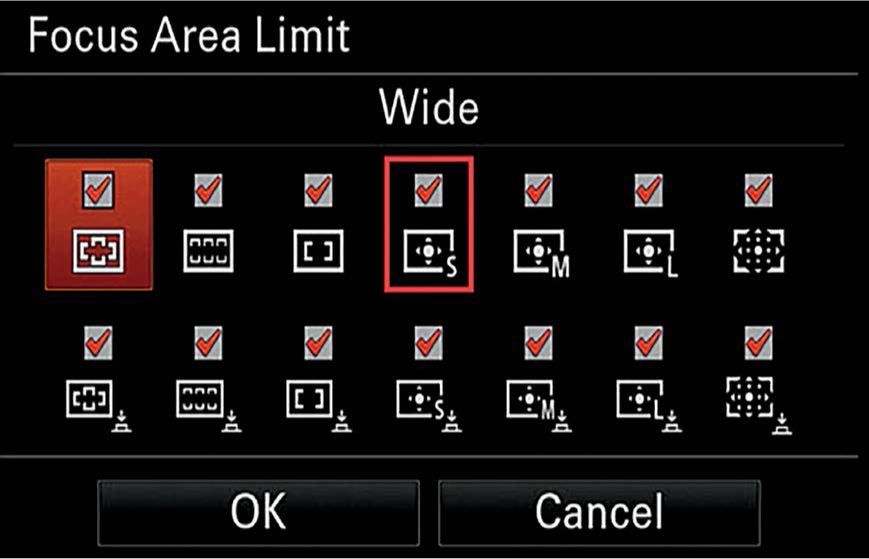
Figure 2.5
This is an example of the focus-area selection screen for a Sony mirrorless camera. Many cameras will have this adjustment in their menu settings.
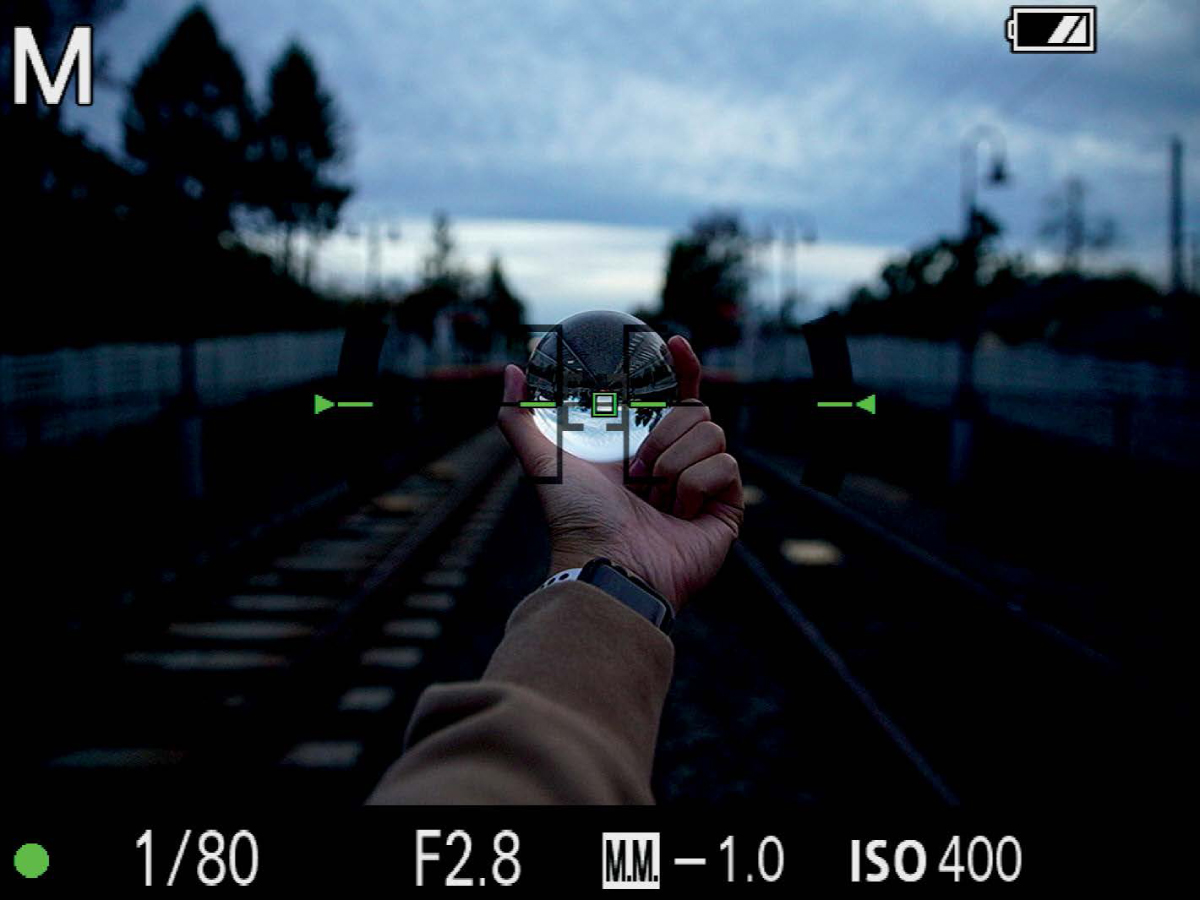
Figure 2.6
Selecting the smallest focus area will allow you to have pinpoint accuracy in controlling what part of the lensball you want the camera to focus on. For example, in this capture I have aligned the focus point where the train tracks meet the horizon. Your camera acquires focus the quickest in high-contrast areas. You may notice some delay or “travel” when trying to focus on indistinguishable objects like the bushes and the dirt.
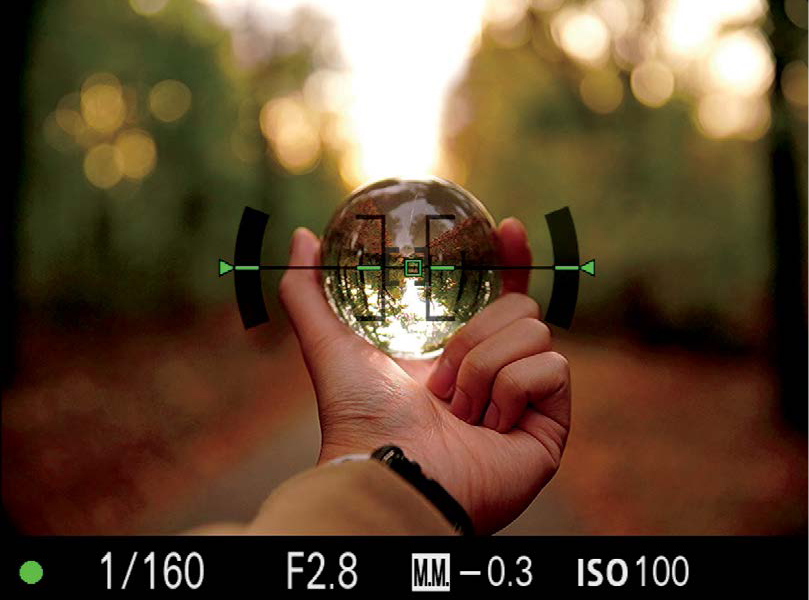
Figure 2.7a
This shows an in-camera view of what I find important when capturing a photo. Pay attention to keeping your minimum shutter speed in line with the exposure, as well as maintaining a balanced composition.

Figure 2.7b
Selecting a focus point in the center of the ball rather than at the edge allows the blur to naturally transition into the middle. It guides the viewer’s attention toward the main subject of the frame, which in this case is the intersection of the leading lines where the path and treeline meet. This is primarily an artistic recommendation, but it doesn’t hurt to try this out.
I also use Single Point AF to assist in setting up my composition. By anchoring the focusing point on, let’s say, the center of the frame, I will know to press the shutter button when the lensball lines up with that square. This prevents any wavering, which may cause the image to lean too heavily on one side or the other. Because you are shooting for “two compositions,” having this setup will make the composition process significantly easier. In my workflow, I use the smallest AF point my camera allows and move it over the point of highest contrast within the center of the ball. This guarantees that I get my “subject” in focus every time without accidentally focusing on the front or side curvature of the sphere.
AF-S versus AF-C
Continuing on this topic, let’s discuss the appropriate times to choose between using Single shot and Continuous focus servo modes (these setting names may differ depending on camera manufacturers). This is not to be confused with Single Point and Dynamic Area autofocusing, which were mentioned earlier. These focusing modes determine how your camera behaves when you press down on the trigger.
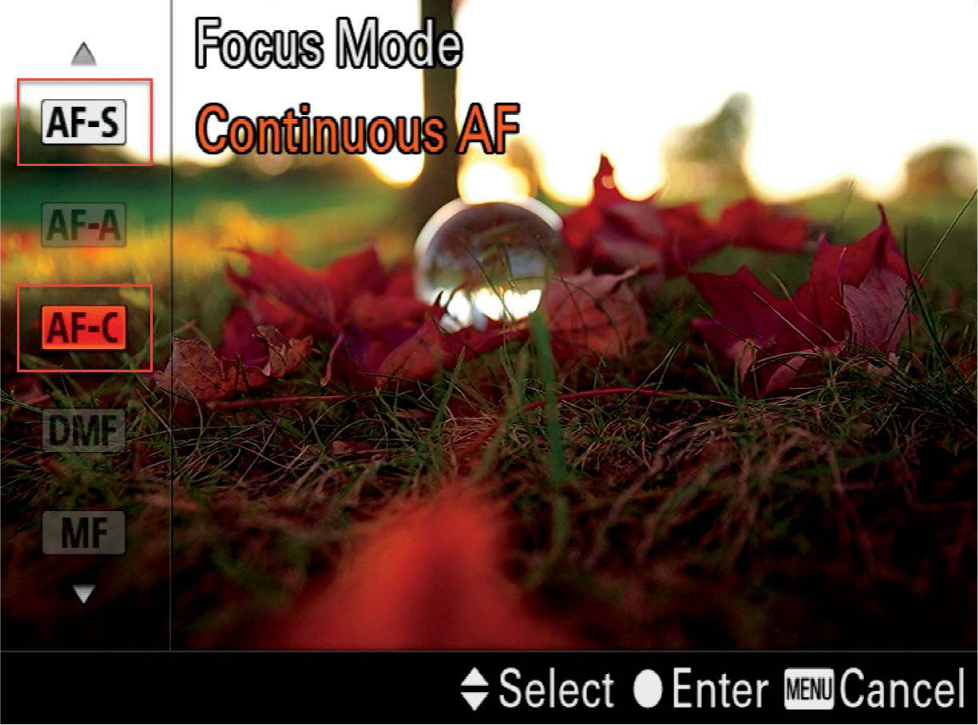
Figure 2.8
Tip: I generally use Continuous autofocus when shooting handheld, and reserve Single shot AF for when I’m using a tripod or stationary platform. Any slight movement can throw off the focus from the time you half-press the shutter button to the moment you release it.
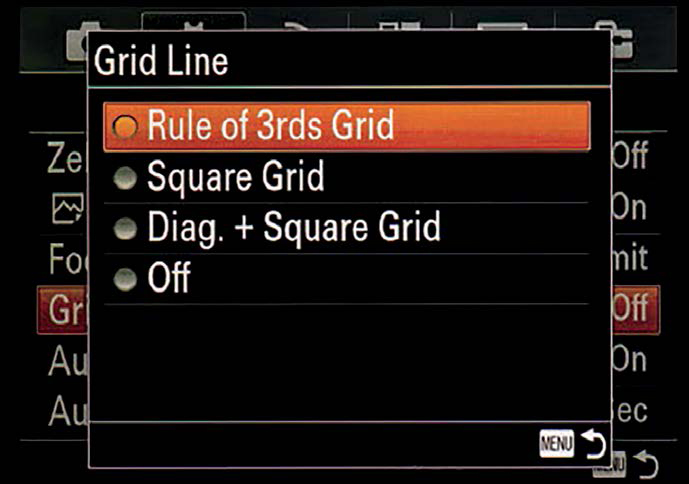
Figure 2.9
I enable the viewfinder grid lines display and horizontal leveler to help compose the shot. Cameras generally come with a number of compositional overlays to help photographers balance their images. Since most cameras have small screens and viewfinders, displaying these guides will save you the process of cropping or rotating your photos later. Although it is not a law to follow the rule of thirds or leading lines, it will help make the overall image more interesting and guide the viewer’s eyes toward the subject.
Single shot autofocus (AF-S) basically locks the focus the moment you half-press the shutter button and keeps it locked until you release or execute the shot. This is excellent when the lensball is kept at a set distance away from the camera. The only downfall is that if you move forward or backward, your focusing plane will move as well. This should be reserved for shooting with a tripod or if you are confident in remaining motionless while lining up the shot. In a handheld situation, I like to set the camera to high-speed burst mode and Single shot AF and shoot three images per focus lock. This way if I do sway or move the focusing plane, I will likely get one image in perfect focus.
An alternative would be to use Continuous autofocus; however, this may pose a problem depending on the lens and camera body you use. Some telephoto lenses will “hunt” to focus by zooming back and forth until the lens finds a high-contrast area to lock onto. This may work for wider compositions, but in my experience, it has caused me to miss focus a number of times.