
CHAPTER 4
Metalworking Studio
The freedom to create whatever you want whenever you want has its advantages, and setting up your own metal shop can be a rewarding experience. However, to build a functioning metal shop from scratch can cost quite a bit. On top of the thousands of dollars you may spend on tools, you also need to consider electrical work, maintenance, utility costs, and any custom building that needs to be done for safety. As I’ve mentioned a few times already, I discourage new metalworkers from doing this until they have spent some time creating work in an existing metal shop. Of course, I understand that not everybody has access to a metal shop, so in this chapter I’ll review some things to keep in mind when and if you have to set one up. An indoor shop has a clear advantage—all-weather use—but if you’re looking to keep things really simple and cheap, a covered outdoor shop is a possibility.
Layout
Safety Concerns
You’ve already learned many of the safety concerns with metalworking, but how do you apply them to your own metal shop? For starters, a metal shop should not be constructed from flammable materials. If the space uses stick-built construction, care should be taken to “fireproof” the walls and ceilings with fire-resistant boards and panels. Almost never is it acceptable to weld on a wooden floor. Antique wooden floors are even more dangerous if used for industrial purposes at some point—who knows what types of oil and flammable liquids have soaked in. A concrete floor is the only choice for a metalworking studio (besides a dirt floor). When a welding studio is set up properly, a look around the room should reveal nothing that can catch fire with a spark or open flame.
You’ll need to check your local building standards to make sure that all electrical work is up to code. Most homes have a 110- to 120-V power supply, but to build a serious metal studio, a 220- to 240-V supply is needed. When dealing with this higher voltage, the stakes are much greater. Always use professionals to deal with wiring, and have all of the work inspected.
There should be plenty of room between tools to allow safe movement and the handling of materials.
Every studio needs some sort of ventilation, even if it is just a few windows or an open garage door. With fans (not blowing toward the weld area, of course), you will be able to ventilate the workspace adequately for most purposes. Better yet, hoods and ventilation systems should be installed, which will help greatly with dust and fumes.
Remember my discussion of gas storage? Gas cylinders always should be secured to a wall, on a trolley, or to the welding machine itself. The best place to store gas cylinders is in a well-ventilated area, typically outside the metal studio but with weather protection. This could mean that you need to build a separate shed for compressed-gas storage. Fuel gases (i.e., acetylene) usually will need to be stored a good distance away from compressed-oxygen tanks as well.
There is a slightly easier way to set up a small home studio—use the great outdoors. If you can construct a secure, dry, covered area somewhere outside your home or garage, some of the hazards are reduced. If electrical power is an issue, remember that you can weld, cut, bend, and more with just an oxygen-acetylene (oxy-acetylene) torch. Because the workspace is outside and covered, you can leave the compressed-gas tanks secured to the cart or a wall. This outdoor shop could be on a concrete slab or in the dirt. You will need to consider any other possible flammable items, such as a deck, firewood, or dry grass if welding outside, of course. Also, if you are able to arc weld outside, you must erect welding screens that deflect any breeze away from your welding area. In addition, consider keeping all materials and electrical tools inside a heated or air-conditioned storage area to cut down on the amount of corrosion that can occur.
CAUTION: Never weld or do hot work directly on concrete. The moisture in the concrete will expand rapidly, causing the concrete to break apart, possibly causing injury.
Lighting
When you start torch cutting and welding, you’ll notice immediately how important lighting is. Anytime you are wearing a shaded filter or welding mask, visibility is reduced. You need to have bright overhead lights directly over your work area, and the addition of a movable work light will help with those hard-to-see areas. If you are welding outside, lighting conditions will vary, but try to take advantage of as much natural light as possible.
Welding Table
A metalworker’s welding table can be as simple as a rectangular sheet of steel or as complex as an all-in-one apparatus with built-in clamps and layout guides. The idea behind a welding table is that you can clamp your work to it securely, and because the whole table is clean (unfinished) steel, no matter where you place your negative clamp, your work will be charged. A general rule of thumb for welding tables is that the thicker the steel top, the better the table. A lot of the heat generated by metal–inert gas (MIG) and torch welding will end up being absorbed into the tabletop. This causes the table to warp, and the more it gets heated, the more it will warp. For an inexpensive home shop table, something around ![]() -in plate will last you quite some time but eventually will show some warpage. A simple heavy-duty welding table is shown in Figure 4.1.
-in plate will last you quite some time but eventually will show some warpage. A simple heavy-duty welding table is shown in Figure 4.1.
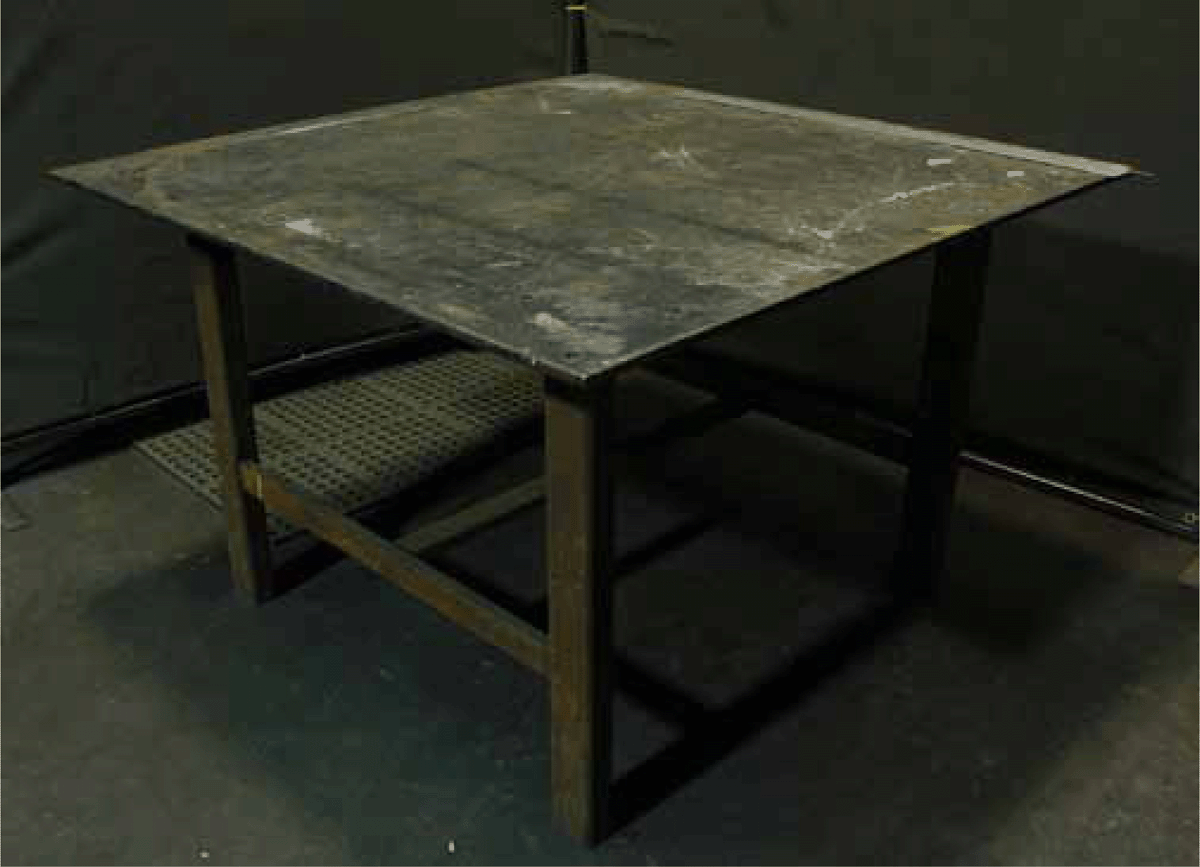
FIGURE 4.1 Example welding table.
Welding tables can be almost any shape—a circular table for circular projects, a long rectangular table for fences or railings, or a square table for all-around use. Making your own table is a great advanced project that you might want to consider after completing the projects in this book.
Cutting Table
Torch and plasma cutting processes work by heating an area of material and blowing the extra material out of the way with compressed gas. This means that on the backside of your cuts you need to leave room for the material to escape or you’ll end up cutting through your tabletop. Cutting tables can simply elevate the work material off the surface of a solid table (but then you have a lot of cleanup to do). Some of them are made of cast iron and have holes for the sparks to escape, and others are made from flat bar welded or positioned together on end to support the material while allowing sparks to escape. Figure 4.2 shows a well-used cutting table.

FIGURE 4.2 Example cutting table.
Cutting/Grinding Area
Angle grinders, chop saws, and bench grinders all create a large amount of dust, sparks, and noise. Many shops will have a separate area for such tools so that the main shop space doesn’t get too dirty. A grinding room should have its own worktable where your items can be securely clamped. Having a bench vice in this room comes in very handy.
Steel Storage
Of course, as you start to work on projects, you’re going to have a variety of steel lengths, sheet goods, and more odds and ends than you’ll know what to do with. A nice metal storage rack will save you a lot of headache in the future. This rack should be secured to the floor or wall of the studio and allow for lengths of your choice to be stored easily. Remember that stock and tube come in lengths over 20 ft. If you don’t have space for these, you can set up an area to cut the material down to the correct size when you first receive it.
Horizontal storage racks are great because most of the work you do on lengths of steel is in the horizontal position. Vertical racks take up less floor space but do add the danger of pieces falling a long way and causing injury or damage. The storage rack should be positioned in an area where you can easily transport material to the chop saw or other cutting device. In that way, you’ll only have to carry long lengths of material for short distances.
Paint Area
If you’re interested in finishing your pieces with a high-quality professional automotive paint job, you’ll have to look elsewhere because I’m not going to cover that. There are other books on advanced finishing methods, but for this book, I’m going to keep things pretty simple.
Most kinds of painting require excellent lighting and ventilation and a clean work area. If you want to get the smoothest possible finish, spray painting is your best bet, but you must consider the amount of overspray it produces. Many shops where finishing is a common practice set up a spray booth just for this. For a slightly more handmade finish, you can use latex- or oil-based paints and a brush or roller. For both of these, you need to ventilate your area well to remove any fumes produced. Painting outside is not the best option because debris can get blown onto your new paint job. Direct sun also can cause some strange drying patterns. I’ll assume in this book that you have access to an open garage floor or something similar where you can brush or spray paint your projects. Also covered later in this book is wax finishing, which you can do right in your metal shop.
Buying Tools
Many of the tools required for metalwork and the projects in this book are available at just about every hardware store around from the small corner shop to the big-box stores. There are specialty welding supply stores all over this country as well, which you may not be aware of. These stores usually sell welders, hand tools, safety equipment, and the supply gases required for various types of welding. Buying from these stores can save you money because they often will sell consumables in larger quantities than regular hardware stores. I recommend getting consumables such as grinding discs in quantity. In that way, there’s always a fresh one around when you need it, and you don’t have to make do with a used disk that you really should have thrown away long ago. To find out what welding supply stores there are near you, try a Yellow Pages search for “welding,” “steel,” “gas,” or “hardware.” Or search Google for “welding supply” in your area. You also could contact one of the organizations listed in the Resources section at the end of this book to see if they have any tips.
Used tools are fairly common and can be a good investment, but the quality and availability are unpredictable. If you have an existing relationship with someone who is offering a tool and can vouch for its quality, you may be well off. You should be able to see the tool in use before purchasing it. Keep an eye out for any unusual corrosion on the surface and electrical components. There are lots of gems out there, but there are also lots of lemons. Choose wisely!
When buying tools, you need to make sure that you have the power supply to operate them. Many industrial tools require 240 V or even higher, and some use a three-phase power supply.
As far as brands go, there are too many to name, and I can’t recommend one over another. I will say that the companies who helped to provide photographs and diagrams in this book are the ones that I’ve used for years. Miller Welding is the premier name in welding. The company makes almost everything you would need to start welding, and it stands behind its products. Metabo and North Safety also make great products and are always looking to make the best they can. Besides using the products these companies provide, one thing that really stands out is their commitment to the arts. Miller and Metabo understand the connection between industrial arts and industry and have supported the Steel Yard, a 501(3)c nonprofit organization, through donations in the past. A company that shows that kind of support proves to me that it is invested in the future of metalworking.
Cleaning and Maintenance
As with everything, a metalwork shop and the tools within need occasional cleaning and maintenance. When you work in a shared space, a shop supervisor usually handles the maintenance side of things, but cleaning your workspace for the next person to use is very important. Cleaning up between stages of a project helps you keep track of tools and materials and makes the cleanup and the end of a workday much easier. There are times when I feel “too lazy” to clean up thoroughly, and eventually I end up spending more time looking for the tool I need than actually using it. The area around most of your tools will need more frequent cleaning to get rid of grinding dust, weld spatter, and steel shavings. I generally recommend not putting off cleaning until you need to do it; rather, you should make it a part of the process and clean as you go.
If you are responsible for maintaining tools in your own shop, each tool should have a specific set of instruction outlining what maintenance requirements it has. If you can’t find this, the information is usually available on the manufacturer’s website.