
In video games, the GUI is one of the most important parts of the game. It's where you see how much health you have, what level you are at, how much gold you're carrying, and so on. It's how you gather information on your character and the world you are in.
In this chapter, we'll be covering the following topics:
- Both 2D and 3D GUI elements
- How to create GUI buttons
- How to create a 2D health bar
- Tracking the player's level by using a GUI label
- Using two GUI boxes to make an experience bar
- Creating a 3D health bar
- Showing 3D damage reports
- Showing enemy name tags
To start our GUI programming, we'll create some buttons, a health bar, a level counter, and an experience counter. All of these are common in a variety of video games and are key elements to game design.
Since in this part of the chapter we will be dealing with 3D space, we'll need to set up a scene to test with. We'll only need a basic test level, so create a new scene and name it Chapter 2. Add a cube or plane for the floor, a directional light, a GameObject for our enemy, and two quads. This is what my scene looks like:
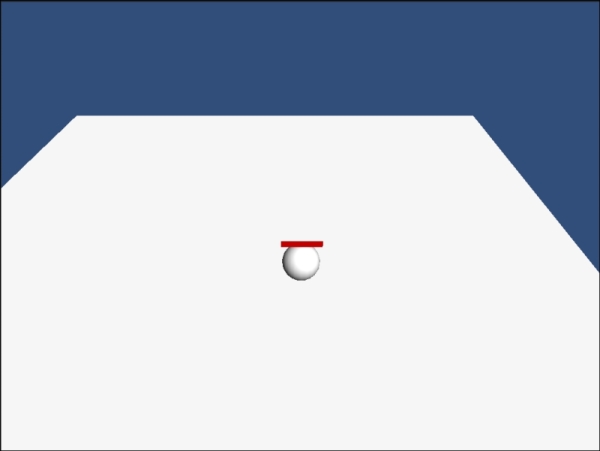
Set the two quads in the same position just above your enemy object and rotate one of them by 180 degrees so that the two quads look like one object. Drag one of the quads onto the other, making a parent-child object. Now that our scene is ready, let's get to the scripting.
Before we start creating our 2D UI, let's make the script to house it all. Create a new C# script and name it GUI_2D. Inside the script, remove the Update function. Add a OnGUI() function. Finally, add System.Collections.Generic to your using statements; we'll need this for some of our variables.
Our first step in creating 2D buttons in our GUI will be to add these variables:
List<Rect> SkillButtons = new List<Rect>();
List<Rect> ItemButtons = new List<Rect>();
We will use these two List arrays as containers to hold the rectangles for our buttons. For now, they aren't public but if you wanted to expose them to Inspector, you could make them public.
Next, we'll need to add rectangles to our lists. Add this block of code to our Start() function:
SkillButtons.Add(new Rect(Screen.width/2 + 50, Screen.height/2 + 333, 55, 55));
SkillButtons.Add(new Rect(Screen.width/2 + 105, Screen.height/2  + 333, 55, 55));
SkillButtons.Add(new Rect(Screen.width/2 + 160, Screen.height/2  + 333, 55, 55));
ItemButtons.Add(new Rect(Screen.width/2 - 160, Screen.height/2  + 333, 55, 55));
ItemButtons.Add(new Rect(Screen.width/2 - 105, Screen.height/2  + 333, 55, 55));
ItemButtons.Add(new Rect(Screen.width/2 - 50, Screen.height/2 + 333, 55, 55));
Here, we will add three buttons to each of our lists. We place our skill buttons to the right of the center of the screen, and we place the item buttons to the left of the center of the screen. Also, all of our buttons have a width and height of 55.
Our last step in creating our buttons is to draw them. We will add this code to our OnGUI() function:
GUI.Button(SkillButtons[0], "Skill A");
GUI.Button(SkillButtons[1], "Skill B");
GUI.Button(SkillButtons[2], "Skill C");
GUI.Button(ItemButtons[0], "Item A");
GUI.Button(ItemButtons[1], "Item B");
GUI.Button(ItemButtons[2], "Item C");
What each of these lines does is draw our button at the location of our rectangles, which we stored in our lists. They also provide text to be displayed on the button; we will use placeholder text as an example.
To create a health bar, we will use a GUI box. First, we'll need to add a few variables to calculate our health and the length of the bar:
public float currentHP = 100;
public float maxHP = 100;
public float currentBarLength;
public float maxBarLength = 100;
We have two variables for our health and bar length: one for the current amount and the other for the maximum amount. Our variables are set to public so that we can access them from outside our script.
Finally, to make the health bar, we'll need to add a couple of lines to the OnGUI() function to draw it on the screen:
currentBarLength = currentHP * maxBarLength / maxHP;
GUI.Box(new Rect(Screen.width/2 - 20, Screen.height/2 + 300, currentBarLength, 25f), "");
The first line of the code will draw our health bar. We set its location to be just above our buttons we created earlier. The second line of the code calculates how long the health bar will be. It multiplies the current amount of health by the maximum bar length, and then divides it by the maximum amount of health. All of these are variables that we've set to 100, but can be modified to make the bar bigger or smaller.
Our level counter will be used to show the player's current level. It's a simple yet gratifying GUI element for the player. We'll only need one variable for the counter:
public int currentLevel = 1;
public GUIStyle myStyle;
We'll use currentLevel to show the player's current level. The GUIStyle variable will be used to access the properties of our GUI label. To draw this on the screen, we'll use a GUI label; add this line of code to the OnGUI() function:
GUI.Label(new Rect(Screen.width/2 + 15, Screen.height/2 + 335, 30, 30), currentLevel.ToString(), myStyle);
What this line of code does is draw the currentLevel variable on our screen, between the two sets of buttons.
In the Start() function, add this line of code at the end:
myStyle.fontSize = 36;
We add this so that we can edit the size of the label font.
The experience counter will show the player how much experience they earned as well as how much more experience is left until they gain a new level. To show this, we will use two GUI boxes: one for the player's current experience amount and the other for the total amount of experience possible.
First, we'll need to add a few variables; they'll be similar to the ones we used in the health bar:
public float maxExperience = 100;
public float currentExperience = 0;
public float currentExpBarLength;
public float maxExpBarLength = 100;
Our next step will be to draw it in the OnGUI() function:
  currentExpBarLength = currentExperience * maxExpBarLength / maxExperience;
if(currentExpBarLength > 5)
  GUI.Box(new Rect(Screen.width/2 - 20, Screen.height/2 - 300, currentExpBarLength, 25), "");
  GUI.Box(new Rect(Screen.width/2 - 20, Screen.height/2 - 300, maxExperience, 25), "");
As you can see, we follow the same code as we did to draw our health bar, except we draw two boxes on top of each other. The first box represents the current amount of experience; it only shows when the player has earned more than five experiences. This is to prevent the box from looking inside-out. The second box shows the maximum amount of experience.
Our next step will be to reset our experience and increase our level when the maximum amount of experience is gained. Enter this code:
if(currentExpBarLength >= maxExpBarLength)
{
currentExpBarLength = 0;
currentExperience = 0;
currentLevel++;
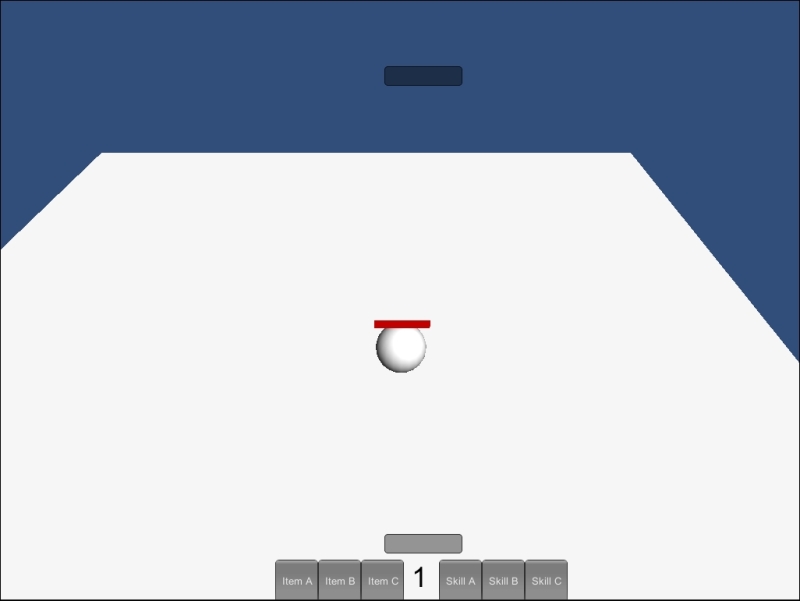
}In the preceding if statement, we check to see whether our current experience bar length is greater or equal to the maximum of the experience bar length. If it is, we reset our current experience and current experience bar length to 0. Then, finally, we increase our current level. The 2D section of this chapter is now complete. This is what our scene looks like now with our 2D GUI:
Building an immersive 3D UI
For our 3D GUI, we'll create similar elements that are used in 2D. We will create health bars, damage reports, and enemy name tags that will all appear to be in 3D.