
Who is your daddy and what does he do?
In the last two chapters we've been using classes to write and test our code. But what is a class exactly? What is the importance of the class tree, why use one at all? In this chapter we're going to take a closer look at what it means when we say that UnrealScript is an object-oriented programming language.
In this chapter we will:
Discuss the class tree and the principles of object-oriented programming
Talk about inheritance and what it means to the class tree
Use function overriding to change the behavior of our classes
Talk about casting and how to use it on our classes
Go over the different class properties that can be used
Discuss the difference between Actors and Objects
Let's start by talking about classes, what they are and how to use them.
If you were coming out with a new line of cars, you would want every one of them to be exactly the same, that way you'd know what to expect. To do that you would need a schematic. It's no different in programming. We want each instance of a projectile, vehicle, or weapon to start out exactly the same as any other, and to do that we use classes as our blueprints. Each class contains the variables, functions and other properties that define that object's behavior. Like cars, objects created from a class can be changed after they are created, but the starting point is always the same.
What does this mean for us in practical terms? Let's take a look at our friend AwesomeActor to see if he can help demonstrate.
Write the following code in our
AwesomeActorclass:class AwesomeActor extends Actor placeable; var() int MyInt; function PostBeginPlay() { `log(self @ MyInt); } defaultproperties { MyInt=4 Begin Object Class=SpriteComponent Name=Sprite Sprite=Texture2D'EditorResources.S_NavP' HiddenGame=True End Object Components.Add(Sprite) }We'll use an editable
MyIntvariable to see class behavior.Compile the class and open up the editor. Next to our existing
AwesomeActor, place another one.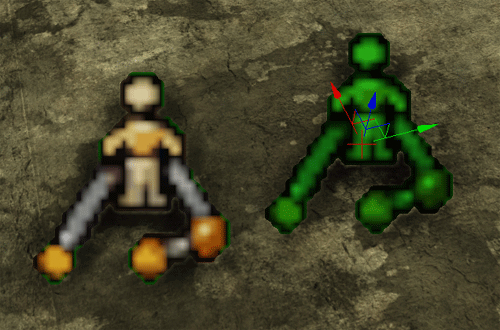
Save the map and run it from the editor, then close out the game and editor.
Now let's take a look at our
Launch2.logfile:[0010.61] ScriptLog: AwesomeActor_0 4 [0010.61] ScriptLog: AwesomeActor_1 4
We can see that class instances are created with the class name and then a number added to the end. Remembering that in programming everything starts with 0, in our case we have
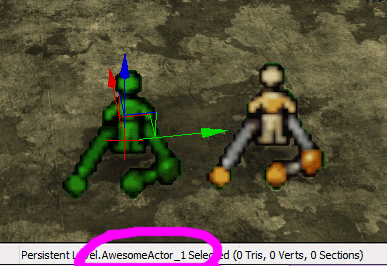
AwesomeActor_0andAwesomeActor_1. Since we haven't changed anything about them yet, both have the default value ofMyInt, 4.How do we know which one's which? A handy bar at the bottom of the editor can help us. Reopen the editor and click on one of the AwesomeActors to select it. At the bottom of the editor we can see that instance's name.
From our log we can see that each instance of
AwesomeActorhas been created in the same manner. Now let's change one of them. Double-click on one to open up its properties, and changeMyIntto23.
Save the map and run the game, then exit and take a look at
Launch2.log.[0007.76] ScriptLog: AwesomeActor_0 4 [0007.76] ScriptLog: AwesomeActor_1 23
We can see that even though both instances were created from the same class blueprint, we can change them after they have been created. This is an important principle of object-oriented programming. Having classes lets us quickly create objects of the same type without having to have a separate file or code for each instance we're going to use. An object is created from the class with all of that class' properties, and then we can change them after they have been created.
Another important principle of object-oriented programming is inheritance. Let's say our game had four different kinds of weapons: Pistols, machine guns, sniper rifles, and laser cannons. A lot of the functionality of those guns would be the same. They would each have ammo, damage, accuracy, and so on. Instead of having to duplicate all that code, they could all inherit the basic functionality of a weapon and change the properties they needed to to get their specific functionality.
We can see an example of this by taking a look at the class tree in UnCodeX, under Actor | Inventory | Weapon | UDKWeapon. Expanding UTWeapon we can see the different types of weapons provided as examples in the UDK:

We can see that
UTBeamWeapon(like the plasma gun we start with when running the game),UTWeap_RocketLauncher, andUTWeap_ShockRifleBaseare amongst our weaponry. Each of these behaves differently, but all of them have common functionality.Clicking on
UTWeapon, we can see some of its variables./** Initial ammo count if in weapon locker */ var int LockerAmmoCount; /** Max ammo count */ var int MaxAmmoCount; /** Holds the amount of ammo used for a given shot */ var array<int> ShotCost;
Things like MaxAmmoCount and ShotCost are common to all of the weapons, so instead of having to duplicate the variables to all of the subclasses, they're declared in all of the weapons' parent class, UTWeapon. Indeed, if we look at UTWeapon's subclasses like UTWeap_RocketLauncher, we won't find MaxAmmoCount or any of UTWeapon's other variables declared in any of them.
Speaking of weapons, I think it's time we started having a little fun with our code. AwesomeActor has been good to us so far, but he doesn't really do a lot besides sit there and send out log messages. Let's make a weapon.
The best way to learn about inheritance is to see it in action, and the most basic way to see it is through a game's weapons. They're easy to modify and are a good starting point for learning about the UDK's classes.
Create a new
.ucfile in ourAwesomeGame/Classesfolder and call itAwesomeGun.uc. Write the following code in it:class AwesomeGun extends UTWeap_RocketLauncher_Content; defaultproperties { FireInterval(0)=0.1 ShotCost(0)=0 }Compile our class. Now here's where we would ask, "How did it compile? I didn't declare any variables, but we're putting some in our default properties!" This is how inheritance works. We already saw the
ShotCostvariable inUTWeaponon line 27:/** Holds the amount of ammo used for a given shot */ var array<int> ShotCost;
If we look higher up in the class tree at Weapon, we can see
FireIntervalon line 44 (as of the October 2011 build):/** Holds the amount of time a single shot takes */ var() Array<float> FireInterval;
When we create our class, any variables, properties, and functions of the classes higher in the tree are automatically created inside our class. This saves a lot of duplicated code, as anything that's going to be common to all of the subclasses only needs to be declared once. Remember when I said that a lot of programming is reading through the source code? This is why. To understand what functionality is already there and what variables we can already use, it's important to read through the classes higher up in the tree to see what they can do. This also prevents us from reinventing the wheel as it were, writing code to do something that already exists.
In our case, using the already existing
FireIntervalandShotCostkeeps us from having to write any code at all to change the way our gun works. We can just change the default properties in our class.Open up the editor. To use our new weapon, we're going to need to place a weapon factory. In the Actor Classes browser, make sure Categories is unchecked, then browse down to NavigationPoint | PickupFactory | UDKPickupFactory | UTPickupFactory | UTWeaponPickupFactory. Place a UTWeaponPickupFactory on the floor where our AwesomeActors are, and delete our AwesomeActors.
Double-click on the factory to open its properties, and change its Weapon Pickup Class to our AwesomeGun.

One minor thing to do, unrelated to our programming. Since the weapon factory we placed is a navigation point, we need to rebuild paths in the editor to prevent us from getting warnings about it when we open up the map again later. Click on the build paths icon in the top toolbar, and then close the window that comes up afterwards.

Save the map and test it out. Run over to the weapon factory to pick up our custom gun, and then spray the level down with rockets.
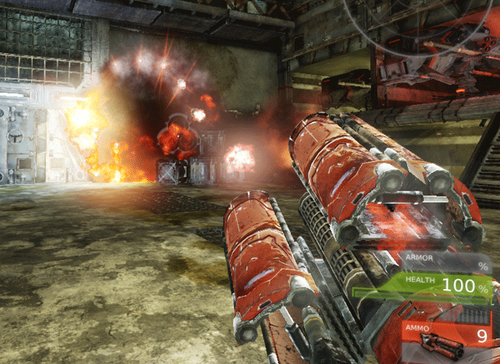
Boosh! And/or kakow! The changes we made were simple, but we can easily see how they affected the game. Changing the ShotCost to 0 effectively gave us infinite ammo, since firing a rocket consumes 0 ammo. Changing the FireInterval to 0.1 made it so that we fire ten rockets per second.
It's important to remember that variables and functions that are inherited only come from classes directly above ours in the class tree. As an experiment, let's create a subclass of our AwesomeGun.
Let's add a variable to our AwesomeGun class and see how it works with another class we'll create.
Add an int to our
AwesomeGunclass calledMyInt. Our code should now look like this:class AwesomeGun extends UTWeap_RocketLauncher_Content; var int MyInt; defaultproperties { FireInterval(0)=0.1 ShotCost(0)=0 }Now create another class in our
AwesomeGame/Classesfolder calledAnotherGun.uc. Type the following code into it:Compile the code. We'll see that it compiles fine as our
AnotherGunis inheritingMyIntfromAwesomeGun.Now let's change the class we're extending from to be the same as AwesomeGun's parent class:
class AnotherGun extends UTWeap_RocketLauncher_Content;
defaultproperties
{
MyInt=4
}
Now when we compile, we'll get a warning:
Warning, Unknown property in defaults: MyInt=4
Even though the classes extend off of the same class, inheritance only happens when the class we want to use the variable in is inside the one that declares the variable in the class tree. We can change the default property of the variable for our class, and this is how we get different functionality out of them such as our example with the firing rate.
In addition to variables, functions declared in parent classes are also inherited by their children. This lets us change behavior that goes beyond simple variable changes. For example, two pickups under Inventory | UTInventory | UTTimedPowerup in the class tree, UTBerserk and UTUDamage, have the same function called GivenTo which is inherited from Inventory. Even though the function name is the same, they give the inventory items their unique behavior. UTBerserk's GivenTo function calls a function that increases the player's weapon firing rate, while UTUDamage's GivenTo function increases the player's DamageScaling variable. These functions also set different sound effects and overlays for the two different items.
To experiment with function overriding we're going to expand our AwesomeGame classes to include a custom GameInfo and PlayerController class. The GameInfo controls the rules of the game and is what makes Deathmatch different from "Capture the Flag" for example. A custom GameInfo is one of the most important classes when creating our own game, and most of the time it is the first class created in a new project.
The PlayerController is the brain behind the player's character running around on screen. It processes our input, controls the player's viewpoint, and passes and receives messages to and from other players among many other things. It is another important class in a custom game, and taking the time to read through it will help you understand how a lot of things are done in a UDK game.
So with that, let's make a custom game!
Creating a custom GameInfo class is simple enough; it's just knowing where to let the game know that you want to run it. First up, let's create the class.
Create a new file in our
AwesomeGame/Classesfolder calledAwesomeGame.uc. Type the following code into it:class AwesomeGame extends UTDeathmatch; defaultproperties { }UTDeathmatchis a good place to start for a customGameInfo, even for games that don't involve killing anyone, or for single player games.UTDeathmatchand its parent classes have a lot of functionality in common with those types of games including the player spawn behavior.Now let's create a custom
PlayerController. Create a new file in ourAwesomeGame/Classesfolder calledAwesomePlayerController.uc. Type the following code into it:class AwesomePlayerController extends UTPlayerController; simulated function PostBeginPlay() { super.PostBeginPlay(); `log("AwesomePlayerController spawned!"); } defaultproperties { }We are almost done with the code part. One other thing that a
GameInfoclass does is control what type ofPlayerControlleris spawned. If you wanted to have a class-based game you could do it by creating more than one customPlayerControllerclass and using your customGameInfoto spawn the one the player selects.For
AwesomeGamewe're only using one type ofPlayerController, so let's set that in the default properties.class AwesomeGame extends UTDeathmatch; defaultproperties { PlayerControllerClass=class'AwesomeGame.AwesomePlayerController' }Remember that the first part of the property,
AwesomeGame, depends on what you named your folder underDevelopmentSrc.PlayerControllerClassis a variable declared inGameInfoand inherited by all subclasses ofGameInfoincluding ourAwesomeGame.Compile the code.
The map we've been using up until now has been fine for our purposes, but we're going to need something with a little more room to experiment from now on. If you're familiar with the editor then create a simple flat map with a player start at the center and lights so we can see. If you'd rather just get to the programming, place the file called
AwesomeTestMap.udkincluded with the book into theUDKGame/Content/Maps/AwesomeGamefolder that we created in Chapter 1.Time to run our game! Since the editor can't be open while we compile, and starting up the editor takes a bit of time, I prefer to use batch files to run test maps. It saves a lot of time and they're easy to set up. Create a text file anywhere that's convenient for you and call it
Awesome Test Map.txt. Write the following in it:C:UDKUDK-AwesomeGameBinariesWin32UDK.exe AwesomeTestMap?GoalScore=0?TimeLimit=0?Game=AwesomeGame.AwesomeGame -log
Make sure all the punctuation is correct, there are only two spaces after
UDK.exeand before-log. If you've installed the UDK in a different location or under a different name, be sure to write down your correct path toUDK.exe. This file is also included with the book if you're unsure of the format. Once again remember that the first part ofAwesomeGame.AwesomeGamerefers to the name of the.ufile you have compiled.Save the text file, and then rename it to change the extension from
.txtto.bat.Double-click on the file to run the test map. You'll notice that the DOS window that pops up looks really familiar. Adding
-logto the end of our batch file makes it so that we can see the log being written as it happens. If we look carefully at it, or shut down the game and openLaunch.log(notLaunch2.log, we're not running the editor now), we can see our log show up:[0005.67] ScriptLog: AwesomePlayerController spawned!
Awesome!
Now we know that our code is working correctly. The batch file is telling the game to use our custom GameInfo class, which is telling the game to use our custom PlayerController. When setting up a new UDK project these are usually the first two classes that get created, so now we have a good starting point for creating a custom game. So what can we do now?
Let's get to our experiment with function overriding by changing the way the player's camera works. If you've ever played any overhead view games like Gauntlet you'll know what we're going to do. In games like that, the camera stays in a fixed position high above the player's head, looking down towards the player. To do that, we're going to override the GetPlayerViewPoint function.
We know from our look at vectors in the previous chapter that we can get the location of actors in the world. If we wanted to move our camera away from the player, we'll need the player's location and an offset that we can use to make sure the camera stays in the same location relative to the player, like in the following diagram:

We could just directly add the values in the function, but to keep things organized it's usually a good idea to keep variables like that in the default properties where they can easily be found and changed if desired. We may also want to use this value for other purposes, so it's good to keep it all in one variable instead of having to track down and change each time we use it.
Let's add our offset and its default property to our code.
class AwesomePlayerController extends UTPlayerController;
var vector PlayerViewOffset;
defaultproperties
{
PlayerViewOffset=(X=-64,Y=0,Z=1024)
}
The Z value will make it, so our camera is above the player. You can set this value to whatever feels right to you, but for now I'm using 1024. We've also put a value in for X to make it so the camera is moved to the side a bit and not completely straight down. But why is it negative? This value was chosen so that the radar on the default HUD stays aligned with our current direction. Other than that it's really arbitrary, there's no reason it couldn't be positive or even moved to the Y value if we wanted.
Now for the
GetPlayerViewPointfunction. Looking at where it's declared inController.uc, we see it needs to be written like this:simulated event GetPlayerViewPoint(out vector out_Location, out Rotator out_Rotation)
So let's place the function in our
AwesomePlayerControllerto override it.simulated event GetPlayerViewPoint(out vector out_Location, out Rotator out_Rotation) { }The first thing we need to do is call the parent class' version of the function. We'll cover the super, more in the next chapter, but basically when we're overriding functions, calling the super makes the code in our parent class' version of the function we're overriding to be also executed. For
GetPlayerViewPointthis is important because otherwise the camera wouldn't work at all. Let's add the line to our function:simulated event GetPlayerViewPoint(out vector out_Location, out Rotator out_Rotation) { super.GetPlayerViewPoint(out_Location, out_Rotation); }At this point nothing has changed, if we compiled now and ran the game it would still be a first person viewpoint. Now we'll apply our offset. Add these lines after the call to the super:
if(Pawn != none)
{
out_Location = Pawn.Location + PlayerViewOffset;
out_Rotation = rotator(Pawn.Location - out_Location);
}
This is a fair bit of code, so let's go through it one step at a time. The
ifstatement you should recognize from the section in the last chapter about flow control. In this case we're checking to see if ourPlayerControllerhas a Pawn.In the UDK, a
Pawnis the physical representation of the player, the actual object in the world, with thePlayerControllerbeing its brain in a sense. In the game thePlayerControllerdoesn't move, and indeed if we log ourAwesomePlayerController'slocation in theGetPlayerViewPointfunction we'll see that once spawned it stays at the same location. In order for our camera to follow the player, we need to follow the Pawn since that is the actual visual actor of the player.Inside the if statement, the first line gets our
Pawn'slocation and adds ourPlayerViewOffsetvariable to it. Wherever thePawnis, the camera will stay locked to it with this offset.The next line is a bit of math to figure out the camera's rotation. We want it to always point toward the player, so we subtract our camera's location from the Pawn's to get a vector that points toward the player, and then turn that vector into a rotator that the function can use. This is a handy vector equation. The best way to remember it is to visualize two vectors, A and B. If we wanted to figure out what vector C was in the following diagram:

If we only have A and B, we can figure out what C is, by moving backwards along A, and then forwards along B as in the following diagram:

This would give us C = -A + B, or C = B - A. In our code B would be the Pawn's location and A would be the camera's, giving us our line of code:
out_Rotation = rotator(Pawn.Location - out_Location);

What in the world is going on here? We seem to be invisible except for a floating gun, and we're shooting at the ground. A big part of programming is knowing that your code isn't going to work perfectly the first time you write it. I call this process "breaking it towards completion". It might be broken right now, but it's a lot closer to what we wanted than when we first started. Let's see if we can make it better, starting with the invisible player.
By default you can't see your own
Pawn. This might not make sense at first. We can see our arms and the gun in our hands, so what am I talking about? The things we see in first person view are actually different actors attached to us, usually cut off above the elbows so we only see the arms and the weapon in our hands. If we were able to see our ownPawn, the animation of it running would frequently obscure the camera's view and make it look like a polygon factory exploded on our monitor. To prevent this, meshes have a variable calledbOwnerNoSee. When that's set toTrue, the owner of that actor can't see it. This is what we'll change in our function. Add a new line to the top of our if statement:Pawn.Mesh.SetOwnerNoSee(false);
Our function should now look like this:
simulated event GetPlayerViewPoint(out vector out_Location, out Rotator out_Rotation)
{
super.GetPlayerViewPoint(out_Location, out_Rotation);
if(Pawn != none)
{
Pawn.Mesh.SetOwnerNoSee(false);
out_Location = Pawn.Location + PlayerViewOffset;
out_Rotation = rotator(Pawn.Location - out_Location);
}
}
Compile and run the code.
That's better. We can see our
Pawnnow. We're a bit obscured by the crosshair, but we can ignore that for a minute. We have a bigger problem right now. If anyone attacked us we'd be totally screwed because we're shooting at the ground. Let's fix that next.In a normal FPS game on the UDK, when a weapon fires it asks the
PlayerControllerwhich direction we're facing so it knows what to shoot at. Normally thePlayerControllertells the weapon to use our camera's rotation. This isn't going to work in our case, as we've changed it, so the camera is always pointing toward the ground. To fix this we're going to override another function calledGetAdjustedAimFor. Write the following code after ourGetPlayerViewPointfunction:function Rotator GetAdjustedAimFor( Weapon W, vector StartFireLoc ) { return Pawn.Rotation; }This tells the weapon to use our Pawn's rotation instead of the camera's rotation. Since the Pawn never changes its pitch value (otherwise when we looked up it would look like we were lying on our back), this will make sure that we always shoot straight ahead. Our class should now look like this:
class AwesomePlayerController extends UTPlayerController;
var vector PlayerViewOffset;
simulated event GetPlayerViewPoint(out vector out_Location, out Rotator out_Rotation)
{
super.GetPlayerViewPoint(out_Location, out_Rotation);
if(Pawn != none)
{
Pawn.Mesh.SetOwnerNoSee(false);
out_Location = Pawn.Location + PlayerViewOffset;
out_Rotation = rotator(Pawn.Location - out_Location);
}
}
function Rotator GetAdjustedAimFor( Weapon W, vector StartFireLoc )
{
return Pawn.Rotation;
}
defaultproperties
{
PlayerViewOffset=(X=-64,Y=0,Z=1024)
}
Compile and run the game again.

Much better! Now let's see if we can take care of that crosshair.
Whether or not to show the crosshair is stored as a
configbool in thePlayerControllerclass. This means we can't just change it in the default properties, since we can't setconfigvariables in the defaults. This means we can change it one of three ways. We can remove the crosshair from the Scaleform HUD file, but Scaleform is a bit out of the scope of this book. We can change theconfigvalue in the INI files, but if the player were to change it the crosshair would appear again. For a more permanent solution, we can change thebNoCrosshairvariable in an overriddenPostBeginPlay.Change our
PostBeginPlayfunction to look like this:simulated function PostBeginPlay() { super.PostBeginPlay(); bNoCrosshair = true; }Our class should now look like this:
class AwesomePlayerController extends UTPlayerController;
var vector PlayerViewOffset;
simulated function PostBeginPlay()
{
super.PostBeginPlay();
bNoCrosshair = true;
}
simulated event GetPlayerViewPoint(out vector out_Location, out Rotator out_Rotation)
{
super.GetPlayerViewPoint(out_Location, out_Rotation);
if(Pawn != none)
{
Pawn.Mesh.SetOwnerNoSee(false);
out_Location = Pawn.Location + PlayerViewOffset;
out_Rotation = rotator(Pawn.Location - out_Location);
}
}
function Rotator GetAdjustedAimFor( Weapon W, vector StartFireLoc )
{
return Pawn.Rotation;
}
defaultproperties
{
PlayerViewOffset=(X=-64,Y=0,Z=1024)
}
Compile and run the code.

Almost there! Now what's with that giant gun? Remember when I talked about the first person view, and how the arms and weapon we see are different than the ones everyone else sees. The giant floating gun is what we would normally see in first person view, so let's hide it.
In our
GetPlayerViewPoint'sif statement, let's add this bit of code:if(Pawn.Weapon != none) Pawn.Weapon.SetHidden(true);
Now our code will check if we're holding a weapon and if so, hide it. Our function should now look like this:
simulated event GetPlayerViewPoint(out vector out_Location, out Rotator out_Rotation) { super.GetPlayerViewPoint(out_Location, out_Rotation); if(Pawn != none) { Pawn.Mesh.SetOwnerNoSee(false); if(Pawn.Weapon != none) Pawn.Weapon.SetHidden(true); out_Location = Pawn.Location + PlayerViewOffset; out_Rotation = rotator(Pawn.Location - out_Location); } }Compile and run.
Perfect!
We've overridden a few functions in our quest to get things how we want. Overriding functions allows us to take the functionality that already exists and tweak it to fit our purposes. We could do a lot of different things with the GetPlayerViewPoint function for instance. With the right code it could be turned into an RTS click-to-move type of camera that isn't focused on our Pawn, or a sidescroller, or a third person over the shoulder camera.
Function overriding is the main reason why I say it's important to read through the source code. Knowing what already exists will help you figure out what you need to change to get the functionality you want out of the game. The two classes we've already subclassed, GameInfo and PlayerController, are good places to start reading, as well as Actor and Object for general functions available to all classes.
Next up we're going to take a look at how to use actor classes themselves as variables.
In our discussion of variables in the last chapter, I purposely left out the one that's used most often, but now that we've had a chance to take a look at how classes work and are created, we can talk about how to use Actor classes themselves as variables. We've poked around a little bit in it when we made our Pawn visible and hid the giant floating gun, but let's explore it further.
For this experiment we're going to bring back our old friend the AwesomeActor. We'll use him as a variable in our AwesomePlayerController.
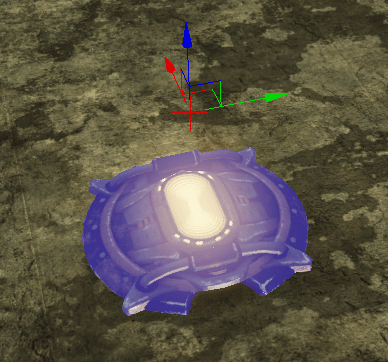
For this experiment we'll need
AwesomeActorto be visible, so let's make sure our default properties are set up for that. OurAwesomeActorclass should look like this:class AwesomeActor extends Actor; defaultproperties { Begin Object Class=SpriteComponent Name=Sprite Sprite=Texture2D'EditorResources.S_NavP' End Object Components.Add(Sprite) }Since we'll be spawning
AwesomeActorduring gameplay we don't need it to be placeable, and we're not going to do anything more with it once it's spawned so we don't need thePostBeginPlayfunction for now.In our
AwesomePlayerController, we're going to use the function that's called when we click the left mouse button to fire, calledStartFire. Let's add that to our class:exec function StartFire( optional byte FireModeNum ) { super.StartFire(FireModeNum); }The
FireModeNumin this function is used forweaponsthat have more than one firing mode, like the plasma bolts versus the beam of the Link Gun. We don't need to worry about that variable for our experiment though, let's just make sure it calls the super so we don't completely override the function and our gun still works.Now let's declare a variable of our
AwesomeActortype at the top of ourAwesomePlayerControllerclass.var AwesomeActor MyAwesomeActor;
We talked about the defaults of all of the other variables in the previous chapter, but what is the default for a variable of an Actor class? Only one way to find out! Let's log it in the AwesomePlayerController's PostBeginPlay function.
simulated function PostBeginPlay() { super.PostBeginPlay(); bNoCrosshair = true; `log(MyAwesomeActor @ "<-- Default for MyAwesomeActor"); }Our
AwesomePlayerControllershould now look like this.class AwesomePlayerController extends UTPlayerController; var AwesomeActor MyAwesomeActor; var vector PlayerViewOffset; simulated function PostBeginPlay() { super.PostBeginPlay(); bNoCrosshair = true; `log(MyAwesomeActor @ "<-- Default for MyAwesomeActor"); } exec function StartFire( optional byte FireModeNum ) { super.StartFire(FireModeNum); } simulated event GetPlayerViewPoint(out vector out_Location, out Rotator out_Rotation) { super.GetPlayerViewPoint(out_Location, out_Rotation); if(Pawn != none) { Pawn.Mesh.SetOwnerNoSee(false); if(Pawn.Weapon != none) Pawn.Weapon.SetHidden(true); out_Location = Pawn.Location + PlayerViewOffset; out_Rotation = rotator(Pawn.Location - out_Location); } } function Rotator GetAdjustedAimFor( Weapon W, vector StartFireLoc ) { return Pawn.Rotation; } defaultproperties { PlayerViewOffset=(X=-64,Y=0,Z=1024) }Now you can see how code can get long and complicated, we're only doing simple stuff so far and look at all the code in this class! This is why it helps to have variables and functions with very descriptive names. A lot of the time you can get an idea of what's going on in the code just by reading it out loud to yourself. A descriptive name also makes it easier to search in UnCodeX to find out where things are being used.
Compile our code and run it. In
Launch.logwe can find out what the default for Actor variables is.[0008.17] ScriptLog: None <-- Default for MyAwesomeActor
As we can see, the default for Actor variables is None. Where have we seen that before? We already have an example of how to use Actor variables in flow control statements in our code right here!
if(Pawn.Weapon != none)
Pawn.Weapon.SetHidden(true);
In this case, our
Pawnhas anActorvariable calledWeapon. If we look at where that's declared in the Pawn class:/** Weapon currently held by Pawn */ var Weapon Weapon;
So the Pawn's
Weaponis a variable of the Actor type of Weapon. It can be confusing when you're looking at code to see whether something's referring to a variable or a class, especially when the variable has the same name as the class it's a type of, so I wouldn't recommend doing this in your own code. That's why we named ourAwesomeActorasMyAwesomeActor. It still lets us easily tell what type of Actor it is while avoiding the confusion of the exact same name as the class.In the flow control statement using the Pawn's Weapon variable, we can see that we're checking to see that it's not equal to none. For Actor variables, this checks if this variable is referencing any Actor. If it is, then it won't be none and the flow control statement can continue.
One important thing to remember is that this does not mean that every Actor in the game is a variable or is assigned to one, or that declaring a variable of an Actor type automatically creates that Actor in the world. Actor variables are simply a way for us to store a reference to an Actor in the world. An Actor can be referenced by more than one variable in any number of different classes, or it may not be referenced by any variables. For instance, when we were first testing our
AwesomeActorclass, we were placing them directly in the level inUnrealEd. There was noAwesomeActorvariable in any other class that was referencing them.So how DO we assign things to our Actor variables? There are a few different ways of doing that. The first is by copying it from another variable that already has the reference stored. Let's say we created a variable of the type Weapon in our
AwesomePlayerController:var Weapon AnotherWeaponVariable;
PostBeginPlayis a bit too soon in the game's start up sequence to try and assign a reference to our weapon, so let's do it when we fire the gun. Let's change ourStartFirefunction to look like this:exec function StartFire( optional byte FireModeNum ) { super.StartFire(FireModeNum); AnotherWeaponVariable = Pawn.Weapon; `log(AnotherWeaponVariable); }Compile the code and run it. While in game, fire the gun (more than once is fine, it won't hurt anything). Exit and let's take a look at the log.
[0005.79] ScriptLog: UTWeap_LinkGun_0
The format may look familiar, the underscore with a number after it also showed up in the editor during our
AwesomeActortests in the first chapter.Another thing that we'll notice is that even though the variable is declared as the Weapon class, a
UTWeap_LinkGunactor was logged. Actor variables can reference either an actor of the variable type or any of its subclasses. This makes writing code more convenient, since we only need one variable to hold the player's Weapon instead of a different variable for every weapon class.Now that we have the reference, we can manipulate it the same way we would
Pawn.Weapon.For instance, our if statement inGetPlayerViewPoint:if(Pawn.Weapon != none) Pawn.Weapon.SetHidden(true);
Could be changed to this:
if(AnotherWeaponVariable != none)
AnotherWeaponVariable.SetHidden(true);
One important thing to remember about this though is that even though we assigned
AnotherWeaponVariabletoPawn.Weapon, we only did it once. IfPawn.Weaponchanged,AnotherWeaponVariablewouldn't automatically change to match it. For example, say your favorite color was purple. If I said my favorite color was your favorite color, mine would be purple as well. If you changed your favorite color to blue, mine would still be purple unless I said my favorite color was your favorite color again. Make sense?The second way of getting a reference to an Actor is by spawning that Actor ourselves. Using our
AwesomeActoras an example, let's change ourStartFirecode to this:exec function StartFire( optional byte FireModeNum ) { super.StartFire(FireModeNum); MyAwesomeActor = spawn(class'AwesomeActor',,, Pawn.Location); `log(MyAwesomeActor @ "<-- MyAwesomeActor"); }If we look at where the spawn function is declared in Actor.uc we can see how it's used:
native noexport final function coerce actor Spawn
(
class<actor> SpawnClass,
optional actor SpawnOwner,
optional name SpawnTag,
optional vector SpawnLocation,
optional rotator SpawnRotation,
optional Actor ActorTemplate,
optional bool bNoCollisionFail
);
The function line may look confusing, but the important part for us right now are the parameters. We tell it what class to spawn and the rest is optional. The only thing we're giving it for now is a location, which is our Pawn's location to make it easy to tell when the
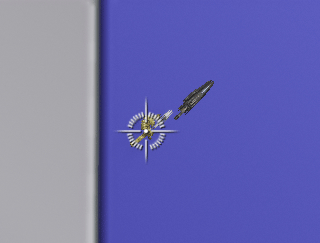
AwesomeActorhas been spawned.Compile the code and test it out. When we fire our weapon, an
AwesomeActorshould appear in game as well as the log. Fire the weapon a few times while moving around so we can see what happens.
Our AwesomeActors are spawning! Now let's take a look at the log:
[0007.76] ScriptLog: AwesomeActor_0 <-- MyAwesomeActor
[0008.11] ScriptLog: AwesomeActor_1 <-- MyAwesomeActor
[0008.52] ScriptLog: AwesomeActor_2 <-- MyAwesomeActor
[0008.81] ScriptLog: AwesomeActor_3 <-- MyAwesomeActor
[0021.36] ScriptLog: AwesomeActor_4 <-- MyAwesomeActor
We can see that as each
AwesomeActorwas spawned, it was assigned to ourMyAwesomeActorvariable, but when a new one was spawned the reference was replaced with the new one. We can also see that this doesn't mean the old one was destroyed just because MyAwesomeActor's reference changed.Another way we can get a reference to an Actor is by using what's called an iterator. There are a few functions in
Actor.ucwe can use that will cycle through all of the actors currently in the level and let us sort through them to find what we want. Before we do this we need to place anAwesomeActorin the level ourselves so we can see if we can get a reference to it. Change AwesomeActor's code to read theplaceablekeyword:class AwesomeActor extends Actor placeable; defaultproperties { Begin Object Class=SpriteComponent Name=Sprite Sprite=Texture2D'EditorResources.S_NavP' End Object Components.Add(Sprite) }Compile the code, then open our test map in the editor and place an
AwesomeActornear the player start. Save the map and close the editor.Now for the iterator function. We can do this in
PostBeginPlay, so let's put it there:simulated function PostBeginPlay() { super.PostBeginPlay(); bNoCrosshair = true; foreach DynamicActors(class'AwesomeActor', MyAwesomeActor) break; `log(MyAwesomeActor @ "<-- MyAwesomeActor"); }The way iterators work is that for every Actor in the map it finds that is either the class we specify (AwesomeActor in this case) or a subclass of that class, it will assign it to the variable we specify (MyAwesomeActor) so we can do things to it or check things about it. The break line right afterward makes it exit the loop after the first one it finds, but the
MyAwesomeActorvariable will keep the reference to it. Let's try it out.Compile the code and test. Close the game and take a look at the log:
[0004.62] ScriptLog: AwesomeActor_0 <-- MyAwesomeActor
The code found it!
Using Actors as variables is an important concept to grasp in UnrealScript. Without them objects in the world would have a hard time interacting with each other and it would be difficult to have any kind of complexity without them. As with any other type of variable we can use logical operators on them such as == or != to test if two variables are the same or not. They can also be made editable, since Actors placed in the world already exist and getting a reference to another one is as simple as typing its name into the property. They can't however be used in the default properties, since our classes are just blueprints for objects that haven't been created yet.
Before we move on to our next subject, let's try a challenge.
In our experiment with getting a reference to an Actor as we spawned it, every time a new one was spawned the reference was replaced. But, if we had an array of our class declared like this:
var array<AwesomeActor> MyAwesomeActors;
How would we rewrite the StartFire function to keep a reference to every AwesomeActor that we spawned instead of just the latest one?
Another important principle in object-oriented programming in UnrealScript is typecasting, or casting for short. We know that when creating subclasses we can add functions or variables that don't exist in the parent class. We also know that when we have an actor variable that it can reference a subclass of that actor. So if we have a subclassed actor referenced in our variable, how do we use the variables or functions that are unique to that subclass?
The answer of course is casting. Let's set up a subclass of AwesomeActor and see how we can use it.
Create a new file in our
AwesomeGame/Classesfolder and call itUberActor. Type the following code into it:class UberActor extends AwesomeActor placeable; function UberFunction() { `log("UberFunction was called!"); } defaultproperties { }We're extending off of
AwesomeActorand adding a function calledUberFunctionthat will log when it is called. Remembering our inheritance, we don't need the sprite in the default properties because we will inherit it fromAwesomeActor.Compile the code and open the editor. If we take a look in the Actor browser we'll see our
UberActorunderneathAwesomeActorin the class tree.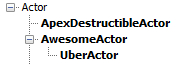
Close the editor for now; we'll be spawning the
UberActordirectly so we can get an easy reference to it.In our
AwesomePlayerControllerclass, add theStartFirefunction again and spawn anUberActorinto ourMyAwesomeActorvariable:exec function StartFire( optional byte FireModeNum ) { super.StartFire(FireModeNum); MyAwesomeActor = spawn(class'UberActor',,, Pawn.Location); `log(MyAwesomeActor @ "<-- MyAwesomeActor"); }And since we've made a lot of changes these past few pages, let's make sure our
AwesomePlayerControllerclasses match:class AwesomePlayerController extends UTPlayerController; var AwesomeActor MyAwesomeActor; var vector PlayerViewOffset; simulated function PostBeginPlay() { super.PostBeginPlay(); bNoCrosshair = true; } exec function StartFire( optional byte FireModeNum ) { super.StartFire(FireModeNum); MyAwesomeActor = spawn(class'UberActor',,, Pawn.Location); `log(MyAwesomeActor @ "<-- MyAwesomeActor"); } simulated event GetPlayerViewPoint(out vector out_Location, out Rotator out_Rotation) { super.GetPlayerViewPoint(out_Location, out_Rotation); if(Pawn != none) { Pawn.Mesh.SetOwnerNoSee(false); if(Pawn.Weapon != none) Pawn.Weapon.SetHidden(true); out_Location = Pawn.Location + PlayerViewOffset; out_Rotation = rotator(Pawn.Location - out_Location); } } function Rotator GetAdjustedAimFor( Weapon W, vector StartFireLoc ) { return Pawn.Rotation; } defaultproperties { PlayerViewOffset=(X=-64,Y=0,Z=1024) }Compile and run the code, shoot the gun a few times, then shut down the game and take a look at the log:
[0007.73] ScriptLog: UberActor_0 <-- MyAwesomeActor
[0008.52] ScriptLog: UberActor_1 <-- MyAwesomeActor
[0009.52] ScriptLog: UberActor_2 <-- MyAwesomeActor
As expected, even though
MyAwesomeActorhas been declared as anAwesomeActortype, our subclass can still be used and referenced byMyAwesomeActor.Now what do we do if we want to call
UberFunction?Let's try calling it directly in ourStartFirefunction:exec function StartFire( optional byte FireModeNum ) { super.StartFire(FireModeNum); MyAwesomeActor = spawn(class'UberActor',,, Pawn.Location); `log(MyAwesomeActor @ "<-- MyAwesomeActor"); if(MyAwesomeActor != none) MyAwesomeActor.UberFunction(); }That should work, right? Since our
MyAwesomeActorvariable references anUberActor, we should be able to just call the function right?Compile the code.
Error, Unrecognized member 'UberFunction' in class 'AwesomeActor'
Well that's no good. Since we declared
MyAwesomeActoras anAwesomeActortype, the game will treat it as one when we try to call functions and variables directly on it. Any functions and variables in the subclass won't be available to us. This is where casting comes in handy.Let's change the
StartFirefunction a little bit.exec function StartFire( optional byte FireModeNum ) { super.StartFire(FireModeNum); MyAwesomeActor = spawn(class'UberActor',,, Pawn.Location); `log(MyAwesomeActor @ "<-- MyAwesomeActor"); if(UberActor(MyAwesomeActor) != none) UberActor(MyAwesomeActor).UberFunction(); }Now let's try compiling:
Success - 0 error(s), 0 warning(s)
That's better!
Now let's run the game, fire the weapon, and see what happens in the log:
[0006.59] ScriptLog: UberActor_0 <-- MyAwesomeActor
[0006.59] ScriptLog: UberFunction was called!
There we go, our
UberFunctionwas called successfully! But what happens if we run this code with aMyAwesomeActorthat isn't anUberActor? Let's try that out.Let's change the
StartFirefunction again to spawn a normalAwesomeActorinstead of anUberActor:exec function StartFire( optional byte FireModeNum ) { super.StartFire(FireModeNum); MyAwesomeActor = spawn(class'AwesomeActor',,, Pawn.Location); `log(MyAwesomeActor @ "<-- MyAwesomeActor"); if(UberActor(MyAwesomeActor) != none) UberActor(MyAwesomeActor).UberFunction(); else `log("MyAwesomeActor is not an UberActor."); }
We've also added an else to our flow control statement, if it's not able to call UberFunction the log will let us know.
Compile and run the code, fire the weapon, and then exit and take a look at the log.
[0008.80] ScriptLog: AwesomeActor_1 <-- MyAwesomeActor
[0008.80] ScriptLog: MyAwesomeActor is not an UberActor.
The code went through to our else statement, so it's working correctly. Our
MyAwesomeActorisn't anUberActornow. But what's going on with theMyAwesomeActorvariable exactly?Let's change
StartFireagain. This time we'll add two logs, one normal and one with casting.exec function StartFire( optional byte FireModeNum ) { super.StartFire(FireModeNum); MyAwesomeActor = spawn(class'AwesomeActor',,, Pawn.Location); `log(MyAwesomeActor @ "<-- MyAwesomeActor"); `log(UberActor(MyAwesomeActor) @ "<-- UberActor(MyAwesomeActor)"); }What do you think the typecast log is going to show? Let's find out.
Compile and run the game, fire the gun, and exit to look at the log:
[0008.65] ScriptLog: AwesomeActor_1 <-- MyAwesomeActor
[0008.66] ScriptLog: None <-- UberActor(MyAwesomeActor)
That makes sense. An actor variable can either reference an object that actually exists in the level, or else it will be "none". When we're casting a variable, if the actor referenced by our variable isn't the class that we're casting to or any of its subclasses, the cast will give us "none" to let us know.
In addition to letting us use functions and variables that only exist in subclasses of our variable's class, casting gives us a way to react differently to a variable depending on what class it is. As an example, take the following code. Don't write this down; trust me it's not going to compile:
var Pet MyPet;
function ReactToPet()
{
if(Cat(MyPet) != none)
Sneeze();
else if(Dog(MyPet) != none)
PetTheDog();
else
`log("What are you, pet?");
}
Next let's see if we can get a practical example of casting for our game.
Let's change the way our Pawn reacts to the weapon he's carrying. We'll make him invisible when he picks up a rocket launcher, and make him visible for a bit after he fires it. Sure why not!
For this example we don't need to do anything to the rocket launcher class itself, all of our work will be in our
AwesomePlayerController. Let's strip out all of ourAwesomeActor/UberActorexperimentation and get back to our basicAwesomePlayerController:class AwesomePlayerController extends UTPlayerController; var vector PlayerViewOffset; simulated function PostBeginPlay() { super.PostBeginPlay(); bNoCrosshair = true; } exec function StartFire( optional byte FireModeNum ) { super.StartFire(FireModeNum); } simulated event GetPlayerViewPoint(out vector out_Location, out Rotator out_Rotation) { super.GetPlayerViewPoint(out_Location, out_Rotation); if(Pawn != none) { Pawn.Mesh.SetOwnerNoSee(false); if(Pawn.Weapon != none) Pawn.Weapon.SetHidden(true); out_Location = Pawn.Location + PlayerViewOffset; out_Rotation = rotator(Pawn.Location - out_Location); } } function Rotator GetAdjustedAimFor( Weapon W, vector StartFireLoc ) { return Pawn.Rotation; } defaultproperties { PlayerViewOffset=(X=-64,Y=0,Z=1024) }Well, maybe not so basic, but as far as code goes we're just getting started!
There's a function that's called on Controllers when they switch weapons, called
NotifyChangedWeapon. Let's use that to find out if the player is using a rocket launcher and make our Pawn invisible if they are:function NotifyChangedWeapon(Weapon PrevWeapon, Weapon NewWeapon) { super.NotifyChangedWeapon(PrevWeapon, NewWeapon); if(Pawn == none) return; if(UTWeap_RocketLauncher(NewWeapon) != none) Pawn.SetHidden(true); else Pawn.SetHidden(false); }First thing we do is call the super. Next, if we don't have a Pawn then we can't make it invisible, so exit out of the function if our Pawn is none (which can happen when we're dead or in spectator mode and so on). Finally, we cast
NewWeapon, which is a Weapon variable, toUTWeap_RocketLauncher. If it is that class or a subclass, then we make our Pawn invisible. If it isn't, we know the player has switched to another weapon and we make them visible again.Compile the code. Before we can test it out, we need to place a rocket launcher spawner in our test level. Open AwesomeTestMap in the editor, and in the Actor Browser select NavigationPoint | PickupFactory | UDKPickupFactory | UTPickupFactory | UTWeaponPickupFactory and place one near the player start. Double-click it to open up its properties and set its Weapon Pickup Class to
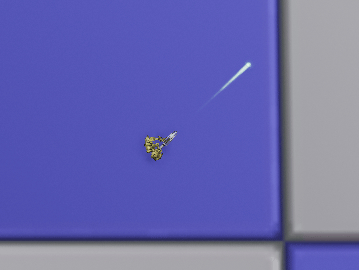
UTWeap_RocketLauncher_Content. Remember to Build Paths in the top toolbar of the editor, then save and close the editor.Run our batch file and walk to the weapon spawner to pick up the rocket launcher. We'll see our Pawn turn invisible, and we can still fire the weapon. Now use the mouse wheel to switch back to the Link Gun and we'll see the Pawn become visible again.

Ok, I am totally making this up as I go along and even I'll admit that's pretty awesome. Only one thing left to do, let's make the Pawn visible for a bit after we fire the rocket launcher!
To do that, we'll alter our
StartFirefunction and use another cast:exec function StartFire( optional byte FireModeNum ) { super.StartFire(FireModeNum); if(Pawn != none && UTWeap_RocketLauncher(Pawn.Weapon) != none) { Pawn.SetHidden(false); SetTimer(1, false, 'MakeMeInvisible'), } }Now when we fire whatever weapon our Pawn is holding, we check if it's a UTWeap_RocketLauncher and if it is, show our Pawn. We also use a function called SetTimer to make a one second delay before calling a function we'll write next, called
MakeMeInvisible. Don't compile yet, we need to write that function first.The function we're going to write now,
MakeMeInvisible, doesn't exist anywhere else, it's something we're making up specifically for ourAwesomePlayerController.function MakeMeInvisible() { if(Pawn != none && UTWeap_RocketLauncher(Pawn.Weapon) != none) Pawn.SetHidden(true); }A simple function, all we do is make sure we have a Pawn and are still holding our rocket launcher (the player might have switched weapons during the delay), and if so make our Pawn invisible.
Now our
AwesomePlayerControllershould look like this:class AwesomePlayerController extends UTPlayerController; var vector PlayerViewOffset; simulated function PostBeginPlay() { super.PostBeginPlay(); bNoCrosshair = true; } function NotifyChangedWeapon(Weapon PrevWeapon, Weapon NewWeapon) { super.NotifyChangedWeapon(PrevWeapon, NewWeapon); if(Pawn == none) return; if(UTWeap_RocketLauncher(NewWeapon) != none) Pawn.SetHidden(true); else Pawn.SetHidden(false); } exec function StartFire( optional byte FireModeNum ) { super.StartFire(FireModeNum); if(Pawn != none && UTWeap_RocketLauncher(Pawn.Weapon) != none) { Pawn.SetHidden(false); SetTimer(1, false, 'MakeMeInvisible'), } } function MakeMeInvisible() { if(Pawn != none && UTWeap_RocketLauncher(Pawn.Weapon) != none) Pawn.SetHidden(true); } simulated event GetPlayerViewPoint(out vector out_Location, out Rotator out_Rotation) { super.GetPlayerViewPoint(out_Location, out_Rotation); if(Pawn != none) { Pawn.Mesh.SetOwnerNoSee(false); if(Pawn.Weapon != none) Pawn.Weapon.SetHidden(true); out_Location = Pawn.Location + PlayerViewOffset; out_Rotation = rotator(Pawn.Location - out_Location); } } function Rotator GetAdjustedAimFor( Weapon W, vector StartFireLoc ) { return Pawn.Rotation; } defaultproperties { PlayerViewOffset=(X=-64,Y=0,Z=1024) }Now we're getting somewhere! Compile the code and test it out. When we pick up the rocket launcher and switch to it, we become invisible, and when we fire it our Pawn becomes visible for a second before turning invisible again. Awesome! If we switch to the Link Gun we become visible again and stay visible even after we fire it.
As we can see, using casting on Actor variables lets us get really specific with our functionality, right down to reacting differently to subclasses of our variable's class.
True/False: When we change a variable in an actor in the editor, the change applies to all actors of that class.
We can use casting to treat an actor variable as if it were a:
a.
Parent classb.
Subclassc.
Any Actor classTrue/False: When a cast fails it will return 'none'.
We learned a lot in this chapter about the class tree.
Specifically, we covered:
What classes are and how the game uses them
What inheritance means and how to change inherited variables and functions
Using function overriding to change a subclass' behavior
Casting actor variables to use a subclass' functions and tell subclasses apart
Now that we've learned about how classes relate to each other in the class tree, we're ready to start learning more about classes themselves and expand our game's arsenal of classes to give us more functionality.