Chapter 9: Implementing Program Flow
So far, we've mostly worked with either recorded macros, or relatively simple and short procedures. The code was easy to follow, since it started on line one and flowed line by line, until the procedure ended. Your life is about to change, however, because program flow will introduce you to conditions and decisions. It will be up to you to anticipate what users will do or expect, and write code to meet those expectations.
In this chapter, we will cover the following recipes:
- Exploring program flow
- Changing the flow using the GoTo statement
- Using If and If-Then structures to make decisions
- Using the Select Case structure
- Using loops
By the end of this chapter, you will be able to implement program flow principles in your VBA Sub procedures.
Technical requirements
This cookbook was written and designed to be used with MS Office 2019 and MS Office 365, installed on either Windows 8, 8.1, or 10.
If your hardware and software meet these requirements, you have everything you need.
Demonstration files can be downloaded from https://github.com/PacktPublishing/VBA-Automation-for-Excel-2019-Cookbook.
Please visit the following link to check out the CiA videos: https://bit.ly/3jQRvVk.
Exploring program flow
This chapter will open the door for you to a whole new way of thinking about programming. In the previous chapters, we've merely scratched the surface – making sure that you know your way around some basic, and some not so basic, aspects of VBA.
Program flow controls how your code is executed. This is where the real programming starts. Instructing a machine to make decisions has always been a challenge for programmers. A PC, by definition, is an unintelligent piece of hardware. Everything it does is done via software that has been designed by humans. Every command that software executes is based on a set of choices – options between two or more actions.
It's up to you, the programmer, to think of all the possible options your code has to choose between. You need to control the flow of your code by skipping over some statements and executing others, once or several times, until certain conditions are met. Every step of the way, your code must test conditions to determine what the procedure does next.
Changing the flow using the GoTo statement
In this recipe, we will be exploring the GoTo statement. Before I say another word, it is important to mention that whatever we do in this recipe is nothing more than a basic explanation of how to use the GoTo statement. The only time you should ever use it is when you do error handling, which will be discussed in Chapter 11, Handling Errors. The Sub procedure we create here is, however, a good example of how you can control program flow.
Let's see how the GoTo statement works.
Getting ready
Open Excel and activate a new workbook. Save the file as a macro-enabled file on your desktop and call it ProgramFlow. Sheet1 should be active. Press Alt + F11 to switch to the VBA Editor. With that open, insert a new module.
How to do it…
- Create a new Sub procedure and call it GoToSample:
Sub GotoSample()
End Sub
- Add the following lines of code:
Sub GotoSample()
Password = InputBox("Enter your password: ")
If Password <> "aBc" Then GoTo WrongPassword
End Sub
- Create code to display a message box for when the correct password is entered:
Sub GotoSample()
Password = InputBox("Enter your password: ")
If Password <> "aBc" Then GoTo WrongPassword
MsgBox "Welcome to our website"
'Lines of code
'More lines of code
Exit Sub
End Sub
- The last bit of code will take care of incorrect entries or errors:
Sub GotoSample()
Password = InputBox("Enter your password: ")
If Password <> "aBc" Then GoTo WrongPassword
MsgBox "Welcome to our website"
'Lines of code
'More lines of code
Exit Sub
WrongPassword:
MsgBox "Sorry, wrong password"
End Sub
- Press F5 to run the procedure. Type the correct password, aBc, in the message box and click OK. Another message box will appear with a welcome message. Click OK.
- Now, run the code again, this time entering an incorrect password. Click OK. This message box is less welcoming, informing you that your password was incorrect.
How it works…
Let's see how this most basic decision-making process works:
- In this procedure, users are asked for a password. Using InputBox works well in this case.
- Should you enter the correct password, it stands to reason that the bypassing procedure will not be invoked. A message box will welcome you, after which the rest of the code in the procedure will be run.
- Once the procedure comes to the last line of code, it will exit without activating the WrongPassword code, and end the Sub procedure.
- When the password is incorrect – not corresponding to the correct password – the rest of the procedure is bypassed. The GoTo command stops further execution of the rest of the code by sending you to the indicated area, in this case, WrongPassword.
- Once there, a message box will be activated, telling you that your password is incorrect (in Chapter 11, Handling Errors, we will discuss a more elegant way of returning to the procedure).
Using If and If-Then structures to make decisions
Of all the control structures in VBA, the If-Then and ElseIf structures are probably the most important. You will use these more than any of the other structures.
The word If sets a condition. It works like normal English; If you do not study, you may fail your exam. In other words, you need to make a decision. If you study, you pass, or else you fail.
In this recipe, we explain this control structure and its conditional statement with two examples, the first being very basic, and the second slightly more complex. Simplistic or not, you will see how you can use code to make your life easier. PCs are much faster than the human brain when it comes to repetitive tasks and decisions.
Getting ready
With ProgramFlow.xlsm still open on Sheet1, enter the single word Red in cell A1.
Press Alt + F11 to switch to the VBA Editor. With that active, insert a new module.
How to do it…
There are many ways of using the If statement. The simplest form is a single line of code, using only If and Then as keywords:
- As always, we start with a new Sub procedure. Call it IfThenSample, and then enter the following code:
Sub IfThenSample()
If Range("A1") = "Red" Then MsgBox "Danger"
End Sub
This is how it will appear on screen:
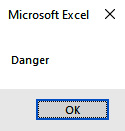
Figure 9.1 – Message box
- Press F5 to run the code. Observe the message box with the Danger message. Click OK to return to the Editor.
- Press Alt + F11 to switch to Excel. Replace the word Red in cell A1 with Green. Switch back to the Editor, and then press F5 again. Nothing happens, which is not surprising.
- To make the code slightly more useful, add another line of code after the first:
Sub IfThenSample()
If Range("A1") = "Red" Then MsgBox "Danger"
If Range("A1") = "Green" Then MsgBox "Proceed"
End Sub
- Running the procedure this time will display a message box with the Proceed message.
There are obvious limitations, and limited use for this type of decision making. Let's investigate something slightly more useful. This time, we will use the If and ElseIf keywords to create a nested If statement. We will continue with the same recipe.
- Switch back to Excel and enter the value 4 in cell A1. Return to the Editor. Create a second Sub procedure below the first one and call it ElseIfSingle. Copy the following sample code and paste it into the procedure:
Sub ElseIfSingle()
If Sheet1.Range("A1").Value > 5 Then
Debug.Print "Value is greater than five."
ElseIf Sheet1.Range("A1").Value < 5 Then
Debug.Print "Value is less than five."
Else
Debug.Print "Value is equal to five."
End If
End Sub
- Activate the Immediate window (View | Immediate Window or Ctrl + G).
- Run the code by pressing F5, first with the value 4 in cell A1. Observe the message in the Immediate window. Next, run it after replacing 4 with 5 in cell A1. Finally, run it one final time with the value 6 in cell A1. Three messages should be visible in the Immediate window.
How it works…
The program flow in this example can be explained as follows:
- The first line of code tests the value in cell A1. Since it is not larger than 5, in other words, it doesn't meet the condition, the line of code directly after that will be skipped. No message will be displayed in the Immediate window.
- The second condition will now be tested and found true. 4 is, after all, less than five. As per the next instruction, the message will now be displayed in the Immediate window:
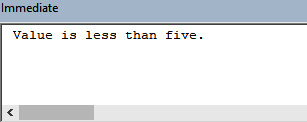
Figure 9.2 – Message in the Immediate window
- The third condition test will be skipped, since the purpose of the code was to test for one condition only; less than, equal to, or larger than.
There's more…
- Change the value in cell A1 back to 4. This time, cycle through the lines of code, step by step, by pressing F8, the keyboard shortcut for Step Into. Check which lines are skipped, and which message is displayed in the Immediate window every time.
- Once done, change the value in cell A1 to 5. Step into the code again. Once finished with 5, change the value to 6. Stepping into the code should show you how the first condition is met, and the rest of code is skipped to end the procedure.
There is a lot more you can do with the If-Then control structure. As you gain experience, you will discover the power of long and complex nested If controls. As long as you understand the basic principles, the rest will come easy.
Using the Select Case structure
This recipe covers yet another control structure, the Select Case structure. There are similarities between this and the If-Then-Else structure, which will make it easier to understand the working process. This structure works well enough when you have only two options to choose between, but excels when you have to make decisions between three or more options.
Getting ready
Make sure that ProgramFlow.xlsm is still active. Clear Sheet1 of any data and enter the following numbers in column A:
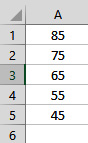
Figure 9.3 – Data for Select Case
Press Alt + F11 to switch to the VBA Editor. With that open, insert a new module.
How to do it…
- Create a new Sub procedure. Call it SelectCaseSample, and then copy the following code:
Sub SelectCaseSample()
Dim Mark As Integer
Range("A1").Select
Mark = ActiveCell.Value
Select Case Mark
Case Is < 50
ActiveCell.Offset(0, 1).Value = "Try again"
Case Is < 60
ActiveCell.Offset(0, 1).Value = "D"
Case Is < 70
ActiveCell.Offset(0, 1).Value = "C"
Case Is < 80
ActiveCell.Offset(0, 1).Value = "B"
Case Else
ActiveCell.Offset(0, 1).Value = "A"
End Select
End Sub
- Resize Excel and the VBA Editor in such a way that you can see both windows on one screen:
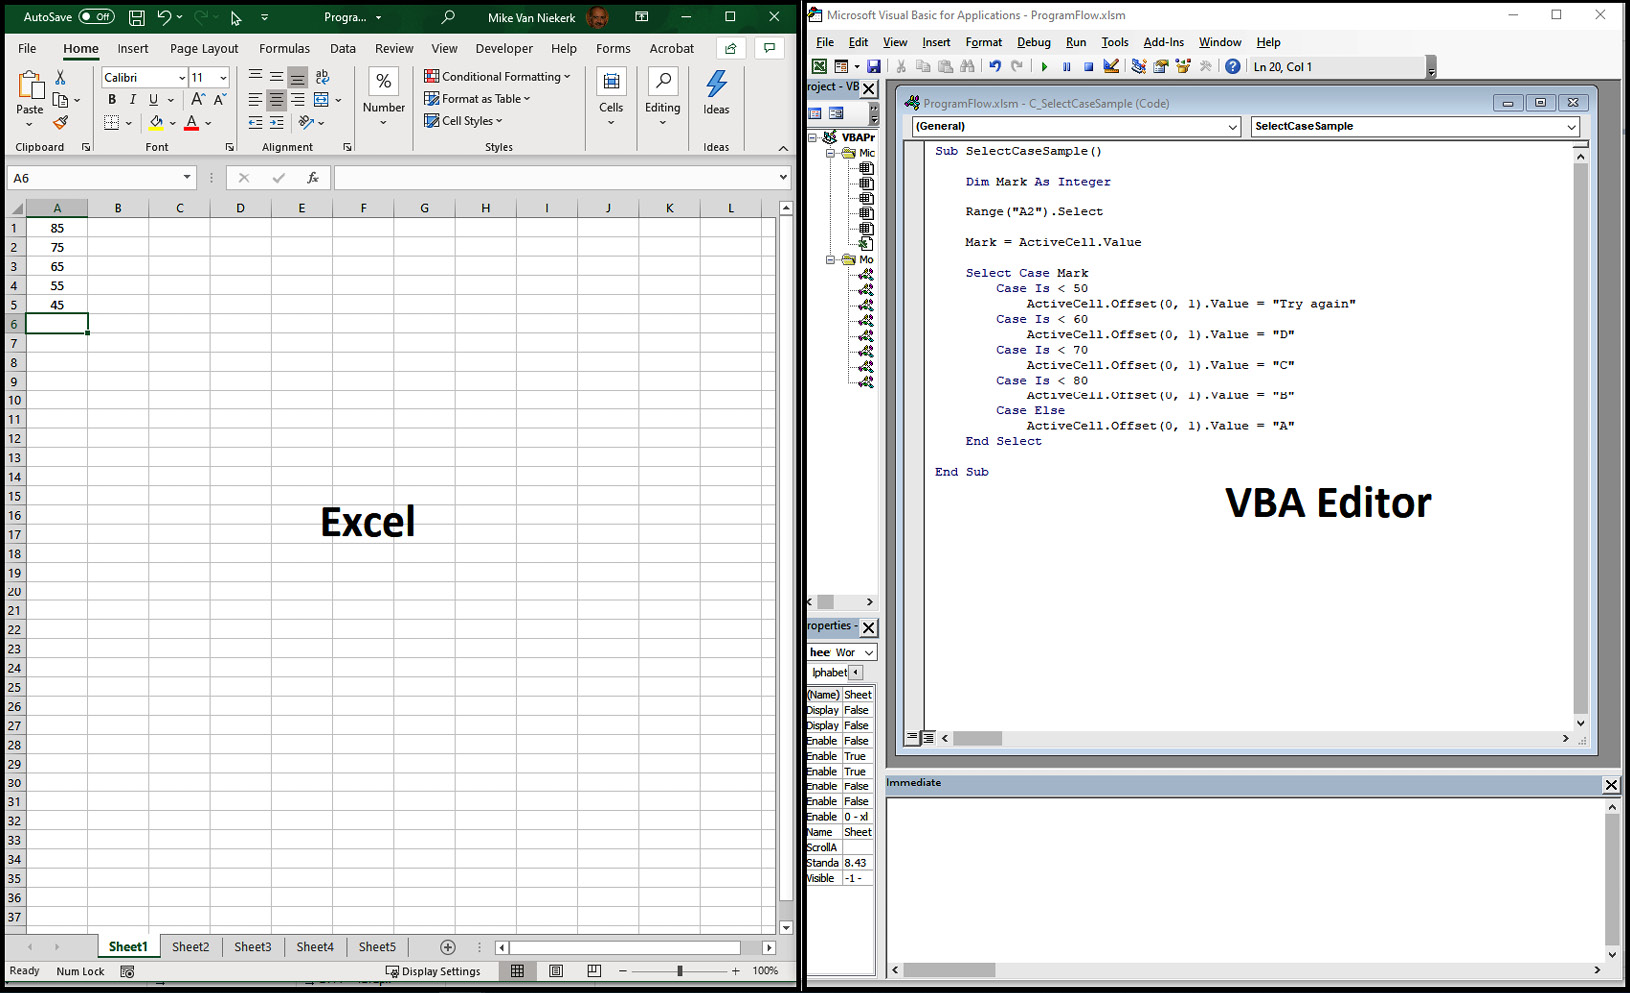
Figure 9.4 – Viewing Excel and the VBA Editor
- Click in the code window and press F8 to step into the code. Keep pressing F8 until the letter A appears in cell B1.
- Reset the procedure and change the first range reference to A2:
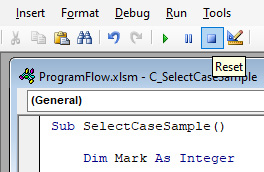
Figure 9.5 – The Reset button
- Repeat the process until you reach cell A5, each time changing the range reference to the next cell in column A. The data on Sheet1 should now look like this:

Figure 9.6 – Results
How it works…
This was a rather long-winded and ineffective process. Let's see what happened, and how we can improve on it.
Before starting, close the Immediate window in the VBA Editor, and replace it with the Locals window (View | Locals Window):
- Change the range reference back to cell A1, and press F8 to step into the code. Your screen should look like this:

Figure 9.7 – Stepping into code
- Press F8 twice more, until the focus is on the Mark variable. Observe how the active cell (cell A1)'s value has been assigned to the variable. To see the assigned value, hover the mouse curser over ActiveCell.Value:
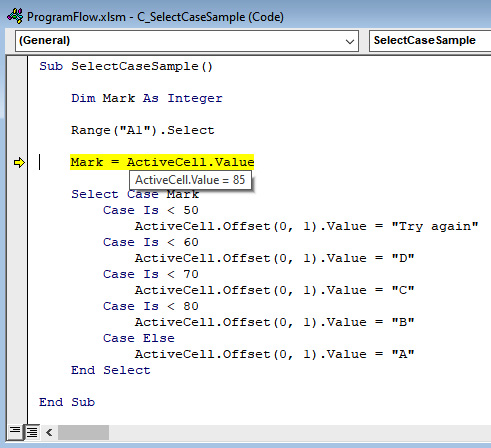
Figure 9.8 – Value assigned to a variable
- This value, 85, will now be tested in each case against the criteria. The first case is less than 50, meaning it will be skipped. Ditto for each case where 85 is larger than the set standard.
- Press F8 until you are on the last case, Case Else. This time, when you press F8, it will execute the next line because 85 is larger than 80. According to the case structure, any values not smaller than 80 must be assigned the value A. Furthermore, it must be placed in the same row, one column to the right:

Figure 9.9 – Meeting the criteria
- Pressing F8 now will end Case Select, while the next F8 will end the procedure.
- To add the correct symbol next to the value in cell A2, you will have to change the first range reference to A2 and step into the procedure again. Observe how every case is skipped, until it meets the less than 80 criterion. The line after that is executed, and because the value has been found, the case will be ended, after which the procedure will be ended.
- Repeat this process, each time changing the first range reference to the next cell in column A, until all the values have symbols in column B.
- It is quite obvious that this is a highly inefficient process. The problem is that neither the If-Then nor the Select Case structure can go through the code repetitively, at least not without manual intervention. In the following section, we will introduce you to loops, and when we finally combine If-Then or Case structures with a loop structure, you will never look back.
Using loops
In this final recipe of this chapter, we will show you how to use loops.
Loops are used to automatically repeat a set of statements until a condition is met. There are different types of loops that can be used in VBA:
- The Do loop
- The Do-Until loop
- The For Next loop
For and For Each loops can both be used to iterate through collections and arrays. Only the For loop can be used to iterate through a range of specified values, for example, 1 to 10. Only the For loop can be used to replace items of an iterated collection or array.
- Looping through a collection of objects
Getting ready
With ProgramFlow.xlsm still open on Sheet1, press Alt + F11 to switch to the VBA Editor With that open, insert a new module.
How to do it…
The first loop under discussion is the Do loop:
- Type the following code into the LoopSample Sub procedure:
Sub LoopSample()
Range("A1").Select
Do
ActiveCell.Offset(1, 0).Select
Loop Until ActiveCell.Value = ""
End Sub
- Resize the two windows again before stepping into the procedure.
- Press F8, and observe how cell A1 is selected in Excel.
- Press F8 again until you enter the Do loop. Press it again and observe how cell A2 is selected.
- Keep stepping through the code with F8 until you reach the final entry in cell A5. Pressing F8 one last time will exit the loop and end the procedure.
In the next Do Until loop, I've inserted the If Else structure in order to automate the process:
- Clear the data in cells B1:B5, and then insert a new module. Create the following Sub procedure in the code window:
Sub ElseIfDoLoop()
Dim Mark As Integer
Dim Symbol As String
Range("A1").Select
Do Until ActiveCell.Value = ""
Mark = ActiveCell.Value
If Mark < 50 Then
Symbol = "Try again"
ElseIf Mark < 60 Then
Symbol = "D"
ElseIf Mark < 70 Then
Symbol = "C"
ElseIf Mark < 80 Then
Symbol = "B"
ElseIf Mark <= 100 Then
Symbol = "A"
Else
End If
ActiveCell.Offset(0, 1).Value = Symbol
ActiveCell.Offset(1, 0).Select
Loop
End Sub
- To speed things up a bit, simply press F5 to execute the Sub procedure. Observe the newly inserted values in cells B1 to B5. The inserted If structure in the loop automated the process of assigning symbols to the values, saving us a lot of time.
The For Next loop is next:
- Create yet another module, and then insert the following text in the code window:
Sub ForNextSample()
Dim Count As Integer
Range("D1").Select
For Count = 1 To 20
ActiveCell.Value = Count
ActiveCell.Offset(1, 0).Select
Next Count
End Sub
- Once again, press F5 to execute the code. Column D will now display a series of values, in sequence, starting in cell D1 and ending in cell D20.
Finally, we have to loop through a collection of objects. A collection is a series of objects of the same type: workbooks, worksheets, ranges, and even cells fall into that category. There are various ways in which the concept can be demonstrated. In this recipe, we will be investigating two possible ways.
- The first example will loop through all the worksheets in the active workbook. In preparation for this Sub procedure, insert four extra worksheets into the workbook, and open the Immediate window in the Editor. Then, enter the following code in the code window:
Sub ListWorkSheetNames()
Dim SingleSheet As Worksheet
For Each SingleSheet In Worksheets
Debug.Print SingleSheet.Name
Next SingleSheet
End Sub
- When you press F5, the names of the five sheets will be displayed in the Immediate window.
In the final example, we will be looping through a range of cells. To make the most of this, we will have to combine a number of loops in a single Sub procedure.
In preparation, we need to clear Sheet1 and then add some data to the blank sheet:
- Enter a series of values in cells D1:D10. Start at 85 and use the Autofill feature to create a decreasing series with a step value of 4:
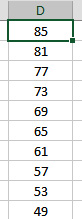
Figure 9.10 – Values in cells D1:D10
- Before running the ElseIfDoLoop procedure, change the starting reference to D1. Now run the ElseIfDoLoop procedure from cell D1. The result should look like this:
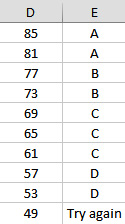
Figure 9.11 – Values with symbols
- Create a final new module and copy the following text into the code window.
The first part of the code declares all the variables:
Sub CountSymbols()
Dim SingleCell As Range
Dim ListOfCells As Range
Dim CountSymbol_A
Dim CountSymbol_B
Dim CountSymbol_C
Dim CountSymbol_D
Dim CountSymbol_TryAgain
Now we set the object range, and then the nested If statements:
Set ListOfCells = Range("D1", _
Range("E1").End(xlDown))
For Each SingleCell In ListOfCells
If SingleCell.Value = "A" Then
CountSymbol_A = CountSymbol_A + 1
ElseIf SingleCell.Value = "B" Then
CountSymbol_B = CountSymbol_B + 1
ElseIf SingleCell.Value = "C" Then
CountSymbol_C = CountSymbol_C + 1
ElseIf SingleCell.Value = "D" Then
CountSymbol_D = CountSymbol_D + 1
ElseIf SingleCell.Value = "Try again" Then
CountSymbol_TryAgain = CountSymbol_TryAgain + 1
End If
Next SingleCell
Here we assign values to the range F1 to F5:
Range("F1") = "Total A"
Range("F2") = "Total B"
Range("F3") = "Total C"
Range("F4") = "Total C"
Range("F5") = "Total Try"
And finally, we place the variable output in the range G1 to G5:
Range("G1") = CountSymbol_A
Range("G2") = CountSymbol_B
Range("G3") = CountSymbol_C
Range("G4") = CountSymbol_D
Range("G5") = CountSymbol_TryAgain
End Sub
- Press F5 and observe the newly inserted information in columns F and G:

Figure 9.12 – Displaying total values
Now this is starting to look like something you could use in the future. Let's investigate the construction of these procedures.
How it works…
Here's how loops work:
- The first procedure, LoopSample, is the simplest example of what a loop can do. It can start anywhere, but in this case we start in cell A1.
- Between the Do and Loop keywords, the single line of code tells VBA to move one row down, in the same column, from the active cell.
- By adding the Until keyword after Loop, we limit the downward movement to the first open cell. In other words, when the active cell is found to be empty, the loop ends.
The next procedure, ElseIfDoLoop, has a nested If inside the loop. Doing a Step Into will help a lot to clarify each step of the procedure:
- After declaring two variables, Mark and Symbol, cell A1 is selected.
- The same limitation as in the LoopSample procedure is inserted in order to end the loop when reaching the last entry in column A.
- Now, the active cell's value is assigned to the Mark variable. With that value stored in memory, each If statement is checked. The last one meets the criterion because 85 is larger than any of the others. The string A is now assigned to the Symbol variable.
- The If statement ends, and the next line is executed, meaning that the value A is entered in the cell to the right of the active cell, cell A1.
- Offset now moves the focus one row down, in the same column.
- The loop is repeated, adding symbols to the right of each value, until cell A6 becomes the active cell. Being empty, the loop is forced to end, after which the procedure also ends.
The ForNextSample procedure works as follow:
- A variable called Count is declared.
- Cell D1 is selected.
- The count start and end values are set.
- The first Count value is assigned to the active cell.
- Focus moves one row down, in the same column.
- The count loop now starts again, because the end value, 20, has not been reached.
- The loop continues until the value 20 is entered in the last cell, after which the loop ends and the procedure also ends.
Finally, the collection loop must be explained. In the first example, ListWorkSheetNames, we print the names of each worksheet in the immediate window. Here's how it works:
- A variable called SingleSheet is declared as a worksheet object.
- The For loop is given its parameters, which is to find all worksheet objects and print their names in the Immediate window.
- By stepping into the code (pressing F8), you will see how each sheet name is found and printed, until the loop ends after printing the last name.
The second example of a loop structure is essentially a loop through a range of cells. By adding some extra coding, it has the potential to become something useful.
The aim of this procedure is to count the number of symbols in each category, add them, and then print the totals in a new position. Here's how the code works:
- Declare range variables for the range that we will loop through, as well as the individual cells in the range.
- Next, declare variables for each symbol to be counted.
- Now, set the range for the ListOfCells variable. Observe that this range covers the entire column.
- Start the For loop, telling it to investigate each cell in the range.
- Insert a nested If structure inside the For loop. Observe how each symbol is detected and then added to the category variable. It will help a lot if you use the Step Into shortcut, F8, to cycle through each step here.
- Once the end of the range has been reached, the For loop ends. The procedure, however, has more commands waiting.
- The title for each symbol count is assigned to cells F1:F5.
- Finally, in the range G1:G5, the total values for each symbol category are assigned.
- The procedure ends.
Like everything else in life, it will take time for you to assimilate this information. Work through these examples repeatedly, and then try some of your own.