
Chapter 17: Creating Word Documents with Excel VBA
When dealing with VBA for Excel, you'd be forgiven for thinking that your coding would limit you to working within Excel only. However, if you think carefully about the role of VBA within Office Suite, you'd realize that it is common to all the applications within the suite.
Knowing this, a new set of possibilities opens up. You can, for instance, capture data in Excel via a user form, and then automatically export it to a Word document. The beauty of this is that everything is executed in the background. In other words, you don't need to manually copy data from Excel, search for the correct Word document to paste this information, save the file, and then close Word again.
In this chapter, we will cover the following recipes:
- Creating a new instance of Word
- Writing and formatting text
- Copying data into Word
- Using templates and bookmarks
By the end of this chapter, you will be able to create Word documents from within Excel.
Technical requirements
This cookbook was written and designed to be used with MS Office 2019 and MS Office 365, installed on either Windows 8, 8.1, or 10.
If your hardware and software meet these requirements, you are good to go.
Demonstration files can be downloaded from https://github.com/PacktPublishing/VBA-Automation-for-Excel-2019-Cookbook.
Please visit the following link to check the CiA videos: https://bit.ly/3jQRvVk.
Creating a new instance of Word
The first step in the process of creating a Word document from within Excel requires some changes to the available references. To be exact, we'll have to set a reference to Word's object library in the VBA Editor. Without this step, Excel cannot communicate with Word at all, let alone create documents and paragraphs.
In this recipe, we will be creating a new instance of Word from within Excel.
Getting ready
Open Excel, and activate a new workbook. Save the file as a macro-enabled file on your desktop and call it Word_Interaction.xlsm. Sheet1 should be active. Press Alt + F11 to switch to the VBA Editor, and then insert a new module.
It goes without saying that MS Word must also be installed on your computer in order for the instructions in this recipe to work effectively.
How to do it…
Here is how to link Word to Excel:
- In the VBA Editor, click on Tools | References. The References - VBAProject dialog box will open:
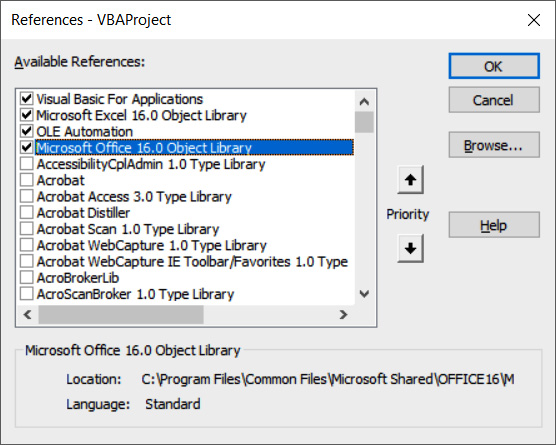
Figure 17.1 – The References - VBAProject dialog box
- Scroll down the list of available references until you find Microsoft Word 16.0 Object Library. Earlier versions of Word will have a different number, but will still refer to the Word object library:
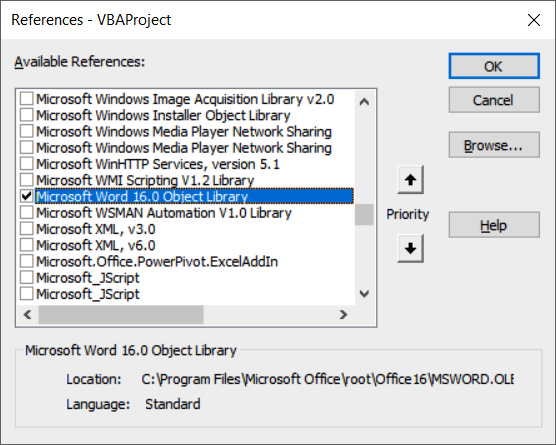
Figure 17.2 – The Microsoft Word 16.0 Object Library selected
- Once selected, click on OK to save the selection and also to close the dialog box.
Note
It is important to know that the reference to the Word object library is only valid for the Excel workbook you're working in currently. Every new workbook will have to be referenced to Word in exactly the same way.
- Create a Sub procedure to initiate Word from within Excel. There are several ways of doing this, but for this recipe, we will be using this specific technique:
Sub CreateWordDoc()
Dim wdApp As Word.Application
Set wdApp = New Word.Application
wdApp.Visible = True
wdApp.Activate
End Sub
- Press F5 to run the procedure, or to test it, if you will. A new instance of Word will appear on your screen. Close the Word application once you know that the Sub procedure is working.
- Opening Word without opening a new document is not very useful. Add the next lines of code to the Sub procedure to open a new document:
Sub CreateWordDoc()
Dim wdApp As Word.Application
Set wdApp = New Word.Application
With wdApp
.Visible = True
.Activate
.Documents.Add
End With
End Sub
Note
Because we need to use the Word.Application keyword every time we refer to MS Word, the loop structure makes it easier to refer to Word.Application via the wdApp variable.
- If you now run the procedure, Word will open again, this time displaying a new document, Document1.
- Close Word, but don't save the document. Return to the VBA Editor in Excel.
These steps will enable you to create a new instance of Word from within Excel, using VBA for Excel.
How it works…
Enabling the Microsoft Word object library for this Excel workbook made it possible to use Word keywords and methods within Excel. These keywords can open an instance of Word, as well as a new Word document, all from within Excel.
Writing and formatting text
It's all very well to know how to open Word with a new document available. However, we need more than this. A heading for the new document would be a good start, but that is still not enough. Formatting the heading is also necessary, and will round it off professionally.
In this recipe, we will be writing and formatting text.
Getting ready
Make sure Word_Interaction.xlsm is still open, and that the VBA Editor is active.
How to do it…
These are the steps to enter and format text in Word:
- To add text to a Word document via Excel, add the following line of code:
Sub CreateWordDoc()
Dim wdApp As Word.Application
Set wdApp = New Word.Application
With wdApp
.Visible = True
.Activate
.Documents.Add
.Selection.TypeText "Employee Information"
End With
End Sub
- Press F5. Running the Sub procedure will now result in a new instance of Word, with a new document open, and the line of text in the Sub procedure at the top of the page. Close Word without saving, since there is more code to add to our procedure in Excel:

Figure 17.3 – New instance of Word, with document and text
- It is quite clear that we need to do some formatting here. By starting a nested loop structure, this will save us repeating the keywords. Furthermore, if you haven't done it so far, you can use IntelliSense to assist you with all the Word keywords.Add the following lines of code to the VBA Editor:
Sub CreateWordDoc()
Dim wdApp As Word.Application
Set wdApp = New Word.Application
With wdApp
.Visible = True
.Activate
.Documents.Add
With .Selection
.ParagraphFormat.Alignment = _
wdAlignParagraphCenter
.BoldRun 'Switch Bold on
.Font.Size = 16
.TypeText "Employee Information"
.BoldRun 'Switch Bold off
.TypeParagraph 'Enter a new line
.Font.Size = 11
.ParagraphFormat.Alignment = _
wdAlignParagraphLeft
.TypeParagraph
End With
End With
End Sub
- When you run the Sub procedure now, there will be a marked improvement in appearance:
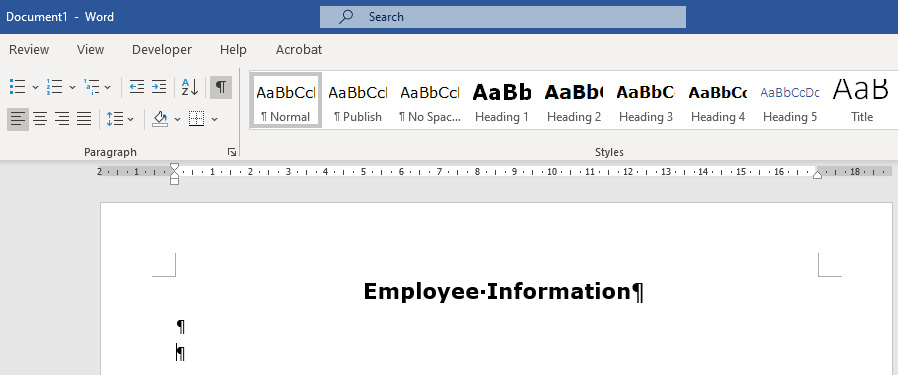
Figure 17.4 – Formatting done via VBA in Excel
Using these principles, users will be able to format a Word document with VBA coding in Excel.
Copying data into Word
We could have opened Word manually and achieved what we've just done, but the whole purpose of the exercise is to do it from Excel, so that data in a spreadsheet can be written to the Word document automatically.
What we need to do now is select data, copy it, and then paste that as part of the opening and formatting process.
In this recipe, we will be copying data into Word.
Getting ready
Make sure that Word_Interaction.xlsm is still open. Activate Sheet1, and enter the following data:

Figure 17.5 – Working data
How to do it…
Follow these steps to copy text from Excel to Word:
- Create code to automatically select whatever range is on a sheet:
Sub CreateWordDoc()
Dim wdApp As Word.Application
Set wdApp = New Word.Application
With wdApp
.Visible = True
.Activate
.Documents.Add
With .Selection
.ParagraphFormat.Alignment = _
wdAlignParagraphCenter
.BoldRun 'Switch Bold on
.Font.Size = 16
.TypeText "Employee Information"
.BoldRun 'Switch Bold off
.TypeParagraph 'Enter a new line
.Font.Size = 11
.ParagraphFormat.Alignment = _
wdAlignParagraphLeft
.TypeParagraph
End With
End With
Range("A1", Range("A2").End(xlDown) _
.End(xlToRight)).Copy
wdApp.Selection.Paste
End Sub
- Run the Sub procedure to check your coding. We know that the first part will work, but in this case, we need to see whether the data on our spreadsheet was copied into Word:

Figure 17.6 – Excel data copied and pasted into Word
- Saving the Word document is what we need to do next. When you add these lines of code, pay attention to the changes in the With statement:
Sub CreateWordDoc()
Dim wdApp As Word.Application
Set wdApp = New Word.Application
With wdApp
.Visible = True
.Activate
.Documents.Add
With .Selection
.ParagraphFormat.Alignment = _
wdAlignParagraphCenter
.BoldRun 'Switch Bold on
.Font.Size = 16
.TypeText "Employee Information"
.BoldRun 'Switch Bold off
.TypeParagraph 'Enter a new line
.Font.Size = 11
.ParagraphFormat.Alignment = _
wdAlignParagraphLeft
.TypeParagraph
End With
Range("A1", Range("A2").End(xlDown) _
.End(xlToRight)).Copy
.Selection.Paste
.ActiveDocument.SaveAs2 Environ("UserProfile") _
& "DesktopEmployeeReport.docx"
End With
End Sub
- The last thing we need to do is close down the document, and finally, Word itself. Just add the following two lines in a new line after the filename:
.ActiveDocument.Close
.Quit
- When you run the procedure now, you will see Word open briefly, and immediately close again. If you want to eliminate that, simply comment the following two lines out:
'.Visible = True
'.Activate
- We're still not done, because every time we run the procedure, the file is replaced without giving us the option of saving it under a new name. We need to add code to create a unique filename every time we run the procedure. By declaring a new variable, SaveAsName, and then assigning a formatted version of the Now function, we can create a unique name for the file every time it is saved. Add these two lines after .Selection.Paste:
SaveAsName = Environ("UserProfile") _
& "DesktopEmployeeReport " _
& Format(Now, "yyyy-mm-dd hh-mm-ss") & ".docx"
.ActiveDocument.SaveAs2 SaveAsName
- Every time you run the procedure now, a new file with a unique name will be saved.
Following these instructions will enable you to automatically copy data from Excel into Word.
How it works…
Here is an explanation of what we did.
Selecting data in Excel is not a new concept, and neither is copying. Saving it in a Word document with Excel VBA requires making use of the Environ function, as well as formatting of the filename. This will ensure that a new file is created every time the Excel VBA procedure is executed.
See also
Visit https://bettersolutions.com/vba/functions/environ-function.htm for more information on the Environ function and keywords.
Using templates and bookmarks
To copy an entire Excel spreadsheet and paste it into Word doesn't make sense. You could rather have done everything in Word from the beginning, saving you the whole effort of copying from Excel and pasting in Word.
The point is, if you have an existing Word document or even a Word template, and you regularly need to export selected information from a spreadsheet in Excel to this template, this is the way to do it. The word automation acquires new meaning if you can link Excel with Word in this manner.
In this recipe, we will be pasting Excel data into a Word document at a specific bookmark.
Getting ready
Make sure that Word_Interaction.xlsm is still open, and that the VBA Editor is active.
How to do it…
We need to do the following:
- Open the Word document that was saved to the desktop. Delete the inserted table, (select only the entire table – no lines before or after, click the Layout contextual tab, and then Rows & Columns | Delete | Delete Table)
- Enter the short sentence Latest information on employees in the open space.
- Insert a bookmark in the first open line after this sentence. Click on Insert | Bookmark. The Bookmark dialog box will appear. Enter a name in the Bookmark name textbox, and then click on Add to close the dialog box:

Figure 17.7 – Bookmark name
- Click on File | Save As, and save the file as a Word template. The file extension is .dotx. Call the file EmployeeReportTemplate.
- Depending on the operating system and the version of MS Office on your PC, the file will be saved in a specific folder, dedicated to template files:

Figure 17.8 – Folder for template files
- Close the file and return to the VBA Editor in Excel.
- Add the following line of text in the code window to open a specific file, and not just a blank document:
Sub CreateWordDoc()
Dim wdApp As Word.Application
Set wdApp = New Word.Application
With wdApp
.Visible = True
.Activate
.Documents.Add "C:UsersUserDocumentsCustom _
Office TemplatesEmployeeReportTemplate.dotx"
- Because we're making use of a template, we do not need any of the formatting we did for the previous document. Delete the following lines of code:
With .Selection
.ParagraphFormat.Alignment = _
wdAlignParagraphCenter
.BoldRun 'Switch Bold on
.Font.Size = 16
.TypeText "Employee Information"
.BoldRun 'Switch Bold off
.TypeParagraph 'Enter a new line
.Font.Size = 11
.ParagraphFormat.Alignment = _
wdAlignParagraphLeft
.TypeParagraph
End With
- Use the GoTo method to instruct Word exactly where the copied data from Excel must be inserted. That's why we created a bookmark in the Word template. The final coding for the entire procedure should look like this:
Sub CreateWordDoc()
Dim wdApp As Word.Application
Dim SaveAsName As String
Set wdApp = New Word.Application
With wdApp
'.Visible = True
'.Activate
.Documents.Add "C:UsersUserDocumentsCustom _
Office TemplatesEmployeeReportTemplate.dotx"
Range("A1", Range("A2").End(xlDown) _
.End(xlToRight)).Copy
.Selection.Goto wdGoToBookmark, , , "ExcelTable"
.Selection.Paste
SaveAsName = Environ("UserProfile") _
& "DesktopEmployeeReport " _
& Format(Now, "yyyy-mm-dd hh-mm-ss") & ".docx"
.ActiveDocument.SaveAs2 SaveAsName
.ActiveDocument.Close
.Quit
End With
End Sub
These instructions will enable you to create a template in Word, and then automatically place content from Excel into the Word document at specific bookmarks.
Inserting Excel data into a Word template can be done with Excel VBA. Inserting a bookmark in the Word template enables Excel to send data to a specific insertion point for the data to be pasted.
See also
Visit https://docs.microsoft.com/en-us/office/vba/api/word.selection.goto for more information on the GoTo method.