Chapter 13: Creating and Modifying Dialog Boxes
Dialog boxes are an integral part of every application in the Windows environment. The Office Suite is no exception. When it comes to Excel, a dialog box will pop up almost every time we interact with the application.
A dialog box should not be confused with a window. Windows can be resized, maximized, and minimized, while dialog boxes cannot be manipulated in that way. They appear in a standard size when information needs to be gathered or shared, after which they're closed.
This broad description of dialog boxes includes all forms and shapes of the item. For the purposes of this chapter, we will only work with message boxes, input boxes, and the open and close dialog boxes. On the other hand, UserForms, which are a more elaborate type of dialog boxes, will be discussed in the next chapter.
We've used message boxes as well as input boxes in the previous chapters, but we're going to take things to a new level here—we'll add icons and titles this time. Even the humble message box can do more than just display a message.
In this chapter, we will cover the following recipes:
- Using the MsgBox function
- Using the InputBox function
- Using the Application.InputBox method
By the end of this chapter, you will be able to write code to effectively activate message boxes and input boxes.
Technical requirements
This cookbook was written and designed to be used with MS Office 2019 and MS Office 365, installed on either Windows 8, 8.1, or 10. If your hardware and software meet these requirements, you are good to go.
Demonstration files can be downloaded from https://github.com/PacktPublishing/VBA-Automation-for-Excel-2019-Cookbook.
Please visit the following link to check out the CiA videos: https://bit.ly/3jQRvVk.
Using the MsgBox function
A message box is the easiest, and also the most common, way of sharing information with users. As well as the built-in message boxes that appear in Excel whenever the application needs to inform you of something, we can create and customize our own message boxes in VBA.
In this recipe, we will be using the MsgBox function to create and manipulate message boxes to suit our needs.
Getting ready
Open Excel, and activate a new workbook. Save the file as a macro-enabled file on your desktop and call it DialogBoxes.xlsm. Sheet1 should be active. Press Alt + F11 to switch to the VBA Editor, then insert a new module.
How to do it…
Let's build and expand the code for message boxes:
- Enter the following code in the code window of Module1:
Sub SimpleMessage()
MsgBox "Basic message box."
End Sub
- Press F5 to run the procedure. This is the message box you should see. Click OK to close it:
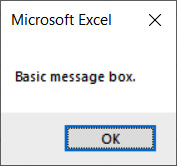
Figure 13.1 – A simple message box
- To customize the title of the message box, click at the end of the line of code and type a comma to make the parameter list appear:

Figure 13.2 – The parameter list
- With the Buttons parameter now highlighted, scroll down the list of available symbols. Select and click on vbInformation:
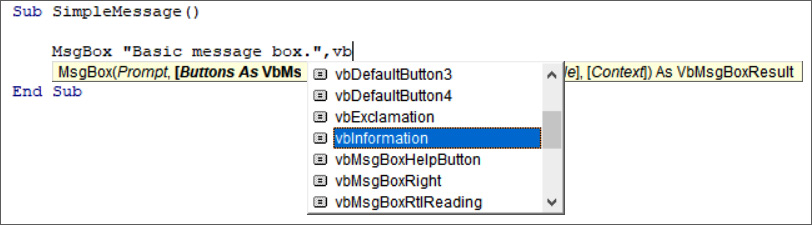
Figure 13.3 – The parameter list
- Enter another comma after vbInformation to enter a title for the dialog box:
Sub SimpleMessage()
MsgBox "Basic message box.", vbInformation, _
"Announcement"
End Sub
- Press F5 to run the code. The customized message box should look like this:
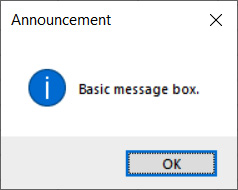
Figure 13.4 – Customized message box
- Close the message box. Let's concatenate, or join, if you will, a message with a VBA function. Create a new Sub procedure under the existing one, still in Module1, by adding the following code:
Sub ConcatenateLines()
MsgBox "The date is " & Date
End Sub
- Run the code. The following message box will appear:

Figure 13.5 – Concatenated strings
- Click OK to close, then add more information with another ampersand. Enter the following code:
Sub ConcatenateLines()
MsgBox "The date is " & Date & ", week 32 of the _
year."
End Sub
- Run the procedure, and see how the message has changed:
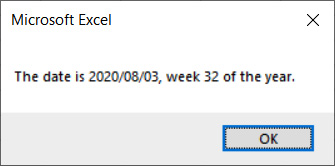
Figure 13.6 – Added information
- Close the message box. If the information is too much for one line, we can create a new line with the vbNewLine command:
Sub ConcatenateLines()
MsgBox "The date is " & Date & "," & vbNewLine _
& "week 32 of the year."
End Sub
- When you run the procedure this time, the message box will look like this:

Figure 13.7 – Message over two lines
- Message boxes can also be used to display values from cells. Press F11 to switch to Excel, then enter the following data in Sheet1:

Figure 13.8 – Data
- Switch back to the VBA Editor. In the code window, create another new Sub procedure by adding the following code:
Sub DepartmentInfo()
Range("A2").Select
MsgBox ActiveCell.Value & " works in " _
& ActiveCell.Offset(0, 1).Value
End Sub
- Pressing F5 will display the following message box:
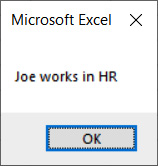
Figure 13.9 – Values from cells
By changing the range to cell A3, A4, or A5, you will get different results every time.
- We can even ask questions with a message box. Alter the code of the second procedure as follows:
Sub ConcatenateLines()
MsgBox "The date is " & Date & "," & vbNewLine _
& "week 32 of the year."
MsgBox "Is this information correct?", vbQuestion _
+ vbYesNo, "Validate"
End Sub
- Run the procedure and click OK to close the first message box. The second message box should look like this:

Figure 13.10 – Message box with Yes/No buttons
- Since there is no way that we can store the choice, be it yes or no, we need to address that next. First, we need to create a variable to store the response. Add the following line of code to the procedure, before the first MsgBox function:
Dim ButtonChoice As VbMsgBoxResult
- Assign the button choice to the variable by changing the second dialog box as follows:
ButtonChoice = MsgBox("Is this information correct?", _
vbQuestion + vbYesNo, "Validate")
Take note of the parentheses that's been added to the message box prompt.
- We now need to add an If statement to check which button was clicked. Add the following code after the previous line:
If ButtonChoice = vbYes Then
MsgBox "Yes, it is correct."
Else
MsgBox "No, it is incorrect."
End If
- The final procedure should look like this:
Sub ConcatenateLines()
Dim ButtonChoice As VbMsgBoxResult
MsgBox "The date is " & Date & "," & vbNewLine _
& "week 32 of the year."
ButtonChoice = MsgBox("Is this information _
correct?", vbQuestion + vbYesNo, "Validate")
If ButtonChoice = vbYes Then
MsgBox "Yes, it is correct."
Else
MsgBox "No, it is incorrect."
End If
End Sub
- Press F5 to run the procedure. Click OK to close the first message box. When the second box appears, click Yes. The following message should appear:

Figure 13.11 – Confirmed as correct
- Press F5 to run the procedure one last time. After the first dialog box is closed, choose No. The following message should appear:
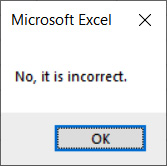
Figure 13.12 – Incorrect
Your imagination is the only limit when it comes to message boxes. These examples will give you a good starting point.
How it works…
Here is the explanation of what we did with message boxes:
- The MsgBox function, in its simplest form, can be used to display a message box containing a text message of your choice.
- To customize the MsgBox function, carefully read the IntelliSense guidelines. After the basic prompt, you can add symbols and a title for the message box.
- The message that appears in the message box can also be enhanced. Use the ampersand (&) to combine strings of text or other functions.
- If the line of text on the message box becomes too long, use the vbNewLine command in the Sub procedure to create a new line.
- We sometimes need information from a specific cell or cells to be displayed in a message box. To achieve that, assign the MsgBox function to the cell.
- There are more buttons than just the standard OK button available for use with message boxes. Use the buttons parameter to select, for instance, the Yes/No buttons.
- Without some way of assigning the Yes or No choice to either a database or a variable, the buttons are not of much use.
- Create a variable to store the choice. Then, use the If function to display either a Yes message box or a No message box.
Using the InputBox function
Input boxes are used to capture information from users. By its very nature, it obtains only one piece of information at a time, be it a value, date, or text information. It is the easiest, and also the most common way of gathering information from users.
Like message boxes, we can create and customize our own input boxes in VBA.
In this recipe, we will be using the InputBox function to create and manipulate input boxes to suit our needs.
Getting ready
Make sure that DialogBoxes.xlsm is still open. Sheet1 should be active. Press Alt + F11 to switch to the VBA Editor, then insert a new module.
How to do it…
Enter the following code to create an input box:
- In Module2, create the following Sub procedure:
Sub AskForName()
InputBox "Please enter your name"
End Sub
- Press F5 to run the code. The following input box will appear. Click on the Cancel button to close the dialog box:

Figure 13.13 – A standard input box
- To customize the input box, click at the end of the code line and enter a comma. The parameter list will appear. Take note that the last parameter specifies that the entry must be a string value:

Figure 13.14 – Parameter list
- Add a title for the input box by adding "Personal Details" after the comma:

Figure 13.15 – Title added in code
- Press F5 to run the code. The input box has a new title:
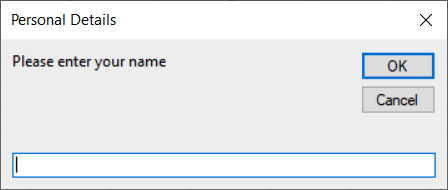
Figure 13.16 – New title in input box
- We can even change the default value of the input box. Edit the text as follows:
Sub AskForName()
InputBox "Please enter your name", "Personal _
Details", "Enter first name here…"
End Sub
- Press F5, and observe the resulting input box:

Figure 13.17 – Default value
- Next, we want to capture what's been entered in the input box. Change the code as follows. Make sure that the arguments are put in parentheses:
Sub AskForName()
Range("A2").Value = InputBox("Please enter your _
name", "Personal Details")
End Sub
- Press F5 to run the code, enter your name in the input box, then click OK. Switch back to Excel to confirm that your name has been entered on cell A2.
- Instead of writing the value to a specific cell, we can store what's been entered in the input box in a variable. Let's declare a variable to make this happen:
Sub AskForName()
Dim YourName As String
YourName = InputBox("Please enter your name", _
"Personal Details")
End Sub
- When you run the procedure, no entries or dialog boxes will be visible. Let's take care of that problem by adding a message box:
Sub AskForName()
Dim YourName As String
YourName = InputBox("Please enter your name", _
"Personal Details")
MsgBox "Hi " & YourName
End Sub
- Run the code, enter your name, and click OK. The following dialog box will appear:
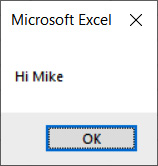
Figure 13.18 – Variable value displayed
- When things go according to plan and users enter their names, as expected, we don't have any problems. When they cancel the input box without entering a name, the message box will not have any value to display. Let's take care of that.
- Edit the procedure as follows:
Sub AskForName()
Dim YourName As String
YourName = InputBox("Please enter your name", _
"Personal Details")
If YourName = "" Then
MsgBox "No entry was made"
Else
MsgBox "Hi " & YourName
End If
End Sub
- If you now run the procedure and cancel or close the input box, a message box will tell you that no entry was made. However, if you do enter a name, you will be greeted with the original message box.
How it works…
- A convenient way to ask for information in Excel is to use an input box. It is the simplest way for users to interact and provide information.
- Input boxes can be customized as far as the title, prompt, default value, and symbol are concerned. The parameter list serves as a guide to what can be added.
- Values entered into an input box are often stored as a variable.
- As in so many cases when programming in VBA, we need to plan for user errors. An example of this is data validation, which was covered in detail in Chapter 12, Debugging. Always add code to do data validation.
Knowing how to use the InputBox function is the first step of interacting with users.
Using the Application.InputBox method
The standard input box works well enough, until you try to capture data other than text. You're also limited to direct inputs, meaning that you cannot click on a value in the spreadsheet while the input box is active.
These are the two main limitations of the standard input box. The other one, the absence of built-in error handling, is also a drawback. There are, in other words, more than enough reasons to progress to the Application.InputBox method.
In this recipe, we will be using the Application.InputBox method to create input boxes with more functionality.
Getting ready
Make sure that DialogBoxes.xlsm is still open. Insert a new sheet and enter the following data on Sheet2:

Figure 13.19 – Sample data
Now, switch to the VBA Editor and insert a new module.
How to do it…
Enter the following partial code to create an application input box:
- In Module3, start creating the following Sub procedure:
Sub ApplicationInputBox()
Dim Name As String
Name = Application.InputBox(
End Sub
- Before typing in the prompt, observe how the parameter list differs from the standard input box:

Figure 13.20 – The parameter list for Application.InputBox
- Complete the Sub procedure now. You do not have to specify a data type, because the default, namely String, will automatically be applied:
Sub ApplicationInputBox()
Dim Name As String
Name = Application.InputBox("Enter employee's name")
Range("A1").End(xlDown).Offset(1, 0).Value = Name
End Sub
- Press F5 to run the code. The following input box will show. Enter a name, then click OK:
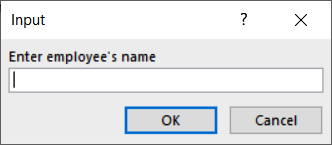
Figure 13.21 – An application input box
- The data on Sheet2 should be updated to include an extra name:
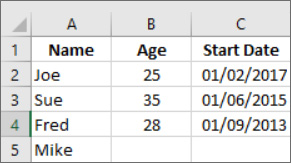
Figure 13.22 – Updated data
- For entering a number, there are two ways to handle the process required. The first is the following:
Sub ApplicationInputBox()
Dim Name As String
Dim Age As Integer
Name = Application.InputBox("Enter employee's name")
Age = Application.InputBox("Enter his/her age", , _
, , , , , 1)
Range("A1").End(xlDown).Offset(1, 0).Value = Name
Range("A1").End(xlDown).Offset(0, 1).Value = Age
End Sub
- The second way is to use named parameters. This is a shorter and less complex technique. Entering all those commas in order to skip parameters to get to the Type parameter is confusing. Here is how we could do it differently:
Sub ApplicationInputBox()
Dim Name As String
Dim Age As Integer
Name = Application.InputBox("Enter employee's name")
Age = Application.InputBox(Prompt:="Enter his/her _
age", Type:=1)
Range("A1").End(xlDown).Offset(1, 0).Value = Name
Range("A1").End(xlDown).Offset(0, 1).Value = Age
End Sub
- When accidentally entering text, the following dialog box will appear:

Figure 13.23 – Built-in validation
- Run the procedure again, but instead of entering a name, click any cell with a name and press Enter. Next, choose a cell in column B to select an age value and press Enter:

Figure 13.24 – Clicking a cell to capture data
- These values will be entered into the table:
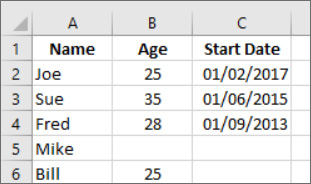
Figure 13.25 – Indirect entries
- To capture dates, enter the following code:
Sub ApplicationInputBox()
Dim Name As String
Dim Age As Integer
Dim StartDate As Date
Name = Application.InputBox("Enter employee's name")
Age = Application.InputBox(Prompt:="Enter his/her _
age", Type:=1)
StartDate = Application.InputBox(Prompt:="Enter _
employment date dd/mm/yyyy", Type:=1)
Range("A1").End(xlDown).Offset(1, 0).Value = Name
Range("A1").End(xlDown).Offset(0, 1).Value = Age
Range("A1").End(xlDown).Offset(0, 2).Value = StartDate
End Sub
- Run the code and enter values in the Name and Age boxes. For Start Date, you can enter anything that is recognizable as a full date, for example, 1/12/2015, or 1 December, 2015. See Step 7 under the How it works… section on implicit datatype conversion.

Figure 13.26 – Date displayed in the correct format
How it works…
- The parameter list for the application input box differs from the standard input box. There are more options and, most importantly, we can assign a data type with the last parameter.
- The following values should be used to indicate data types:

Table13.1 – Indicating data types
- The application input box looks slightly different from the standard input box, but it fulfills the same function.
- Specifying the return type is the most important factor distinguishing this input box from the standard input box. Using the Type 1 parameter, for example, will allow only numbers to be entered into the input box.
- When entering the wrong data type, the built-in validation function will prevent the procedure from crashing. With a normal input box, you'd have a lot of work to write error-handling procedures.
- Another valuable feature of the application input box is its ability to use existing values on the spreadsheet to fill the input box. Standard input boxes are of the modal type, meaning that nothing can be selected on the spreadsheet while the input box is open. That limitation means that you cannot click on a cell to read in that cell's value into the text box.
- Dealing with dates is another challenge, because the application input box does not have a date type option. However, with the help of implicit datatype conversion, a string entry can be converted to a date, as long as the string is recognizable as a full date.
Note
For more detailed information on the Application.InputBox method, have a look at the Microsoft documentation, available at https://docs.microsoft.com/en-us/office/vba/api/excel.application.inputbox.