
Installing the window display
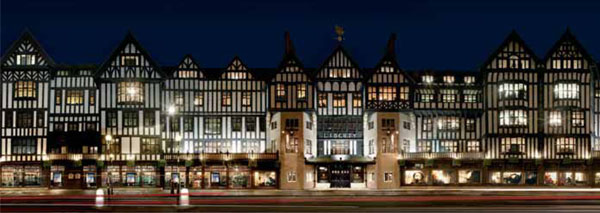
The facade of Liberty’s in London is impressive, but it also means the customer has to focus a little more on what is for sale in the windows. Planning a window scheme that can compete with the architecture is important.
No retailer wants shop windows to be either empty or in a state of undress for long. It is therefore important that a feasible time slot is allocated to dress a window from start to finish. Unless the window scheme is complicated and needs to be dressed over a couple of days, a visual merchandiser should ensure that the window is completed in a day. Many visual merchandisers start early in the morning in order to strip out the existing window scheme while the store is closed so as not to hinder the customers by trailing props and products across the shop floor. It is also an easier time to bring the new scheme to the window.
If the window scheme has been planned accurately, the subsequent dressing of the window should be trouble-free. It is essential that the window about to be dressed is clean and neat; checks should be made to ensure all the lighting is working and that lightbulbs have not blown out. It is easier to put up a ladder and replace lightbulbs before the window is full. Staples, nails, and screws from the previous dressing will need to be removed and, in many cases, holes in walls will need to be filled and sanded.
Next, the walls should be treated. The floor should be left for last in order to avoid unnecessary paint splashes. If the walls are to be painted, it is often wise to start very early in the day, as they may require several coats and, depending on the weather, they may take a long time to dry. Leaving the lighting on will also help raise the temperature by a few degrees. It is advisable to mask the edges of the glass close to the walls; paint-speckled glass will be noticeable to the customer. If the window has a solid floor such as marble or wood, this should also be covered to prevent paint splashes unless it, too, is being painted.
If the window has floorboards cut from MDF, they can be removed and covered away from the window while the walls are being painted, thus saving time. Covering large boards with either fabric or PVC can be difficult purely because of their size—assistance may be needed. As part of your toolbox (see page 201) a staple gun and a pair of scissors are a visual merchandiser’s saviors; they will be required on many occasions, especially when covering panels. Always cut the fabric larger than the board, leaving enough spare to hold and pull while you staple. Start on the longest side first, putting a few staples in the middle of the board on both sides. Then do the same on the shorter sides, pulling the fabric taut; work toward each of the corners, securing the fabric with staples as you go. When you reach the corners, fold the fabric neatly under the board and add some final staples. Remember: you may also need to strip the boards for the next window scheme, so try to use as few staples as possible. Removing staples can be time-consuming and arduous.

Subtle lighting and elegantly posed mannequins in the windows either side of the entrance to Saks Fifth Avenue, New York, help guide customers into the store.
With the walls painted and the floors finished, the dressing can commence. It is always advisable to introduce the props first—they will be the backbone of the whole window scheme. Position the props where you think they will attract attention, remembering that the products should be king and that the props must interact with the merchandise. Larger props are generally placed toward the back of the window, with smaller ones toward the front. It would be pointless to hide the products (and any other props) with a bulky prop. Any hanging props should be suspended first; they must be securely wired or fixed to the ceiling grid. Freestanding props can then be added and arranged.
Remember, mannequins are also props designed to support clothing. It is always worth considering where they will be positioned and how they will interact with the window scheme.
If the window is backless, the unappealing rear of a piece of furniture such as a cabinet will be in full view. Placing another cabinet backing onto it can hide the ugly side and can also be dressed to face in-store, giving the customer two chances to see the display: when entering and when leaving.
As with props, large products should be placed in the window first. It is important at this time to distribute the larger items so that they form the backbone of the main bulk of a grouping. A window may have many groupings, all trailing from one main grouping. The largest and main grouping should be made up of the largest item. A refridgerator, for example, could stand just off-center, with a grouping of other appliances around it; a washing machine may be positioned to the left, near but not touching the refridgerator, with another selection of electrical items; to the right of the window a microwave could be positioned with a smaller group of electrical accessories. It is important that the largest grouping is installed first, before the smaller ones. Concentrating on one small area of the window before finishing the bigger area is not advisable, because it is the fully completed window as a whole that should be considered as the sales device, not just one specific area.

Illuminated skirts resemble lampshades in this Selfridges window in London. The window was designed to promote the launch of the store’s women’s shoe gallery, the largest shoe department in the world.
While you are dressing a window, use the inside of the glass as a mirror to see the reflection of the grouping and setup. It is a very immediate way of gauging how the whole window is taking shape. You must still periodically go outside the window to check it, too.
Checking the window from street level is essential. Spending long hours dressing a window without looking at it from the customer’s viewpoint can lead to problems: the focal point might not be in the correct place and the whole window scheme may need to be adjusted, thus wasting time.
Closed windows can be claustrophobic and sometimes get very hot. It is always best, not only for one’s sanity but also for creativity, to take breaks from difficult dressings. A five-minute rest may inspire and initiate ideas.
When a window is 90 percent complete, it is time to adjust the lighting. The lighting is one of the most vital elements of a window display and, sadly, one that many visual merchandisers forget to adjust. Hours can be spent dressing and perfecting a window display, so it makes sense to illuminate it to make it stand out to passersby. A spotlight focused on an empty back wall can be very distracting—and at night, very visible.
Attention should be focused on the price tags, if used; make sure that they are spelled correctly and that they are positioned adjacent to the relevant products. It is also important to make sure that the text used is large enough to be seen from the street. Finally, all surfaces should be cleaned and floors should be swept.
Some stores have the luxury of having a mock window in the studio, complete with lighting rig, where a whole window can be installed and dressed to see if the design works aesthetically. Retail chains might use this as a visual tool, once photographed, for visual guidelines that can then be sent out to regional stores.
A dramatic window scheme in Topshop, London. At first glance, it seems that the mannequins are simply grouped together to show off the latest trends, but after further scrutiny, it becomes apparent that the entire room they occupy is upside down.