
Node.js, a free and open source JavaScript runtime based upon Chrome’s JavaScript engine that can be downloaded from https://nodejs.org
The TypeScript compiler (tsc), which you install via the Node.js command line with the following command:
Using Node.js and TypeScript will help you to avoid dependencies on the operating system and proprietary development environments. Obviously, all the topics discussed in this chapter apply to other languages and platforms as well. For the last example about MSBuild tasks on Windows, you instead need Microsoft Visual Studio 2017. The Community edition is available for free at www.visualstudio.com .
Note
If you have worked with the first Visual Studio Code releases, it is important for you to know that the way tasks are handled has changed. If this is your case, you might want to read the migration guide for tasks written with older versions to the last version: https://code.visualstudio.com/docs/editor/tasks#_convert-from-010-to-200 .
Understanding Tasks
At its core, Visual Studio Code is a code-centric tool, so it often requires executing external programs to complete operations that are part of the application lifecycle, such as compilation, debugging, and testing.
In the Visual Studio Code terminology, integrating with an external program within the flow of the application lifecycle is a task. Running a task not only means executing an external program but also getting the output of the external program and displaying it in the most convenient way inside the user interface.
Note
Tasks are only available with folders, not individual code files.
A task is basically a set of instructions and properties represented with the JSON notation, stored in a special file called tasks.json. If VS Code is able to detect the type of project or source code inside the folder, a tasks.json file will not always be necessary, and VS Code will do all the job for you. If it cannot detect the type of project or source code, or if you are not satisfied with the default settings of a task, under the current folder, it generates a hidden subfolder called .vscode, and, inside this folder, it also generates a tasks.json file. If VS Code is able to detect the type of project or source code inside the folder, it will also prefill the tasks.json content with the proper information, otherwise you will need to configure tasks.json manually. For a better understanding, I will explain tasks that VS Code can detect and that it configures on your behalf, and then I will discuss how to create and configure tasks manually.
Tasks Types
Build task: A build task is configured to compile the source code, assets, metadata, and resources into a binary or executable file, such as libraries or programs.
Test task: A test task is configured to run unit tests in the source code.
Watch task: A watch task starts a compiler in the so-called watch mode. In this mode, a compiler always watches for changes to any unresolved files after the latest build and will recompile them at every save.
Visual Studio Code provides built-in shortcuts to execute a build task. When new tasks are added, VS Code updates itself to provide shortcuts for the new tasks. Additionally, you can differentiate tasks of the same type. For example, you can have a default build task and other custom build tasks that can be executed only with specific situations.
Running and Managing Tasks
The first approach to understanding tasks in practice is running existing, preconfigured tasks. For the sake of simplicity, start Visual Studio Code and open the project folder called simple from the collection of examples you downloaded previously from the TypeScript Samples repository on GitHub ( https://github.com/Microsoft/TypeScriptSamples ).
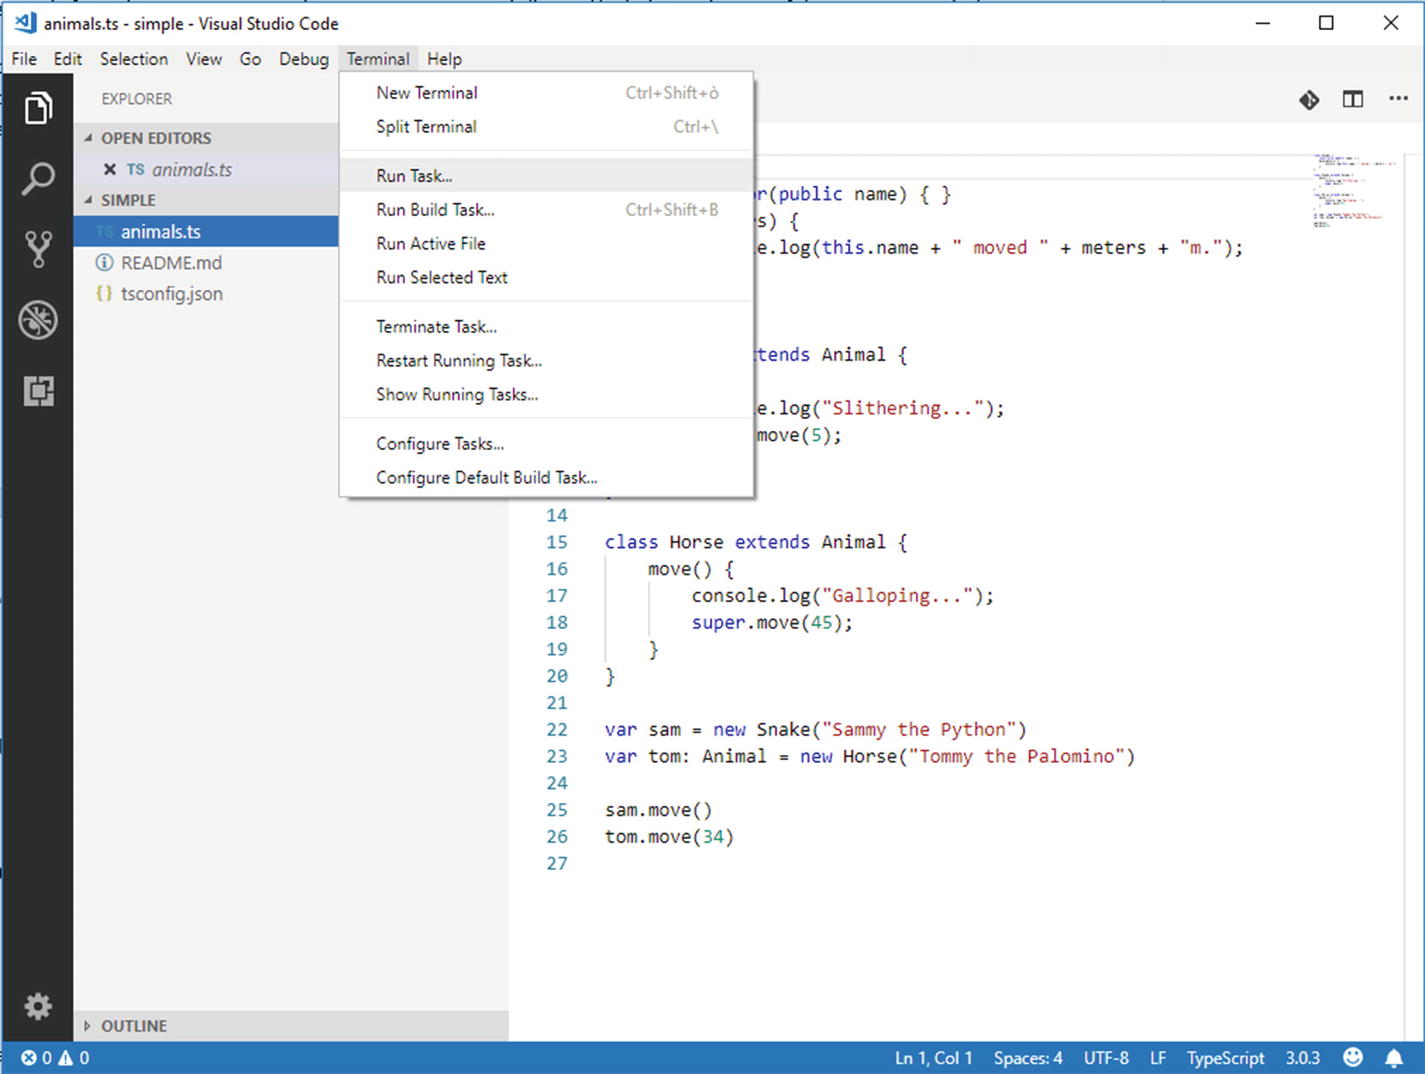
Commands for running and managing tasks in the Terminal menu
Commands for Task Execution and Management
Command | Description |
|---|---|
Run Task | Shows the list of available tasks in the Command Palette and runs the selected task. |
Run Build Task | Runs the default, preconfigured build task (if any). |
Terminate Task | Forces a task to be stopped. |
Restart Running Task | Restarts the currently running task. |
Show Running Task | Shows the output of the currently running task in the Terminal panel. |
Configure Tasks | Shows the list of available tasks in the Command Palette and allows editing the selected task inside the tasks.json file editor. |
Configure Default Build Task | Shows the list of available tasks in the Command Palette and allows selecting for the task that will be used as the build task. |

Running a task from the Command Palette
As you can see, there are two tasks: tsc build and tsc watch, both pointing to the tsconfig.json project file. This means that either task will run against the specified file. tsc is the name of the command line TypeScript compiler, whereas build and watch are two preconfigured tasks whose description has been provided previously. If you select tsc build, Visual Studio Code will launch the tsc compiler and will compile the TypeScript code into JavaScript code, as shown in Figure 8-3.
Note
In the case of TypeScript, the build task will compile TypeScript code into JavaScript code. In the case of other languages, the build task will generate binaries from the source code. More generally, a build task will produce the expected output from the compilation process depending on the language. Also, the list of available tasks varies depending on the type of project or folder you are working with. For example, for .NET Core projects, only a task called build is available.

Executing a build task

Visual Studio Code shows the output of the external tool in a convenient way
In the real world, this error would not probably happen because you have the Problems panel and red squiggles in the code editor that both highlight the error. But this is actually an example of how Visual Studio Code integrates with an external tool and shows its output directly in the Terminal panel, helping to solve the problem with the most detailed information possible.
The Default Build Task
Because building the source code is the most frequently used task, Visual Studio Code provides a built-in shortcut to run this task in the Terminal menu, called Run Build Task (Ctrl+Shift+B on Windows and ⇧+⌘+B on macOS). However, you first need to set a default build task, otherwise the Run Build Task command will behave like the Run Task command.
To accomplish this, select Terminal ➤ Configure Default Build Task. When the Command Palette appears, select the task you want to be set as the default build task, in this case select tsc build. When you do this, Visual Studio Code is actually changing its default configuration and therefore will generate a new tasks.json file under the .vscode folder, and it will open this file in a new editor window. The content and structure of tasks.json file will be discussed shortly in this chapter, so for now let’s focus on the new default build task. If you now select Terminal ➤ Run Build Task, or use the keyboard shortcut, you will see how the default build task will be executed, without the need of specifying it every time from the Command Palette.
Auto-Detected Tasks

Auto-detected tasks
The source code of this extension is made of JavaScript and TypeScript files and is built upon the Node.js runtime. So Visual Studio Code has been able to detect a number of tasks that work well with this kind of project, including tasks to run npm (the command line tool for Node.js) and the tsc TypeScript compiler.
Auto-detected tasks are very useful because they allow to save a lot of time in terms of task automation. However, more often than not, you will have needs that are not satisfied by existing tasks, so you will need to make your own customizations.
Note
In order to auto-detect tasks, behind the scenes VS Code requires that specific environments are installed. For example, VS Code can auto-detect tasks based on Node.js only if Node.js is installed; similarly, it can auto-detect tasks based on Gulp only if Gulp is installed and so on.
Configuring Tasks
When Visual Studio Code cannot auto-detect tasks for a folder, or when auto-detection does not satisfy your needs, you can create and configure custom tasks by editing the tasks.json file. In this section I will go through two examples that will help you understand how to configure your own tasks.
More specifically, I will explain how to compile Pascal source code files using the OmniPascal extension and the Free Pascal compiler, available to all operating systems, and how to build a Visual Studio solution based on the full .NET Framework on Windows by invoking the MSBuild.exe compiler.
The OmniPascal language extension for Visual Studio Code, which you can download via the Extensions panel. This extension is useful to enable Pascal syntax highlighting and code navigation, though you can still compile source files without it.
The Free Pascal compiler, which includes all you need to develop applications using Pascal and that provides a free command line compiler. Free Pascal is available for Windows, macOS, Linux, and other systems, and it can be downloaded from www.freepascal.org .
On Windows only, download the latest version of the .NET Framework (4.7.2 at this writing), which includes the MSBuild.exe tool.
Let’s start with an example based on the Pascal language.
First Example: Compiling Pascal Source Code
In this section, I will explain how to create a custom task that allows for compiling Pascal source code files by invoking the Free Pascal command line compiler from VS Code. Assuming you have downloaded and installed the required software as listed in the preceding text, locate the Free Pascal folder installation on disk (usually /FPC/version number), then open the examples folder. In Visual Studio Code, open any folder containing some Pascal source code. I will use one called fcl-json.

Editing Pascal source code
- 1.
Select Terminal ➤ Configure Task: When the Command Palette appears asking for a task to configure, select Create tasks.json from template (see Figure 8-7). There is no existing task to configure at this particular point, so the only thing you can do is creating a new tasks.json file.
- 2.
The Command Palette will now show the list of available task templates: MSBuild, maven, .NET Core, and Others (see Figure 8-8). Select Others to create a new task that is independent from other systems.

Creating a new task from scratch

Selecting a task template
The label property value is now build so that the task is clearly provided as the build task.
The type property value is shell, meaning it will be executed by the operating system’s shell.
The command property value is fpc, which is the file name of the Free Pascal compiler.
The args property value is an array of command line arguments to be passed to the external program; in this case there is only one argument that is the active source file, represented by the $(file) variable.
Note
As a general rule, an external program can be invoked without specifying its full path only if such a path has been registered in the operating system’s environment variables, such as PATH on Windows. In the case of Free Pascal, the installer takes care of registering the program’s path, but remember to have a look at the environment variables for other programs.
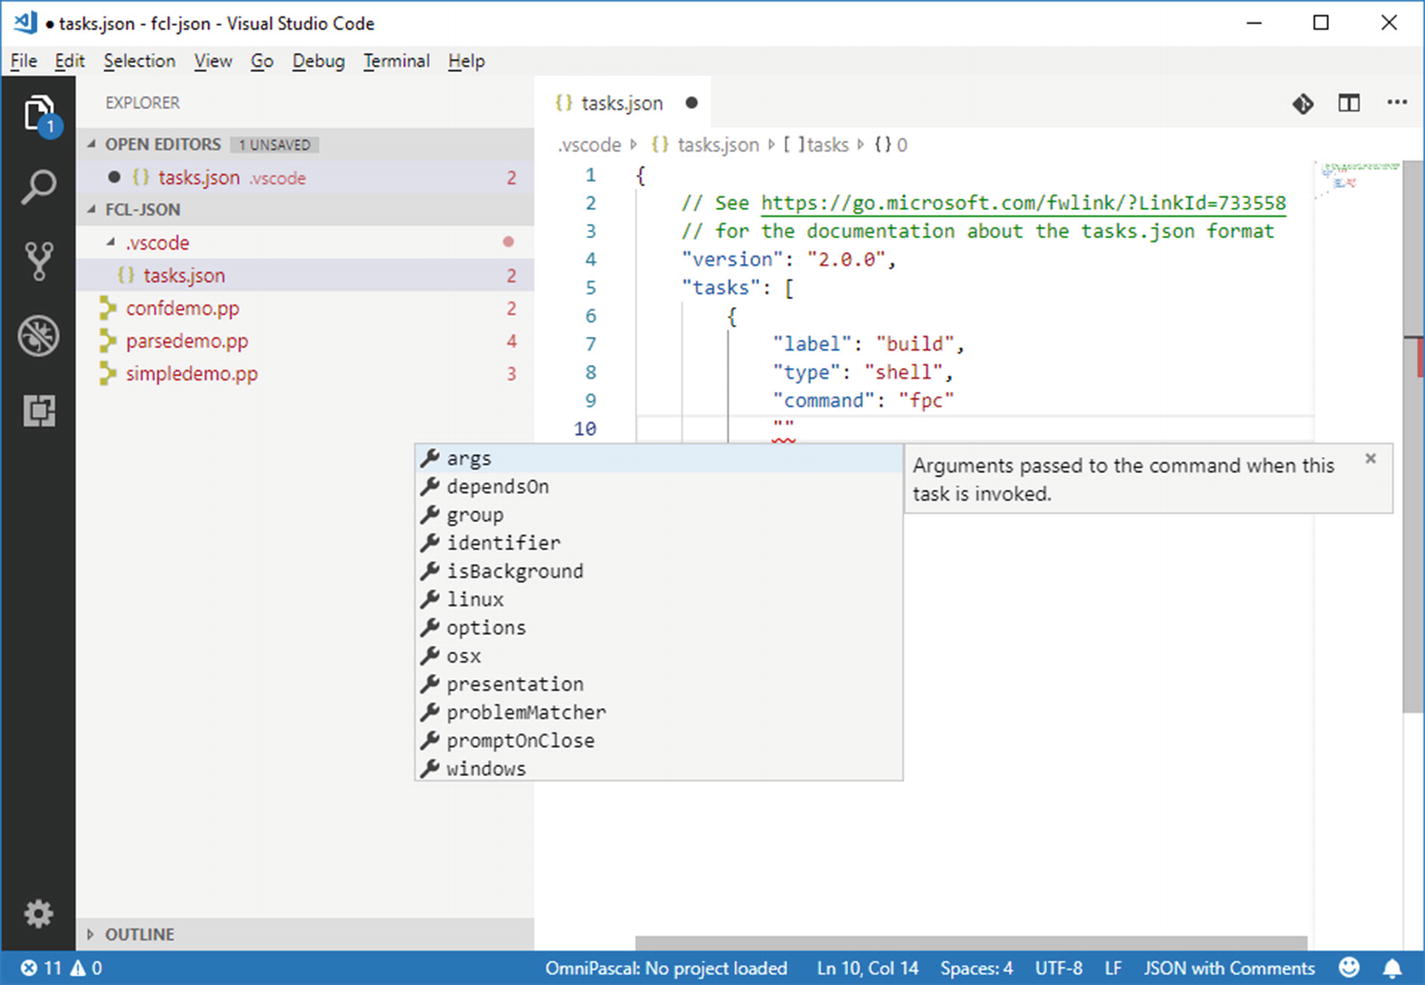
IntelliSense helps defining tasks properties

Selecting the new task
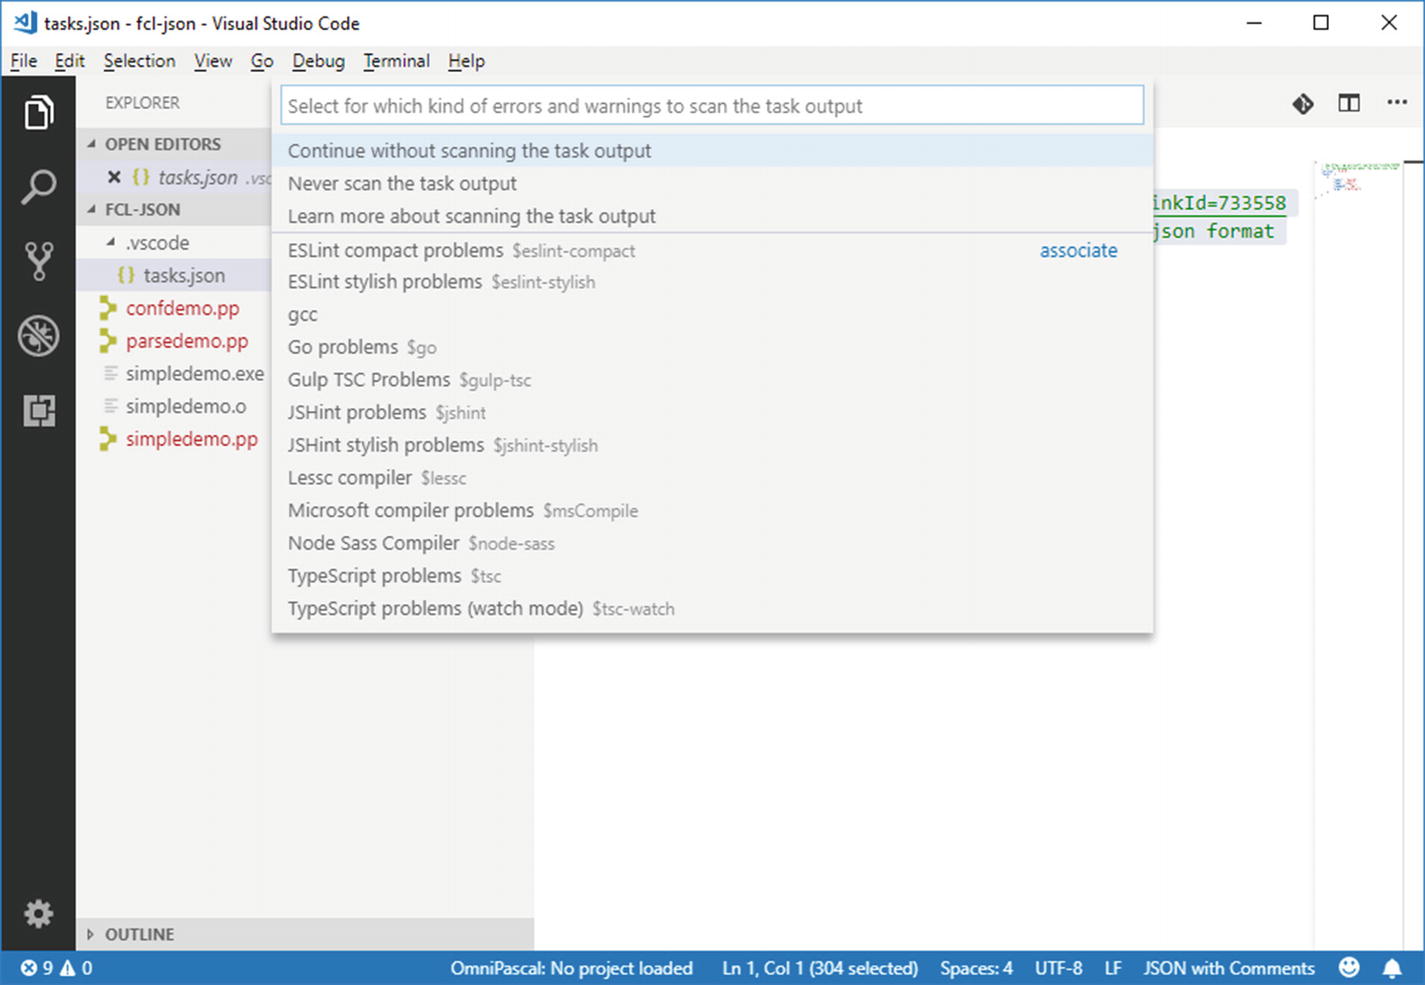
Selecting a problem matcher
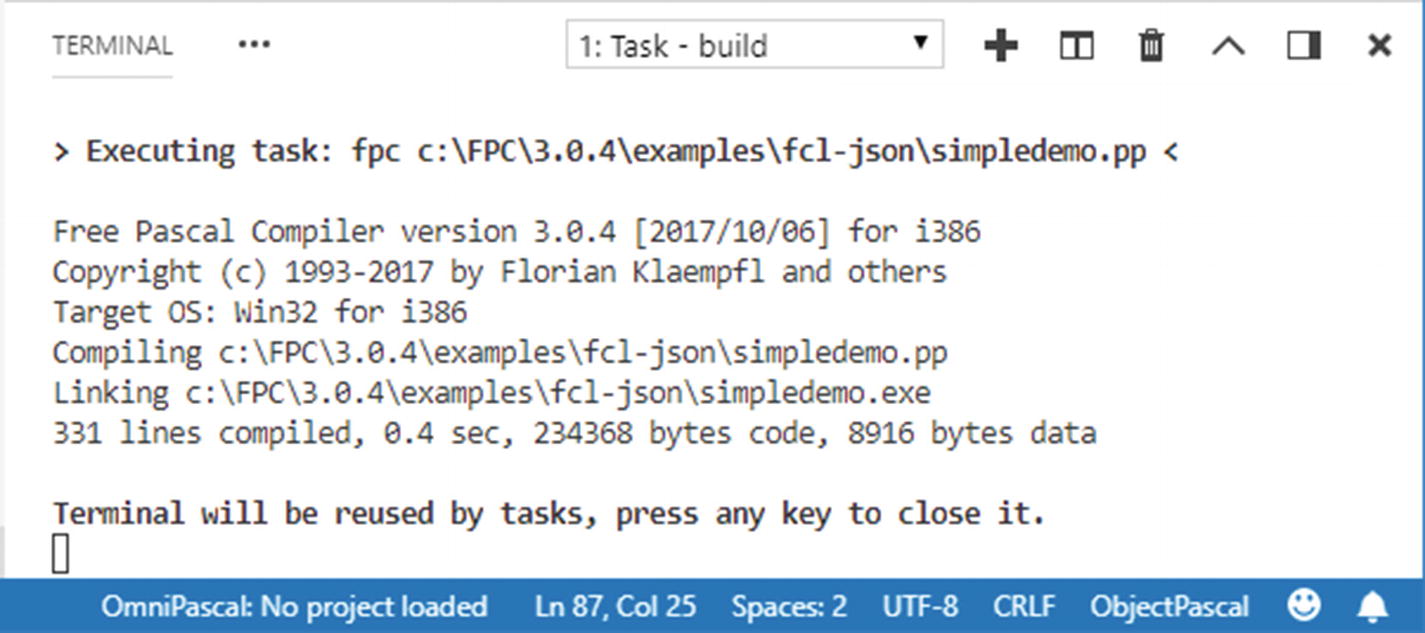
Executing the Free Pascal compiler
If the execution succeeds, you will find a new binary file in the source code’s folder. If it fails, the compiler’s output displayed in the Terminal panel will help you understand what the problem was. Before moving to a second example, I will now explain more about default tasks, task templates, JSON properties in tasks.json, and variables.
Multiple Tasks and Default Build Tasks
Tasks.json can define multiple tasks. At the beginning of this chapter, I told you that, among the others, common tasks are build and test, but you might want to implement multiple tasks that are specific to your scenario. For example, suppose you want to use the Free Pascal compiler to build Delphi source code files.

All defined tasks are displayed in the Command Palette
- 1.
Select Terminal ➤ Configure Default Build Task.
- 2.
In the Command Palette, select the build task defined previously.
- 3.
With a Pascal source file active, select Terminal ➤ Run Build Task, or press the keyboard shortcut for your system.
This command will automatically start the default build task, without the need of manually selecting a task every time.
Understanding tasks.json Properties and Substitution Variables
Available Properties for Task Customization
Property Name | Description |
|---|---|
label | A string used to identify the task (e.g., in the Command Palette). |
type | Represents the task type. For custom tasks, supported values are shell and process. With shell, the command is interpreted as a shell command (such as bash, cmd, or PowerShell). With process, the command is interpreted as a process to be executed. |
command | The command or external program to be executed. |
args | An array of command line arguments to be passed to the command. |
windows | Allows specifying task properties that are specific to the Windows operating system. |
Osx | Allows specifying task properties that are specific to macOS. |
Linux | Allows specifying task properties that are specific to Linux and its distributions. |
Group | Allows for defining task groups and for specifying to which group a task belongs to. |
Presentation | Defines how Visual Studio Code handles the task output in the user interface (see the following example). |
Options | Allows for providing custom values about the cwd (current working directory), env (environment variables), and shell (default shell) options. |

IntelliSense helping with groups
echo can be true or false and specifies whether the task output is actually written to the Terminal panel.
reveal can be always, never, or silent and specifies whether the Terminal panel where the task is running should be always visible, never visible, or visible only when a problem matcher is not specified and some errors occur.
focus can be true or false and specifies if the Terminal panel should get focused when the task is running.
panel can be shared, dedicated, or new, and it specifies if the terminal instance is shared across tasks or if an instance must be dedicated to the current task or if a new instance should be created at every task run.
showReuseMessage can be true or false and specifies whether a message should be displayed to inform that the Terminal panel will be reused by a task and that therefore it is possible to close it.
Other values can be omitted because we are okay with the default values seen in the preceding text.
Note
The list of supported properties is much longer, but most of them are not of common use. If you want to get deeper knowledge about the full list of available properties, you can look at the tasks.json schema, which provides detailed comments about each property and that is available at https://code.visualstudio.com/docs/editor/tasks-appendix .
Supported Substitution Variables
Variable | Description |
|---|---|
${workspaceFolder} | Represents the path of the currently opened folder. |
${workSpaceFolderBasename} | Represents the path of the currently opened folder without any slashes. |
${file} | The active code file. |
${relativeFile} | The active code file relative to ${workspaceFolder}. |
${fileBaseName} | The active code file’s base name. |
${fileBaseNameNoExtension} | The active code file’s base name without the extension. |
${fileDirname} | The name of the directory that contains the active code file. |
${fileExtname} | The file extension of the active code file. |
${cwd} | The current working directory of the task. |
${lineNumber} | The currently selected line number in the active file. |
${selectedText} | The currently selected text in the active file. |
${env.VARIABLENAME} | References an environment variable, such as {$env.PATH}. |
Using variables is very common when you run a task that works at the project/folder level or against file names that you either cannot predict or that you do not want to hardcode. You can check the variables documentation for further details at https://code.visualstudio.com/docs/editor/variables-reference .
Operating System-Specific Properties
Sometimes you might need to provide task property values that are different based on the operating system. In Visual Studio Code, you can use the windows, osx, and linux properties to specify different values of a property, depending on the target.
More specifically, you will need to move the property of your interest under the operating system property and provide the desired value. In the preceding code, the command property has been moved from the higher level down to the windows and linux property nodes. All supported properties can have different values, not only command.
Reusing Existing Task Templates
In the previous example about compiling Pascal source code, you have seen how to create a custom task from scratch. However, for some particular scenarios, you can leverage existing task templates, which consists of tasks.json files already preconfigured to work with specific command and settings.
This template is very useful if you want to work with Microsoft Visual Studio solutions inside VS Code, and a more specific example is coming in the next subsection. It is worth mentioning that this template has been included thinking about C# solutions (such as web applications and Xamarin projects), but MSBuild can build any kind of solution so it can be reused for different purposes.
They provide ready-to-use configurations for projects of the targeted type, where you might need only a few adjustments.
They provide a complete task structure, where you only need to replace the command and target and optionally the presentation and the problem matcher.
You will now see an example based on the MSBuild task template.
Second Example: Building a MSBuild Solution (Windows Only)
MSBuild has been the Microsoft build engine since the very first release of the .NET Framework back in 2002. It is a very powerful tool, because it can build a Visual Studio solution with no effort. So, a very nice to have feature would be the possibility of compiling your solutions and projects inside Visual Studio Code.
You can configure a task to run MSBuild.exe, the build engine used by Visual Studio. In the next example, you will see how to compile an MSBuild solution made of a Visual Basic project based on Windows Presentation Foundation (WPF), but of course all the steps apply to any .sln file and to any supported languages. If you do not have one, in Visual Studio 2017 create a blank WPF project with Visual Basic as the language. There’s no need of writing code, as I focus on the project type. Save the project, then open the project folder in VS Code.
Add the MSBuild directory to the PATH environment variable via Control Panel ➤ System ➤ Advanced system settings ➤ Environment Variables.
Specify the full MSBuild pathname in tasks.json. This is the quickest option and the one I will use.
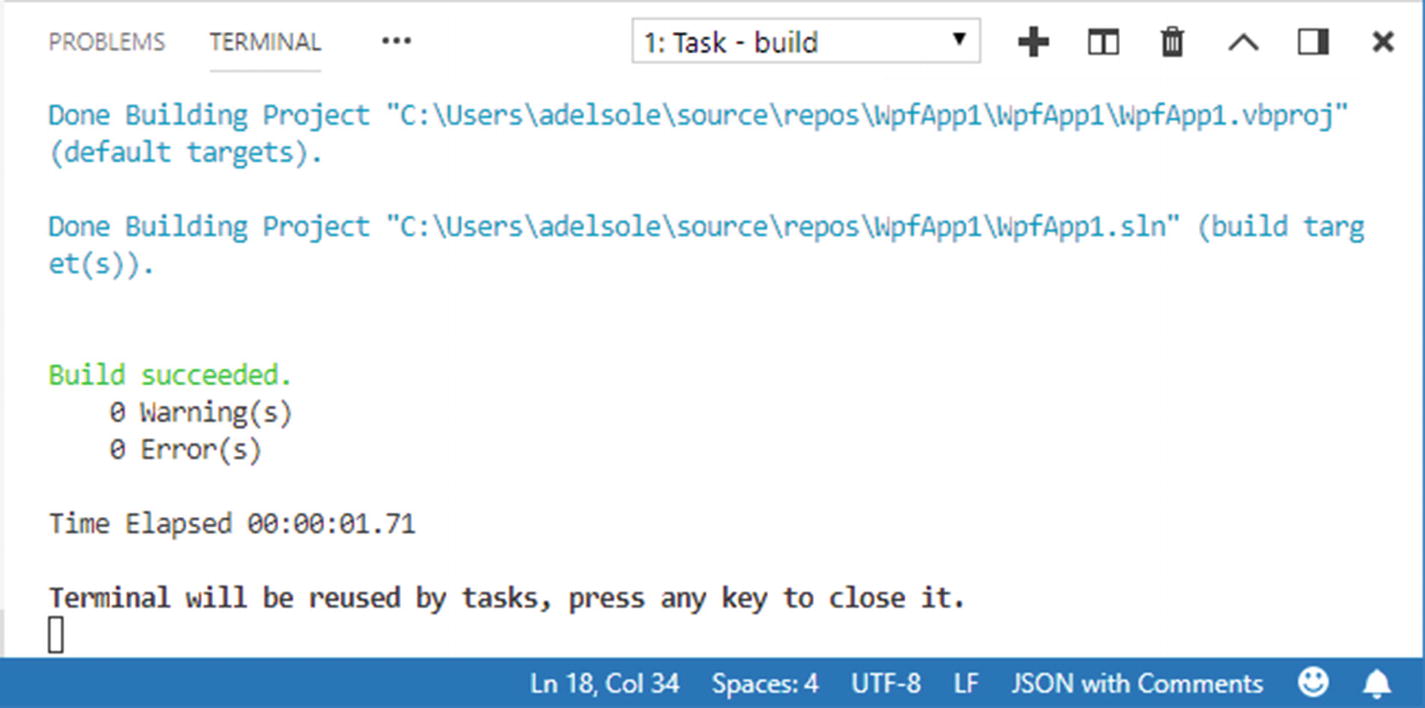
Compiling a WPF project written in Visual Basic with the MSBuild task
The preconfigured MSBuild task uses the $msCompile problem matcher to detect problems related to C# and Visual Basic in the build output, so that they can be presented in a convenient way in the user interface. Let’s spend some more words about problem matchers.
Understanding Problem Matchers
Problem matchers scan the task output text for known warning or error strings and report these inline in the editor and in the Problems panel. Visual Studio Code ships with a number of built-in problem matchers for TypeScript, JSHint, ESLint, Go, C# and Visual Basic, Lessc, and Node Sass (see https://code.visualstudio.com/docs/editor/tasks#_processing-task-output-with-problem-matchers ).
Built-in problem matchers are extremely useful, because for the aforementioned environments, VS Code can present problems that occurred at build time in the Problems panel, but it can also highlight the line of code in the code editor that caused the problem.
The owner property represents the language service, which is external in this case, but it could be, for example, cpp in the case of a C++ project. But the most important property is pattern, where you specify a regular expression (regexp) to match error strings sent by the external program. Also notice, with the help of comments, how matches are grouped by target. Building problem matchers can be tricky and it is out of the scope of this book, so I recommend you to read the official documentation available at https://code.visualstudio.com/docs/editor/tasks#_processing-task-output-with-problem-matchers .
Running Files with a Default Program
In case you are editing in VS Code a file whose type is associated with the operating system, you do not need to create custom tasks to run it. For example, a batch program (.bat) in Windows or a shell script file (.sh) on macOS can be run by simply clicking Terminal ➤ Run Active File.
The file name will be passed to the current terminal program on your system (PowerShell on Windows or the bash on Linux and macOS) so that the operating system will try to open the file with the program that is registered with the file extension, if any. In the case of a batch or shell script file, the operating system will execute the file. The output will be displayed in the Terminal panel.
Note
Only the output of the operating system or of command line tools will be redirected to the Terminal panel. For instance, if you try to edit a .txt file and then select Terminal ➤ Run Active File, such a file will be opened inside the default text editor on your system, and there will be no additional interactions with the Terminal panel.
Summary
There are many features in Visual Studio Code that make it different from a simple code editor. Tasks are among these features. With tasks you can attach external programs to the application lifecycle and run tools like compilers. VS Code ships with task auto-detection for some environments, but it allows for creating custom tasks when you need to associate specific tools to a project or folder.
By working on the tasks.json file and with the help of IntelliSense, you will be able to include the execution of any external program in your folders. The execution of external programs like compilers is certainly useful, but it would not be so important if VS Code could not make a step forward: debugging code, which is discussed in the next chapter.