
Chapter 8
Get It Done with Windows 8’s Productivity Apps
In This Chapter
- Understanding the relationship between your Microsoft account and key Windows 8 productivity apps
- Using People to manage contacts
- Using Mail to manage e-mail
- Using Calendar to manage your schedule
- Using Messaging to communicate with others
- Using SkyDrive to store and access files online
- Using Windows Reader to view PDF files
- Using Bing Maps to get directions and find your location
- Understanding the Other Metro productivity apps
- Using Microsoft Office for advanced productivity tasks like document editing, spreadsheet creation, presentation making, and note-taking
Throughout its decades-long existence, Windows has been known primarily for its use as the basis for the PC productivity workhorse, and it has long included a suite of useful productivity applications. These applications have always ranged from marginally useful to truly useful depending on the version of Windows and the tool in question. But with Windows 8, you are given a truly impressive arsenal of useful Metro-style productivity apps and, of course, traditional Windows applications.
This chapter examines the new Metro-style apps that Microsoft includes with Windows 8 and RT, whether they’re acquired with a new PC purchase or downloaded separately from the Windows Store. These include new contacts, e-mail, calendaring, and messaging solutions that replace legacy Windows Live applications, as well as useful new apps for cloud storage access, PDF reading and annotation, mapping, and more. This chapter also briefly examines the Office 2013 applications—Word RT, Excel RT, PowerPoint RT, and OneNote RT—which come exclusively with Windows RT, the ARM-based variant of Windows 8.
It’s Going to Change
Thanks to the dynamic nature of its new apps platform, the Metro-style apps that Microsoft includes with Windows 8/RT will change over time, so it’s highly likely that the apps described in this chapter will appear somewhat differently over time and will include additional features. This is normal, and as a general statement, it’s probably fair to say that the Metro-style productivity apps you use will provide a superset of the functionality we describe in this chapter.
A Note About the Windows Productivity Apps and Your Microsoft Account
Before we can discuss the individual productivity apps that are considered part of the full Windows 8 experience, you need to be aware that many of these apps—including the core People, Mail, Calendar, and Messaging apps—all rely on connectivity with your Microsoft account, or what used to be called a Windows Live ID. You may recall from previous discussions in this book that we strongly recommend using a Microsoft account for your sign-in with Windows 8 instead of an old-fashioned local account because that former account type provides such useful integration capabilities. But we realize that some of you will ignore this advice, either because you feel you know better or because you simply don’t have a choice, perhaps because the Windows 8 PC you’re using is supplied by work or for other reasons.
Don’t confuse “connected” with “online.” Some of these apps do work when the PC is offline. But they all rely on online services, not local-only data.
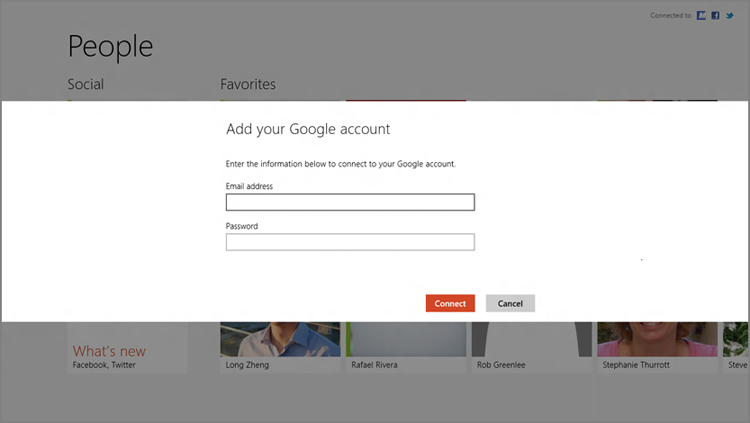
If that’s the case, the first time you launch People, Mail, Calendar, or Messaging, you will be asked to sign in to your Microsoft account, as shown in Figure 8-1. There is no way to use these four apps otherwise, because they are, by nature, what we call connected apps, or apps that offer no disconnected-only experience. (Microsoft calls them communications apps.)
Figure 8-1: You will sign in to your Microsoft account. Oh yes, you will.

That is, they rely on online services in ways that are pervasive and necessary. So with People, you will not manage contacts that are local to that one PC. Instead, you will manage contacts that are stored in one or more cloud-based services. Ditto for Mail, Calendar, and Messaging. None of these apps works only with local data. (In fact, none work with local data at all.)
Microsoft first took this approach with Windows Phone back in 2010, and it was somewhat controversial at the time. Some users, familiar with local personal information stores like that provided by traditional Windows applications such as Microsoft Outlook didn’t understand the benefits of centralized, cloud-based data storage, or were perhaps suspicious of such services or unwilling to change. With Windows 8, however—and with Windows Phone 8 as well, for that matter—Microsoft has leapt firmly into this connected future. And while you’re still welcome to use old-fashioned applications that lock data to a single hard drive on a single PC, the software giant won’t help you do so with its own Metro-style apps in Windows 8.
We recognize that this will still be somewhat controversial with an increasingly smaller group of people who resist change for whatever reason. But we also believe that Microsoft’s approach with Windows 8 is correct. And having long ago adopted this cloud-based model, we’re excited to access our data from anywhere now using Windows 8. We suspect most of you are as well.
When you sign in to Windows 8 for the first time with a Microsoft account, a number of interesting things happen behind the scenes, including the ability to sync settings between PCs. But Windows 8 also provides this account information to apps, including the core productivity apps that one might want to use with an online account, like Mail, Calendar, Messaging, and People. That latter app, based on the People hub that appeared first in Windows Phone, is Windows 8’s new contacts management app. And it provides a nice interface for aggregating the contact lists from multiple accounts, providing a single view into them all, and thus for all the people you know and interact with each day.
The People app is shown in Figure 8-2.
Figure 8-2: The People app helps you manage your contacts.

This app is called the People hub on Windows Phone, but it looks and works similarly.
The People app also provides a nice, Metro-style view of all of the activities that your contacts are doing online, culled from the various feeds that are associated with their accounts. This can include sources such as Windows Live, Facebook, Twitter, and more, and includes the ability to comment on what others are doing.
Finally, you can also use the People app to view and edit your own online persona, which is the way other people view you out in the world.
Understanding the People App
Like all Metro-style apps, the People app is a full-screen experience with a nice layout that automatically flows according to the size and pixel density of your display. This app consists of the main view and several other views, including:
- Social: A timeline-like view of your contacts’ activities across all of the connected online services.
- Me: Here, you can view and edit your own online persona.
- Notifications: A list of notifications from each of the connected online services.
- What’s new: The latest activities from across the connected activities.
You can switch to the other views by clicking (or tapping) the appropriate headings or tiles in the People app’s main view.
The People app also provides an app bar that is hidden by default. Its functionality varies by view and is described in the appropriate sections later in this chapter. But as always, this app bar can be enabled by right-clicking any on-screen empty space with the mouse, by swiping toward the center of the screen from the top or left edge, or by typing Winkey + Z.
The People app is also designed to be snapped, utilizing a new feature of the Metro environment that allows one app to be used as a secondary app next to another Metro-style app or the Windows desktop. As you can see in Figure 8-3, the snapped view of the People app provides a handy miniaturized version of the full app.
Figure 8-3: The People app in snapped view

Managing Accounts
While you may have many contacts and other information associated with your Microsoft account, it’s as likely that you use other account types for e-mail, contacts, calendar, and task management too. And for this reason, the People app is one of a few places in Windows 8 from which you can configure other accounts as well. Configurable account types include:
- Facebook: The world’s most popular social networking service, Facebook is a great way to keep up with your friends’ and families’ activities. In Windows 8, the People app will pull information from your Facebook friends list (that is, contacts) and provide a look at their activities in the What’s new view.
- Twitter: This very popular micro-blogging service has emerged as a social networking wunderkind in its own right, providing numerous feed types, topic searching, and follower and following lists. Twitter posts, called tweets, will appear in the What’s new view.
- LinkedIn: Popular with upwardly mobile, white collar wage earners, LinkedIn is the social network for those who wish to keep up with co-workers and professional contacts. The People app integrates with your LinkedIn contact lists.
Microsoft is in the process of replacing Hotmail with a new web-based e-mail service called Outlook.com. It works similarly to Hotmail.
- Microsoft/Hotmail: Microsoft’s popular web-based mail service is the basis for most people’s Microsoft accounts, and since Windows 8 uses this account as your sign-in by default, chances are you’ve already configured one. Hotmail provides e-mail, contacts, calendaring, and task services, and as with the Google account type, each surfaces in the appropriate Windows 8 apps. The People app, as you’d expect, integrates with your Hotmail contact list.
- Exchange: The People app can connect natively to Exchange and Exchange-type accounts, meaning those that utilize the Exchange ActiveSync (EAS) technologies, a de facto standard for mobile devices. Generally speaking, you will use this account type for any account that utilizes Exchange Server, Office 365, or something similar, all of which offer e-mail, contacts, calendaring, and task management. The People app provides integrated access to Exchange or EAS-based contacts.
- Google: The world’s largest Internet company provides excellent e-mail and contacts (Gmail) and calendaring and tasks (Google Calendar) services, and this account type will connect each to the appropriate apps in Windows 8. The People app accesses your Gmail account’s contact list.
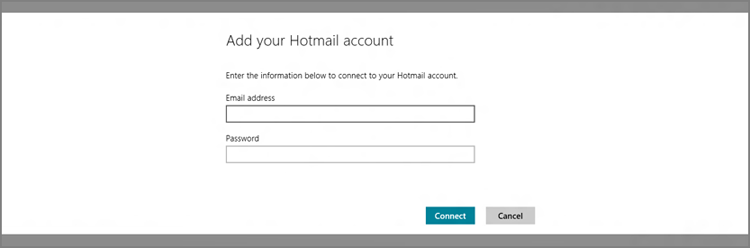
To configure an account, click the appropriate account type under Add people to your contact list and follow the steps requested. Each account addition occurs via a full-screen notification-type interface like the one shown in Figure 8-4.
Figure 8-4: Adding a new account to Windows 8
If this account isn’t present, you can access the Accounts interface from the Settings pane. Shown in Figure 8-5, this pane can be reached in a variety of ways, including by typing Winkey + I, swiping in from the right edge of the screen, and tapping Settings, or by using the Metro-style mouse hotspot for the Charms bar and then clicking Settings.
You can also delete accounts from here, though it’s not particularly obvious. Just right-click the account you’d like to delete—or tap and hold—and choose Delete from the menu that appears.
Click Accounts to view Accounts settings, which lets you access and add additional account types. The Accounts settings interface is shown in Figure 8-6.
Figure 8-5: People settings pane

Figure 8-6: Accounts settings

Managing Contacts
Managing accounts is usually a one-time thing. For the most part, you’ll be interacting with contacts while using the People app. And the nice thing about this app is that all of your contacts, aggregated from multiple accounts, can be accessed in a single location. From here, you can perform a number of useful activities related to contacts.
Interacting with Your Contacts
If you manually launch the People app, you’ll be presented with the app’s main view, which lists all of your contacts in two groups. If you’ve configured any contacts as favorites, as described a bit later, those contacts will appear on the left.
The default view is pretty basic, and pretty obvious. But there is a fun hidden feature that makes it much easier to navigate through a huge list of contacts: Just tap any letter. To jump to the contacts that start with F, for example, just type F. The view will change, as shown in Figure 8-7.
Figure 8-7: You can quickly jump through the contact lists by typing a letter.

To view the details for an individual contact, simply select that contact from the list. What you see here will vary pretty wildly based on a number of factors, including which account(s) to which the contact is attached and what information you or they have provided, but it should resemble Figure 8-8.
Figure 8-8: A typical contact card
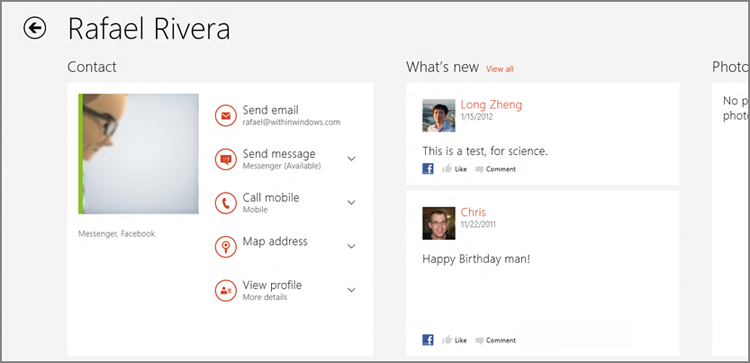
Some of the information that can be associated with a contact includes:
- Contact information: Name, associated account(s), address, and so on, but also actionable options such as Send e-mail, Send message, Map address, and more.
- What’s new: A list of the contact’s activities, culled from one or more accounts.
- Photos: A collection of the contact’s photos, culled from one or more accounts.
For both What’s new and Photos, the views are not just read-only: You can comment on posts and photos, and even “like” items, just as you might if you accessed Facebook or Twitter manually.
NOTE If you have duplicate contacts—two contact cards with the same information—you can also link them together. View one of the duplicates, display the app bar, and choose Link.
Editing a Contact
To edit a contact’s information, right-click anywhere while viewing a contact card and then choose Edit from the app bar. A new view called Edit contact info will appear, as shown in Figure 8-9.
Figure 8-9: You can easily edit a contact’s information.

Edit the information as needed and then click Save in the app bar to save the changes.
Adding a New Contact
You can also add a new contact, of course. To do so, display the app bar while in the People app’s main view and click the New button. (It resembles a “+” sign.)
This interface is fairly obvious and similar to the Edit screen mentioned previously, but the one area to call out is the Account drop-down list: This interface determines which account will store the new contact. By default, People will use your Microsoft account for all new contacts, but you can change that on the fly if you prefer to associate it with another account.
Adding a Contact to Favorites
The Windows 8 People app, like previous Microsoft contacts management solutions such as Windows Live Messenger and the Windows Phone People hub, supports the notion of favorite contacts. Favorite contacts, or Favorites, are provided a special and prominent location in the main view of the People app, so you can access them more easily.
To add a contact to favorites, open that person’s contact view, display the app bar, and then click Favorite. When you return to the main view of the app, that contact will have been added to the favorites area on the left.
NOTE To remove a contact from favorites, simply visit the person’s contact card, display the app bar, and toggle the Favorites button again. Bam, they’re off the island.
Pinning a Contact to Start
If you find yourself interacting with a certain contact frequently, you can pin that person’s contact tile to your Start screen for quick access. To do so, open that person’s contact view, display the app bar, and then click Pin to Start. You’ll be shown a preview of the tile, as shown in Figure 8-10, and be provided with a chance to edit the tile name.
Figure 8-10: Pinning a contact to the Start screen

To view the new tile, return to the Start screen and navigate to the end (right side). As you can see in Figure 8-11, your contact now appears in live tile form on your Start screen.
And it is indeed live, and not just a static picture. By default, the contact’s live tile will animate and will display recent activities culled from their What’s new feed. You can, of course, disable that effect: Simply right-click the tile and choose Turn off live tile from the app bar that appears. (You can also unpin the tile from this interface.) Other possible configuration options include moving the tile to a new location, perhaps in a new or existing tile group.
Figure 8-11: A frequently-accessed contact appearing as a live tile on the Start screen

Search: Finding Contacts
Like many other Metro-style apps, the People app supports the system-wide Search contract, so you can use this capability to find a particular contact whether you’re currently in the app or not.
To search from within People, type Winkey + Q. This displays the standard Search pane, with the People app selected. Now, just type part of the name of a contact you’d like to find. When you press Enter, the search results appear within the People app, as shown in Figure 8-12.
What’s amazing about these new system-wide Metro features, of course, is that you don’t even have to be using People to search for contacts. In fact, you can do so from anywhere in Windows 8: the Start screen, another Metro-style app, or even from the desktop.
Figure 8-12: Search from within People.

To see this in action, return to the Windows desktop (Winkey + D) and tap Winkey + Q. The Search pane appears as expected, so start typing part of the name of a contact you’d like to find. But this time, instead of just typing Enter, select People from the list of apps. Voila! The search results are returned in the People app.
Seeing What’s New with Your Friends, Family, Co-Workers, and Other Contacts
In addition to functioning as a super-powered address book, the People app also provides a What’s new feed that aggregates content from Facebook, Twitter, and other accounts. It’s a one-stop shop where you can find out what’s going on with your friends, family, and other contacts, no matter where they’re posting information. The What’s new view is shown in Figure 8-13.
What’s new provides a decidedly Metro-y take on this sort of information, with each post segregated into a tile-like space. Scrolling occurs horizontally—that is, left to right—and not vertically, as with document-based applications. And while the app will refresh this view periodically, you can refresh it yourself by enabling the app bar and clicking the Refresh button.
One of the neatest things you can do, of course, is interact with your contacts by leaving comments and other feedback to their posts. What you can do varies from account type to account type. For example, you can also choose to “like” a Facebook post, mark a Twitter “tweet” as a favorite, or “retweet” something you see on Twitter. To do any of this, find a post you like and click it. It will display full screen, as in Figure 8-14, providing a more complete view that includes others’ comments as well as whatever actions are available.
Figure 8-13: The What’s new view provides a way to easily keep up with your friends and other contacts’ activities.

Figure 8-14: A contact’s post shown in all its full-screen glory

Then, tap the Add a comment box on the bottom to add a comment. You can optionally click a Like, Favorite, or Retweet button if available, again depending on the account to which the post was made.
Viewing Your Digital Persona . . . And Creating Your Own Posts
In addition to your contacts and their aggregated activities view, People provides a handy front end for managing your own digital persona, or the online account or accounts that establish you as an entity that can perform tasks and establish relationships with others. Called Me and shown in Figure 8-15, this interface is to you as the What’s new view is to others, a look at what’s going on . . .with you.
Figure 8-15: The Me view is all about you.

In this view, you can see and edit your own contact information via the View profile link, view your own What’s new feed, which is culled from whatever online accounts you’ve configured, view and deal with pending notifications, and view the photos you’ve recently posted to social networks and other accounts.
Most important, perhaps, you can also use this interface to post to supported social networks. If you have more than one configured, you’ll see a drop-down letting you choose the service you want to use, and a text box labeled “What’s on your mind?” where you can type in your new post.
It’s perhaps surprising that the Windows 8 Mail app is a big-screen version of the mobile Mail app that first debuted in Windows Phone, providing access to multiple e-mail accounts using an interface that’s optimized for bigger, touch-enabled screens. It utilizes common e-mail features like attachments, CC and BCC support, and the reading of textual and graphical e-mails. It also works in either portrait or horizontal display modes, so you can manage mail the way you want to.
Understanding the Mail App
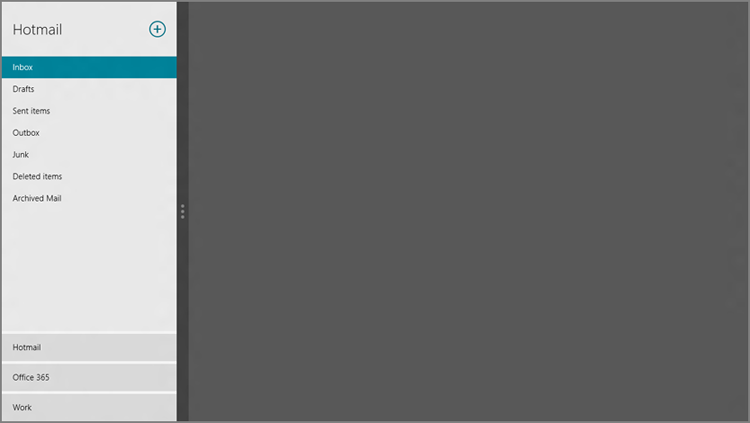
Mail provides a three-pane view, as shown in Figure 8-16, where you can see the major elements of the app’s primary user interface.
Figure 8-16: The Mail app

These elements include:
- Accounts pane: This leftmost pane provides access to each configured account and to the e-mail folders contained within each. (Only the folders for the currently selected account are shown.) The number of unread messages will appear next to the Inbox folder heading. Or, if you have multiple accounts, next to the link for that account. In Figure 8-17, you can see the accounts pane in Mail as it looks configured for three different accounts.
Figure 8-17: Multiple accounts in Mail

To select multiple messages, right-click them in turn in the Mailbox folder pane. Once the messages you want are selected, you can apply actions such as Mark as Read, Mark as Unread, Move, and Delete to them. These all occur through Mail’s app bar.
- Messages pane: Displays the contents of the current folder in the currently selected e-mail account. (The default is Inbox.)
- Reading pane: Displays the currently selected e-mail message.
- New: Click to create a new e-mail message.
- Respond: Click to reply, reply to all, or forward the currently selected e-mail message.
- Delete: Click to delete the currently selected e-mail message.
If you display Mail’s app bar, you will reveal several other commands, including:
- Sync: Click this button to manually check for new e-mail messages at each configured account.
- Pin to Start: Click to pin the current mail folder view to the Start screen for fast access. This works much as it does for contacts in the People app: You can rename the tile as desired, and it will appear at the right end of the Start screen when first created.
- Move: Click this button to move the selected message to a new folder. When clicked, the Folders view will temporarily appear—with the rest of the app grayed out—so you can pick a new location for the message.
- Mark as read/Mark as unread: This button toggles the “read” state of the selected message. By default, a message is marked as read when it is selected.
NOTE Mail is a modern and fairly efficient e-mail solution, but as a mobile app it’s missing a few typical features one might be expecting. Key among these, perhaps, is the ability to drag and drop, such as you might do to move messages from one folder to another: This capability simply doesn’t exist in Mail, and if you’re used to managing mail in, say, Windows Live Mail, Outlook, or even web-based solutions like Hotmail or Office 365, it takes some getting used to. Remember: Metro-style apps work like—are, in fact—mobile apps, so they follow some usage patterns that may seem out of place on a full-featured PC.
Managing Accounts
While Windows 8 supports numerous account types as explained in the previous section about the People app, only a few of them—Hotmail, Google, and Exchange (which handles Exchange Server, Office 365, many other Exchange ActiveSync-based account types), and IMAP—provide e-mail support that works with the Mail app. Put another way, the Mail app functions much like a mobile device mail application and not like a full-featured desktop application such as Outlook. It’s basically just an EAS e-mail app—Hotmail and Google use EAS behind the scenes to sync with mobile devices—though to be fair, it’s more accurately described as a connected mail app, since it does also work with IMAP-based e-mail accounts too.
This design has its pros and cons, but the end result is that Mail, like Windows 8, is forward leaning, and not all that concerned with legacy e-mail solutions based on out-of-date technologies like POP3. If you need that kind of support, you will have to look elsewhere.
The first time you use Mail, you’ll see a little box in the bottom of the Accounts pane that explains how you add accounts and provides a link for doing so. But you can add accounts at any time by visiting the Settings pane, as with other Metro apps. To display that pane, press Winkey + I, or find it via the Charms bar, and then click Accounts. You will see a display much like that in Figure 8-18, listing the accounts you’ve already configured.
Figure 8-18: Mail accounts settings

To add a new account, click Add an account. Then, in the next screen, choose among the available account types; Hotmail, Google, Exchange, or Other Account. Account creation occurs as it does in the People app, via a full-screen Metro-style notification like the one in Figure 8-19.
Figure 8-19: Adding a new e-mail account
Note that if you need to configure an IMAP-type e-mail account, you will want to use Other Account as the account type and then click the Show more details link to enter the appropriate server information.
To manage an existing account, navigate to Settings, Accounts and then click the account you wish to edit. You’ll see a pane like that in Figure 8-20.
Figure 8-20: Managing an existing account

Some of the key items you can configure here include:
- Account name: The name of the account as it appears in Mail. (Mail chooses generic names like Hotmail and Exchange by default.)
- Download new email: The schedule for e-mail retrieval, which for EAS-type accounts can be configured to As items arrive, Every 15 minutes, Every 30 minutes, Hourly, or Manual.
- Download email from: The range of pasted e-mail to download to your PC.
- Automatically download external images: Can be on or off depending on the security settings of your e-mail provider.
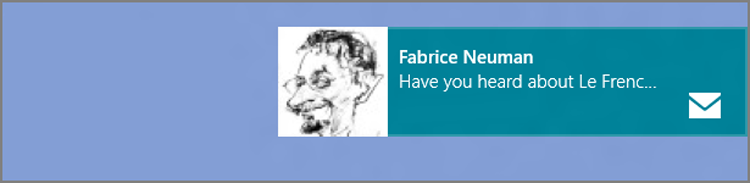
- Show email notifications for this account: Can also be set to on or off. If on, you will be notified with a “toast”-style notification each time you receive a new e-mail. These notifications resemble Figure 8-21.
- Remove account: This button lets you remove the account from Mail.
Figure 8-21: An e-mail notification toast
Managing E-mail
Once your various accounts are all configured, you can begin using Mail normally, as you would with any other mail application. Things work mostly as expected, though there are a few unique aspects to this application you should be aware of.
First, there’s no centralized, linked inbox view as there is on Windows Phone and other mobile e-mail clients. Instead, each account is accessed separately, with its own inbox and set of folders. So if you are using multiple accounts, you can jump back and forth through the Accounts pane.
You can multi-select contiguous e-mail messages as you would other objects in Windows, such as files in the filesystem—select the first message, scroll down to the last one you wish to select and, while pressing the Shift key, select the last. Voila!
As a Metro experience, the Mail app makes it a bit ponderous to select multiple e-mails in the Mailbox folder pane and then act on them as a single unit. For example, suppose you want to select three e-mails and then move them to a new folder. To do so in Mail, you must right-click each e-mail to select them in turn—a small check box will appear in each e-mail header to indicate the selection, as shown in Figure 8-22—and then select the appropriate command—in this case, Move—from the app bar.
Want to select all of the messages in a folder? Select one and then press Ctrl + A.
Figure 8-22: Selecting multiple e-mails

When you do select Move, most of the Mail app visually fades away, aside from the Folders view, so you can choose where you’d like to move the e-mail.
Sending and Receiving New Mail
Mail retrieval happens automatically and, as noted previously, the schedule can be configured on an account-by-account basis. But you can always manually check for mail at any time if you’re the disbelieving type: Display the app bar and tap Sync.
Responding to or Forwarding an E-mail
Microsoft overloads the Respond button in the upper right of the Mail app with three related and useful commands: Reply, Reply all, and Forward. When you tap this button, a small pop-up menu appears, offering those options.
If you find this too ponderous—which it certainly can be—you can use keyboard shortcuts instead: Ctrl + R for Reply, Ctrl + Shift + R for Reply all, and Ctrl + F for Forward.
Writing an E-mail
When you write a new e-mail or respond to an e-mail you’ve received, Mail first provides the view in Figure 8-23.
Figure 8-23: A plethora of options are available for e-mails you write with Mail.

The following options are available initially:
- Account: If you’ve configured two or more e-mail accounts, you can choose from which to send the message, using a drop-down box.
- To: The e-mail recipient. Mail will use auto-complete as you type, comparing the name or e-mail address you’re typing with the contacts in the People app. If you’ve configured an Exchange-type account, you can also use the drop-down that appears to search your workplace’s user directory.
- CC: A “carbon copy” field reserved for recipients that are not the direct target of the e-mail but need to be included for some reason.
- Show more: Here, you can display BCC (“blind carbon copy”) and priority choices, the latter of which lets you change from the default of Normal to High or Low priority, depending on the needs of the message.
- Subject: The subject of the e-mail.
- Message body: The body of the e-mail message, including, optionally, the pre-populated signature (which can be configured in account settings).
- Send: Click this button to send the message.
- Cancel: Click this button to save a draft of the message or delete it.
The default set of options provided by Mail here are, of course, decent. But if you display the app bar in this view, you’ll find many more options. These include:
- Save draft: Click this button to save a draft of the current message.
- Attachments: This most interesting of commands triggers a Metro-style file picker view, providing you with a way to select one or more files from common filesystem locations—Documents, Pictures, Music, and the like—and apps that surface files from online services, including Camera, Photos, and SkyDrive, which is shown in Figure 8-24.
Figure 8-24: You can add file attachments using a standard Metro-style file picker.

- Copy/Paste: This button, which will read Copy/Paste or Paste depending on whether anything is selected and/or in the Windows Clipboard, lets you perform common Copy and Paste operations.
- Font: A simple font picker with several fonts and font sizes from which to choose.
- Bold, Italic, and Underline: Three common text-related commands, each with its own button.
- Text color: A simple font color picker with just several colors.
- Bulleted list: A way to start a bulleted list or select text and then change that to a bulleted list.
- Emoticons: This opens a pane with a surprisingly diverse and voluminous collection of high-resolution emoticons across categories like people, activities, food and things, travel, nature, and symbols. As you can see in Figure 8-25, this pane slides in from the left side of the screen and stays open so you can add multiple emoticons if needed.
Figure 8-25: An amazing array of emoticons

- More: This button triggers a pop-up menu with more choices, including Bulleted list, Numbered list, Undo, and Redo.
Searching for E-mail
As with the People app, you search your e-mail using the system-wide Search capability, or contract. Put more succinctly, you search for content in the Mail app. This works as it does everywhere else in Metro: Just type Winkey + Q from within the Mail app, or do so from anywhere in the system and then choose Mail from the list of apps on the right. This displays the standard Search pane.
Now, just type in a search term. This can be part of an e-mail message or subject line, or the name of a person who has sent you e-mail (or received e-mail from you). When you tap Enter, the search results appear within the Message pane of the currently selected account in the Mail app, as shown in Figure 8-26.
Figure 8-26: Search for e-mail from anywhere in Windows 8.

Note that Search provides a history list of previously performed searches, and that this history is app-specific. So when you search from Mail, this Mail-specific history list appears below the Search box so you can re-do the search at any time.
Configuring the Mail App
Aside from the accounts settings discussed previously, the Mail app offers only a handful of other interesting configuration choices. You can configure the following features through the Permissions choice in this pane:
Note, however, that when this is enabled, you can still determine whether each account triggers these notifications individually. (You do so through the settings for each account.)
- Notifications: This toggle determines on an app-wide basis whether Mail can trigger “toast”-style notifications every time a new e-mail arrives.
- Lock screen: By default, the Windows 8 lock screen will provide a simple Mail icon with a number indicating how many new, unread e-mails are available. (It is similar to the behavior in Windows Phone, actually.) For this feature to work, of course, Mail has to be running in the background. And if you’d prefer for that not to happen, you can disable it here.
CROSSREF You can configure which of the available lock screen icon spots is used by Mail by visiting PC Settings, Personalize, Lock screen. We discuss this and other personalization features in Chapter 5.
Snap: Sharing the Screen with Mail App
As with other Metro apps, Mail supports the Metro Snap view, by which you can dock, or snap, the app to the left or right side of the screen and use it alongside another Metro-style app or the Windows desktop. Frankly, it’s not horrible when you consider the amount of information this app displays normally. But because of the thin, 320-pixel-wide area afforded to snap apps, Mail can only show a single pane at a time in this view. You can see this effect in Figure 8-27.
Figure 8-27: Mail in snapped view
You can navigate between the Accounts, Messages, and Reading pane views, though many e-mail messages are difficult, if not impossible, to read in this view because of the horizontal space limitations. The best reason to consider snapping Mail is for those times when you’re working in another app, or on the desktop, but you want to keep an eye on Mail for some reason. When the e-mail you want does arrive, you can simply unsnap the app and view it full screen instead.
Microsoft provides several excellent calendaring services through its Hotmail and Exchange technologies, with the latter surfacing not just in traditional, enterprise-based versions of Exchange Server but also in the far more affordable and accessible Office 365 service. Powering these services on the back end is a Microsoft technology called Exchange ActiveSync (EAS), which provides push-based support for e-mail, contacts, tasks, and, yes, calendaring. EAS is a de facto industry standard, it’s used even by Microsoft competitors such as Apple and Google, and it’s at the heart of Microsoft’s new Calendar app.
Like the Windows Phone app on which it is based, Calendar is a connected calendar, one that is designed to work in concert with one or more online calendars, in this case calendars that are provided using EAS technologies. So it works with Microsoft calendars such as Hotmail Calendar and Exchange/Office 365, of course, but also calendars from other companies, such as Google Calendar.
If you set up Windows 8 to sign in with a Microsoft account as we recommended early on in the book (and you did, right?), then you already have a Hotmail Calendar. And that calendar is automatically available through the Calendar app. You can, of course, configure other calendars as well.
Understanding Calendar
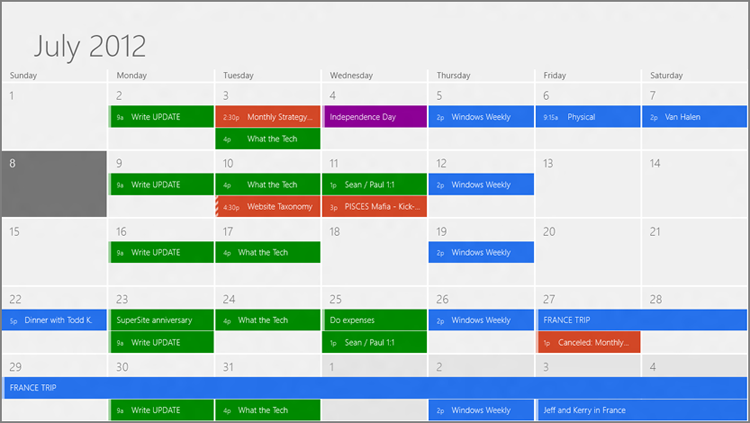
Calendar offers a simple, full-screen, Metro-style interface. The default display, shown in Figure 8-28, provides a look at your schedule using a month view.
To see more options, as always, you right-click any empty space on the screen (or, with touch, swipe toward the middle of the screen from the top or bottom edge of the screen). When you do so, Calendar’s app bar appears as shown in Figure 8-29.
Figure 8-28: Calendar app
The Day, Week, and Month app bar buttons are used to change the view. For example, the week view will resemble Figure 8-30.
Figure 8-29: Calendar’s app bar

Figure 8-30: Calendar’s week view

You can also navigate through your schedule using browser-like “back” and “forward” commands. To move back or forward in time through your schedule, you can swipe the screen in either direction or use the Internet Explorer-like keyboard shortcuts Ctrl + Left Arrow and Ctrl + Right Arrow (for back and forward, respectively). Or, when you move the mouse around on-screen, you’ll see small navigational arrows appear near the top left and top right of the screen. Click one to navigate in either direction.
These browser-like navigational movements take place within the context of the current view. So when you go back while viewing your schedule in week view, you go back to last week. Go forward while using day view and you will navigate to tomorrow. It’s all very logical.
Of course, you may sometimes find yourself lost in the schedule, or at least so far in the future or past that navigating manually to the current date will be tedious. Fortunately, in this case, Calendar provides a handy Today button in the app bar. Just click that to return to the current day, week, or month, depending on the view you’ve chosen.
Managing Accounts
A calendar is only valuable to you if it holds your schedule, so the first order of business is getting this app connected to the calendar service you use. The choices are somewhat limited because Calendar supports EAS-based calendars only.
To access the account management interface, you must display the Calendar settings pane. As with any Metro-style app, you do so by typing Winkey + I, or by activating the Charms bar with the mouse or touch and then choosing Settings.
The Calendar settings pane, provides only a few options, including Accounts, which is what you’re concerned with here. (Another useful entry, Options, will be discussed later in the chapter.)
In the Accounts view that appears, you’ll see a list of configured accounts—just Hotmail by default—and an Add an account link, as in Figure 8-31. Click that, and you’ll be offered the supported account types.
Figure 8-31: Calendar account management

Since this works as it does in Mail, there’s no need to belabor the point, and indeed, accounts you configure here will be configured for you in Mail (and People), and vice versa.
Calendar lets you configure multiple accounts, of course, and the events associated with each account will be color coded in the application. (You can change these colors through Settings, Options, as described later in the chapter.) Additionally, you can configure multiple accounts of the same type. So if you have two Hotmail accounts, for example, you can easily configure Calendar to display the schedule from both.
NOTE When you configure an EAS-type account in People, Mail, or Calendar, that account is automatically made available to the other apps as well. So if you added a Gmail account to Mail earlier, its corresponding Google Calendar-based schedule will already appear in Calendar too.
Working with Events
Some calendar solutions refer to events as “appointments.” The terms are interchangeable.
Once you start viewing your various calendars in the Windows 8 Calendar app, you’ll probably want to use this interface to manage your various events as well. And as you might expect, Calendar offers some useful functionality around creating and viewing events, as well as how you can be reminded about pending events.
You can also use the Ctrl + N keyboard shortcut to create a new event.
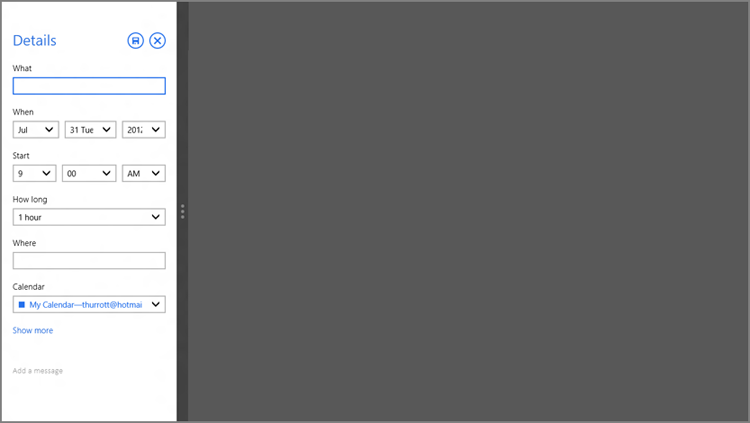
To create a new event, open the Calendar app bar and tap New. (This button resembles a “+” sign.) You’ll see the view in Figure 8-32, which provides a plethora of items to configure.
Figure 8-32: The new event view

These items, which have been nicely simplified using plain language, include:
- When: A number of Metro-style fields that let you configure a date for the event.
- Start: A number of Metro-style fields that let you configure the start time for the event.
- How long: Here, you can choose a length of 0 minutes, 30 minutes, 1 hour (the default), 90 minutes, 2 hours, all day, or custom. That latter option changes the Details pane of the new event view to include an End date area where you can configure the exact date and time the event will end.
- Where: Really just a plain text field that can contain any text, this field lets you enter a location for the event, like Las Vegas, Home, Phone, or whatever.
- Calendar: If you’ve configured more than one calendar, you can choose which calendar gets associated with this event.
- Show more: This link provides access to additional event items, including How often, Reminder, Status, Who, and Private.
- Title: On the right side of this display is a title area, which allows you to provide a name, or title, for the event.
While some calendar solutions support rich text and even graphics in the message field, Microsoft apparently never got that memo: You can only use plain text here.
- Message: Also on the right side is an expansive message area that lets you copy and paste or write details about the event.
Oddly, unlike the New Mail screen in the Mail app, this screen doesn’t provide an app bar or any options related to formatting.
To save the event, just click the Save button. Or cancel it by clicking the Cancel button.
Dealing with Reminders
Like other Metro-style apps, Calendar provides notifications using the standard, system-level notifications that you see from time to time. As you may know, Windows 8 offers two basic notification types, full-screen warnings and pop-up toast notifications that appear in a thin strip near the top right of the screen. Calendar uses the latter type, and at the configured time, you’ll see a Calendar notification toast appear, as in Figure 8-33. Click the toast and Calendar will load so you can view more details about the event.
Figure 8-33: Calendar notification toast

Configuring Calendar Options
Calendar offers some useful configuration options. To view and modify them, visit Settings, Options, and you’ll see an Options pane like that in Figure 8-34.
Figure 8-34: Calendar Options.

Here, you can determine on a calendar-by-calendar basis whether to display that calendar’s events in Calendar and what color you wish to use to display that calendar. Note that calendar sources with multiple calendars will show an entry for each calendar.
Snapping Calendar
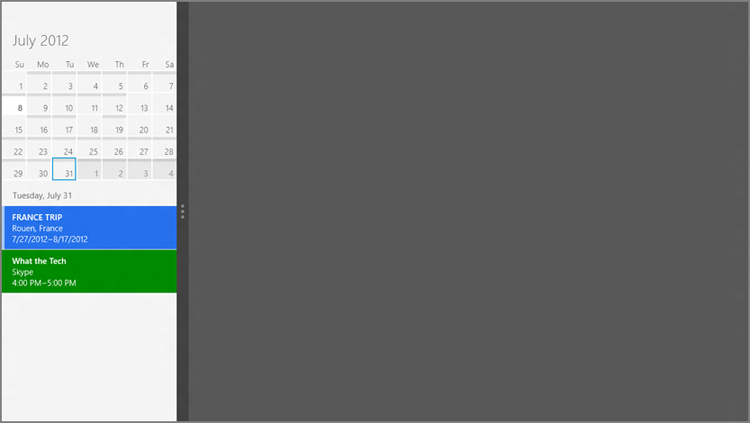
Like other Metro-style apps, Calendar supports the Metro Snap capability, so you can snap it in a subordinate position on-screen next to another Metro-style app or the Windows desktop. Unlike some Metro-style apps, however, Calendar works quite well in this arrangement, providing a customized layout that matches the thin area provided quite nicely.
As you can see in Figure 8-35, the snapped Calendar app provides a thumbnail view of the month as well as any events that are occurring today. You can also click other days in the month view to see the events for those days.
Figure 8-35: Calendar snapped next to the desktop
You can always type Ctrl + T to “go to today” in Calendar, whether it’s in snapped view or the normal full-screen mode. Ctrl + N works in snapped view, too, for creating a new event.
Two additional commands are available via the snapped Calendar’s app bar: Go to today in the calendar and Add a new event. When you choose the latter, you get the nice snapped version of the new event screen shown in Figure 8-36.
Figure 8-36: The new event view, snapped
Lock Screen and Live Tile Use
Because of the nature of the Calendar app and the underlying calendar services it utilizes, this is a very interesting example of where the Windows 8 integration strategy makes a lot of sense. That is, while you can absolutely open the Calendar app to view your events and manage your schedule, oftentimes you simply won’t need to. And that’s because the Calendar app is very deeply integrated into Windows 8.
In the previous section, we discussed how the Calendar app can provide notifications that alert you to pending events no matter where you are in the system—Start screen, Metro-style app, or the Windows desktop—or what you’re doing. But Calendar also provides at-a-glance calendaring information in other key places in the Windows 8 user interface, such as the Lock and Start screens.
Lock Screen
The expressive new Windows 8 lock screen provides a ton of useful information at a glance, including the date and time, the number of pending e-mails, your network connectivity, and so on. But Calendar is awarded a special capability on the lock screen: When configured properly, you can see the title, location, and duration of your next event, as shown in Figure 8-37.
Let’s review the three configuration interfaces you could access to change this behavior.
The first is the Calendar settings pane. If you access this interface (easiest way: Winkey + I from within the app) and click Permissions, you’ll see an option there that allows this app to run in the background and display information on the lock screen. This option must be set to On for this functionality to work.
Figure 8-37: Calendar event information on the lock screen

The second place is in PC Settings, the new Metro-style control panel. If you access this interface (Winkey + C, Settings, More PC settings) and navigate to Personalize, Lock screen, as shown in Figure 8-38, you will see some pertinent settings for Calendar.
Figure 8-38: In PC Settings, you can configure how Calendar works with the lock screen.
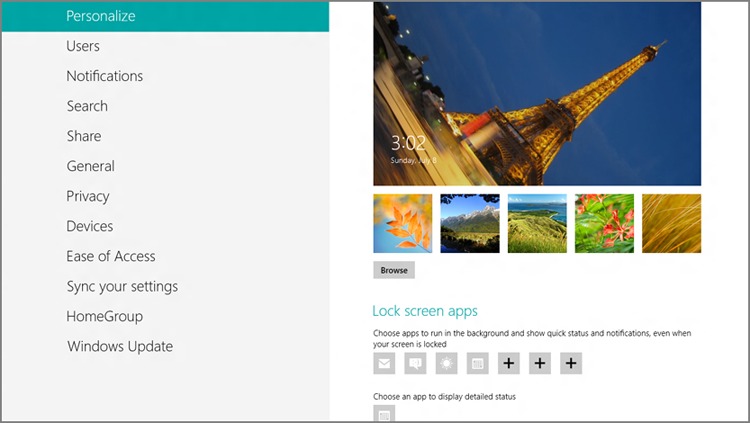
Under the Lock screen apps area, you’ll see that Windows 8 allows you to configure up to seven Metro-style apps that can run in the background and provide quick status and notifications. But below that is a very interesting option: You can configure a single app to display detailed status information. If Calendar isn’t chosen here, click the “+” icon and choose Calendar from the pop-up list.
If you’re still not seeing Calendar events on the lock screen, there’s one last place to check. In PC Settings, navigate to Notifications and then ensure that the option Show app notifications on the lock screen is set to On.
CROSSREF Windows 8 offers far too many ways to customize the system, but we cover this functionality in Chapter 5 if you can’t get enough.
Live Tile on the Start Screen
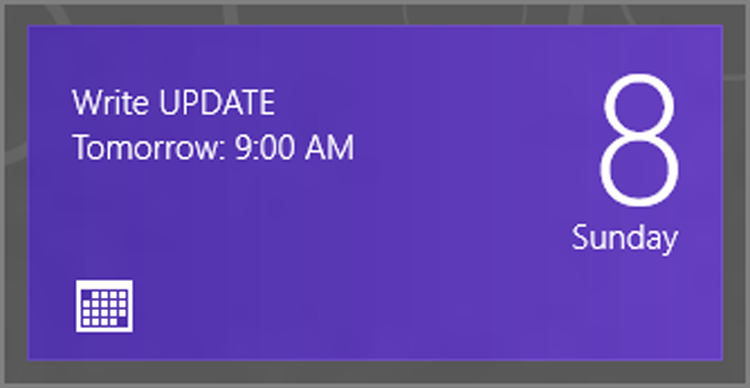
If you’re using the Start screen as a dashboard of sorts, you know that most Metro-style apps provide live tiles that provide ongoing, app-related updates. In the case of Calendar, this functionality is quite useful, as the app’s live tile will animate through the day’s pending events as you watch. The Calendar live tile, shown in Figure 8-39, is quite expressive.
Figure 8-39: The Calendar live tile
Of course, if you misconfigure things, the live tile could be very static. But you can check the live tile properties easily enough to make sure it’s configured to your liking. To do so, right-click the Calendar live tile and consider the commands that appear in the app bar at the bottom of the screen, as in Figure 8-40.
Figure 8-40: The Calendar live tile settings

- Unpin from Start: Here, you can remove the Calendar live tile if you don’t wish to use it anymore.
- Uninstall: This option lets you uninstall Calendar.
- Smaller/Larger: Calendar can only display live updates when it’s set to the larger (rectangular) tile size. If you set it to the smaller (square) size, it will simply animate between static displays.
- Turn live tile off/on: You can use this command to toggle whether live updates appear on the tile’s surface. By default, this is set to on.
If you’re familiar with Windows Phone, you know that Microsoft’s smartphone platform sports an excellent unified messaging client called—wait for it—Messaging that lets you communicate with others via services such as SMS, MMS, Windows Live Messenger, and Facebook, all via a single interface. That Messaging client uses color-coded threads to differentiate between conversations you have, regardless of the service used, and you can switch back and forth between the available services depending on which services your contacts use as well. It’s a nice little app that integrates well with the underlying OS, popping-up notification toasts if you’re doing something else and a new message arrives.
NOTE SMS stands for Short Message Service and is used for text messaging, while MMS stands for Multimedia Messaging Service and can be used for sharing video, photos, and other multimedia content.
The Messaging app for Windows 8 works in much the same way, though there are some key differences between the two. The biggest is that the Messaging app for Windows 8 does not support cell phone/smartphone services such as SMS and MMS, since these occur over carrier networks and almost always incur additional fees.
Though these the two apps work similarly, those who are familiar with Windows Live Messenger for Windows might consider Messaging to be its Metro-styled equivalent, or even replacement. That’s because Messaging works with the same basic two services as does Windows Live Messenger: Windows Live and Facebook.
Understanding Messaging
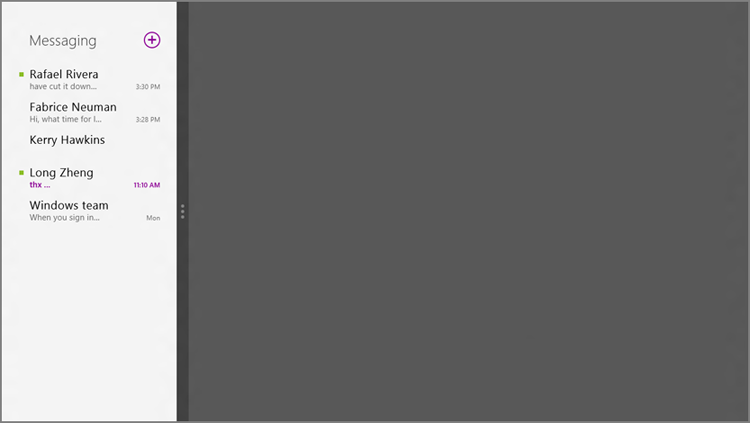
Messaging provides a simple, full-screen interface like that shown in Figure 8-41.
On the left, you will find a Threads pane that contains the various threads, or conversations, you have (or are currently having) with others. Each contact will have their own thread, so each time you communicate with the same person, the new conversations will be appended to the previous ones.
Figure 8-41: Messaging

The Threads pane also includes a prominent New message link which lets you start a new conversation with a contact.
On the right of the application window is the large Messages pane, which shows you the conversations that have occurred in the currently selected thread. At the bottom of the window is a box in which you can type a message. When you tap Enter, that message is added to the currently selected conversation and thread.
When you activate the Messaging app bar—by right-clicking a blank area of the screen, tapping Winkey + Z, or swiping toward the center of the screen from the top or bottom edge—a few additional commands are revealed.
- Status: This button allows you to set your online status, which is how you will appear to other contacts in their own messaging applications. Available choices in the pop-up menu that appears when this button is clicked include Available (what we used to call “online”) and Invisible (“appear offline”).
- Invite: This button triggers a pop-up menu with two choices, Add a new friend and View invites.
- Delete: This command lets you delete the currently selected thread. It will delete the entire thread, and not any individual part of the thread.
Managing Accounts
Messaging is primarily a Microsoft Messaging (formerly Windows Live Messaging) client, and as such it will be automatically configured to access this service if you sign in to your PC using a Microsoft account as we recommend. That said, you can also connect to Facebook’s messaging service (as you can from Windows Live Messenger), and we suspect other services will come on board over time, thanks to the Windows 8 extensibility features.
Accounts are added and managed in Messaging as they are in other Metro-style apps like People, Mail, and Calendar, through Settings, Accounts. Unlike other apps, however, Messaging does not support multiple Messaging or Facebook accounts: You get only one of each.
Working with Threads
To start a new messaging thread, click the New message link. The unique People chooser interface will appear, as shown in Figure 8-42.
Figure 8-42: The People chooser lets you pick a contact to communicate with.

The People chooser is very interesting, because it connects to whatever Metro-style apps that have registered with the system to provide access to contacts, or the People app by default. But as more such apps become available, you’ll be able to choose contacts from those apps, too, using the drop-down control to the right of the People title in the chooser.
The chooser is also smart about which contacts to show you. That is, it doesn’t provide you with a rote list of every single contact you have. Instead, it only shows you those contacts that are connected to a compatible service. You can optionally toggle the view between all of these contacts and only those who are currently online.
Once you’ve selected a contact, you return to the main Messaging view. If you’ve not yet communicated with the selected contact, a new thread will be created. If you have, the new messages you’ll exchange will be appended to the end of your existing thread.
Messages within a thread follow a logical form, using rectangular conversation “bubbles” that are similar to those in other messaging apps, such as the one in Windows Phone. Each time you hit Enter, that message—contained in its own bubble—is completed and sent to your contact.
Handling Notifications
Since most people won’t want to stare at the Messaging screen and wait for a new message to arrive, Messaging supports the standard Windows 8 notifications capabilities and will provide pop-up notification “toasts”—along with a corresponding notification sound—whenever a new message does appear. These toast notifications will appear briefly on-screen, near the top-right corner, no matter where you are in the system, on the Start screen, while using a different Metro-style app, or on the Windows desktop. A typical Messaging notification can be seen in Figure 8-43.
Figure 8-43: Messaging notifications appear over other Windows 8 experiences.

NOTE This is probably obvious, but Messaging notifications will not appear when you’re using Messaging. If you receive a message from another contact outside of the thread you’re currently viewing, Messaging will do one of two things:
- If a thread already exists for that contact, the thread is moved to the top of the threads list.
- Otherwise, a new thread is created and added to the top of the threads list.
To deal with a Messaging notification, just click it and you’ll be brought into the Messaging app where you can read the entire message and reply if necessary.
Of course, notifications are, by definition, interruptions and you may want to configure the way the system deals with notifications globally or for Messaging particularly.
As with other apps, you can configure some notification settings in Settings, Permissions, including whether Messaging notifications are enabled in Windows and on the lock screen.
Notifications can also be globally and temporarily toggled on or off using the Settings pane. To access this interface, type Winkey + I or open the Charms bar and then select Settings. From this interface, you can select the Notifications icon near the bottom of the pane to toggle this functionality, as shown in Figure 8-44.
Figure 8-44: Notifications can be toggled globally, on the fly, using this icon.

That functionality is nice from time to time, such as when you’re busy working and don’t want to be disturbed. But as you use Windows 8 more and more, you may find that you want to change the way Messaging notifications work going forward. This happens via the new PC Settings interface. (You can reach PC Settings at any time by accessing the Settings pane and selecting More PC settings.)
A few relevant options here include:
- Notification sounds: We happen to find the chime that rings each time a notification appears to be annoying. If you do too, change the option titled Play notification sounds to Off.
- Show individual app notifications: You can determine whether individual Metro-style apps, including Messenger, can even display notification toasts. Given the nature of this app, we recommend leaving notifications on for Messaging. But if you’re not interested, you can disable this behavior.
Snapping Messaging
Messaging provides a reasonably useful snapped experience by which you can snap the app to the left or right side of the screen alongside another Metro-style app or the Windows desktop. In this mode, only one of Messaging’s panes can be seen at a time, as shown in Figure 8-45.
Figure 8-45: Messaging app in snapped mode
Most Messaging functions work just fine in this mode. You can view individual message threads, add messages to an existing thread, and, via the hidden app bar, change your status or start a new message thread.
For years, Microsoft has offered a cloud storage service called SkyDrive that has offered an industry-best allotment of free online storage—7 GB most recently—but few ways to use it effectively. As a result, SkyDrive had been largely ignored by the computer-using public, while competing offerings from Apple (iCloud), Amazon (Cloud Player and Cloud Drive), and Google (Google Play and Google Drive) have grabbed all the headlines.
SkyDrive has had a few names over the years, including Windows Live SkyDrive. Today, however, it’s referred to as Microsoft SkyDrive, or simply SkyDrive.
That’s changed. And while there are many reasons why SkyDrive is central not only to Microsoft’s vision for Windows 8 specifically, but also for all of its consumer-oriented offerings generally, here’s one pertinent fact that may drive this home nicely. Windows 8 doesn’t provide a way to browse the local filesystem from the new Metro environment. But it does offer a way to browse your SkyDrive storage, and the SkyDrive app is a neat little solution for those of us with our heads—well, our data at least—in the clouds.
SkyDrive Requires a Microsoft Account Sign-In
There is one important consideration with the SkyDrive app. We mentioned early in the chapter that the People, Mail, Calendar, and Messaging apps require you to sign in with a Microsoft account, though you can do so even if you’re signing in to the PC with a traditional local account. The SkyDrive app does not allow this: To use this app, you must sign in to the PC with a Microsoft account. To change how you sign in, you can visit PC settings, Users, and then select Switch to a Microsoft account. (Or, if you’re using a domain account, you can connect a Microsoft account to that domain account.)
Understanding the SkyDrive App
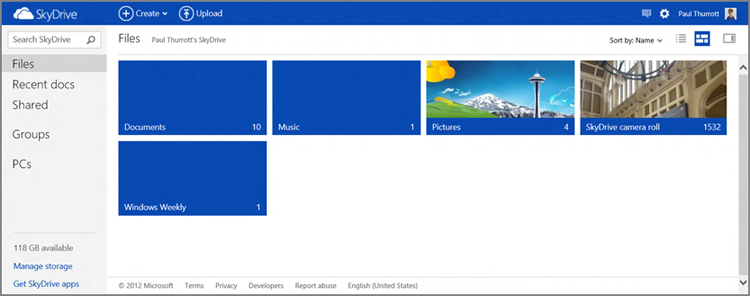
The SkyDrive user interface, shown in Figure 8-46, replicates the folder structure of your SkyDrive storage.
You can also install the SkyDrive application for the Windows desktop and view and manage your SkyDrive-based storage from there.
To understand how this is so, compare it to the web-based view of the same SkyDrive account, which is shown in Figure 8-47. Restyled to resemble the Metro app, the SkyDrive web interface also utilizes Metro-style elements to represent folders and files, providing a more consistent experience.
Figure 8-46: The SkyDrive app

Figure 8-47: SkyDrive on the web now resembles the Metro SkyDrive app too.
Navigate inside one of the folders in the SkyDrive app and you’ll see a similar Metro treatment applied to documents as well. In Figure 8-48, you can see a SkyDrive-based folder that contains both subfolders, on the left, and documents and other files, which are displayed on the right.
Figure 8-48: Documents in the SkyDrive app

Beyond that, SkyDrive offers browser-like navigational controls, including a large, obviously placed “Back” icon in the top left of the screen. Keyboarders can also use the browser-based Alt + Left Arrow shortcut to navigate back if they’d like.
As with other picker-style Metro user experiences, there’s a subtle widget next to the SkyDrive title. Click this widget, which resembles a downward-facing arrow, and a small menu, or jump list, appears, as shown in Figure 8-49. This menu lets you jump to frequently needed locations, including the root of your SkyDrive storage as well as virtual views such as recent documents and shared documents.
Figure 8-49: SkyDrive’s jump list

Opening and Editing Documents and Other Files
Would you prefer to open that document in Microsoft Office on your PC? You’ll have to download it first, as discussed next.
To open a document, simply tap (or click, or otherwise select) it. Some document types, like PDF files, will open in the Metro-style app, or Windows desktop application, that is associated with that file type. However, some behave a bit differently than expected. For example, Office documents—Word documents, Excel spreadsheets, and PowerPoint presentations—as well as OneNote notebooks open in the SkyDrive-based Office Web Apps instead. This can be seen in Figure 8-50.
When viewing a folder full of photos, as shown in Figure 8-51, SkyDrive provides a more compelling and panoramic view of the folder contents.
But there’s still little you can do beyond viewing individual photos: No slideshow is available, and you can’t even manually switch from photo to photo in a pleasant full-screen view.
Copying Files from SkyDrive to the PC
To copy (or download) a document, photo, or other file from your SkyDrive storage to the PC, simply select it and then display the app bar (Winkey + Z is quickest). Then, select the Download button, which can be seen in Figure 8-52. You can perform this action on individual files or multiple files.
Figure 8-50: A SkyDrive-based Word document will open in the Office Web Apps.
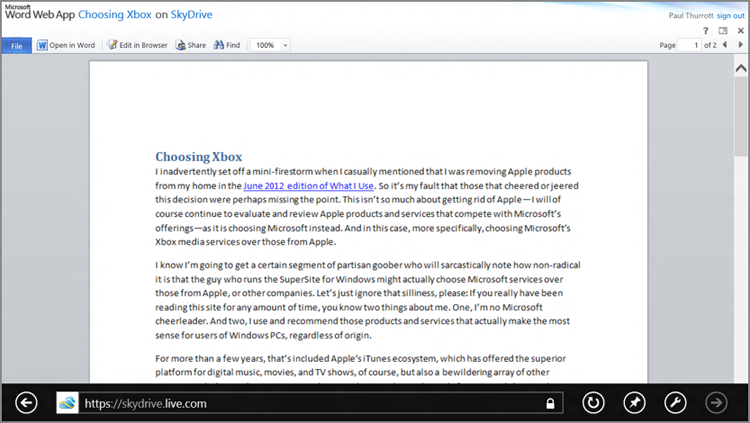
Figure 8-51: Viewing a folder full of photos on SkyDrive

Copying Files from the PC to SkyDrive
To copy (or upload) a document, photo, or other file from your PC to SkyDrive, navigate to the destination location in SkyDrive, display the app bar and then select the Add button. A File picker screen will appear, allowing you to select one or more files from your local filesystem, as well as from various Metro-style apps that are connected to online services of their own.
Figure 8-52: You can download SkyDrive-based files using the app bar.

As you select files to upload, they are added to the File picker’s basket, which runs along the bottom of the screen. This basket lets you collect files from various locations and then upload only when you’ve gotten all the files you want, no matter where they’re found throughout your PC’s filesystem and potentially on other storage services in the cloud.
Sharing Files from SkyDrive
To share files from SkyDrive, you use the system-wide, Metro-style sharing mechanism that’s available to all apps. Simply open the Share pane (via the Charms bar, or with the Winkey + H keyboard shortcut) and you can share the currently selected document, photo, or other file via any apps that are configured to offer this capability. In Figure 8-53, you can see that Mail and People are available for sharing the currently selected document.
Figure 8-53: Sharing a file from SkyDrive

Windows Reader also works with Microsoft’s aborted XPS document format.
After fighting against the tide of Adobe’s popular PDF document format for years, Microsoft has finally given in and created its own Windows PDF reader app. Dubbed Windows Reader, this great little app works as expected and is a lightweight and fast alternative to Adobe’s bloated Reader application, even for those who prefer to stick largely with desktop applications.
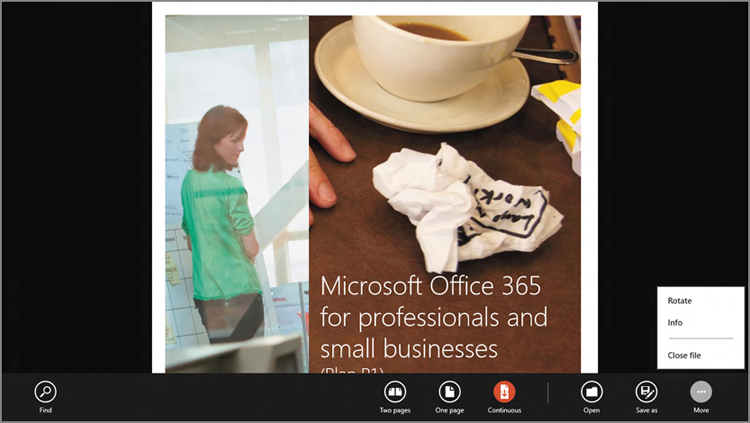
Windows Reader presents a very simple full-screen interface, like many Metro-style apps, but some interesting features are revealed, as always, by activating the app bar (Winkey + Z, swipe toward the center of the screen from the top or bottom edge, or right-click anywhere). Windows Reader is shown in Figure 8-54 with its app bar displayed.
Figure 8-54: Windows Reader with its app bar displayed
Windows Reader provides the following features related to PDF document viewing:
- Zoom: In any of the available view styles, you can zoom in and out to better see the document. Zooming works as it does elsewhere in Metro: Via pinching on touch-based systems, with Ctrl + - (zoom out) and Ctrl + + (zoom in) keyboard shortcuts, or by holding down the Ctrl key and using your mouse’s scroll wheel.
NOTE Zoom out enough and you’ll see a nice thumbnail view.
- View styles: The Two pages, One page, and Continuous buttons in the Reader app bar work like toggles so that only one can be on at a time. In Two pages view, Reader will display two pages of the current document side by side. In One page view, only one whole page will be seen at a time and you must use the app’s navigational controls (discussed next) to move from page to page. In Continuous view, only one whole page will be seen at a time, but you can scroll through the document continuously, with the start of the next page being visually attached to the end of the current page.
- Navigation: In Two pages and One page view, you can swipe left and right, use the left and right arrow keys, or click the pop-up navigational controls that appear to move through the document.
In Continuous view, navigation works differently. That is, instead of behaving like a standard Metro-style app with horizontal navigation, it behaves like a traditional document-based Windows application and utilizes vertical navigation instead. In this mode, you can move through the document by swiping up and down, by using the up and down arrow keys, or by utilizing the scroll bars that appear on the right side of the application.
- Find: By using the Find button in Reader’s app bar, you can search for text within the current document. This interface supplies Previous and Next buttons so you can find individual references to the search text, and an optional results pane, that calls out each instance of the search text in the document for quick navigation.
This right-click menu also lets you copy the text to the Windows clipboard.
- Annotations: You can make annotations (but not edits) to a PDF document with Reader by selecting a block of text, right-clicking, and choosing Highlight (to add a colored highlight to the text) or Add a note (to embed a note in the PDF). You can then save the changes to the original PDF or to a copy.
Reader won’t save rotation changes you make to the document, for some reason.
- Rotate: If you’ve ever gotten a PDF file that seems to be visually sideways, you know how useful this command can be.
- Print: Since Windows Reader is a document-based app, you may actually want to make a hard copy from time to time. That works as it does elsewhere in the Metro environment: You access the Devices charm (Winkey + C, Devices) and then select the appropriate printer from the list. Or, access the printer list directly with Ctrl + P.
In Windows 8, Microsoft has adapted many excellent Bing services into Metro-style apps. And while some of them are worth only a passing mention, one app in this group, Bing Maps, is quite useful.
Bing Maps
As it does for Windows Phone, Microsoft provides an excellent Bing Maps app for Windows 8 that brings the beautiful and useful Bing location and directions functionality to a new generation of Windows PCs and devices. You’re welcome to use Maps on any PC, of course, but it works best on highly mobile devices such as tablets and hybrid portable computers that have pervasive Internet connectivity, perhaps via a cellular-type connection, and of course a GPS sensor.
NOTE We’ll often refer to Bing Maps simply as Maps, and it is that latter, simpler name that is used in the user interface.
It won’t be surprising, perhaps, that Bing Maps prompts you to access your location information before running for the first time, as shown in Figure 8-55.
Figure 8-55: Bing Maps needs access to your location for fairly obvious reasons.

Once your location is available, Maps will then zoom into your current location, using a nice animation that’s the hallmark of Bing Maps across the web and various mobile implementations.
All Over the Map: Navigating with Bing Maps
Maps works much as expected, and much like other Metro-style apps, with a clean interface and most options hidden in an app bar. You can swipe around on-screen to move the view in various directions, or, on a mouse-based system, simply “grab” the map with the mouse cursor and then move the mouse in any direction to achieve the same effect.
For keyboard users, there’s a neat navigational shortcut that’s not immediately obvious. Simply tapping the arrow keys does nothing. But if you hold down the Ctrl key and then tap an arrow key, the map will navigate one-half-screen’s worth in that direction. Type Ctrl + Left Arrow, for example, will navigate a bit to the west. (How much will depend on the current zoom level.)
Speaking of zoom, this functionality works as expected as well. On touch-based systems, you can pinch to zoom out and reverse-pinch (or double-tap) to zoom in. Mouse users can access the on-screen zoom controls that appear in the left side of the screen, as shown in Figure 8-56. You can also use the mouse’s scroll wheel to zoom in and out.
Figure 8-56: No touch? No problem: You can still zoom with a mouse!

Keyboard users can zoom with Ctrl + - (zoom out) and Ctrl + “+” for zoom in (which is to say, Ctrl, Shift, and “+”).
If you get lost, you can always find your current location by selecting the My Location button on the app bar. (If it’s hidden, you can display the app bar by tapping Winkey + Z, right-clicking, or by tapping and holding.)
Changing the Look of Maps
You can change the look of the Maps presentation in two ways:
- Show Traffic: By default, Maps doesn’t muddy up the view with traffic indications—roads that are colored green, orange or red depending on the traffic level—but this is obviously useful information if you’re using the app on the go. To enable this display, activate the app bar if necessary and tap Show Traffic in the app bar. The view will change to reflect the current traffic conditions, always excellent in the Boston area. To disable this display, simply toggle Show Traffic again.
- Map Style: Maps supports two display styles, Road View, which is the default, and Aerial View. You can toggle this view with the Map Style button in the app bar.
Find Your Own Location
If Maps gets lost for some reason, you can use the My location button in the app bar to find yourself again. Simple.
Finding a Location
To find a particular location with Bing Maps, you use the system-wide Search contract functionality, available from the Search pane. There are many ways to display this pane, but the simplest, perhaps, is to type Winkey + Q; mouse or touch users can display the Charms instead and then choose Search.
To search, simply type a location name into the search box and press Enter (or select the Search button). When you do, Bing Maps will likely navigate to the exact location, unless you’ve been too vague. A direct hit can be seen in Figure 8-57.
Figure 8-57: Find a location with Bing Maps.

Bing Maps utilizes Bing’s search technologies on the back end, so you might expect searching to be fairly granular. It’s not. Yes, you can use paris france to find Paris, France. And if you type in las vegas, Bing Maps will zoom right to Las Vegas, Nevada. But if you meant Las Vegas, New Mexico—or Paris, Texas, for that matter—you’ll need to be more specific. Or, you can use a neat option that appears in the app bar after a location has been found: You’ll see a new More results button that will display other possibilities. (You can also use the Refine button to refine your search, or the Clear button to start over.)
Getting Directions
Where Bing Maps really shines is in its ability to help you find your way. If you want to get directions, click the Directions button in the app bar to display the Directions pane shown in Figure 8-58.
Figure 8-58: Bing’s Directions interface

Then, you can enter starting and ending locations in the provided boxes. The first will default to current location, which is exactly what it sounds like. And if you want to reverse the directions, tap the directional button at the right of the top box.
When you’re ready to get the directions, click Enter (or tap the right arrow icon to the right of the bottom box). Bing will think for a bit and then provide its attractive, full-screen driving directions as shown in Figure 8-59.
Figure 8-59: Getting from here to there with Bing Maps

You can zoom into parts of the route by clicking, tapping, or otherwise selecting individual parts of the route display at the top of the screen. And the printed version of the Bing Maps directions is particularly nice: You access this interface, as always through Charms, Devices, and then the appropriate printer. The Print pane can be seen in Figure 8-60.
You can also use the Clear Map button to exit from this display.
Figure 8-60: Bing Maps makes beautiful printed directions.

Bing
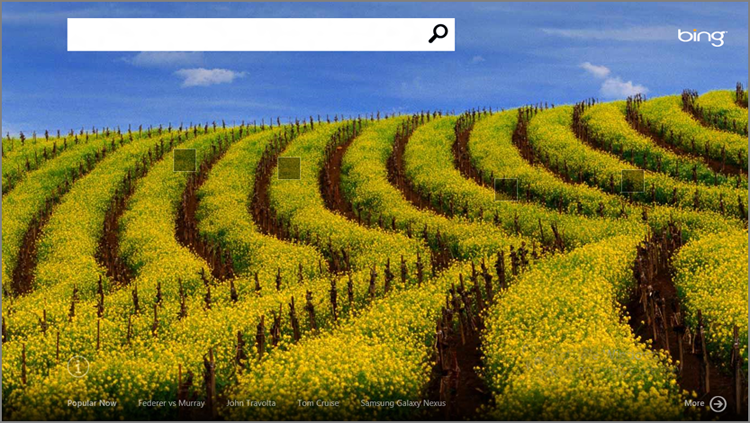
The Bing app is a Metro-based version of the Bing website, with a beautiful full-screen interface sporting Bing’s beloved “picture of the day,” a prominent search box, and links for searches that are popular right at this moment. You can see the Bing app in Figure 8-61.
Figure 8-61: The Bing app
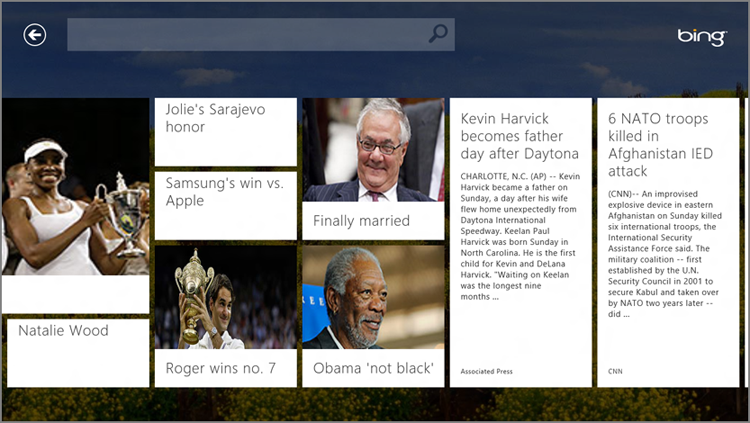
Click the prominent More button in the bottom right of the screen, and you can view a more visual, Metro-like take on the day’s biggest happenings, as in Figure 8-62.
Figure 8-62: Bing’s more visual view of today’s big searches
Bing Finance, News, Sports, and Weather
Microsoft also provides four very similar looking apps, Bing Finance, News, Sports, and Weather, which take the notion of a news aggregator and turn it into something truly beautiful and useful. Each obviously focuses on its own core topic, with Finance providing a gorgeous front end to the stock market and financial news and topics, News providing a general purpose news experience, Sports taking on locale-specific sports news of note, and Weather doing its best to make the weather look gorgeous, no matter how ugly it gets outside.
Since each is so similar from a presentation perspective, let’s just look at one, Sports, to see how something basic can be made to look so beautiful. In Figure 8-63, you can see the Sports landing page, which provides beautiful, magazine-style photography and layout.
Scroll over to the right and you’ll see other top stories from the day, highlighted again in a highly visual style with a nice layout as in Figure 8-64.
Each of the apps is fully customizable in some way. In Sports, for example, you can follow your favorite sports, teams, or players. And in Weather, of course, you can configure the weather display for your favorite places, and even pin individual weather tiles for each on the Windows 8 Start screen.
Figure 8-63: The Sports app

Figure 8-64: Top stories in Sports

Microsoft Office Comes to Windows . . . Sort Of
Over the years, we’ve been struck by how many people seem confused by the relationship between Microsoft’s two most successful product franchises, Windows and Office. That is, many people believe that Office is “part” of Windows and that these two very separate software solutions are thus one. And some are surprised when they reinstall Windows, or get a new PC, to discover that Office is no longer present. So we’ve spent a lot of time trying to educate people about the differences between Windows and Office, and how they are separately acquired.
To be fair, the reason so many people believed that Windows and Office came together is that, for many, they did. Most people acquire both Windows and Office together with a new PC purchase and thus don’t draw a distinction between the two. The problem is, if you’re not paying attention at the time of that PC purchase, you may not get Office at all, or you may get a version of Office that you don’t want.
Also, during the life cycle of Windows 7, many PCs came with a stripped-down Office version called Office Starter that included two very basic Office applications, Word Starter and Excel Starter. This solution came free with many PCs and was designed to be electronically upgraded to higher-end, paid versions of Office.
With Windows 8—and a new family of Office products branded as Office 2013—Microsoft is completely changing the equation. The ARM-based versions of Windows 8, called Windows RT, actually do come with a special version of Office 2013, and while this freebie Office version doesn’t offer all of the power and flexibility of the high-end Office 2013 suites, it’s a far cry from the basic experience previously offered by Office Starter. (Office Starter is no longer available.) Office 2013 for Windows RT version includes Word, Excel, PowerPoint, and OneNote, and if you purchase any Windows RT-based device, you’ll get these powerful applications for free.
Windows PCs that do not include these full-featured Office applications will almost certainly include, or offer, some form of Microsoft Office. Check with your retailer or hardware maker for details.
Windows RT devices come with some significant downsides, however, as well, including one key issue: A lack of compatibility with traditional third-party Windows-based applications. We discuss these issues in Chapter 1.
As you may recall, with Windows 8 and RT, Microsoft has divided the PC market somewhat with two complementary Windows 8 families of products, one of which runs on traditional PCs (and, confusingly, device-like tablet PCs) based on familiar Intel x86/x64 and compatible chipsets. But there are also versions of Windows 8 that run on the ARM platform, which is typically used on very thin, light, and elegant portable devices similar to Apple’s iPad. Those Windows 8 versions, collectively called Windows RT, do include the Microsoft Office applications Word, Excel, PowerPoint, and OneNote. So that’s something to consider when you’re shopping for a device.
NOTE Why do Windows RT devices include Office you ask? Though Windows RT looks and works much like traditional x86 versions of Windows 8, it is not compatible with traditional Windows desktop applications like Office. So Microsoft has made a special version of Office just for Windows RT, while focusing mostly on Metro-style apps going forward on that platform.
There is some precedence for this product bundling. As long ago as 1995, when Microsoft launched the first version of Windows CE, a specially made version of Windows designed to run on non-PC devices of the day, it also bundled basic versions of its Office applications, then called Pocket Office, with the tiny machines that ran that OS. And through the years, subsequent updates to that product line, including Pocket PC and Windows Mobile, also included these Pocket Office applications as part of the platform.
And in the modern Windows Phone platform, which is today now based on the PC version of Windows 8, Microsoft continues to bundle Office. Windows Phone 8 includes what’s now called Office Mobile 2013, with portable versions of Word, Excel, PowerPoint, and OneNote that provide not just document compatibility and basic editing functionality, but also interoperability with Microsoft’s cloud-hosted Office document repositories, SkyDrive and SharePoint. So it should be no surprise that Windows RT devices—that is, those machines that sit logically between phones and “true” (or at least traditional) PCs—would also offer similar functionality.
Expectations for Office on a highly mobile device like a tablet are, of course, somewhat reduced compared to those one might have for a solution that runs on a full-featured PC. But since many Windows RT and Windows 8-based devices can be docked or otherwise transformed into more powerful PCs with keyboards, mice, and external screens, the bundling of these applications is all the more interesting for those of us who want one device that does it all.
In any event, the bundled version of Office includes the following solutions:
- Word: When you think about word processing, you think about Microsoft Word, and while there have been many pretenders throughout the years, none have approached the power and utility of Microsoft Word, nor its amazing reading experiences. In fact, Word is so good, we used it to write this book.
- Excel: Excel is Microsoft’s spreadsheet solution, and like Word, it dominates the market in which it competes. Excel offers all of the number crunching functionality you expect and lets you analyze and visualize data in amazing, graphical ways.
- PowerPoint: Microsoft’s presentation package is a staple in offices and schools around the world, offering professional features, support for amazing embedded multimedia, and the ability to broadcast to any Internet-connected PC or device.
Microsoft is also providing two Metro-style Office apps with Office 2013, OneNote and Lync. These work with both Windows 8 and Windows RT.
- OneNote: Less well known than the other Office applications, perhaps, OneNote is ideal for portable devices, offering amazing, cloud-connected note-taking capabilities.
As this chapter ably demonstrates, Windows 8 is a productivity whirlwind, with an amazing array of Metro-style apps and traditional desktop applications that will keep you up to date, efficient, and working through any conditions. From the new Metro-style People, Mail, Calendar, Messaging, SkyDrive, Reader, and Bing offerings like Maps, Bing, Finance, News, Sports, and Weather, and more, Windows 8 includes enough in the box to keep you busy for a long, long time. Of course, Windows 8 isn’t just about work. And in the next two chapters, we’ll examine the fun side of Windows 8, examining its entertainment and game capabilities, respectively.