
Chapter 13
Launching Your YouTube Channel
IN THIS CHAPTER
![]() Setting up your YouTube channel
Setting up your YouTube channel
![]() Making your channel your own through customization
Making your channel your own through customization
![]() Exploring ways to profit from your channel
Exploring ways to profit from your channel
Big brands have made their home on YouTube. Take a look at the channels of GoPro (www.youtube.com/user/GoProCamera), Lowe’s (www.youtube.com/user/Lowes), or Red Bull (www.youtube.com/user/redbull), and you’ll see YouTube channels with millions of subscribers and even more millions of video views. Having a YouTube channel is a must for any marketer, as it will form the house for all of the content that you’ll create and post on YouTube.
In this chapter, you discover how to set up and customize your own YouTube channel. You also find out how to profit from your channel.
Creating Your YouTube Channel
Your channel is your home on YouTube, a place where all your video content lives and where you can access a host of incredibly powerful features to get the most out of the platform. Spending some time setting up your channel for you, your brand, or your business will set you up for success in all you do on YouTube. After you create your channel, you’ll be able to:
- Customize your channel so that it reflects your brand identity and represents your business effectively (see Chapter 15)
- Upload your videos ads and video content (see Chapter 14)
- Create playlists to organize your videos (see Chapter 14)
- Begin growing your video and subscriber count (see Chapter 10 for tips and best practices when creating your videos; see Chapter 7 on how to buy media to help boost your numbers)
Considering how valuable creating a channel can be to a marketer, it’s really easy to get started. All you need is a Google account. If you don’t have a Google account for your business, see the nearby sidebar.
With your Google account in hand, you’re ready to fire up your YouTube channel.
 YouTube is constantly evolving and improving its platform, and features are often tweaked or moved. Despite this constant change, the principles in this section remain the same. Don’t worry if a button isn’t where you expect it to be; it’ll likely be somewhere nearby.
Follow these steps to create your YouTube channel:
Sign in to YouTube using your Google account.
The YouTube home page appears, and the icon in the upper-right corner changes to your account’s profile picture or an icon of your name’s initial.
 If you have several Google accounts, make sure that you’re signed in with the one you want to use for your YouTube channel.
Click on the profile picture or icon and then click on Choose My Channel from the a drop-down menu that appears.
You see your channel, your home on YouTube.
If this is the first time you’re accessing your channel, you’re asked to create a channel.
Choose the name you’d like to use YouTube with.
You can use either your name or a name that best represents how you’ll be using your channel — for example, your business or brand name. You can change this name later, but I recommend picking something that simply and clearly describes who this YouTube channel represents.
Click on the Create Channel button.
Your brand new channel, shown in Figure 13-1, is alive. Your channel probably looks pretty empty because it’s ready for you to customize it. (See the section “Customizing Your Channel,” later in this chapter, for information on how to start making it your own.)

FIGURE 13-1: A brand new YouTube channel.
Customizing Your Channel
Figure 13-1 shows a brand new, freshly minted YouTube channel. There’s not a lot to see! With no videos, no playlists, and no branding, your channel is a blank slate ready for you to customize as you see fit.
You want to customize your channel so that it is uniquely identifiable and demonstrates what can be found on it. To accomplish this goal, you should address some big items right away:
- Banner image
- Links to your banner
- Channel icon
- Channel description
 You can tweak things later as your YouTube efforts evolve. Regularly review your channel and make updates to keep things fresh.
Adding a banner image
The banner image is that large image spanning the top of a channel. Your banner is an opportunity to showcase your channel’s identity and give it a look and feel that’s unique to you.
The image you upload will be used on your channel on desktop computers, TV screens, and mobile phones, so choose an image that you think looks good across all devices.
A good image will
- Be a compelling representation of what your channel is about. Choose something bold that stands out!
- Be on brand for your business. It should match or be in the same family as your other brand creative, such as your website.
- Be as clearly visible on mobile phones as it is on desktops. For example, if it contains text, ensure that it can be read on all devices.
Whatever you choose, be sure you have the rights to the artwork you use. For example, you can use photographs you have taken yourself or illustrations you’ve had created. You can also find images that are available without royalty using Google Image Search.
To add a banner image to your channel:
Click on the Customize Channel button.
You will see a beautiful clean slate that is ready for your creative touch. Your Google account profile image appears in the upper-left corner of the banner, along with images of devices and the Add Channel Art button.
Click on Add Channel Art.
A box appears where you can upload photos.
Select a photo from your computer to upload or choose from the images in Your Photos or Gallery.
Use a high resolution, large size image that is at least 2,048 x 1,152 pixels.A preview shows you how the image will look across devices.
Click on the Adjust the Crop button to alter your image and check the check box for Auto Enhance to make changes to things like brightness.
Your channel art is uploaded.
YouTube offers downloadable channel art templates that you can use to design your channel art. Visit http://bit.ly/YTchannelarttemplate and navigate to the Image size & file guidelines section where you can find a downloadable zip file.
Adding links to your banner
On other YouTube channels, you may have noticed links to social media sites, such as Facebook, that sit on top of the channel’s banner image. You can add these links to your channel’s banner, too, by following these steps:
- Navigate to your channel and click on the About tab.
- Click on the Links button (near the bottom of the page) to add up to five external website links.
Give each link a title, enter the URL, and then click on the Add button.
For example, you may choose to title your links as My Fan Club or My Facebook Page.
Add more links until you’re happy and click on the Done button.
These links appear on your YouTube Channel’s banner.
Editing your channel icon
Your channel’s icon, also known as a profile picture, comes from your Google account, and it’ll follow you around pretty much wherever you go. The channel icon appears as the profile picture on your YouTube channel when someone visits, and it’ll be the image you click to access your Google account. It will also be the image that appears next to your comments when you comment on someone else’s video. It’s everywhere!
Even though the image you upload for your channel icon will be square, when it’s live it’ll appear with a circular crop. Keep that in mind and choose a profile picture that keeps the main image in the center, and not off to the sides.
Your channel icon should complement the rest of your YouTube channel art. For example, you may want your icon to be a photo of you, your product, service, or something that represents you that is consistent with your YouTube channel overall and your banner image. Coca-Cola’s channel icon, shown in Figure 13-2, is a great example because it shows its logo and product lineup, and is immediately identifiable as Coca-Cola wherever it may appear on the web.
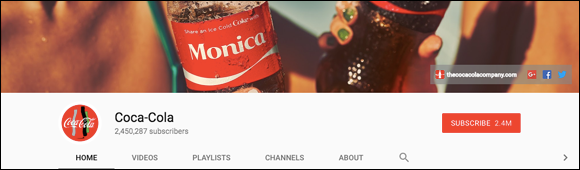
FIGURE 13-2: Coca-Cola’s channel icon matches the channel.
To add or update your channel icon, follow these steps:
Hover your mouse pointer over your channel icon and click on the pencil icon that appears.
An overlay message tells you that you’ll be taken to your Google account to change the image.
Click on the Edit button.
A new browser tab displays your Google About me page, with an overlay to let you upload a photo.
Choose an image to upload, adjust the crop, and click on Done.
The image you choose is posted immediately.
Return to your channel and check your channel icon.
Make sure that it’s clear and complements your channel’s banner. If you’re not happy, change it!
Adding your channel description
The channel description is simply a few sentences describing your channel. This description appears in a few areas on YouTube, including when users mouse over your channel icon or visit the About section on your channel.
You can include links and write up to 1,000 characters in the channel description. A good channel description may say who you are and what you do, tell people what videos they can find on your channel, encourage viewers to interact with you on YouTube and your social channels, or provide links to other places where viewers may find you on the Internet, such as your website.
To get a sense of how other people have described their channels, visit other channels on YouTube and click on About to see their descriptions.
Figures 13-3 and 13-4 are two examples of great channel descriptions. In Figure 13-4, Coca-Cola gives information on who it is, the company’s origin, where you can find it, and its product range. This channel description helps you know you’ve arrived at the right place.
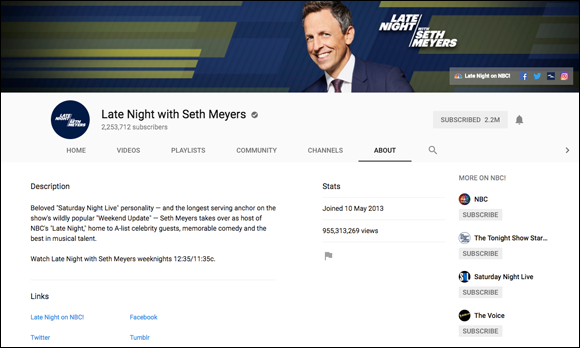
FIGURE 13-3: A good example of an About tab on a YouTube channel from Seth Meyers. Here’s where you can add your channel description.

FIGURE 13-4: Coca-Cola provides a great example of a channel description.
To add or change your channel’s description, go to your channel’s main page and follow these steps:
- Click on Customize Channel.
Click on the About tab and then click on the Channel Description button.
An input box opens, enabling you to write a brief description of your channel.
Type your description and click on Done.
You can edit this description at any time.
Digging Deeper into Channel Customization
You can do many things to customize your channel beyond just adding art, text descriptions, and social links. Your YouTube channel offers ways to initiate discussion, link to other YouTube channels, and make choices about how you’ll display videos.
If you get lost at any point, click on your profile image in the upper-right corner of YouTube and click on My Channel from the drop-down menu to return to your channel.
About tab
In the About tab, you can see how many subscribers you have, the date you joined YouTube, and the description of your channel. In the About tab, you can
Add your email address so that people can reach you.
The email address you list doesn’t have to be the one you use to access your YouTube channel.- Use a drop-down menu to select your location. (Choose your home country, where you are based.)
- Add links to your website and social sites so that people find you on Facebook, Twitter, Instagram, LinkedIn, and other social sites.
Channels tab
You can add featured channels to highlight some of the channels you like the most or to informally connect your channel to other channels you may have.
Some YouTuber’s have a primary channel for their videos, where they review new technology, and then a second channel that they use for videos like vlogging about their life and adventures. You also may have friends who have YouTube channels that you’d like to link to.
Similarly, some brands have a primary channel for their videos and then use other channels for one-off special advertising campaigns or initiatives, charitable efforts, or partnerships.
Warby Parker, an eyewear brand, has a primary channel for its videos about how its products are made, short films, TV spots, and its corporate social responsibility efforts (see Figure 13-5). The company also has a separate channel, WarbyParkerHelp, for its customer service videos. On this channel are videos that tackle key customer questions around topics like prescriptions or its home try-on program.
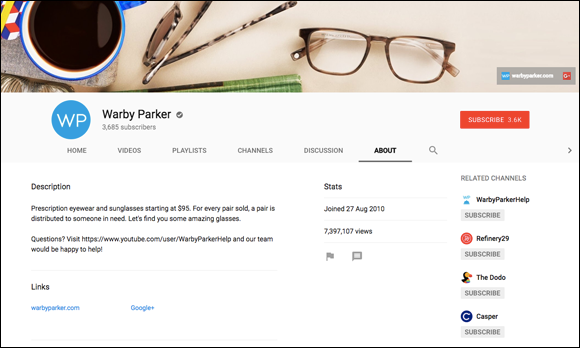
FIGURE 13-5: Warby Parker’s primary YouTube channel links to its WarbyParkerHelp channel, which features videos tackling key customer service questions.
You can add featured channels by following these steps:
In the Featured Channels section of your Channels tab, click on the Add Channels button.
A page like the one shown in Figure 13-6 appears.
Enter a channel username or URL and click on the Add button.
The channel appears in the list of Added channels.
You can add either a channel username or a URL.
- Repeat Step 2 to add channels.
When you’ve added all the channels you’d like, click on the Done button.
The featured channels appear on the right side of your channel and in the Channels tab.
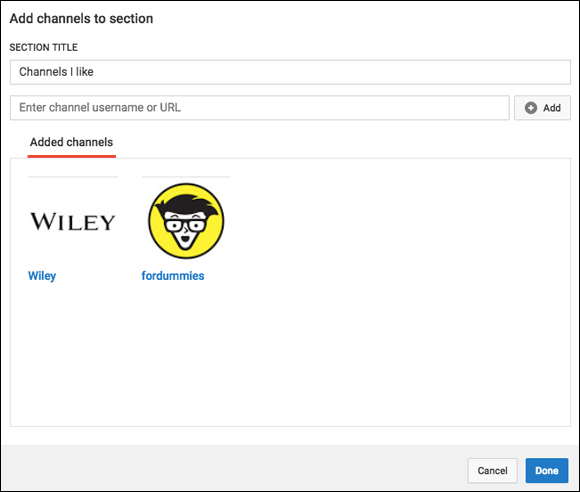
FIGURE 13-6: I renamed the section Channels I like and linked it to my two favorite channels: For Dummies and Wiley.
Discussion or Community tab
While you’re setting up your channel, you may notice a Discussion tab, which sometimes appears as the Community tab.
The Discussion tab is an area where the channel owner, subscribers, and visitors can post text comments, such as status updates and replies. Most channels have a Discussion tab.
The Community tab typically appears when your channel reaches a certain number of subscribers and is rolling out increasingly over time. If you do have the Community tab, you’ll be able to not only post text updates, but also create polls, post GIFs, and interact with subscribers and visitors. The Community tab is a more advanced version of the Discussion tab, allowing for images and links, not just text, to be posted (see Figure 13-7).
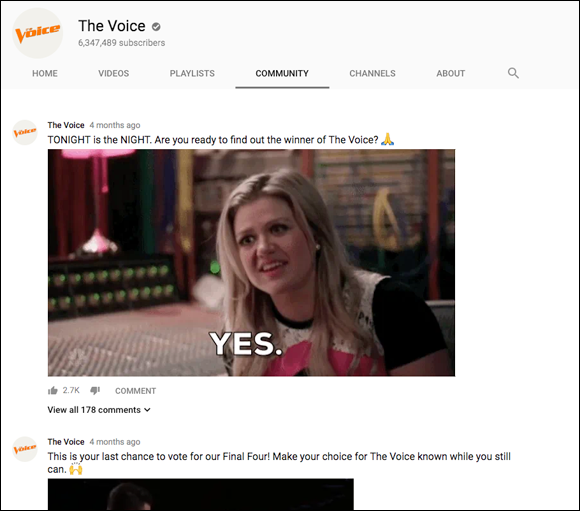
FIGURE 13-7: The Voice makes use of its Community tab by posting questions to engage its audience along with a fairly spectacular selection of animated GIFs from its show.
Here are some ideas to get you started posting in your Discussion or Community tab.
- State the purpose of your Discussion or Community tab. Let people know what you’ll be posting here and what you’re looking for in return from them. For example, perhaps your Discussion tab will be used exclusively for feedback on your products and services, so you’re looking for people to provide candid constructive feedback.
- Post your latest videos. Use the tab to direct people engaging in discussion to your latest posting. You can also post videos from your archive when relevant — for example, resurfacing something from the previous year, such as a fall recipe video you made.
- Promote any products or services you are offering. Strike a balance when doing so because people aren’t looking for the heavy sell here. If someone is asking a question about your product or service, provide a link directing them to it. Don’t periodically blast promotional messages apropos of nothing.
- Ask people questions. Use polls to ask questions like what your next videos should be or what they think about various topics. Maybe you’re developing a new product that you want input on.
- Speak the language of the Internet with visuals. Communicating using memes is common, and even the most conservative of brands can find that using memes is a fun way to create a rapport with their audience.
- Encourage people to act. Perhaps you want people to rally around a cause, take some kind of action, or focus their attention on a topic.
When you first start your YouTube channel, the Discussion or Community tabs won’t have a lot of action. Don’t worry too much about spending a lot of time posting in this section until you get a volume of subscribers that warrant your time. Test posts occasionally to see whether people are seeing and responding to them.
For inspiration, follow the community posts of channels you subscribe to so that you can see how they’re engaging with their audience.
Home tab shelves
YouTube offers a lot of flexibility to organize your channel, enabling you to merchandise your video content in a variety of ways and focus people’s attention on what’s important. Think of your other social channels, such as Facebook. Many of these channels are waterfalls of content, simply showing the latest posting in a never-ending stream of posts scrolling back into time. You may have the option to pin a post to the top of the page, but that’s pretty much the limit.
With YouTube, you can craft your Home tab to appear how you’d like, focusing people’s attention where it matters by using shelves. A shelf is a row of content, such as a playlist you want your audience to see.
The Channel shelf lets you group videos together in a specific way so that your audience can make easier decisions about what they want to watch. You can have up to ten shelves on one channel.
To group videos together:
In the Home tab of your YouTube channel, click on Customize Channel.
You can now edit your channel’s features, as shown in Figure 13-8.
Click on the Add a section button.
A little section appears within the page. It features two drop-down menus: Content and Layout. The Content drop-down menu lists the options to craft your channel’s layout:
- Videos: You can create sections for videos, including your most popular uploads, a list of uploads in order of most recent, liked videos, and live streaming options.
- Playlists: You can include playlists you’ve created, a single or multiple playlist, and more.
- Channels: You can feature the channels you subscribe to as well as use a custom grouping option.
- Other: You can create sections that contain recent activities and recent posts.
- From the Content drop-down menu, choose the type of shelf you’d like to create.
- From the Layout drop-down menu, choose whether you’d like the shelf to be laid out horizontally in a row or vertically as a list.
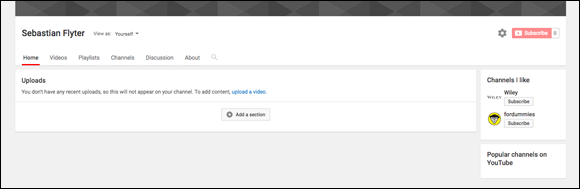
FIGURE 13-8: When you customize your channel, you see your channel with the addition of buttons that let you edit features and options.
Your top row should match your marketing priorities, such as your campaigns in market or your best performing content.
Marketers should consider refreshing the layout of their channel periodically throughout the course of the year.
Editing home tab shelves
If you need to edit any of the shelves you set up, follow these steps:
In the Home tab of the channel you want to edit, click on Customize Channel.
You see your channel with the option to edit features.
Hover your cursor over the shelf you want to edit and click on the Edit icon.
The Edit icon is a pencil button that appear when you hover over the shelf.
Change the content and layout of the shelf as you want.
See the preceding section for details on how to make these changes.
Click on the Done button.
If you don’t like what you see, instead of clicking on Done, you can click the Bin icon to delete the section or cancel to discard your edits.
Re-ordering channel sections
If you want to change the order of the shelves in your channel, you can easily move them around:
- In the Home tab of the channel, you want to edit, click on Customize Channel.
- Hover your cursor over the shelf you want to edit and click the up or down arrow to move the shelf above or below other shelves.
- Repeat as needed to move shelves up or down.
Channel trailer
One of my favorite features of the YouTube channel is the ability to create what’s known as a channel trailer, a short video that is shown to people who visit your channel but are not yet subscribers. This trailer video is an opportunity to pitch them your channel and show them a “best of” video that entices them to watch more of your videos and to subscribe.
The best trailer videos are short, lasting a minute or less, and keep things punchy and fun. Focus on what’s really important to your audience and why your channel delivers to their needs.
To add a channel trailer:
Create your video and upload it to your channel.
Visit Chapter 14 for details on uploading videos.
In the Home tab of the channel you want to edit, click on Customize Channel.
You have the option to edit your channel for returning subscribers or new visitors.
Click on For new visitors.
The Channel trailer button appears.
- Click on the Channel trailer button.
- In the window that appears, choose one of your videos from your channel.
- Enter the URL of the YouTube video.
Click on Save.
Your channel trailer is set!
Avoid making this a boring “Welcome to my channel” video introduction. Instead, get straight to the best content in a short and sweet video that sells viewers on you and your channel and encourages them to subscribe right then and there.
Making Money from Your YouTube Channel
You may be surprised to find out that your YouTube channel can be a money-maker. Most marketers aren’t as concerned with turning their marketing channels into revenue streams, but that’s not to say there aren’t opportunities to do so that are worth considering.
Tons of YouTubers dedicate a lot of time and effort in creating channels with popular videos and are able to make a decent living from the revenue. Top YouTubers can pull in millions of dollars a year in revenue from their channels and a variety of ancillary sources.
The main thing to consider for marketers who want to participate in a program like the YouTube Partner Program (YPP) or other revenue generating techniques is whether there are any conflicting issues with treating your channel as a revenue source.
If you’re a marketer, you’re primarily using YouTube as a marketing channel, and you don’t need generating revenue from the channel to be a distraction if it’s not a primary goal of your business. You may not like to have lots of ads running in and around your videos either. While you do have options to control these settings, the goal is to service your business needs. Generating revenue from YouTube is a business in itself.
The YouTube Partner Program
Introduced in 2007, the YouTube Partner Program (YPP) transformed the YouTube landscape. YPP enabled people creating and uploading videos to their YouTube channels to participate in ad revenue sharing. Suddenly, people who made content for fun could actually make money from their videos.
You can sign up for YPP if you meet certain eligibility criteria. If accepted, you start to earn money from advertisements that are served against your videos and from the YouTube Premium subscribers who watch your content.
To be eligible for the program, you need a channel that has reached more than 4,000 watch hours in the previous 12 months and has more than 1,000 subscribers.
The criteria to join the YouTube Partner Program can change from time to time as YouTube works to ensure the program delivers a quality experience. Check the most current eligibility criteria by visiting: https://support.google.com/youtube and searching for YouTube Partner Program.
Signing up for YPP requires the completion of four stages:
- Agree to the YouTube Partner Program terms.
- Sign up for AdSense.
- Set your monetization preferences.
- Get reviewed.
Agree to the terms
To sign up for YPP, start by following these steps:
- Sign in to YouTube and visit the YouTube.com home page.
- Click on your account icon in the upper-right corner.
From the menu that appears, click on the Creator Studio button.
The Creator Studio interface appears.
- Under the Channel menu, click on the Monetization option to visit the Monetization subsection.
- Click on Enable and follow the on screen steps to accept the YouTube Partner Program Terms.
Sign up for AdSense
After you agree to the YPP terms (see preceding section), the next stage is to sign up for AdSense.
If you already have an AdSense account or want to set up an AdSense account associated with an umbrella account that owns multiple YouTube channels, visit https://support.google.com/youtube and search for Setting up an AdSense account. A helpful tool guides you to the specific set of steps to follow in these scenarios.
The following steps apply if you don’t yet have an approved AdSense account yet or when you’re creating a new association between a YouTube channel you manage:
Visit
www.youtube.com/account_monetization.You’re redirected to AdSense.
Make sure you're signed in to the Google Account that you want to create an AdSense account for.
Check that the email address in the top corner matches the Google Account that manages your YouTube account.
Accept the AdSense association and provide your contact information to submit your AdSense application.
You’re redirected back to YouTube, and a message appears saying that your AdSense application has been received.
Set your monetization preferences
After you sign up for AdSense (see the preceding section), your next stage is to set your monetization preferences. You’re able to set the types of ads you want to run on your videos and automatically turn on monetization for all your existing and future videos.
To set your monetization preferences:
- In Creator Studio, click on Status and features in the Channel Section.
- In the left menu, choose Channel ⇒ Upload defaults to be taken to that subsection.
Check or uncheck the Monetize with ads check box next to Monetization.
You’re asked to acknowledge some terms.
- Read the terms and click on the Got it button to proceed.
- Check the boxes under Ads formats to choose the types of ads you want to show
- Click on Save.
For marketers, I recommend selecting not-monetized for each video that is uploaded automatically instead of choosing specific videos. Because you may be uploading your own ads to YouTube, you won’t want other ads to run against them.
Get reviewed
After you agree to the terms, sign up for AdSense, and set your monetization preferences (see preceding section), you’ll have met the program’s thresholds to be reviewed. In the fourth and final stage, the YPP team reviews your application to ensure that it meets all of its criteria and policies, which includes the YouTube Partner Program Policy, YouTube’s Terms of Service, and its Community Guidelines. YPP will let you know once your application has been reviewed.
If you’re successful, you’ll start to see revenue appear in your AdSense account.
Other ways to make money
Beyond using YouTube to promote sales of your products or services, or to grow brand awareness and product consideration, which both drive revenue, you can make money through YouTube in some other ways. While these approaches usually apply to YouTubers, marketers may be able to find creative ways to leverage them.
Patreon
Patreon is the name of an incredible third-party service. This membership platform uses the idea of patronage, where you can give money to YouTubers, just like rich aristocrats and royal families who paid artists to create works.
Patreon is primarily designed for creatives, such as YouTube creators, who set a monthly subscription style payment — for example, $5 a month. In exchange for contributing monthly, the fans get access to special content or features set by the creator such as early access to videos or shout outs. Patreon won’t apply to all marketers. For example, if you’re a large corporation selling the market’s most popular brand of shampoo, it’s going to be pretty hard to convince fans to give you money, no matter how much they like your content. However, some marketers will be able to find ways to apply Patreon to their business goals. Visit www.patreon.com to learn more and sign up.
Working with brands
Brands will pay YouTubers who exert a certain amount of influence over their audience to encourage people to buy their product or become aware of their brand. Visit Chapter 12 to find out more about collaborating on videos with YouTubers.
However, you may be a marketer who can create partnerships with other brands who want to reach your audience. That brand may pay you to access your audience if it’s large enough, or perhaps you’ll arrange a deal where you cross promote each other without exchanging money.
Merchandising
Many big brands will offer merchandise, branded clothing, accessories, and products of all sorts with the brand’s logo emblazoned front and center. This technique is leveraged by popular YouTubers, such as PewDiePie. PewDiePie offers a range of merchandise, shown in Figure 13-9, so his 70 million plus subscribers can express their fandom and he can further monetize his audience. Marketers can take advantage of promoting their merchandise through their YouTube channel.
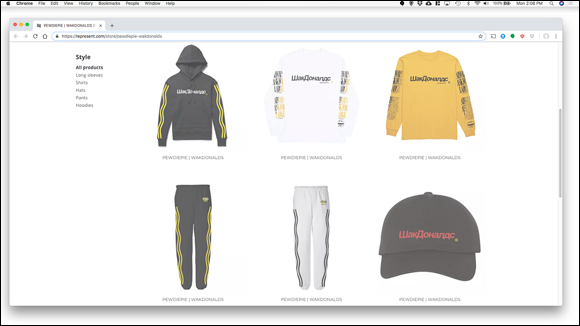
FIGURE 13-9: PewDiePie’s merchandise store of clothing and accessories.
Crowdfunding
Crowdfunding is a method to source funds for a project or venture by asking your audience to contribute small amounts of money. TheUnsolicitedProject, (www.youtube.com/user/UnsolicitedProject), a YouTube channel with more than 400,000 subscribers, was able to successfully crowdfund to make its first feature film, surpassing its goals of funding by 300 percent.
Crowdfunding can be a great approach to fund projects if you’re a marketer, especially if you work in creative fields, nonprofits, causes, and anything where crowdfunding feels uniquely applicable.
Two of the top crowdfunding platforms are Kickstarter (www.kickstarter.com) and Indiegogo (www.indiegogo.com.).