
We'll begin by searching Thingiverse for a bathroom sink/vanity. A quick search yields models for soap dishes, toothbrush holders, and filters—not exactly for what we were searching. Let's try the same search on GrabCAD. This search yields much more promising results. We'll select the model Bathroom Sink assembly by Emil.Rindell.
Looking at the file types, we see IronCAD 2011, STEP/IGES, Rendering, STL, and Other. We aren't using IronCAD 2011, therefore, we won't have access to the native file type. However, he has provided .step/.iges that is a universal file type, along with .stl, which is our print-ready format. Let's download the model, and then look at .stl in MakerWare as shown in the following screenshot:
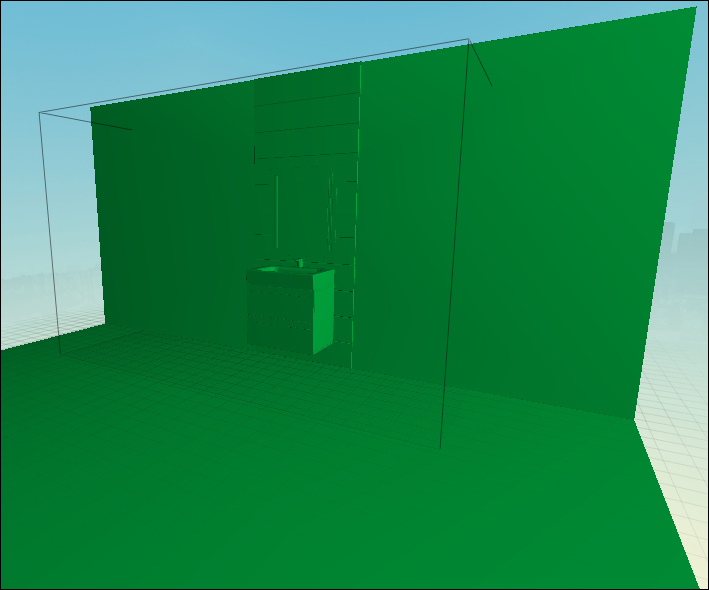
Bathroom Sink assembly in MakerWare
Notice how the creator has chosen to model the sink attached to a back surface. We are just interested in the sink, so we'll need to modify this model to be only the sink.
Let's start by opening the .step file in our CAD package. From here, we are able to make changes to the part's geometry. Let's remove everything that isn't the sink/vanity, and we should be left with the model, as shown in the following image:
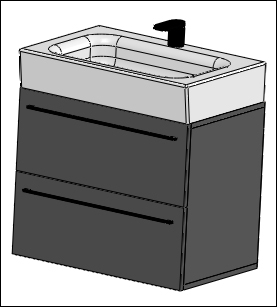
The sink from Bathroom Sink assembly
Next, we need to prepare this model to be printed. To do this, we need to check that we have a minimum wall thickness of 0.8 mm in XY and 0.2 mm in Z. Also, to make life easier on our printer, we can remove complexities such as the faucet and handles on the drawers in this example (depending on the size we intend to print).
Looking at the model more closely, we notice that the sink is below our minimum wall thickness, as is the back of the storage component. The following image shows these components before and after modification to increase thickness:
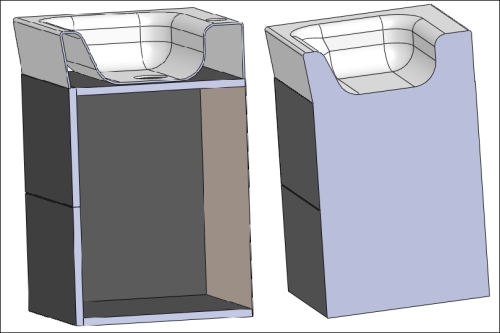
The sink's cross section from Bathroom Sink assembly
The model is nearly ready to print. We should scale the model in our CAD software so that we can measure and ensure our wall thickness remains above the minimum. The scale value should be 0.15.
We've saved the file as ch7_sink_print_ready.stl, which we will import into MakerWare and print using the Standard print resolution. Note that this model is a prime candidate for Z Print if we want our sink to be of a different color from our cabinet.
Congratulations! We have just edited and printed a model from GrabCAD!