49. DETERMINING FOCUS PROBLEMS
![]()
WHEN THINGS DON’T go right and you end up with a blurry image, use that opportunity to learn from your mistakes. Understanding why a photo is not focused properly is an important skill that will prove useful to all photographers.
There are a limited number of reasons why a photograph may not be sharp, so learn to spot the following problems.
Incorrect Focus
If you or the camera didn’t focus on the right spot, it’s usually easy to see because something else is in sharp focus. Look for anything that is sharp and try to determine if it is in front of or behind your desired focus point (Figure 49.1).
When everything is out of focus, it can be hard to determine what the problem is. If everything is smoothly out of focus, and gets more out of focus the further away it is from the camera, it’s likely that the camera focused at a minimum distance. This is one of the most difficult types of blur to figure out because there is nothing sharp on which to base conclusions.
If it was the camera that didn’t focus correctly, you may need to choose a smaller or larger focus point to ensure it’s getting the precise area you want in focus. It may help to use some sort of stabilization system so that you can hold the camera steadier. If it was you who mis-focused, perhaps you should use a manual focusing tool like magnification or peaking.
Insufficient Depth of Field
If you didn’t set an appropriate aperture, you may end up with a depth-of-field range that doesn’t quite cover everything you want. These photos will be easy to spot because they have some of your subject in focus, but either the foreground or background falls out of focus too quickly (Figure 49.2).
Solving this one is easy. Stop the aperture down farther, or change your shooting position. You should study the image’s metadata to see what focal length and aperture you chose. Then you can make the appropriate changes.
Subject Movement
When you don’t have a fast enough shutter speed to capture a moving subject, you will end up with a blur. In some cases, a blurred moving subject can make a great photo, but when you want to see the detail of the subject, it’s a big disappointment. Look elsewhere in the photo for areas or subjects that are in focus. If stationary subjects are sharp and moving subjects are blurry, that is a good clue that you need a faster shutter speed. Many variables affect what the necessary shutter speed will be for a given scene but a good rule of thumb is that 1/500 second stops fast human action and 1/60 second stops casual human action. Next time you’re in a similar situation, set a faster shutter speed and check your results while still out in the field (Figure 49.3).

49.1 Incorrect focus is often identified by something other than the intended subject being in focus. In this image, the grass is in focus well in front of the horse and rider, which was the intended subject.
ISO 200; 1/5000 sec.; f/2.8; 300mm; Canon EOS 5D Mark IV

49.2 These two subjects should both be in focus, but aren’t because too wide an aperture was chosen. The resulting depth of field is too narrow to keep both subjects sharp.
ISO 800; 1/80 sec.; f/1.4; 50mm; Canon EOS 5D Mark IV
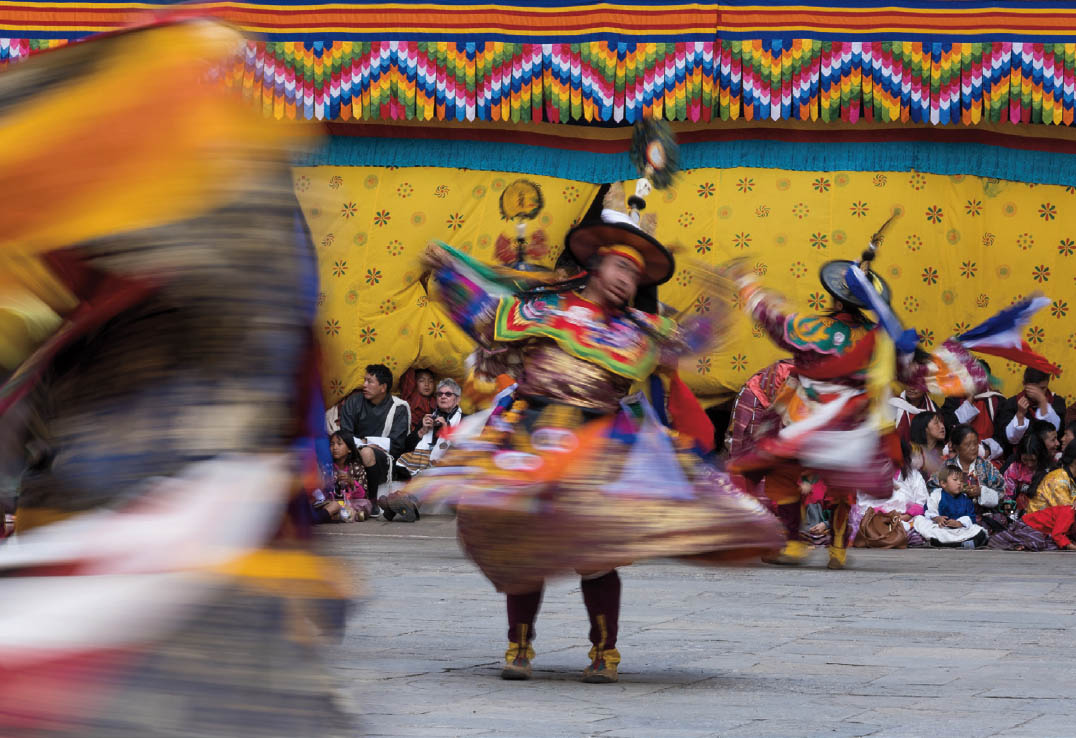
49.3 Subject movement can be identified in the image by the blur. The stationary subjects in the image will be less blurry or even sharp.
ISO 160; 1/15 sec.; f/16; 95mm; Fujifilm X-T3
Camera Movement
The most likely reason an image is blurry is camera movement. This is quite easy to diagnose as the entire image is soft and there is a feeling of motion to the photograph. If the camera moved during the exposure, it moved in a direction that will be recorded in the image. Look for blur streaks, most likely from left to right or from up to down (Figure 49.4).
The two solutions to this problem are using a faster shutter speed and more stability for the camera. Once again, check the metadata of a blurred image and look for information regarding the lens you used and what shutter speed was applied. Remember the rule of thumb for shutter speeds and lenses: The shutter speed should be 1 over the focal length of the lens. With a 200mm lens, you should be at 1/200 second or faster to eliminate handheld movements. There are other variables to factor in, such as crop factor and image stabilization, but this rule is a good starting point.
This problem could also be solved with either image stabilization or a tripod. For static scenes that are turning out a little blurry, try stabilization for a convenient solution. For darker situations, or when capturing long exposures, a tripod is sure to solve all the camera-movement problems.
Think of every blurry image as a chance to test your detective skills. Once you know the typical problems and how they manifest themselves, you’ll be able to find the solution and declare that it was “elementary, my dear Watson.” You can then take those lessons back into the field and turn them into photographs that are sharp and in focus.
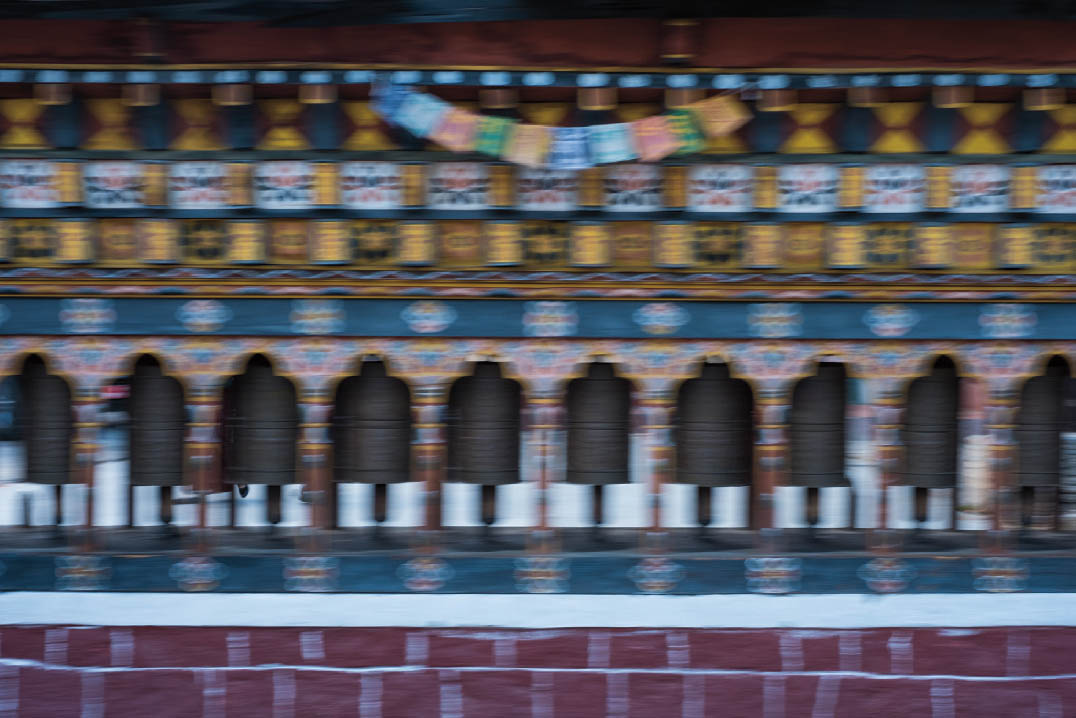
49.4 Blurry images caused by camera movement will have a similar amount of blur over the entire photo. Blur streaks may be seen along the path that the camera was moving. In this photo a horizontal blur can be seen.
ISO 160; 1/15 sec.; f/16; 95mm; Fujifilm X-T3