Tables serve an important place in design; they allow you to precisely position text graphics, and objects on a Web page. Without tables, information would simply stack up on the page, and based on the width and height of the visitor’s browser window, would reformat on the fly.
Although tables give designers control over the positioning of images and text on the page, tables were originally intended for displaying tabular data, not for use in page layout. However, never underestimate the creative brainpower of Web designers. Designers saw tables and thought that if they can hold, position and control tabular data, maybe they can hold other information. That started the use of tables for layout and design.
In Dreamweaver, you can easily add punch to your page by using a table to display a background image, in a row within a table, or in individual cells within a table. Table cells can be used to hold site navigation, as well as specific areas devoted to text, graphics, even animation and video.
Although tables are not the only way to format a Web page (you have frames and layers) they are still one of the most popular and stable ways to contain and control the layout of a web page. That’s the good news...
In truth, tables will eventually be phased out as design elements and return to their original position of displaying tabular data. What will replace them is strict coding using elements such as layers. However, until that happens, tables will remain a valuable tool in the Web designer’s arsenal.
This chapter will not only show you how to create and modify tables in Dreamweaver; in addition, you will learn how they fit into the overall design scheme of a Web page, and why they are necessary.
Tables are basically grids that allow the designer to precisely control the content of a Web page. The three main mechanisms of a table are rows, columns, and cells. A row extends across the entire table from left to right. Columns extend vertically from the top to the bottom of the table. A cell is the area where a row and column intersect. By default, table cells will expand to fit the content inserted into them.
If you’re working in the design window, Dreamweaver will visually display the table, and allow you to expand or contract the table or individual rows or columns with a simple click and a drag.
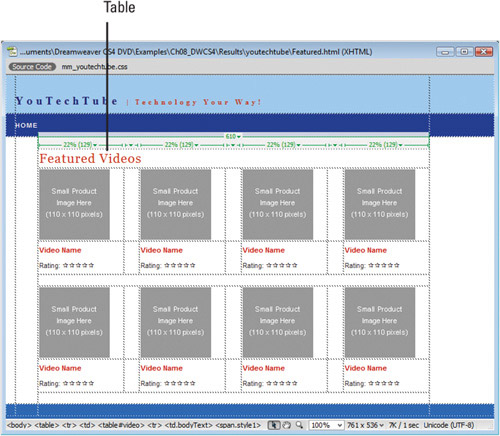
Creating a table in Dreamweaver is basically a three-step process: Step one: insert the table, Step two: modify the table to fit the specific design requirements of the current page, and Step three: add the content (text, graphics, etc) to the individual cells. Be advised, that since tables can display differently in different and older browsers, it’s important to test your table-driven pages to make sure what you see is what you’re visitors are seeing. The following examples illustrate how a table-driven Web page might appear in different browser windows.
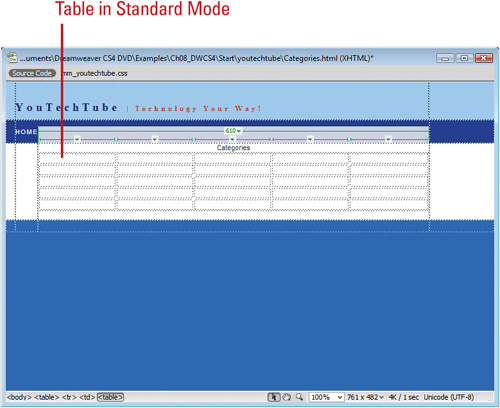
You can create tables using two different modes: Standard and Expanded Tables. Layout mode from Dreamweaver CS3 has been removed from CS4 to extend the other modes. Each mode has its strengths and weaknesses. Standard mode is useful for creating and displaying a table as it will appear in a Web browser and adding and editing content. Expanded Tables mode adds cell padding and spacing to all the tables in a document and increases borders to make editing easier. For example, you might use Expanded Tables mode to position the insertion point to the left or right of an image, without inadvertently selecting the image or table cell, and then switch back to Standard mode to make your changes. By default, Dreamweaver starts you out in Standard mode.
![]() Create a new Web page or open the Web page you want to view.
Create a new Web page or open the Web page you want to view.
![]() Click the View menu, and then click Design or click the Design button to display the page in Design mode.
Click the View menu, and then click Design or click the Design button to display the page in Design mode.
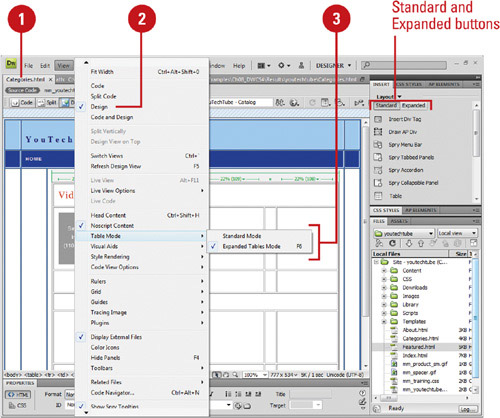
![]() Click the View menu, point to Table Mode, and then select from the following modes:
Click the View menu, point to Table Mode, and then select from the following modes:
• Standard. Use to display a table as it will appear in a Web browser and edit it.
Timesaver
To quickly return to Standard mode, click the [Exit] link in Expanded Tables, located at the top center of the Document window.
• Expanded Tables. Use to edit a table. This mode adds cell padding and spacing, and increases border.
• You can also click the Standard or Expanded button on the Layout tab on the Insert panel.
When you insert a table using Standard mode, you get a very ordered table... think spreadsheet and you’ve got a pretty good idea of what I’m talking about. And once the table is created, you can, if you choose, to make changes in Standard or Expanded Table mode. You can add or subtract cells from the table design, add any type of information needed.
![]() Open a Web page where you want to insert a table.
Open a Web page where you want to insert a table.
![]() Click to place the insertion point for the new table.
Click to place the insertion point for the new table.
![]() Click the View menu, point to Table Mode, and then click Standard Mode.
Click the View menu, point to Table Mode, and then click Standard Mode.
• You can also click the Standard Mode button on the Layout tab on the Insert panel.
![]() Click the Insert menu, and then click Table.
Click the Insert menu, and then click Table.
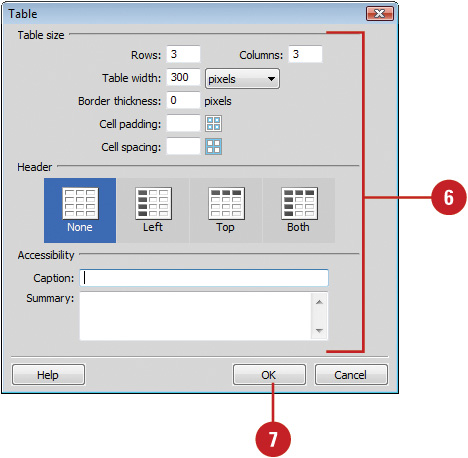
![]() Create a table using the following options:
Create a table using the following options:
• Rows. Enter a value for the number of rows in the table.
• Columns. Enter a value for the number of columns in the table.
• Table Width. Enter a value (pixels or percent), for the initial width of the table.
• Border Thickness. Enter a value for the border width of the table.
• Cell Padding. Enter a value for the number of pixels between a cell’s content and the cell boundaries.
• Cell Spacing. Enter a value for the number of pixels between adjacent table cells.
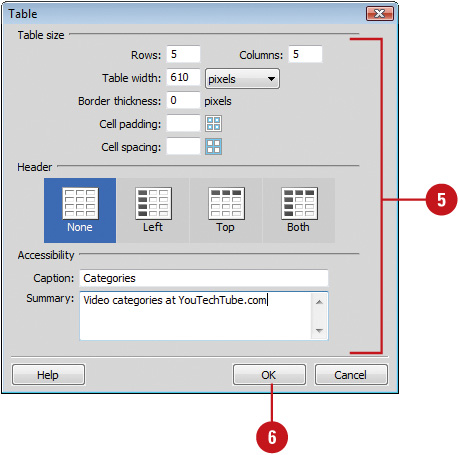
• Header. Select a position for a header area in the table: None, Left, Top, Both.
• Caption. Enter a table caption (displays outside of the table).
• Align Caption. Click to align where the table caption appears in relation to the table: default, top, bottom, left, right.
• Summary. Enter a table description. Screen readers read the summary text, but the text does not appear in the user’s browser.
![]() Click OK.
Click OK.
Did You Know?
You can change the highlight color for table elements. Click the Edit (Win) or Dreamweaver (Mac) menu, click Preferences, and then click Highlighting. To enable or disable highlighting for table elements, select or clear the Show check box for Mouse-Over. To change the highlighting color for table elements, click the Mouse-Over color box, and then select a color. When you’re done, click OK.
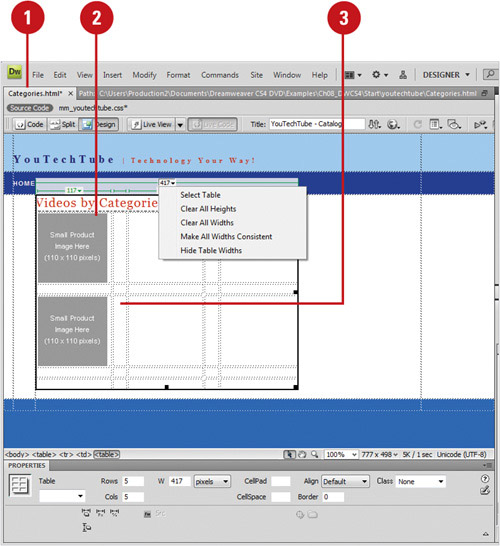
After you create the initial table and cells, you can select, resize, move, or even delete the table and cells to fine tune it. When you move or resize a cell in a table, there are a few things you need to avoid. These include overlapping cells, crossing the boundaries of the table, and making the cell smaller than its contents. Before you can resize, move, or delete a table or cell, you need to select it first. You can select the table by clicking the table header arrow at the top or an outside table edge, or select a cell by clicking a cell edge. When you select the table or place the insertion point in the table, the widths of tables and cells appear at the top or bottom of the table in pixels or as a percentage of the page width. Next to the widths are arrows for the table and column headers you can use to display a menu with related commands. When you point to a table edge, Dreamweaver highlights it to make it easier to see.
![]() Open the Web page containing the table you want to modify.
Open the Web page containing the table you want to modify.
![]() Click the Design button to display the page in Design mode.
Click the Design button to display the page in Design mode.
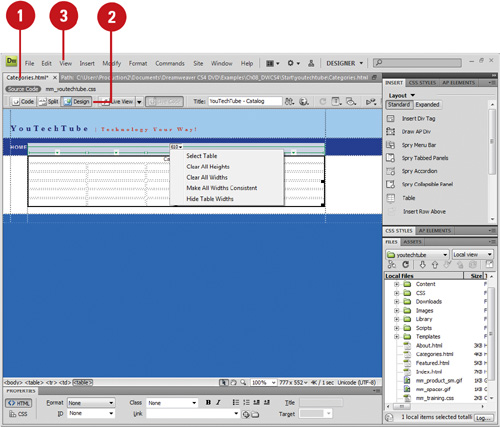
![]() Click the View menu, point to Table Mode, and then click Standard Mode or Expanded Tables Mode.
Click the View menu, point to Table Mode, and then click Standard Mode or Expanded Tables Mode.
• You can also click the Standard or Expanded button on the Layout tab on the Insert panel.
![]() To modify the table:
To modify the table:
• Select Table. Click in the table, click the Modify menu, point to Table, and then click Select Table, or click the table header arrow, and then click Select Table.
• Resize Table. Select the table, and then drag the control points on the right table edge to expand or contract the table.
• Delete Table. Select the table, and then press the Backspace (Win) or Delete (Mac) key to remove the table.

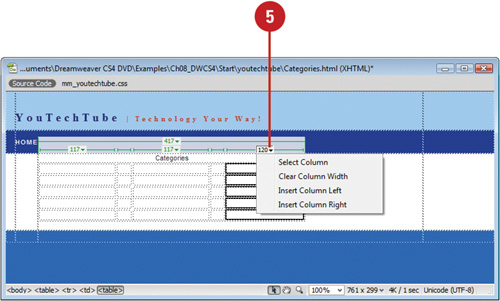
![]() To modify columns or rows:
To modify columns or rows:
• Select Columns. Click in the column, click the column header arrow, and then click Select Column.
• Select Columns or Rows. Click the left edge of a row or the top edge of a column, or drag to select multiple columns or rows.
• Resize Columns or Rows. Drag the border to change the size; for a column, the table keeps it’s width. To change change column width and keep column width, shift-drag the column border.
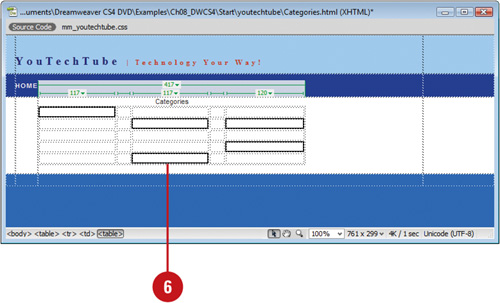
![]() To modify the individual cells:
To modify the individual cells:
• Select Cell. Click on the edge of an active table cell, or Ctrl-click (Win) or
![]() -click (Mac) anywhere in the cell.
-click (Mac) anywhere in the cell.
To select more than one cell, drag from cell to cell, or Ctrl-click (Win) or
![]() -click (Mac) multiple cells.
-click (Mac) multiple cells.
• Resize Cell. Select the cell, and then drag any of the control points on the cell edges to expand or contract the size of the selected cell.
• Delete Cell. Select the cell, and then press the Backspace (Win) or Delete (Mac) key to remove the selected cell.

DW 4.1
After you finishing creating the table layout and cells, you can insert content. You can add text, images, and other data in Standard or Expanded Table modes. Simply click in the cell where you want to add material, and then type, paste, or insert the content you want. If you have content available in the Assets or Files panel, you can drag it into the table; releasing your mouse when you’re hovering over the right cell. You can only add content to layout cells; the empty grey area in a layout table is not available for content. When you add content to a cell, it automatically expands to accommodate the incoming content, which changes the size of the column and table.
![]() Open the Web page that contains the table you want to add content.
Open the Web page that contains the table you want to add content.
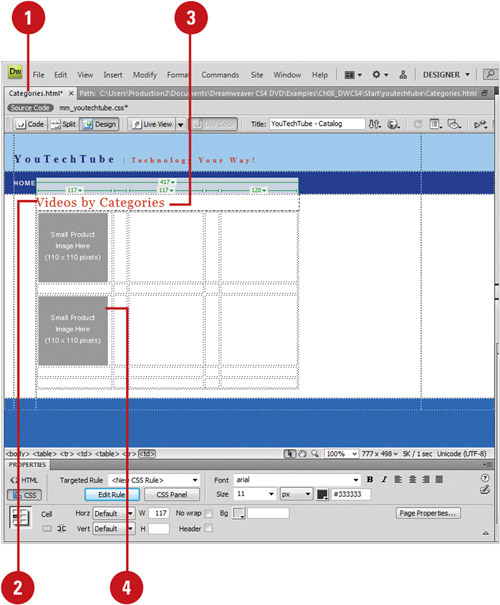
![]() Click to place the insertion point in the layout cell where you want to add content.
Click to place the insertion point in the layout cell where you want to add content.
![]() To add text, type or paste the text you want.
To add text, type or paste the text you want.
• Press Enter (Win) or Return (Mac) to add a paragraph return.
• Press Shift+Enter (Win) or Shift+Return (Mac) to add a soft return.
Note
By default, the text is left justified and centered within the cell, and soft wraps at the end of the table cell.
![]() To add an image, click the Insert menu, click Image, select the image file you want, and then click OK.
To add an image, click the Insert menu, click Image, select the image file you want, and then click OK.
The table expands to accommodate the text or image content.
See Also
See “Importing Tabular Data” on page 93 for information on importing data and creating a layout table.
![]() Select the table text you want to modify.
Select the table text you want to modify.
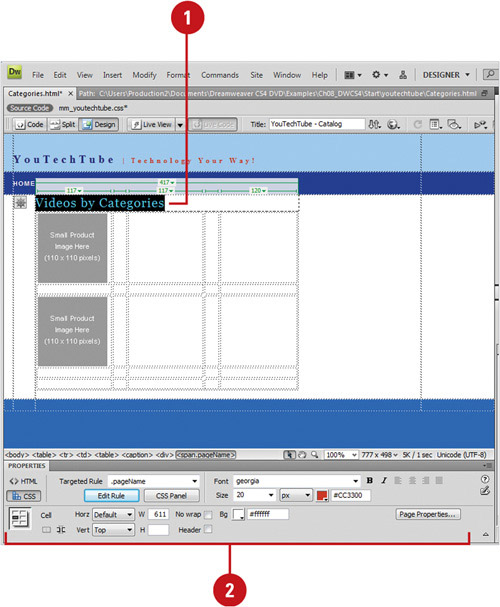
![]() In the Properties panel, modify the text using the following options:
In the Properties panel, modify the text using the following options:
• Format. Click to change the basic HTML format of the text (heading and paragraph styles).
• Style. Click to work with CSS style sheets.
• Alignment. Click to change the justification of the text (Align Left, Align Center, Align Right, or Justify).
• Bold/Italic. Click to bold or italicize the selected text.
• Font. Click to change the default font of the selected table text.
• Size. Click to change the default size of the selected table text.
• Color. Click to change the color of the selected table text (black, default).
Did You Know?
You can sort rows in a table. If you don’t have any merged cells in a table, you can sort the table. Select the table or click in any cell, click the Commands menu, and then click Sort Table. In the Sort dialog box, set the options you want, and then click OK. Some of the sort options include Sort By, Order, Sort Includes The First Row, Sort Header Rows, Sort Footer Rows, and Keep All Row Colors The Same After The Sort Has Been Completed.
Instead of retyping data in a table that you have in another document, such as Microsoft Excel, you can import it into table in Dreamweaver. The tabular data needs to be saved in a delimited text format with items separated by tabs, commas, colons, or semicolons. If you want to use data from a table in Dreamweaver in another document, you can export table data into a text file. When you export a table, the entire table is exported. You cannot export parts of a table. However, you can copy parts of a table and paste it into another document.
![]() Open the Web page with the table you want to format.
Open the Web page with the table you want to format.
![]() Click to place the insertion point in any cell of the table.
Click to place the insertion point in any cell of the table.
![]() Click the File menu, point to Export, and then click Table.
Click the File menu, point to Export, and then click Table.
![]() Specify the following options:
Specify the following options:
• Delimiter. Specifies the character you want to separate items in the exported file.
• Line Breaks. Specifies the operating system in which you want to open the exported file.
Different operating systems use different ways of indicating the end of a line break.
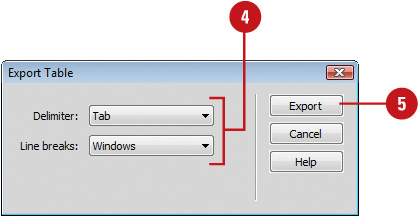
![]() Click Export.
Click Export.
![]() Navigate to the location where you want to save the file.
Navigate to the location where you want to save the file.
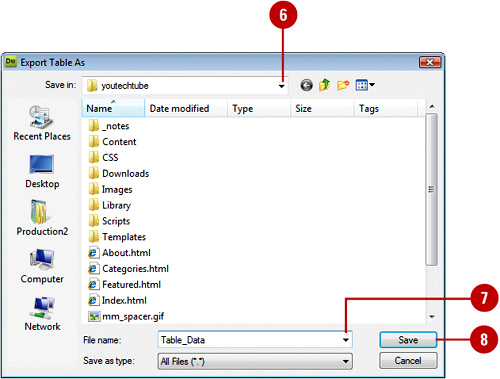
![]() Enter a name for the file.
Enter a name for the file.
![]() Click Save.
Click Save.
![]() Open the Web page with the table you want to use.
Open the Web page with the table you want to use.
![]() Click to place the insertion point in any cell of the table.
Click to place the insertion point in any cell of the table.
If you click in an existing table, you’ll create a nested table.
![]() Click the File menu, point to Import, and then click Tabular Data.
Click the File menu, point to Import, and then click Tabular Data.
![]() Specify the following options:
Specify the following options:
• Data File. Enter the name of the file, or click Browse to select it.
• Delimiter. Specify the character used to separate items in the imported file. Select Other to enter a delimiter character.
• Table Width. Specifies the width of the table. Select Fit to Data to make each column wide enough to fit the data. Select Set to specify an exact width.
• Cell Padding. Specifies the number of pixels between a cell’s content and the cell boundaries.
• Cell Spacing. Specifies the number of pixels between adjacent table cells.
• Format Top Row. Specifies the formatting applied to the top row.
• Border. Specifies the width in pixels of the table’s border.
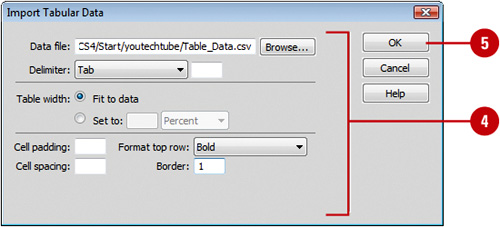
![]() Click OK.
Click OK.
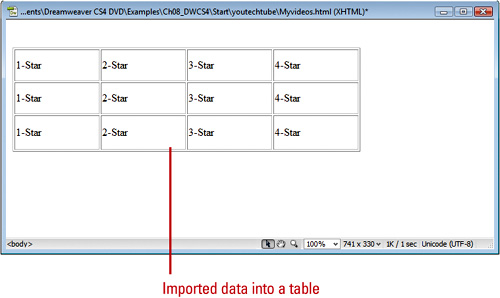
Dreamweaver creates a new table with the tabular data from the imported file.
As you begin to work on a table, you might need to modify its structure by adding more rows and columns to accommodate new text, graphics, or other tables. The table realigns as needed to accommodate the new structure. When you insert rows or columns, the existing rows shift down, the existing columns shift right, and you choose what direction the existing cells shift. Similarly, when you delete unneeded rows, columns, or cells from a table, the table realigns itself.
![]() Open the Web page with the table you want to modify.
Open the Web page with the table you want to modify.
![]() Click to place the insertion point where you want to add a row or column.
Click to place the insertion point where you want to add a row or column.
![]() To add a row or column, click the Insert menu, point to Table Objects, and then click Insert Columns to The Left, Insert Column to The Right, Insert Row Above, or Insert Row Below.
To add a row or column, click the Insert menu, point to Table Objects, and then click Insert Columns to The Left, Insert Column to The Right, Insert Row Above, or Insert Row Below.
Timesaver
Use buttons on the Layout tab on the Insert panel or the column header menu (arrow above a column) for columns.
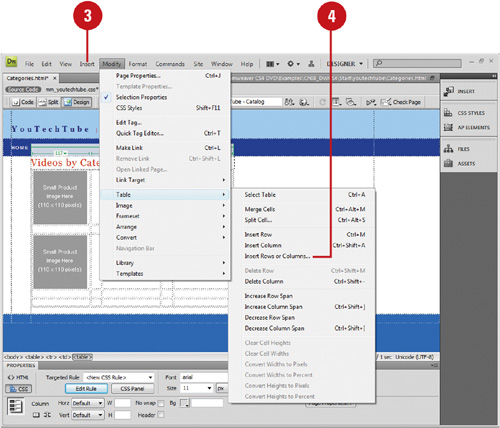
![]() To add multiple rows or columns, click the Modify menu, point to Table, and then click Insert Rows Or Columns, enter the number of columns or rows you want to add to the table, and the related options, and then click OK.
To add multiple rows or columns, click the Modify menu, point to Table, and then click Insert Rows Or Columns, enter the number of columns or rows you want to add to the table, and the related options, and then click OK.
Did You Know?
You can delete rows and columns in a table. Select the rows or columns you want to delete, click the Modify menu, point to Table, and then click Delete Row or Delete Column.
After you create a table, you can resize the columns and rows to fit your space and data needs. You can set a column to a variable, fixed or consistent width. If you see two numbers for a column’s width, then the column width set in the HTML code doesn’t match the columns width on the screen. You can make the width specified in the code match the visual width. After you insert content into the cell, you can clear the excess width and height of the cell.
![]() Open the Web page with the table you want to modify.
Open the Web page with the table you want to modify.
![]() To change a columns width, use any of the following:
To change a columns width, use any of the following:
• Change Column Width and Keep Table Width. Drag the right border of the column to change it.
• Change Column Width and Keep Other Column Widths. Shift-drag the column border.
• Clear Column Width. Click the Column Header Arrow, and then click Clear Column Width.
![]() To change a row height, drag the lower border of the row.
To change a row height, drag the lower border of the row.
![]() Click the Table Header Arrow, and then select any of the following options:
Click the Table Header Arrow, and then select any of the following options:
• Clear All Heights or Clear All Widths. Removes the excess empty space in a cell.
• Make All Widths Consistent. Makes all the column widths the same.
• Hide Table Widths. Hides the table widths at the top of the table.
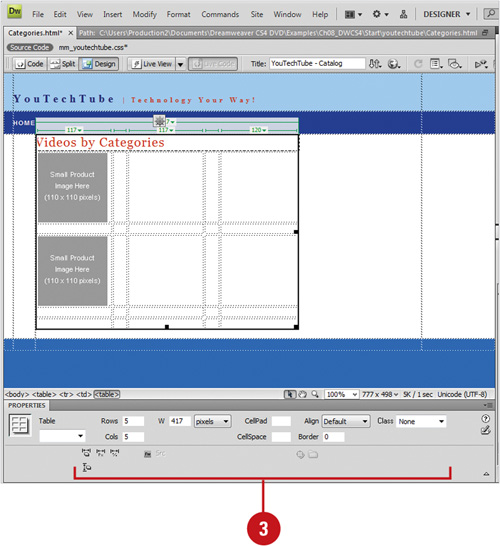
Cells can also be split or combined (also known as merged). Often there is more to modifying a table than adding or deleting rows or columns; you need to make cells just the right size to accommodate the text you are entering in the table. For example, a title in the first row of a table might be longer than the first cell in that row. To spread the title across the top of the table, you can merge (combine) the cells to form one long cell. Sometimes to indicate a division in a topic, you need to split (or divide) a cell into two.
![]() Open the Web page with the table you want to modify.
Open the Web page with the table you want to modify.
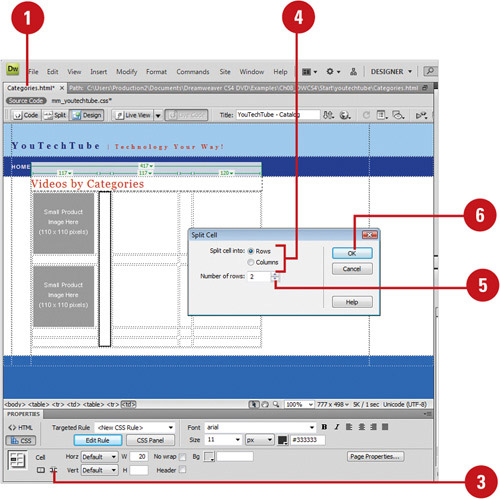
![]() Select the cell or cells you want to split.
Select the cell or cells you want to split.
![]() Click the Split Cell button in the expanded Properties panel.
Click the Split Cell button in the expanded Properties panel.
• You can also click the Modify menu, point to Table, and then click Split Cell.
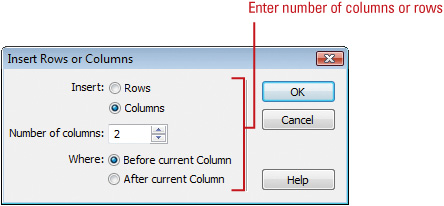
![]() Click the Columns or Rows option.
Click the Columns or Rows option.
![]() Type the number of columns or rows you want.
Type the number of columns or rows you want.
![]() Click OK.
Click OK.
![]() Open the Web page with the table you want to modify.
Open the Web page with the table you want to modify.
![]() Click a column, row, or group of adjacent cells, and then drag to select them.
Click a column, row, or group of adjacent cells, and then drag to select them.
![]() Click the Merge Cells button in the expanded Properties panel.
Click the Merge Cells button in the expanded Properties panel.
• You can also click the Modify menu, point to Table, and then click Merge Cells.
The cells merge into a single, larger cell.
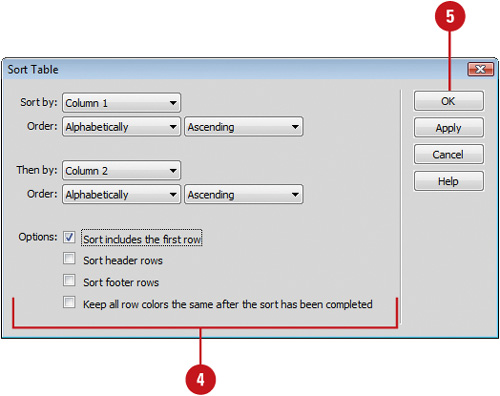
If you have a table without merged cells you can sort the rows of a table based on one or more columns. You can table information by ascending order from A to Z, earliest to latest, or lowest to highest, or by descending order from Z to A, latest to earliest, or highest to lowest. In addition, you can set sort options to include the first row and header and footer rows, and keep all row colors the same after the sort has been completed.
![]() Open the Web page with the layout table you want to modify.
Open the Web page with the layout table you want to modify.
![]() Select the table or click in any table cell.
Select the table or click in any table cell.
![]() Click the Commands menu, and then click Sort Table.
Click the Commands menu, and then click Sort Table.
![]() Specify the following options:
Specify the following options:
• Sort By. Enter the name of the file, or click Browse to select it.
• Order. Specify the character used to separate items in the imported file. Select Other to enter a delimiter character.
• Then By/Order. Specify the character used to separate items in the imported file. Select Other to enter a delimiter character.
• Sort Includes The First Row. Specify the character used to separate items in the imported
• Sort Header Rows. Specify the character used to separate items in the imported
• Sort Footer Rows. Specify the character used to separate items in the imported
• Keep All Row Colors The Same After The Sort Had Been Completed. Specify the character used to separate items in the imported
![]() Click OK.
Click OK.
When you create a table, it’s not just about what you place into the individual table cells; it’s how you format the table and the individual cells. When formatting tables, you can set properties for the entire table or for individual rows, columns, or cells in the table. You can set table properties to specify the number of rows and columns you want as well as the number of pixels between cells, either CellPad or CellSpace. When a property is set to one value for the whole table and another value for individual cells, cell formatting takes precedence over row formatting, which in turn takes precedence over table formatting. For example, if you set the alignment for a single cell to center align, then set the alignment of the entire table to left align, the center align cell does not change to left align, since cell formatting takes precedence over table formatting. It’s all about priority.
![]() Open the Web page with the table you want to format.
Open the Web page with the table you want to format.

![]() Select the table you want to change.
Select the table you want to change.
![]() In the Properties panel, modify the table using the following options:
In the Properties panel, modify the table using the following options:
• Table ID. Enter an ID for the table (used when calling from JavaScript).
• Rows. Sets the number of rows in the selected table. Click to enter a new value.
• Cols. Sets the number of columns in the selected table. Click to enter a new value.
• CellPad. Sets the number of pixels between a cell’s content and the cell boundaries.
• CellSpace. Sets the number of pixels between adjacent table cells.
• Align. Determines where the table appears, relative to other elements in the same paragraph, such as text or images. Click to change alignment from Left (default), Center, or Right.
• Border. Sets the number of pixels for the border of the table. Click to enter a new value.
• Class. Used with CSS (Cascading Style Sheets) to help define the properties of the table. In this example, leave the box at None.
• Clear Column Widths and Clear Row Heights. Deletes all specified row height or column width values from the table.
• Convert Table Widths To Pixels and Convert Table Heights To Pixels. Sets the width or height of each column in the table to its current width in pixels (also sets the width of the whole table to its current width in pixels).
• Convert Table Widths To Percent and Convert Table Heights To Percent. Sets the width or height of each column in the table to its current width expressed as a percentage of the Document window’s width.
• Bg Color. Sets the table’s background color.
• Brdr Color. Sets the color for the table’s borders.
• Bg Image. Specifies the source and path to a table background image. You can click the Browse For File or Point To File button to select the file.
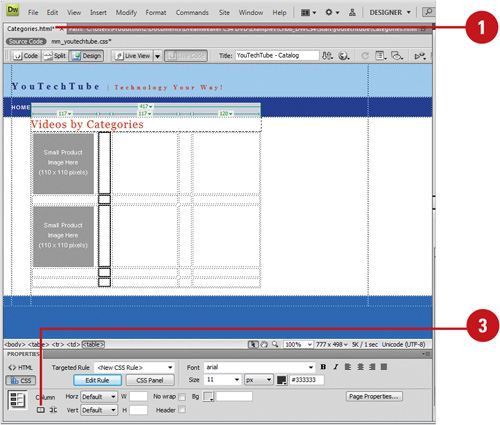
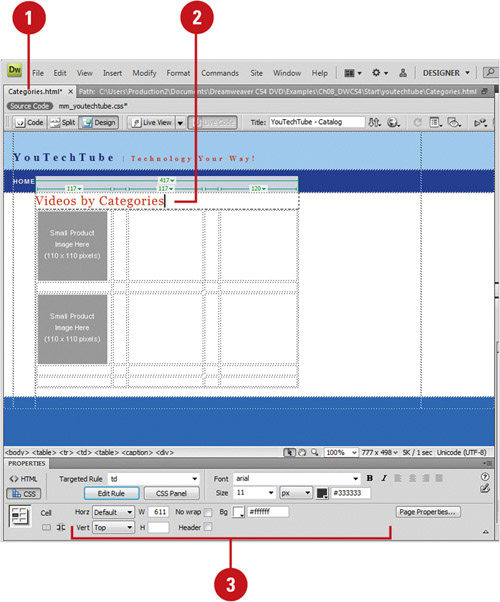
Cells can contain colors or image backgrounds, and when placing text and graphics, you decide how the information appears within the table cells; however, there is a priority to how the cells are formatted. When a property, such as background color or alignment, is set to one value for the whole table and another value for individual cells, cell formatting takes precedence over row formatting, which in turn takes precedence over table formatting. It’s all about priority. For example, if you set the background color for a single cell to green, then set the background color of the entire table to blue, the green cell does not change to blue, since cell formatting takes precedence over table formatting.
![]() Open the Web page with the table you want to format.
Open the Web page with the table you want to format.
![]() Select the cells, rows, or columns you want to change.
Select the cells, rows, or columns you want to change.
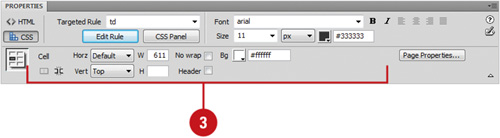
![]() In the Properties panel, modify the selection using the following options:
In the Properties panel, modify the selection using the following options:
• Horz. Click to change the default (left) horizontal placement of items placed within the cell (Left, Center, Right).
• Vert. Click to change the default (middle) vertical placement of items placed within the cell (Default, Top, Middle, Bottom, Baseline).
• W & H. Enter a value for the width and height of selected cells in pixels, or as a percentage of the entire table’s width or height. To specify a percentage, follow the value with a percent symbol (%).
Note
To let the browser determine the proper width or height based on the contents of the cell and the widths and heights of the other columns and rows, leave the box blank (default).
• No Wrap. Select if you do not want text to wrap between the left and right borders of the selected cell.
• Header. Select to format the selected cells as table header cells. The contents of table header cells are bold and centered by default.
• Bg Image. Enter the filename for the background image. You can click the Browse For File or Point To File button to select the file.
• Bg Color. Click to choose a background color for the selected cells (background color is independent of text color).
• Brdr Color. Click to choose a border color for the selected cells.
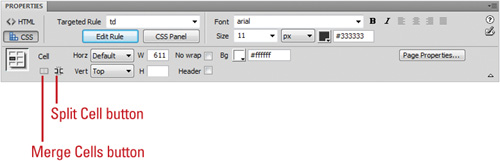
• Merge Cells. Click to combine selected cells, rows, or columns into one cell.
• Split Cells. Click to divide a cell, creating two or more cells. This option is disabled if you have more than one cell selected.
DW 4.2
You can use a tracing image as a guide to create a page design in Dreamweaver. For example, you can use Adobe Photoshop to create an exact replica of what you want your Web page to look like (i.e. headings, body text areas, navigation, etc), and then use that image as a tracing image to help design the actual Web page. A tracing image is a JPEG, GIF, or PNG formatted image that appears in the background of the Document window. In addition, a tracing image is visible only in Dreamweaver, not visible when you view the page in a browser. When the tracing image is visible, the page’s real background image and color are not visible in the Document window; however, the background image and color is visible when the page is viewed in a browser.
![]() Open a Web page that you want to insert the tracing image.
Open a Web page that you want to insert the tracing image.
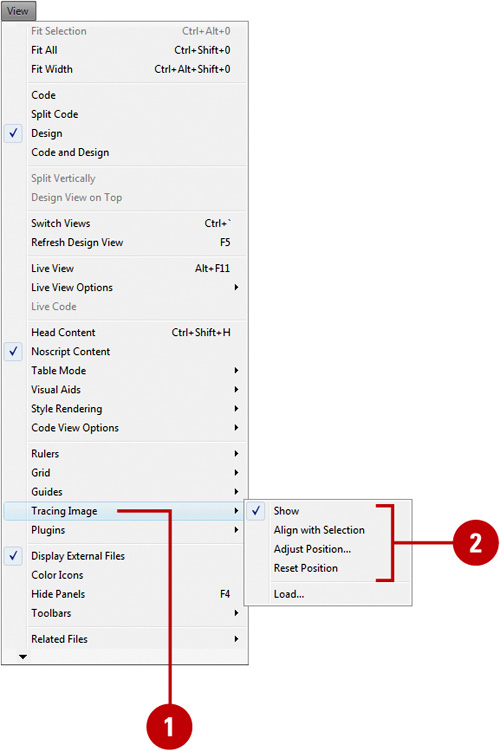
![]() Click the View menu, point to Tracing Image, and then click Load.
Click the View menu, point to Tracing Image, and then click Load.
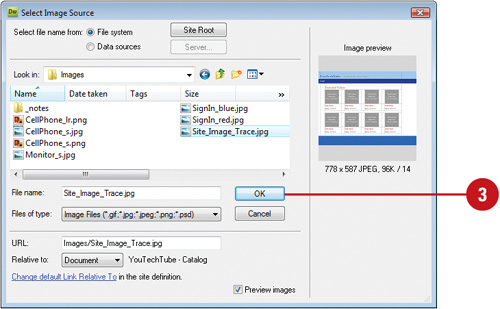
![]() Navigate to the image you want to use, select it, and then click OK.
Navigate to the image you want to use, select it, and then click OK.
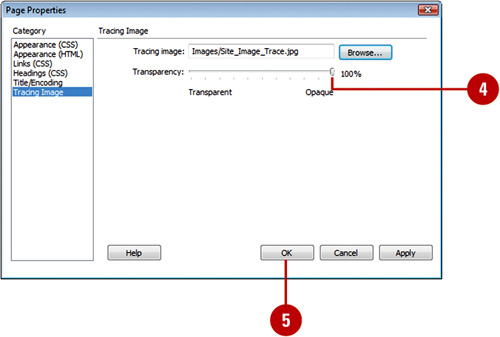
![]() Drag the Transparency slider to adjust the transparency of the tracing image.
Drag the Transparency slider to adjust the transparency of the tracing image.
Note
If the chosen graphic file is not located in the current Site, Dreamweaver prompts you to save a copy within the active Site folder (recommended).
![]() Click OK.
Click OK.
The tracing image now appears in the background of the current Web document.
![]() Click the View menu, and then point to Tracing Image.
Click the View menu, and then point to Tracing Image.
![]() Select from the following options:
Select from the following options:
• Show. Select to show or hide the tracing image.
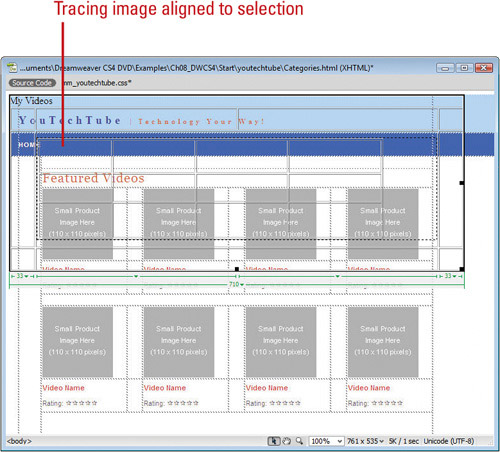
• Align With Selection. Select an element in the document window, and then use this option to align the upper-left corner of the tracing image with the upper left corner of the selected element (i.e. a table cell).
• Adjust Position. Select to open a dialog box where you can precisely specify the position of the tracing image by entering coordinate values in the X and Y text boxes.
• Reset Position. Select to return the tracing image to its default position, the upper-left corner of the Web document.
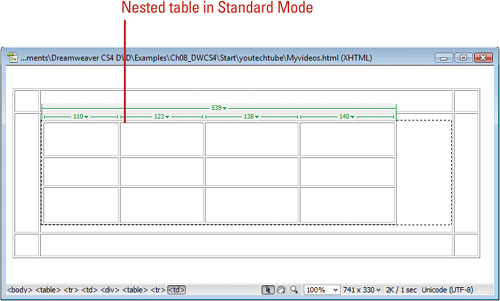
A nested table is a table inside a cell of another table. You can format a nested table as you would any other table; however, its width is limited by the width of the cell in which it appears. The cells inside a nested table are isolated from changes made to the outer table; for example, when you change the size of a row or column in the outer table, the cells in the inner table don’t change size. The question arises as to why you might want to do something like this, and there are several answers to that. You might want to use a table to add design elements to a page, and at the same time use one of the cells for tabular data, or you have a picture and a related caption and you want them to remain stationary in relation to one another while text on the page flows according to the size of the browser window. In older browsers (pre 5.0) creating nested tables can slow down the load of the page. In Web design one of the things we have to do is balance page content to load speed. Make sure you keep things in balance.
![]() Open the Web page containing a table, or create a new table.
Open the Web page containing a table, or create a new table.
![]() Click the Design button to display the page in Design mode.
Click the Design button to display the page in Design mode.
![]() Click the View menu, point to Table Mode, and then click Standard Mode.
Click the View menu, point to Table Mode, and then click Standard Mode.
![]() Select the cell you want to insert the nested table.
Select the cell you want to insert the nested table.
![]() Click the Insert menu, and then click Table.
Click the Insert menu, and then click Table.
![]() Choose the properties for the nested table you want from the Table dialog box.
Choose the properties for the nested table you want from the Table dialog box.
![]() Click OK.
Click OK.
The nested table is inserted into the selected cell.
Note
By default, the nested table is left justified and centered vertically within the cell. If you want to change the position of the nested table, select the cell that contains the table, and make your changes using the Properties panel.