
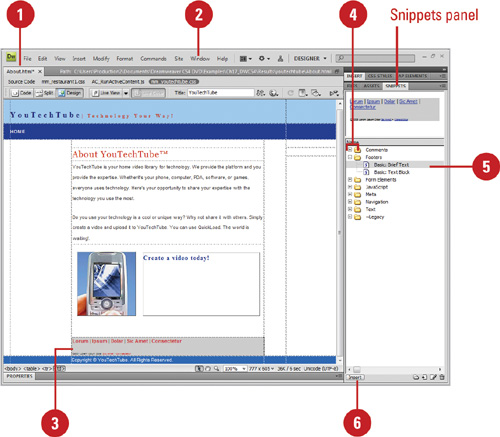
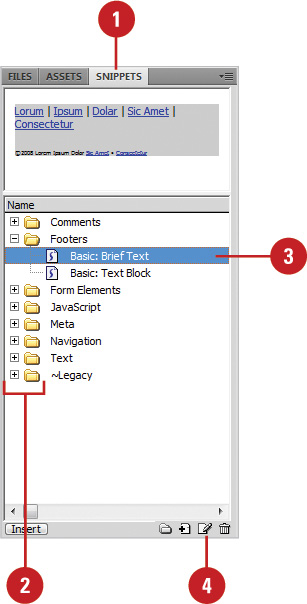
The Snippets panel is a collection of Scripts (called Snippets) that you can drop into your Web pages. Essentially, a snippet is a pre-built selection of code. The Snippets panel in turn acts like a code library, with sections or folders for different snippets. There are ten major folders, and some folders have subfolders to organize content.
Each folder has a small triangle, located to the right of the folder name. Clicking this icon expands or contracts the folders contents, revealing either more folders or snippets of code. For example, expanding the JavaScript folder reveals 16 more sub-folders, jam-packed with cool features to add to your Web site. There are thousands of JavaScript codes that can be executed within a Web browser, so Dreamweaver categorized JavaScript into sub-folders to help you better understand where to find the code you need. You will find a group of scripts for managing and controlling Browser functions, cookies, readable functions and a whole host of additional tools. All said and told, the JavaScript folder alone has over 80 individual snippets.
Most well designed Web sites have areas that are repeated from page to page. These would include header areas, navigation bars, information boxes, footers, etc. Occasionally, changes need to be made in these areas. There are wonderfully easy-to-use components in Dreamweaver to make those changes appear on multiple pages when the change is made at one location. Dreamweaver has two such components, Libraries and Templates. Library items are sections of a Web page that can be used over and over again. Dreamweaver Templates are really large Library items.
In this chapter, you’ll learn how to work with and add snippets to your Web pages, as well as modify and edit them. In addition, you’ll learn how Library items can streamline your workflow in the creation of a complex Web site.
If you build a complex Web site, it’s almost a certainty that you will use design elements over and over again. However each time you need them you either have to recall a particular command, or more likely copy and paste the code containing the content you want to reuse. Knowing that is not the most efficient way to work, Dreamweaver created a solution that most people don’t know about called Code Snippets.
Similar in philosophy to Microsoft’s macros or Adobe’s actions, snippets are a incredible way to automate some of your repetitive tasks and make your job easier. They are composed of bits of code and/or content that you can save, edit, use, and reuse as often as you want on any Web site you happen to be working on.
Dreamweaver snippets allow you to save and reuse chunks of code over and over. This saves time and effort in maintaining a large Web site. Plus Dreamweaver has a lot of pre-written snippets to use. Use snippets to store things like headers and footers, logos, and scripts.
Snippets offer a simple and convenient method of creating fragments of reusable code. Snippets can be a single line or a considerable sized chunk of code such as HTML, XHTML, CSS, CFML, PHP, JavaScript and other types of code. Since they are reusable, snippets save you hours of time because you don’t have to recreate the same code over and over. You have the ability to create snippets in Dreamweaver, or in another application, and bring them into the Snippets panel, use the pre-designed snippets supplied by Dreamweaver, or use snippets created by other designers.
The following is an example of snippet code, written in JavaScript that checks for the current location of the mouse.
/*
Example:
function test()
{
if (document.layers) getMouseLoc; //NS
else if (document.all) getMouseLoc(); //IE
alert(mouseLocation.x+","+mouseLocation.y);
}
in the BODY: <a href="#"
onMouseOver="test()">test</a> */
function Point(x,y) { this.x = x; this.y = y; }
mouseLocation = new Point(-500,-500);
function getMouseLoc(e)
{
if(!document.all) //NS
{
mouseLocation.x = e.pageX;
mouseLocation.y = e.pageY;
}
else //IE
{
mouseLocation.x = event.x +
document.body.scrollLeft;
mouseLocation.y = event.y +
document.body.scrollTop;
}
return true;
}
//NS init:
if(document.layers){
document.captureEvents(Event.MOUSEMOVE);
document.onMouseMove = getMouseLoc; }
Information on the current location of the mouse can be used to trigger a variety of actions. For example, when the user hovers over an image, a dialog box could appear to describe the image.
Dreamweaver employs two types of snippets: a wrap snippet and a block snippet. Wrap snippets will insert code above and below any selected content on the page. Block snippets, by contrast, simply drop in the snippet content after the insertion point on the page.
To use a block snippet, place an insertion point inside an open document, select the snippet from the Snippets panel, and then click the Insert button at the bottom of the panel. You can also drag and drop the snippet from the panel into an open document, as you would an image or any other media file.
To use a wrap snippet, select the content in Design view that the snippet will wrap around, select the snippet in the Snippets panel, and then click the Insert button at the bottom of the panel.
Snippets are a great way to reduce the time spent reproducing repetitive tasks. They’re easy to use and apply to the documents. However, they do require some experience in writing code in languages such as: HTML, XHTML, CSS, CFML, PHP and JavaScript.
While it’s not the purpose of the chapter to teach you how to write snippet code, there are a lot of Web sites out there that offer free (and for cash) snippets, which you can download and use in the construction of your Web sites. Some of these sites include:
http://www.assonetriver.com/snippets/
http://www.luckychair.com/downloads.html
http://www.programmersheaven.com/search/LinkDetail.asp?Typ=1&ID=13270
As a matter of fact, simply do a Web search using the words “free” and “snippets” and sort through the hundreds of hits. One word of caution: not all snippets are created equal, and may contain code that is not compatible with every browser, so checking and testing is the rule of the day, when it comes to downloading snippets. In addition, some sites might use the downloading of a snippet to also download a virus onto your computer, so know the sites that you’re using to downloading the snippets.
As mentioned in the previous section, you can apply (add) a snippet to a Dreamweaver document in one of two ways: block or wrap. The blocking method requires that you click to create an insertion point in the document and then add the snippet; the wrapping method requires that you select (in Design mode) the selection of the page that you want to wrap the code around. Both methods have their advantages; for example, you could use the block method to insert a snippet into the HTML code that would pre-load rollover images, or you could use the wrap method to select a section of text, or an image, that turns the selection into a link, but is masked from appearing in the status window of the browser. Although Dreamweaver contains many pre-designed snippets, they may require a bit of editing before use.
![]() Open the document you want to insert the block snippet.
Open the document you want to insert the block snippet.
![]() Click the Window menu, and then click Snippets to display the Snippets panel.
Click the Window menu, and then click Snippets to display the Snippets panel.
![]() Click in the page where you want to insert the snippet.
Click in the page where you want to insert the snippet.
![]() Click the Plus (+) icon next to the folder in the Snippets panel with the snippet you want to insert (in this example, click the (+) next to the Footers folder).
Click the Plus (+) icon next to the folder in the Snippets panel with the snippet you want to insert (in this example, click the (+) next to the Footers folder).
![]() Select the snippet you want to insert.
Select the snippet you want to insert.
![]() Click the Insert button in the Snippets panel.
Click the Insert button in the Snippets panel.
![]() Open the document you want to insert the Wrap snippet.
Open the document you want to insert the Wrap snippet.
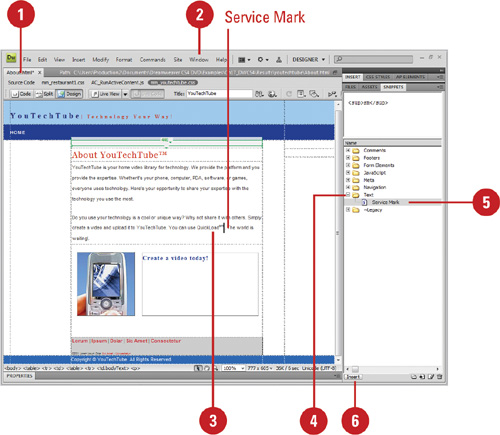
![]() Click the Window menu, and then click Snippets to display the Snippets panel.
Click the Window menu, and then click Snippets to display the Snippets panel.
![]() Select the text in Design view that you want to apply this snippet.
Select the text in Design view that you want to apply this snippet.
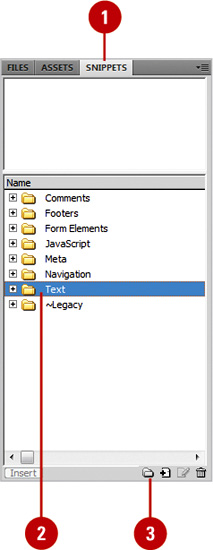
![]() Click the Plus (+) or Minus (-) icon next to the folder to display the snippet you want to insert from the Snippets panel (in this example, click the (+) next to the Text folder).
Click the Plus (+) or Minus (-) icon next to the folder to display the snippet you want to insert from the Snippets panel (in this example, click the (+) next to the Text folder).
![]() Select the snippet you want to insert (in this example, click Service Mark).
Select the snippet you want to insert (in this example, click Service Mark).
![]() Click the Insert button in the Snippets panel to wrap the snippet around the selected text.
Click the Insert button in the Snippets panel to wrap the snippet around the selected text.
Did You Know?
You can insert a recent snippet. Click the Insert menu, point to Recent Snippet, and then select the recently used snippet you want.
You can add or edit a keyboard shortcut for a snippet. Open the Snippets folder, right-click (Win) or control-click (Mac) in the Snippets panel, click Edit Keyboard Shortcuts, click the Commands popup, select Snippets (if necessary), select the snippet you want to change, enter a keyboard shortcut in the Press key box, and then click OK.
In Dreamweaver, you can use one of the many pre-designed snippets, one you developed yourself or others you downloaded from the Web. If any of these snippets is not exactly what you need, you can edit the snippet code directly in Dreamweaver. In addition to editing snippet code, you can also change snippet options, including name, description, snippet type (either block or wrap), and preview type (either in Design or Code view). The blocking method requires that you click to create an insertion point in the document and then add the snippet; the wrapping method requires that you select (in Design view) the selection of the page that you want to wrap the code around.
![]() Click the Window menu, and then click Snippets to display the Snippets panel.
Click the Window menu, and then click Snippets to display the Snippets panel.
![]() Click the Plus (+) or Minus (-) icon next to the folder to display the snippet you want to insert from the Snippets panel (in this example, click the (+) next to the Footers folder).
Click the Plus (+) or Minus (-) icon next to the folder to display the snippet you want to insert from the Snippets panel (in this example, click the (+) next to the Footers folder).
![]() Select the snippet that you need to edit (in this example, click Title and Hanging List).
Select the snippet that you need to edit (in this example, click Title and Hanging List).
![]() Click the Edit Snippet button in the Snippets panel.
Click the Edit Snippet button in the Snippets panel.
Note
If you don’t want to change the original snippet, simply make a copy of the snippet you want to change, and perform the edit to the copy.
![]() Edit the snippet using the following options:
Edit the snippet using the following options:
• Name. Change the name for the snippet, if desired.
• Description. Change the description of this snippet, if desired.
• Snippet Type. Select the Wrap Selection option for the wrap type or the Insert Block option for the block type.
• Insert Code. Modify the code to fit the particular situation (in this example, the copyright date, and links were updated to reflect the current project).
• Preview Type. Select the Design or Code option to specify how you want to preview the snippet in the Document window.
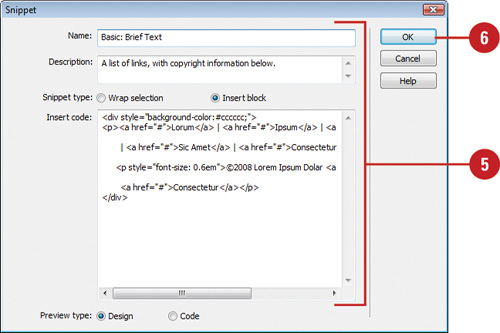
![]() Click OK.
Click OK.
Did You Know?
You can delete a code snippet or snippet folder. Open the Snippets folder, click the snippet folder or code snippet you want to remove, click the Remove button, and then click Yes. When you delete a folder, all the snippets in the folder are also deleted.
You can share a snippet. Snippets are located in the Program Files (Win) or Applications (Mac) folder in the following subfolders: Adobe/Adobe Dreamweaver CS4/Configuration/Snippets/snippet type name. You can copy and paste a snippet file into the same location to share it with others.
Although Dreamweaver supplies you with dozens of useful sections of snippet code, there will always be the time when you need something that isn’t supplied. One method is to jump out onto the Web, go to your friendly search engine, and look for something that might fit the bill. Not only are there a lot of sites out there that have free code for you to use, it’s very possible that you might be able to modify an existing piece of code to suit your purposes. And let’s not forget Adobe; they’ve given us the exchange that is just jam packed with high-end code snippets for just about any occasion; many of them free. Just point your browser to: http://www.adobe.com/cfusion/exchange/ While this section is not designed to make you a snippet programmer, there are probably a lot of you code warriors out there (myself included), who have the ability to write our own snippets. And here’s a bit of advice... if you design what you think is a really cool snippet, you can post it on the Adobe Exchange and share it with others.
![]() Click the Window menu, and then click Snippets to display the Snippets panel.
Click the Window menu, and then click Snippets to display the Snippets panel.
![]() Select the folder where you want to create a new snippet folder.
Select the folder where you want to create a new snippet folder.
![]() Click the New Snippet Folder button.
Click the New Snippet Folder button.
The new folder appears selected with the name, untitled.
![]() Type a name for the folder, and then press Enter (Win) or Return (Mac).
Type a name for the folder, and then press Enter (Win) or Return (Mac).
![]() Click the Window menu, and then click Snippets to display the Snippets panel.
Click the Window menu, and then click Snippets to display the Snippets panel.
![]() Select the folder that you want to add your new snippet.
Select the folder that you want to add your new snippet.
![]() Click the New Snippet button.
Click the New Snippet button.
![]() Use the following options to create the snippet:
Use the following options to create the snippet:
• Name. Enter a name for the snippet.
• Description. Enter a description of the snippet.
• Snippet Type. Select the Wrap Selection option for the wrap type or the Insert Block option for the block type (in this example, Insert Block).
• Insert Code. Enter or paste the code for the snippet. For the Wrap Selection option, enter or paste the code in the Insert Before or Insert After box (in this example, JavaScript code was added to create a date last modified area to the page; the file is called Snippet.xml in the Scripts folder).
Timesaver
You can copy code from another text program (even Microsoft Word), and paste it using Ctrl+V (Win) or
![]() +V (Mac) into the Snippet dialog box.
+V (Mac) into the Snippet dialog box.
• Preview Type. Select the Design or Code option to specify how you want to preview the snippet in the Document window.
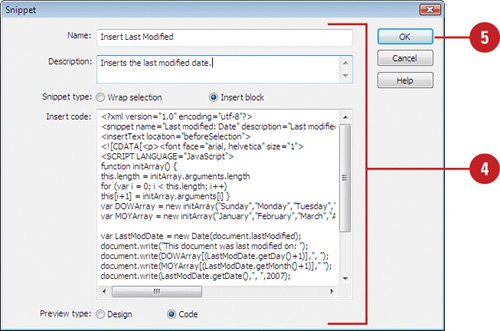
![]() Click OK.
Click OK.
Dreamweaver saves the code and adds it to the Snippets panel.

DW 7.1
Assets are individual elements, such as images, movies, colors, scripts, and URL links, you add to your Web site. You create assets when you insert elements from other programs, such as Adobe Photoshop or Adobe Flash. The assets are stored in the Assets panel, where you can insert and manage them for use in other parts of your Web site.
Dreamweaver provides two special types of assets: libraries and templates. A library is a Dreamweaver file that contains individual assets or copies of assets, while a template is a Dreamweaver file that contains editable regions. The assets in a library are called library items.
Library items are sections of a Web page that can be used over and over again. You can create a library item from any element in the body section of a document, including navigation bars, images, text, tables, forms, Java applets, plug-ins, and ActiveX controls. For example, a navigation system that you want to use on many of the pages in your site is best created and saved as a library item. That way when you need it, all you have to do is add the navigation to the page by dragging it out of the Assets panel.
This gives you a tremendous savings in terms of time creating all those replicating items in Web design. And another benefit is the consistency factor. You know that if the original Library item works, they all work, because they are based on the original item.
Library items also give you a grand advantage when it comes to changes. Again, let’s say that you’ve created a catalog Web site with hundreds of pages that contain images, and descriptions of your products. However, they’re not the only things on those pages; you’ve got a header, footer, navigation, background image or color. There’s a lot of stuff going on... and then something happens. You make a modification to the site that requires you to add another button to the Navigation bar... OOPS.
No problem. You created the navigation system for those pages as a library item, and then you inserted that item into a template (more about Templates in a later chapter). So all you have to do is open the original library item, make your changes, and instruct Dreamweaver to update the site. Sounds too good to be true, doesn’t it?
Dreamweaver stores library items in a Library folder within the local root for each site. However, for linked items, such as images, the library stores only a reference to the item. When you insert a library item in a page, Dreamweaver creates a link to it instead of inserting it, so the item is able to be updated later.
The time to begin the creation of library items is at the very beginning stages of site development. As you are working out the natty details, look at sketches of your pages, and decide what items are worth creating library items and/or templates, and what are not. It’s a bit late in the process (after the site is designed) to think back and wish that you had converted this item or that into a library item or template. Think up-front... begin with the end in mind.
DW 7.1
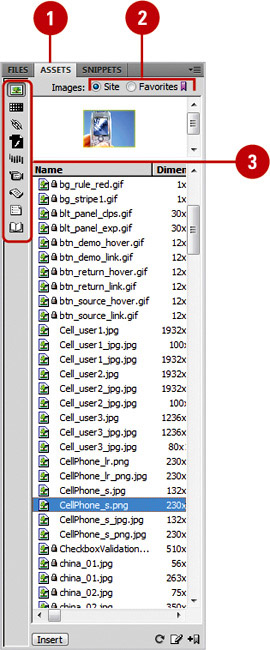
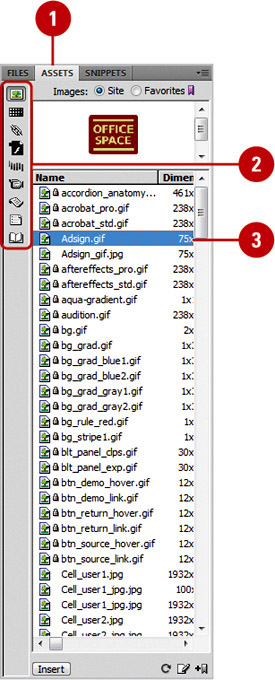
While the Files panel gives you access to your Web site and allows you to add, delete, and link files, quickly and efficiently, it doesn’t help you in the actual placement of assets into the documents. That job is left to the Assets panel. The Assets panel holds all of the individual elements that make up your Web pages; they’re the puzzle pieces that when properly assembled create awesome Web sites. The Assets panel includes a variety of elements that you store in a site, such as images, movie files, colors, and library elements.
![]() Click the Window menu, and then click Assets to display the Assets panel.
Click the Window menu, and then click Assets to display the Assets panel.
![]() Click the Site option to show all of the assets in your site, or click the Favorites option to show only the assets you set as a favorite.
Click the Site option to show all of the assets in your site, or click the Favorites option to show only the assets you set as a favorite.
![]() Click any of the following category buttons to display the assets you want:
Click any of the following category buttons to display the assets you want:
• Images. Displays images in the GIF, JPEG, or PNG formats.
• Colors. Displays the colors that are used in pages and style sheets in your site.
• URL. Displays any external links in your current site documents.
• Flash. Displays files in any version of the Flash format.
• Shockwave. Displays files in any version of the Shockwave format.
• Movies. Displays files in QuickTime or MPEG format.
• Scripts. Displays JavaScript or VBScript files.
• Templates. Displays a list of all the templates in the site.
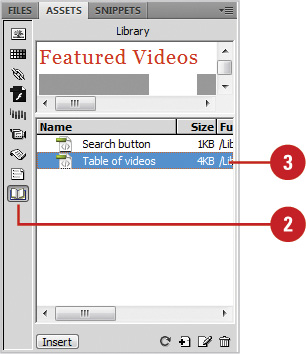
• Library. Displays a list of all library items (elements used in multiple pages).
DW 7.1, 7.2
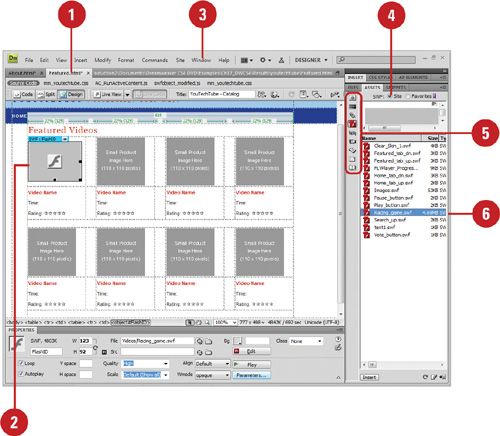
Once an asset is part of a Web site, you can insert it in another page using several different methods. You can drag the asset from the Assets panel directly into Design or Code view or click to place the insertion point where you want the asset and use the Insert button at the bottom of the Assets panel.
![]() Open the Web page you want to insert an existing asset.
Open the Web page you want to insert an existing asset.
![]() Click in the document to add an insertion point.
Click in the document to add an insertion point.
![]() Click the Window menu, and then click Assets to display the Assets panel.
Click the Window menu, and then click Assets to display the Assets panel.
![]() Click the Site option to show all of the assets in your site, or click the Favorites option to show only the assets you set as favorites.
Click the Site option to show all of the assets in your site, or click the Favorites option to show only the assets you set as favorites.
![]() Select the category that contains the asset you want to insert.
Select the category that contains the asset you want to insert.
![]() Insert the asset using one of the following methods:
Insert the asset using one of the following methods:
• Click the Insert button in the Assets panel. The asset appears at the insertion point.
• Click and drag the asset from the Assets panel directly into the active document. The asset appears where you release your mouse.
DW 7.1, 7.2
The Assets panel does much more than let you look at assets of your site. As a matter of fact, it’s a powerful tool to help you manage and edit all the elements that make up a Web site. You can use the Assets panel to edit an image, or even create a new image. Once an asset is edited, it will impact all Web pages that use that particular asset. For example, you use the Assets panel to reopen an image that’s used on several Web pages, perform a bit of touchup, and then save the file. In response, all the pages that used that particular asset will update to reflect the changes. Now that’s power.
![]() Select the Window menu, and then click Assets to display the Assets panel.
Select the Window menu, and then click Assets to display the Assets panel.
![]() Select the category that contains the asset you want to edit.
Select the category that contains the asset you want to edit.
![]() Double-click the asset you want to edit, or select the asset, and then click the Edit button.
Double-click the asset you want to edit, or select the asset, and then click the Edit button.
Dreamweaver launches the program required to edit the image (default application is Fireworks).
![]() Make changes to the image, save the file, and then close the edit program.
Make changes to the image, save the file, and then close the edit program.
The image is resaved with the changes, and all Web pages that utilize the image automatically reflect the changes when loaded.
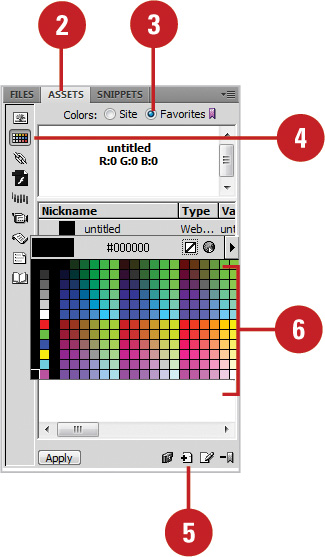
If you regularly use the same color or URL in a Web site, you can add it to the Assets panel in the Favorites list, so it’s available whenever you need it. After you add a color or URL, you can apply it to selected text or images in Design view. For example, you can select text on a page and apply a color asset to change text color or select text or an image on a page and apply a URL link to it.
![]() Open the Web page you want to insert an existing asset.
Open the Web page you want to insert an existing asset.
![]() Click the Window menu, and then click Assets to display the Assets panel.
Click the Window menu, and then click Assets to display the Assets panel.
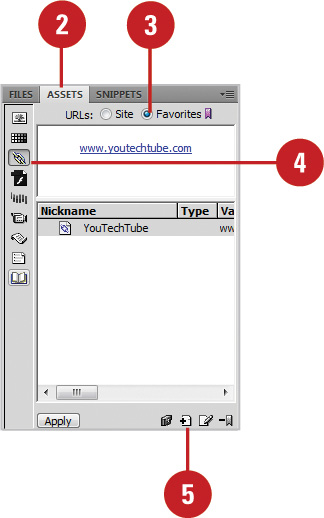
![]() Click the Favorites option.
Click the Favorites option.
![]() Click the URLs category.
Click the URLs category.
![]() Click the New URLs button.
Click the New URLs button.
![]() Enter the URL and nickname (optional) you want.
Enter the URL and nickname (optional) you want.
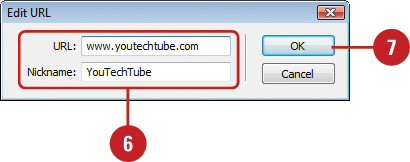
A nickname helps you identify a URL; it doesn’t affect the link.
![]() Click OK.
Click OK.
![]() Open the Web page you want to apply a color to text.
Open the Web page you want to apply a color to text.
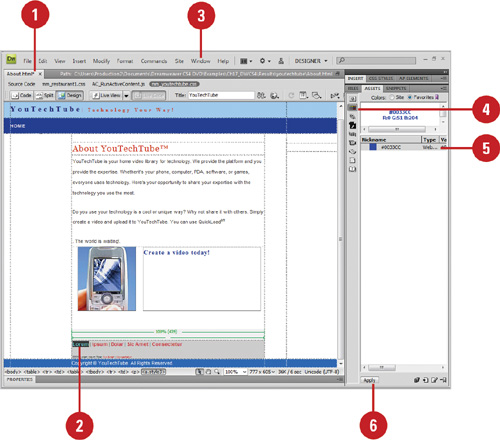
![]() Select the text you want to apply a color.
Select the text you want to apply a color.
If you click to place the insertion point, the color applies to the text appearing after the insertion point.
![]() Click the Window menu, and then click Assets to display the Assets panel.
Click the Window menu, and then click Assets to display the Assets panel.
![]() Click the Color category.
Click the Color category.
![]() Select the color you want to apply.
Select the color you want to apply.
![]() Click the Apply button.
Click the Apply button.

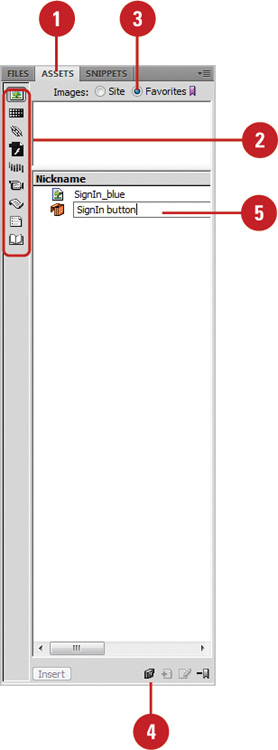
When the list of assets for a Web site becomes long, it’s difficult to find the assets you want to use. For the assets you frequently use, you can add them to a Favorites list to make them easier to find, and even group related ones together. If the names of the assets in your Favorites list are difficult to identify, you can give them nicknames to make them easier to locate and use. When you give a nickname to an asset, it doesn’t affect the real filename of the asset.
![]() Select the Window menu, and then click Assets to display the Assets panel.
Select the Window menu, and then click Assets to display the Assets panel.
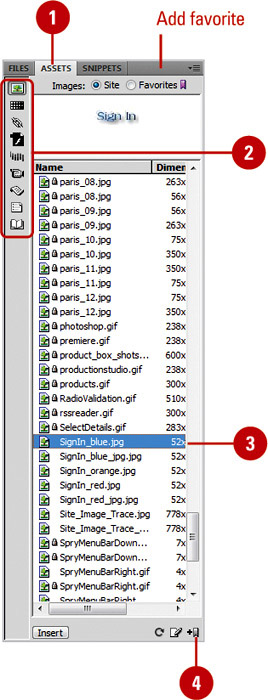

![]() Select the category that contains the asset that you want to modify.
Select the category that contains the asset that you want to modify.
![]() Select one or more assets you want to add from the Site list or remove from the Favorites list.
Select one or more assets you want to add from the Site list or remove from the Favorites list.
![]() Use any of the following methods:
Use any of the following methods:
• Add. Click the Add To Favorites button in the Assets panel.
• Delete. Click the Remove From Favorites button in the Assets panel.
Did You Know?
You can sort assets. Open the Assets panel, select the category that contains the assets you want to sort, and then click the column heading you want to sort by.
You can resize the Assets panel. Open the Assets panel, and then drag the splitter bar between the preview area and the list of assets to resize the panel.
![]() Click the Window menu, and then click Assets to display the Assets panel.
Click the Window menu, and then click Assets to display the Assets panel.
![]() Select the category that you want to create a group.
Select the category that you want to create a group.
![]() Click the Favorites option.
Click the Favorites option.
![]() Click the New Favorites Folder button.
Click the New Favorites Folder button.
![]() Type a name for the folder, and then press Enter (Win) or Return (Mac).
Type a name for the folder, and then press Enter (Win) or Return (Mac).
![]() Drag assets into the folder.
Drag assets into the folder.
Did You Know?
You can copy assets from the Assets panel to another site. Open the Assets panel, select the category that contains the assets you want to copy, right-click (Win) or control-click (Mac) one or more assets (or a Favorites folder) in either the Site list or Favorites list, click Copy To Site, and then select the target site name from the submenu list of all the defined sites.
DW 6.6
Library items are elements in a Web page you store in a library that you can reuse to quickly create other pages. It can’t be overstated just how valuable library items are; not only to increased speed in construction, but perfect consistency between pages. Creating and using library items is fairly straightforward; you create and select an element, such as a navigation bar, and then use the New Library Item button in the Library category to create a library item. After you create a library item, you can use it on any page with a simple click and a drag.
![]() Open a page that contains information you want to convert to a library item.
Open a page that contains information you want to convert to a library item.
![]() Click the Window menu, and then click Assets to display the Assets panel.
Click the Window menu, and then click Assets to display the Assets panel.
![]() Click the Library category.
Click the Library category.
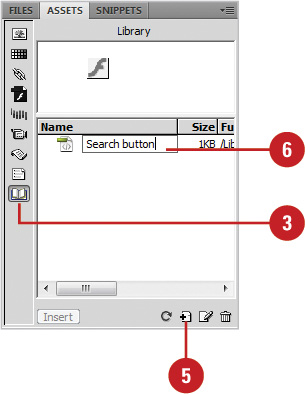
![]() Select the item or items that you want converted into a library item.
Select the item or items that you want converted into a library item.
![]() Click the New Library Item button.
Click the New Library Item button.
Dreamweaver adds the item to the Assets panel as an untitled library item.
![]() Enter a name for the library item, and then press Enter (Win) or Return (Mac).
Enter a name for the library item, and then press Enter (Win) or Return (Mac).
![]() Open the Web page you want to insert a library item.
Open the Web page you want to insert a library item.
![]() Click the Window menu, and then click Assets to display the Assets panel.
Click the Window menu, and then click Assets to display the Assets panel.
![]() Click the Library category.
Click the Library category.

![]() Use one of the following methods to add a library item to a page:
Use one of the following methods to add a library item to a page:
Drag and drop the item from the Library in the Assets panel directly into the page.
Click to place the insertion point in the active document, select the library item you want to insert, and then click the Insert button in the Assets panel.
Did You Know?
You can disconnect a library item from a library. If you to edit a library item on a specific page and not everywhere else it’s used, you need to disconnect the library item from the library. Open the Assets panel, select the Library category, right-click the library item you want to disconnect, and then click Detach From Original.
DW 6.6
Creating and using library items, such as a navigation bar, is fairly straightforward. The creation, saving, and subsequent use of library items is discussed in the previous section. After you create an object, you can use it on any Web page with a simple click and a drag. The fun part (and it’s easy) is when you need to make a modification to a library item. When you think about it, that’s the real power of library items. When you make changes to a library item, Dreamweaver changes the item everywhere it was used.
![]() Click the Window menu, and then click Assets to display the Assets panel.
Click the Window menu, and then click Assets to display the Assets panel.
![]() Click the Library category.
Click the Library category.
![]() Open the library item using one of the following methods:
Open the library item using one of the following methods:
Select the item, and then click the Edit button in the Assets panel.
Double-click on the library item.
In the Properties panel, click the Open button.
Dreamweaver opens the document in a new window.
![]() Make changes to the item using standard editing techniques.
Make changes to the item using standard editing techniques.
![]() Click the File menu, and then click Save.
Click the File menu, and then click Save.
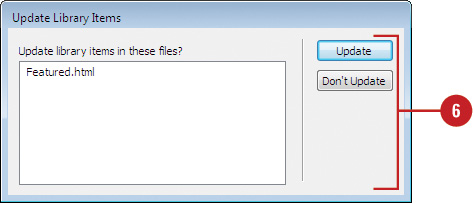
Dreamweaver opens the Update Library Items dialog box.
![]() Choose from the following options:
Choose from the following options:
• Update Library Items In These Files. Displays a list of all files associated with this library item.
• Update. Click the Update button to perform an update on all displayed files.
• Don’t Update. Click the Don’t Update button to cancel the update.
Dreamweaver opens the Update Pages dialog box.
![]() Choose from the following options:
Choose from the following options:
• Look In. Click the Look In option to update all files within a specific site, or click the Entire Site option to update all files within the working site.
• Update. Select to update Library Items, Templates (associated with the Library Item), or both.
• Show Log. Select to show a log of the update when finished.
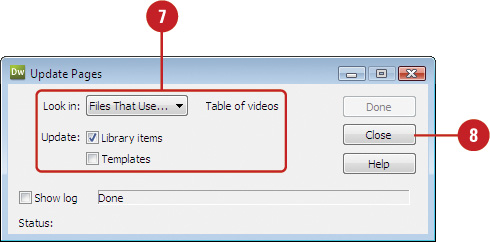
![]() Click Start to begin the update process, if necessary, and then click Close.
Click Start to begin the update process, if necessary, and then click Close.
DW 6.6
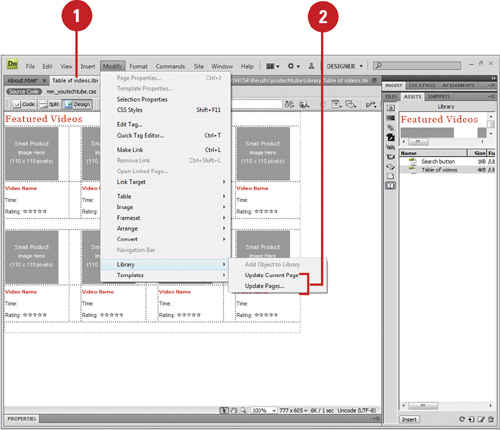
If you choose not to update a library item when you edit it, you can still update it later using the Update Current Page or Update Pages commands. The Update Current Page allows you to update the active document in the Document window, while the Update Pages command allows you to update the entire Web site. In addition to updating library items, you can also rename individual items or delete the ones you no longer use.
![]() Open the Web page with library items you want to update.
Open the Web page with library items you want to update.
![]() Update the library items using either of the following methods:
Update the library items using either of the following methods:
• Update Current Page. Click the Modify menu, point to Library, and then click Update Current Page.
• Update Entire Site. Click the Modify menu, point to Library, click Update Pages, specify what to update in the Look In popup, select the Library Items check box, and then click Start.
Did You Know?
You can customize the highlight color of library items. Click the Dreamweaver (Mac) or Edit (Win) menu, click Preferences, select the Highlighting category, select the Library Items check box, select a highlighting color, select the Show check box, and then click OK.
You can show or hide highlighting. Click the View menu, point to Visual Aids, and then click Invisible Elements.
![]() Open the Web page with library items you want to rename or delete.
Open the Web page with library items you want to rename or delete.
![]() Click the Window menu, and then click Assets to display the Assets panel.
Click the Window menu, and then click Assets to display the Assets panel.
![]() Click the Library category.
Click the Library category.
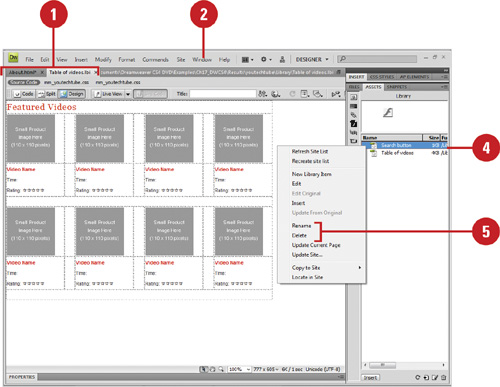
![]() Select the library item you want to rename or delete.
Select the library item you want to rename or delete.
![]() Use any of the following methods:
Use any of the following methods:
• Rename a Library Item. Right-click the library item, click Rename, type a new name, and then press Enter (Win) or Return (Mac).
• Delete a Library Item. Right-click the library item, click Delete, or click the Delete button, and then click Yes to confirm the deletion.
As you develop a site, you use some Dreamweaver behaviors and JavaScript code constantly. The basic rollover image, for example, is so useful for navigation bars, you may end up putting it on every page of your site. Unfortunately, each time you add a behavior to a page, Dreamweaver adds lines of JavaScript code as well, and more code means slower downloads. You usually end up using the same behaviors repeatedly, so it makes sense to collect these functions and save them in an external JavaScript file. External JavaScripts help you speed up the download of your Web pages. When the scripts are downloaded, they are cached on the visitor’s computer. Once your scripts are cached, each subsequent page that is downloaded only requires the browser to download the HTML... and not the scripts, which saves time. You can create a JavaScript file (.js) in Dreamweaver or an external editor, and then copy the JavaScript code that Dreamweaver produces or enter your own code in the JavaScript file (.js) and save it in your site folder (typically in a folder called Scripts) for easy access from the Assets panel.
![]() Click the File menu, and then click New.
Click the File menu, and then click New.
The New Document dialog box opens.
![]() Click the Blank Page category.
Click the Blank Page category.
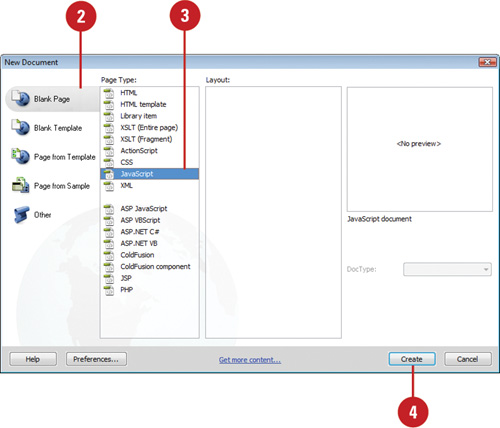
![]() Click the JavaScript page type.
Click the JavaScript page type.
![]() Click Create.
Click Create.
![]() Enter your JavaScript code, or copy and paste Dreamweaver generated JavaScript code (located in Code view) in the JavaScript file.
Enter your JavaScript code, or copy and paste Dreamweaver generated JavaScript code (located in Code view) in the JavaScript file.
![]() Click the File menu, and then click Save.
Click the File menu, and then click Save.
![]() Navigate to the folder location in your local root site folder where you want to store the script file, typically called Scripts folder.
Navigate to the folder location in your local root site folder where you want to store the script file, typically called Scripts folder.
![]() Enter a name for the script file.
Enter a name for the script file.
![]() Click Save.
Click Save.
![]() Open the local root site folder for your Web site from the desktop.
Open the local root site folder for your Web site from the desktop.
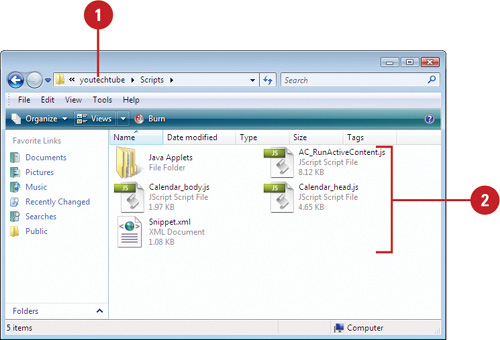
![]() Drag the user-created JavaScript file from the desktop into the internal folder named, Scripts.
Drag the user-created JavaScript file from the desktop into the internal folder named, Scripts.
![]() Open Dreamweaver.
Open Dreamweaver.
![]() Click the Site menu, point to Manage Sites, select the site that you dragged the JavaScript code, and then click Done.
Click the Site menu, point to Manage Sites, select the site that you dragged the JavaScript code, and then click Done.
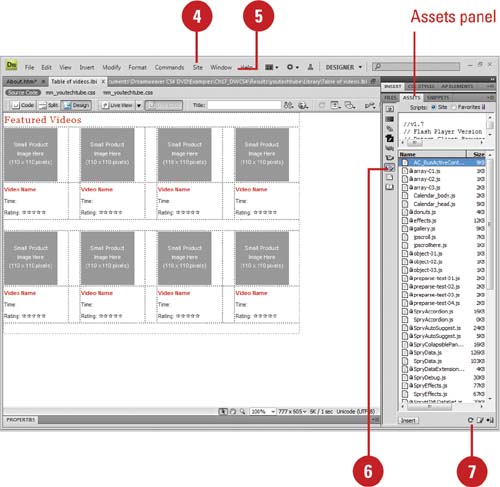
![]() Click the Window menu, and then click Assets to display the Assets panel.
Click the Window menu, and then click Assets to display the Assets panel.
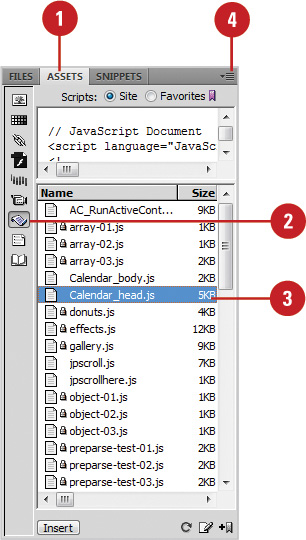
![]() Click the Scripts category.
Click the Scripts category.
![]() Click the Refresh button.
Click the Refresh button.
The new JavaScript code appears in the Assets panel.
Did You Know?
You can create an external JavaScript library item by dragging a JavaScript file directly to a page. Open a page in Dreamweaver, drag the user-created JavaScript file (.js) from the desktop directly to the page in Dreamweaver, and then click Yes to save the code in the active site folder (recommended). Open the Assets panel, click the Scripts category, and then click the Refresh button to display the JavaScript file.
After you create an external JavaScript file in Dreamweaver or another external editor and store it in a folder, typically called Scripts, in your local root site folder, you can insert the JavaScript into any page in your site and reduce page download times. If you need to make a change to an external JavaScript file, you can do it directly from Dreamweaver using the Assets panel. When you make a change to a JavaScript file, the new code is automatically used when the script is called.
![]() Open the Web page you want to insert an external script.
Open the Web page you want to insert an external script.
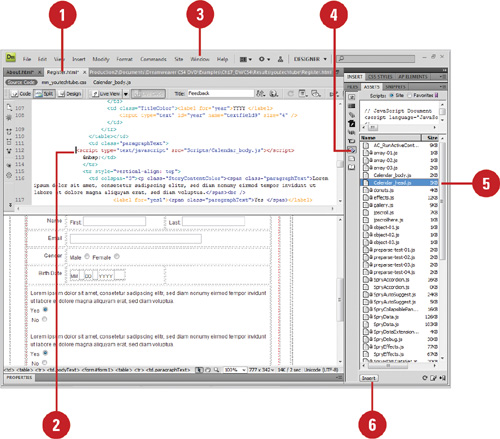
![]() Click in the document where you want to insert the JavaScript code.
Click in the document where you want to insert the JavaScript code.
Note
If the script is to be attached to the entire Web page, click the <body> tag in the tag selector at the bottom left of the Document window.
![]() Click the Window menu, and then click Assets to display the Assets panel.
Click the Window menu, and then click Assets to display the Assets panel.
![]() Click the Scripts category.
Click the Scripts category.
![]() Select the script you want attached to the page.
Select the script you want attached to the page.
![]() Click the Insert button.
Click the Insert button.
Dreamweaver inserts the script into the page.
Did You Know?
You can get free javascripts on the Web. Check out the free scripts at www.java-script.net. You can also perform a search for free javascripts from additional Web sites.
![]() Click the Window menu, and then click Assets to display the Assets panel.
Click the Window menu, and then click Assets to display the Assets panel.
![]() Click the Scripts category.
Click the Scripts category.
![]() Select the script you want to edit.
Select the script you want to edit.
![]() Click the Assets Options button, and then click Edit.
Click the Assets Options button, and then click Edit.
The script appears within a window, the same size as the current document window.
![]() Make the necessary changes to the script.
Make the necessary changes to the script.

![]() Click the File menu, and then click Save.
Click the File menu, and then click Save.
![]() Click the Close button to close the JavaScript document.
Click the Close button to close the JavaScript document.
DW 1.5
A server-side include is a file that the Web server uses in your pages when a browser opens the page. In Dreamweaver, you can insert server-side includes in your pages, edit the includes, or preview pages containing includes.
When you insert a server-side include in a Web page, Dreamweaver places a reference to an external file; the actual contents of the server-side include are not placed in the file. However, Dreamweaver displays the contents of the server-side include in Design view to make it easier to create and layout your pages. In addition, you can preview your pages in your browser to display them as if they were on your Web server. When you display a page with a server-side include in your browser, the server creates a new page inserting the contents of the file and displays the result. This can make updating files more flexible, however it does take a little longer to display the page.
There are two types of server-side includes: Virtual and File. The type you need depends on the Web server you use. Some servers can only use certain types of files for server-side includes, so check the documentation of your server software to determine which is the best type for you. Or, you can just try each type to see which one works for you.
![]() Open the Web page with the server-side include you want to modify.
Open the Web page with the server-side include you want to modify.
![]() Select the server-side include.
Select the server-side include.
![]() Open the Properties panel.
Open the Properties panel.
![]() Use the options in the Properties panel to modify server-side settings or change/update the server-side include file.
Use the options in the Properties panel to modify server-side settings or change/update the server-side include file.
• If your server is an Apache Web server, click Virtual. This works well for Apache Web server where File doesn’t always.
• If you server is a Microsoft Internet Information Server (IIS), click File. This works well for IIS where Virtual only works in certain circumstances.