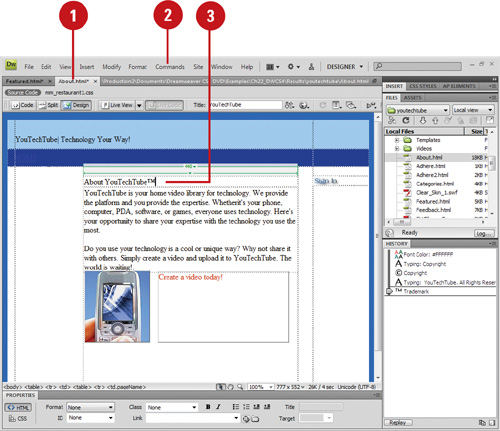
What You’ll Do
You can’t change time; it plods forward at sixty minutes an hour, twenty-four hours a day. Unfortunately, when you’re involved in creating a complex Web site, and up against a deadline, there never seems to be enough time in the day.
Adobe understands the need for efficiency in their applications, and Dreamweaver is no exception. Built into the structure of the program are ways to help you get the job done, and get it done quickly. However, it’s not just about finishing a project fast, it’s also about doing it right. Again, Dreamweaver creates a perfect balance between efficiency and quality.
For example, you’re working along, and suddenly decide that 6 steps ago, you deleted something that should not have been deleted. No problem, just use the History panel to go back in time and correct the error. That’s great, but the History panel is much more than multiple undos. It actually allows you to automate repetitive tasks by creating commands out of selected history steps.
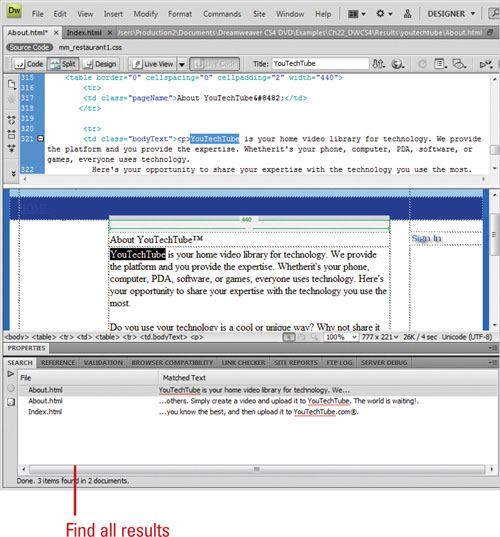
Here’s another one: You’re almost finished with your site; it’s 75 pages, all nicely checked out and ready to go. Then you discover a misspelling that occurs on all the pages. No problem, you simply access Find and Replace and correct the error. But Find and Replace is more that just a simple text corrector; you can search for specific source code, text within tags, even search for a specific tag. In addition, if it’s something that you search for often, you can save the search as a query and use it over and over again.
The History panel helps you automate and streamline the way you work in Dreamweaver. As you work in Dreamweaver, the History panel tracks all your steps behind the scenes for the entire document or only for individual or all objects. With the History panel, you can do any of the following:
• Undo or redo steps to correct mistakes.
• Replay selected steps for new tasks to streamline repetitive work.
• Record steps for replay from the Commands menu to automate your work.
The History panel doesn’t replace the Undo, Redo, and Repeat commands on the Edit menu, it simply tracks every step you perform. When you undo or redo one or more commands, the History panel displays the results; the Undo/Redo slider moves according to the commands you select.
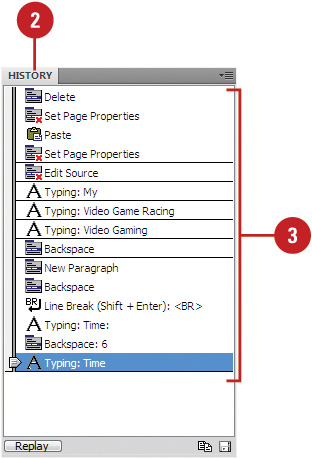
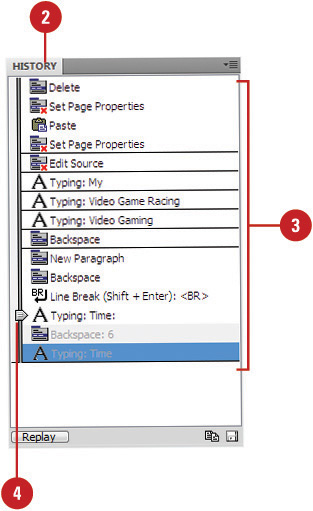
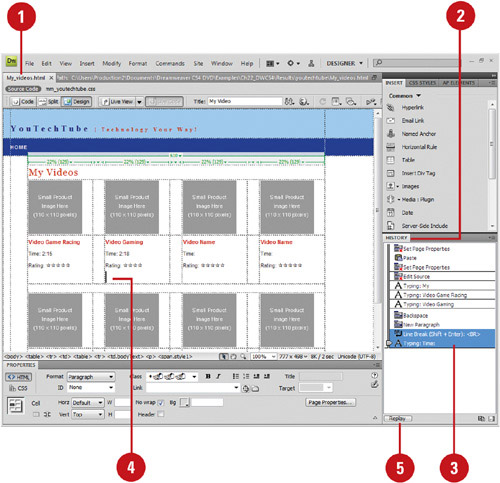
You can open the History panel using the Window menu like any of the other panels in Dreamweaver. Each step you take in the active document during a work session (since you created or opened the document) appears on a separate line in the History panel. The first step you perform in a work session appears at the top of the list and the last step appears at the bottom. If a red X appears in the icon for a step, it indicates Dreamweaver cannot save or replay the step. Unlike other panels in Dreamweaver, the History panel includes a slider on the left side you can use to undo/redo steps; the Undo/Redo slider initially points to the last step you performed. The bottom of the History panel includes buttons to replay selected steps, copy selected steps to the Clipboard, and create a command from selected steps. The Options menu displays commands, such as Clear History, specific to the History panel.

You can use the Window menu to open the History panel like any of the other panels in Dreamweaver. Each step you take in the active document during a work session appears on a separate line in the History panel. Steps you take in one Dreamweaver document don’t appear in other documents’ History panel lists. As the History panel records each step taken to the active document, it consumes memory and hard disk space. If you no longer need the steps in the History panel and want to free up some memory, you can erase the entire list. When you close a document, Dreamweaver clears the History panel.
• To open or close the History panel, click the Window menu, and then click History.
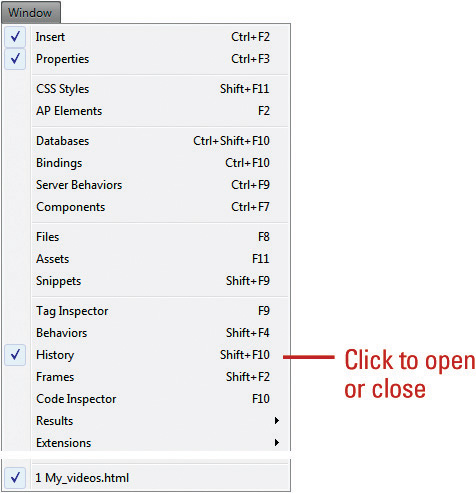
The command toggles on and off to open and close the History panel.
• To show or expand the History panel, click History on the History panel title bar.
![]() Open the History panel.
Open the History panel.

![]() Click the Options menu, and then click Clear History.
Click the Options menu, and then click Clear History.
![]() Click Yes to confirm the operation.
Click Yes to confirm the operation.
As you change the current open document, you begin to see the History panel record each action you make. For example, type in a line of text and a typing layer displays in the History panel (including the text you just entered). Now, select the text and change it to italic: the History panel displays the change. Each action in the document creates a new action layer in the panel. Now, continue on for a few steps, and then you realize that you didn’t want to italicize the text. As long as that history step is still in the History panel, you can go back in time and undo that step. If the step you need to change is the last one, then all you need to do is press
![]() +Z (Mac), or Ctrl+Z (Win). If you change your mind you can always press
+Z (Mac), or Ctrl+Z (Win). If you change your mind you can always press
![]() +Y (Mac), or Ctrl+Y (Win) to redo the last undo ... sound confusing? Not really; however, if it is, then the History panel eliminates the confusion by giving you a visual list of all your history steps.
+Y (Mac), or Ctrl+Y (Win) to redo the last undo ... sound confusing? Not really; however, if it is, then the History panel eliminates the confusion by giving you a visual list of all your history steps.
![]() Open the Web page you want to use.
Open the Web page you want to use.
![]() Open the History panel.
Open the History panel.
![]() Perform several actions within the document to create a running history.
Perform several actions within the document to create a running history.
![]() In the History panel, perform a multiple undo using one of the following methods:
In the History panel, perform a multiple undo using one of the following methods:
• Drag the slider on the History panel to the desired step in the History panel.
• Click the slider bar next to the step you want to undo and the slider will scroll automatically to that step.

Note
Any actions performed after the undo overwrite the undone actions and create a new history for the document from that point forward.
![]() Open the Web page you want to use.
Open the Web page you want to use.
![]() Open the History panel.
Open the History panel.
![]() Perform several actions within the document to create a running history, and then undo one or more actions.
Perform several actions within the document to create a running history, and then undo one or more actions.
![]() In the History panel, perform a multiple redo using one of the following methods:
In the History panel, perform a multiple redo using one of the following methods:
• Drag the slider down on the History panel to the desired step in the History panel.
• Click the slider bar next to the step you want to revert to and the slider will scroll automatically to that step.
Note
A redo can be performed only so long as you haven’t performed a multiple undo, and then created new steps.
You can replay steps from the History panel to the same object or to a different object in the document. You can replay steps only in the order in which you performed them; you can’t rearrange the order of the steps in the History panel. If a red X appears in the icon for a step, it indicates Dreamweaver cannot save or replay the step.
![]() Open the Web page containing the steps you want to replay.
Open the Web page containing the steps you want to replay.
![]() Open the History panel.
Open the History panel.
![]() Select the steps you want:
Select the steps you want:
• One Step. Click a step.
• Adjacent Steps. Drag from one step to another or click the first step, hold down the Shift key, and then click the last step.
• Nonadjacent Steps. Hold down the
![]() (Mac) or Ctrl (Win) key, and then click steps.
(Mac) or Ctrl (Win) key, and then click steps.
![]() Select the same object used in the History steps or another object.
Select the same object used in the History steps or another object.
![]() Click Replay in the History panel.
Click Replay in the History panel.
The steps are replayed in order, and a new step called Replay Steps appears in the History panel.
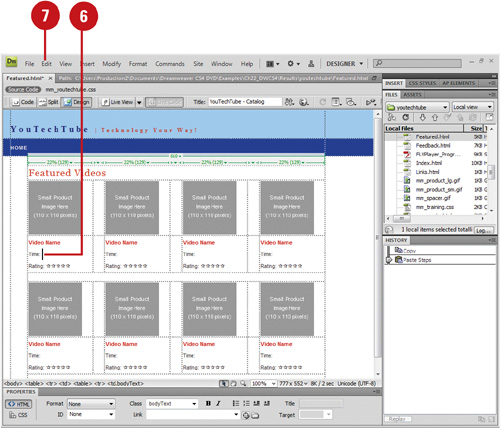
Each document only tracks its own set of steps in the History panel. When you close a document, Dreamweaver clears the History panel. If you want to use a set of steps in another document, you need to copy them from one History panel and paste them to another document. You can use the Copy Steps button on the History panel or the same command on the Options menu to complete the task. When you paste steps into another document, Dreamweaver replays the steps and the History panel shows the steps as only one step called Paste Steps (Mac) or Paste (Win).
![]() Open the Web page containing the steps you want to copy.
Open the Web page containing the steps you want to copy.
![]() Open the History panel.
Open the History panel.

![]() Perform several actions within the document to create a running history.
Perform several actions within the document to create a running history.
![]() Select the steps (called a History action) that you want to copy.
Select the steps (called a History action) that you want to copy.
![]() Click the Copy Steps button in the History panel.
Click the Copy Steps button in the History panel.
![]() Click in the document to place the insertion point where you want to paste the steps or select an object to apply the steps.
Click in the document to place the insertion point where you want to paste the steps or select an object to apply the steps.
![]() Click the Edit menu, and then click Paste.
Click the Edit menu, and then click Paste.
Dreamweaver executes the saved History steps at the insertion point of the cursor.
The History panel records the steps you take in the order in which you perform them in Dreamweaver. If you perform the same set of steps several times while you work on a document, you can save the steps in the History panel as a command on the Commands menu, which you can reuse again and again. This is where the real power is located. Dreamweaver stores the commands you save for future use in any document. While History records most actions performed while working on a page, there are some things that it can’t record, such as dragging an object from one place on the page to another. If a black line separating the steps or a red X appears in the icon for a step, it indicates Dreamweaver cannot save or replay the step.
![]() Open the Web page you want to use.
Open the Web page you want to use.

![]() Open the History panel.
Open the History panel.
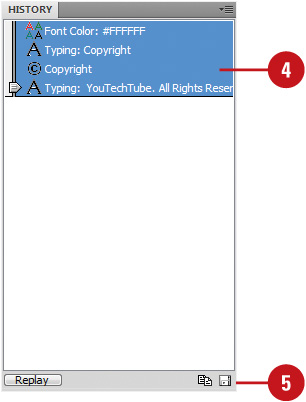
![]() Perform several steps within the page (in this example, a copyright notice is created using a specific font and formatting).
Perform several steps within the page (in this example, a copyright notice is created using a specific font and formatting).
Important
When selecting the text to change its formatting do not click and drag; instead use the left arrow key while holding down the shift key.
Dreamweaver records all of the steps within a box in the History panel.
Note
If you see a black line separating the steps, or a red X, that indicates the steps cannot be saved or replayed as a single command.
![]() When finished creating the copyright symbol, select all of the steps that you want saved as a command, by clicking and dragging on the steps in the History panel.
When finished creating the copyright symbol, select all of the steps that you want saved as a command, by clicking and dragging on the steps in the History panel.
![]() Click the Save Steps button in the History panel.
Click the Save Steps button in the History panel.
![]() Enter a descriptive name for the command.
Enter a descriptive name for the command.

![]() Click OK.
Click OK.
![]() To reuse the command, click the Commands menu, and then click the command name.
To reuse the command, click the Commands menu, and then click the command name.
The bottom of the Commands menu displays a list of your saved history commands.
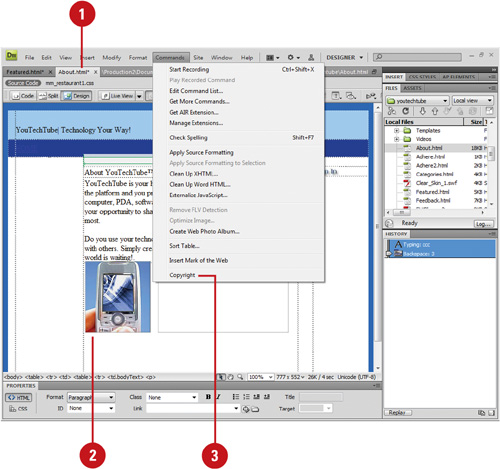
The History panel is one of those tools in Dreamweaver that many users don’t take full advantage of. Most designers use it as a tool for multiple undos. While that’s a fine way to use it (I love multiple undos), there’s more to the History panel than that. The History panel’s job is to record all the actions you make in an open document, based on a user-defined number of steps, and lets you take multiple steps backwards with the use of the panel’s slider. Its real power, however, is the ability to record, play, save, and reuse user-defined commands. User-defined commands are great timesaving tools when you build complex Web sites and know that you’ll do certain things over and over again. For example, you might want to insert a copyright statement at the bottom of each page. We’re not talking about a library item, just some simple italicized text. That’s just perfect for a command. After you save steps as a command, you can run, rename, or delete commands.
![]() Open the Web page you want to run (apply) a Command.
Open the Web page you want to run (apply) a Command.
![]() Click in the document where you want to run the Command.
Click in the document where you want to run the Command.
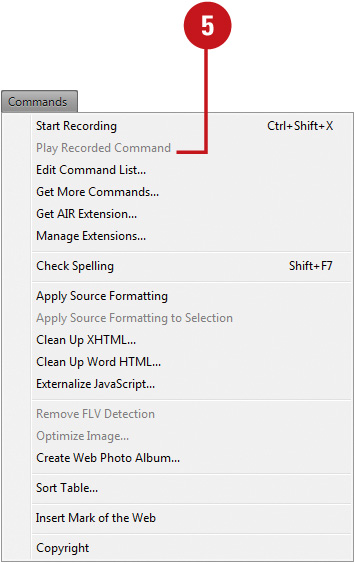
![]() Click the Commands menu, and then select the command from the list at the bottom of the menu (in this example, copyright).
Click the Commands menu, and then select the command from the list at the bottom of the menu (in this example, copyright).
Dreamweaver applies the command at the insertion point of the cursor.
![]() Click the Commands menu, and then click Edit Command List.
Click the Commands menu, and then click Edit Command List.

![]() Select from the following options in the Edit Command List dialog box:
Select from the following options in the Edit Command List dialog box:
• Rename. Select a command from the list, and enter a new name, if desired.
• Remove. Select a command from the list, and then click the Delete button.
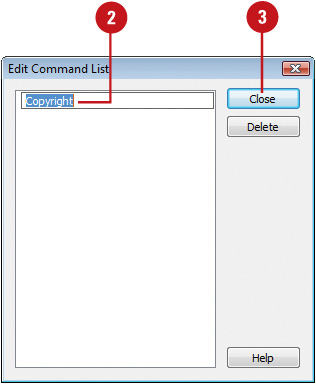
![]() Click Close to save your changes.
Click Close to save your changes.
Did You Know?
You can get more commands. Click the Commands menu, and then click Get More Commands. Your browser opens the Adobe Exchange, where you can pick up hundreds of specific commands (many for free).
If you need to quickly create a command for temporary use, such as your current working session, you can use the Start Recording and Stop Recording commands on the Commands menu. The actions you take during the recording process are stored internally by Dreamweaver and cannot be edited. Dreamweaver stores only one recorded command at a time. This means when you record a new command, the old command is erased. However, if you like a recorded command, you can save it for future use.
![]() Open the Web page you want to use for recording purposes.
Open the Web page you want to use for recording purposes.
![]() Click the Commands menu, and then click Start Recording.
Click the Commands menu, and then click Start Recording.
![]() Perform the steps you want to record (the cursor changes to indicate you’re recording).
Perform the steps you want to record (the cursor changes to indicate you’re recording).
![]() When you’re done, click the Commands menu, and then click Stop Recording.
When you’re done, click the Commands menu, and then click Stop Recording.

![]() To play back the recorded command, click the Commands menu, and then click Play Recorded Command.
To play back the recorded command, click the Commands menu, and then click Play Recorded Command.
Did You Know?
You can save a temporary recorded command. Click the Commands menu, click Play Recorded Command, select the Run Command step in the History panel, click the Save Steps button, enter a name for the command, and then click OK.
By default, the History panel is set for a maximum of 50 undos. Your first job is to determine whether 50 undo steps is enough (or too many), and modify the History panel by using the General category in the Preferences dialog box. You can set the number of history steps to any number between 2 and 9999. As the History panel records each step taken in the active document, it consumes memory and hard disk space. The larger the number of history steps you specify, the more memory and hard disk space Dreamweaver consumes on your computer.
![]() Click the Dreamweaver (Mac) or Edit (Win) menu, and then click Preferences.
Click the Dreamweaver (Mac) or Edit (Win) menu, and then click Preferences.
![]() Click the General category.
Click the General category.
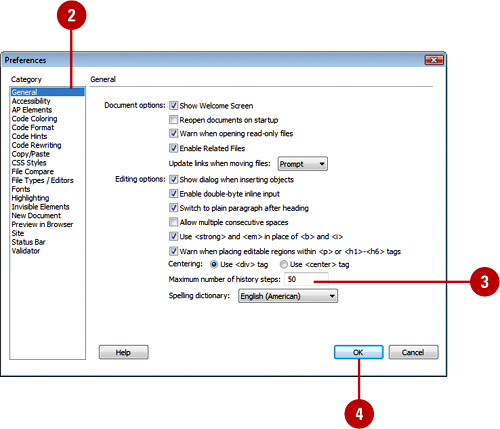
![]() Enter a numeric (2-9999) value into the Maximum Number Of History Steps box.
Enter a numeric (2-9999) value into the Maximum Number Of History Steps box.
![]() Click OK.
Click OK.
Dreamweaver’s Find and Replace is a powerful tool for searching for and changing HTML text, tags and their attributes within the document you are working on. Conducting a simple find/replace on text allows you to search for a specific phrase, words or characters, and replace them. The advanced text option allows you to search for and replace text strings inside or outside of a target tag with the specific criteria you want; this acts as a filter for the search.
![]() Open Dreamweaver (it is not necessary to open a document).
Open Dreamweaver (it is not necessary to open a document).
![]() Click the Edit menu, and then click Find And Replace.
Click the Edit menu, and then click Find And Replace.
![]() Select the following options from the Find and Replace dialog box:
Select the following options from the Find and Replace dialog box:
• Find In. Click the popup to look for the find text by the desired area for the search.
• Search. Click the popup, and then click Text (Advanced).
• Find. Enter the text to search.
• Replace. Enter the text to replace.
• Tag. Click the popup, click Inside Tag or Not Inside, and then select a target tag to look for text in (to the right).
• Criteria. Click the Plus (+) button or the Minus (-) button to add or remove search criteria.
When you add a criteria, click to select what to look for in the tag (With Attribute, Without Attribute, or Containing, or Not Containing), and then specify the criteria you want.
For example, with Attribute chosen, the attribute is color, and the equal sign was used to indicate we’re looking for a specific color (990000).

![]() Select from the following Find and Replace options:
Select from the following Find and Replace options:
• Match Case. Select to make the Find text case sensitive.
• Match Whole Word. Select to match whole words.
• Ignore Whitespace. Select to treat all whitespace as a single space for the purpose of matching.
• Use Regular Expression. Select to use string expressions to help locate information.
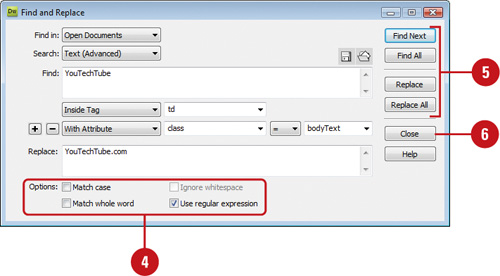
![]() Click Find Next, Find All, Replace, Replace All to perform the find and replace.
Click Find Next, Find All, Replace, Replace All to perform the find and replace.
![]() Click Close to end the Find and Replace routine.
Click Close to end the Find and Replace routine.
Did You Know?
You can repeat the last search. Dreamweaver remembers your last search. So, if you close the Find and Replace dialog box to do additional editing, you can resume the prior search. Click the Edit menu, and then click Find Again.
See Also
See “Finding and Replacing Text or Code” on page 120 for information on using the Find and Replace command.

DW 5.4
When you need to find a specific tag within the document you are working on, you can use the advanced features in the Find and Replace dialog box. The advanced options allow you to search for and replace specific tags inside or outside of a target tag with the specific criteria you want, including tag attributes. In other words, you can set conditions that act as a filter for the search. Searching the source code takes you into the code and stops at each occurrence of the search.
![]() Open Dreamweaver (it is not necessary to open a document).
Open Dreamweaver (it is not necessary to open a document).
![]() Click the Edit menu, and then click Find And Replace.
Click the Edit menu, and then click Find And Replace.
![]() Select the following options from the Find and Replace dialog box:
Select the following options from the Find and Replace dialog box:
• Find In. Click to look for the find text by the desired area for the search.
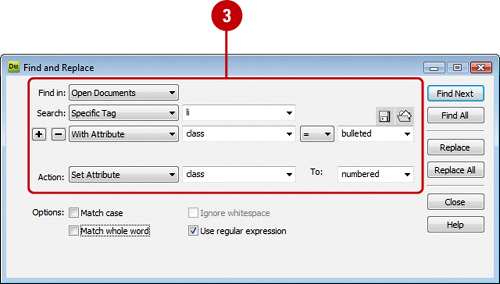
• Search. Click the popup, and then click Specific Tag.
• Tag. Click the list arrow, and then select the tag to look for from the list (to the right).
• Tag Criteria. Click to select what to look for in the tag (With Attribute, Without Attribute, or Containing, or Not Containing), and then specify the criteria you want.
For example, with Attribute chosen, the attribute is color, and the equal sign was used to indicate we’re looking for a specific color (990000).
• Criteria. Click the Plus (+) button or the Minus (-) button to add or remove search criteria.
• Actions. Click to select from the available actions to perform, when a match is made.
![]() Select from the following Find and Replace options:
Select from the following Find and Replace options:
• Match Case. Select to make the Find text case sensitive.
• Match Whole Word. Select to match whole words.
• Ignore Whitespace. Select to treat all whitespace as a single space for the purpose of matching.
• Use Regular Expression. Select to use string expressions to help locate information.

![]() Click Find Next, Find All, Replace, Replace All to perform the find and replace.
Click Find Next, Find All, Replace, Replace All to perform the find and replace.
Dreamweaver looks for the specific tag and makes the change you specify.
![]() Click Close to end the Find and Replace routine.
Click Close to end the Find and Replace routine.

See Also
See “Finding and Replacing Text or Code” on page 120 for information on using the Find and Replace command.
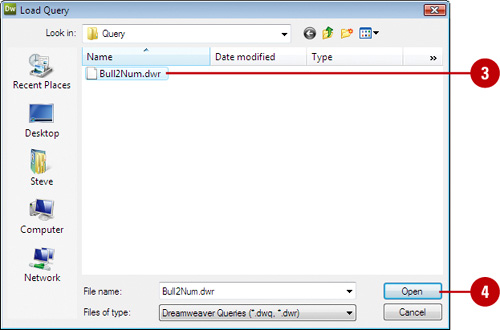
If you create a complex search and want to use it again, you can save it as a query, and use it over and over again. When you save a query in the Find and Replace dialog box, Dreamweaver saves the file with the extension .DWR. After you save a query, you need to load (open) it before you can use it. In addition to the .DWR extension, some queries from older versions of Dreamweaver may use the extension .DWG.
![]() Click the Edit menu, and then click Find And Replace.
Click the Edit menu, and then click Find And Replace.
![]() Create a Find and Replace search using any of the methods described in the previous sections.
Create a Find and Replace search using any of the methods described in the previous sections.

![]() Click the Save Query button.
Click the Save Query button.
![]() Select a location for the query (default: working site folder).
Select a location for the query (default: working site folder).
![]() Enter a descriptive name for the query.
Enter a descriptive name for the query.
![]() Click Save to record and save the query.
Click Save to record and save the query.