
What You’ll Do
Now that you’ve created a Web page, it’s time to throw in some text to get the message across. Text comes in many forms: from headings and paragraphs, bulleted points, and body text written especially for the Web. Your job as a Web designer is to make it all flow together in a logical, attractive, understandable fashion.
Many designers who come from the professional printing industry are surprised at the lack of typographic control on a normal Web page. Specific fonts are suggested, not specified, sizes are relative, and line spacing seems to be imaginary. Designers of print-to-paper are used to exacting standards and control. For example, tell a print designer that although he specified the Benguiat font to be used in his brochure design, the readers might wind up with Times New Roman, or Garamond. That designer would be out the door and looking for a new print shop. Yet, that’s what sometimes happens on the Internet.
Some Web designers, to achieve the desired look, respond by converting their text into graphics, but don’t. For one reason, text converted into graphics bloats the size of the page and increases download times; another reason is that text converted to graphics is not searchable.
Cascading Style Sheets (CSS) are more and more becoming a real option and give the Web designer almost as much control as the print designer.
In this chapter we’re going to talk about text as it relates to standard Web page construction: adding text to a page, modifying text, using text to attract attention, formatting text, checking text... text, text, text.
Working with text is not just about placing letters on a page; it’s about using text as a page design element and it’s also about readability. What’s the use of adding text to a Web page if it’s too small to read, or the font is not one that renders well on a pixel-based monitor? Remember, there are fonts that look good on paper, and fonts that look good on a computer monitor. Dreamweaver is going to help us out with the formatting part of the equation; it’s up to you to make the words sound good. The cool thing about working with text in Dreamweaver is the choices you have; for example, you can choose to type text directly into a page, or copy and paste the text from a word processing document. Text is added to the Web page in several ways: you can open up a blank Web page and just start typing; however, you have very little control over text formatting. Another way is to create a table, and insert the text into the individual table cells. This gives you the ability to control your margins and paragraph formatting. The newest way is through the use of individual layers. Layers not only give you the ability to control your paragraph formatting; in addition, they give you the ability to move the layers, even stacking one layer on another.
![]() Open the Web page you want to add text.
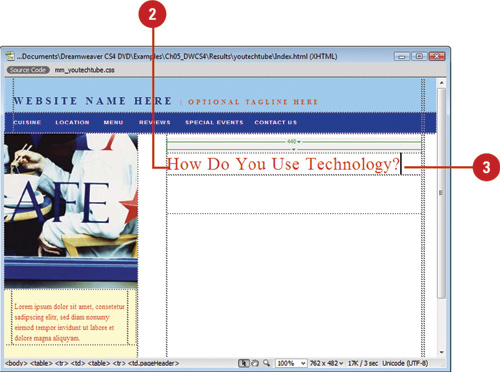
Open the Web page you want to add text.
In this example we use a Web page with an inserted table.
![]() Click with your mouse in the table cell that you want to add text.
Click with your mouse in the table cell that you want to add text.
![]() Begin typing the text that you want to add.
Begin typing the text that you want to add.
![]() Press the Enter (Win) or Return (Mac) key to start a new paragraph.
Press the Enter (Win) or Return (Mac) key to start a new paragraph.
Dreamweaver adds text based on its default formatting parameters, and automatically wraps the text when it comes to the end of the table cell.
If you have data in tabular form, such as a database or spreadsheet, you can import the data as delimited text files. Before you can import the data, you need to export or save the data in the database or spreadsheet as a delimited text file, which is a file format with the data separated by tabs, commas, colons, or semicolons. From here, you can import the data file to your page in Dreamweaver and format it as a data table. When you import the data, you can specify the table layout and formatting options you want.
![]() Open the Web page you want to import content.
Open the Web page you want to import content.
![]() Click in the location where you want to insert content.
Click in the location where you want to insert content.
![]() Click the File menu, point to Import, and then click Tabular Data.
Click the File menu, point to Import, and then click Tabular Data.
![]() Click Browse, navigate to the location with the file you want to import, select the delimited file, and then click Open.
Click Browse, navigate to the location with the file you want to import, select the delimited file, and then click Open.
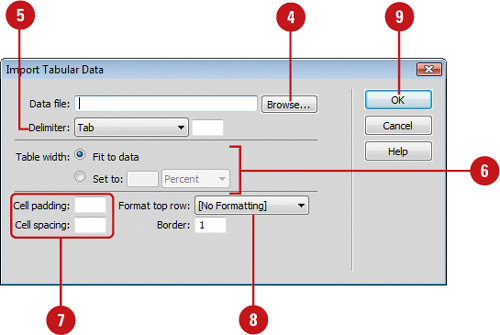
![]() Click the Delimiter popup, and then select the delimiter type you used when you exported or saved the file.
Click the Delimiter popup, and then select the delimiter type you used when you exported or saved the file.
![]() Click the Fit To Data or Set To option. If you selected the Set to option, enter a specific width or a percentage of the browsers window width you want (in pixels).
Click the Fit To Data or Set To option. If you selected the Set to option, enter a specific width or a percentage of the browsers window width you want (in pixels).
![]() Enter the cell padding and cell spacing you want (in pixels).
Enter the cell padding and cell spacing you want (in pixels).
![]() Click the Format Top Row popup, select the formatting option you want, and then enter the table border width you want (in pixels).
Click the Format Top Row popup, select the formatting option you want, and then enter the table border width you want (in pixels).
![]() Click OK.
Click OK.
If you’re a Windows user you can import Microsoft documents directly onto your Web pages. You can use the Import submenu on the File menu to import content from Microsoft Word or Microsoft Excel documents into your Web pages. If you want to create a link to a Microsoft Word or Excel document, you can simply drag the document file to where you want the link in your page. If the document files is not located inside the local root folder, Dreamweaver prompts you to copy the file to the root to maintain proper site organization. In addition, when you upload your page to your Web server, you need to make sure you also upload the Microsoft Word or Excel document, so the link works properly.
![]() Open the Web page you want to import Microsoft content.
Open the Web page you want to import Microsoft content.
![]() Click in the location where you want to insert content.
Click in the location where you want to insert content.
![]() Click the File menu, point to Import, and then click Word Document or Excel Document.
Click the File menu, point to Import, and then click Word Document or Excel Document.
![]() Navigate to the location with the Microsoft document you want to import.
Navigate to the location with the Microsoft document you want to import.

![]() Select the document.
Select the document.
![]() Click Open.
Click Open.
See Also
See “Cleaning Up Word HTML” on page 464 for information on cleaning HTML in a Word document.
![]() Open the Web page where you want to create a link to Microsoft content.
Open the Web page where you want to create a link to Microsoft content.
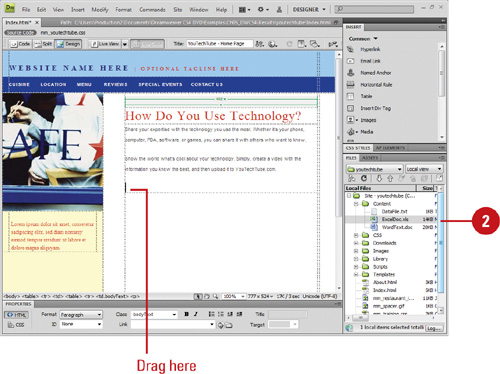
![]() Drag the Word or Excel file from its current location to your page and position the link where you want it.
Drag the Word or Excel file from its current location to your page and position the link where you want it.
• You can use the Files panel to drag a file to the Document window. Click the Window menu, and then click Files.
![]() Click the Create A Link option.
Click the Create A Link option.
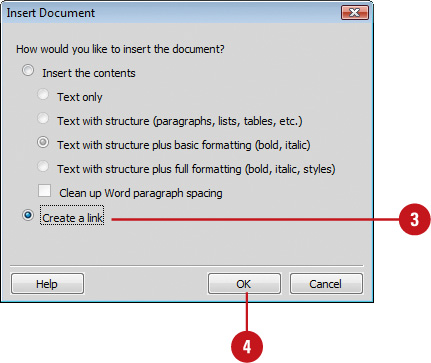
![]() Click OK.
Click OK.
![]() If the document file is not located inside your root folder, click Yes to copy the document to the site root.
If the document file is not located inside your root folder, click Yes to copy the document to the site root.
The Copy File As dialog box opens.
![]() Click Save.
Click Save.
The name of the linked file appears as the link text, which you can change.
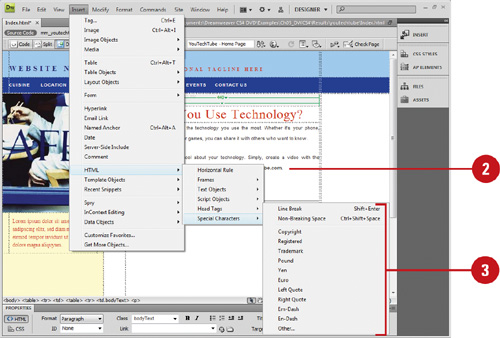
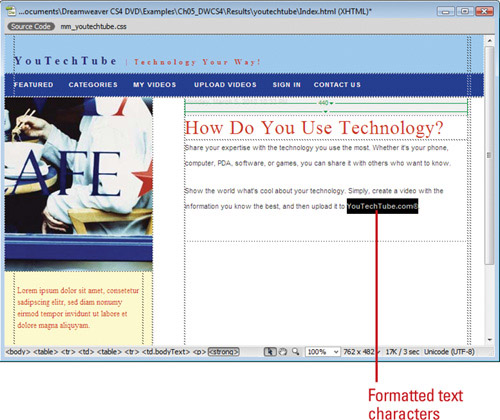
In word processing you have all the letters of the alphabet, and you have special characters. Special characters help to further define what you’re saying. For example, you could say that your Web site has a copyright date of 2007, or you could use a special character, and say it this way: ©2007. HTML only allows one space between characters. If you want to add more, you can use the Non-Breaking Space command on the Special Characters submenu. The Special Characters submenu also allows you to insert other characters, such as character with accents and other international characters. However, the visitor’s browser must support the “other” character inserted for it to be visible to the user; therefore testing is essential. In addition to special characters, you have the ability to add things like the current date and even the time, and have the date/time items automatically update with the passage of time. When you use the Insert Date option your pages will always reflect the correct date.
![]() Open the Web page you want to insert special characters.
Open the Web page you want to insert special characters.
![]() Click to place the insertion point where you want to insert text.
Click to place the insertion point where you want to insert text.
![]() Choose one of the following options:
Choose one of the following options:
• Click the Insert menu, point to HTML, point to Special Characters, and then select a special character from the available options.
• Select the Text tab on the Insert bar, click the Characters button, and then select from the available special character options.
Dreamweaver places the special character at the insertion point.
Did You Know?
You can add space between characters. Press Control+Shift+Spacebar (Win) or Option+Spacebar (Mac).
![]() Open the Web page you want to insert other characters.
Open the Web page you want to insert other characters.
![]() Click to place the insertion point where you want to insert text.
Click to place the insertion point where you want to insert text.
![]() Click the Insert menu, point to HTML, point to Special Characters, and then click Other.
Click the Insert menu, point to HTML, point to Special Characters, and then click Other.
![]() Select a character from the available list. A copy of the HTML code used to display the character appears in the input window in the upper left.
Select a character from the available list. A copy of the HTML code used to display the character appears in the input window in the upper left.
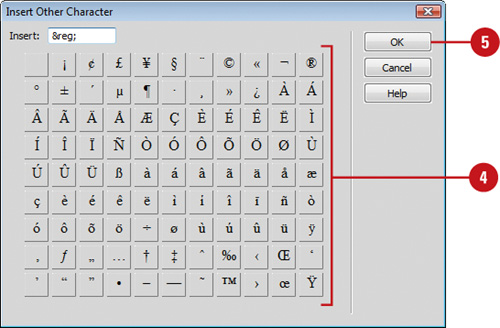
![]() Click OK.
Click OK.
![]() Open Dreamweaver, and then open a Web document.
Open Dreamweaver, and then open a Web document.
![]() Click to place the insertion point where you want to insert text.
Click to place the insertion point where you want to insert text.
![]() Choose from the following options:
Choose from the following options:
• Click the Insert menu, and then click Date.
• Select the Common tab on the Insert bar, and then click the Date button.
The Insert Date dialog box opens.
![]() Select the format you want the day and date to display.
Select the format you want the day and date to display.
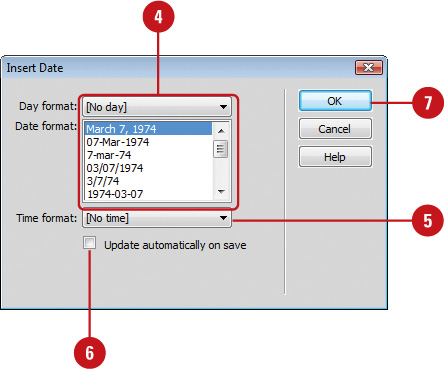
![]() Select a format for the time (optional).
Select a format for the time (optional).
![]() Select the Update Automatically On Save check box to update the date/time every time the page is saved.
Select the Update Automatically On Save check box to update the date/time every time the page is saved.
![]() Click OK.
Click OK.
Like any other application that process text, Dreamweaver needs a que from you as to what you want to do. If you plan to make a change to the current text, you need to inform Dreamweaver of that fact by making a selection. There are several ways that you can select text in Dreamweaver. The first thing to notice is that Dreamweaver does not have a specific text tool. That’s because the cursor is sensitive to the area it’s hovering over. For example, if you hover over an image, and click your mouse, Dreamweaver selects the image; however, if you’re hovering over a section of text and click your mouse, Dreamweaver turns into a text tool, and create an insertion point into the text. That’s why Dreamweaver doesn’t have that old familiar Toolbox, like you see in applications such as: Photoshop, Illustrator, and Flash because it’s the position of the cursor in the document that automatically determines what happens. Of course, once the text is selected, it can be modified, deleted, even copied.
• Single Click. Creates an insertion point within the body of text.
• Double Click. Selects a single word (separated by spaces or a paragraph return).
• Triple Click. Selects one paragraph (all text between two paragraph returns; including any punctuation).
• Click and Drag. Click within a body of text and drag the mouse to select a group of text. Release the mouse and the dragged text remains selected.
• Click release Shift Click. Click once within the body of text and release. Then move to another area, hold the shift key and click once. All the text between the two mouse clicks is selected.
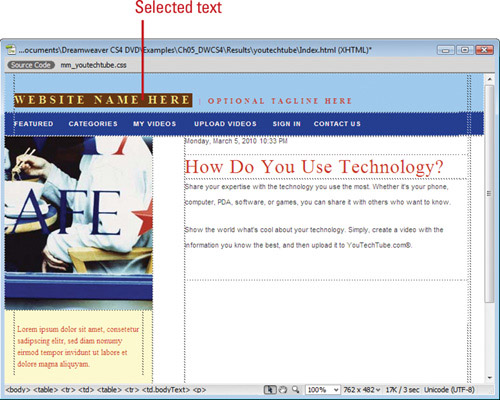
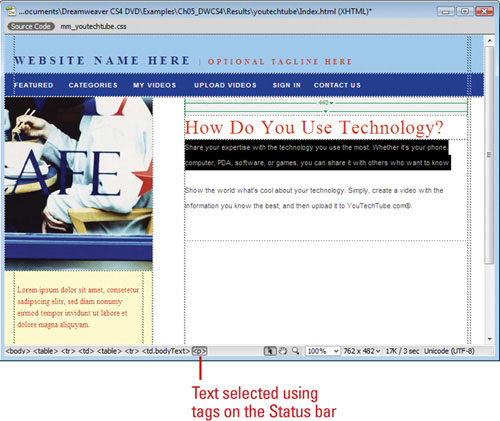
![]() Click to place the insertion point where you want to select text, and then look at the Status bar.
Click to place the insertion point where you want to select text, and then look at the Status bar.
The tags for the area you’ve selected appear on the left side of the Status bar.
![]() Click the specific tag you want in the Status bar to select the tag within the code.
Click the specific tag you want in the Status bar to select the tag within the code.
For example, when you click the <p> (paragraph) tag, all the text associated with that tag appears selected.
Did You Know?
The tag selector is not just for text. For example, if you choose an image <alt> tag, the corresponding image within the document will be selected. This is a quick and easy way to make selections within complex Web documents.
You can use the Select All command to select all of the text within the selected body. Click once within the text body, click the Edit menu, and then click Select All, or press Ctrl+A (Win) or
![]() +A (Mac).
+A (Mac).
If you cut or copy text from a file in any other application (word processor, spreadsheet, or database), Dreamweaver inserts the copied text at the insertion point of the cursor. Understand that the default Paste command has limited control over the formatting of text: It can only paste plain, unformatted text; bold, italic, or other formatting options are not carried over with the text... unless you’re using Microsoft Word. By default, performing a copy/paste command from MS Word retains most font formatting. Unfortunately, unless you change the Preferences of the Paste option, the Copy/Paste commands have limited control over text. For example, you have a heavily formatted section of text in Microsoft Word and you want to bring the text into Dreamweaver without any formatting because you plan to use a Style Sheet to do all the document formatting. That’s where the Paste Special command comes into play. With Paste Special, you can control what formatting options are used when pasting the text.
![]() Open a text document within your word processor (i.e. Microsoft Word).
Open a text document within your word processor (i.e. Microsoft Word).
![]() Select the text that you want to paste into Dreamweaver.
Select the text that you want to paste into Dreamweaver.
![]() Click the Edit menu, and then click Copy, or click the Copy button on the Standard toolbar or Home tab (Vista).
Click the Edit menu, and then click Copy, or click the Copy button on the Standard toolbar or Home tab (Vista).
![]() Open Dreamweaver, and the Web page you want to add the text.
Open Dreamweaver, and the Web page you want to add the text.

![]() Click to place the insertion point where you want to insert text.
Click to place the insertion point where you want to insert text.
![]() Click the Edit menu, and then click Paste.
Click the Edit menu, and then click Paste.
Dreamweaver pastes the copied text at the insertion point.
Did You Know?
You can access the copy/paste preferences directly from the Paste Special dialog box. When you select the Paste Special command, simply click the Paste Preferences button, and you can make your changes permanent.
![]() Open a text document within Microsoft Word.
Open a text document within Microsoft Word.
![]() Select the text that you want to paste into Dreamweaver.
Select the text that you want to paste into Dreamweaver.
![]() Click the Edit menu, and then click Copy, or click the Copy button on the Standard toolbar or Home tab (Vista).
Click the Edit menu, and then click Copy, or click the Copy button on the Standard toolbar or Home tab (Vista).
![]() Open Dreamweaver, and the Web page you want to add the text.
Open Dreamweaver, and the Web page you want to add the text.
![]() Click to place the insertion point where you want to insert text.
Click to place the insertion point where you want to insert text.
![]() Click the Edit menu, and then click Paste Special.
Click the Edit menu, and then click Paste Special.
![]() Select from the following options:
Select from the following options:
• Text Only. Pastes text without formatting.
• Text With Structure (paragraphs, lists, tables, etc.). Pastes structured text without formatting.
• Text With Structure Plus Basic Formatting (bold, italic). Pastes structured text and simple HTML formatting.
• Text With Structure Plus Full Formatting (bold, italic, styles). Pastes structured text, HTML formatting, and CSS styles.
• Retain Line Breaks. Select this option to keep line breaks.
• Clean Up Word Paragraph Spacing. Select this option if you’ve chosen Text With Structure, or Text With Structure Plus Basic Formatting, and want to eliminate extra spacing between paragraphs.
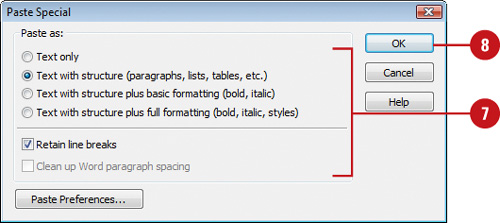
![]() Click OK.
Click OK.
You can use the Copy/Paste section of the Preferences dialog box to customize how the Paste command inserts text into a Web page. You can set special paste preferences as default options to paste text from other programs. You can set options to paste text only, text with structure, such as paragraphs, list and tables, and text with structure and formatting, including HTML and CSS styles.
![]() Click the Dreamweaver (Mac) or Edit (Win) menu, and then click Preferences.
Click the Dreamweaver (Mac) or Edit (Win) menu, and then click Preferences.
![]() Click the Copy/Paste category.
Click the Copy/Paste category.
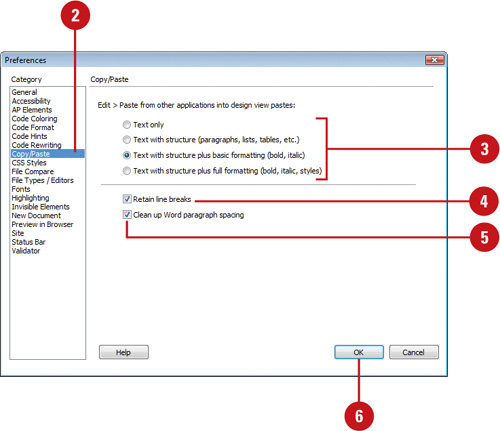
![]() Select from the following check boxes:
Select from the following check boxes:
• Text Only. Pastes unformatted text.
• Text With Structure (paragraphs, lists, tables, etc.). Pastes structured text without formatting.
• Text With Structure Plus Basic Formatting (bold, italic). Pastes structured text and simple HTML formatting.
• Text With Structure Plus Full Formatting (bold, italic, styles). Pastes structured text, HTML formatting, and CSS styles.
![]() Select the Retain Line Breaks check box to keep line breaks in pasted text.
Select the Retain Line Breaks check box to keep line breaks in pasted text.
![]() Select the Clean Up Word Paragraph Spacing check box if you selected the Text with Structure or Text with Structure Plus Basic Formatting option, and want to eliminate extra space between paragraphs when you paste your text.
Select the Clean Up Word Paragraph Spacing check box if you selected the Text with Structure or Text with Structure Plus Basic Formatting option, and want to eliminate extra space between paragraphs when you paste your text.
![]() Click OK.
Click OK.
When you select one of Dreamweaver’s default fonts, you’ll notice that they come in groups of three: A primary font, secondary font, and general font. This is known as a font combination. Font combinations determine how a browser displays text in your Web page. A browser uses the first font in the combination that is installed on the user’s system. For example, if you choose the Arial and the visitor does not have Arial, the browser attempts to find Helvetica, if it can’t find Helvetica, it substitutes a sans-serif font. If none of the fonts in the combination are installed, the browser displays the text as specified by the user’s browser preferences. You can use the Edit Font List command to set the font combinations that appear in the Properties panel and the Font submenu on the Format menu.
![]() Click the Format menu, point to Font, and then click Edit Font List.
Click the Format menu, point to Font, and then click Edit Font List.
![]() Select the font combination you want to edit.
Select the font combination you want to edit.
![]() Use any of the following to add, modify, or remove the selected font combination.
Use any of the following to add, modify, or remove the selected font combination.
• New Combination. Click the Add button (Plus), select a font from the Available fonts list, and then click Left Arrow button to add it to the font list.
• Delete Combination. Select the font combination you want to remove, and then click the Subtract button (Minus).
• Add Fonts. Select a font from the Available fonts list, and then click Left Arrow button to add it to the font list.
• Remove fonts. Select a font from the Chosen fonts list, and then click Right Arrow button to remove it from the font list.
• Change Combination Order. Select the font combination you want to arrange, and then click the Up or Down arrows.
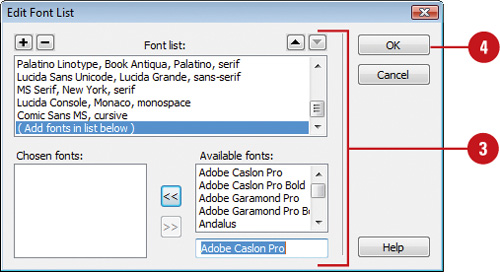
![]() Click OK.
Click OK.

DW 4.4
Selecting text is one thing; knowing what to do with it once it’s been selected is another. Dreamweaver has a set of character formatting tags that allows you to change the size, color and style of the text, and then generate the specific HTML tags. Remember, formatting text is not just about changing the text; you also have you ask yourself the question of why you’re changing it. Does that heading text really need to be THAT big... Is it OK to change the color of text to red? Many a good Web site has gone down the tubes because of bad design. Remember, do not change the text just because you can; change it because it reflects the overall design of the site.
![]() Open the Web page you want to format.
Open the Web page you want to format.
![]() Select a word inside the text that you want to modify.
Select a word inside the text that you want to modify.

![]() Click the Window menu, and then click Properties to open the Properties panel.
Click the Window menu, and then click Properties to open the Properties panel.
![]() Click HTML to format HTML tags or click CSS to modify CSS.
Click HTML to format HTML tags or click CSS to modify CSS.

![]() Choose from the following type of formatting options:
Choose from the following type of formatting options:
• Format. Click the button and choose from the predefined styles. Leave this option at its default value.
• Class. Displays the class style currently applied to the text. If no styles have been applied the option displays No CSS. Leave this option at its default value.
• Bold. Click to bold the selected text.
• Italic. Click to italicize the selected text.
• Font. Click to change the font type of the selected text.
• Size. Click the Size button, and then first choose how you want to measure font sizes (percent, pixels, points, etc), and then change the size in the input field. For example, if you’re fonts by percentage (default), and you change the size to 50 percent, the selected text will be half the size of the standard font; 200 percent, twice the size, etc.
• Text Color. Click the Text Color button, and then choose a new color for the selected text, or click in the coding box and type in the hexadecimal code value for the desired color.

Note
Hexadecimal codes are preceded by a pound sign (#), and are three sets of double-digit number values representing the percentages of red, green, and blue, respectively.
Did You Know?
You can make multiple formatting changes at once. After you select the text you want to change, if you click the Page Properties button on the Properties panel, you can perform all of your formatting changes to the text, and change options to the Page Properties at the same time.
DW 4.4
Paragraph text formatting differs from standard text formatting in one way: The changes made impact the entire paragraph, not just the individual words. For this reason, paragraph formatting does not require you to select the paragraph; you just have to click inside the paragraph you want to change. Once the paragraph is selected you can work with Dreamweaver’s paragraph style options.
![]() Open the Web page you want to format.
Open the Web page you want to format.
![]() Select a word inside the text that you want to modify.
Select a word inside the text that you want to modify.
![]() Click the Window menu, and then click Properties to open the Properties panel.
Click the Window menu, and then click Properties to open the Properties panel.
![]() Click HTML to format HTML tags or click CSS to modify CSS.
Click HTML to format HTML tags or click CSS to modify CSS.

![]() Choose from the following type formatting options:
Choose from the following type formatting options:
• Format. Click the Format button and select one of the available options.
Note
The paragraph style applies the default style for an <p> HTML tag, as do the H1 thru H6 Heading styles.
• Align. Select one of the justification buttons: Align Left, Align Right, Align Center, or Justify to change the justification of the active paragraph.
• Indent. Click the Text Indent or Text Outdent button to indent (in or out) the left margin of the text paragraph.
• Ordered/Unordered. Click the Ordered List or Unordered List button to convert the select paragraph into a list.

The formatting options are applied to the selected text.
One of the problems with formatting text on a Web page is the problem of controlling line spacing. For example, when you press the Enter key to create a new paragraph, HTML create a <p> or paragraph tag, jumps you down to the next line, and leaves a bit of extra space between the lines; however, what if you don’t want the extra space? HTML takes care of this pesky problem by giving us another obscure HTML code called a line break, or the <br> tag.
![]() Open the Web page you want to change.
Open the Web page you want to change.
![]() Click your mouse inside the document and begin typing.
Click your mouse inside the document and begin typing.

![]() Use either of the following to control line spacing:
Use either of the following to control line spacing:
• Paragraph. Press the Enter key.
Dreamweaver inserts the paragraph tag <p> into the text and adds extra line spacing between the two lines.
• Line Break. Press the Shift + Enter keys.
Dreamweaver inserts the line break tag <br> into the text and does not add any extra space between the lines.
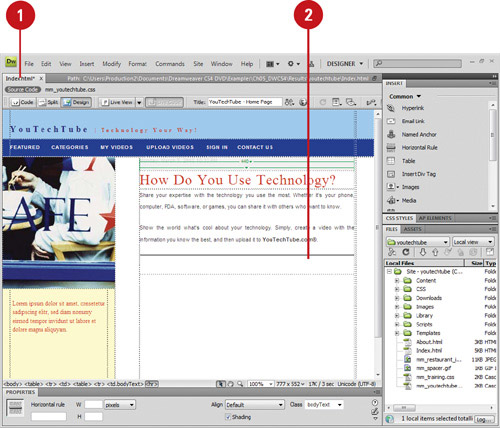
Horizontal lines have a variety of uses in the construction of a Web page. Whether they’re used to separate sections of a page or to underline an important piece of text, you have several decisions to make. Inserting a horizontal line provides a simple, yet effective way to highlight the information you want visitors to see. Lines have a variety of properties that you can modify, including width, height, alignment, and color.
![]() Open and display the Web page you want to use.
Open and display the Web page you want to use.
![]() Click where you want to insert a horizontal line.
Click where you want to insert a horizontal line.
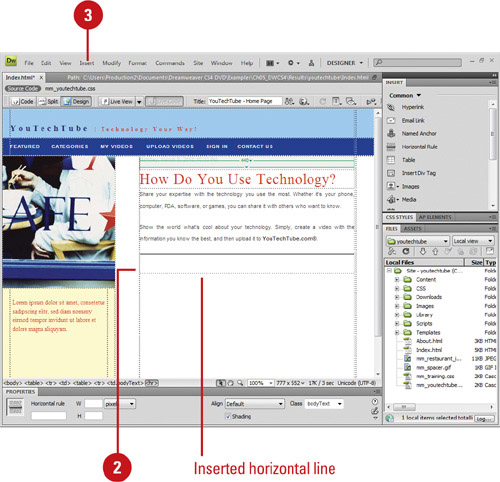
![]() Click the Insert menu, point to HTML, and then click Horizontal Rule.
Click the Insert menu, point to HTML, and then click Horizontal Rule.
![]() Open and display the Web page with the horizontal line you want to change.
Open and display the Web page with the horizontal line you want to change.
![]() Select the horizontal line you want to modify.
Select the horizontal line you want to modify.
![]() Select the formatting options you want in the Properties panel:
Select the formatting options you want in the Properties panel:
• W. Width of the line. Specified in pixels or as a percentage of the window width.
• H. Height of the line in pixels.
• Align. Alignment of the line on the page.
• Shading. Select the check box to create a shaded line.

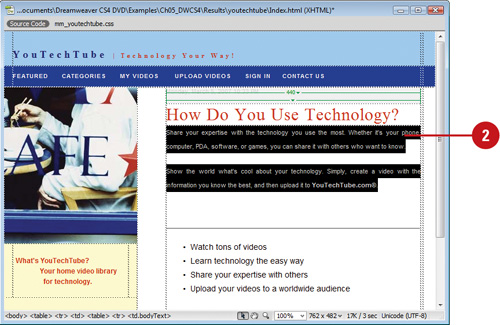
Most word processors have the ability to create bulleted or numbered lists of information. A bulleted list can itemize a topic’s points or catalog the properties of an object. A numbered list is helpful for giving step-by-step instructions. A list can break up the page and simultaneously draw the viewer’s eye to key details. Lists are an important alternative to the basic textual tools of paragraphs and headings. In this chapter, you can study Dreamweaver’s tools for designing and working with each of the three basic types of lists available in HTML: ordered lists, unordered lists, and definition lists. An ordered list is used when it’s important that the listed items appear in a sequential order. As a professional chef, I use ordered lists all the time for the steps to a specific recipe. An unordered list is used when the sequence of the listed items is of no great concern. Again, as a chef, I use unordered lists to display my list of ingredients to a recipe.
![]() Open the Web page you want to format.
Open the Web page you want to format.
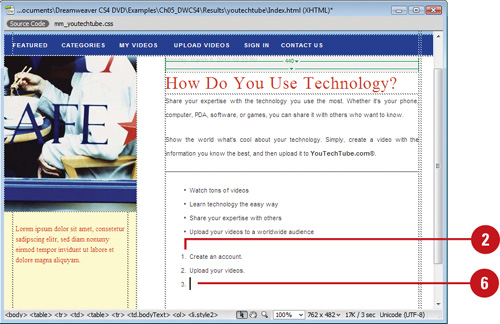
![]() Click within the document where you want to insert the ordered list, or select a group of text that you want to convert into a list.
Click within the document where you want to insert the ordered list, or select a group of text that you want to convert into a list.
![]() Click the Window menu, and then click Properties to display the Properties panel.
Click the Window menu, and then click Properties to display the Properties panel.
![]() Click HTML to format HTML tags.
Click HTML to format HTML tags.
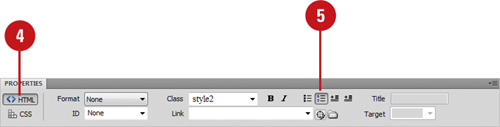
![]() Click the Ordered List button in the Properties panel.
Click the Ordered List button in the Properties panel.
Dreamweaver inserts the Roman numeral 1 into the document.
![]() To add items to the list, type an item, and then press Enter (Win) or Return (Mac).
To add items to the list, type an item, and then press Enter (Win) or Return (Mac).
Did You Know?
You can create a nested or indented list. A nested list is a list that contains another list. Select the items you want to nest, click the Indent button in the Properties panel, or click the Format menu, and then click Indent.
![]() Open the Web page you want to format.
Open the Web page you want to format.
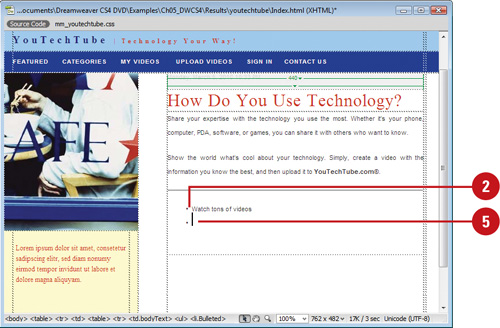
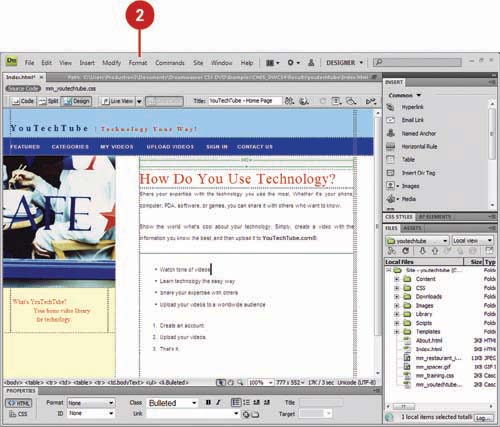
![]() Click within the document where you want to insert the unordered list, or select a group of text that you want to convert into a list.
Click within the document where you want to insert the unordered list, or select a group of text that you want to convert into a list.
![]() Click the Window menu, and then click Properties to display the Properties panel.
Click the Window menu, and then click Properties to display the Properties panel.
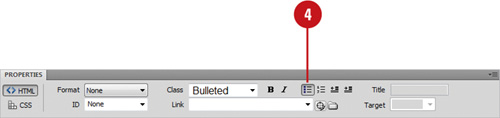
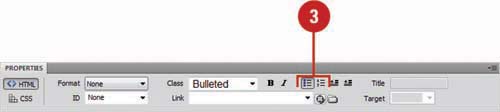
![]() Click the Unordered List button in the Properties panel.
Click the Unordered List button in the Properties panel.
Dreamweaver inserts a default round bullet into the document.
![]() To add items to the list, type an item, and then press Enter (Win) or Return (Mac).
To add items to the list, type an item, and then press Enter (Win) or Return (Mac).
![]() Open the Web page you want to format.
Open the Web page you want to format.
![]() Select the paragraphs you want to make into a list.
Select the paragraphs you want to make into a list.
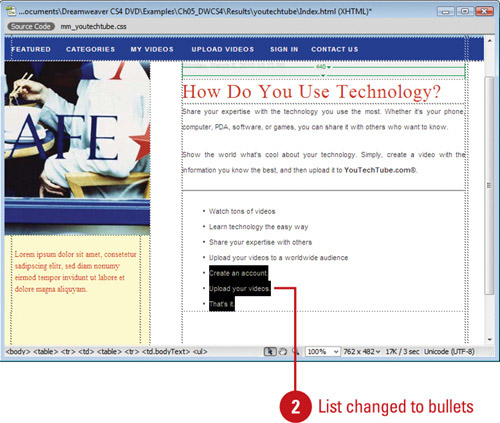
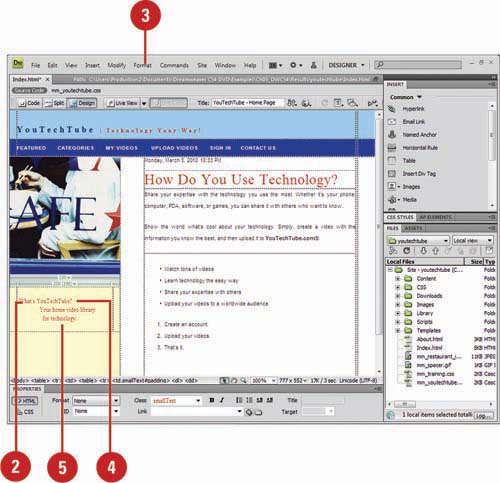
![]() Click the Unordered List or Ordered List button in the Properties panel, or click the Format menu, point to List, and then select the type of list you want: Unorder List, Ordered List, or Definition List.
Click the Unordered List or Ordered List button in the Properties panel, or click the Format menu, point to List, and then select the type of list you want: Unorder List, Ordered List, or Definition List.
A definition list doesn’t use leading characters (bullets or numbers) to map the items; instead, definition lists are used in areas like glossaries. I might create a definition list explaining cooking terminology. A definition list does not use bullets to identify the items, and it’s composed of two lines: the first line is for the name of the item, and the second line is indented and describes the item; hence the name, definition list. If you happen to have a very long definition, and you want to separate it into two or more paragraphs, don’t press the Enter key; that will take you to a new definition term. Simply press the Shift plus Enter key to create a soft return, and then type the second paragraph.
![]() Open the Web page you want to format.
Open the Web page you want to format.
![]() Click within the document where you want to insert the definition list.
Click within the document where you want to insert the definition list.
![]() Click the Format menu, point to List, and then click and then click Definition List.
Click the Format menu, point to List, and then click and then click Definition List.
![]() Type a definition term and press the Enter key. The new line is automatically indented.
Type a definition term and press the Enter key. The new line is automatically indented.
![]() Type in a definition description.
Type in a definition description.
![]() Press the Enter key to add another definition term, and press Enter again to add the corresponding definition description.
Press the Enter key to add another definition term, and press Enter again to add the corresponding definition description.
The Definition list can be continued for as long as you want.
![]() Press the Enter key twice to end the list and return to the normal paragraph style type.
Press the Enter key twice to end the list and return to the normal paragraph style type.
After you create a list, you can use the List Properties dialog box to make changes to it. Some of the list options you can change include number style, number reset, or bullet style. You can make changes to the entire list or to a specific item in the list.
![]() Click anywhere within the ordered list you want to modify, or click on a specific item that you want to change.
Click anywhere within the ordered list you want to modify, or click on a specific item that you want to change.
![]() Click the Format menu, point to List, and then click Properties.
Click the Format menu, point to List, and then click Properties.
![]() To modify the list use the following options:
To modify the list use the following options:
• Click the List Type popup, and then click Bulleted List, Numbered List, Directory List, or Menu List.
• Click the Style popup, and then select the style you want.
• Enter the starting number you want to use by the list (available only when creating a numbered list).
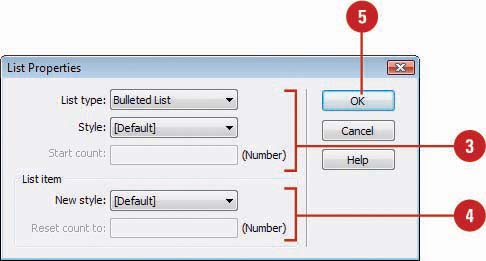
![]() To modify an individual item:
To modify an individual item:
• Click the New Style popup to change the style of the active list item.
• Enter the reset count number you want to use by the active list item (available only when creating a numbered list).
![]() Click OK.
Click OK.
Dreamweaver gives us the ability to change the style of text. A style is a collection of formatting settings saved with a Web site or template that you can apply to text, graphics, and tables at any time. Changing the style of text is useful when you want to draw the reader’s eyes to a particular phrase or word. For example, using a bold font might indicate that the word is very important. Dreamweaver accomplishes this by using two types of tags: physical tags and logical styles. Physical tags change how the text looks (bold, italic, underline, etc). Logical styles define a certain look or style. For example, a paragraph style, or a heading style changes the text, based on pre-defined values. In addition, when you use logical styles for HTML text, it becomes easier to find what you’re looking for. For example, you could conduct a search to find all paragraphs defined as citation text. Dreamweaver provides you with built-in styles, or you can create your own user-defined styles.
![]() Open the Web page you want to apply a text style.
Open the Web page you want to apply a text style.
![]() Select the character, word, or words that you want to apply the text style.
Select the character, word, or words that you want to apply the text style.
If you select a word or words and apply a style, the style will only affect the selected text. If you click inside a paragraph and apply a style, the style will change the entire paragraph.
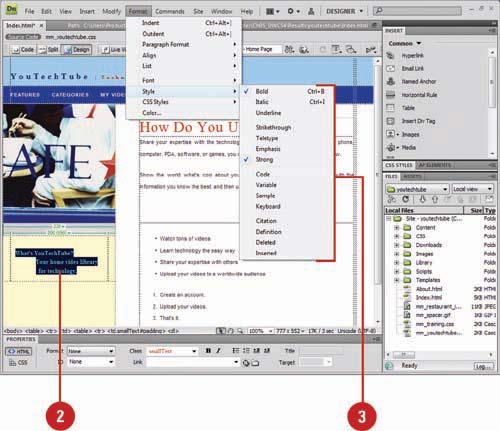
![]() Click the Format menu, point to Style, and then select from the following options:
Click the Format menu, point to Style, and then select from the following options:
![]() Open the Web page you want to apply a text style.
Open the Web page you want to apply a text style.
![]() Select the character, word, or words that you want to apply the text style.
Select the character, word, or words that you want to apply the text style.
If you select a word or words and apply a style, the style will only affect the selected text. If you click inside a paragraph and apply a style, the style will change the entire paragraph.
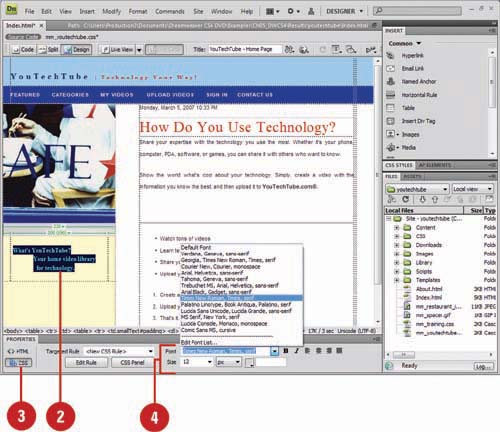
![]() Click CSS in the Properties panel to apply or create a CSS rule.
Click CSS in the Properties panel to apply or create a CSS rule.
![]() Choose from any of the following style options:
Choose from any of the following style options:
• Font. Click the Font popup, and then select the font style you want.
• Size. Click the Size popup, and then select the point size you want.
Note
You can also change the font using the Format menu. Click the Format menu, point to Font, and then select a style.
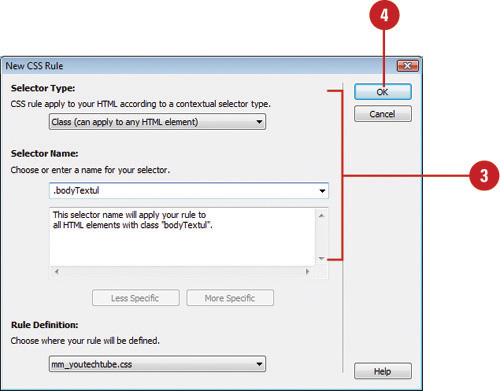
![]() If the New CSS Rule dialog box appears, select the following options:
If the New CSS Rule dialog box appears, select the following options:
• Selector Type. Specify a selector type: Class, ID, Tag, or Compound.
• Selector Name. Select or enter a name for your selector.
• Rule Definition. Select where to define the rule, either a the current document or external CSS file.
![]() Click OK.
Click OK.
While embedding physical tags or logical styles into a document is a very common way to change the look of text, the Web design community is moving to Cascading Style Sheets. Cascading Style Sheets can be used in conjunction with logical styles to define how that style works when viewed by the visitor, and give you more control over what your visitors will see. It’s also important to understand that the visual look of standard HTML styles and tags are defined by the browser application, and may appear different when viewed on different browsers. If you modify a style, you make the change once, but all text tagged with that style changes to reflect the new format.
![]() Open the Web page you want to create a customized style.
Open the Web page you want to create a customized style.
![]() Click the Format menu, point to CSS Styles, and then click New.
Click the Format menu, point to CSS Styles, and then click New.
![]() Choose from the following options:
Choose from the following options:
• Selector Type. Select the Class (can apply to any tag) option.
• Selector. Enter a name for the style.
Note
Class names should begin with a period (if you don’t add it, Dreamweaver will), and have no spaces or additional punctuation.
• Define In. Select the This Document Only option or select an existing external style sheet.
![]() Click OK.
Click OK.
![]() Click the Type category.
Click the Type category.
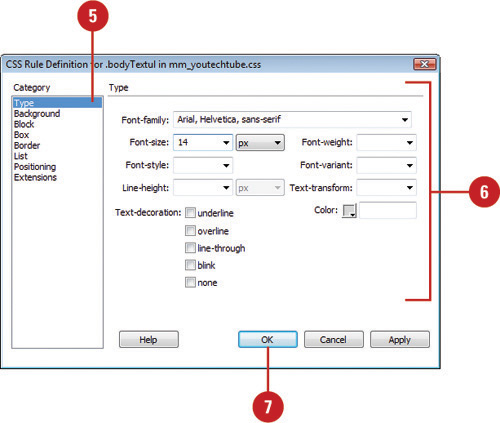
![]() Format the font based on the available options.
Format the font based on the available options.
![]() Click OK.
Click OK.
![]() Open the Web page you want to apply a CSS text style.
Open the Web page you want to apply a CSS text style.
![]() Select in the paragraph that you want to apply the custom style.
Select in the paragraph that you want to apply the custom style.
Remember the style you created can only be used within the original document. If you open another document, you will not be able to use this new style.
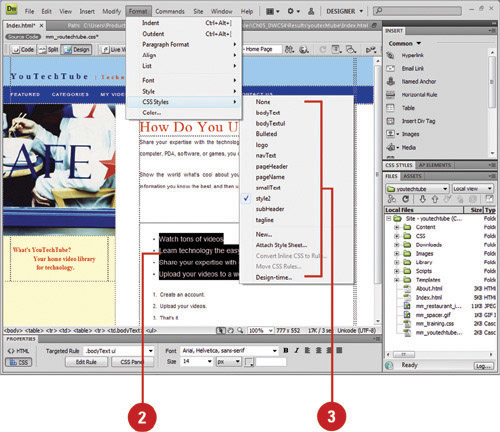
![]() Click the Format menu, point to CSS Styles, and then click on the name of the new style.
Click the Format menu, point to CSS Styles, and then click on the name of the new style.
Timesaver
You can also change the Style in the Properties panel. Click the Style popup, and then select the style you want to apply.
The new style is applied to the selected text.
If you no longer like the name you specified for a style or the name doesn’t adequately describe the formatting style, you can rename it using the Style popup in the Properties panel. The Style popup provides access to the Rename command where you can change the name of a style.
![]() Open the Web page you want to rename a style.
Open the Web page you want to rename a style.
![]() Click the Window menu, and then click Properties to open the Properties panel.
Click the Window menu, and then click Properties to open the Properties panel.
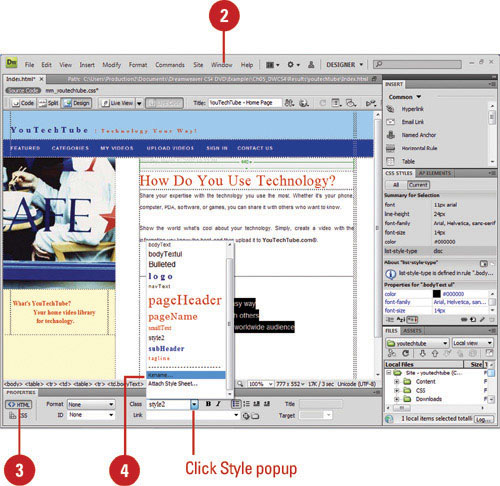
![]() Click HTML in the Properties panel.
Click HTML in the Properties panel.
![]() Click the Style popup, and then click Rename.
Click the Style popup, and then click Rename.
![]() Click the Rename Style popup, and then select the style you want to rename.
Click the Rename Style popup, and then select the style you want to rename.
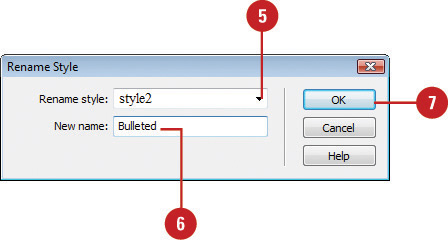
![]() Type a new name for the style.
Type a new name for the style.
![]() Click OK to close the dialog box and save your changes.
Click OK to close the dialog box and save your changes.
The Results panel appears, displaying the selected style.
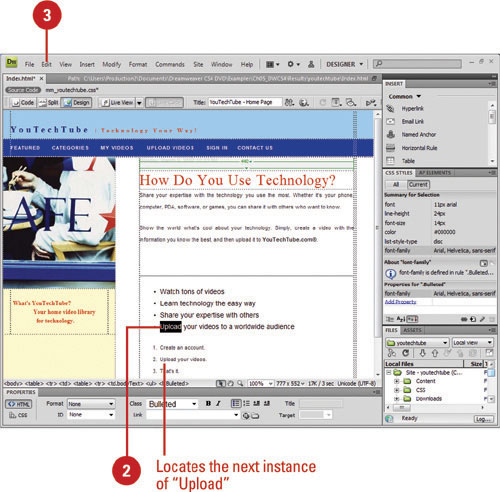
If you need to quickly find another instance of a word or phrase in a Web page, you can use the Find Selection command instead of the Find and Replace command. All you need to do is select an instance of the text or phrase you want to find, and then select the Find Selection command on the Edit menu, or press Shift+F3. After you find the selection, you can use the Find Next command to locate the next occurrence of the selection.
![]() Open the Web page you want to find text.
Open the Web page you want to find text.
![]() Select a word or phrase.
Select a word or phrase.
![]() Click the Edit menu, and then click Find Selection.
Click the Edit menu, and then click Find Selection.
Dreamweaver goes through the document, finds and highlights the next occurrence of the selected word.
![]() To locate the next occurrence of the word, click the Edit menu, and then click Find Next.
To locate the next occurrence of the word, click the Edit menu, and then click Find Next.
DW 5.4
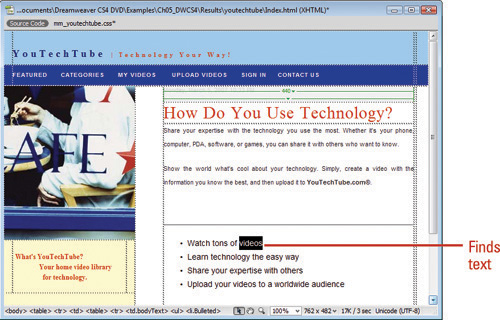
Suppose that you discover you need to change a word throughout a Web page or entire site. You do not need to read through the document to find every instance of the word and manually change it. The Find and Replace command can do that for you. Dreamweaver can find every instance for you, and walk you through the Web site from page to page until all the corrections have been made. In addition to text, you can also find and replace code. You can search one or more Web page or an entire Web site. The results of performing a Find All and Replace All appear within the Results window under the Search tab, and results remain there until the next time you perform a Find All or Replace All. If you select a word or group of words before opening the Find and Replace dialog box, the words automatically are added to the Find box.
![]() Open the Web page you want to find and replace text.
Open the Web page you want to find and replace text.
![]() Click the Edit menu, and then click Find and Replace.
Click the Edit menu, and then click Find and Replace.
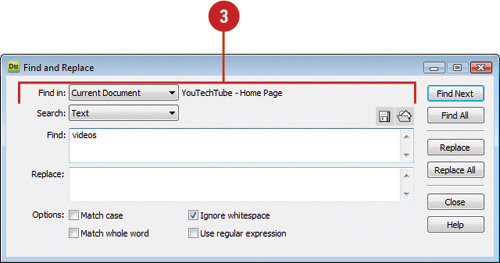
![]() Choose from the following Find and Replace options:
Choose from the following Find and Replace options:
• Find In. Click to determine what documents you want to search; everything from the current document to the entire site.
• Search. Click to determine what logical parts (Text or Source Code) of the document you want searched.
• Find. Enter the text that you want to find.
• Replace. Enter the text (optional) that you want to use to replace the text entered in the Find input box.
• Load Query. Click Load Query button to load a previously saved Find and Replace query.
• Save Query. Click Save Query button to save the current Find and Replace query.
![]() Choose from the following Find and Replace options:
Choose from the following Find and Replace options:
• Match Case. Select to make the Find text case sensitive (charlie, as opposed to Charlie).
• Match Whole Word. Select to match whole words.
• Ignore Whitespace. Select to treat all whitespace as a single space for the purpose of matching.
• Use Regular Expression. Select to use string expressions to help locate information.

![]() Choose from the following controls to find what you want:
Choose from the following controls to find what you want:
• Find Next. Find the next occurrence of the Find input field, based on the current position of the cursor.
• Find All. Find all occurrences of the Find input field.
• Replace. Find the next occurrence of the Find input field and replace it with the text in the Replace field.
• Replace All. Find all occurrences of the Find input field and replace with the text in the Replace field.
![]() Click Close to exit the Find and Replace dialog box.
Click Close to exit the Find and Replace dialog box.
The Results panel appears for the Find All and Replace All.
Timesaver
Press F3 (Win) or
![]() +G (Mac) to perform a search again without displaying the Find and Replace dialog box.
+G (Mac) to perform a search again without displaying the Find and Replace dialog box.
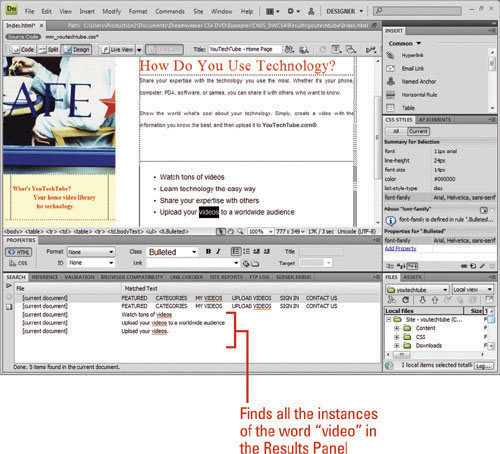
The results of performing a Find All and Replace All search in the Find and Replace dialog box appear within the Results window under the Search tab. The search results remain there until the next time you perform a Find All or Replace All. You can access the search results by opening the Results panel. Within the Results panel, you can quickly highlight a specific result, open the Find and Replace dialog box, stop a search in progress, and save the search results in the XML.
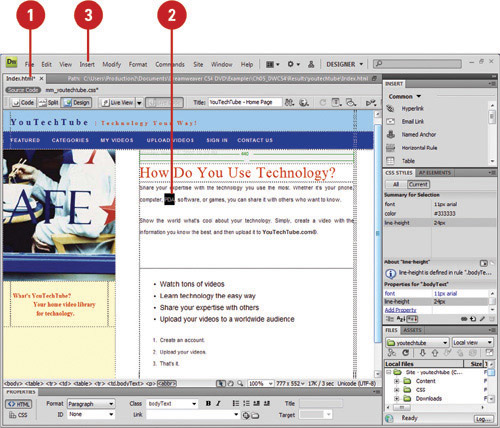
![]() Open the Web page you want to find and replace text.
Open the Web page you want to find and replace text.
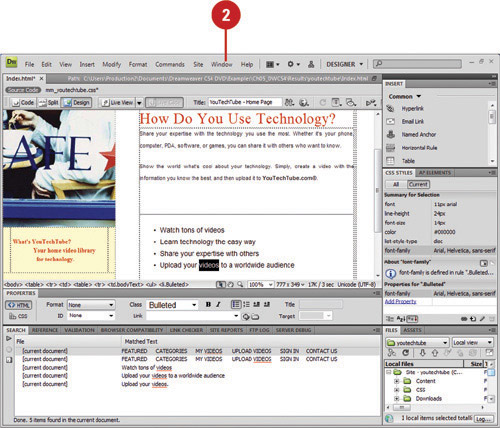
![]() Click the Window menu, and then click Results to open the Results panel.
Click the Window menu, and then click Results to open the Results panel.
The list of pages containing the previous search results opens in the Results panel at the bottom of the Dreamweaver window.
![]() Click the Search tab if necessary.
Click the Search tab if necessary.
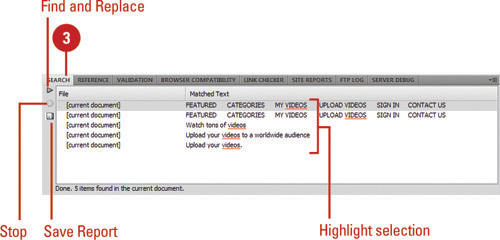
![]() Choose from the following Find and Replace options:
Choose from the following Find and Replace options:
• Highlight Selection. Double-click a selection from the Results panel to open the file if necessary and highlight the selection in the document.
• Find and Replace. Click to open the Find and Replace dialog box.
• Stop. Click to stop a search in progress.
• Save Report. Click to save the search results as a report in the XML file format.
![]() Click the Window menu, and then click Results to close the Results panel.
Click the Window menu, and then click Results to close the Results panel.
If your Web page contains acronyms, such as MADD for Mothers Against Drunk Driving, and abbreviations, such as CE for Copy Editor, you can define them using HTML tags for use with search engines, spell checkers, language translation programs, or speech synthesizers.
![]() Open the Web page you want to define an acronym or abbreviation.
Open the Web page you want to define an acronym or abbreviation.
![]() Select the acronym or abbreviation in the text.
Select the acronym or abbreviation in the text.
![]() Click the Insert menu, point to HTML, point to Text Objects, and then click Acronym or Abbreviation.
Click the Insert menu, point to HTML, point to Text Objects, and then click Acronym or Abbreviation.
![]() Enter the full text of the acronym or abbreviation.
Enter the full text of the acronym or abbreviation.
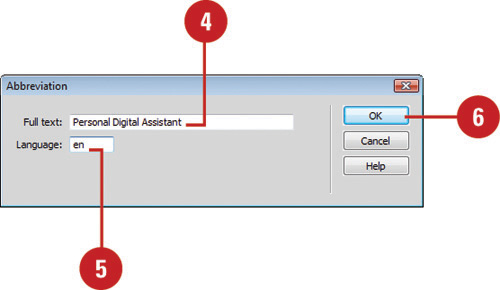
![]() Enter the language you want, such as en for English, it for Italian, or de for German.
Enter the language you want, such as en for English, it for Italian, or de for German.
![]() Click OK.
Click OK.
One of the worst things that you can do (well, almost one of the worst) is to have misspelled words on your Web page. Not only do they distract the reader, they distract from the overall impression of professionalism that you’re trying to imply. Besides, since everyone on the planet knows there’s something called a spellchecker there’s simply no excuse for misspelled words. Fortunately, Dreamweaver includes a simple spellchecker to help avoid such awkward moments. You should always spell check a Web page before it’s moved online. One other fine point: Using a spellchecker does not mean that the words are used correctly. For example, to, too, and two, are all spelled correctly; however, they have very different meanings. So, the order of events follows: Spell Check first; then read the text (called type editing), and be sure that it makes sense.
![]() Open the Web page you want to spell check.
Open the Web page you want to spell check.
![]() Click the Commands menu, and then click Check Spelling.
Click the Commands menu, and then click Check Spelling.
Dreamweaver begins the spell check process and stops on the first problem word.
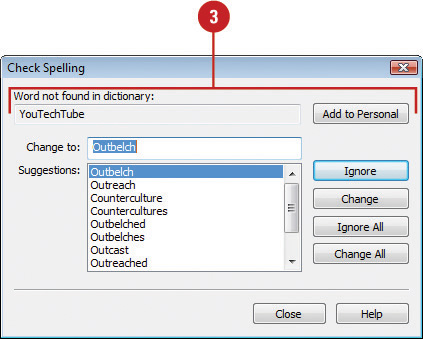
![]() Use the following options to work with the problem word:
Use the following options to work with the problem word:
• Word Not Found In Dictionary. Displays the offending word, and highlights the word in the Web page document.
• Change To. Type in the word you want to use to substitute for the offending word.
• Suggestions. Choose an option from the listed suggestions.
• Add To Personal. Click to add the offending word to Dreamweaver’s personal dictionary. Excellent for names or technical terms that are spelled correctly, but keep coming up as misspelled.
![]() Choose from the following controls to change the selection:
Choose from the following controls to change the selection:
• Ignore. Ignore the word, proceed to the next offending word, and don’t add the word to the personal dictionary.
• Change. Change the word; based on the text in the Change To dialog box, or the appropriate selected suggestion.
• Ignore All. Ignore all occurrences of the offending word, but don’t add to the personal dictionary.
• Change All. Change all occurrences of the offending word.
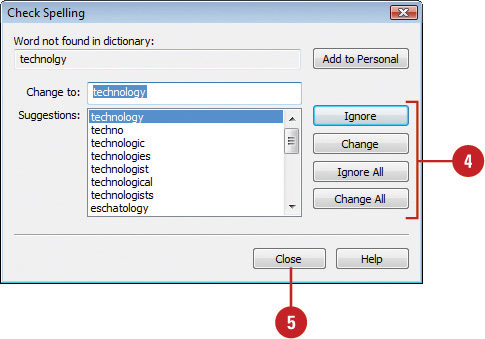
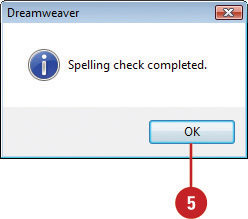
![]() Click Close to close the Check Spelling dialog box, or click OK when the spell check is completed.
Click Close to close the Check Spelling dialog box, or click OK when the spell check is completed.
Did You Know?
You can spell check in more than English. Click the Edit (Win) or Dreamweaver (Mac) menu, click Preferences, click the General category, click the Spelling dictionary popup, select the dictionary language you want, and then click OK. You can download dictionaries for additional languages from the Dreamweaver Support Center. Click the Help menu, and then click Dreamweaver Support Center.
Probably one of the greatest inventions of the computer industry is the ability to Undo, and Redo. Now, if we could just figure out how to give real life an undo feature... that would be something. Dreamweaver gives us the ability to undo our past mistakes, and redo something we wished we had not removed. The History panel shows the actions you’ve just taken in Dreamweaver, and enables you to undo or repeat any number of steps. History gives us the ability to control our working environment, and allows us to try creative ideas; knowing full well, that if we make a mistake, it’s a simple matter to go back in time. The History panel is Dreamweaver’s time machine.
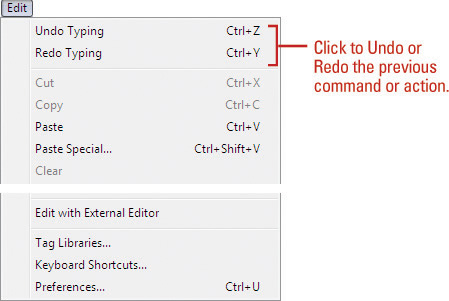
• Click the Edit menu, and then click Undo, or click the Undo button on the Standard toolbar to reverse your most recent action, such as typing a word or formatting a paragraph.
• Click the Edit menu, and then click Redo, or click the Redo button on the Standard toolbar to restore the last action you reversed.

![]() Open a Web document, and perform several actions (i.e. create text, insert an image, etc).
Open a Web document, and perform several actions (i.e. create text, insert an image, etc).
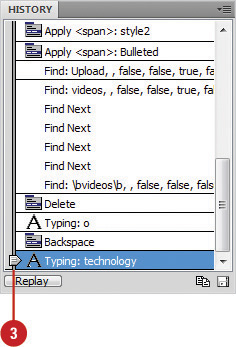
![]() Click the Window menu, and then click History to open the History panel.
Click the Window menu, and then click History to open the History panel.
You’ll see a line-by-line listing of all the steps performed to the current Web document.
![]() To perform a multiple undo, click the arrow located to the left History panel, and then drag it up the list.
To perform a multiple undo, click the arrow located to the left History panel, and then drag it up the list.
Every item listed under the arrow will be undone.
Note
To perform a multiple redo, click the arrow, and drag it down the list. All items above the arrow (including the item the arrow is pointing) will be restored.
Did You Know?
You can change the number of History Steps. The default number of History steps is 50; while that may seem enough for most folks, you can change the number of steps in Preferences. Click the Edit (Win) or Dreamweaver (Mac) menu, click Preferences, click the General category, and then change the number of steps. The maximum value for history steps is 9,999... that’s a lot of steps. When you’re done, click OK.
You can use the Fonts section of the Preferences dialog box to view encoding for the selected font and size you want. File encoding makes sure your Web browser and Dreamweaver use the right character set for the selected language. The fonts you select in the Preferences dialog box don’t affect the page display in a Web browser, however, it does affect the page display in Dreamweaver. You can specify the font and size you want to use in Code view, or as a proportional or fixed font.
![]() Click the Dreamweaver (Mac) or Edit (Win) menu, and then click Preferences.
Click the Dreamweaver (Mac) or Edit (Win) menu, and then click Preferences.
![]() Click the Fonts category.
Click the Fonts category.
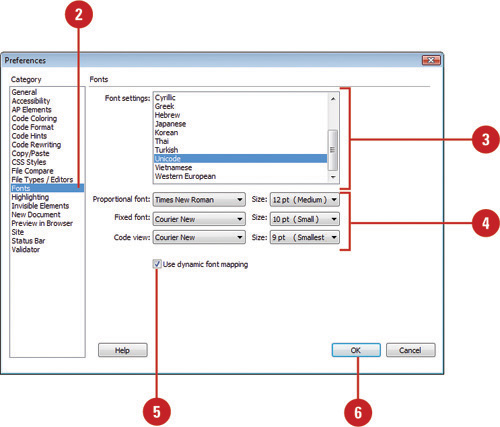
![]() Select the encoding type you want to view.
Select the encoding type you want to view.
![]() Select from the following check boxes:
Select from the following check boxes:
• Proportional Font. Select the font and size you want to use to display normal text, such as paragraphs, headings, and tables.
• Fixed Font. Select the font and size you want to use to display text within pre, code, and tt tags.
• Code View. Select the font and size you want to use for all text in Code view.
![]() Select the Use Dynamic Font Mapping check box.
Select the Use Dynamic Font Mapping check box.
![]() Click OK.
Click OK.