
Chapter 13. Form Data Validation
Understanding Form Validation
HTML forms are used to collect data from users by using several field types. Forms are used for data entry, as front-end search engines, for filling out orders, for signing guest books, for providing user names and passwords to secure applications, and much more. Although forms have become one of the most important features in HTML, these forms provide almost no data validation tools.
This becomes a real problem when developing Web-based applications. As a developer, you need to be able to control what data users can enter into what fields. Without that, your programs will constantly be breaking due to mismatched or unanticipated data. And thus far, you have used forms only as search front ends—when forms are used to insert or update database tables (as you’ll see in Chapter 14, “Using Forms to Add or Change Data”), this becomes even more critical.
Thankfully, ColdFusion provides a complete and robust set of tools with which to implement form data validation, both client-side and server-side.
Since its inception, HTML has always provided Web page developers with a variety of ways to format and display data. With each revision to the HTML specification, additional data display mechanisms have been made available. As a result, HTML is a powerful data-publishing tool.
Although its data presentation options continue to improve, HTML’s data collection capabilities leave much to be desired. In fact, they have barely changed at all since the language’s very early days. Although there is hope for a change in HTML 5, at the time this book is being written, the most widely used browsers do not support the enhanced form options. Therefore, we have to work with the form options available to the widely used browsers.
HTML data collection is performed using forms. HTML forms support the following field types:
• Free-form text fields
• Select box (or drop-down list boxes)
• Radio buttons
• Check boxes
• Multi-line text boxes
• Password (hidden input) boxes
→ See Chapter 12, “ColdFusion Forms,” for more information about HTML forms and using them with ColdFusion.
So what’s wrong with this list? Actually, nothing. These field types are all the standard fields you would expect to be available to you in any development language. What is wrong, however, is that these fields have extremely limited capabilities. There are two primary limitations:
• Inability to mark fields as required
• Inability to define data types or filters, for example, to only accepting digits, a ZIP code, an e-mail address, or a phone number
What this means is that there is no simple way to tell HTML to disallow form submission if certain fields are left empty. Similarly, HTML can’t be instructed to accept only certain values or types of data in specific fields.
HTML itself has exactly one validation option, the maxlength attribute, which can be used to specify the maximum number of characters that can be entered in a text field. That’s it—no other validation options are available.
To work around these limitations, HTML developers have typically adopted two forms of validation options:
• Server-side validation
• Client-side validation
Comparing Server-Side and Client-Side Validation
Server-side validation involves checking for required fields or invalid values after a form has been submitted. The script on the server first validates the form and then continues processing only if all validation requirements are met. Typically, an error message is sent back to the user’s browser if validation fails; the user then goes back to the page, makes the corrections, and resubmits the form. Of course, the form submission must be validated again upon resubmission, and the process must be repeated if the validation fails again.
Client-side scripting lets the developer embed instructions to the browser within the HTML code. Because HTML itself provides no mechanism for doing this, developers have resorted to using scripting languages, such as JavaScript, which is supported by just about every browser. These interpreted languages support basic data manipulation and user feedback and are thus well suited for form validation. To validate a form, the page author would create a function to be executed as soon as a Submit button is clicked. This function would perform any necessary validation right inside of the browser, and allow the submission to proceed only if the validation check was successful. The advantage of this approach is that the user doesn’t have to submit a form to find out an error occurred in it. Notification of any errors occurs prior to form submission.
Pros and Cons of Each Option
Neither of these options is perfect, and they are thus often used together, complementing each other. Table 13.1 lists the pros and cons of each option.
Table 13.1 The Pros and Cons of Client and Server Form Validation

From a user’s perspective, client-side validation is preferable. Obviously, users want to know what’s wrong with the data they entered before they submit the form for processing. From a developer’s perspective, however, server-side validation is simpler to code, guaranteed to always work regardless of the browser used, and less likely to fall victim to browser incompatibilities.
Tip
Form field validation should never be considered optional, and you should get in the habit of always using some type of validation in each and every form you create. Failure to do so will inevitably cause errors and broken applications later.
Using Server-Side Validation
As mentioned earlier, server-side validation involves adding code to your application that performs form field validation after the form is submitted. In ColdFusion this usually is achieved with a series of <cfif> statements that check each field’s value and data types. If any validation steps fail, processing can be terminated with the <cfabort> function, or the user can be redirected to another page (maybe the form itself) using <cflocation>.
Using Manual Server-Side Validation
The code shown in Listing 13.1 is a simple login prompt used to gain access to an intranet site. The file (which you should save as login1.cfm in a new directory named 13) prompts for a user ID and password. HTML’s only validation rule, maxlength, is used in both form fields to restrict the number of characters that can be entered. The form itself is shown in Figure 13.1.
Listing 13.1 login1.cfm—Simple Login Screen
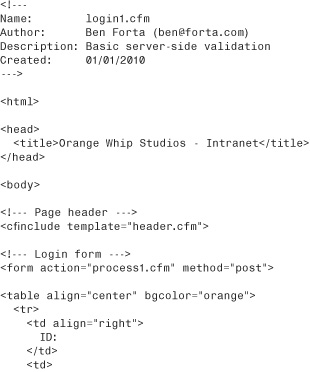

Figure 13.1 HTML forms support basic field types, such as text and password boxes.

This particular form gets submitted to a template named process1.cfm (specified in the action attribute). That template is responsible for validating the user input and processing the login only if all the validation rules passed. The validation rules necessary here are
• Login ID is required.
• Login ID must be numeric.
• Login password is required.
To perform this validation, three <cfif> statements are used, as shown in Listing 13.2.
Listing 13.2 process1.cfm—Basic Server-Side Login Validation Code

The first <cfif> checks the length of LoginID after trimming it with the Trim() function. The Trim() function is necessary to trap space characters that are technically valid characters in a text field but are not valid here. If the Len() function returns 0, an error message is displayed, and the <cfabort> statement halts further processing.
Tip
Checking the length of the trimmed string (to determine whether it’s empty) is functionally the same as doing a comparison against an empty string, like this:
<cfif Trim(LoginID) IS "">
The reason I used Len() to get the string length (instead of comparing it to "") is that numeric comparisons are generally processed more quickly than string comparisons. For even greater performance, I could have eliminated the comparison value and used the following:
<cfif not Len(Trim(LoginID))>
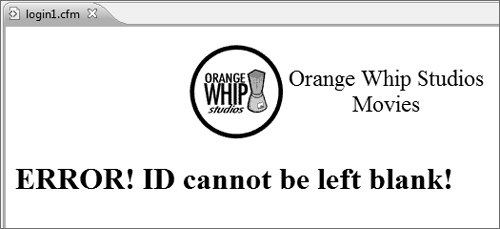
The second <cfif> statement checks the data type. The IsNumeric() function returns TRUE if the passed value was numeric (contained only digits, for example) or FALSE if not. Once again, if the <cfif> check fails, an error is displayed and <cfabort> halts further processing, as shown in Figure 13.2. The third <cfif> checks that a password was specified (and that that the field was not left blank).
Figure 13.2 <cfif> statements can be used to perform validation checks and then display error messages if the checks fail.
This form of validation is the most powerful and flexible of all the validation options available to you. There’s no limit to the number of <cfif> statements you can use, and there’s no limit to the number of functions or tags you can use within them. You can even perform database operations (perhaps to check that a password matches) and use the results in comparisons.
Tip
The <cfif> statements can be combined using AND and OR operators if necessary. For example, the first two <cfif> statements shown in Listing 13.2 could be combined to read
<cfif (Len(Trim(LoginID)) IS 0) OR (NOT IsNumeric(LoginID))>
Of course, there is a downside to all of this. Managing and maintaining all of those <cfif> statements can get tedious and complex, especially since most of your forms will likely contain more than just two controls, as ours did here.
Using <cfparam> Server-Side Validation
One solution to the proliferation of <cfif> statements in Listing 13.2 is to use the <cfparam> tag (first introduced in Chapter 9, “Programming with CFML”). The <cfparam> tag has two distinct functions:
• Providing default values for variables
• Performing field value validation
The difference is whether or not a default is provided. Look at this example:
<cfparam name="LoginID">
No default value is provided, and so LoginID is required, and if not present an error will be thrown.
By contrast, this next example has a default value:
<cfparam name="color" default="red">
In this example color isn’t required, and if not present, the default value of red will be used.
<cfparam> also supports one additional attribute, a type, as seen in this example:
<cfparam name="LoginID" type="integer">
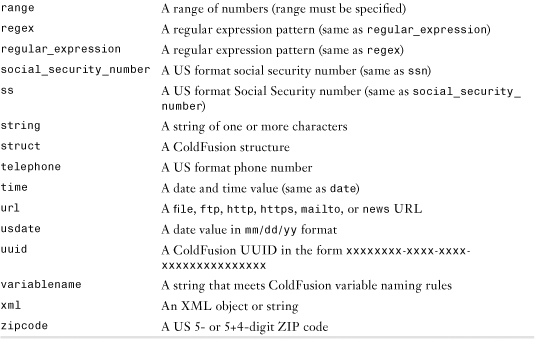
In this example LoginID is required (because no default is specified). In addition, it must be an integer (a number), and if it’s something other than an integer an error will be thrown. ColdFusion supports a complete range of validation types, as listed in Table 13.2.
Table 13.2 Supported Validation Types

Listing 13.3 is an updated version of Listing 13.2, this time replacing the <cfif> statements with <cfparam> tags.
Listing 13.3 process2.cfm—<cfparam> Server-Side Validation

The code in Listing 13.3 is much cleaner and simpler than the code in Listing 13.2, yet it accomplishes the same thing. To test this code, modify login1.cfm and change the <form> tag so that action="process2.cfm". Try submitting the form with errors and you’ll see a screen like the one shown in Figure 13.3.
Figure 13.3 When using embedded form field validation, ColdFusion automatically displays an error message listing which checks failed.

As you can see, there’s a trade-off here. <cfparam> makes validation much simpler, but you lose control over formatting and presentation. <cfif> statements are a lot more work, but you retain total control over ColdFusion processing.
Note
The screen shown in Figure 13.3 is the default ColdFusion error screen. This screen can be changed using the <cferror> tag, which will be introduced in Chapter 18, “Introducing the Web Application Framework.”
There is, however, a downside with both forms of server-side validation. If you were to add or rename a field, for example, you’d have to remember to update the destination page (the page to which the fields get submitted, as specified in the <form> action attribute), as well as the form itself. As your forms grow in complexity, so does the likelihood of your forms and their validation rules getting out of sync.
Using Automatic Server-Side Validation
Server-side validation is the safest and most secure form of form field validation, but it can also become a maintenance nightmare. ColdFusion to the rescue!
ColdFusion enables developers to embed basic form validation instructions within an HTML form. These instructions are embedded as hidden form fields. They get sent to the user’s browser along with the rest of the form fields, but they aren’t displayed to the user. When the user submits the form back to the Web server, however, those hidden fields are submitted too—and ColdFusion can then use them to perform automatic field validation.
These hidden form fields serve as validation rules, and ColdFusion can generate them for you automatically. It does this via some new tags, <cfform> and <cfinput>. But first, an explanation.
As you have already seen, <form>, <input>, and related tags are used by browsers to display HTML forms. ColdFusion doesn’t process <form> or <input> tags when it sees them in your code (as it did in Listing 13.1). It simply passes them down to the browser. ColdFusion only processes CFML tags (or expressions without blocks to be processed), not HTML tags.
<cfform> is ColdFusion’s version of <form>, and <cfinput> is ColdFusion’s version of <input>. The tags can be used interchangeably, and the code

is functionally identical to

When ColdFusion processes the <cfform> tag it simply generates the HTML <form> tag, and when it processes <cfinput> it generates <input>. So why bother doing this? Because these tags essentially intercept the form generation, allowing ColdFusion to insert other code as needed, such as validation code. For example, look at the following code snippet:

This tag accepts a password, just like the <input> seen in Listing 13.1. But unlike the tag in that listing, here a <cfinput> tag is used. And once <input> has been replaced with <cfinput>, additional attributes (that are instructions to ColdFusion) may be introduced. required="yes" tells ColdFusion that the password field is required, message contains the error message to be displayed if validation fails, and validateAt="onServer" instructs ColdFusion to validate the page on the server after form submission. When ColdFusion processes this tag it generates an <input> tag (because Web browsers would have no idea what <cfinput> was anyway), along with other code that it writes for you, hidden form fields that contain validation rules that ColdFusion can process upon form submission.
Caution
The <cfinput> tag must be used within <cfform> tags; you can’t use <cfinput> with <form>. Doing so will throw an error.
Listing 13.4 contains an updated login screen, this time containing <cfform> and <cfinput> tags providing validation rules.
Listing 13.4 login2.cfm—Embedded Server-Side Validation Rules


Note
When using <cfinput> every form field must have a name, even type="button".
If you were to run this code, it would look exactly as it did before (Figure 13.1). That’s because ColdFusion generated the same HTML form code as we did before. So where is the difference? Do a View Source, and you’ll see that the form generated by ColdFusion looks like this:


There is no <cfform> in this code, no <cfinput>, and no closing </cfform>. ColdFusion generated the standard HTML form tags, and also made some other changes:
• Listing 13.4 had no method specified, but <cfform> knew to automatically set method="post".
• <cfform>, <cfinput>, and </cfform> were replaced with <form>, <input>, and </form> respectively.
• Three hidden fields were added to the form; these contain the validation rules that ColdFusion will use when processing the form submission.
• Other changes were made too, but those relate to client-side validation, which we’ll get to shortly.
Run login2.cfm and submit the form with missing or invalid values. You’ll see an error screen like the one shown in Figure 13.4.
Figure 13.4 Validation errors caught by embedded server-side validation throw a friendlier error message screen.

Note
The screen shown in Figure 13.4 is the default validation error screen. This screen too can be changed using the <cferror> tag.
As you can see, the ColdFusion validation rules are simple and effective. And because the validation rules are embedded into the form itself, your forms and their rules are less likely to get out of sync.
Note
The validation rules seen here were generated by ColdFusion automatically. If needed, you can embed the hidden validation rules yourself, although you’ll seldom have to. In previous versions of ColdFusion this was necessary, as no automatic generation existed.
Of course, when validation errors occur the user will still have to go back to the form to make any corrections. The benefits of embedded validation rules are really only for developers. Embedded validation does nothing to improve the user experience—for that you need client-side validation.
Using Client-Side Validation
The biggest drawback in using server-side validation is that the validation occurs after form submission. This means that if any validation rules fail, the user must go back to the form, make the corrections, and resubmit it to the server. To make matters worse, some browsers lose the data in the form fields when the Back button is clicked, forcing the user to reenter all the data.
Obviously, this hardly creates a user-friendly interface. Too many good Web sites have lost visitors because their forms were aggravating to work with.
Fortunately, an alternative is available: client-side validation.
Understanding Client-Side Validation
To perform client-side validation, you add a series of browser instructions to your Web page. The browser interprets these instructions and executes them right on the user’s computer (i.e., on the client side) before the form ever gets submitted to the server.
To validate a form, you write a script that will trap the form submission and allow it to proceed only if a series of validation checks have passed. If any checks fail, you would display an error message and prevent the form from being submitted.
Of course, to do this, you’d have to learn JavaScript.
Client-Side Validation Via <cfform>
You’ve already seen how ColdFusion can dramatically simplify server-side validation by automatically generating code for you. Well, it can do the same for client-side validation, generating the JavaScript needed to validate form fields. And the best part is that you already know the tags you need to make this work: they are <cfform> and <cfinput>.
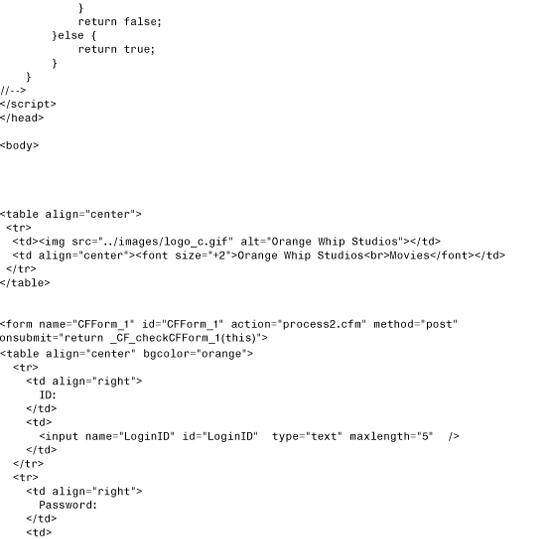
Listing 13.5 contains login3.cfm, a slightly modified version of login2.cfm. Make that very slightly modified. Can you even see the change?
Listing 13.5 login3.cfm—Client-Side Validation Rules


Listings 13.4 and 13.5 are almost identical. The only change is the validateAt attribute in the two <cfinput> tags, which has been changed from
validateAt="onServer"
to
validateAt="onSubmit"
onServer tells ColdFusion to generate validation code that will be processed on the server (as seen previously). onSubmit tells ColdFusion to generate code that will be processed by the browser when the form is about to be submitted. validateAt="onSubmit" generates JavaScript code, which it embeds into your form (in the much the same way as it embedded hidden form fields for server-side validation).
Run login3.cfm; the form should look exactly as it did before. But now if you generate an error you’ll see a pop-up window right in your browser, as seen in Figure 13.5.
Figure 13.5 Client-side validation error messages are displayed in a browser pop-up box.

Using client-side validation, the form was never submitted, because it failed the validation test. onSubmit validation essentially traps the form submission, and only allows it to continue if it passes all validation tests. This is obviously a far friendlier user experience; if users see a pop-up message like the one in Figure 13.5 they will be able to make corrections and resubmit the form.
Note
The pop-up error box is a standard browser dialog that varies from browser to browser, and there is no way to change what it looks like. The only thing you can change are the actual error messages themselves.
It is worth noting that a lot is going on under the hood to make all this work, and ColdFusion has successfully shielded you from it. But do a View Source and you’ll see that the generated code has gotten quite lengthy and complex:


That’s a lot of code, and most of it is the JavaScript needed to validate form fields.
So what can client-side validation check for? The exact same checks that server-side validation does. Use required="yes" to make a form field required, and use validate= specifying any of the types listed in Table 13.2 previously. The same validation options are supported by both server-side and client-side validation; all you have to do is decide which you want and specify validateAt="onServer" or validateAt="onSubmit".
Note
There is actually a third option supported by validateAt. To force client-side validation as soon as the user leaves the form field (either by clicking on another field or by tabbing between fields) specify validateAt="onBlur". But use this option sparingly, as this type of validation can annoy your users.
Tip
If validateAt is not specified, the default of validateAt="onSubmit" will be used.
One of the validation types warrants special mention. validate="range" checks that a number is within a specified range, which means that you must provide the range of allowed values. This is done using the range attribute, as follows:
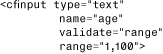
This code snippet will allow numbers from 1 to 100. You may also specify just a minimum (and no maximum) by only providing one number in the range, as follows:

This code will only allow 18 or higher. To specify a maximum but no minimum, just provide the second number, like this:

This code will only allow 17 or lower.
Note
The actual JavaScript validation code is in a file named cfform.js in the cfide/scripts directory beneath the Web root. This file is included dynamically using a <script> tag whenever any validation is used.
Extending <cfinput> Validation Options
You can’t add your own validation types to <cfinput>, but you can extend the validation by providing regular expressions. A regular expression is a search pattern used to match strings. Full coverage of regular expressions is beyond the scope of this book, but here is an example to help explain the concept.
Note
Interested in learning more about regular expressions? You may want to get a copy of Teach Yourself Regular Expressions in 10 Minutes (Sams, ISBN 0672325667).
Colors used in Web pages are often specified as RGB values (colors specified in amounts of red, green, and blue). RGB values are six characters long—three sets of two hexadecimal values (00 to FF). To obtain a set of RGB values in a form you could use three <cfinput> tags like this:

validate="regex" specifies that regular expressions are to be used for validation. The regular expression itself is passed to the pattern attribute. [A-Fa-f0-9] matches a single character of A through F (upper- or lowercase) or 0 through 9. The { 2,} instructs the browser to only accept a minimum of 2 instances of the previous expression. That coupled with maxlength="2" provides the exact validation rule needed to accept RGB values.
As you can see, with minimal work you can write regular expressions to validate all sorts of things.
Specifying an Input Mask
We’re not quite done yet. Client-side validation provides users with a far better experience than does server-side validation. But let’s take this one step further.
All the validation thus far checks for errors after a user inputs data into a form field. Which begs the question, why let users type incorrect data into form fields in the first place? If a form field requires specific data (like LoginID in the forms above, which required a numeric ID), let’s prevent the user from typing anything else.
As simple as that suggestion sounds, controlling user input at that level is rather complex, and requires some very sophisticated scripting. Fortunately, you don’t have to write that validation code either. The <cfinput> tag supports an additional attribute named mask that accepts an input filter mask. A filter is a string made up of characters that identify what is allowed for each character entered. For example, 9 is used to allow only digits (0 through 9). So the following mask would only allow two digits and nothing else:
mask="99"
Table 13.3 lists the mask characters supported by <cfinput mask=>.
Table 13.3 Supported Mask Characters

So, for a US ZIP code you could use the following mask:
mask="99999-9999"
And this mask could work for Canadian postal codes:
mask="A9A 9A9"
And to mask a US Social Security number you could use
mask="999-99-9999"
Of course, masking and validation may be combined, as seen in Listing 13.6, an update to our login page.
Listing 13.6 login4.cfm—Login Screen with Client-Side Validation Rules and Masking


Run this new login form. It will look just like the previous login screens, but see what happens when you try to type an alphabetical character into the LoginID field. And all it took was one more <cfinput> attribute.
Validation on the Server and Client
You’ve seen <cfinput> used to validate on the server and on the client. So far we used one or the other, but it need not be an either/or proposition. In fact, <cfinput> supports the use of multiple validation types at once. All you need to do is specify the types delimited by commas.
So, to validate the UserID field using masks, client-side validation, and server-side validation, you could do the following:

Preventing Multiple Form Submissions
I want to share one last <cfinput> goodie with you. All Web application developers face the problem of dealing with multiple form submissions. For example, a user fills in a form, clicks the Submit button, and then gets impatient and submits it again and again and again.
If your form was a front end to database searches, this would result in multiple searches being performed. And while this won’t negatively impact your data, it will definitely slow the application. This becomes an even bigger issue when forms are used to insert data into database tables (as will be seen in the next chapter). Multiple form submissions then are a real problem, as users could inadvertently insert multiple rows to your table.
Once again, <cfinput> comes to the rescue with a special validate option that only applies to form buttons. validate="SubmitOnce" generates JavaScript code that prevents multiple form submissions. For example, to not allow our login form to be submitted multiple times, the button could be changed to

Clean and simple, thanks to <cfinput>.
Putting It All Together
Before you run off and plug <cfform> and <cfinput> into all your templates, there are some other details that you should know:
• Not all browsers support JavaScript. Most newer ones do, but there still are older ones out there. Even if a user’s browser supports JavaScript, the user may choose to disable it. Browsers that don’t support or that disable JavaScript will generally ignore it, enabling your forms to be submitted without being validated if only client-side validation is used.
• You should combine the use of JavaScript validation with server-side validation. These will never fail validation if the browser does support JavaScript, and if the browser doesn’t, at least you have some form of validation.
• Don’t rely solely on automatically generated server-side validation (via embedded hidden fields). Clever hackers could quite easily remove those hidden fields and submit your form without server-side validation.
• The JavaScript code can be quite lengthy. This will slightly increase the size of your Web page and thus the time it takes to download it from your Web server.
• Mix and match validation types. Use <cfinput> to generate multiple validation types; the more validation you do, the safer your applications will be.
• Manual server-side validation is your last defense. Regardless of the validation options used, it’s safest to always use manual server-side tests (either using <cfparam> or <cfif> statements). If you are using <cfinput>, users will never get caught by those tests, so you may not need to even worry about prettying up the error messages. But for that mischievous user who just wants to find a way in, manual server-side validation is your last defense.