
9. Inverse Kinematics With Bones
Lesson overview
In this lesson, you’ll learn how to do the following:
Use the Bone tool to build armatures with connected movie clips.
Use the Bone tool to build armatures inside shapes.
Animate armatures using inverse kinematics.
Constrain and pin the armature joints.
Edit the position of armature bones and joints.
Refine shape deformations with the Bind tool.
Simulate physics with the Spring feature.
Use rig mapping to swap armatures with new graphics.

This lesson will take approximately 2 hours to complete.
To get the lesson files used in this chapter, download them from the web page for this book at www.adobepress.com/AnimateCIB2023. For more information, see “Accessing the lesson files and Web Edition” in the Getting Started section at the beginning of this book.

You can create complex and natural motion with articulations—joints between linked objects and within shapes—using the Bone tool for animation, a process called inverse kinematics.
Getting started
![]() Note
Note
If you have not already downloaded the project files for this lesson to your computer from your Account page, make sure to do so now. See Getting Started at the beginning of the book.
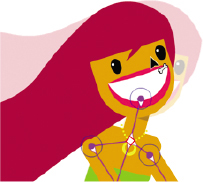
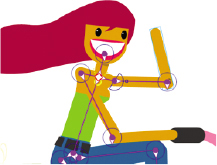
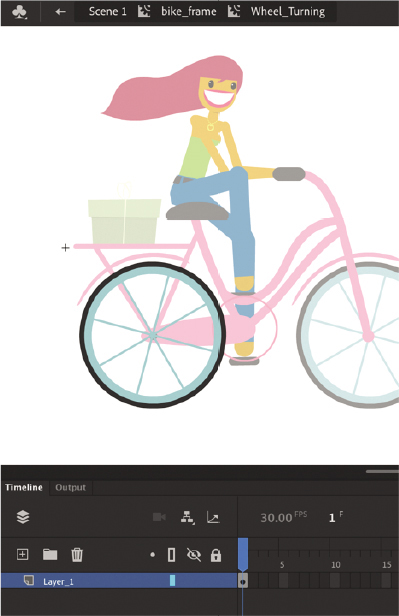
You’ll start the lesson by viewing the bicycle-riding animated character that you’ll create as you learn about the Bone tool and armatures.
Double-click the 09End.fla file in the 09/09End folder to open it. Choose Control > Test, or click the Test Movie button.
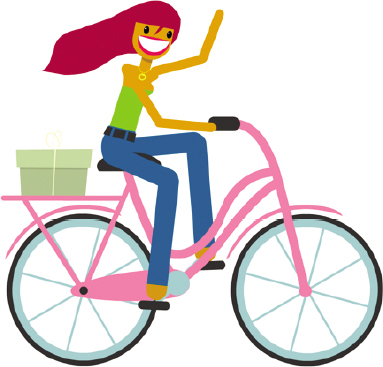
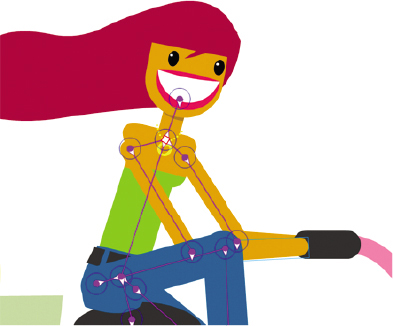
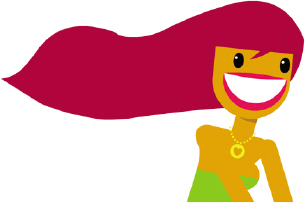
The animation depicts a woman riding a bicycle and waving, her hair blowing in the wind. In this lesson, you’ll build an armature (similar to a rig with the Asset Warp tool) and then animate the motion of limbs pedaling the bicycle. You’ll also animate the wheels and pedals turning.
Double-click the 09Start.fla file in the 09/09Start folder to open the initial project file in Adobe Animate.
Choose File > Save As. Name the file 09_workingcopy.fla, and save it in the 09Start folder.
Saving a working copy ensures that the original start file will be available if you want to start over.
Character animation with inverse kinematics
You learned to animate characters with layer parenting in Lesson 4 and by building rigs with the Asset Warp tool in Lesson 5. In this lesson, you’ll learn to use the Bone tool, which gives you another option for character animation.
The Bone tool allows you to build an armature, which is similar to the rig you build with the Asset Warp tool. Both are made up of joints and bones in a hierarchical structure. However, that’s where the similarity ends.
The Bone tool uses a method called inverse kinematics as a way to move your armature. Inverse kinematics is a mathematical way of calculating the different angles of a jointed object to achieve a certain configuration. In inverse kinematics, you move the child bone and the parent bone moves along with it.
By contrast, layer parenting and modern rigging with the Asset Warp tool are based on forward kinematics, where moving the parent bone will control its child bones.
In this lesson, you’ll animate the pedaling motion of a bicycle rider. By just positioning the character’s foot (the child bone), the upper leg and lower leg (the parent bones) are automatically adjusted.
Key differences between the Bone tool and the Asset Warp tool
There are a few basic differences between the Bone tool and the Asset Warp tool in terms of their capabilities, how they work, and how you use them, including the following:
The Asset Warp tool uses forward kinematics, while the Bone tool uses inverse kinematics.
You use the Bone tool on connected movie clip symbols or inside vector shapes. You use the Asset Warp tool on vector shapes or bitmaps.
The Bone tool can create only a single continuous armature in its layer. The Asset Warp tool, on the other hand, can create a rig that contains multiple, separate bones or single joints.
You animate a Bone tool armature in a special armature layer. You animate an Asset Warp tool rig with classic tweens.
Building your armature to animate a character
When animating a character with limbs and joints, first determine which pieces of the character need to move. At the same time, examine how those pieces connect and move. This will almost always be a hierarchical structure, like a tree, starting from a root and branching out in various ways. For the Bone tool, this structure is called the armature. Like a real skeleton, each rigid piece that makes up the armature is called a bone. The armature defines where your object can bend and how the different bones are connected.
You use the Bone tool to create your armature. The Bone tool tells Animate how a series of movie clip instances is connected, or provides the jointed structure within a shape. A connection between two or more bones is called a joint.
In your 09working_copy.fla file, view the graphics for the bicycle and Ruby, the rider, which have already been created and placed on the Stage for you.
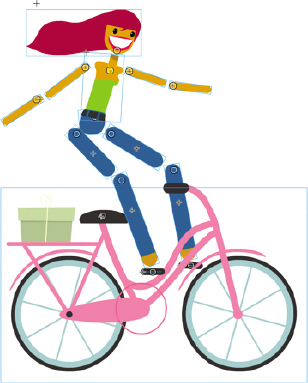
The pieces of the rider have been positioned so that it is easy to see how they relate to one another. Keeping some space between the pieces will make connecting the bones for your armature easier. Don’t worry that Ruby doesn’t look exactly right, because you’ll move her pieces together in a later step.
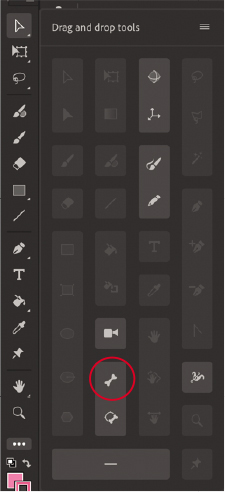
If necessary, click the Edit Toolbar option to add the Bone tool to the Tools panel, then select the Bone tool.
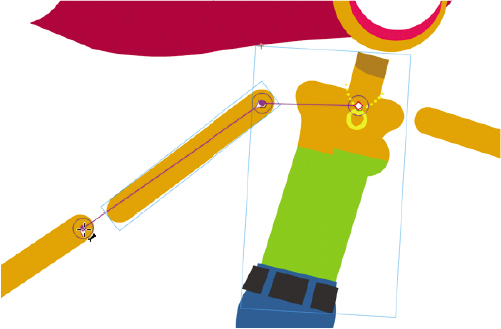
Click the middle of Ruby’s chest and drag with the Bone tool to the top of her right upper arm. Release the mouse button.

Your first bone is defined in a new armature. Animate shows the bone as a straight line with a square at its base joint and a circle at its tip joint. Each bone is defined from one joint to the next.

In the timeline, your newly created armature is automatically put in a new layer with a new icon and the default name, Armature_#. This special type of layer keeps your armatures separate from other objects on the timeline, such as graphics and motion tweens.
 Note
NoteRuby and her bicycle are graphics from the Adobe Assets panel. There you’ll find many other animated and static assets to use or adapt for your own projects.

Now click the end of your first bone (at Ruby’s shoulder) and drag it to the top of her lower arm (her elbow). Release the mouse button.
NoteThe first armature layer created in a pristine file will be called Armature_1, and each time you add a new armature layer, its name will be incremented by 1. Don’t worry if the name of your armature layer doesn’t match the one in these screenshots.
 Tip
TipIf you have trouble placing your bones correctly because your cursor snaps to nearby edges, you can disable snapping. In the Doc tab of the Properties panel, click Snap To Objects (the magnet icon) to deselect it.
Your second bone is defined.
Select the Selection tool and experiment with grabbing the last bone in the chain (Ruby’s right forearm) and moving it up and down the Stage.
Because the bones connect the whole arm to Ruby’s torso, moving the lower arm causes the upper arm and torso to move as well, albeit in a somewhat unnatural manner. Don’t worry, though; later in this lesson you’ll learn how to constrain joints for better control.
Extending your armature
You'll continue to build out the armature of Ruby by connecting her other arm, her legs, and the bicycle.
With the Bone tool selected, click the base of your very first bone (in Ruby’s chest), and drag the Bone tool to the top of her other upper arm. The first bone is considered your “root bone.” Release the mouse button.
Continue creating more bones in her lower arm.
Your armature now extends in two directions: one for Ruby’s left arm and one for her right arm.
Click the base of your very first bone (in Ruby’s chest) and drag the Bone tool to the middle of her pelvis.
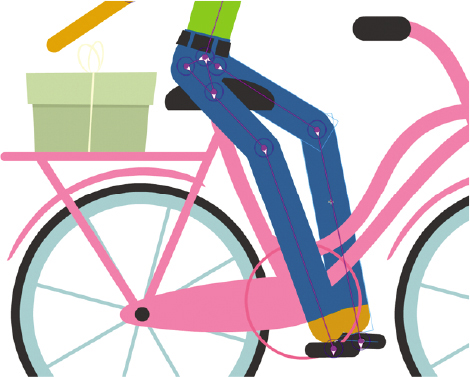
Extend the armature from the pelvis down to both of Ruby’s lower legs. The pelvis will branch off to the right and left thighs, lower legs, and black pedals. You can move objects around to make things easier to connect.
Connect the torso to Ruby’s head and her pelvis to the seat of the bicycle.
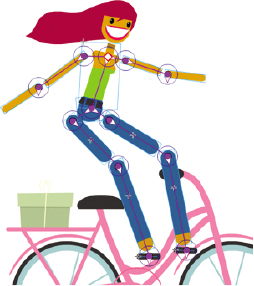
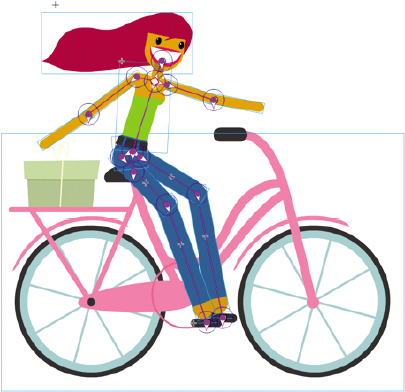
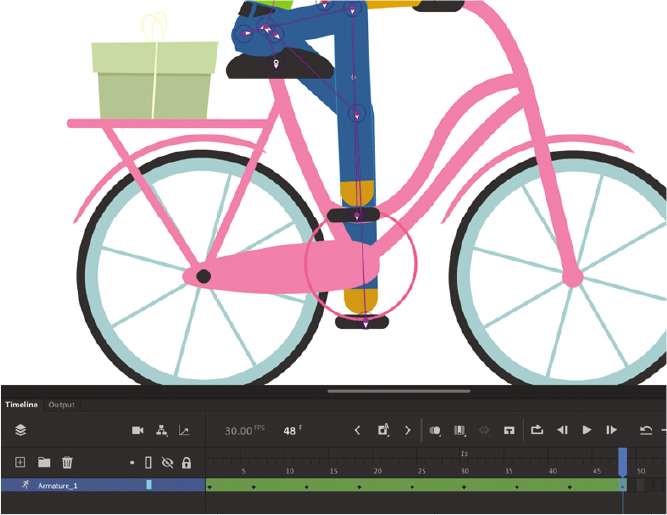
Your armature now connects all the pieces of Ruby, including her bicycle, and defines how each piece can rotate and move in relation to the other pieces in the armature.
NoteYou might wonder why we need to include the bicycle as part of Ruby’s armature. The bicycle doesn’t move, but it needs to appear between her legs, so one leg will be behind the bicycle and the other will be above it. Since all the parts of an armature are on one layer, one solution to managing overlapping objects is to have them in the armature itself.
Armature hierarchy
The first bone of an armature is the root bone and the parent of the child bones linked to it. A bone can have more than one child attached to it, as you have for your Ruby armature, making for a very complex relationship. The bone in the chest is the parent, each bone to the upper arm is a child, and the arms are siblings to each other. As your armature becomes more complicated, you can use the Properties panel to navigate up and down the hierarchy using these relationships.
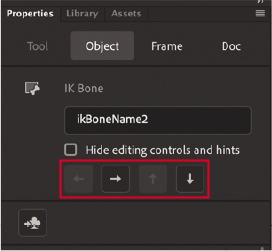
When you select a bone in an armature, the top of the Properties panel displays a series of arrows.
You can click the arrows to move through the hierarchy and quickly select and view the properties of each bone. If the parent bone is selected, you can click the down arrow to select the child. If a child bone is selected, you can click the up arrow to select its parent or click the down arrow to select its own child if it has one. The sideways arrows navigate between sibling bones.
Moving the bones of the armature
Now that you’ve connected each movie clip with your bones in a complete armature, you can edit each bone’s relative position. Initially, there were gaps between the movie clips to make connecting them easier. Holding down the Option/Alt key allows you to move the position of any bone in your armature.
Select the Selection tool and click an empty part of the Stage to deselect the armature.
Hold down the Option/Alt key and move Ruby’s right upper arm closer to her body. You can also use the Free Transform tool.

The upper arm is repositioned, but the armature remains intact.
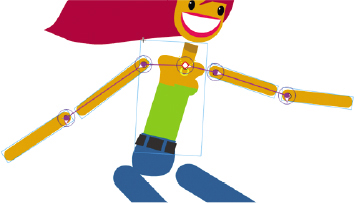
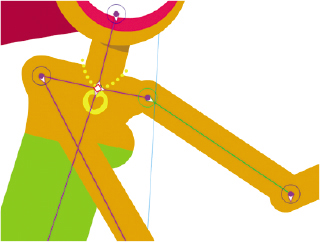
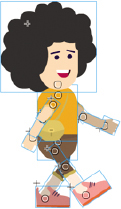
Hold down the Option/Alt key and move all the parts of Ruby’s body and the bicycle closer together to eliminate the gaps in her joints.
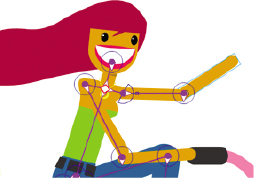
The character and her armature should look similar to the following figure.
Modifying the position of the joint
If you want to change the point where one bone connects to another—the joint—use the Free Transform tool to move its transformation point. This also moves the rotation point of the bone.
If, for example, you made a mistake and attached the end point of your bone to the middle of the next movie clip rather than to the base, that body part would rotate unnaturally.
To modify the position of the joint, select the Free Transform tool and click the movie clip to select it. Move the transformation point to a new position.

The bone now connects to the new transformation point of the movie clip.
Rearranging the stacking order
When you build an armature, the most recent bone will move to the top of the stack in your graphics. Depending on the order in which you connected your bones, the individual movie clips may not overlap correctly. For example, in the previous task, Ruby’s legs may not overlap with the bicycle in a way that makes sense. One leg should be behind the bicycle and the other leg should be in front. Use the Modify > Arrange command to change the stacking order of the movie clips in your armature so that they overlap each other correctly.
Select the Selection tool and Shift-select the three movie clips that make up Ruby’s back leg, including the pedal.
Choose Modify > Arrange > Send To Back, or right-click and select Arrange > Send To Back (Shift+Command+Down/Shift+Ctrl+Down).
The selected bones of the armature move to the bottom of the stacking order, so Ruby’s right leg is now behind the bicycle and the bicycle seat now sticks out from in between her legs.
Select the two clips that compose Ruby’s left arm and use the Modify > Arrange command to move the objects to the back.
Select Ruby’s head and choose Modify > Arrange > Bring To Front, or right-click and choose Arrange > Bring To Front (Shift+Command+Up/Shift+Ctrl+Up).
The head of the armature moves to the top of the stacking order, so Ruby’s head is now above her neck.
TipUse Modify > Arrange > Send To Back to move selected graphics all the way to the bottom of the stacking order, or use Modify > Arrange > Send Backward to move the selected graphics just one level back. Similarly, use Bring To Front to move graphics to the top of the stacking order, or use Bring Forward to move graphics just one level up.

Select the Selection tool and move the armature around to see how Ruby’s right and left arms and legs move behind or in front of her body, and make any corrections, if needed.
Creating the pedaling cycle
Ruby’s pedaling is a basic looping animation in which her feet will go around in a circle.
Armatures help make animating the pedaling motion easier because you only have to position her feet on the pedals correctly in keyframes (called poses), and since her feet are connected to the rest of her body, those upper limbs will follow naturally.
Posing your armature
In the first pose, you’ll establish Ruby’s starting position with her feet and pedals at opposite sides of the rotation motion.
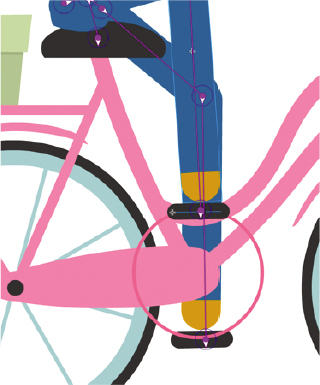
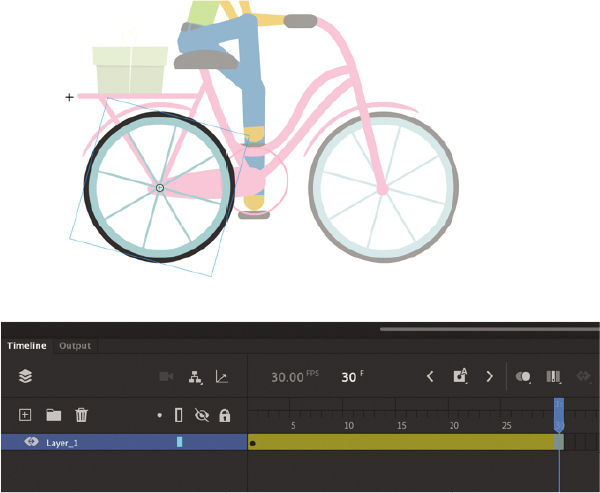
Using the Selection tool, drag Ruby’s right foot to the top of the pink circle, which represents the path of the pedaling motion. Move the black pedals that are attached to her feet so that they are parallel to the ground.
As you drag her leg and pedal, the bones that are connected to them also move. If you have trouble controlling the armature, don’t worry! It takes practice, and in the following sections, you’ll learn more tips and tricks to constrain or isolate certain joints for precision positioning.
Move Ruby’s left foot and pedal to the bottom of the pink circle. Try to keep the black pedal on the curve of the circle.
Move Ruby’s arms to position them on the handlebars of the bicycle.
Your first pose is completed at frame 1 of your armature layer.
Isolating the rotation of individual bones
As you pull and push on the armature to create your pose, you may find it difficult to control the rotation of individual bones because of their linkages. Holding down the Shift key as you move individual bones will isolate their rotation.
Select the back pedal.
With the Selection tool, drag the pedal.
The leg moves to follow the motion of the pedal.
Now, while holding down the Shift key, drag the pedal.
The pedal rotates around the leg, but the rest of the armature doesn’t move. The Shift key isolates the rotation of the selected bone.
Holding down the Shift key helps you isolate the rotations of individual bones so that you can position your poses exactly as you want them. Return to Ruby’s legs and pedals to make any necessary adjustments using the Shift key.
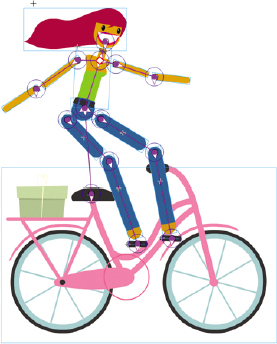
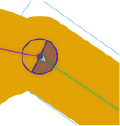
Pinning individual bones
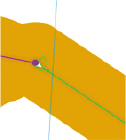
Another way you can more precisely control the rotation or position of your armature is to fix individual bones in place. For example, currently, the bicycle is free to move and rotate under the rider (as seen in this figure), so pinning it will lock it in place.

Select the Selection tool.
Select the bone of the bicycle near the bicycle seat.
The bone becomes highlighted, indicating that it is selected.
In the Properties panel, select the Pin option.

The bicycle is fixed to the Stage in the current position. A white circle with a black dot appears on the joint to indicate that it is pinned.
You can also select a joint and click it when your cursor changes to the icon of a pushpin. That selected bone will be pinned. Click again to unpin the bone.

The armature motion is different when using the Pin option versus using the Shift key. The Shift key isolates an individual bone and all the rest of the bones connected to it. When you pin a bone, the pinned bone remains fixed, but you’re free to move all the child bones.
Disabling and constraining joints
Before you insert the rest of the poses, you can add refinements to your armature that will make it easier to position Ruby. The various joints of the armature can rotate freely, which isn’t particularly realistic. Many armatures in real life are constrained to certain angles of rotation. For example, your forearm can rotate up toward your bicep, but it can’t rotate in the other direction beyond your bicep. Your hips can wiggle around your torso but not by very much. These are constraints that you can also impose on your own armature. When working with armatures in Animate, you can choose to constrain the rotation for various joints or even constrain the translation (movement) of the various joints.
Disabling the rotation of joints
If you drag Ruby’s head, you’ll see that the bone that connects the torso with the pelvis can rotate freely, which allows wildly unrealistic positions.
Select the bone that connects Ruby’s head with her torso.
The bone is highlighted.
In the Properties panel, if necessary, deselect the Enable option in the Joint: Rotation section.
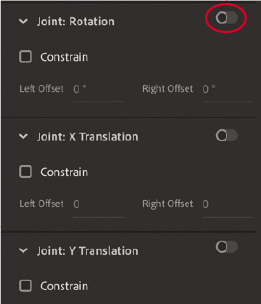
The circle around the joint at the head of the selected bone disappears, which means that the joint is no longer able to rotate.

Now drag Ruby’s head.
Her head can no longer rotate around the joint in the torso (but it can still rotate around its last joint).
Constraining the range of rotation
There’s still some work to do with the armature. You can allow rotation but also constrain that range of rotation for various joints.
Select the bone that connects Ruby’s chest to her left upper arm.
The bone becomes highlighted.

In the Properties panel, if necessary, deselect the Enable option in the Joint: Rotation section.
Rotation about the joint in the torso is disabled so that the upper arm cannot move as wildly around the torso.
Select the child bone (the bone from the upper arm to the forearm).
In the Properties panel, select the Constrain option in the Joint: Rotation section.

The angle indicator changes from a full circle to a partial circle on the joint, showing the minimum and maximum allowable angles and the current position of the bone.
In the Properties panel, set the Left Offset rotation angle to -90 degrees and the Right Offset rotation angle to 90 degrees.
Drag the upper arm.
You can move the arm, but its rotation is constrained to the extremes of rotating straight up or straight down, preventing your armature from being positioned in unrealistic positions and making it much easier to control and position your poses.
TipIn real life, joints only allow bones to rotate. However, in Animate, you can allow joints to slide in either the x (horizontal) or the y (vertical) direction, and you can set the limits on how far those joints can travel. Use Joint: X Translation and Joint: Y Translation in the Properties panel to enable and constrain this kind of motion, just like you do with rotation.
Using on-Stage controls for joint constraints
You can make quick adjustments to any joint rotation or translation constraints by just using the on-Stage controls that appear over joints, rather than making those adjustments in the Properties panel. Using the on-Stage controls lets you see the constraints in context with the other bones and graphics on the Stage.

Simply select a bone and move your mouse pointer over the joint in the head of the bone. A circle with four arrowheads highlights in blue. Click it to access the on-Stage controls.
To change the constraints for rotation, move your mouse over the outer edge of the circle, which will highlight in red, and click it.
Click inside the circle to define the minimum and maximum angles for the joint rotation. The shaded area is the range of permissible rotation. You can also drag to change the angles within the circle. Click outside the circle to confirm your adjustments.
If you want to disable the rotation at that joint, click the lock icon that appears when you roll over the center of the circle.
To change the constraints for translation (movement up and down or side to side), move your mouse over the arrows inside the circle, which will highlight in red.

Click either the horizontal or vertical arrow, and then drag the offsets to constrain the translation of the joint in either direction.
Adding poses
Your armature is now ready. You’ve connected your bones and applied the appropriate constraints to make it easier to pose. In the timeline, you insert poses just as you would insert keyframes for a motion tween.
Inserting poses
![]() Note
Note
When dealing with armature layers, “poses” and “keyframes” are essentially the same thing.
Recall that your goal is to define unique poses that will allow a natural pedaling motion. You’ll create eight additional poses for Ruby’s feet to approximate the circle in which they will travel. The whole cycle will last 48 frames, so each pose will take six frames.
On the timeline, select frame 6.
Move Ruby’s feet and pedals so that the front foot/pedal is at the northwest position (about 1 o’clock) and the back foot/pedal is on the opposite side.

A new pose/keyframe is inserted at frame 6.

On the timeline, select frame 12.

Move Ruby’s feet and pedals so that the front foot/pedal is at the west position (about 3 o’clock).
 Tip
TipYou can add eases to your inverse kinematics animations by selecting the animation on the timeline and choosing an ease type and strength in the Properties panel. Eases can change the animation by starting slowly (ease-in) and by ending gradually (ease-out).
Continue adding new poses every six frames and positioning Ruby’s feet along the pink circle. You’ll end up with nine poses, each at roughly every 7 minutes of a clock face, along 48 frames. The first and last poses will be the same.
 Tip
TipYou can edit poses on the timeline just as you can with the keyframes of a motion tween. Right-click along the timeline and choose Insert Pose to insert a new pose. Right-click any pose and select Clear Pose to remove the pose from the layer. Command-click/Ctrl-click a pose to select it. Drag the pose to move it to a different position along the timeline.
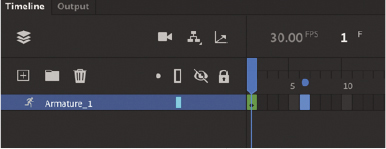
Select Loop Playback at the bottom of the timeline (Shift+Option+L/Shift+Alt+L), and extend the markers to cover the entire animation span from frame 1 to frame 48.
TipMake sure the first and last poses are exactly identical by copying the first keyframe and pasting it in the last frame. Hold down the Option/Alt key and drag the first keyframe to frame 48.

Click the Play button at the bottom of the timeline (press the Return [macOS] or Enter [Windows] key) to view your animation loop.
Adding a wave and head nod
Now that the pedaling motion is complete, you’ll add additional movements that give Ruby some personality.
Select frame 18 and move Ruby’s left arm up in the air to wave.

Select frame 24 and move her forearm to a straighter position.
Select frame 30, move Ruby’s left arm up, and angle her forearm close to her head to complete her wave.
In one of the poses (you choose), rotate her head slightly so that Ruby gives a nod during her wave.
Inverse kinematics with shapes
Ruby and her bicycle are an armature made with various movie clip symbols. You can also create armatures inside shapes, which are useful for animating objects that do not have obvious joints and segments but can still have an articulated motion. For example, the arms of an octopus have no actual joints, but you can add bones to a smooth tentacle to animate its undulating motion. You can also animate other organic objects, such as a snake, a waving flag, leaves of grass bending in the wind, or, as you will do in the next task, Ruby’s hair blowing in the wind.
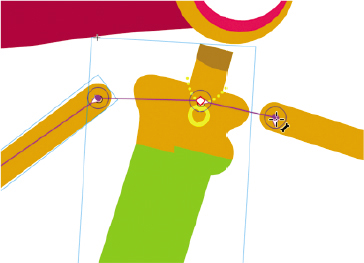
Defining bones inside a shape
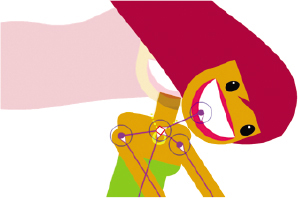
Ruby’s hair is a shape with a red fill and no stroke. You’ll add bones to it in order to animate it.
In the library, open the Girl Bicycle__assets__folder and double-click the Ruby_Head movie clip symbol.
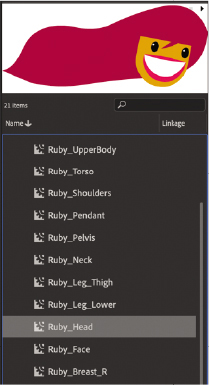
In symbol editing mode, note that her hair is in the bottom layer.
Choose the Bone tool.
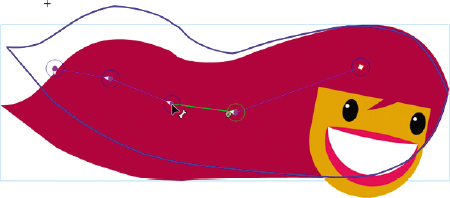
Click inside the shape starting from the right side, and drag a bone inside the hair part of the way.

Animate creates an armature inside Ruby’s hair and moves it to its own armature layer.
Click the end of the first bone and drag out the next bone a little farther down toward the tip of the hair.
The second bone is defined.
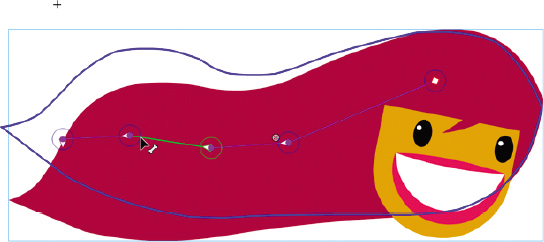
Continue building the hair armature with a total of about four bones.

When the armature is complete, use the Selection tool to drag the last bone to see how the deformation of the hair follows the bones of the armature.
Animating the hair
Animating an armature within a shape follows the same process as animating an armature built with movie clips. You establish different poses for your armature with keyframes along the timeline.
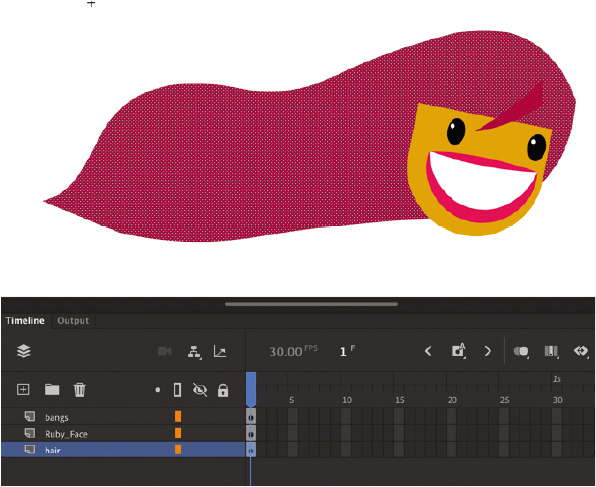
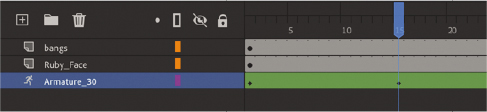
Select frame 40 for all three layers and choose Insert > Timeline > Frame (F5).

Animate adds frames up to frame 40 on the timeline. Making the number of frames in the nested animation of Ruby’s hair different from the main timeline of the pedaling will ensure that the animations are not synchronized, resulting in a more natural loop.
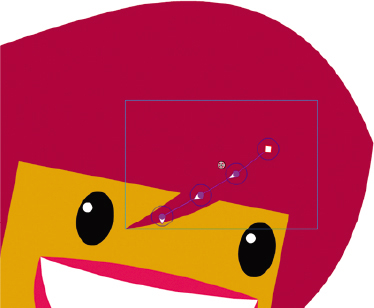
Move the playhead on the timeline to frame 15.
Move the armature in Ruby’s hair to deform it. You can also hold down the Shift key as you move a bone to isolate its rotation.
Animate inserts a new pose for Ruby’s hair at frame 15.
Move the playhead to frame 25.
Move the armature in Ruby’s hair to position it in a different way.
Animate inserts a new pose for Ruby’s hair at frame 25.
Hold down the Option/Alt key and drag the first pose to the last frame (40).

Animate duplicates the first pose into frame 40 so that the animation will end at the same place as it begins.
Exit symbol editing mode and test your movie. Because the hair animation is a nested animation in a movie clip symbol, simply pressing Play/Enter on the main timeline won’t show her hair moving.
Ruby’s hair waves and blows as she pedals her bicycle.
To complete the animation, add an armature to Ruby’s bangs in the bangs layer, and animate the wisp of hair fluttering in her face.
TipThe organic control of a shape by its armature is a result of a mapping between the anchor points along the shape and its bones. You can edit the connections between the bones and their control points and refine the behavior with the Bind tool. The Bind tool must be added to the Tools panel from the Edit Toolbar option. Consult the Animate Help documentation for more information on how to use this advanced tool.
Simulating physics with springiness
So far, you’ve seen how armatures can help you easily pose your characters and objects in different keyframes to create smooth, natural motion. But you can also add a bit of physics to your armatures so that they react to how they move from pose to pose. The Spring feature helps you do this easily.
Spring simulates physics in any animated armature, whether you’re using movie clips or a shape. A flexible object normally would have some “springiness” that would cause it to jiggle on its own as it moved and continue to jiggle even after motion of the entire body stopped. The amount of springiness depends on the object—for example, a dangling rope would have a lot of jiggle, but a diving board would be much stiffer and have less jiggle. You can set the strength of the spring depending on your object, and you can even set different springiness amounts for each bone in an armature to help you get the exact amount of rigidity or flexibility in your animation. In a tree, for example, the larger branches will be less springy than the smaller end branches.
Adding springiness to Ruby’s hair
Adding spring to the armature in Ruby’s hair allows it to have additional residual motion after a pose in a keyframe. The strength values for spring can range from 0 (no spring) to 100 (maximum spring).
In the library, double-click the Ruby_Head movie clip symbol to enter symbol editing mode if you’re not there already.
In symbol editing mode, select the last child bone in Ruby’s hair.

In the Properties panel, in the Spring section, set the Strength to 100.

The last bone has the maximum spring strength since the tip is the most flexible part of the whole armature and would have the most independent motion.
Select the next bone in the armature. You can simply click it on the Stage, or you can navigate up the armature hierarchy with the arrows in the Properties panel.
In the Properties panel, in the Spring section, set the Strength to 70.
The middle of the bone is a little less flexible than the tip, so it has a smaller strength value.
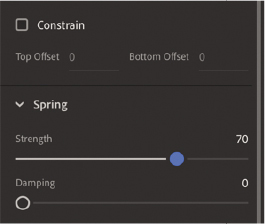
Select the next parent bone, and in the Spring section of the Properties panel, set the Strength to 30.
The base of the hair armature is even less flexible than the middle, so it has a smaller strength value.
The effects of the Spring feature are more apparent when there are additional frames on the timeline after the armature’s final pose. The additional frames allow you to see the residual bouncing effect after the last pose.
Add frames to all the layers until frame 100.

Test your movie.
Ruby’s hair moves from the first pose to the next, but even past the last pose, the hair continues to sway slightly. The back-and-forth rotation of the hair armature, combined with the addition of springiness to the bones, can simulate the responses to physical forces on an object and makes the animation more realistic.
Go back and experiment with different values for the spring strength and see what works for your animation.
Adding damping effects
Damping refers to how much the spring effect decreases with time. It wouldn’t be realistic if the swaying of the hair continued indefinitely. Over time, the swaying should lessen and eventually stop. You can set a damping value for each bone from 0 (no damping) to 100 (maximum damping) to control how rapidly these effects diminish.
Select the last bone of the hair (at the tip), and in the Properties panel, in the Spring section, set the Damping value to 50.
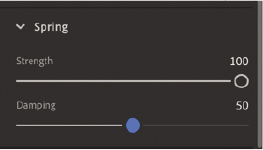
The Damping value will decrease the swaying of the hair over time.
Select the next bone (its parent) in the armature, and in the Spring section of the Properties panel, set the Damping to its maximum value (100).
Continue selecting bones with Strength values and add Damping values to slow the springiness.
Choose Control > Test to see the effects that the Damping values have on the motion of Ruby’s hair.
The hair still sways, but the motion quickly subsides. The Damping values help add a sense of weight to the armature. Experiment with both the Strength and Damping values in the Spring section of your armature to get the most realistic motion.
Tweening automatic rotations
You’re almost done! Ruby pedals and waves, and her hair blows in the breeze, but her bicycle’s wheels and crank need to turn.
Adding a nested animation of rotating wheels
Now you’ll animate rotating wheels inside the movie clip of the bicycle frame.
Double-click the bicycle frame on the Stage.
You enter symbol editing mode for the bike_frame movie clip symbol, but you’re editing in place to see all the other graphics on the Stage (dimmed).
Double-click the back wheel to drill down to the Wheel_Turning movie clip symbol.
Select the wheel on the Stage and click the Create Motion Tween button above the timeline.
Animate creates a tween layer and adds 30 frames.
Click inside the tween, and in the Properties panel, select Clockwise for Rotate, and leave Count at 1x.
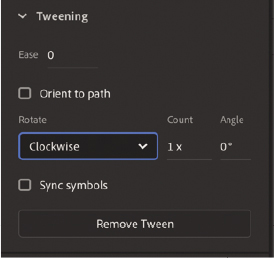
The wheel automatically rotates on its transformation point (which is in the center) for one complete clockwise turn.
Since there is another instance of the Wheel_Turning movie clip for the front wheel of the bicycle, you don’t have to create another tween. Your bicycle wheels are complete.
Adding the crank arm
Finally, the bicycle’s pedals need to be connected to the bicycle with the crank arm that spins the gears.
Double-click the crank_animation movie clip symbol in the library.

You enter symbol editing mode for the movie clip symbol.

Select the movie clip instance on the Stage or the first keyframe on the timeline, and click Create Motion Tween above the timeline.
Animate creates 30 frames in a motion tween layer.
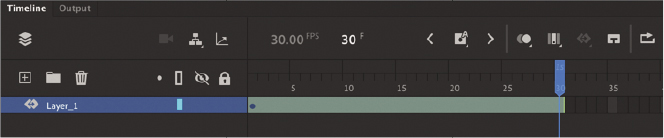
Add frames so that the tween layer has 48 frames.
The animation of the crank arm rotating must be synchronized to Ruby’s pedaling, so the number of frames must match (48 frames).

Select the tween. In the Properties panel, select Clockwise for Rotate and 1x for Count.
Animate automatically tweens a clockwise rotation for one turn.

Frame 1 and frame 48 are identical, so to make a seamless loop, you’ll have to make a slight adjustment. Drag the right edge of the tween to extend the tween to frame 49.
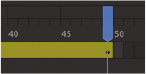
Insert a new keyframe at frame 48.

Remove frame 49.

You still have a total of 48 frames for the rotation, but the ending keyframe doesn’t repeat the beginning keyframe, and the loop will be seamless.
Now go to symbol editing mode for the bike_frame movie clip symbol, and add an instance of the crank_animation symbol to the front_pedal layer. The instance should fit right inside the pink circle.

Copy the crank_animation instance.
Select the back_pedal layer and choose Edit > Paste In Place (Command+Shift+V/Ctrl+Shift+V).
The Paste In Place command pastes the copied items exactly where you copied them from.
Make sure the transformation point is at the center of the crank, and then choose Modify > Transform > Flip Vertical.
The instance flips so that the crank arm now points downward. If the transformation point is not at the center, you can move it with the Free Transform tool.
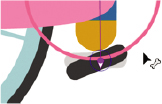
If you hide the layers above the back_pedal layer, you can see the pedal, its transformation point, and how it flips. However, the crank arm will now rotate counterclockwise.

Choose Modify > Transform > Flip Horizontal.
The crank_animation instance flips horizontally so that now the rotation will continue to turn clockwise.
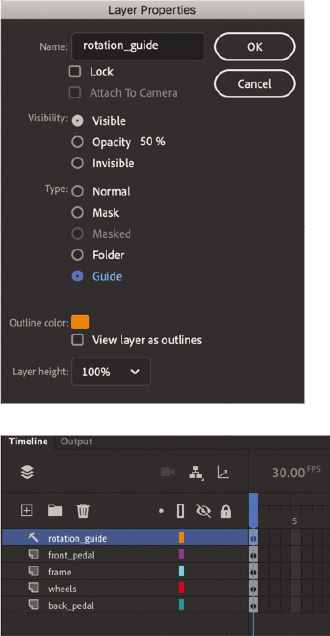
Right-click the icon in front of the rotation_guide layer and choose Properties.
In the Layer Properties dialog box that appears, select Guide for the Type. Click OK.
 Note
NoteA guide layer doesn’t show up when you publish the project. It shows up on your timeline as an icon of a T square.
Exit symbol editing mode and test your movie.

Ruby rides her bicycle, and the spinning crank arms synchronize with her pedaling. The pink circle that acted as your guide to position her feet and pedals doesn’t appear now that it is in a guide layer.
Rig mapping
Rig mapping is a feature that lets you apply saved armatures to different graphics so that, for instance, a walking animation can be reused with many different characters.
You can save your own armature and armature poses in the Assets panel, or you can use the many assets provided by Adobe.
Saving an animated armature in the Assets panel
To save an armature animation in the Assets panel, you must first save it in your library as a movie clip symbol.
Select the armature layer of your Ruby animation. Right-click and choose Convert Layers To Symbol.
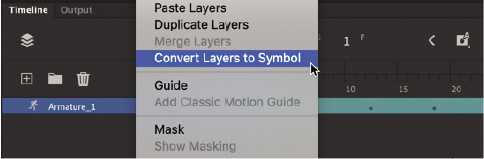
In the Convert Layers To Symbol dialog box, enter Ruby_bike_animation as its name, select Movie Clip as the type, and click OK.

Animate saves the armature layer inside a movie clip symbol, which appears in your library.

Right-click the new movie clip symbol and choose Save As Asset.

In the Save As Asset dialog box, enter a few keywords, separated by commas, that will serve as searchable reminders of the asset. Since you want to save the graphics, the armature, and the animation, keep Objects, Bones, and Motion selected. Click Save.
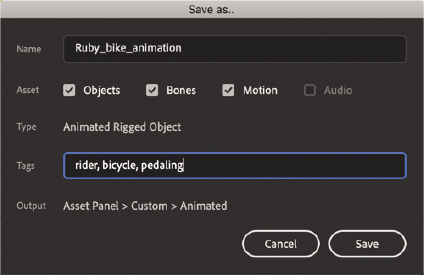
Animate saves the animation in the Custom tab of the Assets panel.
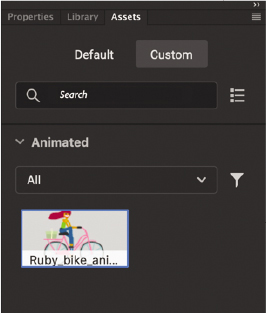
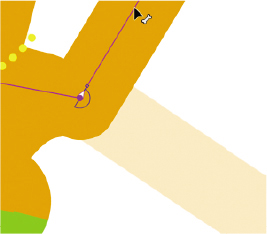
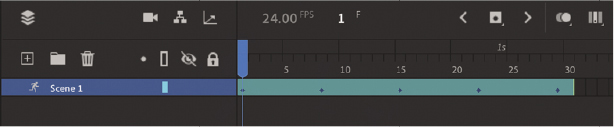
If you choose to save only Bones and Motion (and deselect Objects), your animated armature will be saved to the Assets panel, as the following figure shows.

Using rig mapping to apply an armature to new graphics
In this task, you’ll see how you can apply an animated armature to new graphics.
Open 09Start_rigmapping.fla in the 09Start folder.
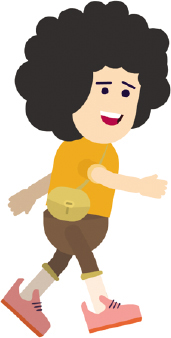
This sample file contains a character on the Stage made up of several movie clips.
Select all the instances on the Stage.
In the Assets panel, select the Default tab and open the Animated section.
In the Filters section, select Characters and Rigs and then choose the Walk Rig asset.

Drag the Walk Rig asset and drop it on the selected character instances.
The Rig Mapping panel appears.
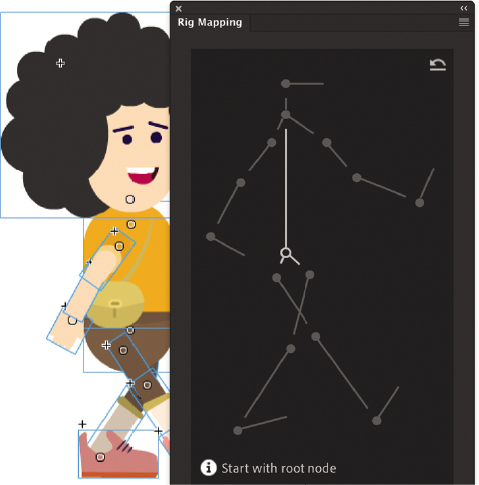
Animate will attempt to map the armature onto the movie clip. If Animate can’t map the armature to the graphics automatically, you’ll need to manually identify which movie clip instances belong to which bones.
Select the root node, which is the hip, highlighted in the Rig Mapping panel.

On the Stage, click the movie clip corresponding to the character’s hip.
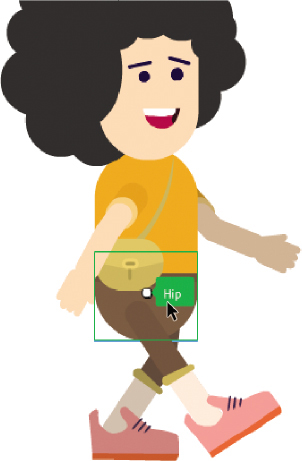
When the movie clip instance is matched to its corresponding armature part, both are highlighted in green.
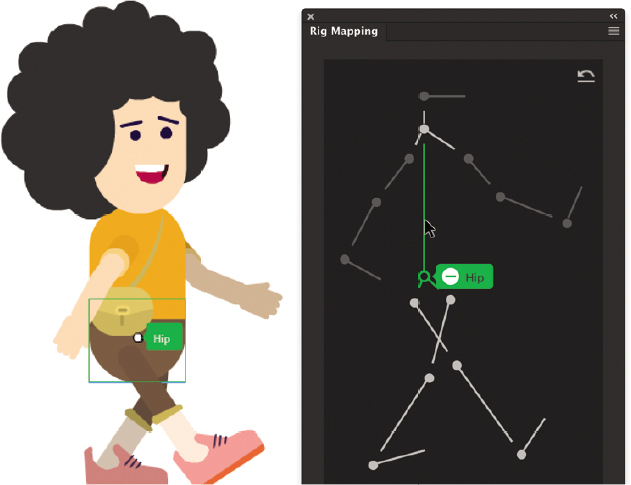
Click the next bone in the Rig Mapping panel and the corresponding movie clip instance on the Stage.
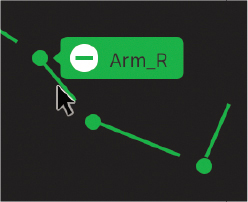
If you make a mistake, click the minus sign near each bone to remove that linkage and choose another bone.
Continue manually matching up the armature with the corresponding graphics on the Stage until the entire rig is complete. Click Apply Skeleton.

When the rig mapping process is complete, the armature is applied to the movie clips and the rig mapping diagram turns pink.

The armature poses appear in the timeline.
Test your movie.
The character performs the walk cycle.
Review questions
1 What are the two ways of using the Bone tool?
2 Define and differentiate these terms: bone, joint, and armature.
3 What is the hierarchy of the armature?
4 How do you constrain or disable the rotation of joints?
5 What do strength and damping refer to in the Spring feature?
6 How do you save just an armature to the Assets panel?
Review answers
1 The Bone tool can connect movie clip instances to form an articulated object that can be posed and animated with inverse kinematics. The Bone tool can also create an armature within a shape, which can be posed and animated with inverse kinematics as well.
2 Bones are the objects that connect individual movie clips or that make up the internal structure of a shape for motion with inverse kinematics. Joints are the articulations between bones. Joints can rotate as well as translate (slide in both the x and y directions). Armatures refer to the complete articulated object. Armatures are separated on their own special armature layers on the timeline where poses can be inserted for animation.
3 An armature is made up of bones that are ordered in a hierarchy. When one bone is connected to another bone, one is the parent and the other is the child. When a parent bone has many child bones, each child bone can be described as a sibling of the others.
4 Hold down the Shift key to temporarily disable the motion of the armature and isolate a single bone’s rotation. Use the Properties panel to pin a bone to prevent it from rotating, or deselect the Enable option in the Rotation section of the Properties panel to disable a particular joint’s rotation.
5 Strength is the amount of springiness of any individual bone in an armature. Add springiness with the Spring feature to simulate the way different parts of a flexible object jiggle when the entire object moves and continue to jiggle when the object stops. Damping refers to how quickly the springiness effect subsides over time.
6 To save an armature to the Assets panel, the armature must be a movie clip symbol. Right-click the movie clip in the library and choose Save As Asset. In the Save As Asset dialog box, select Bones as the option. Animate will save the armature in the Custom tab of the Assets panel.