5. Prototyping and Building a Website
In this lesson, you’ll learn these skills and techniques:
• Prototyping a website in Fireworks
• Placing, scaling, and adjusting images
• Working with layers
• Adding a navigation bar
• Using master pages
• Adding dummy text and rollover behaviors
• Presenting the prototype
• Developing a website in Dreamweaver
• Setting up a page framework with CSS
• Incorporating pages from Fireworks
• Roundtrip editing between Fireworks and Dreamweaver
![]() This lesson will take about two hours to complete.
This lesson will take about two hours to complete.
Learn how to use Fireworks to rapidly prototype a website design—complete with interactive links and rollover behaviors. Preview the pages in a standard web browser and get client approval before you start the website development in Dreamweaver. Incorporate the assets created in Fireworks and replace placeholder items.
Planning for a website
Creating a website requires careful planning and preparation. Before spending a considerable amount of time coding the actual pages, you’ll need to ensure that what you’re developing is what your client expects. The desire of the client to see how the project will look when it’s finished before approving the design can create a dilemma.
You need to present the client with a visual representation of the website design—ideally with fully functional rollover buttons and page links—without actually coding the pages in Dreamweaver.
Note
Before you start working on this lesson, make sure that you’ve installed the Creative Suite 5 software on your computer and that you have correctly copied the Lessons folder from the CD in the back of this book onto your computer’s hard disk (see “Copying the Classroom in a Book files” on page 2).
The solution is to use Fireworks as a rapid prototyping tool. Fireworks enables you to quickly create a mock-up of a few pages of a website—including interactive elements—that can then be previewed in a standard web browser. Once the client approves the design, you can reuse the work you’ve done in Fireworks for the development of the website in Dreamweaver.
You can also use the same design prototype for more than just building a website.
A typical workflow
Designing a website from start to finish involves these basic steps:
- Together with the client, define the scope of the project, including the objectives of the website, the target audience, schedule, and available resources.
- Develop a design strategy and establish the look and feel of the web pages.
- Create a prototype of the website in Fireworks.
- Present the design to the client and refine it as necessary to obtain approval.
- Assemble the required assets and create the website in Dreamweaver.
This lesson will focus on designing the website prototype in Fireworks and then incorporating that work into a Dreamweaver project.
The website you’ll develop consists of a main page and three other pages, which are connected by hyperlinks as shown in the following illustration.

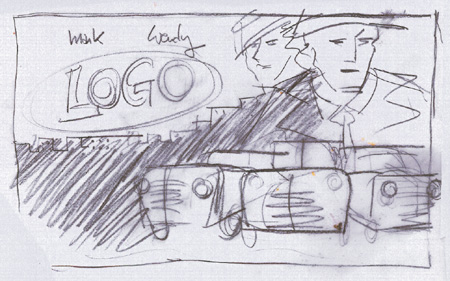
The design sketch for the home page shown in the following illustration was the result of a meeting with the client to establish the overall look and feel of the website.
Based on the design sketches, some images have been specially prepared, incorporating the common assets created in Lessons 1 and 2.
Previewing the assets in Bridge
To get a first impression of the images that will be used in this lesson, you can preview the files in your Lesson05 folder using Bridge.
- Start Adobe Bridge CS5.
- In Bridge, navigate to the Lesson05 folder on your hard disk. Within that folder, select the file CityBackground.psd. This image will serve as the background for the website pages.
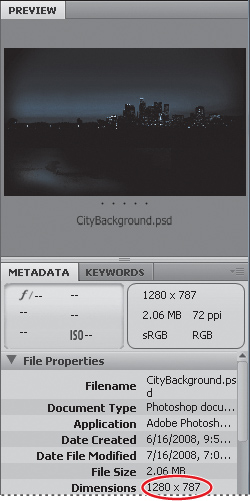
- In the Metadata panel, note the pixel dimensions for this image: 1280 × 787 pixels. This will be the page size—the size of the stage or canvas, if you prefer to using these terms—for the design in Fireworks.
- Select the file Cars.psd. Only the car in the middle comes from a photo taken during the shooting of the film. The image of the car on the left was created from a 3D model as shown in Lesson 1. The car on the right is a flipped copy of the image on the left.

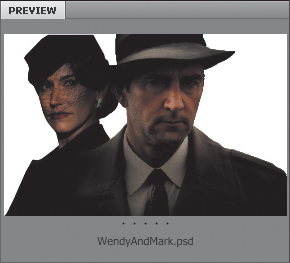
- Select the file WendyAndMark.psd. The photos of the two main actors were placed on separate layers in the Photoshop file. The silhouettes were masked using the Quick Selection tool and the image background removed—a technique similar to that used for the brochure cover in Lesson 2.
- Select the file LogoLockup.psd. The Double Identity logotype was designed in Illustrator and then placed in a Photoshop file. The other text was created in Photoshop by applying a gradient overlay to a type layer. For the purposes of this exercise, the type layers have been rasterized in case you don’t have the appropriate fonts installed.

You won’t use the rest of the images in the Lesson05 folder until later in this lesson.
Creating a prototype website in Fireworks
In the following exercises you’ll work on two pages of a prototype website in Fireworks. In the process you’ll place images, use layers to arrange and organize the page elements, create master pages for items that are shared across pages, add hyperlinks and rollover behaviors, and finally preview the design in a web browser.
Setting the stage
You’ll begin by creating a new document in Fireworks.
- Launch Adobe Fireworks CS5.
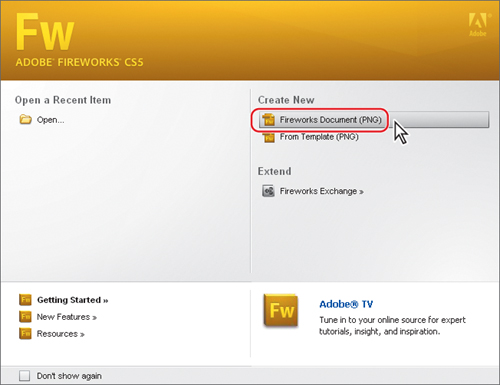
- Click the Create New Fireworks Document (PNG) button in the Welcome screen, or choose File > New.
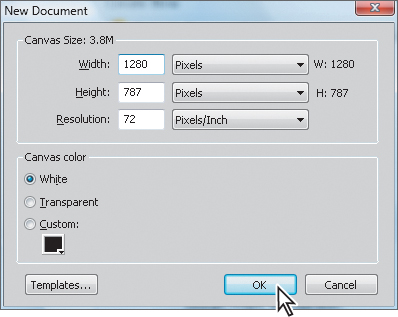
- In the New Document dialog box, type 1280 in the Width text box and choose Pixels from the units menu beside it. Type 787 in the Height text box and choose Pixels from the units menu. Type 72 in the Resolution text box and choose Pixels/Inch from the resolution menu beside it. This is the default resolution for web pages. You can ignore the background color options under Canvas Color; for this prototype website, you will use an image as a background. Click OK.
- Choose File > Save As. In the Save As dialog box, navigate to your Lesson05 folder, select Fireworks PNG (*.png) from the Save As Type/Format menu, name the file Mockup.png, and then click Save.
Placing images
You can insert images into a Fireworks document in many different ways. You’ll discover just a few of the options in the following exercises.
Using copy and paste
Copy an object or text in a variety of file formats from another application to the clipboard, and then use the Place command in Fireworks to insert the clipboard content into the Fireworks document.
- Choose File > Browse in Bridge to switch to Bridge.
- In Bridge, select the file CityBackground.psd, and then choose File > Open With > Adobe Photoshop CS5 (default).
- In Photoshop, choose Select > All, and then choose Edit > Copy.
- Switch back to Fireworks, and then choose Edit > Paste. The background image is inserted into the document Mockup.png.
- Ensure that the background image is selected. In the Properties panel, set the X and Y offset values to 0. The image covers the entire document size.

Tip
If necessary, you can choose a lower magnification level from the Zoom menu in the lower-right corner of the document panel to see the entire document on your screen.
Using drag and drop
You can drag vector objects, bitmap images, or text directly into a Fireworks document from any application that supports drag and drop—including Photoshop, Illustrator, Flash, and others. You can also drag a file from Bridge or from Windows Explorer/the Finder into the Fireworks document.
- Choose File > Browse in Bridge to switch to Bridge.
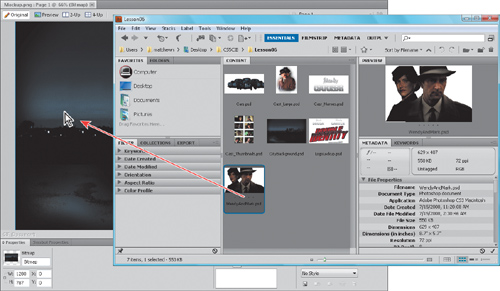
- Position the Bridge window so that you can see both the Bridge window and the Fireworks document in the background at the same time.
- From Bridge, drag the file WendyAndMark.psd onto the Fireworks document.
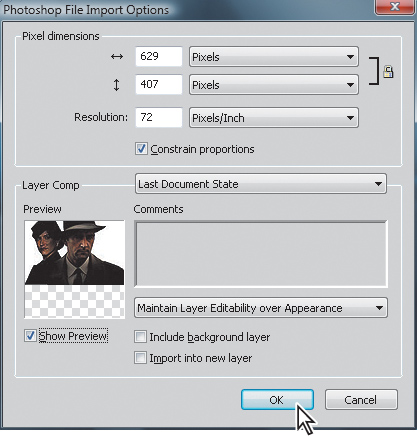
- In Fireworks, the Photoshop File Import Options dialog box appears. Click OK without making any changes to the default options.
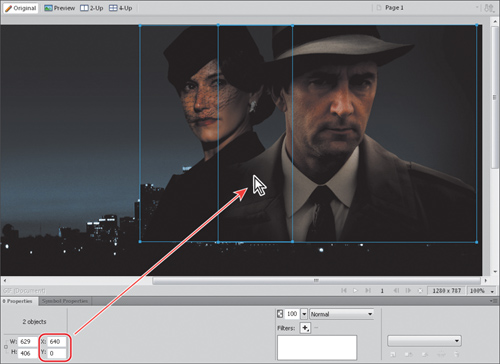
- Drag the placed image toward the top-right corner of the document window. Align the top of the image with the top of the document window and the left edge with the center of the document. Use the smart guides and the X and Y offset values in the Properties panel to guide you.
Applying a gradient mask to a placed image
As you might have noticed, you’ve just imported not one but two images, each placed on a separate layer. To have these images blend in better with the background, you’ll apply a gradient mask to each of them.
Tip
The Photoshop File Import Options dialog box gives you the option to flatten a layered Photoshop file to a single-layer image.
- Choose Select > Deselect. Click to select the image of the man.
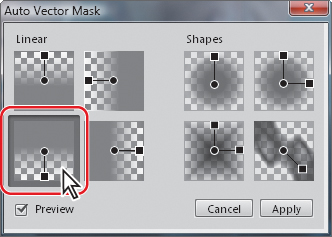
- Choose Commands > Creative > Auto Vector Mask. In the Auto Vector Mask dialog box, select the downward-fading gradient from the Linear options, and then click Apply.
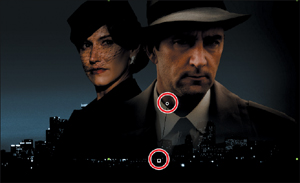
- Reposition the two handles of the gradient mask so that the fade starts near the man’s collar line and ends just below the horizon in the background image.
- Add a gradient mask for the image of the woman in the same way.
Using the Import command
If you prefer to use a menu command to import images, use the Import command.
- Choose File > Import.
- In the Import dialog box, navigate to your Lesson05 folder, select the file Cars.psd, and then click Open.
- In Fireworks, the Photoshop File Import Options dialog box appears. Click OK without making any changes to the default options. Your pointer changes to a graphics placement cursor (
 ).
).
- Click near the center of the background image to place the image of the cars. Drag to position the cars as shown in the following illustration. We set a top-left position of X: 380 and Y: 394 for the group of images.

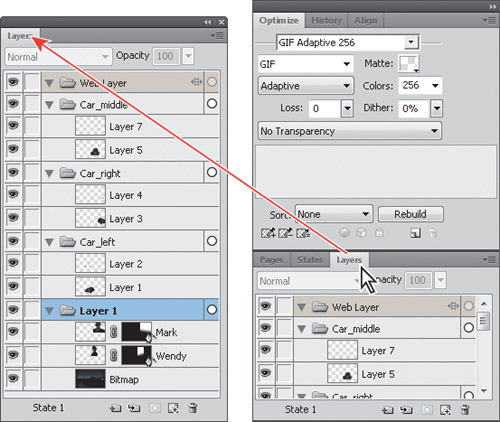
Organizing objects in the Layers panel
The images you’ve placed so far have been added one above the other and each in its own layer to the Layers panel. Before things get too unwieldy, you should organize your image components into folders in the Layers panel.
- Choose Select > Deselect.
- Undock the Layers panel by dragging it out of its panel group, and then resize the panel by dragging its lower-right corner. This will make it easier to work with your layers in the next exercise.
Creating new folders
Try to organize the components in your document by logical groups—the background, the actors, the cars, and so on—and then put each group into its own folder. You’ll start by creating a new folder for the images of the actors, which are currently in the same folder as the background image.
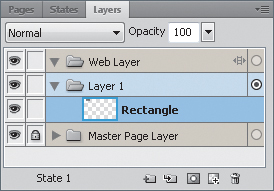
- Select the folder Layer 1 at the bottom of the Layers panel.
- From the Layers panel Options menu (
 ), located at the right side of the panel header, choose New Layer.
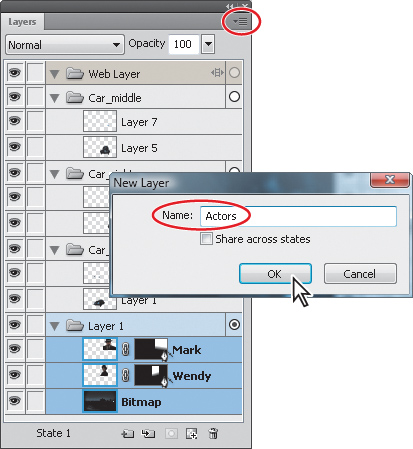
- In the New Layer dialog box, type Actors in the Name text box, disable the Share Across States option, and then click OK.
A new folder, named Actors, is created just above the folder Layer 1.
Note
You can rearrange layers and folders in the Layers panel by dragging them. Release the pointer when you see the horizontal insertion bar at the desired new location.
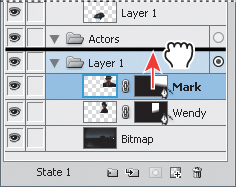
Moving objects between and within folders
You can move an object from one folder to another either by simply dragging it or by first selecting the object and then clicking the selection indicator in the destination folder.
- Choose Select > Deselect; if the Deselect command is unavailable you don’t need to do anything.”
- Drag the layer Mark onto the folder Actors. Release the pointer when you see a black insertion line just below the Actors folder. The layer Mark has been moved inside the Actors folder.
- Select just the layer Wendy and click the selection indicator in the Actors folder. (See first illustration below.) The layer Wendy has been moved inside the Actors folder and placed above the layer Mark. To reestablish the previous stacking order, drag the layer Wendy below the layer Mark inside the Actors folder. (See second illustration below.)
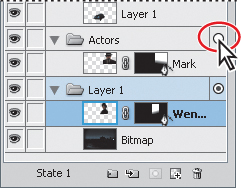
Move Wendy into Actors folder

Change order in Actors folder
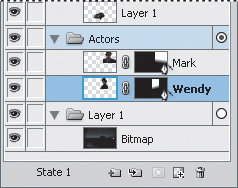
Final arrangement
Tip
In the Layers panel, you can move multiple selected objects at the same time. Ctrl-click/Command-click one or more objects, and then move them to a new folder by one of the two methods described above. The original stacking order of the objects will be preserved.
Nesting folders
Folders can be nested. You’ll now create a new folder to hold the three folders for the cars, as shown in the illustration.
- In the Layers panel, select the folder Car_middle, just below the folder named Web Layer.
- From the Layers panel Options menu, choose New Layer. In the New Layer dialog box, type Cars in the Name text box, disable the Share Across States option, and then click OK.
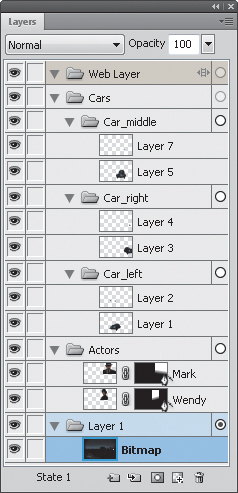
- Drag the folder Car_left onto the new Cars folder, followed by the folder Car_right, and finally the folder Car_middle. Don’t click the selection indicator in the folder Cars—this would move the selected layers without their parent folder.
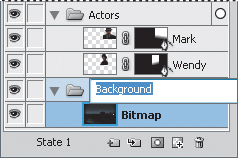
Renaming folders
Giving your folders descriptive names is good organizational practice and helps you keep an overview.
- Double-click the name of the folder Layer 1 near the bottom of the list in the Layers panel.
- Type Background as the new name, and then press Enter.
Collapsing and expanding folders; locking and unlocking folders and layers
You can collapse and expand folders to show only the level of detail that currently interests you. Folders and layers you’re not currently working with can be locked to avoid unintentional changes.
- Click the triangles next to the folder names Cars, Actors, and Background to collapse those folders.
- Click a triangle again to expand a folder.

- To avoid changing objects unintentionally, click the box in the column immediately to the left of the folder or layer name. A padlock icon (
 ) appears in the box, indicating that the objects in that folder or on that layer are locked.
 - Click the padlock icon to unlock the folder or layer.
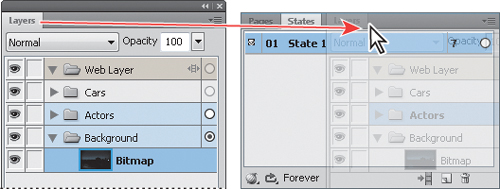
- You can leave the Layers panel undocked for the remainder of this lesson. Alternatively, return the Layers panel to its original location by dragging it by its tab into the same group as the Pages and States panels. To dock the panel in that group, release the mouse button when you see a blue line surrounding the panel group.
Working with layer comps and flattening images during import
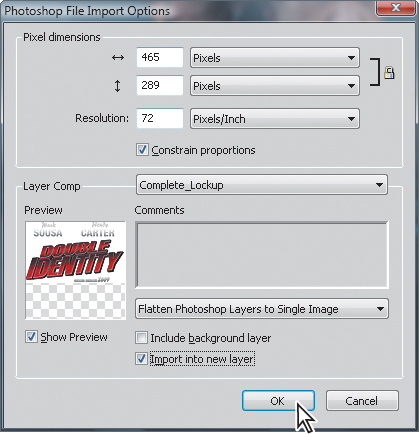
You’ll now import a logo lockup into the document from a Photoshop file. A lockup is a set arrangement of a logo together with one or more text elements as defined by the designer. This logo lockup consists of several objects in multiple layers. The file also contains layer comps; during import you can choose which layer comp to import. Because you won’t need access to the individual objects in the logo lockup for this exercise, you can flatten the imported layer comp into a single layer in Fireworks.
- Choose File > Import. In the Import dialog box, navigate to your Lesson05 folder, select the file LogoLockup.psd, and then click Open.
- In the Photoshop File Import Options dialog box in Fireworks, activate the Show Preview option. Preview each of the available layer comps in the Layer Comps menu in turn; then, select the layer comp Complete_Lockup. From the menu below the Comments pane, choose Flatten Photoshop Layers To Single Image. Activate the option Import Into New Layer. Make sure your settings are exactly as shown in the illustration, and then click OK.
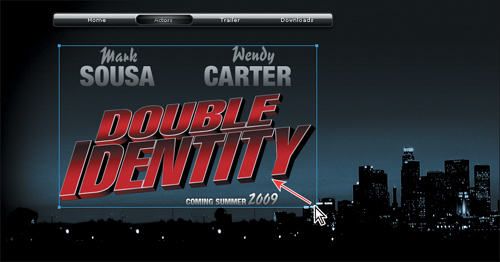
- The pointer changes to a graphics placement cursor (). Click near the top-left corner of the background image to place the logo image. Drag to reposition the image as shown in the illustration below. We set a top left position of X: 100 and Y: 80 for the image, leaving some space above for the menu bar.

- Create a new folder above the Cars folder in the Layers panel, name the new folder Logo, and then drag the layer with the newly placed logo image into that folder.
Adding a navigation bar
Your first page is almost complete. All that’s missing is a navigation bar. Fireworks comes with a library of ready-to-use rich symbols, such as interactive buttons and navigation bars.
Note
Rich symbols are editable design and interface components that can be used and reused for website designs, interface prototypes, or any other graphic composition.
- In the Common Library panel (Window > Common Library), scroll down if necessary to see the Menu Bars folder. Click the folder name to expand the folder. Select Menu_Bar_04. You can see a preview of the menu bar design in the area at the top of the Common Library panel.
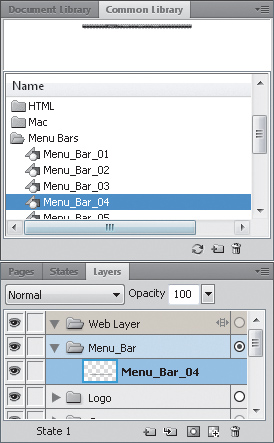
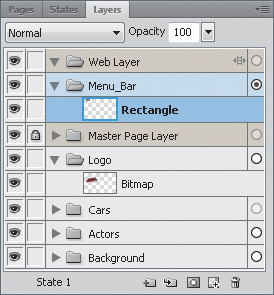
- Create a new folder in the Layers panel and name the folder Menu_Bar. Position the new folder just below the folder Web Layer. Click to select the new folder, and then drag Menu_Bar_04 from the Common Library panel onto the Fireworks canvas. In the Layers panel, the menu bar symbol is placed in the folder Menu_Bar.
- Double-click the new navigation bar on the canvas to enter symbol-editing mode. The other objects on the canvas are dimmed. Note the path to the symbol currently being edited—the symbol Menu_Bar_04 located inside the Page 1—in the tray at the top of the document.
- In the Layers panel, you can see that this menu bar is composed of six objects—four text layers for the button names, a small rectangle to indicate the currently selected button, and a large background rectangle. Select the large background rectangle in the Layers panel; blue selection handles appear at the corners of the menu bar on the canvas.
- In the Properties panel, enter 500 in the W (Width) text box and press Enter..

- Drag the large rectangle to the right on the canvas, holding the Shift key as you drag. Center the rectangle again relative to the four buttons.

- In the Tools panel, select the Type tool (
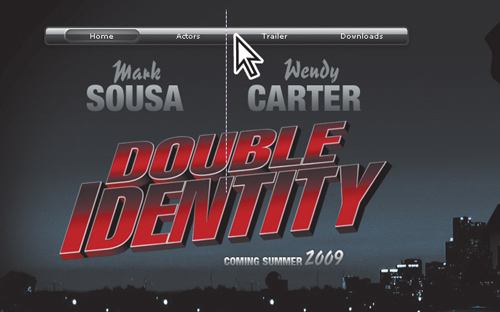
 ). Click inside the text on the About us button to place an insertion cursor. Delete the current text and type Home. Rename the remaining buttons in the same way to Actors, Trailer, and Downloads.

- In the Tools panel, select the Pointer tool (
 ). Exit symbol-editing mode by double-clicking outside the navigation bar.
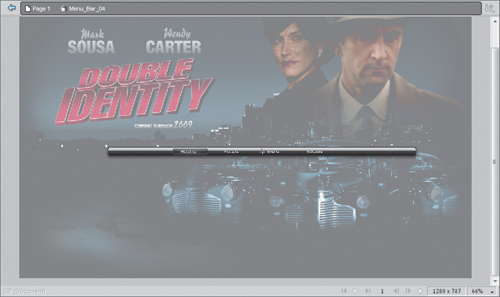
 - Drag the navigation bar to position it near the top of the document, above the logo. Release the pointer when you see the smart guide indicating that the navigation bar is centered above the logo image, as shown in the following illustration. Save your work.
Using a master page
For elements such as a navigation bar that you want to share across all pages, you can create a master page. Elements placed on the master page appear on all the other pages, and subsequent edits made to the master page are reflected on every other page.
Creating a master page
You will now create a new page for the navigation bar and designate it as the master page.
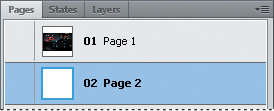
- In the Pages panel, choose New Page from the panel Options menu to add a new, empty page, named Page 2, to the Pages panel right below Page 1.
- Select Page 1 in the Pages panel.
- Click to select the navigation bar on the canvas, and then choose Edit > Cut.
- Select Page 2 in the Pages panel, and then choose Edit > Paste. The navigation bar is now the only element on page 2.

- With Page 2 selected in the Pages panel, choose Set As Master Page from the panel Options menu. Page 2 moves to the top of the list in the Pages panel and [Master Page] is added to its name.
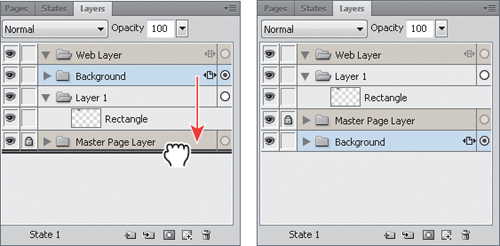
- Select Page 1 in the Pages panel. Note that the navigation bar is not (yet) visible on the canvas. That’s because by default the master page elements are added to each page inside a folder called Master Page Layer that is placed right at the bottom of the layer hierarchy. In this example, this layer is hidden behind the background image so you need to move the folder Master Page Layer up in the layer hierarchy to make its elements visible on page 1.
- In the Layers panel, drag the folder Master Page Layer from the bottom of the list to just below the now empty Menu_Bar folder. If you see an alert warning that a shared layer cannot be made a sublayer, try to reposition the Master Page Layer again, taking special care to release the folder when it’s located between the other two folders and not over one of them (which is indicated by the folder icon beside the name turning yellow).

- Note the padlock icon () in the column immediately to the left of the Master Page Layer name. You can’t unlock this layer from a normal page by clicking the padlock icon; master page objects can only be edited on the master page.
Editing objects on a master page
The navigation bar contains a gradient overlay to give the impression of a depressed button, now indicating the Home page as the current page. Since this gradient overlay needs to be over a different button on each page, you will delete it from the master page and reposition it on page 1.
- In the Pages panel, select Page 2 [Master Page].
- Double-click the navigation bar on the canvas to enter symbol-editing mode.

- Click to select the gradient overlay rectangle over the Home button, being careful not to select the Home button. You should see the blue selection handles at the four corners of the gradient overlay rectangle as well as the two black handles for the gradient. You can also select the gradient overlay rectangle in the Layers panel (the second layer from the bottom).

- Choose Edit > Cut, and then exit symbol-editing mode by double-clicking outside the navigation bar.
- Note that there is no longer a gradient overlay rectangle visible over the Home button. The change to the master page is reflected in this page..

- Switch to Page 1 by choosing its name from the Page menu in the top-right corner of the document pane.
- In the Layers panel, select the empty Menu_Bar folder, and then choose Edit > Paste. The gradient overlay rectangle is placed on a new layer inside the Menu_Bar folder in the Layers panel but off the page in the document window. To move it to where you can see it, enter 200 as X position and 20 as Y position in the Properties panel.
- Drag the gradient overlay rectangle to center it over the Home text button.

Creating new pages based on the master page
Any pages you add to your document after you have created a master page will inherit the master page settings. You will now create three more pages that will all automatically contain the navigation bar from the master page.
- In the Pages panel, choose New Page from the panel Options menu three times to create three additional pages. As you add pages note that the navigation bar is automatically placed on each page.
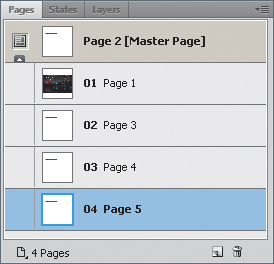
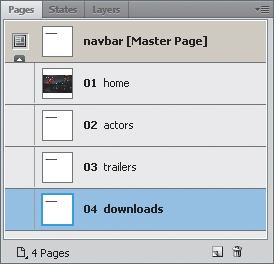
- Before continuing, it’s a good idea to give the pages descriptive names. In the Pages panel, select each page in turn, double-click the page name, and then enter a new name and press Enter. Rename Page 2 to navbar—[Master Page] is added automatically—Page 1 to home, Page 3 to actors, Page 4 to trailer, and Page 5 to downloads.
To complete the mock-up for the navigation bar and before moving on to make the buttons interactive, you’ll place the gradient overlay rectangle over the correct button for each page.
- In the Pages panel, select the page Home. On the canvas, select the gradient overlay rectangle over the Home button, and then choose Edit > Copy.
- Switch to the page Actors. In the Layers panel, select the folder just above the Master Page Layer folder, and then choose Edit > Paste.
- Drag to center the gradient overlay rectangle over the Actors text button. Hold down the Shift key while dragging to restrict the movement to one direction. We set X: 229 and Y: 22 as the position of the top-left corner.

- Change the trailer and downloads pages accordingly—we set the X positions 348 and 467 respectively, for the two rectangles. When you’re done, save your work.
Defining hotspots and linking pages
Hotspots are areas of an image that link to other pages when clicked. To make the navigation bar functional, you’ll create hotspots for the four menu buttons and have them link to the appropriate pages.
- In the Pages panel, click each of the four main pages and note how the appearance of the menu bar changes. The visual mock-up of the navigation bar is complete; you’ll now add functionality.
- Select the master page navbar [Master Page].
- In the Tools panel, select the Rectangle Hotspot tool (
 ), which is grouped with the Circle Hotspot tool (
 ) and the Polygon Hotspot tool (
 ).
). - Using the Rectangle Hotspot tool, drag over the Home button to draw a hotspot area. To reposition the rectangle while dragging, hold down the spacebar.

When you release the mouse button the hotspot area is highlighted over the Home button.

- With the hotspot rectangle still selected, choose the page home.htm from the Link menu in the Properties panel.

- Create hotspot areas for the Actors, Trailer, and Downloads buttons in the same way, linking them to the pages actors.htm, trailer.htm, and downloads.htm, respectively.

- In the Layers panel, note that the four hotspot areas have been created inside the Web Layer folder on the master page. The Web Layer folder appears as the top layer in each document and contains web objects used for adding interactivity to documents exported from Fireworks.

- Save your work.
Previewing web pages in a web browser
- In the Pages panel, select the page Home. Notice the hotspot areas overlaid over the navigation bar menu buttons. To hide or show hotspots and slice areas while working on your page layout, press 2 on your keyboard or click the Hide Slices And Hotspots button or the Show Slices And Hotspots button in the Tools panel.

A. Hide Slices and Hotspots button
B. Show Slices and Hotspots button - To test the functionality of your hotspots, choose File > Preview In Browser > Preview All Pages In [Web Browser Name].
- In your web browser, move your pointer over the menu buttons. Notice how the pointer changes to the Hand cursor when it’s over a hotspot area. Click a menu button to jump to that page.
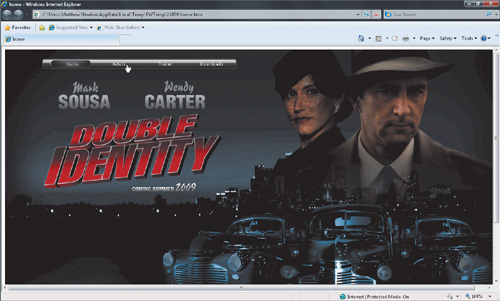
- You can see which page you’re on by the position of the gradient overlay over the menu buttons and by the filename in the address bar.
- If your links don’t work as expected, close the browser window, switch back to Fireworks, and verify that the correct links are specified for the hotspot areas on the master page. Correct any errors, save your changes, and again preview all pages in your web browser.
- When you’ve finished testing your navigation bar, close the web browser window and return to Fireworks.
You’ve completed the mock-up design of the Home page and the navigation bar. Next, you’ll work on the Actors page, creating slices and disjoint rollover behaviors.
Sharing layers to pages
You can share a layer across multiple pages in a document. You’ll share the background image from the Home page to the Actors page. Unlike elements on a master page, elements on a shared layer can be modified from any page.
- In the Pages panel, select the page Home.
- In the Layers panel, select the folder Background. From the Layers panel Options menu, choose Share Layer To Pages. In the Share Layer To Pages dialog box, select the page Actors in the left column (Exclude Layer From Page(s)), and then click Add to add it to the right column (Include Layer To Page(s)).
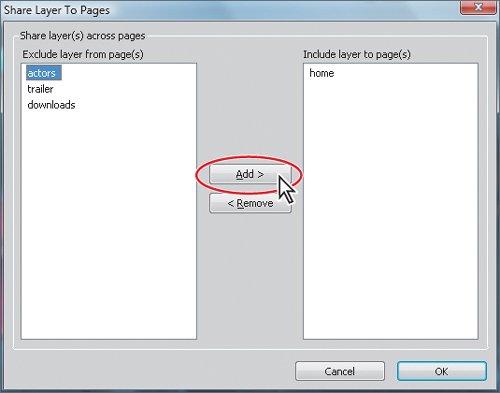
- Click OK to close the Share Layer To Pages dialog box.
- Switch to the page Actors and in the Layers panel move the shared Background folder to the bottom of the layer list.
Detaching shared layers
The logo from the Home page should also be placed on the Actors page but should be scaled down slightly to make more room for other items. To do this, you’ll first share the folder Logo to the page Actors, and then disable the sharing of this layer, allowing you to modify the object on each page individually.
- In the Pages panel, select the page Home.
- In the Layers panel, select the folder Logo. From the Layers panel Options menu, choose Share Layer To Pages. In the Share Layer To Pages dialog box, select the page Actors in the left column and click Add to add it to the right column.
- Click OK to close the Share Layer To Pages dialog box.
- Switch to the page Actors and in the Layers panel drag the shared folder Logo between the folders Master Page Layer and Background.
- With the shared folder Logo selected in the Layers panel, choose Detach Shared Layer from the panel Options menu.
- Click the Pointer tool in the Tools panel and select the logo artwork on the page Actors. Position the pointer over the lower-right bounding box handle. When the pointer icon changes from filled () to hollow (
 ), drag the handle upwards and to the left to reduce the size of the logo image. While dragging, hold down the Shift key to scale the artwork proportionally. Release the mouse button when the width (W) reads 380 in the Properties panel, and then release the Shift key.
- Switch to the home page to confirm that the logo placed there didn’t change in size, and then switch back to the Actors page.
Creating disjoint rollover behaviors
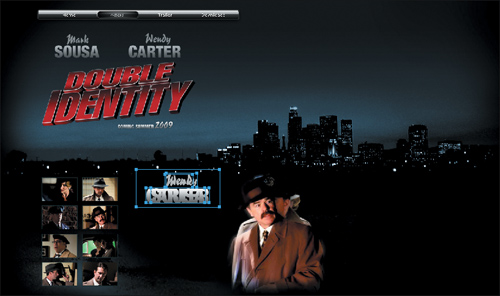
In the lower-left corner of the Actors page you’ll place thumbnail images of the main actors. Moving the pointer over one of the thumbnail images should bring up some text and a large image of the actor in the space to the right of the thumbnails. This is called a disjoint rollover behavior.
Placing the elements
- In the Layers panel, select the folder Background. Choose New Layer from the panel Options menu. In the New Layer dialog box, type Actors Thumbnails in the Name text box, and then click OK.
- Choose File > Import. In the Import dialog box, navigate to your Lesson05 folder, select the file Cast_Thumbnails.psd, and then click Open.
- In the Photoshop File Import Options dialog box, leave the default settings and make sure Maintain Layer Editability Over Appearance is selected in the menu below the Comments field.
- Your cursor changes to a graphics placement cursor (). Click near the left edge of the background image to place the thumbnail images. Drag to reposition the thumbnail images as shown in the following illustration. We set a top-left position of X: 100 and Y: 444 for the group of images.

- Select New Layer from the Layers panel Options menu. In the New Layer dialog box, type Actors Large Images in the Name text box, and then click OK.
- Choose File > Import. In the Import dialog box, select the Photoshop file Cast_Large.psd, and then click Open. In the Photoshop File Import Options dialog box, choose Last Document State from the Layer Comp menu, choose Maintain Layer Editability Over Appearance from the menu below, activate the option Include Background Layer, disable the option Import Into New Layer, and then click OK. Your cursor changes to a graphics placement cursor ().

- Click near the center of the background image to place the large images. Drag, use the arrow keys, or enter X and Y values directly in the Properties panel to reposition the large images. We set a top left position of X: 550 and Y: 400 for the group of images.
- Select New Layer from the panel Options menu. In the New Layer dialog box, type Actors Names in the Name text box, and then click OK.
- Choose File > Import. In the Import dialog box, select the file Cast_Names.psd, and then click Open. In the Photoshop File Import Options dialog box, choose Last Document State from the Layer Comp menu, choose Maintain Layer Editability Over Appearance from the menu below, activate the option Include Background Layer, disable the option Import Into New Layer, and then click OK. Your cursor changes to a graphics placement cursor ().
- Place the name graphics between the thumbnails images and the large images. We set a top-left position of X: 340 and Y: 420 for the group of images. Your page should now look like the following illustration.
- Save your work.
Using dummy text
For the purpose of a website mock-up you’ll normally use dummy text to show how text will look on the page.
- Select New Layer from the Layers panel Options menu. In the New Layer dialog box, type Actors Text as the folder name, and then click OK.
- Choose Commands > Text > Lorem ipsum. A text frame filled with dummy text appears on the page. With the text frame still selected, make sure the text color is white using the color picker for Fill Color in the Tools panel or the Properties panel.
- To reposition the text box, enter the following values in the Properties panel: X: 340 and Y: 520.
- Position your pointer over the lower-right bounding box handle. When the pointer changes from filled () to hollow (), drag the handle downwards and to the left. Release the pointer when the width (W) reads 206 and the height (H) reads 192 in the Properties panel.
Creating slices
The disjoint rollover effect works by swapping images inside defined slice areas on the page. You’ll create slices for the actors names, the large images, and the dummy text.
- Right-click/Control-click the text frame containing the dummy text, and then choose Insert Slice from the menu.
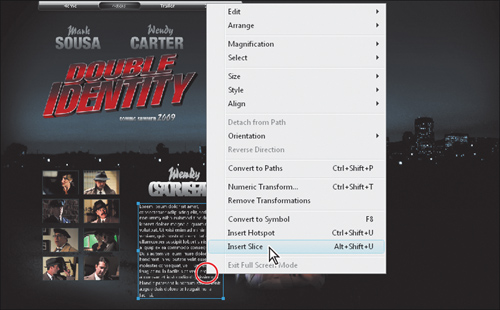
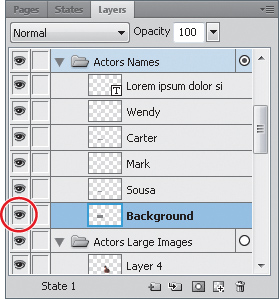
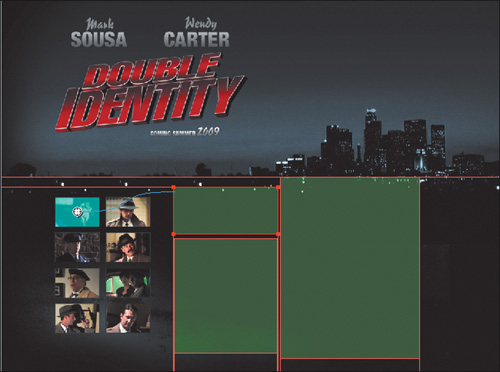
- In the Layers panel, turn on the visibility of the layer Background inside the folder Actors Names. A gray rectangle appears behind the actors names in the document window. Right-click/Control-click near the edge of that gray rectangle, being careful not to click too closely to the actors names. You should see a blue selection rectangle around the gray rectangle. Choose Insert Rectangular Slice from the menu.
- In the Layers panel, turn on the visibility of the layer Layer 5 inside the layer Actors Large Images. A gray rectangle appears behind the actors images in the document. Right-click/Control-click near the edge of that gray rectangle—being careful not to click to closely to the actors images; you should see a blue selection rectangle the size of the gray rectangle—and then choose Insert Rectangular Slice from the menu.
- You’ve created three slices that have all been added to the Web Layer in the Layers panel.
Adding states
Pages can have multiple states; for example: the normal state, the state when the pointer moves over the first hotspot with a rollover behavior, the state when the pointer moves over the second hotspot with a rollover behavior, and so on. States can also be used to implement frame animations. For this exercise, you’ll design just two extra states for the page; doing more is possible but doesn’t add anything essential to the website mock-up.
- In the States panel, confirm that there is currently only one state, State 1, which is selected by default.
- With State 1 selected in the States panel, turn off the visibility of the folders Actors Text, Actors Names, and Actors Large Images. Click the Hide Slices And Hotspots button in the Tools panel to see the page as it would appear in the normal state.
- In the States panel, choose Duplicate State from the panel Options menu. In the Duplicate State dialog box, type 2 in the Number text box, select the After Current State option, and then click OK.

- If it’s not already selected, select State 2 in the States panel. For this state you’ll design how the page will look when the pointer moves over the first actor’s thumbnail image.
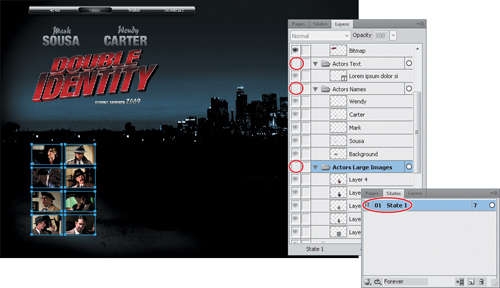
- In the Layers panel, turn on the visibility of the folders Actors Text, Actors Names, and Actors Large Images. Within the folder Actors Names turn off the visibility of all but the two layers Wendy and Carter. Within the folder Actors Large Images turn off the visibility for all but Layer 1, as shown here.

- Select State 3 in the States panel. For this state you’ll design how the page will look when the pointer moves over the second actor’s thumbnail image.
- In the Layers panel, turn on the visibility of the folders Actors Text, Actors Names, and Actors Large Images. Within the folder Actors Names turn off the visibility of all but the two layers Mark and Sousa. Within the folder Actors Large Images turn off the visibility for all but the one layer Layer 2, as shown here.

- Save your work.
You’ve completed the design for the three states of your Actors page. In the next steps you’ll define the hotspot areas and attach disjoint rollover behaviors.
Creating hotspot areas and attaching disjoint rollover behaviors
Moving the pointer over the first thumbnail image should trigger the images you’ve placed in State 2 to appear in the three slices. You’ll place a hotspot area over the first thumbnail image and then attach a disjoint rollover behavior, which will swap an image in a slice area. You can swap images in more than one slice at the same time by attaching additional disjoint rollover behaviors.
- Select State 1 in the States panel.
- Right-click/Control-click the top-left thumbnail image, and then choose Insert Hotspot from the menu.
- Drag the behavior handle (
 ) from the hotspot area onto the first target slice.
- In the Swap Image dialog box that appears when you release the mouse button, choose State 2 from the Swap Image From menu, and then click OK.
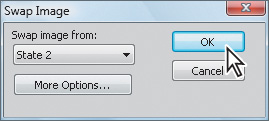
- Repeat steps 3 and 4 twice to create two more disjoint rollover behaviors for the hotspot area over the top-left thumbnail image—one for the slice containing the large image and one for the slice containing the dummy text. Both times, choose State 2 from the Swap Image From menu in the Swap Image dialog box, and then click OK.
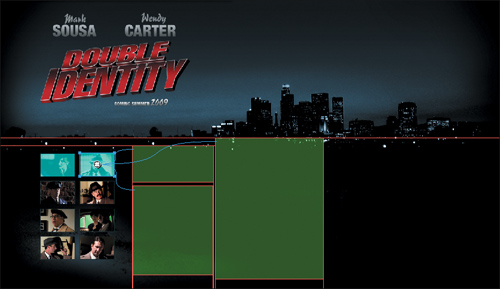
- Create a hotspot area over the top-right thumbnail image and attach a disjoint rollover behavior for each of the three slice areas, each time choosing State 3 from the Swap Image From menu in the Swap Image dialog box. When a hotspot is selected, blue behavior lines indicate the connection between the hotspot and the controlled slice areas.
- Save your work.
- Choose File > Preview In Browser > Preview In [Web Browser Name].
- In your web browser, position your pointer over each of the thumbnail images to test the disjoint rollover behaviors.

- Close your web browser window and return to Fireworks.
Presenting the prototype website to the client
There are many ways in which you can demonstrate the prototype website to your client—many more than we can explore here. You may settle for only one of the methods described here or use several methods in combination.
Exporting the website as a PDF document
Fireworks enables you to export your website prototype as a high-fidelity, interactive, secure PDF document that you can use in an e-mail based or online review process.
- Choose File > Export.
- In the Export dialog box, navigate to your Lesson05 folder, choose Adobe PDF from the Export menu, choose All Pages from the Pages menu, and select the View PDF After Export option.
- (Optional) Click Options to specify compatibility and image quality settings or to set up password protection for the PDF.
- Click Save/Export.

Fireworks generates a PDF version of your website and then opens the document in your default PDF viewer.
- Navigate through the pages using any of the regular page navigation controls. Alternatively, click the menu buttons of the navigation bar inside the document to jump directly to the corresponding pages. Note that in a PDF document you will not be able to preview rollover effects such as those you created on the Actors page.
- Close the PDF document and return to Fireworks.
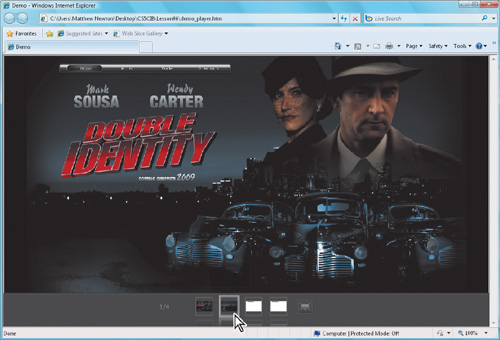
Creating an auto-run slide show
To present the pages of your website as a slide show without the need for user interaction, use the Demo Current Document command.
- Choose Commands > Demo Current Document.
- In the Demo Current Document dialog box, deselect the box for the master page navbar, set the background color to black by typing #000000 in the color text box or by using the color picker beside it, and then click Create Demo. In the Folder For Export dialog box, navigate to your Lesson05 folder—optionally, you could create a subfolder inside the Lesson05 folder—and then click Select [Folder name]/Choose.

- After the export is complete, your default web browser opens and automatically begins displaying the pages of your website as a slide show. Move the pointer towards the lower edge of the browser window to see the navigation controls. You can stop the playback or switch to full-screen mode. Note that once again you can’t preview the rollover effects.
- When you’re done reviewing the slide show, close the web browser window and return to Fireworks.
Exporting states of a page as individual images
When demonstrating complex rollover behaviors, you might want to take snapshots of the various states of a page as individual images.
- Switch to the page actors.
- Choose File > Export.
- In the Export dialog box, navigate to your Lesson05 folder—optionally, you could create a subfolder inside the Lesson05 folder—choose States To Files from the Export menu, and then click Save/Export.
Tip
To create a subfolder while you’re in the Export dialog box, do one of the following: On Windows, right-click the file list pane and choose New > Folder from the menu. On Mac OS, click the New Folder button.

Fireworks generates one image for each state of the current page. You can review the images in Windows Explorer/the Finder or in any image-processing application.
Exporting HTML pages
Probably the best way to demonstrate a website mock-up is to actually export a working website prototype. Fireworks can generate HTML pages and images directly from the Fireworks document—complete with functional navigation bar and rollover behaviors.
- Choose File > Export.
- In the Export dialog box, navigate to your Lesson05 folder.
- Create a subfolder inside the Lesson05 folder: On Windows, right-click the file list pane and choose New > Folder. On Mac OS, click the New Folder button. Name the new folder html_export.
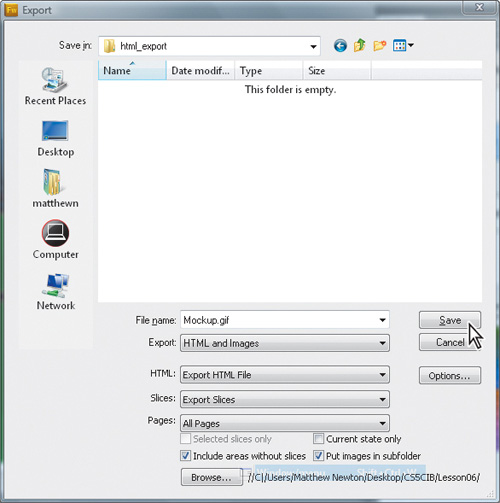
- Navigate to the newly created subfolder inside the Lesson05 folder. In the Export dialog box, choose HTML And Images from the Export menu. Choose Export HTML File from the HTML menu and Export Slices from the Slices menu. Choose All Pages from the Pages menu. Select the option Include Areas Without Slices and deselect the Current State Only option.
- Select the option Put Images In Subfolder. By default, this will place all images in a folder named images inside the selected folder, which is suitable for our purposes.
- Confirm that everything looks exactly as shown in the following illustration, and then click Save/Export.
- When the export is complete, switch to Windows Explorer/the Finder. Navigate to the html_export subfolder inside the Lesson05 folder and double-click the file home.htm. The page opens in your default web browser.
- Test the functionality of the navigation bar by clicking on its menu buttons. You should be able to jump from each page directly to any other page. Navigate to the Actors page and move the pointer over the two top thumbnail images. You should be able to see the disjoint rollover behaviors you created in Fireworks.
Your website mock-up is ready for review by your client or colleagues. You can upload the content of the html_export folder onto a web server and point your client to it. Or, you could demonstrate the functionality of the website in an online meeting. See Lesson 8, “Submitting Work for a PDF Review,” for more information about collaborating in online meetings using Share My Screen and Connect Now. Once you’ve obtained your client’s approval on the design it’s time to build the website in Dreamweaver, reusing the work you’ve done in Fireworks.
Building a website in Dreamweaver
The tight integration between Fireworks and Dreamweaver makes it very easy to create a Dreamweaver website from assets created in Fireworks. Simply export the elements you want to use from your Fireworks document, and then insert them into your Dreamweaver document. From the assets exported from the Fireworks document, you can pick and choose the elements you want to use: images, entire tables containing sliced graphics, individual rollover buttons or ready-to-use navigation bars, complete web pages with all elements already positioned, or any combination thereof.
Creating a new site
You’ll begin by creating a new site in Dreamweaver. Part of the site creation process is to define a location on your hard disk where all the pages and images for your new website will be stored. This location is referred to as the local root folder for your Dreamweaver site.
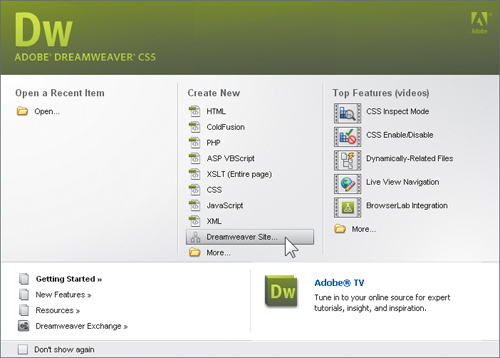
- Launch Adobe Dreamweaver CS5.
- Click the Dreamweaver Site button under Create New in the Welcome screen, or choose Site > New Site.
- In the Site Definition dialog box, type Double Identity Site in the site name text box. (See illustration on next page.)
- Click the Browse button beside Local Site Folder. Navigate to your Lesson05 folder. Create a new folder called Website inside the Lesson05 folder. Open the new Website folder, and then click Select/Choose.
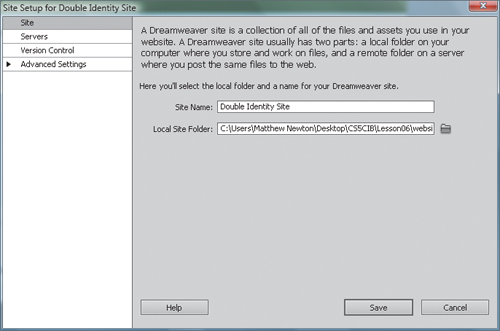
- Click Save in the Site Setup dialog box.
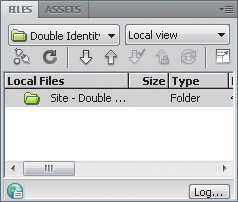
- Your new site is added to the Files panel where you can easily access and organize all the files that make up your website.
Creating new pages with CSS styles
You will now add blank HTML pages to your website into which you will place the HTML pages exported from Fireworks. The Dreamweaver pages will serve as containers for the Fireworks pages. The CSS style attached to the Dreamweaver pages will keep the placed images horizontally centered in the web browser window when the window is enlarged.
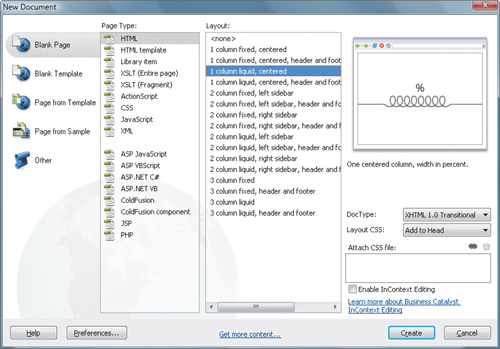
- Choose File > New.
- In the New Document dialog box, select the Blank Page category, if necessary, from the first column. In the Page Type column, select HTML. In the Layout column, select 1 Column Liquid, Centered; then click Create.
- Choose File > Save As. In the Save As dialog box, click the Site Root button, type home.htm in the File Name/Save As text box, and then click Save.
This simple web page layout has a CSS (Cascading Style Sheets) class named container assigned to a single DIV (page division) inside the body of the page. If this is starting to sound confusing, don’t worry. We won’t dive deep into the topic of CSS. For now it’s only important to understand that using CSS separates page content from page layout. For example, the style definition of the class container establishes that the content of the page (inside the container) remains horizontally centered on the page. You could easily change the content to be left aligned, for example, by editing the style definition. No change is necessary to the content of the page.
Inspecting CSS-based page elements
While you edit your web page in Code view, Dreamweaver presents the CSS properties for the current HTML tag in the CSS Styles panel.
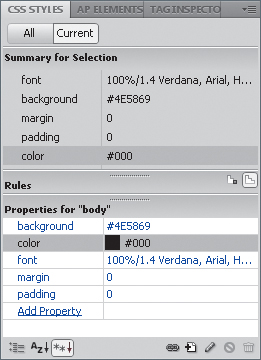
- In Code view, click to place the cursor inside the <body> tag.
- In the CSS Styles panel, notice that the properties shown are specific to the page’s body.
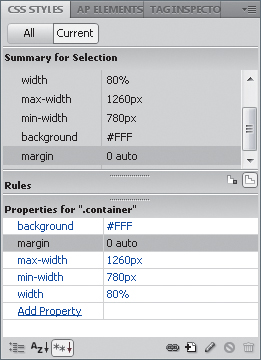
- In Code view, click to place the cursor inside the <div class=“container”> tag.
- In the CSS Styles panel, notice that the properties shown are now specific to the container class.
Inserting Fireworks HTML pages
You’ll replace the entire content of the DIV container with the HTML page exported from Fireworks. You’ll begin by setting the width of the container to the width of the HTML page it should contain.
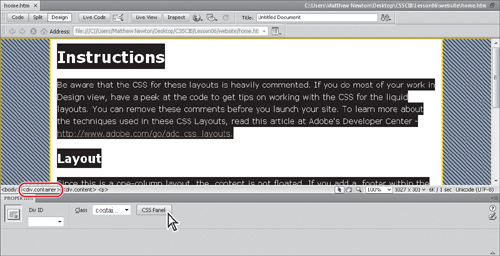
- Click anywhere in the dummy text of the home.htm page in Dreamweaver.
- At the bottom of the document view, click the tag <div.container>, and then click the CSS Panel button in the Properties panel.
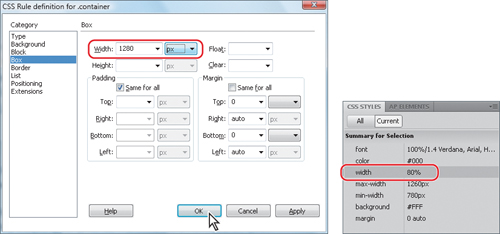
- In the CSS Styles panel, double-click the Width property to open the CSS Rule Definition dialog box. Type 1280 in the Width text box and choose px (pixels) from the units menu beside it. Click OK to close the dialog box.
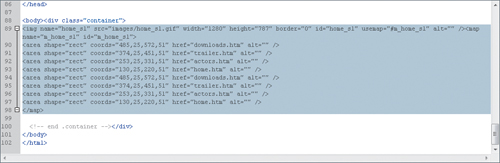
- In Code view, select everything between the tags <div class=“container”> and <!-- end .container --></div>, and then choose Insert > Image Objects > Fireworks HTML.

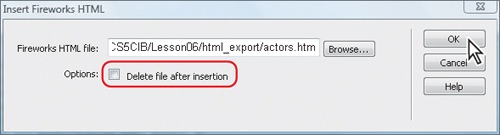
- In the Insert Fireworks HTML dialog box, click the Browse button to locate the Fireworks HTML file you want to insert. In the Select The Fireworks HTML File dialog box, navigate to the html_export folder inside your Lesson05 folder, select the file home.htm, and then click Open. Deselect the option Delete File After Insertion, and then click OK to close the Insert Fireworks HTML dialog box.

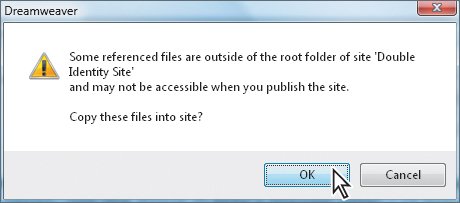
- In the warning dialog box, click OK to copy referenced files into the site folder. It is recommended that you move all files related to the website inside the local root folder. You could also have created the website in Dreamweaver first, and then exported the HTML pages from Fireworks into the local root folder.
- In the Copy Image Files To dialog box, navigate to the local root folder website, create a new folder inside that folder and name it Images, open the new Images folder, and then click Select/Choose.
- In the CSS Styles panel, click the Refresh button to view your updated content in the document pane.
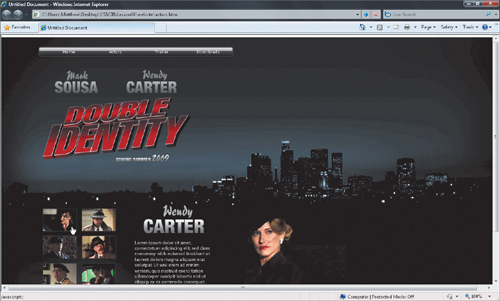
- Choose File > Save and then choose File > Preview In Browser > [Web Browser Name]. The page opens in your default web browser. If your computer screen is large enough, enlarge the width of the browser window and note that the image stays centered within the browser window. Later in this lesson you will change the background color of the page to black so the image blends perfectly into the background.
- Close the browser window and return to Dreamweaver.
Roundtrip editing between Dreamweaver and Fireworks
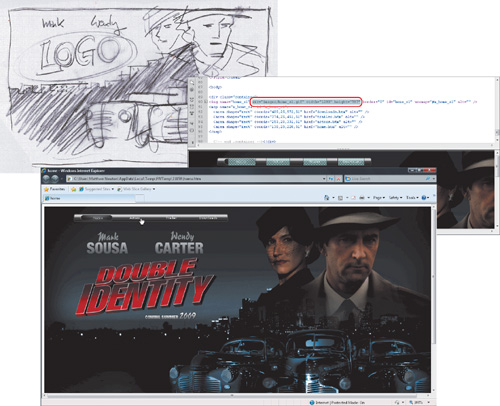
The web page consists of a single large GIF image and an image map for the hotspot areas of the navigation bar. To edit the image, if necessary, you can take advantage of the tight cross-product integration between Fireworks and Dreamweaver: In Fireworks, edit the original file in PNG format, which was used to generate the Fireworks HTML pages and have the changes incorporated automatically when you return to Dreamweaver.
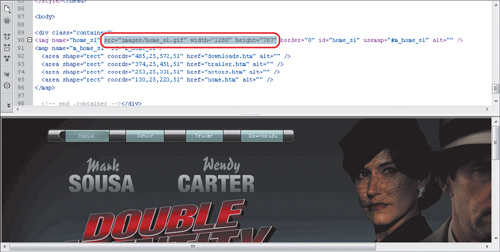
To enable roundtrip editing for the main image in GIF file format on our Home page, shown in Design view and also circled in Code view in the figure above, Fireworks needs to be set as the primary external editor for GIF images in Dreamweaver. This can be done in Dreamweaver Preferences.
Setting Fireworks as primary editor for GIF images
Fireworks can register itself as the primary editor for GIF images on your system. Opening GIFs in Windows Explorer or the Mac Finder will then cause Fireworks to launch.
- Choose Edit > Preferences/Dreamweaver > Preferences.
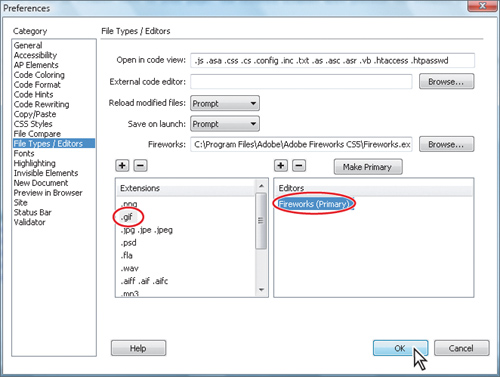
- Select File Types/Editors from the Category list.
- Select .gif from the Extensions list.
- Select Fireworks from the Editors list, and then click the Make Primary button.
- With Fireworks set as primary editor for .gif images, click OK to close the Preferences dialog box.
Edit the original PNG file of a GIF image placed in Dreamweaver
Changes made to a source PNG file in Fireworks can flow automatically into Dreamweaver. Here we’ll update a GIF image by editing our original Fireworks PNG.
- In Design view, right-click/Control-click anywhere in the main image in the Design view in Dreamweaver and choose Edit With > Adobe Fireworks CS5.

- In the Find Source dialog box, click the Use A PNG button.
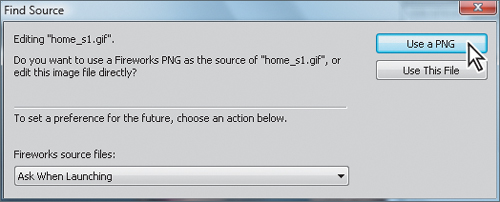
- In the Open/Open File dialog box, navigate to the Lesson05 folder, select the file Mockup.png, and then click Open.
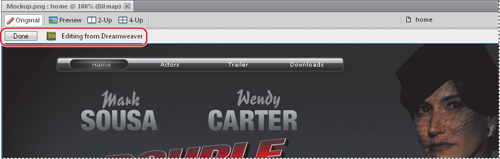
- Fireworks opens the PNG file in a special editing window, which is indicated by an additional bar across the top of the window. If you see an alert about the structure of the HTML table, click OK.
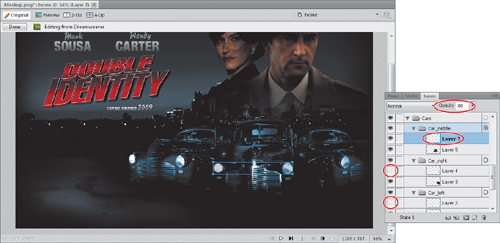
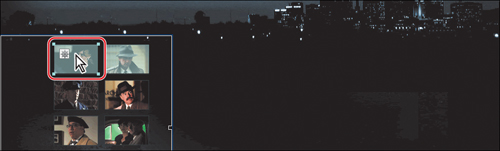
- Make sure you’re on page 1; if necessary, click 01 home in the Pages panel. In the Layers panel, expand the folder Cars, if necessary. Turn off the visibility of Layer 2 inside the subfolder Car_left and Layer 4 inside the subfolder Car_right. Select Layer 7 inside the subfolder Car_middle and change the layer opacity to about 80%. These changes will turn on the headlights of the three cars.
- Click Done in the bar across the top of the editing window to save your edits to the image, close the file, and return to Dreamweaver.
The GIF image used for the Home page in Dreamweaver is automatically updated to reflect the edits you made to the PNG document.
Wrapping up
To complete this lesson, you’ll change the background color of the Home page to black and then use that page as a starting point for your work on the Actors page.
Changing the page background color
- In Dreamweaver, click the tag <body> at the bottom of the document view.
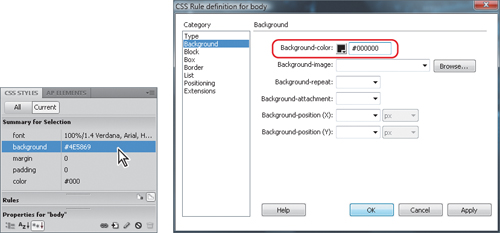
- In the CSS Styles panel, double-click the property background to open the CSS Rule Definition dialog box. Type #000000 in the Background-color text box or click the color swatch beside it and use the color picker to set the background color to black. Click OK to close the dialog box.

Creating new pages using the current page settings
To create the Actors page, you can use a copy of the Home page and then replace the content of the container.
- Choose File > Save As. In the Save As dialog box, click the Site Root button, type actors.htm in the File Name/Save As text box, and then click Save.
- The new page is added to the list of files in the Files panel.

- In Code view, select everything between the tags <div class=“container”> and <!-- end .container --></div>, as shown in the following illustration, and then choose Insert > Image Objects > Fireworks HTML.
- In the Insert Fireworks HTML dialog box, click the Browse button. In the Select The Fireworks HTML File dialog box, navigate to the html_export folder inside your Lesson05 folder, select the file actors.htm, and then click Open. Deselect the option Delete File After Insertion, and then click OK to close the Insert Fireworks HTML dialog box.
- In the warning dialog box, click OK to copy referenced files into the site folder. In the Copy Image Files To dialog box, navigate to the Images folder inside the local root folder website, and then click Select/Choose.
- In the CSS Styles panel, click the Refresh button to view your updated content in the document pane.
- Save your document.
Reviewing the disjoint rollover behavior
The Actors page contains hotspot areas with disjoint rollover behaviors. You can use the Tag Inspector in Dreamweaver to review—or, if necessary, add, delete, or modify—the behaviors for the hotspot areas on the page.
- In Design view, click to select the hotspot area over the top-left thumbnail image.
- Choose Window > Behaviors to open the Behaviors tab of the Tag Inspector. Double-click Swap Image beside the onMouseOver behavior to open the Swap Image dialog box.
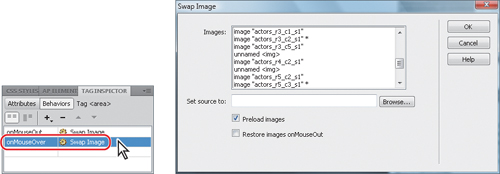
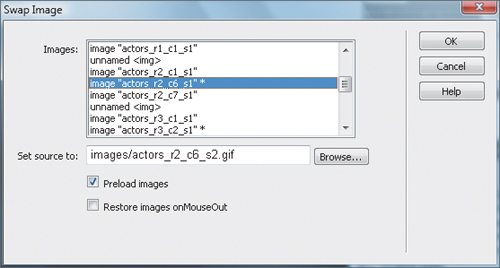
- In the Images list, start from the top and slowly scroll down. One at a time, select each entry with an asterisk (*) behind its name, such as the entry for image “actors_r2_c6_s1” * in the following illustration. The individual images are the slices that make up the entire page. With the “actors_r2_c6_s1” * entry selected, the currently defined replacement image (or slice) is listed as images/actors_r2_c6_s2.jpg in the Set Source To text box.
- Click OK to close the Swap Image dialog box.
- You can verify the name of a slice and the name of the image that will be displayed in that slice in the page’s normal state by clicking to select the slice in Design view.

Previewing the pages in a web browser
The only way to know for certain your work will display ideally in a browser is to open the browser.
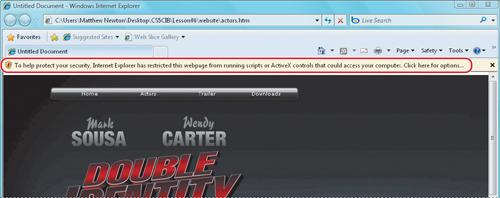
- Choose File > Save, and then choose File > Preview In Browser > [Web Browser Name]. Depending on the security settings on your computer you may first need to allow blocked content before you can display the page.
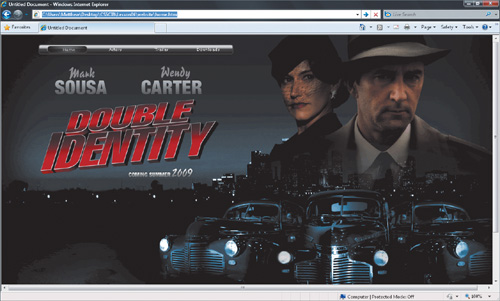
- The page opens in your default web browser.
- Click the Home and Actors buttons in the navigation bar to switch between the two pages you’ve created so far.
- If your computer screen is large enough, enlarge the width of the browser window and note that the background color of the page is now black so the image blends perfectly into the background.
- On the Actors page, move the pointer over the top two thumbnail images to test the disjoint rollover behavior.
- When you’re done reviewing, close the browser window and return to Dreamweaver.
This completes our brief introduction to Fireworks and Dreamweaver.
To complete the website, you would remove the dummy text on the Actors page in Fireworks and create an absolute positioned text frame at the same location in Dreamweaver. Enter the final version of the text provided by the client and add a show/hide behavior to the hotspots over the thumbnail images. The text can then be styled and formatted to your liking—or your client’s—using CSS style sheets, including attributes such as type style, size, color, alignment, and margins.
Needless to say you’d have to add more images and hotspots, and you would also need to complete the two remaining pages.
Finally, you’d upload the pages directly from Dreamweaver to a remote web server.
Review questions
1 Describe the typical workflow for development of a website using Fireworks and Dreamweaver.
2 What is the reasoning behind building a rapid prototype of the website as the first stage of website development?
3 Name three methods for placing images in a Fireworks document.
4 What is a master page used for in Fireworks?
5 How do you use slices and states to implement a rollover behavior?
6 Explain roundtrip editing between Dreamweaver and Fireworks.
Review answers
1 Designing a website from start to finish follows this basic workflow:
• Together with the client, define the scope of the project, including the objectives of the website, the target audience, schedule, and available resources.
• Develop a design strategy and establish the look and feel of the web pages.
• Create a prototype of the website in Fireworks.
• Present the design to the client and refine it as necessary to obtain approval.
• Assemble the required assets and create the website in Dreamweaver, based on the work done in Fireworks.
2 Since the creation of an entire website is quite labor intensive it is essential that you agree with your client on the design direction very early on in the project using the rapid prototyping capabilities of Fireworks. Best of all, all the work that goes into the development of the website mock-up can later be reused for the actual implementation of the website.
3 You can place images in a Fireworks document using drag and drop, copy and paste, or the Import command.
4 For elements that you want to share across all pages, such as a common background image or a navigation bar, you can create a master page. Elements placed on the master page and any edits made to the master page subsequently are reflected on all other pages.
5 Create a slice the size of the area where you want the image to change for the rollover behavior. Place the rollover state image inside the slice area but on a different state of the page. Attach a rollover behavior from another slice or a hotspot to the new slice, and select the swap image from the appropriate state of the page.
6 An image that was exported from Fireworks and then placed in Dreamweaver can be edited by opening the PNG file from which the image was created in Fireworks, making the adjustments, and then reexporting and placing the image in Dreamweaver. This process is automated if you follow these steps:
• To set Fireworks as the primary image editor for the relevant image format, choose Edit With > Fireworks from within Dreamweaver.
• Select the original PNG image when prompted.
• Edit the image in Fireworks.