4. Exploring Render Mode
Lesson overview
In this lesson, you’ll explore how to render a 3D scene and learn the following:
The three different places where rendering takes place in Dimension, and how they differ from one another.
The trade-offs between render speed and quality.
How to get a quick “good enough” render when you are in a hurry.
How to achieve the highest-quality rendered image.

This lesson will take about 45 minutes to complete. To get the lesson files used in this chapter, download them from the web page for this book at www.adobepress.com/DimensionCIB2020. For more information, see “Accessing the lesson files and Web Edition” in the Getting Started section at the beginning of this book.

Dimension’s Render mode produces a 2D scene from 3D models, complete with realistic light, shadow, materials, and reflections.
What is rendering?
Rendering refers to the process of producing a realistic-looking 2D scene from a 3D model or models.
Dimension uses a form of rendering called ray tracing. A high-level explanation of ray tracing is that the computer calculates a path from each pixel in the scene back to the camera and calculates the color of that pixel based on the environment lighting, the directional lights, the material applied to the surface, and reflections from other objects. This requires a lot of computing horsepower, and is far too complex for today’s computers to accurately perform in real time as a scene is edited.
Because of this, Dimension offers three levels of rendering: a real-time rough rendering that Dimension performs as you edit a 3D scene, a blended render preview that automatically switches between a high-quality ray-traced render and real-time rendering as you edit, and the final Render mode.
Exploring real-time rendering
As you position 3D models in Design mode, Dimension displays a basic preview of the resulting scene on the canvas. Because an accurate rendering of the scene is so time-consuming, this real-time preview is only a rough approximation of what the final scene will look like. Effects that will appear especially rough in the real-time preview include:
Shadows cast by 3D models on the ground plane.
Glass and other semi-transparent materials applied to 3D model surfaces.
The camera depth of field.
Things that don’t display at all in the on-canvas preview include:
Reflections cast by one model onto another model.
Reflections cast by models on the ground plane.
In this lesson you’ll explore a finished scene and observe some of these limitations in the real-time rendering of the scene.
Launch Adobe Dimension.
Click Open, or choose File > Open.
Select the file named Lesson_04_begin.dn, which is in the Lessons > Lesson04 folder that you copied onto your hard disk, and then click Open.
If the Render Preview icon
 in the upper-right corner of the work area is selected, click the icon to turn Render Preview off.
Note some of the limitations of the real-time rendering of this scene. The shadows being cast by the 3D models are hard-edged.
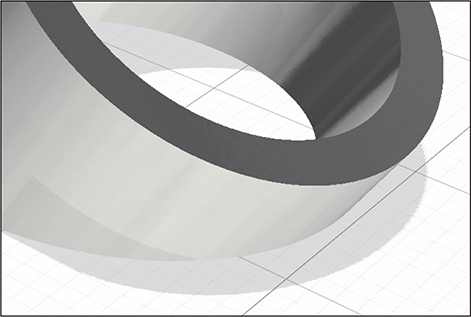
You’d expect to see some part of the wood Prism model reflected in the shiny silver surface of the Pipe model, but no reflection is visible.

Select Environment in the Scene panel.
If the Ground Plane options are hidden in the Properties panel, click the disclosure icon
 to the left of Ground Plane to reveal the options.
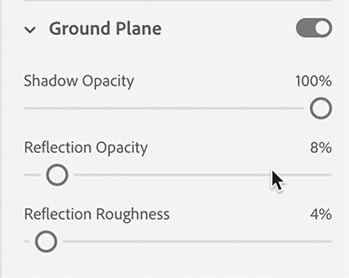
Because there is a Reflection Opacity value of 8%, you’d expect to see a slight reflection of the 3D models in the ground plane, but no reflection appears in the real-time preview.
The bottom line is that the real-time preview is useful primarily as a way to judge the position, size, and placement of 3D models within a scene. To see materials, surfaces, and lighting accurately, you must use the blended render preview.
Exploring blended render preview
The blended render preview automatically switches in and out of an accurate ray-traced render and the faster, less accurate real-time preview on an as-needed basis as you make edits to your scene.
Click the Render Preview icon
in the upper-right corner of the work area.Wait for the render preview to update. Note the rough, speckled “noise” in the shadows in the render preview. This will diminish and the preview will become more accurate as Dimension continues to render the scene.
Select the cup with the Select tool, and use the blue arrow on the Select tool widget to move the cup model to the right a bit. As you do this, you’ll see the ray-traced preview turn off and the real-time preview turn on. As soon as you let go of the cup, the ray-traced preview will begin again.
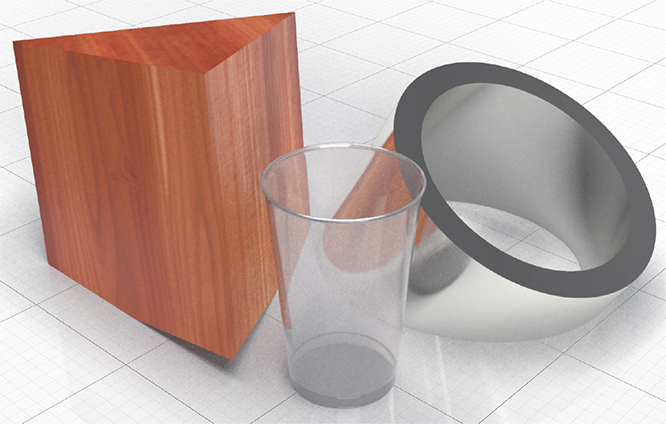
Note that the render preview shows the wood Prism object reflected in the shiny surface of the Pipe model.
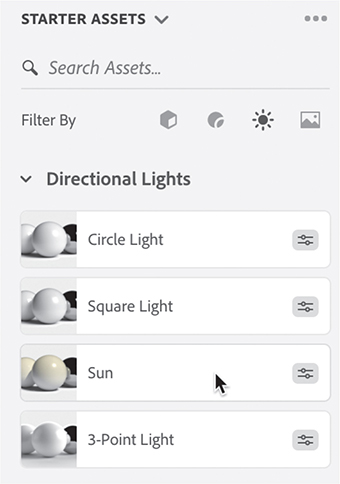
In the Content panel, click the Lights icon
 to view only lights in the panel.
Select Sun to add a light that simulates sunlight to the scene.
In the Properties panel, enter 145% for the sunlight Intensity, 100° for the Rotation, 55° for the Height, and 35% for the Cloudiness. As you adjust the values, you’ll see Dimension switch back to the real-time preview, and return to the ray-traced preview when you’re finished.

Depending on the speed of your computer and the complexity and size of your scene, you’ll need to decide when to switch the blended render mode on and off to suit your needs.
You can tweak the performance of the blended render mode by right-clicking on the Render Preview icon
. This allows you to choose full, half, or quarter resolution for the render preview, and to turn off noise reduction. Reducing the resolution and/or turning off noise reduction can greatly speed up the ray-traced rendering, but of course the preview will not be as accurate.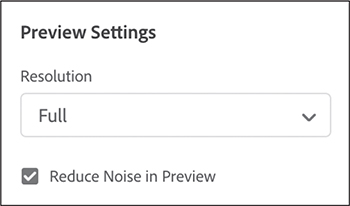
Using render preview snapshots
You can take a snapshot of the ray-traced render preview at any time. Depending on your needs, if Dimension has been working on the render preview for awhile, the render might be good enough for your output requirements.
Click the Share icon
 in the upper-right corner of the screen.
Click the disk icon
 . (Or, you could click the clipboard icon
  to copy the image to the macOS or Windows clipboard.)
Choose a filename and a location, and click the Save button.
Exploring Render mode
To really see an accurate view of the scene, the scene must be rendered in Render mode.
Before you go to Render mode, click the Camera Bookmarks icon
 at the top of the screen.
You’ll see that there are five bookmarks saved with this file.
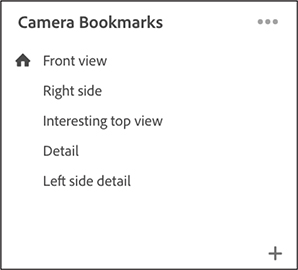
Click each bookmark in turn to see what each view looks like.
When you’re finished, click the “Front view” bookmark to return to that view.
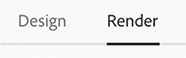
To enter Render mode, click the Render tab at the top of the screen.
Select Local at the top of the Render Settings panel.

You’ll see all five of the camera bookmarks displayed at the top of the panel. This handy feature lets you render multiple camera views of a scene all at once. Since rendering can be very time consuming, this provides a way to queue up multiple renders of a scene and let them run overnight or while you’re at lunch.
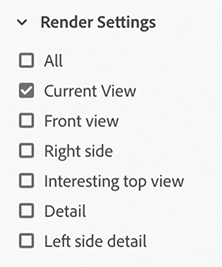
For now, just leave “Current View” selected.
Type My_Lesson_04_end LOW in the Export Filename field. Dimension appends the name of the view to the end of the filename, so this file will be exported as My_Lesson_04_end LOW-Current View.

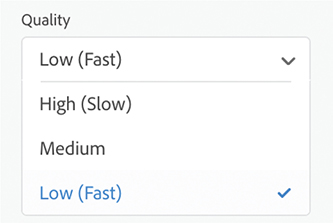
In the Quality setting, choose Low (Fast).
Deselect PSD under Export Format, and select PNG.

If you want to change the export location, click the blue export path and choose a new export location.

Click Render.

 Note
NoteAlthough you can’t continue to work in Dimension while a file is being rendered, you can continue to work in other applications on your computer. If you have notifications turned on in your operating system, you’ll receive a notification when the render is complete.
Wait for the render to finish.
The render took about four minutes on my MacBook Pro. If you don’t want to wait for the render to finish, I’ve saved a copy of the rendered file for you in the lesson files (Lesson_04_end LOW-Current View.png).
Now change the Quality setting to High (Slow).
Change the filename to My_Lesson_04_end HIGH.
Click Render.

Wait for the render to finish. This render took about 25 minutes on my computer. If you don’t want to wait for it to finish, I’ve saved a copy of the file for you in the lesson files (Lesson_04_end HIGH-Current View.png).
 Tip
TipWhile a file is rendering, you can click the Snapshot icon
 at any time to save a PNG or PSD file of the render in progress. Since the render engine performs multiple “passes” through the scene, a partially completed render may be far enough along to give you a good idea of what the final render will look like.
While a file is rendering, the Render Status panel displays a progress bar that provides a rough approximation of how much of the render has completed.

Understanding render speed and quality
As you’ve seen, there are three Quality settings available in Render mode: Low (Fast), Medium, and High (Slow). How do these settings compare?
Use Adobe Photoshop to open the two files you just rendered or, if you wish, the Lesson_04_end HIGH-Current View.png and Lesson_04_end LOW-Current view.png files included in the lesson files.
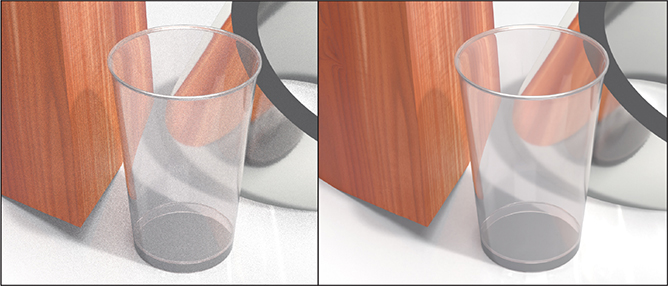
Examine the files closely. You’ll see that the low-quality render (on the left in the accompanying image) contains a lot of noise, which is particularly visible in the shadows. The high-quality render (on the right) contains much smoother shadows and less noise.
You’ll need to determine which render quality you need to suit your needs. Rendering can be very slow. This is a relatively simple file. Larger, more complex files can take much, much longer to render.
Using render export formats
So far, you’ve been rendering into the PNG format. But you may have noted that you can also choose PSD as an output format. What are the advantages to rendering as a PSD file?
There is no difference in the quality of the rendered image between the two formats. The difference is that the PSD file will contain extra layers and masks that make it easier to edit the scene in Photoshop later if necessary. You’ll learn about this in more detail in a later lesson. But for now, open the lesson file named Lesson_04_end HIGH-Current View.psd and examine the Layers panel in Photoshop to view the extra data included in a PSD render.

Understanding cloud rendering (beta)
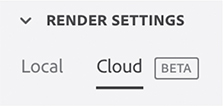
Choosing Cloud under Render Settings in the Properties panel lets you off-load rendering duties to Adobe’s servers, freeing your computer from this processor-intensive task. This option offers all the same options and controls as a local render. This is currently a Beta feature.
Cloud renders are saved to your Creative Cloud Files storage.
Cloud Render is free, and works on a credit system. Creative Cloud members receive a certain number of credits per month, which can be redeemed for cloud renders.
Cloud renders are limited to a maximum scene dimension of 4000 x 4000 pixels. If your scene dimensions exceed this, you receive a warning before the image is uploaded to the cloud renderer, and the image is downsampled to fit within 4000 x 4000 pixels.
Review questions
1. What is ray tracing?
2. What are the three places in Dimension where a 3D scene is rendered into 2D?
3. Do reflections appear in the real-time preview?
4. What is the most visible limitation of the ray-traced render preview?
Review answers
1. Ray tracing refers to the rendering method used by the rendering engine built into Dimension. Ray tracing performs complex mathematical calculations to determine the precise color of each pixel in the scene.
2. Dimension performs rendering in three places: the real-time preview, the ray-traced render preview, and Render mode.
3. No. Reflections cast by objects on the ground plane, and cast by objects on other objects, will not appear in the real-time preview.
4. Because it renders as quickly as possible, the render preview displays a lot of noise, especially in shadows.