6. Working with Materials
Lesson overview
In this lesson, you’ll explore and apply surface materials in a 3D scene and learn the following:
An overview of the types of materials included with Dimension.
How to import materials from Adobe Stock.
How to import materials from other sources.
How to select model surfaces with the Magic Wand tool and then apply materials to those surfaces.
How to adjust material properties, such as glow, opacity, and translucence.
How materials can be linked between multiple models.

This lesson will take about 45 minutes to complete. To get the lesson files used in this chapter, download them from the web page for this book at www.adobepress.com/DimensionCIB2020. For more information, see “Accessing the lesson files and Web Edition” in the Getting Started section at the beginning of this book.
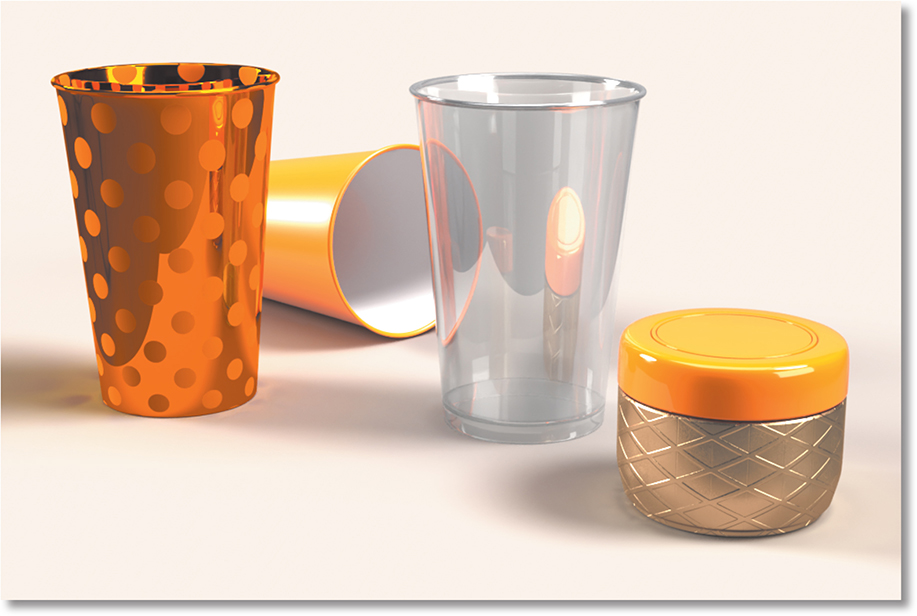
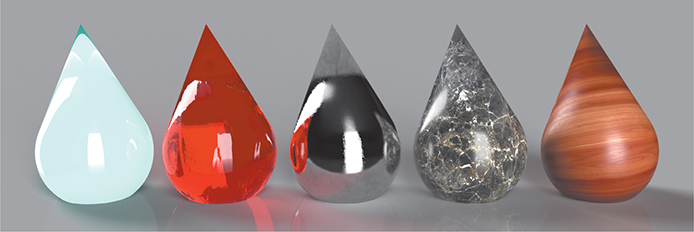
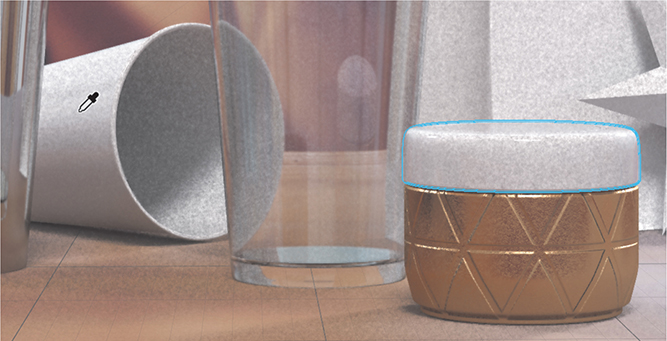
You can apply infinite variations of surface materials to models in Dimension, including metals, glass, plastic, wood, fabrics, and more.
What are materials?
One of the core capabilities of Dimension is the ability to apply a “material” to a 3D object. Materials are usually carefully crafted to accurately simulate materials found in the physical world, such as tile, marble, granite, wood, or fabric.
Dimension can apply two types of materials to models: Adobe Standard Materials (MDL format) and Substances (SBSAR format). The MDL format is a subset of the NVidia Material Definition Language that Adobe calls Adobe Standard Material. This format defines how light behaves when it hits the surface of the material. For example, is light emitted from the surface? If so, how much? Is the surface opaque, transparent, or semi-transparent? Is the surface rough or smooth? Does the surface exhibit “luster” like shiny metal? If you can see through the object to the interior, is the interior translucent, and does the object refract the light?
![]() Tip
Tip
You can read more about Adobe Standard Material at helpx.adobe.com/dimension/using/standard-materials.html.
MDL materials can optionally include images that can control properties of the material. For example, a brick material may include a color image for the variations of brick color, a roughness image to give areas shiny or matte effects, and a “normal” image that adds details like pores to the surface.
![]() Tip
Tip
Learn more about the Substance family of products at www.substance3d.com.
SBSAR materials originate in Substance Designer. Adobe purchased Allegorithmic, the parent company of Substance Designer, in early 2019. The speciality of Substance Designer is creating parametrically-generated materials, or materials that can be dynamically controlled by one or more parameters. For example, a parametric SBSAR concrete material may allow the user to dynamically control the number of cracks in the concrete, the width of the cracks, variations in the color of the concrete, and the roughness of the surface. From a single parametric material, a user can create an infinite variety of random surface variations.
This lesson is a deep dive into materials. Another way to change the appearance of a model’s surface is to apply one or more graphic images to the surface. Any JPEG, PNG, AI, PSD, or SVG file can be applied to a model surface as an image. Applying graphics to model surfaces is covered in depth in a later lesson.
Finding materials
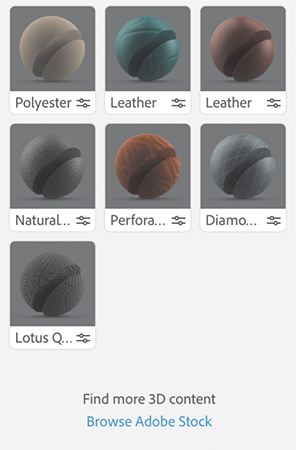
Several dozen starter asset materials can be found in Dimension’s Assets panel, including several types of glass, metals, plastics, liquids, woods, papers, leathers, stones, and fabrics. You can also download hundreds of additional materials from Adobe Stock or obtain MDL and SBSAR files from other sources and place them on your models in Dimension.
Choose File > Open.
Select the file named Lesson_06_01_begin.dn, which is in the Lessons > Lesson06 folder that you copied onto your hard disk, and then click Open.
Click the Add And Import Content icon
 at the top of the Tools panel, and choose Starter Assets.
Click the Materials icon
 to view only materials in the panel.
Click the more icon
 to toggle between list view and grid view until the materials are displayed in the way that you prefer. Scroll through the panel and note the many different types of starter materials available. Note that the materials are grouped by type, with Adobe Standard Materials at the top of the list and Substance Materials at the bottom. As you’ll see in this lesson, you can change the properties of each of these materials, so these are a good starting point for generating a wide variety of surface materials.
Scroll to the bottom of the list of starter materials, and click the words “Browse Adobe Stock.”
 Tip
TipTo place an MDL or SBSAR material that you download , choose File > Import > Place Material On Selection.
Your default web browser launches, and you’re taken to stock.adobe.com, where you’ll see hundreds of additional materials available for purchase.

Sources for SBSAR materials
If you purchase a Substance license at www.substance3d.com, you’ll have access to Substance Designer, which lets you create your own SBSAR materials. A license also gives you access to download professionally-designed materials on Substance Source at source.substance3d.com.

A Substance license is not needed to download free community-submitted materials from Substance Share at share.substance3d.com. Since these are free community-created assets, the quality varies. For compatibility with Dimension, sort the materials by release date, since some of the very old SBSAR materials won’t work in Dimension.

Applying a material to an object
In this lesson, you’re going to apply various materials from the Starter Assets to models in this scene.
Select the Select tool (keyboard shortcut: V).
Select Cup 2 in the Scene panel to select the cup that is lying on its side.
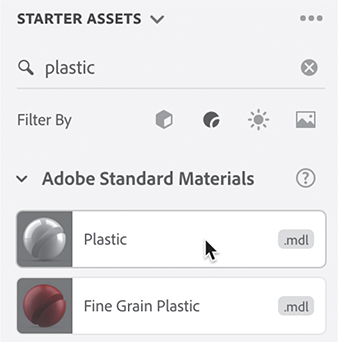
In the Search Assets field at the top of the Starter Assets panel, type plastic.
Select the Plastic MDL material to apply it to the cup.
If you aren’t currently working with Render Preview on, click the Render Preview icon
 to turn it on. Materials preview much more accurately with Render Preview on.
Examine the Scene panel. The Scene panel confirms that the Plastic material has been applied to the Cup 2 model.
 Tip
TipAs an alternative to clicking the back arrow at the top of the Scene panel, you can press the Esc key to “back up” out of the materials view in the Scene panel and return to the model list.
Click the back arrow icon
 at the top of the Scene panel to return to the model list.
Select Cup 3 in the Scene panel to select the rightmost cup.
In the Search Assets field at the top of the Assets panel, type glass.
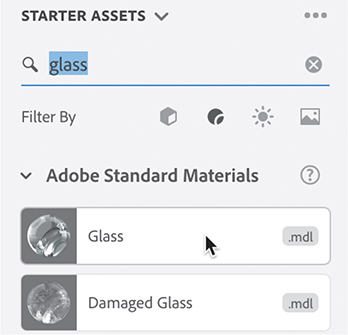
Select the Glass MDL material to apply it to the cup.
Applying materials via drag and drop
Sometimes it’s more convenient to apply a material to a model by dragging the material from the Starter Assets, from a Library, or from your file system onto the surface of a model.
Choose Edit > Deselect All so that none of the objects in the scene are selected.
In the Search Assets field at the top of the Assets panel, type metal.
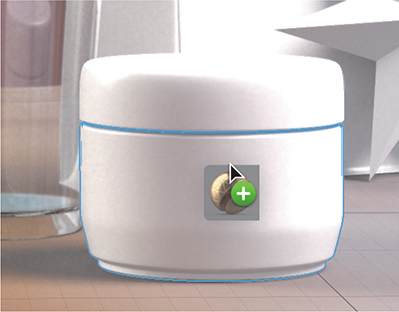
Drag the Metal material onto the leftmost cup in the scene. Release the mouse button when you see a blue highlight around the cup.

Click the back arrow icon
at the top of the Scene panel (or press Esc) to return to the model list.The Twist Jar object is a group, as indicated by the Group icon
 in the Scene panel. Click the Group icon to open the group. You’ll see that the group consists of two models: Lid and Jar. Because this object was modeled as two separate models, you can easily apply separate materials to the lid and the jar. Note that you can open a group without selecting the group. If you accidentally select the Twist Jar group, choose Edit > Deselect All.
In the Assets panel, locate the Geometric Metal SBSAR material and drag it onto the Twist Jar model in the scene. Release the mouse button when you see a blue highlight around the jar body (not the lid).
Sampling a material from another model
Once you’ve applied a material to a model, you can easily apply the same material to other models with the Sampler tool.
Click the back arrow icon
at the top of the Scene panel (or press Esc) to return to the model list.In the Scene panel, select the Lid model under Twist Jar.

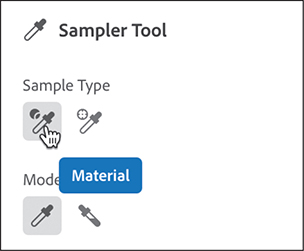
In the Tools panel, select the Sampler tool (keyboard shortcut: I).
Right-click the Sampler tool, and verify that Sample Type is set to Material since you want to sample all the material attributes, not just the material color.
Click away from the Sampler tool options box to dismiss the box.
Click anywhere on the middle cup on the canvas (the plastic cup lying on its side). This will sample the Plastic material from the cup model and apply it to what you have selected (the lid of the small jar).
Changing MDL material properties
So far, you’ve applied starter asset materials without setting any of their properties. But every material can be customized in several ways using the Properties panel.
Click the back arrow icon
at the top of the Scene panel (or press Esc) to return to the model list.In the Scene panel, hover over the Cup 2 model, and click the right arrow icon
 to reveal the model materials.
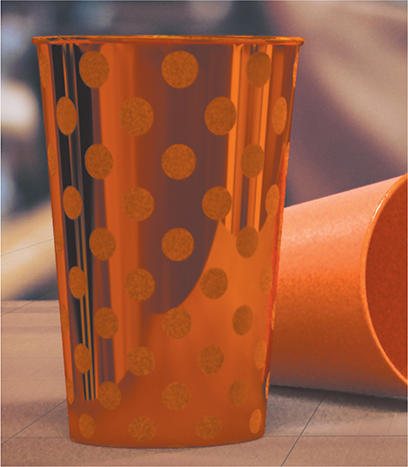
To make the plastic material a bright orange, click the color swatch next to the base color in the Properties panel, and change the color to 255 red, 123 green, 0 blue.

Click the color swatch again to close the color picker.
TipIf you hover over a property name in the Properties panel, a question mark will appear. If you click the property name, you’ll see an animated visual explanation of what that property does.
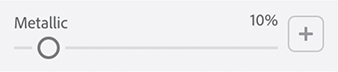
To make the surface a bit shinier, in the Properties panel, increase the Metallic value to 10%.
Because the material for the Jar Lid model was sampled from the Cup 2 model, both models use the same Plastic material, so both are now orange and shiny. Changing the properties of the material on one object also changes the properties of the material on the other object. But what if you want the Cup 2 model to be rougher and less metallic than the Jar Lid? You can achieve this by unlinking the material between the two models.
Select the Break Link To Material icon
 in the Actions panel. Now the materials on the two models are unlinked and their properties can be manipulated independently.
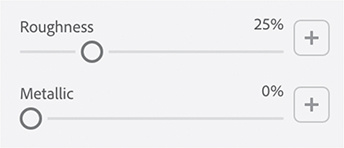
With the Cup 2 plastic material still selected in the Scene panel, enter 25% for the Roughness value.
Enter 0% for the Metallic property.
Click the back arrow icon
at the top of the Scene panel (or press Esc) to return to the model list. TipDouble-clicking a model on the canvas will reveal the model’s materials in the Scene panel. This is an alternative to clicking the right arrow icon in the Scene panel.
Hover over Cup 1 in the Scene panel, and click the right arrow icon
to reveal the model materials.To make the surface a bright orange, in the Properties panel, click the color swatch next to the base color, and change the color to 255 red, 123 green, 0 blue.
Click the color swatch again to close the color picker.
To make the surface less reflective, increase the Roughness value to 30%.
Click the plus icon
 to the right of the Roughness slider.
Click Select a File.
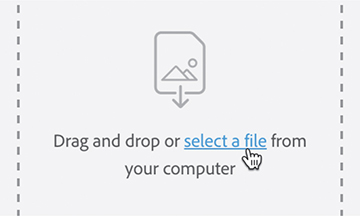
Select the Dots-white.png file and click Open.
With this PNG mask applied, areas that are black in the PNG will be smooth metallic in the image, and white areas will be rough.
 Tip
TipYou can greatly speed up the Render Preview by hiding models you don’t need to preview. To hide a model, click the eye icon
 next to a model in the Scene panel.
Press the Esc key to close the image picker and return to the model list in the Scene panel.
Changing MDL glass material properties
Adjusting the Translucence properties of a material makes it appear like glass or liquid—you can see through it. You can alter the Translucence, Index of Refraction, Density, and Interior Color properties in the Properties panel to make models appear to be made of glass, liquid, or gel.
Hover over the Cup 3 model in the Scene panel, and click the right arrow icon
to reveal the model materials.If the Translucence properties aren’t already open, in the Properties panel, click the right arrow icon
 next to Translucence to reveal them.
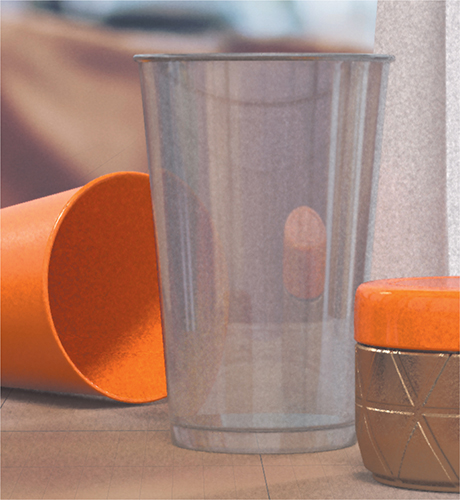
To make the glass more “foggy” or “cloudy,” enter a Translucence value of 90%.

To cause the glass to “bend,” or refract the light more, enter 2.8 for the Index of Refraction. You won’t see the effect of this unless you have Render Preview turned on.

Click the back arrow
at the top of the Scene panel to return to the model list.
Changing SBSAR material properties
If the Twist Jar group isn’t open, click its Group icon
to open it.Hover over the Jar model (not the lid), and click the right arrow icon
to reveal the model materials.
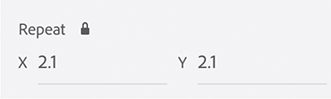
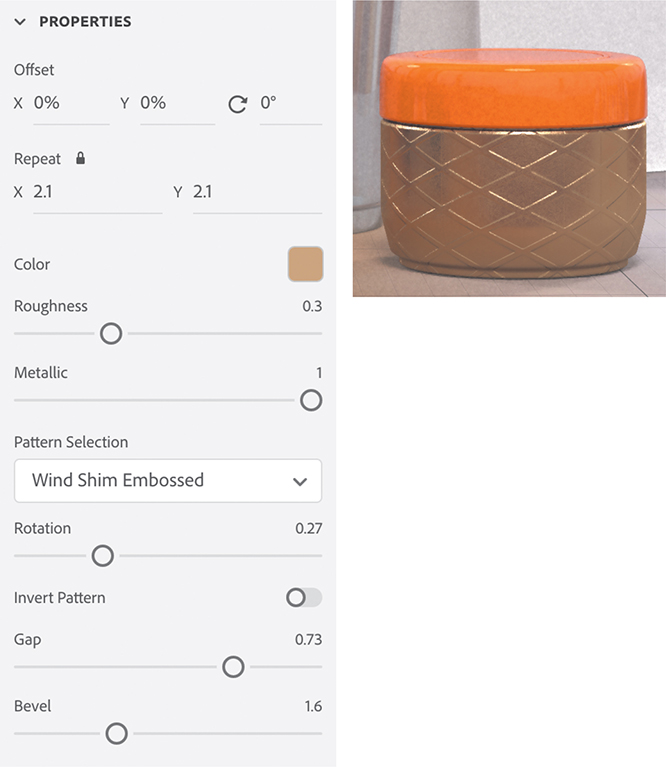
Since Geometric Metal is a parametric SBSAR material, there are numerous adjustable parameters defined by the material creator. To start, enter 2.1 for both the X and Y Repeat.
Experiment with the rest of the parameters in the Properties panel. I used Wind Shim Embossed for the Pattern Selection, .27 for the Rotation, .73 for the Gap, and 1.6 for the Bevel, and left the rest of the values as-is.
Sub-selecting model faces
You’ve seen that models can consist of a group of sub-models. When an object is modeled this way, it is easy to select the various sub-model components independently. Sometimes you may find that you want to apply different materials to different “parts” of a model, but although they look like separate parts, they weren’t created as separate sub-models.
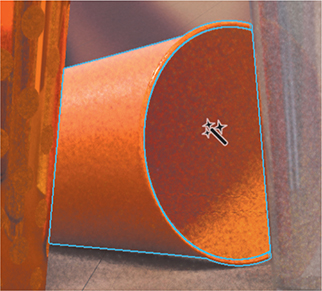
Assuming that the parts in question look different from the surrounding surfaces on the model, there is a way to apply different materials to different surfaces on a single model. The key is to use the Magic Wand tool. The Magic Wand tool works similarly to the Magic Wand tool in Photoshop. When you click a surface with the Magic Wand, Dimension attempts to select the surface up to its “edges.” Let’s try it out.
Double-click the Magic Wand tool.
Set the Selection Size to Tiny.

Click inside the cup that is on its side on the table. Note that a blue selection boundary appears around the inside area of the cup.
In the Content panel, type plastic into the search field.
Select the Plastic MDL material to apply the white plastic material to the inside surface of the cup.

In the Scene panel, hover over Cup 2 and click the right arrow icon
to reveal the model materials.Note that now Cup 2 has two materials applied: Plastic and Plastic 3. (Depending on what you’ve done previously, your second plastic material might be followed by a numeral other than 3).

Click the back arrow
at the top of the Scene panel to return to the model list.
Applying materials to the star
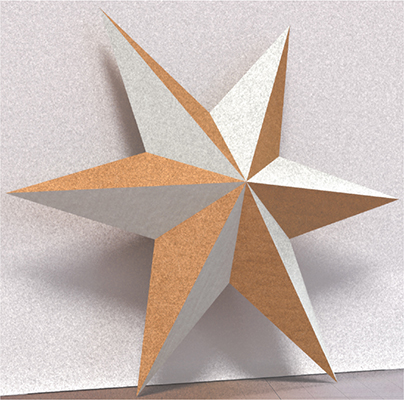
Although the Star model in our scene consists of a single model, you can use the Magic Wand tool to select just some of the surfaces of the star and apply different materials to these surfaces.
Select the Star model in the Scene panel.
Choose Camera > Frame Selection to position the camera to give a large view of the Star model.
In the Content panel, type cardboard into the search field.
Select the Cardboard SBSAR material to apply it to the star.
Click one of the triangular “sides” of the star with the Magic Wand tool. You’ll see the triangle highlighted in blue to indicate it is selected.

Hold down the Shift key, and click every other facet of the star face. Holding down the Shift key lets you add to the selection each time you click with the Magic Wand tool.

In the Content panel, type paper into the search field.
Select the Diagonal Paper SBSAR material to apply it to the star facets.
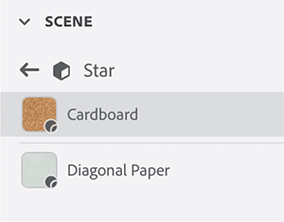
In the Scene panel, hover over “Star” and click the right arrow icon
to reveal the model materials.Note that now the Star model has two materials applied: Cardboard and Diagonal Paper.
Click the Camera Bookmarks icon
 and select Final view to return to the original camera view.
Applying materials to the bag
Double-click the Magic Wand tool (keyboard shortcut: W).
Change the Selection size to medium.
Click on the front of the body of the bag (not the handles).

In the Content panel, type plastic into the search field.
Select the Plastic With Lattice Pattern MDL material to apply it to the bag.
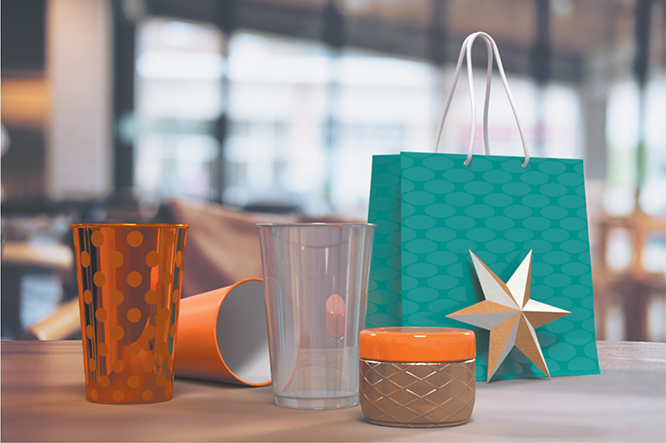
If you have time, render the scene. Or open and examine the Lesson_06_01_end_render_high.psd file, which I’ve rendered for you.
Linking and unlinking materials
In the preceding example, you sampled the material for the Jar Lid model from the Cup 2 model. This created a single material instance that was linked between both models. When you changed the material color, it was updated on both models. As noted, you can unlink the material if you want to control the attributes of the material on each object independently.
Dimension follows a fairly subtle set of rules as to when it links materials and when it doesn’t. Let’s examine material linking more closely and see how Dimension decides when to link materials.
Applying materials en masse
You can apply materials to several models at the same time, resulting in a common linked material, which makes quick work of altering those models.
Choose File > Open.
Select the file named Lesson_06_02_begin.dn, which is in the Lessons > Lesson06 folder that you copied onto your hard disk, and then click Open.
Select the Select tool (keyboard shortcut: V).
Select all three sphere models: click one of the models, hold down the Shift key, and click each of the other two models. Notice that the spheres aren’t grouped together.
In the Content panel, select the Plastic MDL material to apply it to the three selected spheres all at once. When you apply a material to multiple objects with a single click, the material is linked between the objects by default.
Choose Edit > Deselect All to deselect the sphere models.
In the Scene panel, hover over the Sphere 1 model, and click the right arrow icon
to reveal the material applied to the sphere.You will see a Break Link To Material icon
appear in the Actions panel. The presence of this icon tells you that the material you have selected is linked to at least one other model.In the Properties panel, click the color swatch next to Base Color, and change the color to a bright red. The material color of all three spheres changes because all three models share a common linked material. Conclusion: when you apply a material to multiple objects with a single click, the material is linked between the objects by default.

Breaking a link
When you no longer want the material that is applied to multiple models to be linked, you can break the link, allowing you to individually modify the material applied to the models.
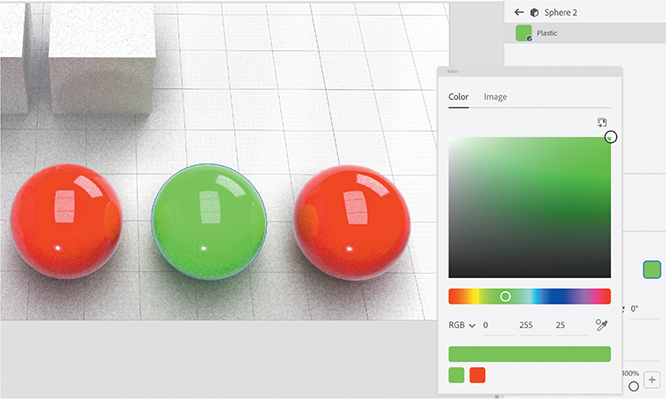
Click the back arrow icon
at the top of the Scene panel to return to the model list.Hover over the Sphere 2 model, and click the right arrow icon
to reveal the material applied to the sphere.Click the Break Link To Material icon
in the Actions panel. The icon will disappear from the Actions panel, indicating that the material is no longer linked to another model.In the Properties panel, click the color swatch next to Base Color, and change the color to a bright green.
The material of Sphere 2 is the only one to change color, since it contains an independent material that is no longer linked to the other spheres.
Applying materials one at a time
If you apply the same material to several objects one at a time, the material is not linked between the models. The material applied to each model is a separate “instance” of the material. The properties of the material instance can be changed without affecting the other models.
Choose Edit > Deselect All.
Locate the Matte MDL material in the Content panel, and drag it onto the leftmost sphere model.
Drag the Matte material onto the middle sphere model.

Drag the Matte material onto the rightmost sphere model.
Press the Esc key to display the model list in the Scene panel.
Double-click the leftmost sphere to reveal the material applied to the sphere in the Scene panel.
No Break Link To Material icon
is displayed in the Actions panel. This means that the material you have selected is not linked to any other models.
In the Properties panel, click the color swatch next to Base Color and change the color to a bright red.
The material of Sphere 1 is the only one to change color, since it contains an independent material that is not linked to the other spheres. Conclusion: when you apply materials independently to objects one at a time, even if you apply the same material to each model, the materials are unlinked by default.

Applying materials with the Sampler tool
If you want to apply a material used on one model to another model, you can do so with the Sampler tool. The result will be a material that is linked between the two models.
Click the back arrow icon
at the top of the Scene panel to return to the model list.In the Scene panel, click Cube 1 to select it.
In the Content panel, select the Metal MDL material to apply it to the surface of Cube 1.
Click the back arrow icon
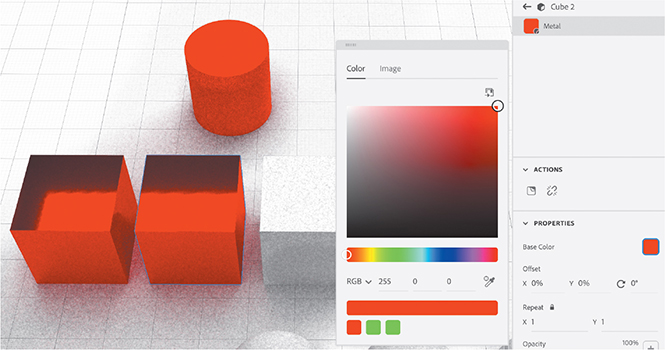
at the top of the Scene panel to return to the model list.Click Cube 2 in the Scene panel to select it.
Select the Sampler tool (keyboard shortcut: I), and click the Cube 1 model (the cube with the metal material applied) on the canvas.
The Scene panel shows that the Metal material is applied to the Cube 2 model. Note that the Break Link To Material icon
appears in the Actions panel. This is your cue that the metal material used for Cube 1 is linked to Cube 2.In the Properties panel, click the color swatch next to Base Color and change the color to a bright red.
Since they are linked, the material color on both Cube 1 and Cube 2 changes. Conclusion: when you use the Sampler tool to sample a material from one model to another, the materials in both models will be linked by default.
Understanding Paste vs. Paste As Instance
Dimension has two Paste commands in the Edit menu: Paste, and Paste As Instance. After you’ve copied a model to the clipboard, both of these commands will paste a duplicate of the model. But the two commands differ in how the material on the duplicate model is linked to that of the original model.
Select the Select tool (keyboard shortcut: V).
Select the cylinder model at the top of the scene.
Choose Edit > Copy.
Choose Edit > Paste.
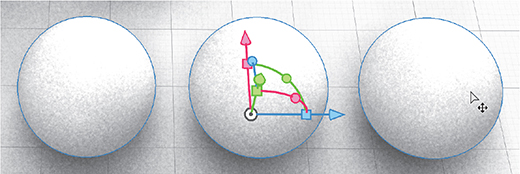
Drag the blue arrow to the right so you can see both cylinders.

On the canvas, double-click the duplicate cylinder that you just created to reveal the cylinder material in the Scene panel.
In the Properties panel, click the color swatch next to Base Color and change the color to a bright green.

Since they aren’t linked, the material on only one of the cylinders changes. Conclusion: by default, when you copy and paste a model, use the Edit > Duplicate command, or Option/Alt-drag to duplicate a model, the materials of the models aren’t linked.
Select the green cylinder model.
Choose Edit > Copy.
Choose Edit > Paste As Instance.
Drag the blue arrow to the right so you can see both green cylinders.
On the canvas, double-click the duplicate green cylinder that you just created to reveal the cylinder material in the Scene panel.
In the Properties panel, click the color swatch next to Base Color and change the color to blue.
The material color on both cylinders changes since the materials are linked. Conclusion: when you use the Paste As Instance command, the materials in both models are linked by default.

Linking summary
The subtleties of how Dimension links materials between objects can be boiled down to the following:
When you apply a material to multiple objects with a single click, the material is linked between the objects by default.
When you apply materials to objects one at a time, even if you apply the same material, the materials are unlinked by default.
When you use the Sampler tool to sample a material from one model to another, the materials in both models are linked by default.
When you copy and paste, use the Edit > Duplicate command, or Option/Alt-drag to duplicate a model, the materials of the models are not linked.
When you copy a model and use the Paste As Instance command, the materials in both models are linked by default.
Review questions
1. What is the main difference between MDL and SBSAR materials?
2. What tool do you use to apply separate materials to different parts of a single model?
3. When using the Magic Wand tool, how do you add to a selection?
4. What tool would you use to sample a material from one model and apply it to another?
5. If you drag the same material onto five objects, one object at a time, will the same material be linked to all five objects?
Review answers
1. MDL models all offer the same group of adjustable settings, such as opacity, roughness, metallic, and translucence. SBSAR models are “parametric,” meaning that they offer many different parameters depending on the whim of artist who created the material.
2. The Magic Wand tool allows you to “subselect” individual surfaces of a model and apply a different material to each surface.
3. After you’ve clicked with the Magic Wand tool to select a surface on a model, hold down the Shift key and click another surface to extend the selection.
4. You can use the Sampler tool (keyboard shortcut: I) to sample a material from one model and quickly apply it to another model.
5. No. If you drag the same material onto five objects, one object at a time, each object will have an independent instance of the material and not be linked to any other models. If you select all five models and apply a material to all five models at once, then the same material is linked to all five models.