
7. Creating Materials with Adobe Capture
Lesson overview
In this lesson, you’ll use the Adobe Capture mobile app and learn the following:
How to use Capture to create unique materials to use in Adobe Dimension.
How to edit materials in Adobe Capture to fit your needs.
How to use materials you’ve created with Capture in Adobe Dimension.

This lesson will take about 45 minutes to complete. To get the lesson files used in this chapter, download them from the web page for this book at www.adobepress.com/DimensionCIB2020. For more information, see “Accessing the lesson files and Web Edition” in the Getting Started section at the beginning of this book.

The Adobe Capture mobile app is a fun and powerful way to create interesting materials that you can apply to your models in Adobe Dimension.
About Adobe Capture
Adobe Capture is a mobile app for iOS and Android devices. The purpose of Capture is to enable you to capture inspiration from the world around you and turn that inspiration into type, brushes, patterns, shapes, colors, gradients, and—specifically for our purposes in Dimension—materials.
When you are out and about and see a material or texture that you think would work well for a model in Dimension, you can shoot a photo of the texture with your mobile device’s camera and, in a few taps of the screen, turn it into a material ready to apply to a model in Dimension.
You can learn more about Adobe Capture at www.adobe.com/products/capture.html.
Download and install Adobe Capture on your mobile device
To download and install Adobe Capture on your iPhone or iPad, go to www.adobe.com/go/getcapture_ios.
To download and install Adobe Capture on your Android mobile device, visit www.adobe.com/go/getcapture_android.
Capturing a material
You can capture a material from a photo that you take with your device, from a stock photo, or from any asset you’ve saved in Creative Cloud. Here’s how.
Launch Adobe Capture on your mobile device. If prompted, sign in with your Adobe ID.

If the Capture preferences on your device are set so that Capture opens directly into camera mode, tap the X in the lower-left corner of the screen to close the camera.
At the top of the screen, choose a CC Library from the menu. If you’re unfamiliar with CC Libraries, just choose My Library.
Tap Materials at the top of the screen.
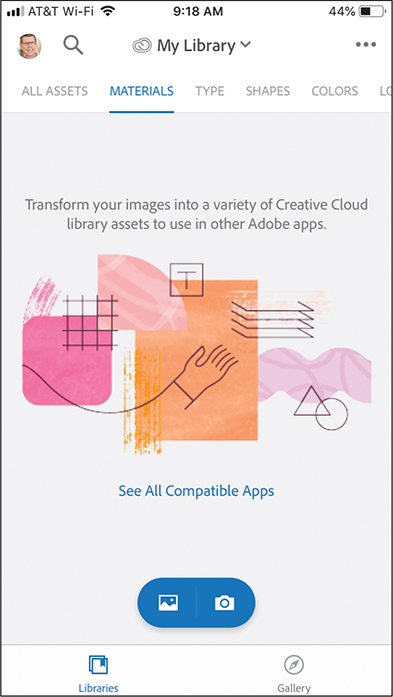
Tap the Camera icon
 .
. Note
NoteYou can tap the sphere in the middle of the screen at any time to freeze the view. Then, if it’s available on your mobile device, you can tap the image adjustments and effects icon
 in the upper-right corner to adjust the exposure, color, and special effects on the image being captured.
Point the camera at an interesting texture or pattern, and then tap the
 icon to take a photo.
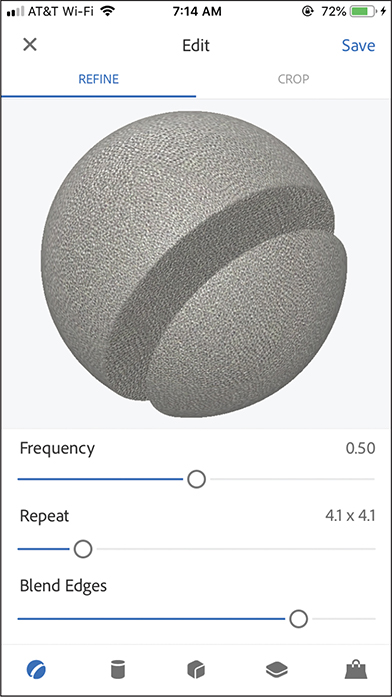
Make adjustments to the material attributes, if desired.
Roughness controls how shiny the surface is. A higher value makes the surface rougher, allowing less shine on the surface.
Detail controls the details in the surface. Increasing the Detail value adds detail to the surface with a sharpening effect.
Metallic controls the degree of metallic luster on the surface. A higher value makes the surface appear more metallic.
Increasing the Intensity setting makes the surface texture higher, and decreasing the setting makes it lower. This value affects the “normal map” bitmap image that appears in the Properties panel in Dimension when the material is applied to a model.
Frequency determines the light and shadow. Adjusting the Frequency value adjusts the sharpening effect to the normal map, changing the appearance of light and shadow on the surface.
Repeat changes the “tile” size of the material. A larger value results in a smaller image that will repeat more frequently when used on a large model. A smaller value will repeat less frequently.

If you increase the Blend Edges value, Capture will attempt to blend the edges between each tile when a material repeats across a model’s surface.
 Tip
TipIf you want to change the name of your material, tap the More icon
 next to the name of the material on the material thumbnails screen and tap Rename.
Tap Save to save the material. The material is added to the CC Library you chose in step 2 and is ready to use in Dimension.
Capture a material from a photo
In addition to capturing materials from your mobile device’s camera, you can also capture materials from a photo that is in your device’s camera roll, that you previously saved in your Creative Cloud storage, that you’ve brought into Lightroom, that is from Adobe Stock, or that is from any other source you have access to on your device, such as Dropbox or Google Drive.
Launch Adobe Capture on your mobile device.

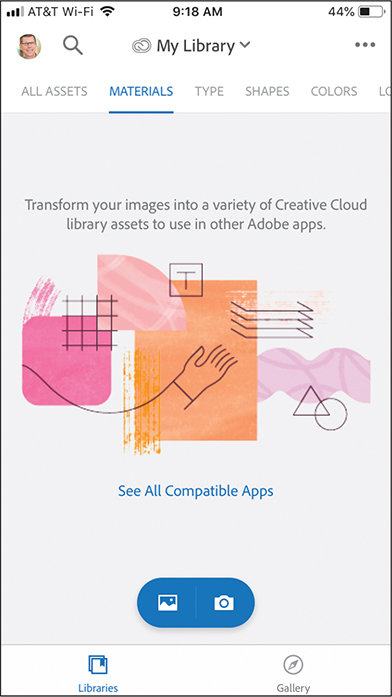
If the Capture preferences on your device are set so that Capture opens directly into camera mode, tap the X in the lower-left corner of the screen to close the camera.
At the top of the screen, choose a CC Library from the menu. If you’re unfamiliar with CC Libraries, just choose My Library.
Tap Materials at the top of the screen.

Tap the image icon
 .
.Tap Stock from the pop-up list to access Adobe Stock.
In the search field, type texture and then tap Search. This will reveal hundreds of texture images.
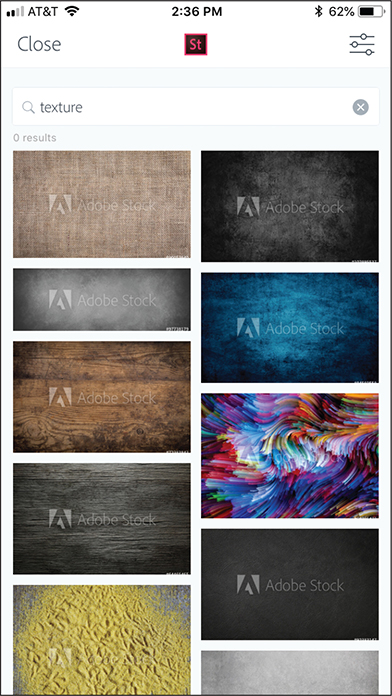
Tap a texture that you like.
Tap either Save Preview (to download a watermarked comp image) or License Asset (to purchase the image).

Choose a CC Library to save the stock image to.

Tap the capture icon
 to bring the image into Adobe Capture.
Make adjustments to the material attributes, if desired.
Tap Save to save the material to your CC Library.
Using a material from Capture in Dimension
Applying a material that was created in Adobe Capture to a model is just like applying a material from any other source. The only difference is that you need to look for the material in a CC Library.
Launch Adobe Dimension.
Choose File > Open.
Select the file named Lesson_07_01_begin.dn, which is in the Lessons > Lesson07 folder that you copied onto your hard disk, and then click Open.
Click the Add And Import Content icon
 at the top of the Tools panel, and choose CC Libraries.
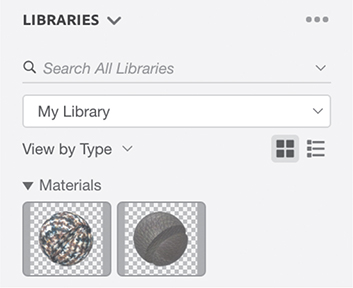
In the menu just under the search field at the top of the Content panel, choose the library that you saved your captured materials into.
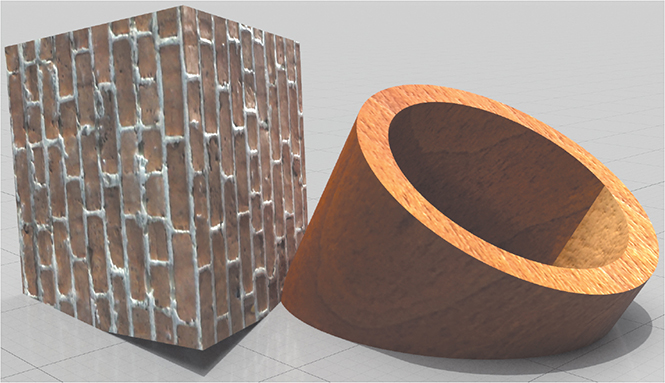
Drag one of the materials you created with Adobe Capture onto the Prism model on the canvas. Or, if you prefer, select the Prism model, choose File > Import > Place Material On Selection, and select the Material_14.mdl file in the Bricks folder to use the Brick material created for you with Capture.
Drag another one of the materials you created with Adobe Capture onto the Pipe model on the canvas. Or, if you prefer, select the Pipe model, choose File > Import > Place Material On Selection, and select the Material_6.mdl file in the Maple folder to use the Maple wood material created for you with Capture.
Modifying material properties
You may need to adjust several things after applying a material generated by Capture to a model in Dimension. A material created with Capture is a photographic bitmap of a specific width and height, along with other bitmaps that define the roughness, metallic luster, and texture of the material. A captured material might not be the correct size or orientation relative to your model, seams may be visible in the material, or the material may appear too smooth or too rough. Here are some ways to rectify these problems.
Material not aligned with model
Choose File > Open.
Select the file named Lesson_07_02_begin.dn, which is in the Lessons > Lesson07 folder that you copied onto your hard disk, and then click Open. If you still have Lesson_07_01_begin.dn open, you can close it without saving.
The scene looks strange with the bricks running vertically up and down the model. Hover over Prism in the Scene panel, and click the right arrow icon
 to reveal the material applied to the prism. Tip
Since you sometimes don’t know the exact rotation value that you will need, you may find it helpful to hover over the Rotation icon
 in the Properties panel and drag to the right or left to adjust the numeric rotation value.
In the Properties panel, Enter –90° for the rotation value to rotate the bricks to align horizontally with the prism.

Material too small or too large compared to the model
When you create a material with Capture, you won’t have a sense of how large or small the pattern or texture will be relative to the model you will apply it to. You can scale the material up or down in Dimension.
If you no longer have the Prism material selected, double-click the Prism model on the canvas with the Select tool.
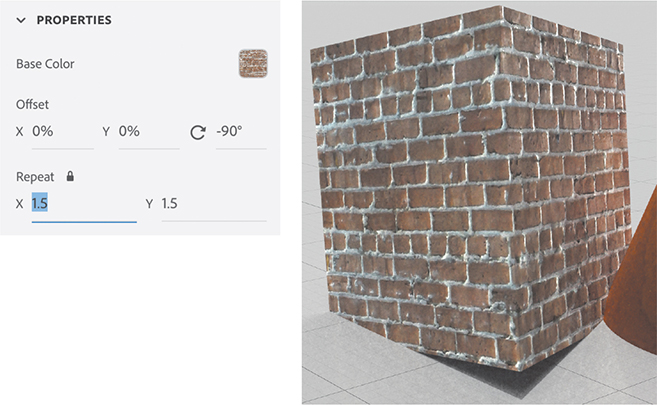
The bricks look a little large in the scene. In the Properties panel, enter 1.5 for the Repeat X and Y values. Entering a larger value for Repeat causes the bitmap to shrink in size and to repeat multiple times, if necessary, to cover the entire model surface. Entering a smaller value enlarges the bitmap so that any visible texture in the material becomes larger relative to the model.
Seam visible in material when applied to the model
Sometimes a seam will be visible in the material applied to a model. In this scene, the seam is quite visible on the Maple material that is applied to the pipe.

There are a couple things that can cause a seam. First, if a material is not large enough to cover the entire surface of the model, it will repeat, or “tile,” across the surface of the model. When this happens, a seam will usually be visible where the material repeats.
This can usually be fixed by applying a “Blend Edges” value when creating the material in Adobe Capture, as described earlier. Or, you may be able to hide the seam by adjusting the offset or repeat values in the Properties panel.
In this scene, however, the seam is caused by the material “wrapping” around from the beginning to the end of the inside surface of the cylinder. So the only way to fix this is to rotate the pipe to hide the seam.
If you currently have a material selected, press the Esc key, and then select the Pipe model with the Select tool.
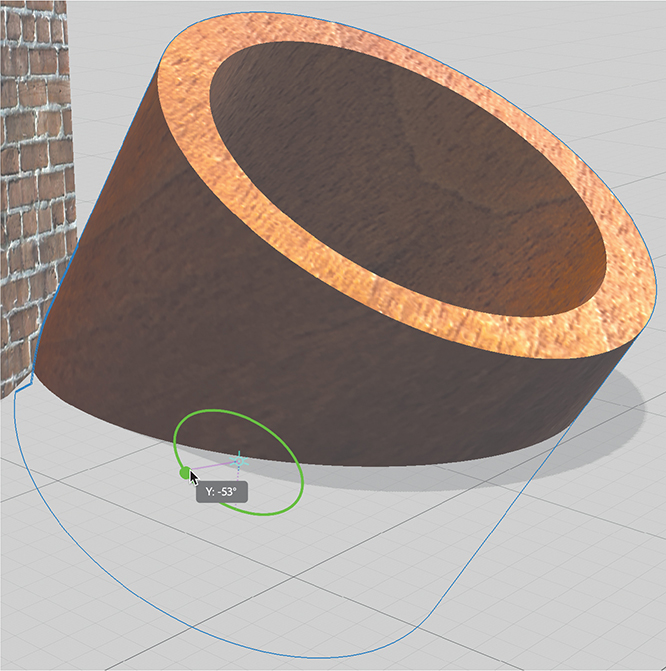
Double-click the Select tool, and make sure that Align To Scene is turned off. This is to ensure that the Pipe rotates around its tilted axis, not around a vertical axis.

Drag the green circle on the transformation widget to the left to spin the Pipe model clockwise until the seam is hidden.
Too much (or too little) surface detail in the material
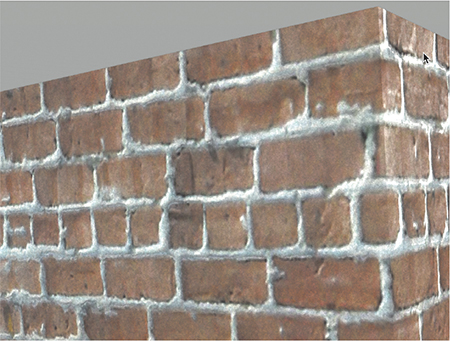
Materials generated by Adobe Capture contain a “normal map.” This is a bitmap file that controls how the surface affects light and shadows. The contrast between light and dark areas in the bitmap affects the visible difference between the “high points” and “low points” on the surface texture. This effect is most noticeable when sunlight hits the surface at certain angles.
In this scene, when sunlight hits the brick material, the white mortar appears to ooze out between the bricks.

Hover over the Prism model, and click the right arrow icon
to reveal the material applied to the prism.In the Properties panel, click the image swatch next to Normal. This reveals the bitmap that is the normal map.

Click the pencil icon
 to edit the image in Photoshop.
In Photoshop, choose Image > Adjustments > Brightness/Contrast.
Select the Use Legacy option, and then enter a value of –75 for the Contrast. Adding contrast will make the surface texture more pronounced, and removing contrast will make it less pronounced.
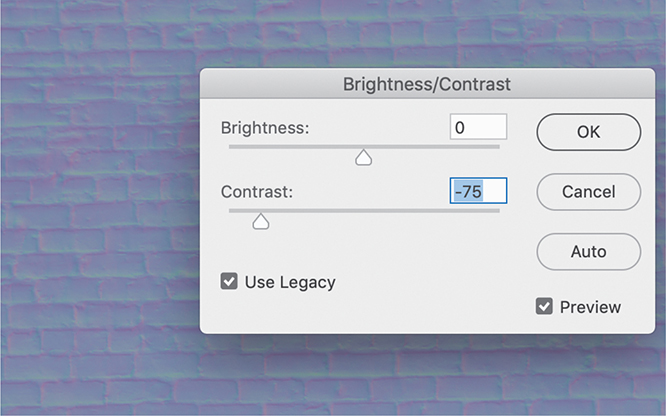
Click OK.
Choose File > Close, and click Save when prompted.
Back in Dimension, click outside the image picker to close it, and you should see that the surface texture is less pronounced.
In the Properties panel, click again on the image swatch next to Normal.

Click the trash can icon
 to remove the Normal bitmap.
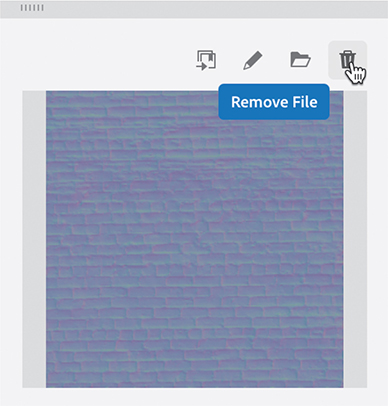
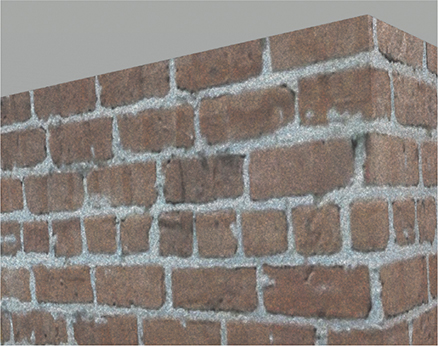
Now the brick and mortar texture should appear completely flat on the prism model.
Material too flat or too shiny
When you create a material with Adobe Capture, you have some control over how metallic the material is. At first glance, it might appear that you can’t edit how metallic a material from Capture is after you’ve applied it to a model. But if you know a little trick, you can.
Hover over the Pipe model, and click the right arrow icon
to reveal the material applied to the pipe.In the Properties panel, you’ll see that the sliders for Roughness and Metallic are grayed out, which indicates that you can’t change them. But here’s the trick.
Click the properties swatch next to Roughness.

Click the trash icon
to remove the bitmap that came from Capture. Now you can adjust the Roughness slider.
Click the properties swatch next to Metallic.
Click the trash icon to remove the bitmap that came from Capture. Now you can adjust the Metallic slider.
Now you have full control over how smooth and shiny the surface of the model is. Enter 53% for the Roughness, and 0% for Metallic.

Review questions
1. When editing a material in Adobe Capture, what does the Metallic slider do?
2. In addition to creating materials from your mobile device camera, what other sources can you use to create materials with Capture?
3. What should you do if a material created with Capture isn’t the right size when applied to a model?
4. Why might you see a “seam” displayed on a model after a material has been applied?
Review answers
1. Adjusting the Metallic value controls the degree of metallic luster (shininess) on the surface of the material.
2. You can create a material with Capture from any image that has been saved to your device’s camera roll, Creative Cloud storage, Dropbox, or Google Drive. Capture can also access images in Adobe Lightroom and Adobe Stock.
3. To change the size and position of a material that is applied to a model, adjust the Offset, Rotation, or Repeat values in the Properties panel as desired.
4. A seam in the material may be visible if the bitmap image used to create the material isn’t large enough to cover the entire model surface. To fix this, you can use the Offset, Rotation, or Repeat values in the Properties panel, or reposition the object to hide the seam.