9. Applying Graphics to Models
Lesson overview
In this lesson, you’ll explore and apply graphics to model surfaces and learn the following:
What types of graphics can be applied to the surface of a model.
The differences between graphics and materials.
How to edit a graphic after it has been applied.
How to apply multiple graphics to a model surface.
How to restrict the application of graphics to specific model surfaces.

This lesson will take about 45 minutes to complete. To get the lesson files used in this chapter, download them from the web page for this book at www.adobepress.com/DimensionCIB2020. For more information, see “Accessing the lesson files and Web Edition” in the Getting Started section at the beginning of this book.
The ability to apply graphics to model surfaces opens all kinds of possibilities for adding labels and other artwork to your models.
Beginning a new project and importing a model
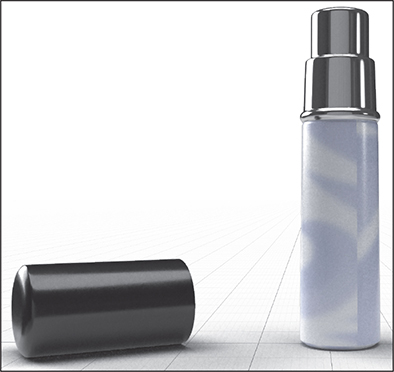
A common task in package design is mocking up a specific type of package with the artwork that is going to be printed on, or affixed to, the package. Since you can import and apply graphics to the surfaces of models, Dimension is useful for this workflow. In this lesson, you will apply background artwork and labels to a perfume bottle.
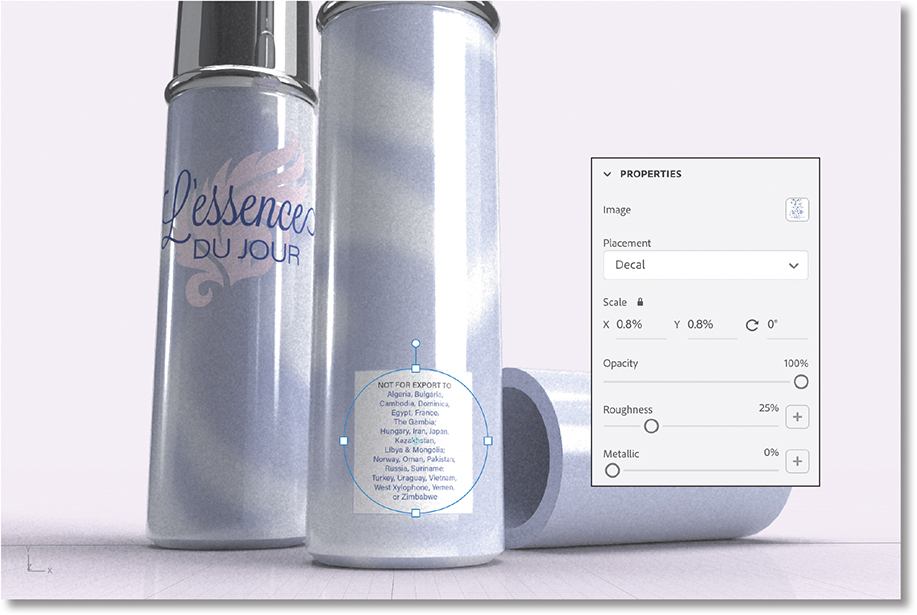
In Adobe Dimension, choose File > New With Settings. This command lets you specify the canvas size and other attributes as you create a new file.
In the New Document dialog, under Canvas Size, change the width to 3000 px and the height to 2000 px. Increasing the pixel dimensions will make your label artwork look much better.
Deselect the Set As Default option, and click Create.
Click the Add And Import Content icon
 at the top of the Tools panel.
Select Adobe Stock.
Select Browse All Adobe Stock 3D.
Your default browser will launch, and you’ll be brought to a page on stock.adobe.com.
In your browser on the Adobe Stock page, type 208142389 into the search field and press Return/Enter.

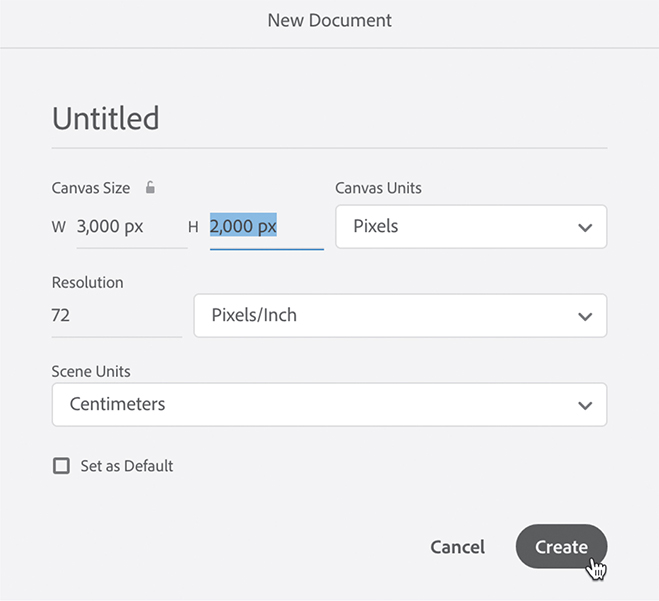
This is the ID number of a perfume bottle model used in this lesson. This model is free.
Click the License For Free button. The asset will be licensed, and downloaded to your browser’s download location.
In Dimension, choose File > Import > 3D Model.
Navigate to your browser’s default download location, open the folder named AdobeStock_208142389, select the file named portable_perfume_spray_1460.obj, and click Open. The model will be placed in the center of the scene, positioned on the ground plane.
Choose Camera > Frame All to position the camera on the model.
Organizing the model components
When you place a model in a scene, the first thing you should do is examine the model in the Scene panel to see how it’s put together. Is it a single model, or a group of models? Are the models labeled in a way that makes sense to you? Taking a few moments to become familiar with the model will pay off as you incorporate it into your scene.
![]() Tip
Tip
You can also hide or show a model by selecting the model and pressing the Command+; (macOS) or Ctrl+; (Windows) keyboard shortcut.
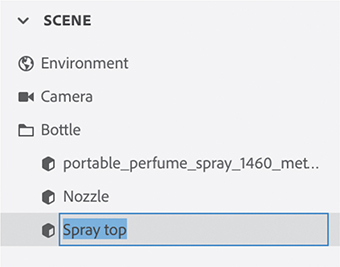
In the Scene panel, you’ll see that the model is a group named portable_perfume_spray_1460. Double-click the name of the model group and change the name to Bottle.

Click the closed model group icon
 to open the group.
Hover over each of the models in the group, and click the eye icon
 twice to hide and show the model to help you identify which model is which.
Change the name of the middle model in the group to Nozzle. Change the name of the bottom model in the group to Spray top.
Note that the top model in the Scene panel contains both the body of the perfume bottle and the bottle cap. It would be useful to work with these separately, so you’ll break them apart.
Right-click or double-click the Magic Wand tool in the Tools panel.
Set the Selection Size to Large.
Click away from the tool option panel to dismiss it.
Click once on the bottle cap on the canvas to select it.
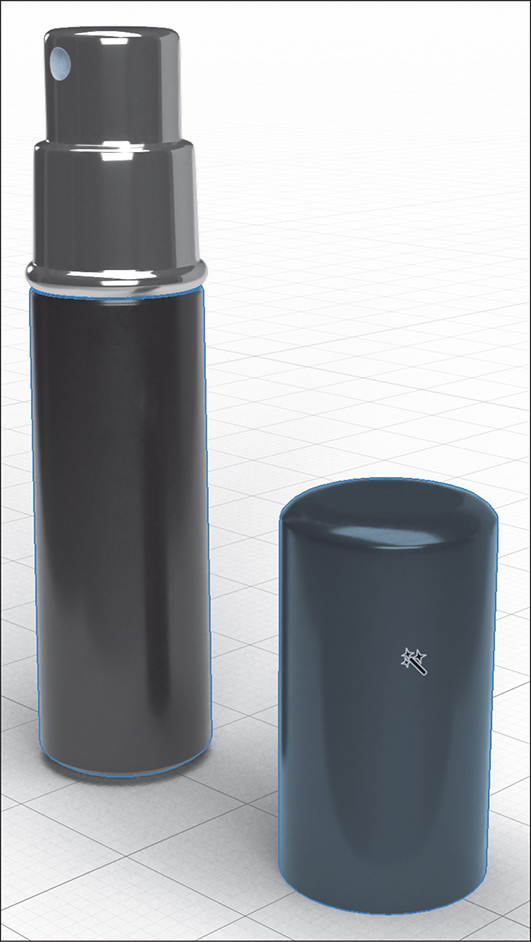
Choose Edit > Cut. The bottle cap should disappear.
Choose Edit > Paste. The bottle cap will be pasted in the same location, but now it is a separate model, as you can see in the Scene panel.
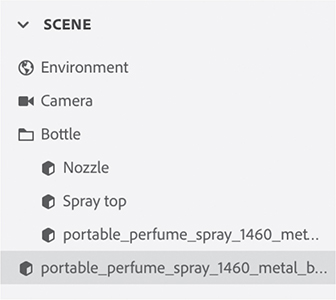
Double-click the new model in the Scene panel, and type Bottle cap for the model name.
Double-click the model named portable_perfume_spray_1460_metal_black and rename it Body.

Select the Select tool (keyboard shortcut: V).
Select the Bottle cap model.
Hold down the Shift key, and drag the blue circle on the Select tool widget clockwise to rotate the bottle cap model until it is lying on its side. Holding down the Shift key constrains rotation to 15° increments, making it easy to rotate the model exactly –90°.
Drag the green circle on the Select tool widget counter-clockwise to rotate the bottle cap 30° or so.
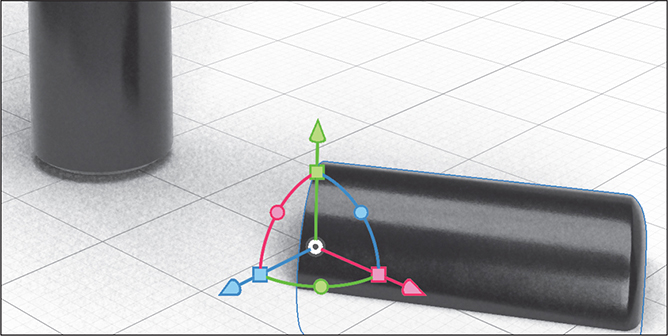
Choose Object > Move To Ground to position the bottle cap on the ground plane.
Select the Bottle group, and Choose Object > Move To Ground to position the bottle on the ground plane.
Select the Orbit tool (keyboard shortcut: 1).
Drag to the right to rotate the view so you are looking straight at the front of the spray bottle.

Click the Camera Bookmarks icon
 at the top of the screen.
Click the plus icon
 to create a new bookmark.
To rename the bookmark, type Front view and press Return/Enter. This will allow you to easily return to this view at any time.
Choose File > Save to save the file with a name and location that will allow you to find it later.
Applying a background graphic
In previous lessons you learned how to apply materials to the surface of a model to change its look. Materials can contain all kinds of properties, such as glow, roughness, metallic luster, and translucence, as well as color and pattern. A graphic is another way to apply color and pattern to a model surface, and this color and pattern works in concert with the model’s surface material.
Files in AI (Adobe Illustrator), PSD (Adobe Photoshop), JPEG, PNG, SVG, or TIFF format can be placed as graphics on the surface of a model.
In the Scene panel, select the Body model.
In the Actions panel, click the Place Graphic On Model icon
 .
.
 Tip
TipBefore placing a graphic on a model, always position the camera so that it is pointed straight at the surface on which you want to position the graphic. The camera view affects where the graphic “lands” when it is placed on the model.
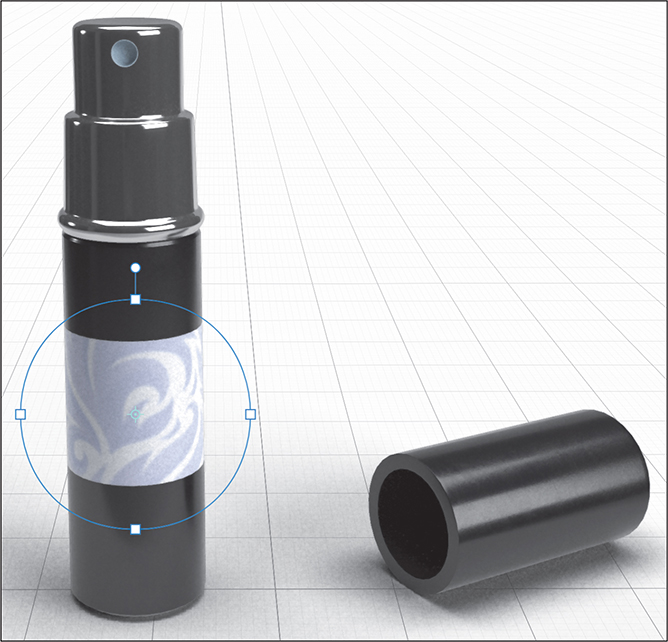
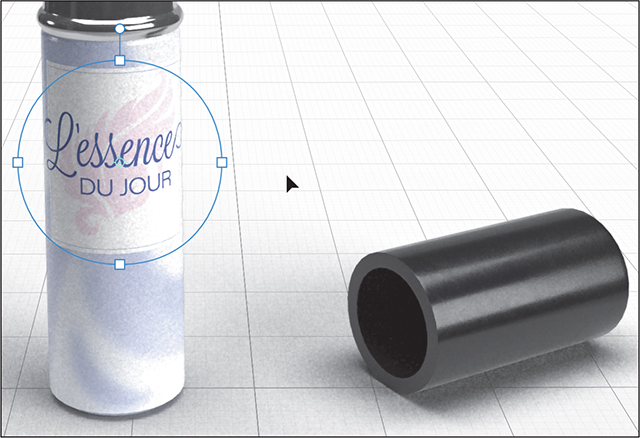
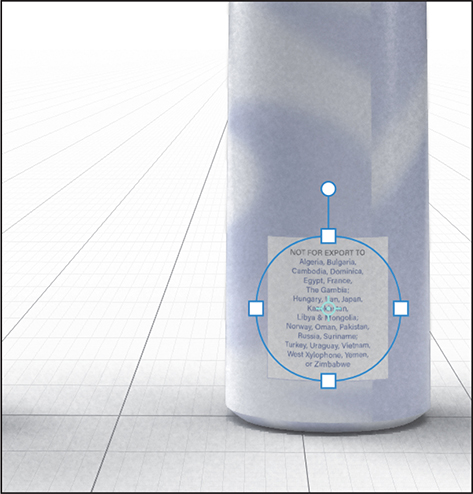
Select the file named Background_label.psd, which is in the Lessons > Lesson09 folder that you copied onto your hard disk, and then click Open.
The label is placed on the body of the spray can, visible to your current view at the size of your model. The label is surrounded by a round selection widget that makes it easy to resize, rotate, or move the label on the model. If you don’t see the selection widget as pictured here, select the Select tool in the Tools panel (keyboard shortcut: V).
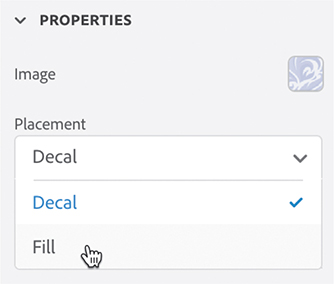
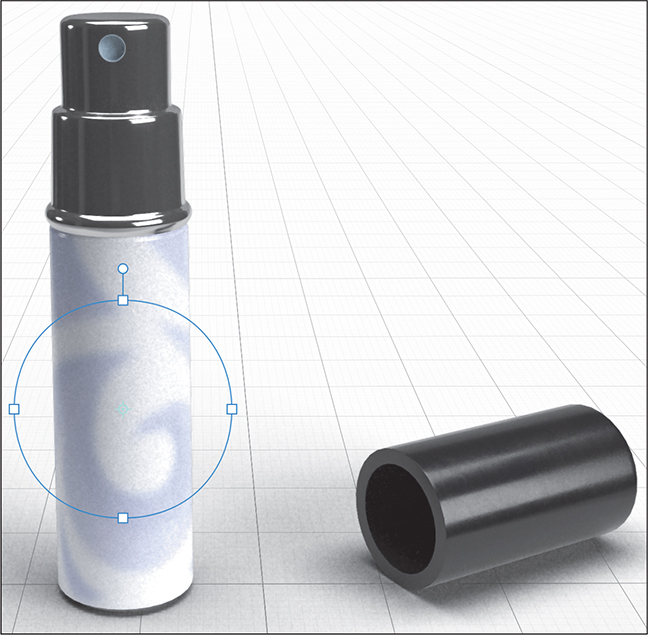
Graphics arrive by default applied as a “decal” to models. But you can also fill the surface of a model with a graphic. In the Properties panel, choose Fill from the Placement menu.
This causes the graphic to scale proportionally until it fills the entire model surface.
You can also choose to tile a smaller graphic across a model surface. To see how this works, enter 10 for the X and Y Repeat values in the Properties panel.
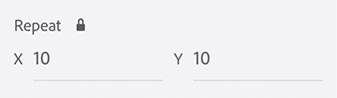
You’ll see the rectangular graphic repeat in a tile pattern across the surface of the model.
Under Placement in the Properties panel, change Repeat to Mirror.

This will cause the tiles to mirror both horizontally and vertically across the model surface.
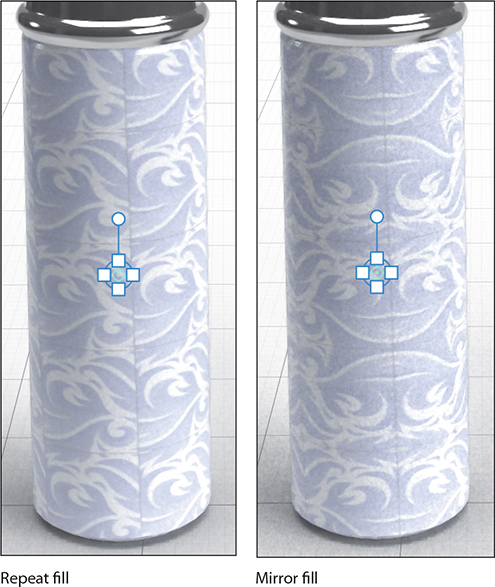
Change the X and Y values for repeat back to 1 so that one large instance of the graphic fills the model surface.
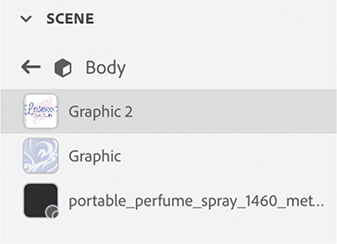
Examine the Scene panel. Note that the Body model now contains both a material (the original material, named portable_perfume_spray_1460_metal_black_MatSG_Mat) and the graphic that you just placed.

Applying additional graphics
A single model surface can contain as many graphics as you wish. Next, you’ll add two more labels to the body of the perfume bottle.
In the Actions panel, click the Place Graphic On Model icon
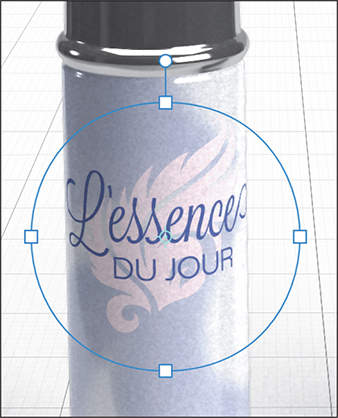
.Select the file named Lessence_du_jour_label.ai and then click Open.
Hold down the Shift key, and drag one of the four selection handles on the widget inward to make the label smaller. Holding down the Shift key constrains the scaling to be proportional.
Drag anywhere inside the selection circle to move the label around on the surface of the model until it is positioned as desired.
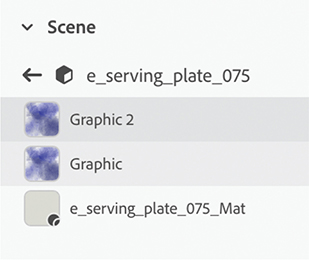
Note that the Scene panel now lists two graphics, as well as the original material applied to the perfume bottle body.
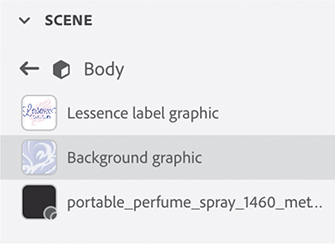
Double-click Graphic 2 and change the name to Lessence label graphic.
TipAlways take a moment to name models, groups, materials, and graphics in the Scene panel. This added clarity will pay off later on when you need to perform further editing in the file.
Double-click Graphic and change the name to Background graphic.
Select the Orbit tool in the Tools panel (keyboard shortcut: 1).
Drag from left to right across the screen until you can see the back side of the spray can.
In the Actions panel, click the Place Graphic On Model icon
.Select the file named Lessence_du_jour_label.ai and then click Open.
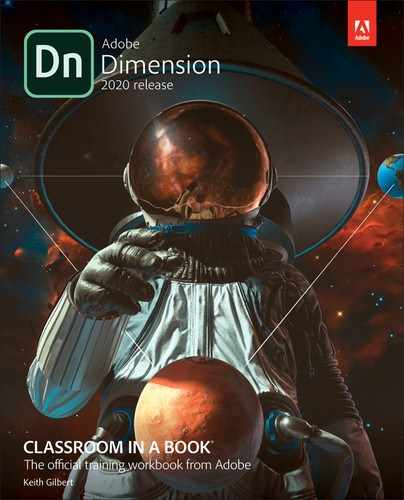
Since this is the same file you placed on the front of the can, you get another copy of the L’essence du Jour label on the back of the can. But this is an Illustrator file that contains multiple artboards, and you can choose a different artboard after the graphic is placed.
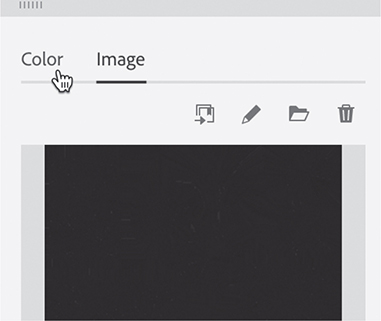
In the Properties panel, click the image swatch next to the word “Image.”
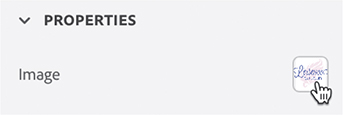
Choose Artboard 2 from the list of artboards.

Use the Select tool to scale and position the label as desired.
Note that there are now three graphics listed in the Scene panel. You can change the stacking order of these graphics.
Drag Graphic 3 below Background graphic in the list, and you’ll see that Background graphic covers up Graphic 3 on the model.
 Tip
TipYou can also drag and drop graphic files from the Macintosh Finder or Windows File Explorer onto a model to place the graphic on the model surface. Or you can copy and paste a graphic from Photoshop or Illustrator onto a selected model in Dimension.
Drag Graphic 3 back up to the top of the list so that it is visible again.
Modifying graphic properties
Each graphic can have its own properties for opacity, roughness, and metallic luster.
Click the Camera Bookmarks icon
at the top of the screen.Select Front View to return to viewing the front of the spray can.
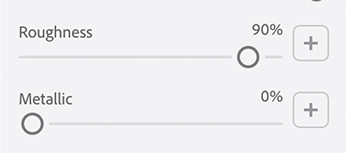
Choose Background graphic in the Scene panel.
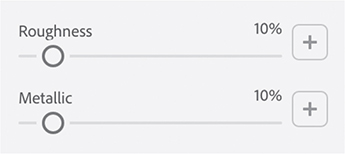
In the Properties panel, change the Roughness value to 10% and the Metallic value to 10%. This affects only the background graphic.
In the Scene panel, select the Lessence label graphic.
In the Properties panel, enter 90% for the Roughness value to give the label a flatter finish.
Editing a label in Illustrator
After you’ve placed a graphic on a model, you can do round-trip editing of the file in Illustrator or Photoshop. If you’ve placed an AI or SVG graphic on a model, it will open in Illustrator for editing. If you’ve placed a JPEG, PNG, PSD, or TIFF image, it will open in Photoshop. After you edit the graphic, it will automatically update on the model.
In the Scene panel, select the Lessence label graphic.
In the Properties panel, click the image swatch next to the word “Image.”
In the box that appears, double-click the image or click the pencil icon
 to edit the graphic in Illustrator.
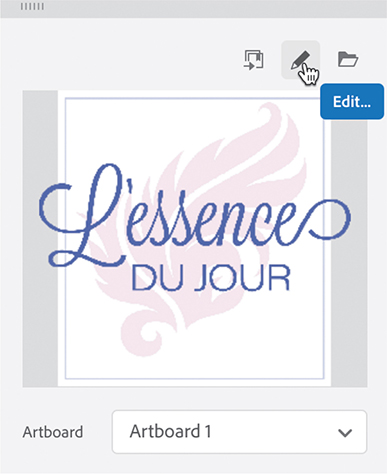
In Illustrator, delete the white box that is behind the image, or make any other edit to the image that you wish.

 Note
NoteWhen you place a graphic on a model, there isn’t a “link” created from the model to the original image file. Instead, the placed image is saved internally in the DN file. When you edit a placed graphic in Illustrator or Photoshop, it’s this internally stored image that you are editing and saving back into the DN file.
In Illustrator, choose File > Close, and, when prompted, save the file.
In Dimension, you should see the label update to reflect the changes you made in Illustrator.
Finishing the scene
Now you’ll add a few final touches to the scene, including colors and lighting.
Select the Select tool in the Tools panel (keyboard shortcut: V).
Click somewhere on the background area around the model to select the environment.
In the Properties panel, click the color swatch next to the word “Background.”

Click the Color Sampler icon
 in the lower-right corner of the color picker.
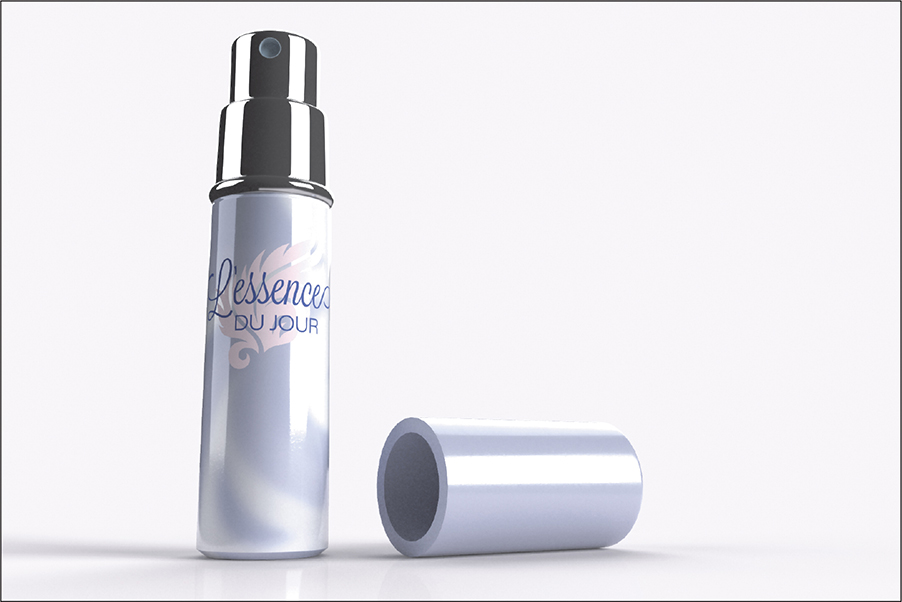
Click a pink area of the L’essence Du Jour label to sample the pink color and apply it to the scene background.

Double-click the Bottle cap model on the canvas to display the Bottle cap materials.
Click the color swatch next to Base Color in the Properties panel.
Click the Color tab.
Click the Color Sampler icon
in the lower-right corner of the color picker.Click a blue area of the Body model to sample the color and apply it to the bottle cap.

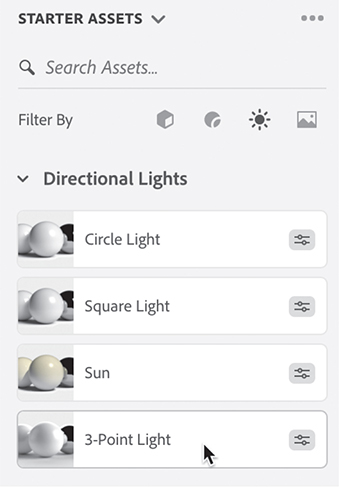
In the Starter Assets panel, click the lights icon
 to display only lights in the panel.
Select 3-Point Light to apply it to the scene.
Select Environment Light in the Scene panel.
Click the Delete icon
 in the Actions panel.
Select Environment in the Scene panel.
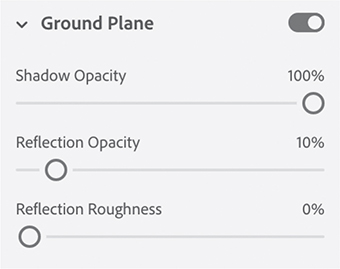
In the Properties panel, change the Reflection Opacity for the Ground Plane to 10%.
Use the Select tool to move the Bottle cap closer to the perfume bottle.
Use the camera tools to adjust the camera angle as desired.
Using advanced techniques
In this lesson you’ll learn some advanced techniques for working with placed graphics. You’ll learn how to stack semi-transparent graphics, how to control where on a model a graphic is initially applied, and how to restrict the application of a graphic image to only certain surfaces on a model.
Begin a new project and import a model
You’ll begin by creating a new file and placing a free model of a serving plate from Adobe Stock in the scene.
In Adobe Dimension, choose File > New With Settings.
In the New Document dialog, under Canvas Size, change the width to 3000 px and the height to 2000 px.
Deselect the Set As Default option, and click Create.
Click the Add And Import Content icon
at the top of the Tools panel.Select Adobe Stock.
Select Browse All Adobe Stock 3D.
In your browser on the Adobe Stock page, type 178262437 into the search field and press Return/Enter.
This is the ID number of a serving plate model used in this lesson. This model is free.
Click the License For Free button. The asset will be licensed, and downloaded to your browser’s download location.
In Dimension, choose File > Import > 3D Model.
Navigate to your browser’s default download location, open the folder named AdobeStock_178262437, select the file named e_serving_plate_075.obj, and click Open. The model will be placed in the center of the scene, positioned on the ground plane.
Choose Camera > Frame Selection to fit the plate model on the screen.

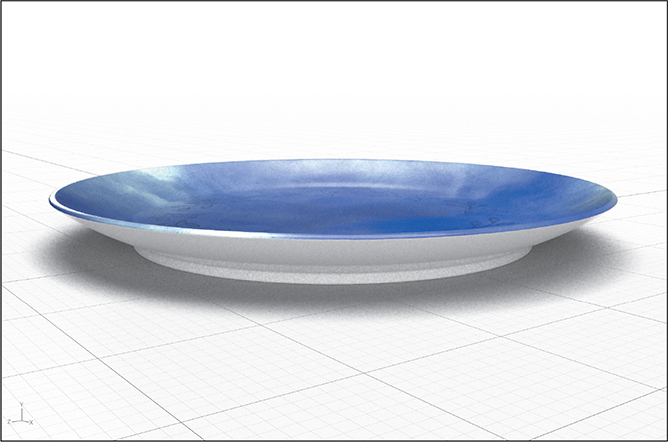
Placing overlapping graphics on the model
Any surface of a model can have multiple graphics applied to it. Transparency in the graphics is supported, so if a graphic is semi-transparent, any graphics or materials underneath will partially show through.
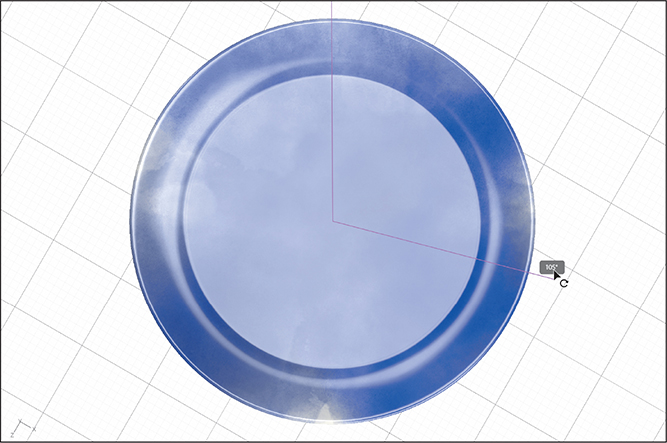
Select the Orbit tool (keyboard shortcut: 1) and use it to position your view of the scene so that you are looking directly down on the top of the plate. You may need to choose Camera > Frame Selection again after doing this so you can see the entire plate on the canvas.

When you place a graphic on a model, Dimension will attempt to center the graphic on the surface of the model that is facing the camera. So it usually works best if you point the camera squarely at the location on the model where you want to place the graphic. That way, less adjustment of the graphic will be required after it is placed.
Select the Select tool (keyboard shortcut: V) and double-click the plate model on the canvas. This will select the material applied to the surface of the serving plate model.
Click the Place Graphic On Model icon
in the Actions panel.Select the Blue_watercolors.png file and then click Open.
This PNG file was created in Photoshop and consists of a transparent background with several semi-transparent brush strokes created with a watercolor brush.
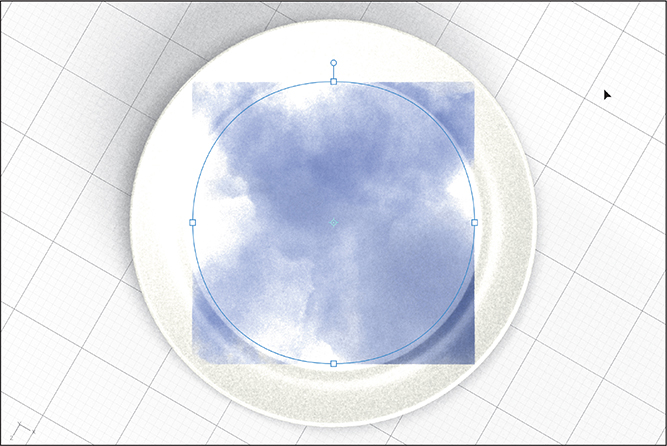
Grab one of the selection handles on the placed graphic, hold down the Shift key, and drag the handle out to make the graphic large enough to cover the top surface of the plate.
Holding down the Shift key causes the graphic image to scale proportionally.

Click the Place Graphic On Model icon
in the Actions panel.Again, select the Blue_watercolors.png file and then click Open.
Grab one of the selection handles on the placed graphic, hold down the Shift key, and drag the handle out to make the graphic large enough to cover the top surface of the plate.
Now you have two copies of the watercolor graphic placed on top of each other. Because the graphic is semi-transparent, they create a rich layered look. You can see both copies in the Scene panel.
Now you’ll rotate one of the copies so that the overlapping semi-transparent strokes create an interesting texture.
Grab the rotation handle at the top of the placed graphic, and pull to rotate the graphic so that the two graphics aren’t lined up exactly on top of each other.
Click the Place Graphic On Model icon
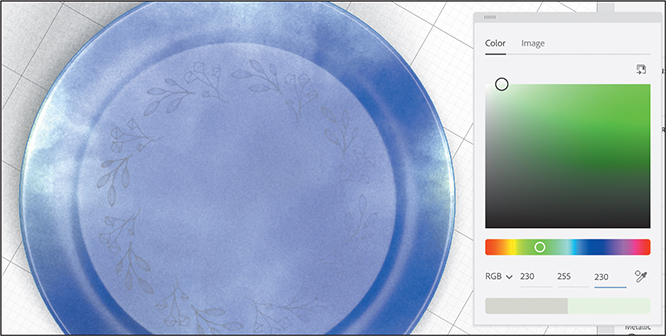
in the Actions panel.Select the Floral_border.ai file, and then click Open.
Size and position the floral border on the plate as desired.

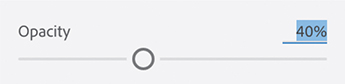
In the Properties panel, enter 40% for the Opacity to make the floral border semi-transparent.
In the Scene panel, you should see all three graphics stacked up above the e_serving_plate_075_Mat material. Select this material.

In the Properties panel, click the color swatch next to the words Base Color, and change the color to 230 red, 255 green, and 230 blue.
Fixing graphic overlap
When applying graphics to models, its common for the graphic to “overlap” or wrap around to an area or surface of the model where you don’t want the graphic to appear. Here’s a technique that can help fix the problem.
Press Esc to exit the Materials view in the Scene panel and instead display the models. The e_serving_plate_075 model should be selected.
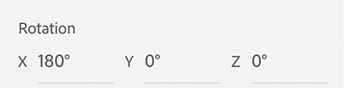
In the Properties panel, type 180° for the X Rotation value. This will flip the plate over.
 Tip
TipThe keyboard shortcut for Move To Ground, Command+period (macOS) or Ctrl+period (Windows) is a good shortcut to learn, as you’ll use this command frequently.
Choose Object > Move To Ground.

You can see that the graphics you added to the top of the plate wrap around onto the sides of the plate. This is because the entire plate surface is a single model with a single applied material.
Ideally, before you applied the materials to the plate, you would have used the Magic Wand tool, Edit > Cut, and Edit > Paste to break the plate model into three separate models (top, sides, and bottom). That would have prevented the problem. If you break apart the model now, you’ll likely need to reposition the graphics on the top surface since the geometry of the model changes when you break it apart. Luckily, there is another technique we can use to restrict the application of the graphic to only the top surface of the plate.
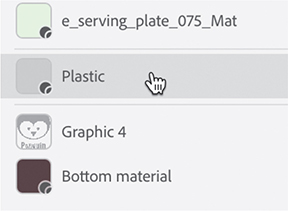
Right-click or double-click the Magic Wand tool in the Tools panel.
Set the Selection Size to Tiny.
Click away from the tool option panel to dismiss it.
Click once on the side area of the plate to select it.

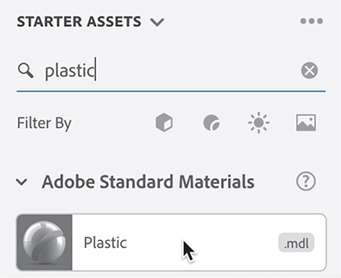
Click the Add And Import Content icon
 at the top of the Tools panel, and choose Starter Assets.
Click the Plastic material in the Content panel to apply it to the selected area of the plate.
Since a graphic applies only to a single material on a model, the graphics no longer wrap onto the slides of the plate.

With the Magic Wand tool, click the bottom center of the plate to select it.
In the Content panel, click the Plastic material to apply it to the bottom area of the plate.
Choose Edit > Deselect All.

Adjusting material properties
With the Select tool, double-click the plate model on the canvas to reveal the materials applied to the plate in the Scene panel. You’ll see the three materials (e_serving_plate_075_mat, Plastic, and Plastic 2) applied to the individual surfaces of the plate, each separated by a horizontal line. One or more graphics can be applied to each material on a model independently.
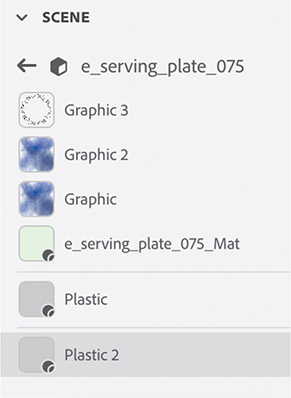
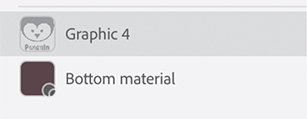
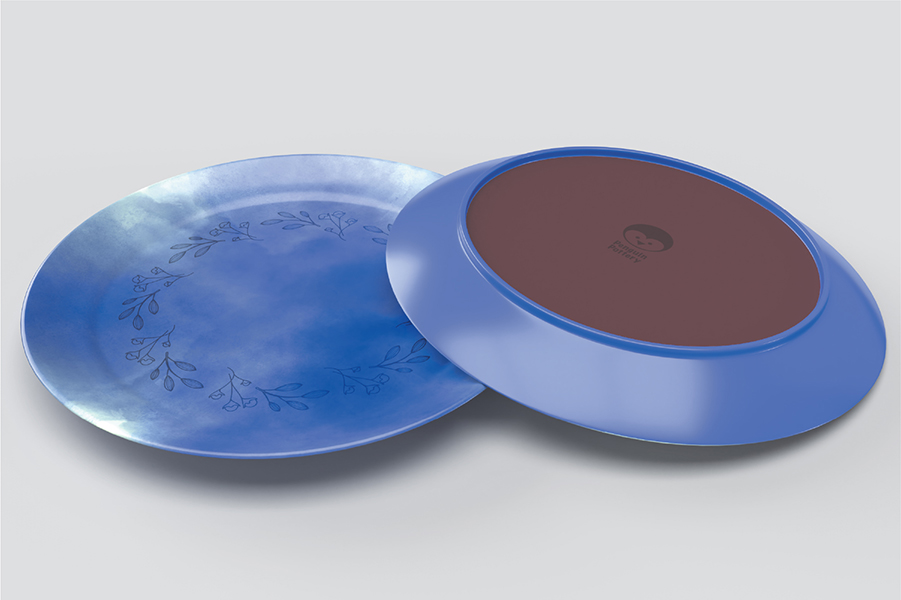
Double-click the Plastic 2 material in the Scene panel, type Bottom material, and press Return/Enter to rename the material.
In the Properties panel, click the color swatch next to Base Color, and change the color to 90 red, 50 green, and 50 blue.
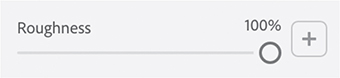
In the Properties panel, change the Roughness value to 100%.
Click the Place Graphic On Model icon
in the Actions panel.Select the Penguin_pottery_logo.svg file and then click Open.
Size and position the logo on the plate as desired.
With the logo still selected, change the Roughness value to 100% in the Properties panel.

Now, in the Scene panel, you’ll see that the Bottom material has the logo graphic (named Graphic 4) applied to it.
Press the Esc key twice to exit the Materials view in the Scene panel and instead display the models. The e_serving_plate_075 model should be selected.
In the Properties panel, type 180° for the X Rotation value. This will flip the plate over.

Choose Object > Move To Ground.
Select the Orbit tool (keyboard shortcut: 1), and drag up on the canvas so that you can see the side of the plate as well as some of the top.
Choose Camera > Frame All.
With the Select tool, double-click the plate model on the canvas to reveal the plate materials.
Select the Plastic material in the Scene panel.
In the Properties panel, click the color swatch next to Base Color.
In the color picker, click the Sample Color icon
and click a blue area on the top surface of the plate to sample a blue color and apply it to the sides of the plate.In the Properties panel, increase Roughness to 20% to make the sides of the plate less shiny.
Select the Orbit tool (keyboard shortcut: 1) and examine your finished plate from different angles. You may also want to try duplicating the plate and positioning one of the plates upside-down in the scene as shown below.
Review questions
1. What is the difference between a material and a graphic?
2. What file formats can be used for graphics?
3. When a graphic is placed on the surface of a model, is the image linked to the original graphics file, or does the image become part of the Dimension file?
4. Besides scaling, rotating, or moving a graphic on the model surface, what other properties of a graphic can be changed?
5. If a graphic overlaps an area of the model where you don’t want the graphic to appear, what are two techniques you can use to address this?
Review answers
1. Both materials and graphics can be used to apply color and pattern to the surface of a model. But a material can contain specific properties such as glow, roughness, metallic luster, translucence and other properties that add realistic “texture” to the material and affect how light interacts with the material. A graphic is just a flat image that can be wrapped around the surface of the model.
Multiple materials cannot be applied to a single model surface, but multiple graphics can be applied to each material.
2. Graphic files in AI (Adobe Illustrator), PSD (Adobe Photoshop), JPEG, PNG, SVG, or TIFF file formats can be placed on a model surface.
3. Graphics become part of the Dimension file. They are not linked to the original graphics file.
4. The opacity, roughness, and metallic properties can be adjusted for each graphic applied to a model.
5. If a graphic “bleeds” over a surface of a model where you don’t want it to appear, you can often address this by using the Magic Wand tool to select the surface where you don’t want the graphic to appear and then either a) cutting and pasting the surface to create a new model from the surface, or b) applying a new material (or another instance of the existing material) to the surface.