
In previous lessons you’ve imported images from a range of sources, explored a variety of ways to organize and find your files, and created projects and presentations to showcase your photos.
In this lesson, you’ll learn how you can output your images and creations to share them with family, friends, or the world at large:
Printing at home and ordering prints online
Fine-tuning the composition of an image in the print preview
Sharing photos by e-mail and Photo Mail
Signing up for an Adobe ID and a Photoshop.com account
Backing up and synchronizing your files
Synchronizing multiple computers
Creating your own Online Album or Web Gallery
Using an online sharing service
Burning your photos and projects to CD or DVD
Exporting images for use on the Web
You’ll probably need between one and two hours to complete this lesson.

Now that you’ve learned how to find your way around the Photoshop Elements workspace, how to organize and find the photos and other media in your growing collection, and how to create photo projects and digital presentations, you’re ready to share your images and creations with the world as printed output, by e-mail, or online.
Before you start working on the exercises in this lesson, make sure that you have installed the software on your computer from the application CD (see the Photoshop Elements 9 documentation) and that you have correctly copied the Lessons folder from the CD in the back of this book onto your computer’s hard disk. (See “Copying the Classroom in a Book files” on page 2.)
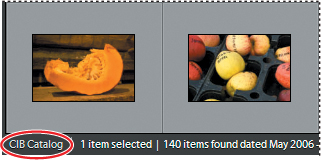
To start, you’ll import the sample images for this lesson to the CIB Catalog that you created at the beginning of Lesson 4.
Start Photoshop Elements and click Organize in the Welcome Screen.
The name of the active catalog is always shown in the lower left corner of the Organizer window. If your CIB Catalog is already loaded, you can skip step to step 4. If another catalog is currently loaded, continue with step 3.
Choose File > Catalog. In the Catalog Manager dialog box, click to select your CIB Catalog in the Catalogs list, and then click Open. If you don’t see the CIB Catalog listed, review “Creating a new catalog” at the beginning of Lesson 4.
Choose File > Get Photos And Video > From Files And Folders. In the Get Photos And Videos From Files And Folders dialog box, locate and open your Lesson05 folder. Select the folder Printing. Activate the option Get Photos From Subfolders and disable the automatic processing options; then, click Get Media.
In the Import Attached Keyword Tags dialog box, click Select All, and then click OK. Click OK to close any other alert dialog box.
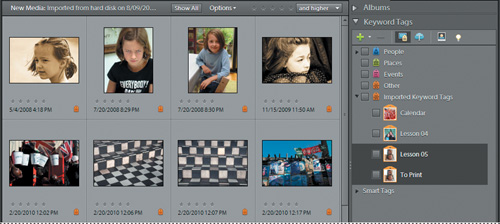
In the Media Browser, you can see thumbnails of the images you’ve just imported to your CIB catalog. In the Keyword Tags panel, the newly added tags have been listed in the category Imported Keyword Tags.
Whether you wish to use your home printer or order professional prints from an online service, Photoshop Elements offers a range of options for printing your photographs and Photo Projects such as photo books, greeting cards, and collages.
You can print your photos individually or in picture packages with one or more photos repeated at a variety of sizes on the same page, preview a multiple selection of photos printed as thumbnail images arranged on a contact sheet, or produce your own photo labels using commercially available label paper.
A contact sheets is a great way to preview and assess a multiple selection of images by printing them at thumbnail size, arranged on a single page in a grid layout.
To learn how to set up a contact sheet on Mac OS, skip ahead to page 153.
Click the Show All button in the Find bar above the Media Browser.
Click the empty Find box beside the keyword tag To Print (in the Imported Keyword Tags category), and then press Ctrl+A to select all the images tagged with the keyword To Print.
Choose File > Print.
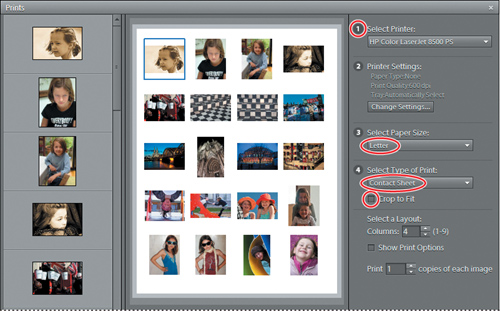
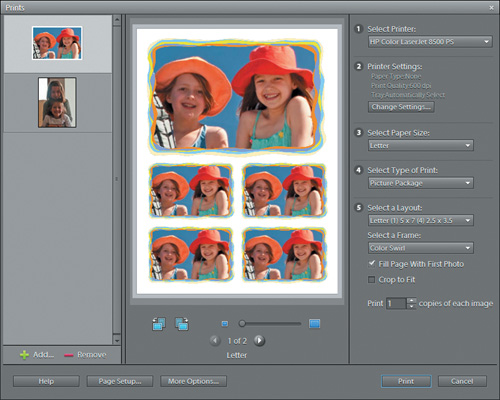
The Prints dialog box opens. The column on the left displays thumbnails of all the photos you selected for this print job. At center stage is the print preview.
Set up the options in the Prints dialog box as shown in the illustration below. Choose a printer from the Select Printer menu. For the purposes of this demonstration choose Letter from the Select Paper Size menu. From the Select Type Of Print menu, choose Contact Sheet, and then disable the Crop To Fit option.
Tip
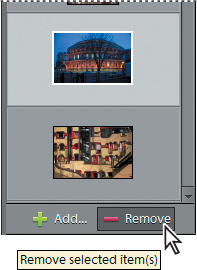
To remove a photo from the contact sheet, select its thumbnail in the image menu column and click the Remove button (
 ) below the menu pane.
The contact sheet layout includes all the images in the thumbnail menu column at the left. With a four-column layout, all twenty photos fit neatly on a single page; the page count below the print preview indicates that you are viewing page 1 of 1.
Under Select A Layout, click the down arrow button beside the Columns number or type 3 in the text box: With only three columns the images are larger, but only nine photos will fit on a single page at this paper size; the page count below the print preview now indicates that you are viewing page 1 of 3. Use the Next Page and Previous page buttons on either side of the page count to navigate between the pages.
Change the number of columns to nine. You can see that a single letter page can accommodate many photos at this setting. Return the layout to four columns.
Click to select any photo in the print preview; then, use the slider below the print preview to zoom in. Drag the photo to reposition it within the frame of its image cell. Select another image, and then use the Rotate buttons to the left of the zoom slider to change the photo’s orientation.
To print image information labels below each image on the contact sheet, first click to activate Show Print Options (just below the Columns setting), and then activate any or all of the Text Label options. Activate Date to print the capture date extracted from the images’ metadata, Caption to print any caption text, Filename to print the filename beneath each photo, or Page Numbers to print a page number on each page of a multiple-page contact sheet.
Click Print or Cancel and skip to “Printing a Picture Package” on page 154.
On Mac OS, you need to initiate a contact sheet print from the Editor. For this demonstration, in which we’ll use all the photos in a single folder, it will be quicker to open the Editor without first making a selection in the Organizer. If you want to print a contact sheet with photos drawn from multiple folders, you’ll need to select the images in the Media Browser—where you can Command-click to select non-consecutive images—and then switch to the Editor as described in step 2:
Press Shift+Command+A to deselect any images that are currently selected in the Media Browser.
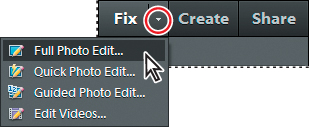
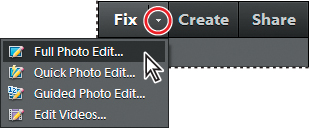
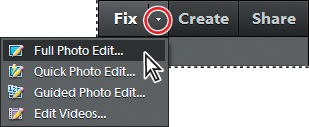
Click the small arrow on the Fix tab at the top of the Task Pane and choose Full Photo Edit from the menu.
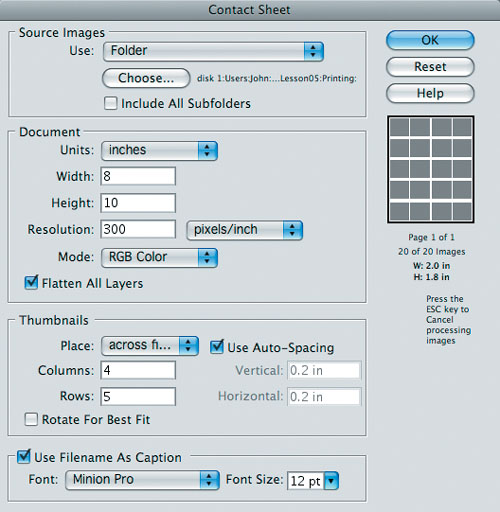
When the Editor opens choose File > Contact Sheet II. Set up the Contact Sheet dialog box as shown in the illustration at the right. Choose Folder from the Use menu under Source Images. Click Choose and locate the Printing folder inside your Lesson05 folder. Under Document, specify a size for your contact sheet. Under Thumbnails, specify the order in which the images will be placed. Activate Use Auto-Spacing; then, type 4 and 5 in the Columns and Rows text boxes respectively. Your Columns and Rows settings are reflected in the layout preview at the right. Disable Rotate For Best Fit, and activate Use Filename As Caption.
Click OK, and then wait while Photoshop Elements places the image thumbnails.

In our example, all twenty images fit onto a single page. When the number of images selected for printing exceeds the capacity of a single page at the layout settings specified, Photoshop Elements generates more pages to accommodate them.
Select the contact sheet page(s) in the Project Bin. Choose File > Print if you wish to print the contact sheet. If not, choose File > Close; then, click Don’t Save.
A Picture Package layout lets you print a photo repeated at a choice of sizes on the same page, much as professional portrait studios do. You can choose from a variety of layout options and range of image sizes to customize your picture package print.
To learn how to set up a picture package on Mac OS, skip ahead to page 156.
Select two or more pictures in the Media Browser, and then choose File > Print.
In the Prints dialog box, choose a printer from the Select Printer menu and a paper size from the Select Paper Size menu. Which layout options are available for your picture package depends on your choice of paper size; for the purposes of this exercise, choose Letter.
Choose Picture Package from the Select Type Of Print menu. If a Printing Warning dialog box cautioning against enlarging pictures appears, click OK; for this exercise you’ll print multiple images at smaller sizes.
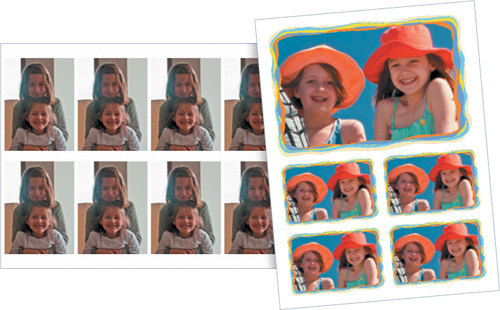
Choose a layout from the Select A Layout menu, and then activate the option Fill Page With First Photo. This will result in a page with a single photo repeated at a variety of sizes, according to the layout you have chosen. If you selected more than one photo in the Media browser, a separate Print Package page will be generated for each photo selected; you can see the print preview for each page by clicking the page navigation buttons below the preview pane.
The layout options available for a Picture Package depend on the paper size specified in the Prints dialog box, the page setup, and the printer preferences. To change the paper size, choose from the Select Paper Size menu or click either the Page Setup button at the lower left of the Prints dialog box or the Change Settings button under Printer Settings. Depending on your printer, you may need to look for the paper size options in the Advanced preferences settings.
Try a few of the options in the Select A Frame menu. For this demonstration, we chose Color Swirl, the last frame style in the menu. You can select only one style per picture package print; it will be applied to every picture in the layout.
Toggle the Crop To Fit option and assess the result; the Crop To Fit option may fit the multiple images more closely to the layout to better fill the printable area, especially when your photo is of non-standard proportions.
Note
The images in a Picture Package layout are automatically oriented to make the best use of the printable paper area for the layout you have chosen. You cannot manually rotate the image cells (or print wells) in a picture package layout; however, you can still zoom or rotate each image within its print well using the zoom slider and orientation buttons below the preview. Drag any image in the picture package to adjust its position within its print well.
Click the Add button (
 ) below the thumbnails menu at the left. In the Add Photos dialog box, you can add images to your print job by choosing from those photos currently visible in the Media Browser, from your entire catalog, or from the images included in a specific album or tagged with a particular keyword. Choose one or more photos from any of these sets, and then click Done; the selected images are added to the thumbnails column in the Prints dialog box.
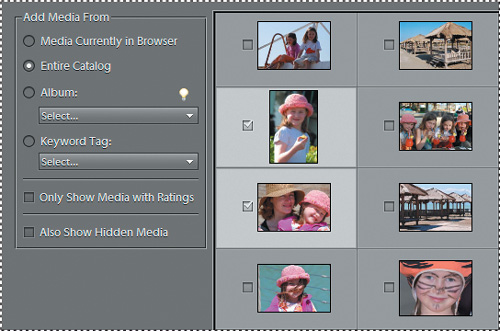
Drag the thumbnail of one of your newly acquired photos from the thumbnails column onto any image cell in the print preview; the original image is replaced.
Click Print or Cancel and skip to “Printing individual photos” in 157.
If necessary, switch to the Organizer, leaving the Editor open. Select two or more photos in the Media Browser.
Click the small arrow on the Fix tab at the top of the Task Pane and choose Full Photo Edit from the menu.
When the Editor opens, double-click whichever image in the Project Bin that you’d like to print first. Choose File > Picture Package.
Under Document in the Picture Package dialog box, make a selection from the Page Size and Layout menus, and then click the Edit Layout button below the Layout preview box.
In the Picture Package Edit Layout dialog box, click to select an image in the layout preview, and then click the Delete Zone button in the Image Zones options. Select another image in the preview and drag it to a new position on the page preview. Drag the handles on the image’s bounding box to scale it or change its orientation.

Option-click an image in the Edit Layout preview and try out some of the menu choices; then experiment with the other settings and buttons in the Image Zones options. For now, click Cancel; clicking Save would overwrite the settings for the selected layout preset.
Click OK in the Picture Package dialog box, and then wait while Photoshop Elements creates a new document and places the images for your Picture Package. If you wish to see the Picture Package printed choose File > Print; otherwise choose File > Close All, and then click Don’t Save.
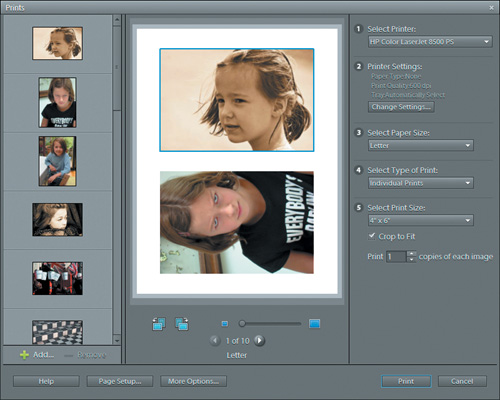
The Photoshop Elements Prints dialog box presents all your printing options in one convenient place and now also enables you to fine-tune the placement of each image within its own print well (its frame in the print preview). You can zoom or rotate an image with the controls beneath the preview and drag to reposition it, enabling you to get the image placed just right for printing without first editing it.
In the Organizer, Ctrl-click / Command-click to select eight or more images.
Choose File > Print. Alternatively, click the Create tab in the Task pane, click Photo Prints, and then click the Print With Local Printer button. On Mac OS, click Yes to continue to the Editor, where printing will be initiated.
In the Prints / Print dialog box, select a printer, paper size and print size from the menus at the right. On Windows, choose Individual Prints from the Select Type Of Print menu. If you see a print resolution alert, click OK to dismiss it.

Experiment with the controls below the Print preview. Click to select an image in the preview and zoom in and out inside the image cell using the zoom slider. Use the Rotate Left and Rotate Right buttons beside the zoom slider to change the orientation of the image within its print well frame. Drag the selected image to reposition it within the frame. Toggle the Crop To Fit option below the Select Print Size menu and observe the effect in the print preview.
Select any image thumbnail in the menu column on the left side of the dialog box and click the Remove Selected Photo(s) button (
).Click the Add Photos button (
) below the thumbnails menu. In the Add Media dialog box, choose a source option under Add Media From; select from photos currently visible in the Media Browser, from your entire catalog, or from the images included in a specific album or tagged with a particular keyword.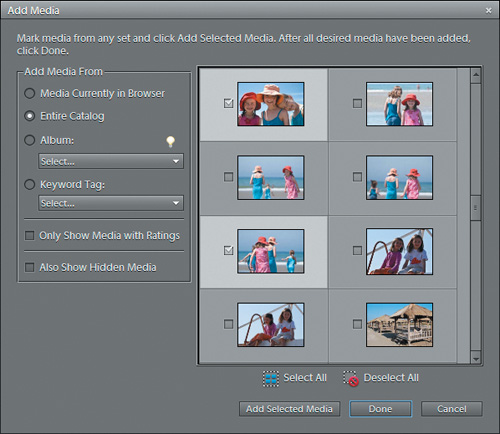
Note
You can add images to the selection to be printed only if they are part of the currently active catalog.
Choose one or more photos from any of these sets, and then click Add Selected Media. The selected images are added to the thumbnails column in the Print dialog box, and the Add Media dialog box remains open. Choose a different source option, select one or more photos; then, click Done to add the photos to your print job and dismiss the Add Media dialog box.
If you’ve selected more pictures than will fit on one page at the image dimensions you specified, Photoshop Elements automatically generates extra pages.
Check the page count below the Print Preview. If your print job has more than one page, preview the other pages by clicking the arrow buttons at either side of the page count.
Click the More Options button at the bottom of the dialog box and explore the settings available in the More Options dialog box. In the Printing Choices section, you can choose to print text details with your images, add image borders or a background color, and print crop marks to help you trim your images. The More Options dialog box also offers Custom Print Size and Color Management settings. Click Cancel to close the More Options dialog box.
In the Prints / Print dialog box, click Print if you wish to see these images printed; otherwise, click Cancel to save your ink and paper for your own prints. On Mac OS, choose File > Close All, but stay in the Editor for the next exercise.
If you want high quality prints of your photos and photo projects—for yourself or to share with others—you can order professional prints from an online service.
Photoshop Elements provides integrated links to online printing partners that you can conveniently access from anywhere in the workspace. In this exercise you’ll learn how to order individual prints from the Organizer.
In the Organizer, select one or more photos in the Media Browser, and then do one of the following:
Choose File > Order Prints > Order Shutterfly Prints.
Click the Create tab at the top of the Task pane. On the Create tab, click the Photo Prints button, and then click Order Prints From Shutterfly.
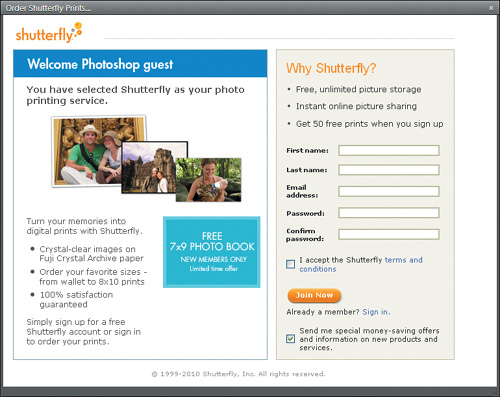
In the Order Shutterfly Prints dialog box, do one of the following:
If you are already a Shutterfly member, click the “Already a member? Sign in.” link, enter e-mail address and password and click Sign In.
If you are not already a Shutterfly member, create a new account by entering your name, e-mail address, and a password of at least six characters. If you accept the Shutterfly Terms and Conditions, click the check box below the personal details fields, and then click Join Now / Next.
Whether you choose to order prints from Shutterfly or Kodak, the experience is similar. Both services lead you through the ordering process in easy-to-follow steps.
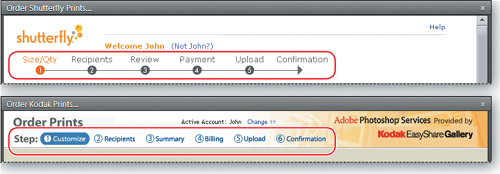
In the first step—Size/Qty for Shutterfly, Customize for Kodak—you can customize your order by specifying print sizes and quantities for the photos in your order. Click Remove under a thumbnail image in the list on the left side of the dialog box to remove that photo from your order.
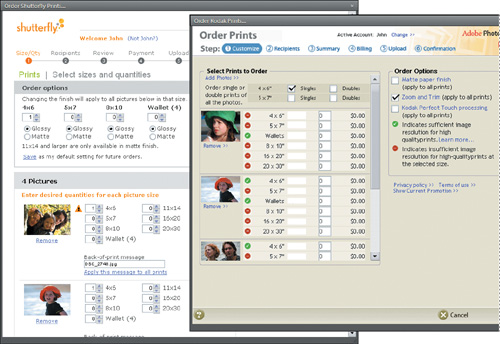
Alert icons beside the thumbnails let you know if your selected photos have a high enough resolution for high-quality prints at the sizes you’ve selected.
When you’re done reviewing your order, click Next.
As you proceed with your order, you’ll add the names and delivery addresses of recipients, review your order—making changes if necessary, provide your credit card details in the Payment / Billing dialog box, upload your images and confirm your order. For this exercise, click Cancel. A dialog box appears to ask if you want to stop using this service. Click OK.
Photoshop Elements users in the U.S. can create an Adobe ID and sign up for a free Photoshop.com account. You can register and sign in from within the application.
Creating an Adobe ID enables Elements Membership services that are integrated with your the Elements Organizer application, giving you access to the Inspiration Browser as well as backup and sharing, and other exciting Adobe-hosted services that extend the capabilities of your Photoshop Elements software.
Basic Elements Membership is free and gives you your own storage space and a personal Photoshop.com URL where you can not only share and showcase your images but also access your photos and videos anytime and from anywhere that you can connect to the Internet. You can also use your Photoshop.com account to back up your Photoshop Elements albums and even to synchronize albums on multiple computers. Basic membership also gives you access to the Inspiration Browser, with integrated tips, tricks and tutorials related to whatever you’re currently working on, providing a powerful way to advance your skill set and helping you make the most out of your photos and creations.
You can upgrade to a Plus Membership to get more storage space as well as access to advanced tutorials. With Plus membership you also get regularly updated content such as project templates, themes, backgrounds, frames, and graphics delivered directly to your software to help you keep your projects fresh and appealing.
Start Photoshop Elements. If Photoshop Elements is already running, click the Welcome Screen button (
 ) in the upper right corner of the workspace.
In the Welcome screen, click Create New Adobe ID. Enter your personal details, your e-mail address and a password, type a name for your personal Photoshop.com URL, and then click Create Account.
An e-mail message will be sent to you to confirm the creation of your account. Follow the instructions in the e-mail to activate your account.
Make sure, your computer is connected to the Internet, and then start Adobe Photoshop Elements.
In the Welcome screen, enter your Adobe ID and password, and click Sign In.
If you didn’t sign in at the Welcome screen, you can always click the Sign In link at the top of either the Organizer or Editor workspace.
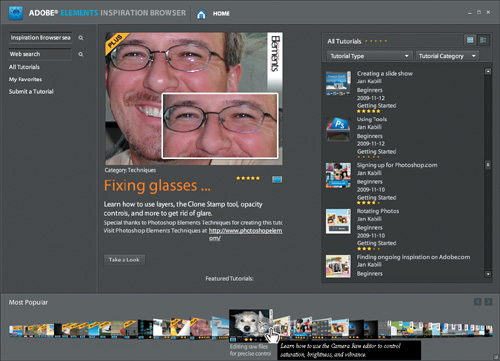
Once you’ve created an Adobe ID, you can access tips and tutorials in the Elements Inspiration Browser, which are regularly updated to help you expand your skills and to get the most out of Photoshop Elements, whatever your level of experience.
Click one of the tips that appear in the status bar across the bottom of the workspace window, or choose Help > Elements Inspiration Browser.

In the Inspiration Browser home screen, you can browse the available content using the Tutorial Type and Tutorial Category menus and the scrolling menu at the right, flip through the most popular content across the bottom of the screen, or use the search fields at the left to search the Inspiration browser or the Web.
In Lesson 1 you learned how to use the E-mail Attachments feature to create copies of your photos optimized as e-mail attachments. In this section we’ll look at other ways to share your pictures with friends, family, clients, or the world at large.
Photo Mail is not supported on Mac OS; if you’re working on Mac OS, you can skip ahead to “Creating an Online Album” on page 165.
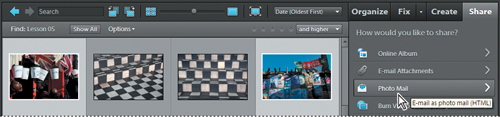
On Windows, another way to share your images by e-mail is to use the Photo Mail feature, which embeds photos in the body of an e-mail, within a customized layout.
In the Organizer, select one or more photos in the Media Browser, and then click the Photo Mail button in the Share panel.
Tip
If this is the first time you’ve accessed an e-mail feature in Photoshop Elements, you’ll be presented with the E-mail dialog box. Choose your e-mail client, enter your name and e-mail address, and then click Continue. You can change these settings on the Sharing tab in the Elements Organizer Preferences.
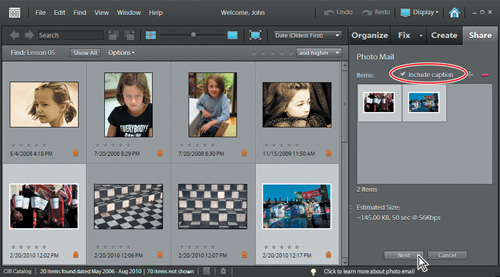
Activate the Include Captions option beside Items, and then click Next.
In the Message text box, delete the default text and type a message of your own.
Select a recipient for your Photo Mail from the list in the Select Recipients pane. If your recipient list is still empty, click the Edit Recipients In Contact Book button (
 ) and create a new entry in the Contact Book dialog box.
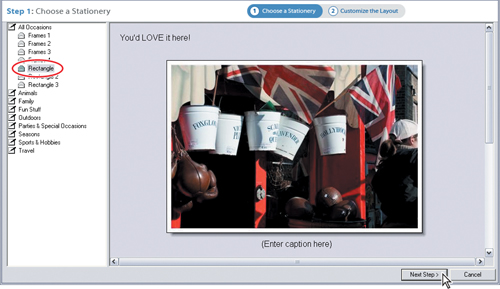
Click Next. In the Stationery & Layouts Wizard dialog box, click each category in the list at the left in turn to see the range of designs available. Choose a stationery style appropriate to your selected photos; then, click Next Step.
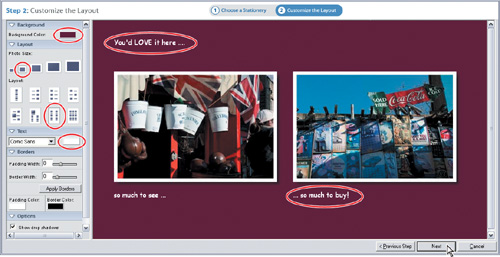
Customize the layout by choosing a Photo Size and Layout option. Choose a font; then click the color swatch beside the font menu and choose a text color. To edit the message or caption, first click the text to make it active. Click Next.
Photoshop Elements opens your default e-mail application, creates an e-mail, and embeds your layout in the body of the message.
Switch back to the Elements Organizer.
A great way to share and showcase your photos is by creating an Online Album. You can choose from a variety of interactive layout templates that are optimized for viewing photos on the Web. Photoshop Elements guides you through the process of adding and arranging photos, applying templates, and sharing your files.
In the Organizer, choose File > Get Photos And Video > From Files And Folders. In the Get Photos And Videos From Files And Folders dialog box, locate and open your Lesson05 folder. Select the folder Wedding. Activate the option Get Photos From Subfolders, if necessary, and disable the automatic processing options; then, click Get Media.
Note
You can only share your album to Photoshop.com if you are a U.S. resident and have already signed up to Photoshop.com. For information on the other album sharing options, refer to Help.
In the Import Attached Keyword Tags dialog box, click Select All, and then click OK. Click OK to close any other alert dialog box.
In the Media Browser, select the first ten wedding images.
Click the Share tab at the top of the Task pane; then click the Online Album button. The Share panel presents you with a choice of options. Activate the option Create New Album; from the Share To options, select Photoshop.com.
Tip
If you find that you can’t activate the Photoshop.com option, make sure that you are signed in with your Adobe ID. If the option is still unavailable, activate the Backup/Sync Is On option on the Backup/Synchronization tab of the Elements Organizer preferences.
Click Next; the selected photos are added to the new album and their thumbnails are displayed in the Content pane on the Share tab.
Under Album Details, type Annie & Jim’s Big Day in the Album Name text box.
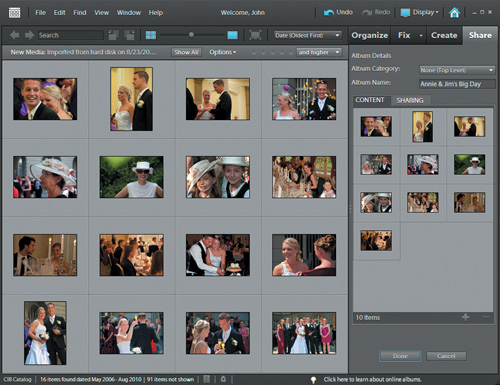
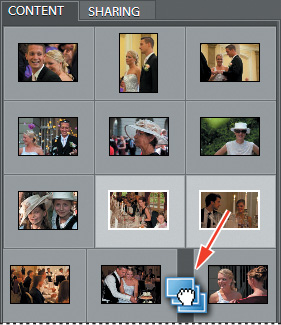
In the Media Browser, select half of the photos that have not yet been added to the album; then, click the Add Items Selected In Media browser button (
) below the Content pane. The selected photos are added to the album and now appear in the Content pane.Drag the remaining images from the Media Browser directly into the Content pane. All sixteen photos should now be included in the album.
To rearrange the order in which the photos will appear in your album, select two or more thumbnails in the Content pane and drag them to a new position. Move more photos singly.
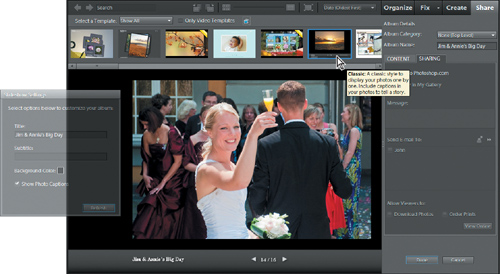
Click the Sharing tab at the top of the Content pane. A progress bar appears while Photoshop Elements builds an album preview based on the default template. A filmstrip-style menu across the top of the preview pane shows thumbnails for the available album templates. Hold the pointer over a thumbnail to see the name of the template and a brief description.
Double-click the Classic template in the filmstrip menu (see illustration below). The album preview is updated to reflect your choice. A semi-transparent Slideshow Settings panel floats in front of the preview. The Slideshow Settings panel becomes opaque when you move the pointer over it.
In the Sharing pane at the right, activate the option Share To Photoshop.com. Activate Display In My Gallery if you wish to share your album publicly. Leave this option disabled if you wish to share your album only with those friends (or clients) to whom you choose to send an invitation.
Type a message to be e-mailed with your invitation in the Message text box. Under Send E-mail To, click the checkbox beside the name of any contact in the list to send an automatically generated e-mail invitation to view your new Online Album. To add more recipients, click the Edit Recipients In Contact Book button (
) and create new entries in the Contact Book dialog box.Specify whether you wish to allow viewers to download photos or order prints.
Scroll to the right in the templates menu above the album preview to locate and double-click the Photo Book template. To hide the Slideshow Settings panel, click the Show/Hide Slideshow Settings button (
 ) above the templates menu. Turn the pages of the photo book by dragging the page corners.
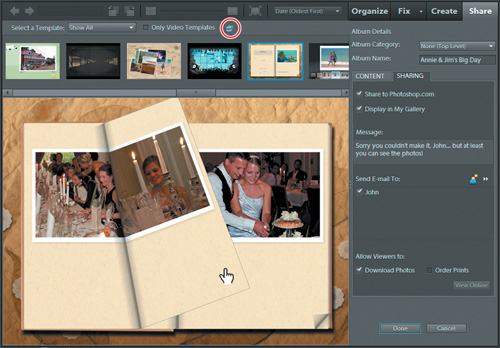
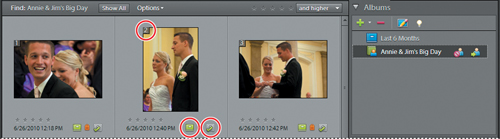
Below the Sharing options, click Done. Click the Organize tab above the Task Pane. In the Albums palette, the new album is marked with an Online Album icon (
 ). You may see an icon with a pair of green arrows to the left of the Online Album icon; this indicates that Photoshop Elements has not yet completed uploading the album to Photoshop.com. Wait a minute or so until the green arrows disappear, and then right-click / Control-click the new shared album and choose View Annie & Jim’s Big Day Album Online. Your default web browser opens to show the album in your Photoshop.com gallery.
Switch back to the Elements Organizer and click the entry for your new album in the Albums panel. In the Media browser, a number in the upper left corner of each photo indicates its place in the album.
Tip
If you don’t see the badges below the thumbnails, as in this illustration, try increasing the size of the thumbnails; if the badges are still not visible, activate Details in the View menu.
Below each thumbnail there is now an Album badge (
 ) to show that the photo is part of an album and a Backup/Synchronization Complete icon (
 ) indicting that the image has been uploaded to Photoshop.com.
(Optional) Click the Stop Sharing button (
 ) to the right of the album name to stop sharing it to Photoshop.com. Click the Share button (
 ) to edit the album or send more e-mail invitations.
If you have a Photoshop.com account it’s easy to convert any Photoshop Elements album into an Online Album.
Click Show All in the Find bar above the Media Browser; then type print in the text search box just above the Find bar. The Media Browser displays the search results: twenty photos tagged with the keyword “To Print.” Select the eight images that don’t feature children.
Click the Create New Album Or Album Category button (
) in the Albums panel and choose New Album from the menu. Under Album Details, type Vacation 2010 to name the new album, and then click Done.An entry for your new album appears in the Albums panel; click the new album entry to isolate the eight vacation photos in the Media Browser.
At this stage you could simply click the Share button (
) to the right of the album’s name to open the Online Album options, but for this exercise we’ll use a different method to convert the album.Click the Share tab, and then the Online Album button. In the Online Album sharing options, make sure the Vacation 2010 album is selected in the Albums list and the options Share Existing Album and Share To Photoshop.com are activated. Click Next; then set up a template and sharing options as you did in steps 5 to 9 of the previous exercise.
When you’re done, click the Organize tab and check the Albums panel; the Vacation 2010 album is now marked with the Online Album icon (
).
From within Photoshop Elements you can use Adobe Photoshop Services to upload your images and creations to social networking and photo sharing web sites. You can also use these services to download photos.
In the Organizer, select the photos you wish to share in the Media Browser.
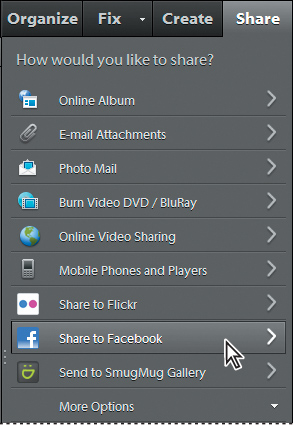
Click the Share tab above the Task Pane. Click either the Share To Flickr, or Share To Facebook button. For both of these operations, the first step is to authorize Elements Organizer to upload images. Click Authorize.
Your default web browser opens. You’ll be stepped through the process of signing in to or creating a Flickr or Facebook account, and then authorizing upload from Photoshop Elements.
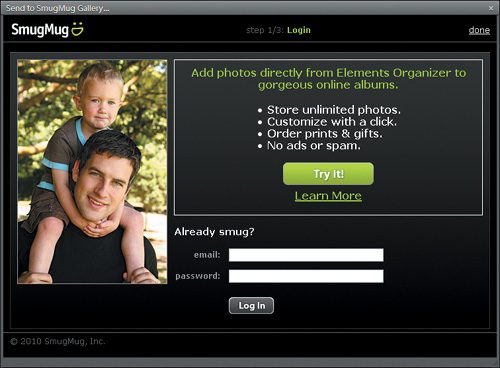
Return to the Organizer. On the Share tab, click the Send to SmugMug Gallery button. Either log in to your SmugMug account, click Try It for a free trial offer.
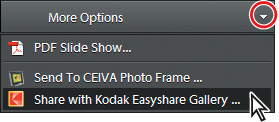
Return to the Organizer. On the Share tab, click the white arrow to open the More Options menu and choose Share With Kodak Easyshare Gallery.
If the Welcome to Adobe Photoshop Services dialog box appears, do one of the following:
If you are already an Ofoto or EasyShare Gallery member, click Sign In, and then use the e-mail address and password associated with your existing online account to sign in.
Create a new account by entering your first name, e-mail address, and a password of at least six characters. If you agree with the Terms of Service, select the respective check box under Create Account, and then click Next.
In the Share With Kodak Easyshare Gallery dialog box, the first step is to specify recipients for an e-mail invitation to view your pictures on Kodak Easyshare. Select existing contacts from the Address Book list, or click Add New Address.
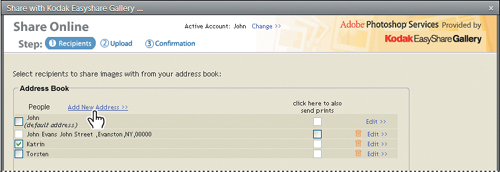
In the Add Address dialog box, complete the address information for the person with whom you wish to share your photos, and then click Next.
In the Share With Kodak Easyshare Gallery dialog box, click the check box beside the newly added address. Under Message, type Photos in the subject field and Enjoy! in the message field; then, click Next and Photoshop Elements will begin uploading your photos.
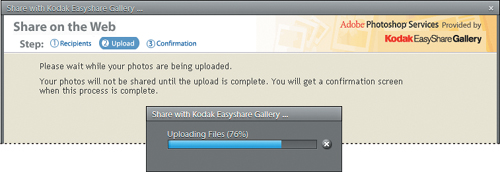
In the Confirmation screen, click Done. Alternatively, if you wish to purchase prints of your photos click Order Prints, and then follow the on-screen instructions.
An e-mail will be sent to the recipient or recipients you specified in step 6, including a Web link to the photos which can be viewed as an online slide show.
If you’ve signed up for Elements Membership and activated your Photoshop.com account, you can choose to synchronize the files in your Photoshop Elements catalog with your Photoshop.com account, making your photos and videos available to you from any web browser through Photoshop.com and Photoshop Express.
Note
This feature is currently only available to Photoshop Elements users in the U.S. who have signed up for Elements Membership and a Photoshop.com account.
You can manage your media from any web browser: add, delete, edit, or re-organize items at home or on the road. Any changes you make online will be synchronized back to Photoshop Elements on your desktop. Don’t worry; the Synchronization feature will not overwrite anything on your base computer—Photoshop Elements creates a Version Set on your computer, so you’ll still have the original file. If you delete something online, a copy is kept on your computer unless you confirm that you really do want it deleted from your Photoshop Elements Catalog.
In previous versions of Photoshop Elements only Albums could be backed up and synchronized in this way, but in Photoshop Elements 9 you can choose to back up your entire catalog, making it even easier to protect your precious files.
Another exciting feature in Photoshop Elements 9 is Multi Machine Sync. If you have separate installations of Photoshop Elements on more than one computer—perhaps on desktop computers at home and at the office, as well as the laptop you use when you travel—you can now synchronize them all to your Photoshop.com account. Any changes you make in your Photoshop Elements catalog on one computer, such as adding, deleting, editing or reorganizing images or albums, will be replicated on your other computers.
In Photoshop Elements 9 it’s easier than ever to manage and monitor backup and synchronization—simply click the Backup/Synchronization Agent icon (![]() ), either at the bottom of the Organizer workspace or in the Windows System Tray (XP), in the Notification Area (Vista), or at the right of the menu bar on Mac OS.
), either at the bottom of the Organizer workspace or in the Windows System Tray (XP), in the Notification Area (Vista), or at the right of the menu bar on Mac OS.

In the Organizer, click the Backup/Synchronization Agent icon (
 ) at the bottom of the Organizer workspace and choose Open Backup/Synchronization Preferences. In the Backup/Synchronization Preferences dialog box, click the triangle beside Advanced Backup/Sync Options.
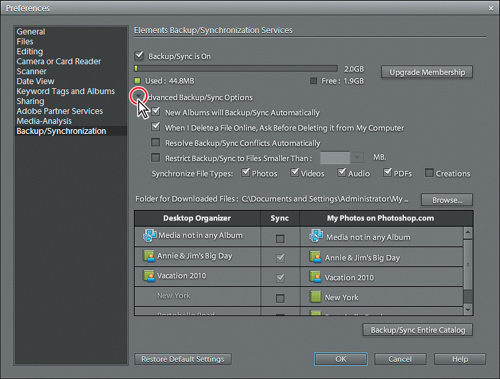
Examine the Backup/Synchronization settings, where you can find out everything there is to know about the current Backup and Synchronization status:
Backup and Synchronization is activated. The status bar shows how much of your online storage space is being used and how much free space you have.
New albums are set to backup and synchronize by default, and by default you will be asked for confirmation before files deleted online are deleted from your computer. Conflicts between the data in your catalog and your backed-up data online will not be resolved without a decision on your part, and there is currently no restriction on backup for large files.
All media file types supported for import are enabled for synchronization. By default, creations built in Photoshop Elements will not be backed up.
In the table below the preferences settings, you can see that synchronization is not enabled for media that is not included in any album, and that both of the albums you created in this lesson are enabled for backup and synchronization. The Online Album icon (
) indicates that these albums are currently being shared and the dimmed check-mark in the Sync column reflects the fact that backup and synchronization cannot be disabled while an album is being shared.
In the Backup/Synchronization Preferences dialog box you’ll also find a button for upgrading your account to Plus membership (which increases your online storage space at Photoshop.com), a setting for specifying a downloads folder, and a button to enable backup and synchronization for your entire catalog.
Click OK to close the Backup/Synchronization Preferences dialog box.
You’ll also find a status bar indicating online space usage—together with a link to manage your Backup/Synchronization Preferences—in the Welcome Screen.
The Backup/Synchronization Agent (![]() ) at the bottom of the Organizer workspace (and in the System Tray on Windows XP or the Windows Vista Notification Area) makes it easy to check on backup and synchronization status for your files without needing to open the preferences dialog box. It also offers additional commands that can be accessed without interrupting your workflow.
) at the bottom of the Organizer workspace (and in the System Tray on Windows XP or the Windows Vista Notification Area) makes it easy to check on backup and synchronization status for your files without needing to open the preferences dialog box. It also offers additional commands that can be accessed without interrupting your workflow.
In the Organizer, click Show All if it’s visible above the Media Browser.
Click the Backup/Synchronization Agent icon (
) at the bottom of the Organizer workspace and choose View Backed Up/Synchronized Files. The media Browser displays the photos in the two albums you created in this lesson.Click the Backup/Synchronization Agent icon in the Organizer just once more and choose View Backup/Synchronization Status. The Elements Backup/Synchronization Status dialog box shows that (within the parameters set in the preferences) your catalog is currently in sync with your online account.
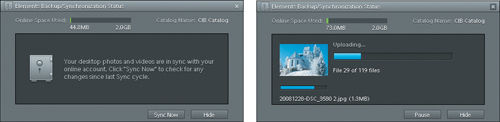
When backup and synchronization is in progress the Backup/Synchronization Status dialog box shows the real-time transfer of data from your desktop Photoshop Elements catalog to your storage space at Photoshop.com.
On Windows, right-click the Backup/Synchronization Agent (
) in the Windows System Tray (XP) or the Notification Area (Vista). On Mac OS, click the Backup/Synchronization Agent in the menu bar. Here you’ll find some commands that can’t be accessed from the agent in the Organizer, such as Backup/Sync Only When Idle and the Stop Backup/Synchronization command.
To synchronize your Photoshop Elements catalog across multiple computers, you first need to connect the machines to be synchronized to the same Photoshop.com account by signing in from your Photoshop Elements installation on each machine. It’s not necessary that you do this at the same time.
On each computer, turn on Backup/Sync and enable Backup/Sync for your entire catalog in the Backup/Synchronization area of the Elements Organizer Preferences. Once one or two synchronization cycles have run, all your computers should have identical catalogs, with exactly the same Albums, keyword tags, image captions, and so on.
Don’t attempt to aid the process; for example, by deliberately recreating a new album on your laptop to match the one you created on your desktop computer. In fact, Photoshop Elements would consider these to be two different files and you would end up with multiple copies on each machine. Simply make your changes on whichever computer you’re working on and Photoshop Elements will update the other copies of your catalog.
The exception to this rule is that Photoshop Elements will not synchronize Stacks and Version Sets across multiple computers. The images inside your Stacks will be synchronised, but you’ll need to recreate the stacking on each machine. For Version Sets, only the top-most version—your edited version—will be synchronized.
If you’re working on one computer and wish to make sure that the changes you make are synchronized to your other machines before you need to work with them, click the Backup/Synchronization Agent and choose View Backup/Synchronization Status. In the Elements Backup/Synchronization Status dialog box, click Sync Now; then, do the same when you get to the next machine.
Even though Photoshop Elements offers a variety of ways to share your photos and creations, there may be situations where you wish to export copies of your files to send to a friend or client on physical media, or for use in another application.
You can copy selected files to a CD or DVD, and copy or move selected files to an external hard disk by simply choosing File > Copy/Move To Removable Drive.
You can also export photos in a different file format than your source files. In the next exercise we’ll look at exporting images optimized for use in a web page design application.
As a final exercise in this lesson you’ll convert a file to JPEG format and optimize it for use on the Web. The JPEG file format reduces the file size and can be displayed by web browsers such as Internet Explorer. If your file contains multiple layers, the conversion to the JPEG file format will flatten them into one layer.
For this operation you’ll use the Save For Web feature, which enables you to tweak the export settings while comparing the original image file with the proposed web-ready version of the image.
In the Media Browser, select a photo you want to export for use on the Web.
Click the small arrow on the Fix tab at the top of the Task Pane and choose any of the three Edit modes—the Save For Web command is available from anywhere in the Editor.
In the Editor, choose File > Save For Web.
In the Save For Web dialog box, choose Fit On Screen from the Zoom menu in the lower left corner of the dialog box.
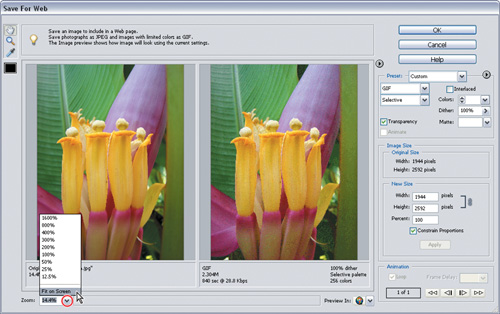
Notice the file-size information under each view of the image. The view on the left displays the file size of the original document.
While you’re previewing photos in the Save For Web dialog box, you can magnify an image by clicking it with the Zoom tool (
 ) from the toolbox in the upper left corner of the dialog box. Alt-click / Option-click the image with the Zoom tool to zoom out. While you’re zoomed in, you can drag either of the images with the Hand tool (
 ); the images move in unison so that you see the same part of the photo in both views.
On the right side of the dialog box, select JPEG Medium from the Preset menu. Notice the change in file size for the JPEG image on the right.
Note
If you need to further reduce the file size, choose the JPEG Low setting, which reduces the file size by discarding more image data and further compressing the image. You can specify intermediate levels between these options by tweaking the Quality setting, either by typing a new value or by clicking the arrow and dragging the slider.
Under New Size, select Constrain Proportions and type 300 in the Width field. The Height is adjusted automatically to retain the image’s original proportions. Click the Apply button. Once again, notice the change in the file size displayed beneath the JPEG view of the image. If necessary, choose Fit On Screen from the Zoom menu.
Click OK. Navigate to the My CIB Work folder in the Save Optimized As dialog box, add _Work to the end of the file name, and then click Save.
The JPEG format reduces the file size by using JPEG compression, which discards some of the data. The amount of data lost, and the resulting image quality, will vary depending on the image you’re working with and the settings you choose.
In the Editor, choose File > Close, without saving changes.
Congratulations! You’ve completed this lesson and should now have a working understanding of the basics of printing, sharing, and exporting. You’ve learned how to set up single or multiple images for printing at home, how to order professional prints online and how to share photos in Photo Mail or to an online sharing service. You’ve created on Online Album and exported photos for use on the Web. Before you move on to the next lesson, take a few moments to work through the following review.
1 | What is Photo Mail? (Windows) |
1 | The Photo Mail feature embeds selected photos in the body of an e-mail within a colorful custom layout. You can tweak the layout and image size, choose backgrounds, frames, and effects, and add text messages and captions. You can send Photo Mail through Outlook Express, Outlook, or Adobe E-mail Service. |
2 | What is a Picture Package? |
2 | A Picture Package lets you print a photo repeated at a choice of sizes on the same page. You can choose from a variety of layout options with a range of image sizes to customize your picture package print. |
3 | How can you fine-tune the composition of a photo for printing? |
3 | You can now fine-tune the placement of each image within its own print well frame in the print preview, enabling you to get the image placed just right for printing without first editing it. Zoom or rotate an image with the controls beneath the print preview and drag to reposition it in the frame. |
4 | What are the advantages of backing up and synchronizing your catalog to your Photoshop.com account? |
4 | Backing up and synchronizing your catalog to your Photoshop.com account means that you can manage your media from any web browser—and any changes made to your catalog online will be synchronized back to Photoshop Elements on your desktop. Furthermore, with Multi Machine Sync you can now even synchronize your files across separate computers. Any changes you make to your catalog on one computer, such as adding, deleting, editing or reorganizing images or albums, will be replicated on your other machines. The capability to backup and synchronize your entire catalog now makes it even easier to manage and protect your precious files. |
5 | Is the Save For Web command available only in Full Edit mode? |
5 | The Save For Web command is available in all three Edit modes: Full Edit, Quick Edit and Guided Edit. |