Transforms
Simply put, transforms are the ways in which we change the geometry (size, shape, and orientation) in our images. Note that you may not transform a Background layer at all and it’s best to transform Smart Objects whenever possible.
Free Transform
This function is the widely used because it includes most of the other transformations. In fact, if you choose any of the transformations in the Edit > Transform menu, you’re actually just activating Free Transform. So, for speed and ease, just use the shortcut ⌘-T/Ctrl-T.
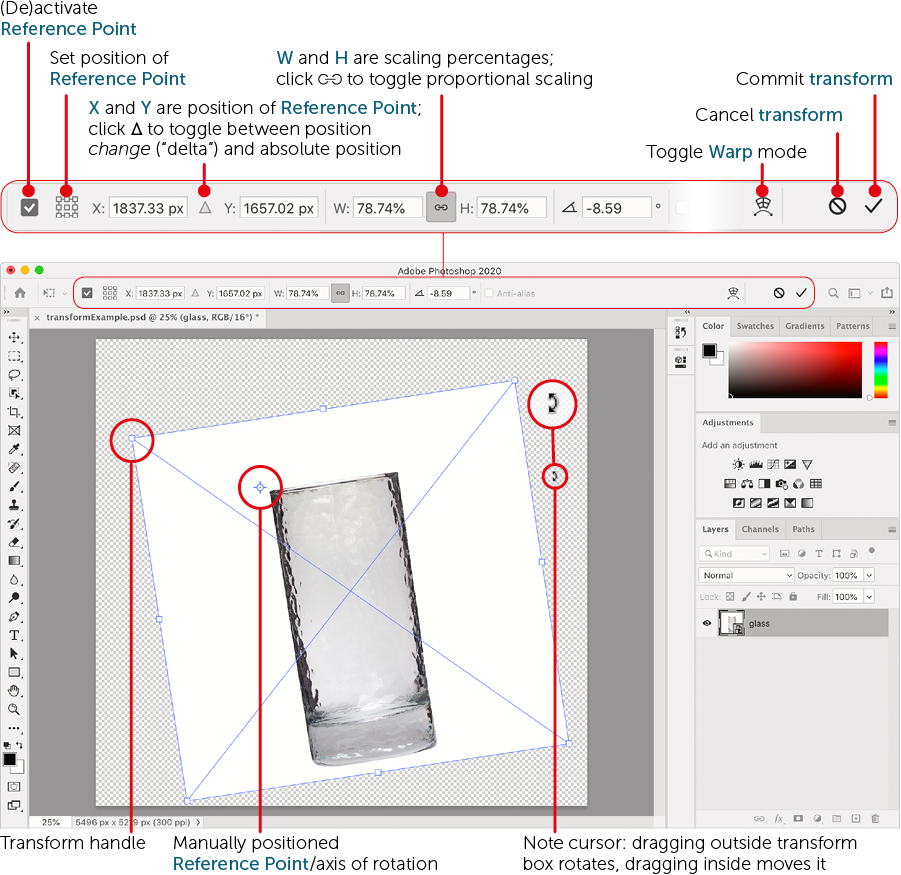
Once activated, a box with transform handles appears and the Options Bar shows your transform’s status and controls. I recommend activating the Reference Point so you can change the axis of rotation (if you need to rotate) and the point from which “centered” scaling happens. You’ll also be able to monitor the absolute or relative position of each control handle—useful for precision transformations.
Note that by default, scaling is proportional. That is, the layer(s) or areas being scaled won’t distort. If you want to allow disproportionate scaling (to affect the “aspect ratio”), either hold down shift as you scale, or click the chain (![]() ) between the width and height scaling fields. Holding shift is an ad hoc toggle, whereas the chain button will remain in the state you choose until you click it again.
) between the width and height scaling fields. Holding shift is an ad hoc toggle, whereas the chain button will remain in the state you choose until you click it again.
To commit a transform, click the check-mark button (![]() ) or press the Enter key. To cancel, either click the cancel button (
) or press the Enter key. To cancel, either click the cancel button (![]() ) or press the escape key. Just to the left of these two buttons is the Warp mode toggle. With this, you can go from geometric transforms to more fluid, freeform ones, and back.
) or press the escape key. Just to the left of these two buttons is the Warp mode toggle. With this, you can go from geometric transforms to more fluid, freeform ones, and back.
Translation, Scaling, and Rotation
To scale in Free Transform, simply drag a control handle on the edge of the box. If the aspect ratio is being maintained (the chain is active between the W and H fields), hold shift to alter the shape of what’s being transformed. Otherwise, shift will hold the aspect ratio.
To move (“translate”) what’s being transformed, just drag the box from anywhere within its interior. To rotate, drag outside the box. If you’ve activated the Reference Point, you’ll see a small crosshair in the middle of the box. That is the axis of rotation. You can reposition it freely by dragging it to anywhere in the document window, or by clicking the small widget in the Options Bar to set it to one of the box’s handles. Rotation will then act around that point.
A numeric position, scaling percentage, and rotation angle can entered in the fields in the Options Bar.
Perspective Adjustment
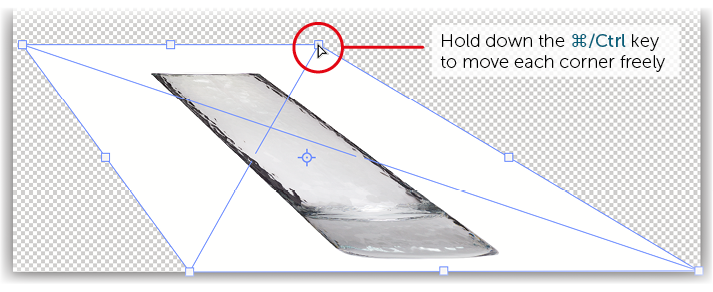
If you ⌘/Ctrl-drag a corner, it moves alone. ⌘/Ctrl-dragging a side handle moves the corners on either side of it together. This is handy for creating quick perspective transforms. To correct perspective distortion, use the Camera Raw filter: see “Transform Tool & Upright Perspective Correction” (page 362) to learn how.
Warping and Sculpting
For a less geometric and constraining transform, click the Warp button (![]() ). I liken this to printing the image on a rubber sheet, then stretching and shrinking it in various ways across its extent.
). I liken this to printing the image on a rubber sheet, then stretching and shrinking it in various ways across its extent.
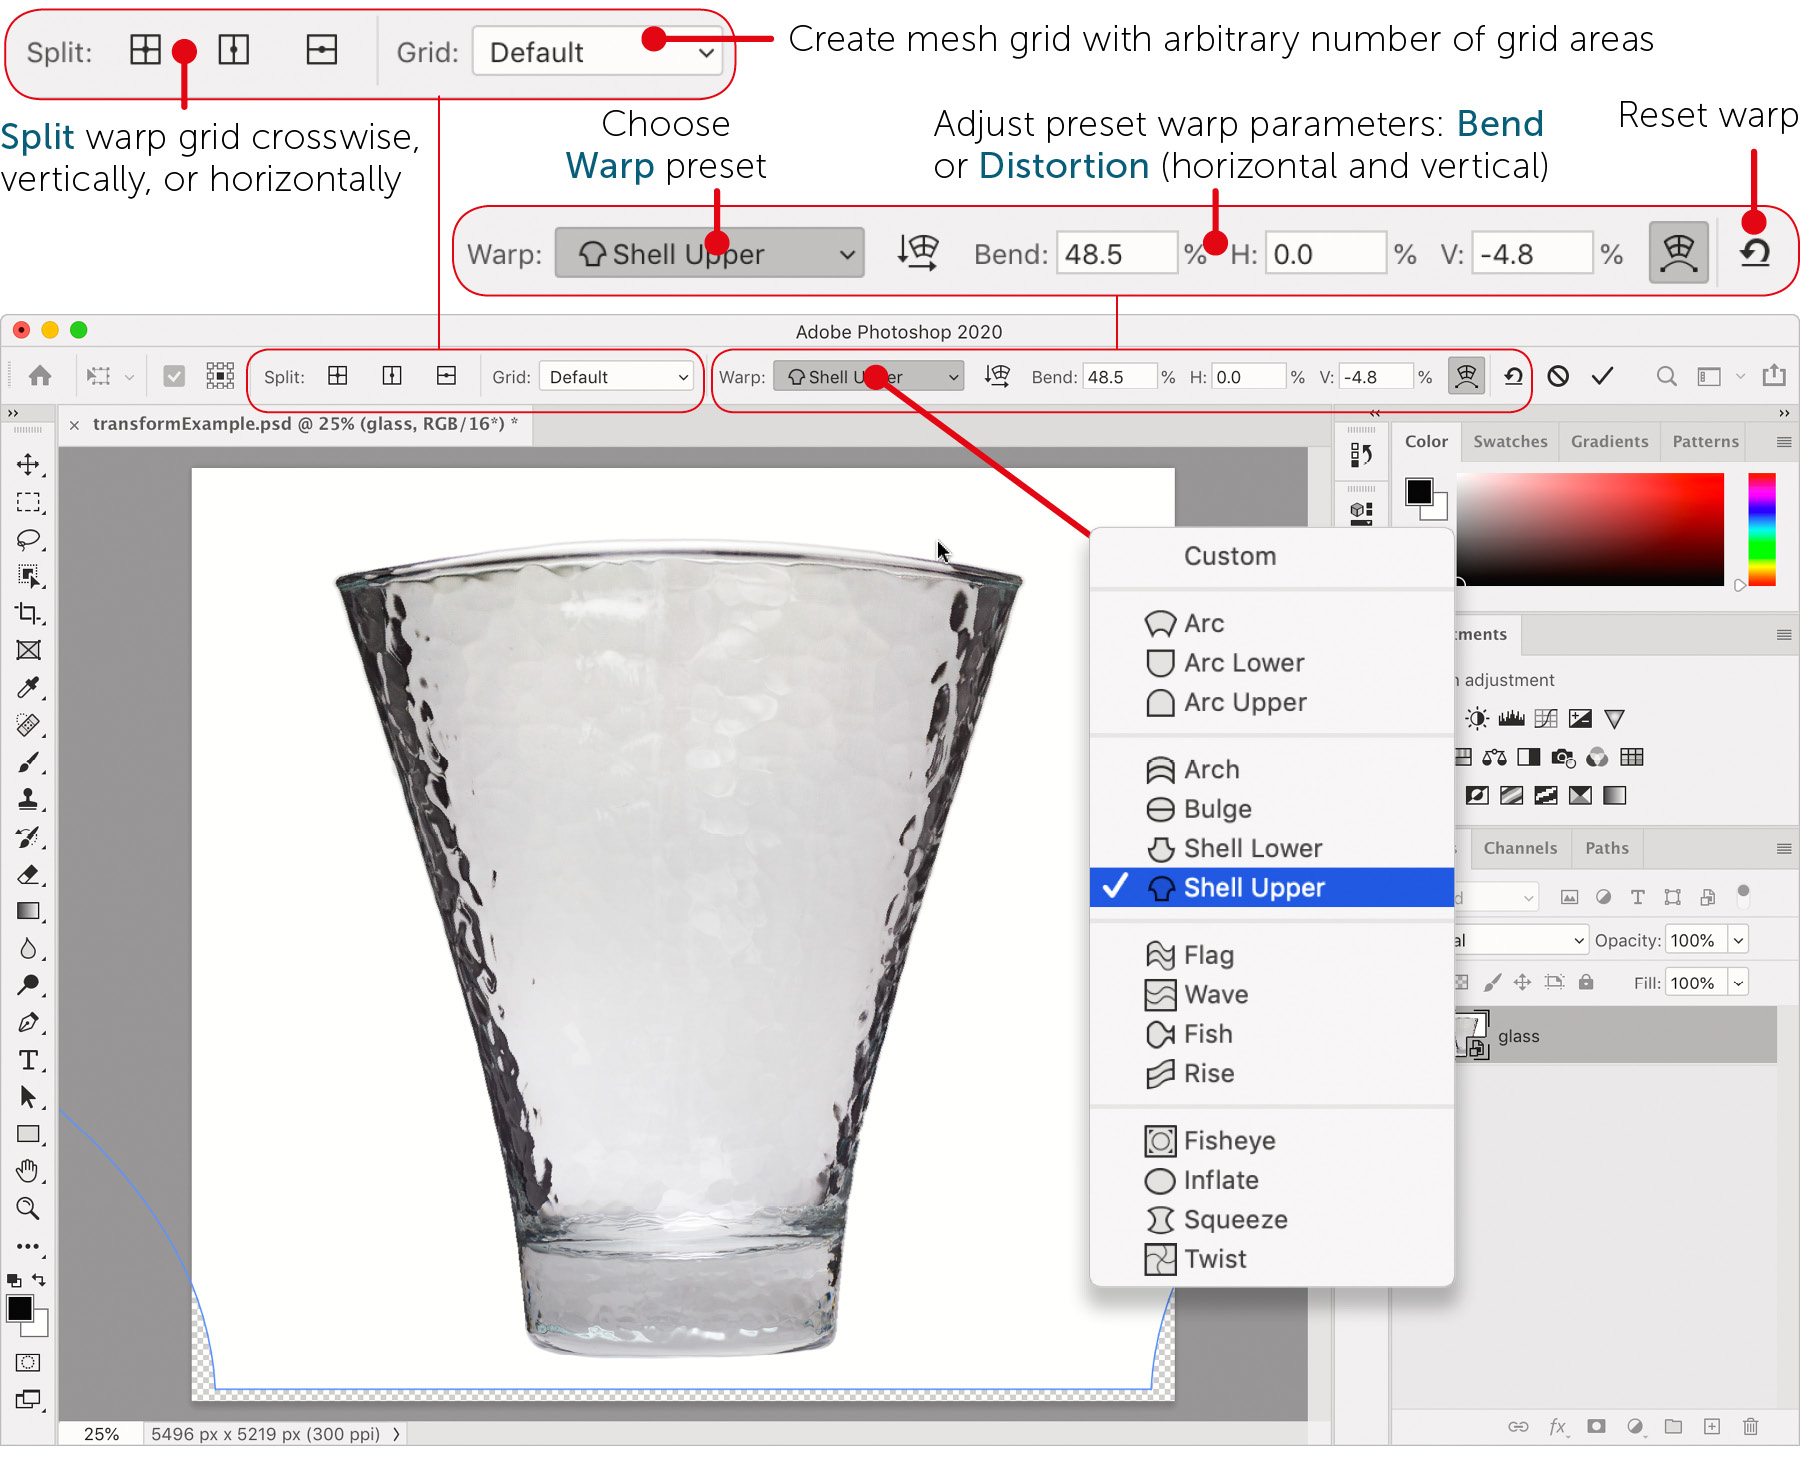
There are two fundamental ways to approach Warp transforms: with presets that can be adjusted or by using a warp grid. The 15 presets are found in a menu in the Options Bar labeled Warp. Each can be customized by adjusting the parameters to the right of that menu. Do so by “scrubbing” them; that is, by dragging their names left or right to change the values in the fields.
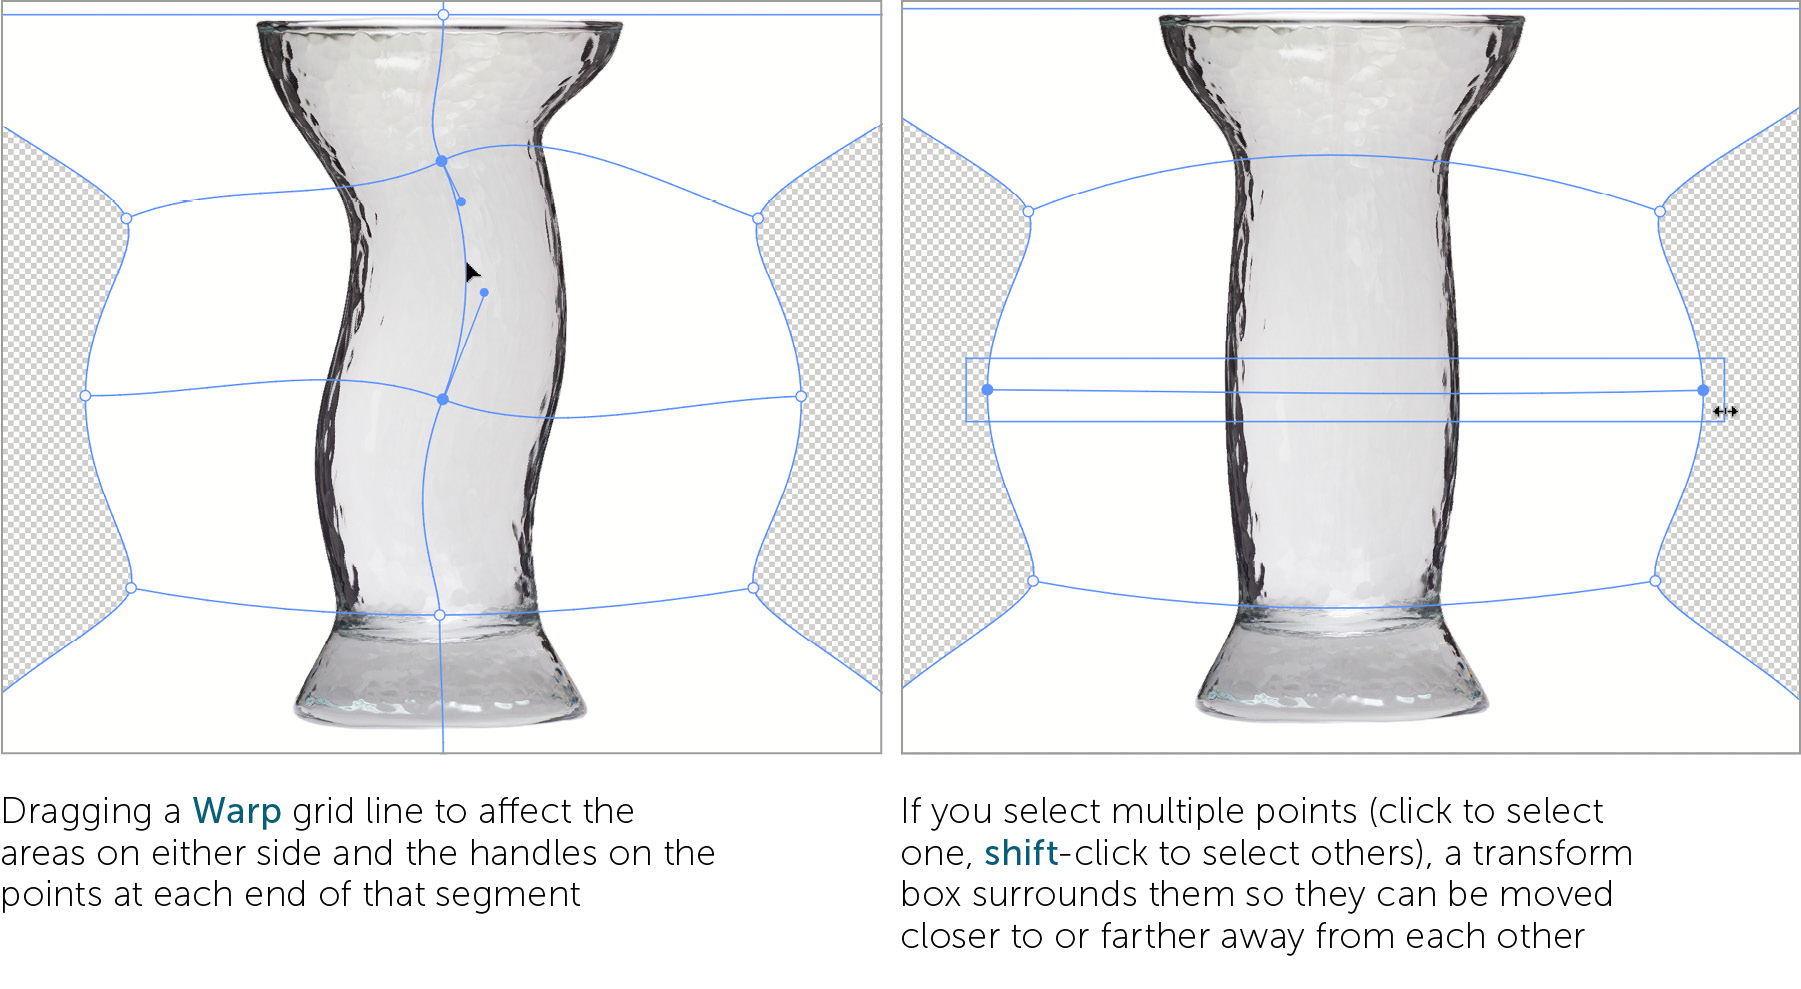
The left side of the Options Bar (while in Warp mode) holds the means to create grid lines. Even with none, the canvas is considered a grid that can be dragged to distort the image upon it. The more grid lines there are, the more you can limit the scope of any distortion. You can drag any grid line, area, point, or handle on a point to distort the image.
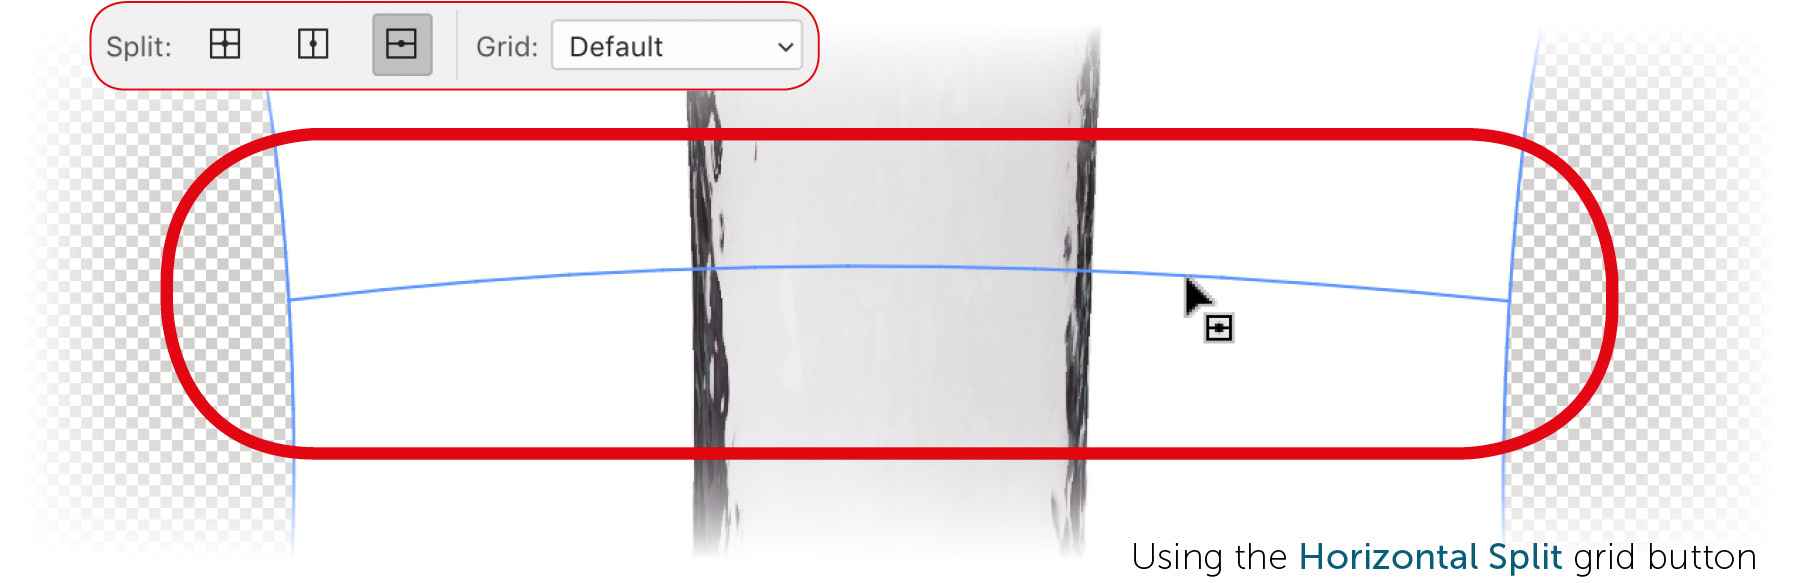
To create evenly spaced grid lines (and therefore areas and points) in whatever number you desire, use the Grid menu. To place lines one or two at a time, use the Split buttons. When you click one, a grid line gets attached to your cursor. To place it, just click somewhere in the image. The Crosswise Split button creates one horizontal and one vertical line intersecting where you click.
For symmetrical distortion, select the points on either side of the grid or area to be adjusted, then resize the box that appears around them. It appears just for this purpose whenever multiple points are selected.
Mirroring
To quickly flip one or more layers, access Free Transform (⌘-T/Ctrl-T), right-click, then choose Flip Horizontal (or Flip Vertical). Right-clicking from Free Transform is also a fast way to rotate 90° or 180°.
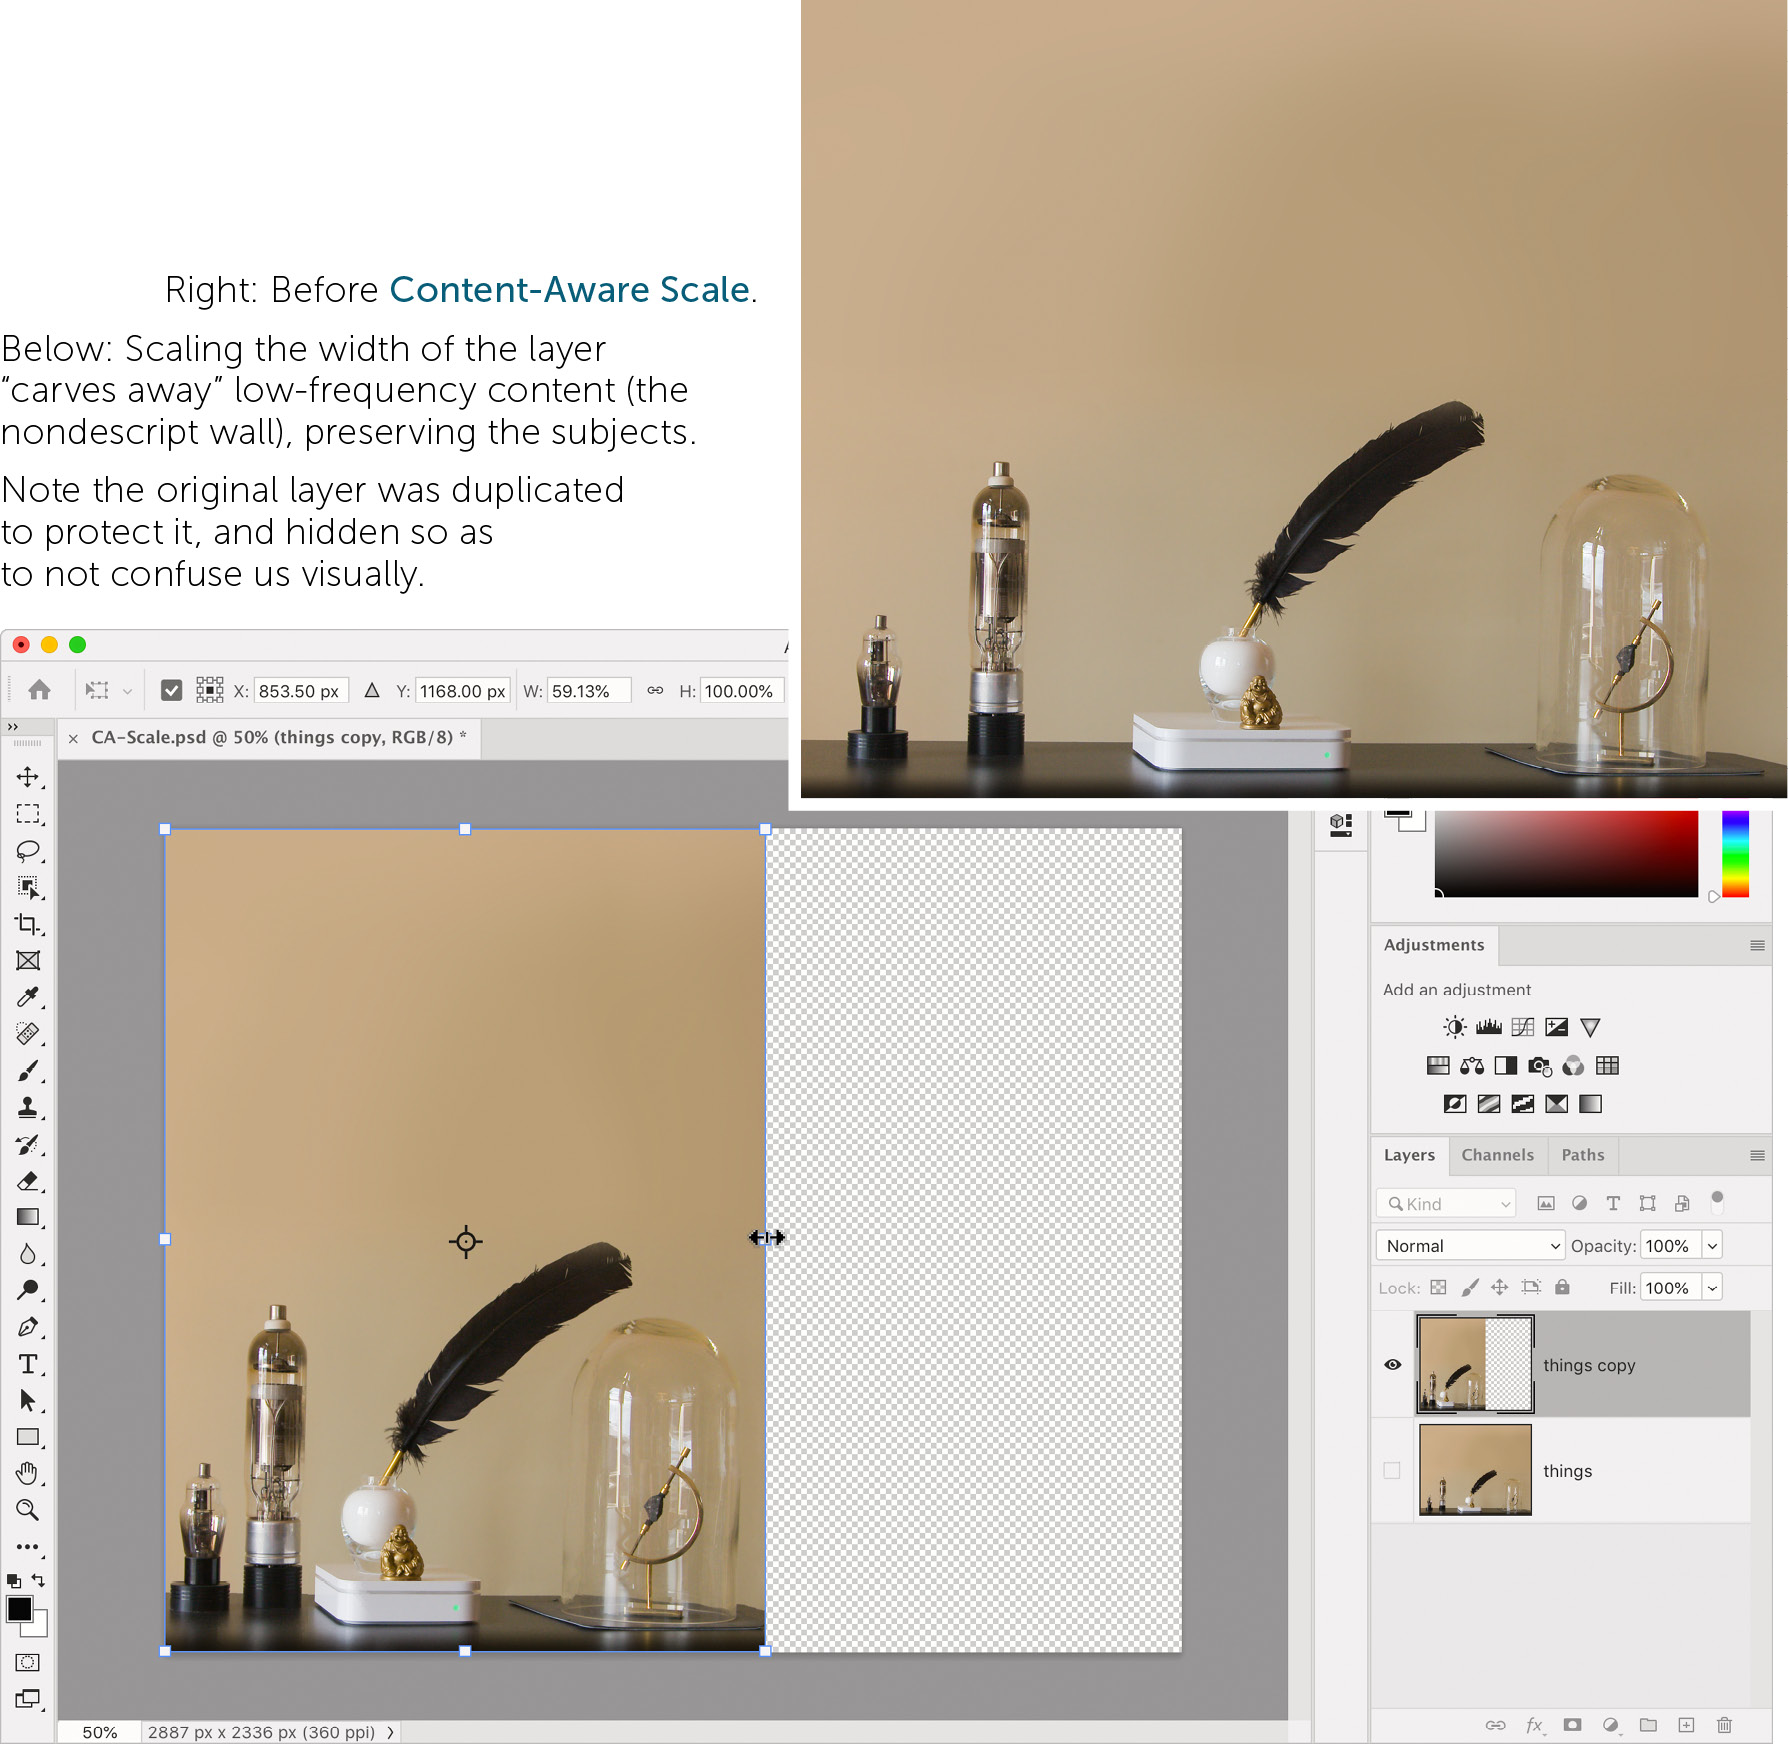
Content-Aware Scale
Select Content-Aware Scale from the Edit menu. The control handles on this transformation tool resemble those of Free Transform, but it behaves very differently. Sadly, Content-Aware Scale cannot be applied to a Smart Object, so we must duplicate the layer to which we want to apply it. Very early-2000s. If the subject is surrounded by what the engineers call “low-frequency” areas (lacking sharp, fine detail), the subject will remain amazingly intact while the rest of the image is discarded.
Beware if faces are present! Cheeks and foreheads are often “low frequency” and may suffer. If people are present, click the small stick figure in the Options Bar once this tool is active to protect skin tones.