
Chapter Seven. Formatting Page Elements with CSS
In Chapter 4, “Designing Pages with Absolute Placement Objects,” and in Chapter 5, “Working with Text and Images,” I explained how to use CSS (Cascading Style Sheets) for page design and text formatting. Beyond controlling page positioning and text format, you can use CSS to format almost any element on a page.
You can use CSS to format:
• Body tags that define pagewide formatting, such as page background, margins, and default font color, type, and size
• HTML tags ranging from images to tables
• Links with special attributes
• Special printable page formatting
Before you dive into formatting with CSS, a note of caution: Don’t rely on CSS styles to make your page readable in a browser. You should apply styles for formatting in such a way that even if the style is not supported in a browser, the page still works. In other words, don’t rely on styles to convey essential information. For example, do not create white text on a black background; if your visitors’ browser does not support the black background, they will only see (or more to the point, not see) white text on a white page. On the other hand, if you place red text on a yellow background, visitors will see that red text on a white page, even if the yellow background is not supported by their browser. If for some reason your style sheet link is broken or corrupted at your remote server, visitors will see the default style.
#52. Formatting Page Elements with Style Sheets
Large, professional Web sites are formatted with external style sheets. External style sheets are files that define formatting for an unlimited number of Web pages. These files provide several levels of control over a Web site that cannot be achieved any other way:
• They ensure consistent formatting and a consistent look and feel throughout your Web site.
• They are a powerful productivity tool. They allow you to instantly attach a complex set of formatting rules to a new or existing Web page.
• They allow you to update or edit the look of an entire site almost instantly.
External style sheets are separate files, with a .css file extension. You generate them automatically in Dreamweaver using the CSS Styles panel. You can open a CSS file in its own Document window and examine the CSS code if you choose. In any case, Dreamweaver takes care of creating and editing the CSS file as you define the CSS attributes.
The concept works like this: A single style-sheet file (or sometimes a few files) stores all the information needed to format every Web page to which that style sheet is attached. When a visitor opens the HTML page to which a CSS file is attached, the browser automatically looks to the CSS file to find out how to display the page. This process does not take any noticeable time. Visitors to your Web site simply see a page with formatting, even though the formatting rules are stored in a separate (CSS) file.
The easiest way to generate a CSS (style sheet) file in Dreamweaver is to create a new style. As you do, you’ll have the option of including that style in a new CSS file. In the following steps, you’ll define a style and save it in a new style sheet. These steps can be adapted to generate a CSS file using any tag as the initiating style.
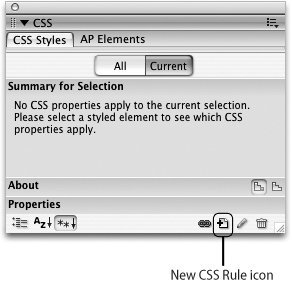
- In the Document window, click the New CSS Rule icon at the bottom of the CSS Styles panel (Figure 52a). The New CSS Rule dialog will appear.
Figure 52a. The New CSS Rule icon in the CSS Styles panel.
- In the Selector Type area of the dialog, click a radio button to choose the type of style you wish to define.
• Choose Class to apply formatting rules, which are independent of tags, to any selected text. If you are creating a Class style, enter a name for your style in the Name box.
• Choose Tag to define formatting for HTML elements, such as headings, paragraphs, images, tables, or pages. When the Tag radio button is selected, every HTML tag appears in a pull-down menu next to the Tag field.
• Choose Advanced (IDs, pseudo-class selectors) to define links, among other things.
Note
Heading tags that are listed in the Property inspector as Heading 1, Heading 2, etc., are listed by their HTML tag names here (e.g., h1 equals the Heading 1 tag).
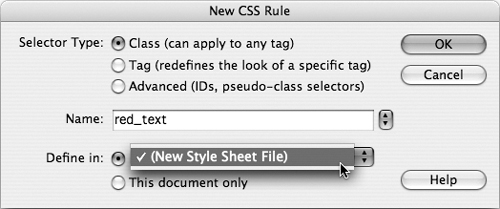
- Click the Define in radio button, and choose (New Style Sheet File) from the menu (Figure 52b).
Figure 52b. Generating a new style sheet.
- Click OK in the New CSS Rule dialog. The Save Style Sheet File As dialog will appear. This is a typical Save As dialog, except that it automatically generates a CSS file with a .css file extension and translates any formatting you define into CSS coding. Navigate to the folder in which you want to save the style sheet, and enter a filename in the Save As field. Then click Save to generate the new CSS file.
- After you click Save, the CSS Rule Definition dialog for the style you are defining will open. Different categories in the Category list offer formatting options for different kinds of page elements. Now, simply note that there is a wide array of formatting options available, and that whatever formatting options you define will be encoded into the CSS file you named and saved in Step 4 (Figure 52c).
Figure 52c. The CSS Rule Definition dialog.

- After you create a style sheet file, the file is visible in the CSS Styles panel. When you expand the CSS file (click the triangle next to it to toggle to expand), all styles within the style will display. Formatting attributes display at the bottom of the CSS Styles panel (Figure 52d).
Figure 52d. Viewing a CSS style in an attached style sheet in the CSS Styles panel.

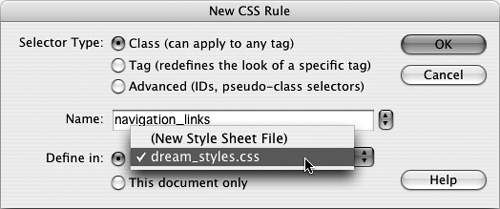
After you create a CSS file, you add styles to the file without creating a new style sheet. So, after you have created your first style and generated a CSS file, the next time you create a new style, click the New CSS Rule icon in the CSS Styles panel, but this time simply accept your existing CSS file in the New CSS Rule dialog (Figure 52e).
Figure 52e. Defining additional styles for an existing CSS file.
As soon as you define a style in an external style sheet, that style is available to be attached to any new or existing page. To attach a style sheet to a page, open the page, and click the Attach Style Sheet (link) icon in the CSS Styles panel. The Attach External Style Sheet dialog will open (Figure 52f).
Figure 52f. Attaching a style sheet to an open page.
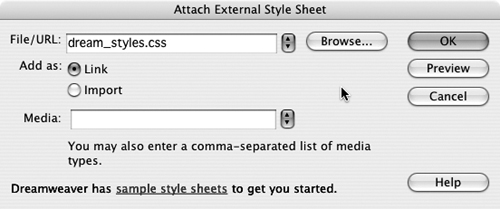
Navigate to your CSS file in the File/URL field, choose the Add as Link option, and click OK to attach the style sheet.
As you add and edit styles to the CSS file, all pages to which the CSS file is attached will update to reflect the new formatting.
#53. Defining Page Style Using the Body Tag
The Body tag is a special tag. It underlies all other tags on a page. Think of the Body tag as the tag you will use to define page layout options such as margins and background color. The Body tag defines page background color (or pattern file), page margins, default font characteristics, and other attributes that apply to an entire page.
A CSS style applied to the Body tag is a powerful, sitewide formatting tool. You can actually define most of the formatting for your site using the Body tag. Also, since the Body tag defines page background color, this is another way in which this one style can control much of your site’s appearance.
To define a style for the Body tag that establishes a default font, a page background color, and margin specs, follow these steps:
- Click the New CSS Rule icon in the CSS Styles panel. The New CSS Rule dialog will open.
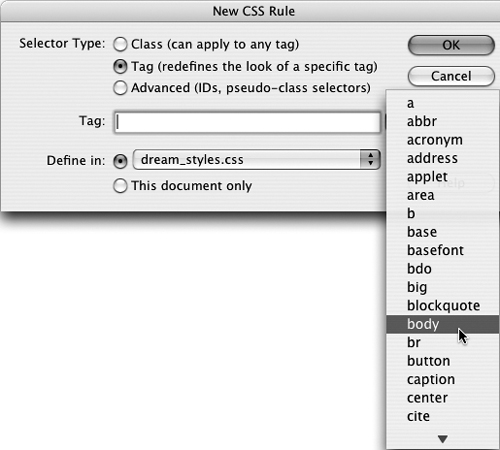
- In the Selector Type area of the dialog, click the Tag radio button. From the Tag pop-up menu, choose body (Figure 53a).
Figure 53a. Defining a Body tag.
- In the Define in area of the dialog, either choose an existing or new CSS file from the pop-up menu (both options are available), or click the This document only radio button to define a Body tag that will format only the currently open page.
- Click OK in the New CSS Rule dialog to open the CSS Rule Definition dialog for your Body tag. In the Type category, choose a font from the Font pop-up menu.
- In the Background category of the CSS Rule Definition dialog, choose a swatch from the Background color area to select a background color for your page(s) if you want something other than the default white color (Figure 53b).
Figure 53b. Defining page background color.

- If you wish, you can define a tiling background image instead of a background color. Do this in the Background category by clicking the Browse button to locate and choose an image file.
Tip
By default, background images tile horizontally (on the Y-axis) and vertically (on the X-axis). In other words, they fill the entire page background when you attach them to a Body tag style. You can use the Repeat pop-up menu in the Background category of the CSS Rule Definition dialog to change the default settings. Options include Repeat-Y, which repeats the image only along the Y-axis (vertically), or Repeat-X, which repeats the image horizontally. Or, you can choose No-Repeat to not repeat the background image at all.
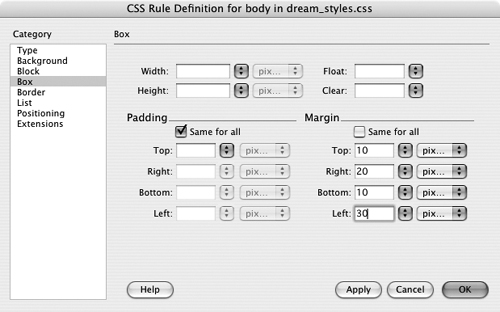
- Different browsers display different default page margins. To define a set margin, select the Box category in the CSS Rule Definition dialog, and enter values for top, left, bottom, and right margins (Figure 53c).
Figure 53c. Defining page margins.
#54. Formatting HTML Text Tags with CSS
There are six HTML heading styles: h1 (Heading 1) to h6 (Heading 6). Defining custom styles for these heading styles and the Paragraph tag is at the heart of designing a look and feel for your Web site. If you have formatted print documents with programs like Adobe InDesign, QuarkXPress, or even Microsoft Word, you probably understand the basic concept of defined styles. This concept applies to Web design as well.
Defined styles provide uniform text formatting, either on a page or, when the styles are defined in an external style sheet, throughout your site. For example, every major heading on your site might be 14-point Arial and purple. All paragraph text might be 10-point Arial, dark gray, and double-spaced.
The following are some of the more useful formatting options available in the CSS Rule Definition dialog:
• The Type category defines font, size, weight, style (italic or roman), and line height.
• The Background category defines a background color or image behind type.
• The Block category defines features such as word spacing, letter spacing, vertical and horizontal alignment, and indentation.
• The Box category defines width, height, padding, and margins for CSS layout elements.
• The Border category defines the style, thickness, and color of borders around text.
• The List category defines the type of bullet or numbering.
• The Positioning category defines positioning of CSS layout elements.
• The Extensions category defines page breaks, cursor display (when a cursor is moved over selected text), and special effects like blur or inversion.
Before walking through the process of defining CSS styles for HTML tags, it might be helpful to quickly review the difference between styles for HTML tags and class styles that are independent of HTML tags. When you assign formatting to selected text using the Property inspector, you often generate what is called a custom or class style to apply a set of formatting rules to any selected text. What happens is that behind the scenes, Dreamweaver CS3 automatically generates custom class styles whenever you apply formatting like font, size, or color to selected text using the Property inspector. These custom class styles can be applied to any selected text. The drawback, in contrast to HTML tag styles, is that custom class styles do not apply automatically to any text, while HTML tag styles automatically attach themselves to any text with that tag. All text you enter will normally have the Paragraph tag, so when you define a style for the Paragraph tag, the tag is automatically applied to much of the text on your page or Web site.
To prepare your site for CSS formatting applied to paragraph and heading text, the first step is to go through your Web page(s) and assign HTML tags to text if you have not done so already. This is covered in Chapter 5, #35, “Formatting Text with HTML Attributes.”
With HTML tags applied to text on your page(s), you’re ready to define CSS styles that will apply to these tags. To do this, follow these steps:
- Click the New CSS Rule icon in the CSS Styles panel (Figure 54a). The New CSS Rule dialog will open.
Figure 54a. Creating a new style by clicking the New CSS Rule icon in the CSS Styles panel.

- Here, you will first choose an HTML tag for which you will define a style. In the Selector Type area of the dialog, click the Tag radio button. From the Tag pop-up menu, choose the tag for which you are defining a style (Figure 54b).
Figure 54b. Defining a new Heading 1 (h1) style in the New CSS Rule dialog.

- In the Define in area of the dialog, either choose a style sheet from the menu, or click the This document only radio button.
Note
See #52, “Formatting Page Elements with Style Sheets,” for an explanation of defining styles in external style sheets.
- Click OK in the New CSS Rule dialog to open the CSS Rule Definition dialog. The formatting options here may be familiar if you have been working with formatting in Dreamweaver. If not, a summary of available formatting options is in the “CSS Formatting Options” sidebar.
- After you define a CSS style, you can click the Apply button in the CSS Rule Definition dialog and see how the style looks when applied to the page. When you finish defining a CSS style for a tag, click OK. The style definition is automatically added to an external style sheet, or to your page (depending on the selection you made in the Define in section of the New CSS Rule dialog when you began defining the style).
#55. Formatting Image and Page Styles
In addition to defining CSS styles for HTML text tags (like paragraph or heading text), you can also use CSS styles to define the appearance of any HTML tag. This can get somewhat complex and can involve CSS formatting that is beyond the scope of this book. But you can also define CSS styles for commonly applied tags, like images or tables.
It often makes sense to define styles for the Image tag and the Table tag. You can define border thickness, color, background color, and other features of tables or images.
To define a style for the Image or Table tag, follow these steps:
- Click the New CSS Rule icon in the CSS Styles panel. The New CSS Rule dialog will open.
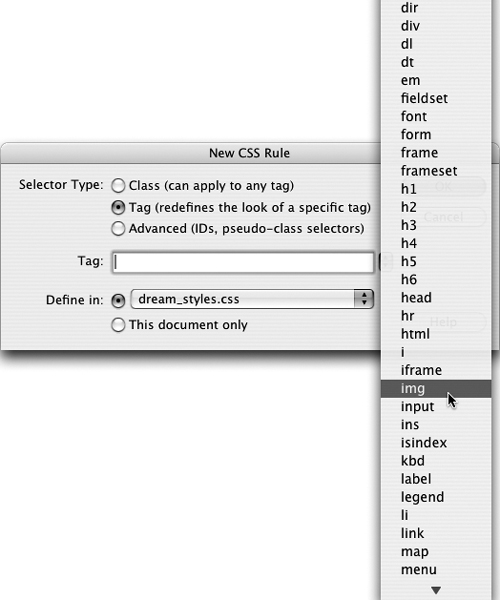
- In the Selector Type area of the dialog, click the Tag radio button. From the Tag pop-up menu, choose the tag for which you are defining a style. The Image tag is img. The Table tag, intuitively enough, is table (not shown) (Figure 55a).
Figure 55a. Defining a new style for all images in the New CSS Rule dialog.
- In the Define in area of the dialog, either choose a style sheet from the menu, or click the This document only radio button.
Note
See #52, “Formatting Page Elements with Style Sheets,” for an explanation of defining styles in external style sheets.
- Click OK in the New CSS Rule dialog to open the CSS Rule Definition dialog. Most likely you will not be applying any options from the Type category in the CSS Rule Definition dialog. Most formatting options applying to text are not relevant for defining image or table properties. However, you can define attributes in the Background (background color or image), Box (borders), or Border (styled borders) categories to customize images or tables throughout your site.
- After you define a CSS style, you can click the Apply button in the CSS Rule Definition dialog and see how the style looks when applied to the page. When you finish defining a CSS style for a tag, click OK. The style definition is automatically applied to an external style sheet, or to your page (depending on the selection you made in the Define in section of the New CSS Rule dialog when you began defining the style).
#56. Applying CSS to Links
By default, links are displayed in blue type (or blue borders for images). Visited links are purple. And active links (ones in the process of being opened) are red. And, by default, all links display with underlining. You can customize the appearance and behavior of links using CSS. CSS formatting is applied to links so ubiquitously that sophisticated Web browsers expect to find features like rollover display or nonunderlined links on sites.
CSS formatting allows you to define four link states. In addition to the three HTML states (regular, visited, and active links), CSS can define a fourth state—hover. Hover state displays when a visitor hovers his or her mouse cursor over the link.
There are many style approaches used for hover link formatting. Sometimes designers turn off underlining for all other link states but will have it appear when a visitor hovers over a link (Figure 56a). Other times, designers define a color or background-display change when a link is hovered over.
Figure 56a. An underscore appears under the hovered-over link, but is not visible in links that are not hovered over.

Normally, you will not define font or font size to link style definitions. That’s because links inherit the font and font size of the HTML formatting tag assigned to the text. For example, Heading 1 (h1) text might include text that is a link. Or, paragraph text might include some text that functions as a link. In either case, the font and font size will not change for the link text.
What normally will change is font color and maybe font attributes like underlining or background. So, when you define CSS styles for links, you will normally avoid defining font or font size and instead define font color and special attributes (like underlining or background).
To create a CSS formatting rule (style) for links on a page (or in a Web site, via an external CSS file), follow these steps:
- With a page open, click the New CSS Rule icon in the CSS Styles panel. The New CSS Rule dialog will open.
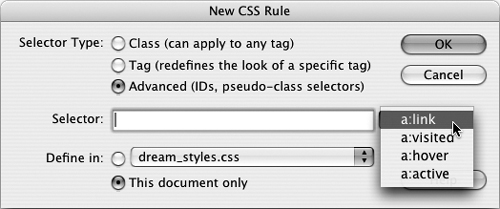
- In the Selector Type area of the dialog, click the Advanced (IDs, pseudo-class selectors) radio button. From the Selector pop-up menu, choose one of the four link states: link, visited, hover, or active.
Note
You will define each of the four link states separately. Link (unvisited link), visited, hover, and active are each a unique style. And, in order for these link styles to be interpreted correctly in browsers, you need to create them in the order listed above. If you need to reorder styles, you can click on any style in the CSS Styles panel and drag it up or down in the panel to reorder.
- In the Define in area of the dialog, either choose a style sheet from the menu, or click the This document only radio button to define styles that will be applied only to the open page (Figure 56b).
Figure 56b. Defining an unvisited link style.
- Click OK in the New CSS Rule dialog to open the CSS Rule Definition dialog for the link state you are defining. The formatting options you are likely to use for a link state are as follows:
• The Type category allows you to define a color for the selected link state using the Color box. The check boxes in the Decoration area allow you to turn underlining on or off. By default, links are underlined, so select the None check box to turn underlining off. Simply deselecting the Underline check box will not turn underlining off (Figure 56c).
Figure 56c. Turning underlining off for a link state.

• The Background category allows you to define a background color or image behind the selected text.
- After you define a CSS link style, click OK to automatically apply it to an external style sheet or to your page (depending on the selection you made in the Define in section of the New CSS Rule dialog when you began defining the style). However, you will not see the effect of any link state other than link (unvisited) until you preview your page in a browser. To do this, choose File > Preview in Browser, and if more than one browser is available, choose a browser from the submenu.
#57. Defining CSS for Printable Pages
Many times, you will want to define different styles for printed pages than you use for monitor display. For example, you might change a light-colored font to black for printing or remove page or table background images.
You do this by creating and attaching a separate CSS file—a separate external style sheet—that holds print formatting rules. You can also preview how a page will look when printed in the Document window.
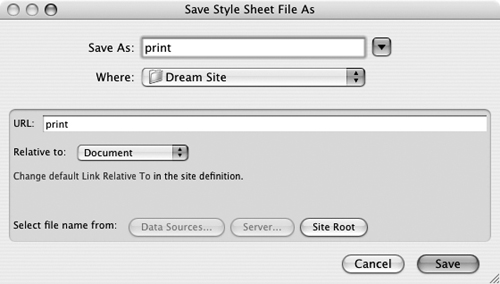
To define a new style sheet for printer output, you can create an external style sheet with CSS tag styles, link styles, or even class styles. Then you name the external style sheet that contains the print styles print.css (Figure 57a).
Figure 57a. Creating a new CSS file called print.css.
Tip
Review the other techniques in this chapter for all the information you need to create an external style sheet.
After you define a distinct set of printable styles in the print.css style sheet file, attach the print.css file as the printer style sheet:
- Open the Web page to which the printer CSS styles will be attached.
- In the CSS Styles panel, click the Attach Style Sheet (link) icon.
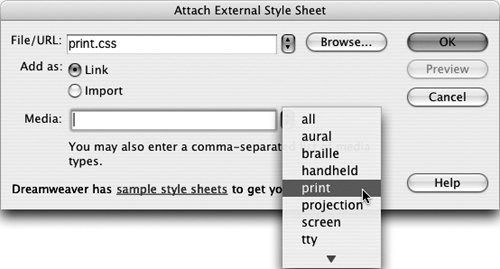
- In the File/URL field of the Attach External Style Sheet dialog, click Browse and navigate to the print.css file. In the Add as area, leave the Link radio button selected.
- From the Media pop-up menu, choose print (Figure 57b).
Figure 57b. Defining print.css as the printer style sheet.
You can attach multiple style sheets to a page and define different CSS files to different media using the same process. To preview your printer styles, click the Render Print Media Type icon in the Style Rendering toolbar (Figure 57c). If the Style Rendering toolbar is not visible, choose View > Toolbars > Style Rendering.
Figure 57c. Previewing the applied print style sheet.

One class style attribute that is only relevant to print style sheets is the page break attribute. To define a page break in the printed version of a Web page, follow these steps:
- Open the Web page to which the printer CSS styles will be attached.
- Click to place your insertion point where the page break should occur on the printed version of the Web page.
- Click the New CSS Rule icon in the CSS Styles panel. The New CSS Rule dialog will open.
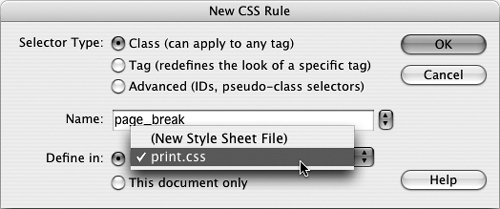
- In the Selector Type area of the dialog, click the Class (can apply to any tag) radio button. From the Name pop-up menu, choose a style name, such as page_break.
- In the Define in area of the dialog, choose your print.css external style sheet from the pop-up menu.
- Click OK in the New CSS Rule dialog to open the CSS Rule Definition dialog (Figure 57d).
Figure 57d. Creating a page break style.
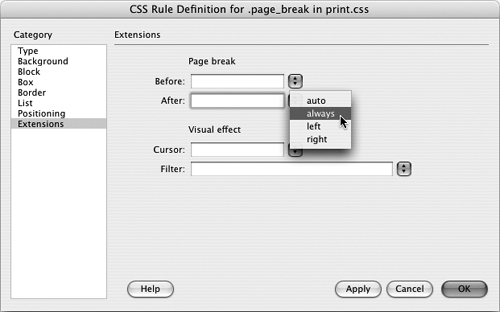
- In the CSS Rule Definition dialog, choose the Extensions category. In the After field, choose always from the pop-up menu (Figure 57e).
Figure 57e. Defining a page break style.
After you define a page break style, you can apply it anywhere by inserting the style from the Property inspector (Figure 57f).
Figure 57f. Inserting a page break style.
