
22. Developing Android 2D Graphics Applications
In Introduction to Android™ Application Development: Android Essentials, we talked about layouts and the various View classes available in Android to make screen design simple and efficient. Now we must think at a slightly lower level and talk about drawing objects on the screen. This chapter covers the two-dimensional drawing features built into the Android platform, including creating custom View classes and working with Canvas and Paint to draw shapes and text. You will also learn about working with bitmaps and how to use the hardware acceleration features of the Android platform.
Drawing on the Screen
With Android, we can display images such as PNG and JPG graphics as well as text and primitive shapes to the screen. We can paint these items with various colors, styles, and gradients and modify them using standard image transforms. We can even animate objects to give the illusion of motion.
![]() Tip
Tip
Many of the code examples provided in this chapter are taken from the SimpleDrawing application. The source code for this application is provided for download on the book’s website.
Working with Canvases and Paints
To draw to the screen, you need a valid Canvas object. Typically, we get a valid Canvas object by extending the View class for our own purposes and implementing the onDraw() method.
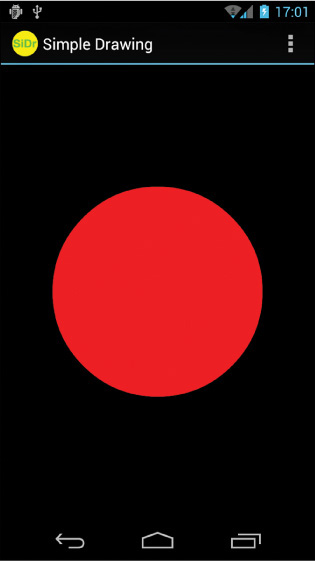
For example, here’s a simple View subclass called ViewWithRedDot. We override the onDraw() method to dictate what the View looks like; in this case, it draws a red circle on a black background.
private static class ViewWithRedDot extends View {
public ViewWithRedDot(Context context) {
super(context);
}
@Override
protected void onDraw(Canvas canvas) {
canvas.drawColor(Color.BLACK);
Paint circlePaint = new Paint();
circlePaint.setColor(Color.RED);
canvas.drawCircle(canvas.getWidth()/2,
canvas.getHeight()/2,
canvas.getWidth()/3, circlePaint);
}
}
We can then use this View like any other layout. For example, we might override the onCreate() method in our Activity with the following:
setContentView(new ViewWithRedDot(this));
The resulting screen looks something like Figure 22.1.
Understanding the Canvas Object
The Canvas (android.graphics.Canvas) object holds the draw calls, in order, for a rectangle of space. There are methods available for drawing images, text, and shapes and support for clipping regions.
The dimensions of the Canvas are bound by the container View. You can retrieve the size of the Canvas using the getHeight() and getWidth() methods.
Understanding the Paint Object
In Android, the Paint (android.graphics.Paint) object stores far more than a color. The Paint class encapsulates the style and complex color and rendering information that can be applied to a drawable such as a graphic, shape, or piece of text in a given Typeface.
Working with Paint Color
You can set the color of the Paint using the setColor() method. Standard colors are predefined in the android.graphics.Color class, an integer value can be used, and a helper method called setARGB() can be used when you don’t have the integer value for the color. For example, the following code sets the paint color to red:
Paint redPaint = new Paint();
redPaint.setColor(Color.RED);
Working with Paint Anti-aliasing
Anti-aliasing makes many graphics—whether they are shapes or typefaces—look smoother on the screen. This property is set in the Paint of an object.
For example, the following code instantiates a Paint object with anti-aliasing enabled:
Paint aliasedPaint = new Paint(Paint.ANTI_ALIAS_FLAG);
Working with Paint Styles
Paint styles control how an object is filled with color. For example, the following code instantiates a Paint object and sets the Style to STROKE, which signifies that the object should be painted as a line drawing and not filled (the default):
Paint linePaint = new Paint();
linePaint.setStyle(Paint.Style.STROKE);
Working with Paint Gradients
You can create a gradient of colors using one of the gradient subclasses. The different gradient classes (see Figure 22.2), including LinearGradient, RadialGradient, and SweepGradient, are available under the superclass android.graphics.Shader.
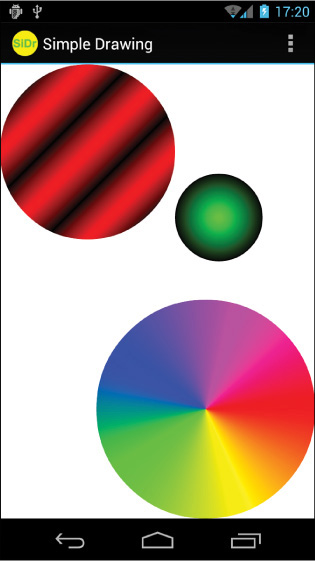
Figure 22.2 Examples of a LinearGradient (top), a RadialGradient (right), and a SweepGradient (bottom).
All gradients need at least two colors—a start color and an end color—but might contain any number of colors. The types of gradients are differentiated by the direction in which the gradient “flows.” Gradients can be set to mirror and repeat as necessary.
You can set the Paint gradient using the setShader() method.
Working with Linear Gradients
A linear gradient is one that changes colors along a single straight line. The top-left circle in Figure 22.2 is a linear gradient between black and red, which is mirrored.
You can achieve this by creating a LinearGradient and setting the Paint method setShader() before drawing on a Canvas, as follows:
import android.graphics.Canvas;
import android.graphics.Color;
import android.graphics.LinearGradient;
import android.graphics.Paint;
import android.graphics.Shader;
...
Paint circlePaint = new Paint(Paint.ANTI_ALIAS_FLAG);
LinearGradient linGrad = new LinearGradient(0, 0, 25, 25,
Color.RED, Color.BLACK,
Shader.TileMode.MIRROR);
circlePaint.setShader(linGrad);
canvas.drawCircle(100, 100, 100, circlePaint);
Working with Radial Gradients
A radial gradient is one that changes colors starting at a single point and radiates outward in a circle. The smaller circle on the right in Figure 22.2 is a radial gradient between green and black.
You can achieve this by creating a RadialGradient and setting the Paint method setShader() before drawing on a Canvas, as follows:
import android.graphics.Canvas;
import android.graphics.Color;
import android.graphics.RadialGradient;
import android.graphics.Paint;
import android.graphics.Shader;
...
Paint circlePaint = new Paint(Paint.ANTI_ALIAS_FLAG);
RadialGradient radGrad = new RadialGradient(250,
175, 50, Color.GREEN, Color.BLACK,
Shader.TileMode.MIRROR);
circlePaint.setShader(radGrad);
canvas.drawCircle(250, 175, 50, circlePaint);
Working with Sweep Gradients
A sweep gradient is one that changes colors in the shape of slices of a pie. This type of gradient is often used for a color chooser. The large circle at the bottom of Figure 22.2 is a sweep gradient between red, yellow, green, blue, and magenta.
You can achieve this by creating a SweepGradient and setting the Paint method setShader() before drawing on a Canvas, as follows:
import android.graphics.Canvas;
import android.graphics.Color;
import android.graphics.SweepGradient;
import android.graphics.Paint;
import android.graphics.Shader;
...
Paint circlePaint = new Paint(Paint.ANTI_ALIAS_FLAG);
SweepGradient sweepGrad = new
SweepGradient(canvas.getWidth()-125,
canvas.getHeight()-125,
new int[] { Color.RED, Color.YELLOW, Color.GREEN,
Color.BLUE, Color.MAGENTA, Color.RED }, null);
circlePaint.setShader(sweepGrad);
canvas.drawCircle(canvas.getWidth()-125,
canvas.getHeight()-125, 125,
circlePaint);
Working with Paint Utilities for Drawing Text
The Paint class includes a number of utilities and features for rendering text to the screen in different typefaces and styles. Now is a great time to start drawing some text to the screen.
Working with Text
Android provides several default font typefaces and styles. Applications can also use custom fonts by including font files as application assets and loading them using the AssetManager, much as one would use resources.
Using Default Fonts and Typefaces
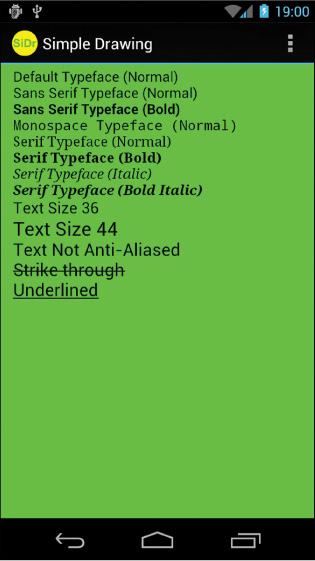
By default, Android uses the Sans Serif typeface, but Monospace and Serif typefaces are also available. The following code excerpt draws some anti-aliased text in the default typeface (Sans Serif) to a Canvas:
import android.graphics.Canvas;
import android.graphics.Color;
import android.graphics.Paint;
import android.graphics.Typeface;
...
Paint mPaint = new Paint(Paint.ANTI_ALIAS_FLAG);
Typeface mType;
mPaint.setTextSize(16);
mPaint.setTypeface(null);
canvas.drawText("Default Typeface", 20, 20, mPaint);
You can instead load a different typeface, such as Monospace:
Typeface mType = Typeface.create(Typeface.MONOSPACE, Typeface.NORMAL);
Perhaps you would prefer italic text, in which case you can simply set the style of the typeface and the font family:
Typeface mType = Typeface.create(Typeface.SERIF, Typeface.ITALIC);
![]() Warning
Warning
Not all typeface styles are supported by all typeface families. You need to test to make sure the desired typeface and style exist on the device.
You can set certain properties of a typeface such as anti-aliasing, underlining, and strike-through using the setFlags() method of the Paint object:
mPaint.setFlags(Paint.UNDERLINE_TEXT_FLAG);
Figure 22.3 shows some of the typeface families and styles available by default on Android.
Using Custom Typefaces
You can easily use custom typefaces with your application by including the font files as application assets and loading them on demand. Fonts might be used for a custom look and feel, for implementing language symbols that are not supported natively, or for custom symbols.
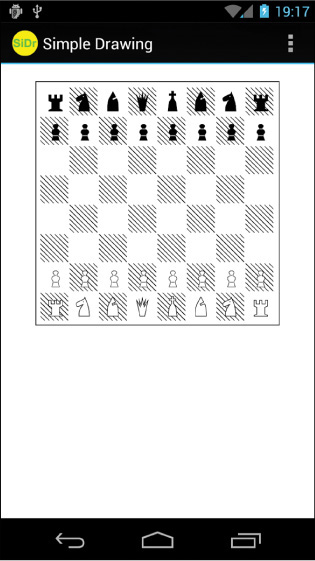
For example, you might want to use a handy chess font to implement a simple, scalable chess game. A chess font includes every symbol needed to implement a chessboard, including the board and the pieces. Hans Bodlaender has kindly provided a free chess font called Chess Utrecht. Using the Chess Utrecht font, the letter Q draws a black queen on a white square, whereas a q draws a white queen on a white square, and so on. This nifty font is available at http://www.chessvariants.com/d.font/utrecht.html as chess1.ttf.
To use a custom font such as Chess Utrecht, simply download the font from the website and copy the chess1.ttf file from your hard drive to the project directory /assets/fonts/.
Now you can load the Typeface object programmatically much as you would any resource:
import android.graphics.Typeface;
import android.graphics.Color;
import android.graphics.Paint;
...
Paint mPaint = new Paint(Paint.ANTI_ALIAS_FLAG);
Typeface mType = Typeface.createFromAsset(getContext().getAssets(),
"fonts/chess1.ttf");
You can then use the Chess Utrecht typeface to “draw” a chessboard (see Figure 22.4) using the appropriate character sequences.
Measuring Text Screen Requirements
You can measure how large text with a given Paint is and how big a rectangle you need to encompass it using the measureText() and getTextBounds() methods.
Working with Bitmaps
You can find lots of goodies for working with graphics such as bitmaps (including NinePatch) in the android.graphics package. The core class for bitmaps is android.graphics.Bitmap.
Drawing Bitmap Graphics on a Canvas
You can draw bitmaps onto a valid Canvas, such as in the onDraw() method of a View, using one of the drawBitmap() methods. For example, the following code loads a Bitmap resource and draws it on a Canvas:
import android.graphics.Bitmap;
import android.graphics.BitmapFactory;
...
Bitmap pic = BitmapFactory.decodeResource(getResources(), R.drawable.bluejay);
canvas.drawBitmap(pic, 0, 0, null);
Scaling Bitmap Graphics
Perhaps you want to scale your graphic to a smaller size. In this case, you can use the createScaledBitmap() method, like this:
Bitmap sm = Bitmap.createScaledBitmap(pic, 50, 75, false);
You can preserve the aspect ratio of the Bitmap by checking the getWidth() and getHeight() methods and scaling appropriately.
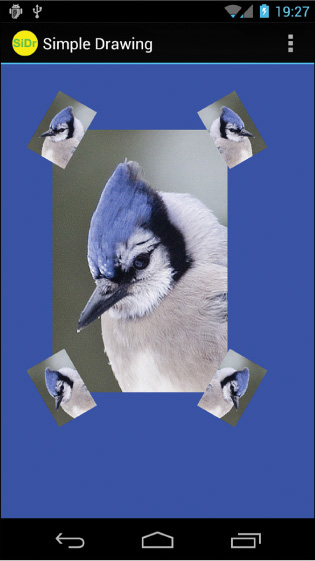
Transforming Bitmaps Using Matrixes
You can use the helpful Matrix class to perform transformations on a Bitmap graphic (see Figure 22.5). Use the Matrix class to perform tasks such as mirroring and rotating graphics, among other actions.
The following code uses the createBitmap() method to generate a new Bitmap that is a mirror of an existing Bitmap called pic:
import android.graphics.Bitmap;
import android.graphics.Matrix;
...
Matrix mirrorMatrix = new Matrix();
mirrorMatrix.preScale(-1, 1);
Bitmap mirrorPic = Bitmap.createBitmap(pic, 0, 0,
pic.getWidth(), pic.getHeight(), mirrorMatrix, false);
You can perform a 30-degree rotation in addition to mirroring by using this Matrix instead:
Matrix mirrorAndTilt30 = new Matrix();
mirrorAndTilt30.preRotate(30);
mirrorAndTilt30.preScale(-1, 1);
You can see the results of different combinations of tilt and mirror Matrix transforms in Figure 22.5. When you’re no longer using a Bitmap, you can free its memory using the recycle() method:
pic.recycle();
There are a variety of other Bitmap effects and utilities available as part of the Android SDK, but they are numerous and beyond the scope of this book. See the android.graphics package for more details.
Bitmap Performance Optimizations
When displaying images in an application, one gotcha that developers tend to overlook is the amount of memory allocated for the application. A really large image could end up consuming all of the available memory before the application is fully loaded into memory, causing the application to run out of memory and resulting in the OutOfMemoryError.
If your application loads multiple images at once, and you do not take care how you manage the images within the application, even if the images are able to load, your application will become slow and feel unresponsive, resulting in a poor user experience that may cause users to uninstall the application.
Luckily, there are a few best practices for working with bitmaps. The following list gives a few suggestions for managing bitmaps:
![]() Load images at the same resolution as you will display them, rather than display them at their source resolution. This can be achieved by using a
Load images at the same resolution as you will display them, rather than display them at their source resolution. This can be achieved by using a BitmapFactory.Options object and setting the inSampleSize parameter for a given image, which allows you to sample the original image by making it smaller in width and height and reduces the number of pixels based on powers of 2.
![]() Load images concurrently, in the background and off the main UI thread, using an
Load images concurrently, in the background and off the main UI thread, using an AsyncTask object.
![]() Leverage the memory cache for temporarily storing bitmaps in your application’s available memory allotment so images don’t need to be re-created every time they are needed, and allocate a portion of your application’s
Leverage the memory cache for temporarily storing bitmaps in your application’s available memory allotment so images don’t need to be re-created every time they are needed, and allocate a portion of your application’s LruCache for Bitmap caching.
API Level 19 introduced a few new Bitmap methods that are useful for managing the performance of bitmaps that you should be aware of. getAllocationByteCount() will help you to determine the memory consumption of a particular Bitmap. reconfigure() allows you to re-initialize a Bitmap to a new configuration without affecting the memory allocated for a particular Bitmap.
![]() Tip
Tip
To learn more about how to optimize your application for working with bitmaps, read the Training guide found within the Android documentation found here: http://d.android.com/training/building-graphics.html.
Working with Shapes
You can define and draw primitive shapes such as rectangles and ovals using the ShapeDrawable class in conjunction with a variety of specialized Shape classes. You can define Paintable drawables as XML resource files, but more often, especially with more complex shapes, this is done programmatically.
![]() Tip
Tip
Many of the code examples provided in this section are taken from the SimpleShapes application. The source code for this application is provided for download on the book’s website.
Defining Shape Drawables as XML Resources
You can define primitive shapes such as rectangles using specially formatted XML files in the /res/drawable/ resource directory, as discussed in Introduction to Android Application Development: Android™ Essentials, Fourth Edition. The following resource file called /res/drawable/green_rect.xml describes a simple green rectangle shape Drawable:
<?xml version="1.0" encoding="utf-8"?>
<shape xmlns:android="http://schemas.android.com/apk/res/android"
android:shape="rectangle">
<solid
android:color="#0f0"/>
</shape>
You can then load the shape resource and set it as the Drawable as follows:
ImageView iView = (ImageView)findViewById(R.id.ImageView1);
iView.setImageResource(R.drawable.green_rect);
You should note that many Paint properties can be set via XML as part of the Shape definition. For example, the following Oval shape is defined with a linear gradient (red to white) and stroke style information:
<?xml version="1.0" encoding="utf-8"?>
<shape xmlns:android="http://schemas.android.com/apk/res/android"
android:shape="oval">
<solid
android:color="#f00"/>
<gradient
android:startColor="#f00"
android:endColor="#fff"
android:angle="180"/>
<stroke
android:width="3dp"
android:color="#00f"
android:dashWidth="5dp"
android:dashGap="3dp"/>
</shape>
Defining Shape Drawables Programmatically
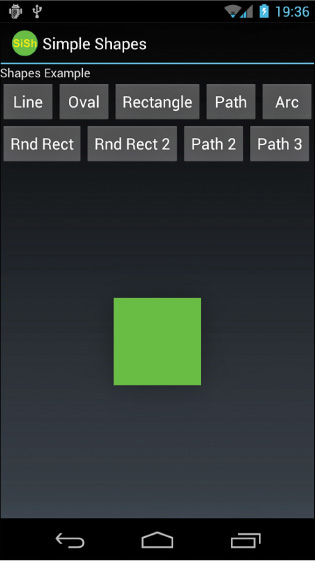
You can also define these ShapeDrawable instances programmatically. The different shapes are available as classes in the android.graphics.drawable.shapes package. For example, you can programmatically define the aforementioned green rectangle as follows:
import android.graphics.drawable.ShapeDrawable;
import android.graphics.drawable.shapes.RectShape;
...
ShapeDrawable rect = new ShapeDrawable(new RectShape());
rect.getPaint().setColor(Color.GREEN);
You can then set the Drawable for the ImageView directly:
ImageView iView = (ImageView)findViewById(R.id.ImageView1);
iView.setImageDrawable(rect);
The resulting green rectangle is shown in Figure 22.6.
Drawing Different Shapes
Some of the different shapes available in the android.graphics.drawable.shapes package include the following:
![]() Rectangles (and squares)
Rectangles (and squares)
![]() Rectangles with rounded corners
Rectangles with rounded corners
![]() Ovals (and circles)
Ovals (and circles)
![]() Arcs and lines
Arcs and lines
![]() Other shapes defined as paths
Other shapes defined as paths
You can create and use these shapes as Drawable resources directly in ImageView views, or you can find corresponding methods for creating these primitive shapes in a Canvas.
Drawing Rectangles and Squares
Drawing rectangles and squares (rectangles with equal height/width values) is simply a matter of creating a ShapeDrawable from a RectShape object. The RectShape object has no dimensions but is bound by the container object—in this case, the ShapeDrawable. You can set some basic properties of the ShapeDrawable, such as the Paint color and the default size.
For example, here we create a magenta-colored rectangle that is 100 pixels long and 2 pixels wide, which looks like a straight, horizontal line. We then set the shape as the Drawable for an ImageView so the shape can be displayed:
import android.graphics.drawable.ShapeDrawable;
import android.graphics.drawable.shapes.RectShape;
...
ShapeDrawable rect = new ShapeDrawable(new RectShape());
rect.setIntrinsicHeight(2);
rect.setIntrinsicWidth(100);
rect.getPaint().setColor(Color.MAGENTA);
ImageView iView = (ImageView)findViewById(R.id.ImageView1);
iView.setImageDrawable(rect);
Drawing Rectangles with Rounded Corners
You can create rectangles with rounded corners, which can be nice for making custom buttons. Simply create a ShapeDrawable from a RoundRectShape object. The RoundRectShape requires an array of eight float values, which signify the radii of the rounded corners. For example, the following creates a simple cyan-colored, rounded-corner rectangle:
import android.graphics.drawable.ShapeDrawable;
import android.graphics.drawable.shapes.RoundRectShape;
...
ShapeDrawable rndrect = new ShapeDrawable(
new RoundRectShape(new float[] { 5, 5, 5, 5, 5, 5, 5, 5 },
null, null));
rndrect.setIntrinsicHeight(50);
rndrect.setIntrinsicWidth(100);
rndrect.getPaint().setColor(Color.CYAN);
ImageView iView = (ImageView)findViewById(R.id.ImageView1);
iView.setImageDrawable(rndrect);
The resulting round-corner rectangle is shown in Figure 22.7.

You can also specify an inner-rounded rectangle within an outer rectangle, if you choose. The following creates an inner rectangle with rounded edges within an outer white rectangle with rounded edges:
import android.graphics.drawable.ShapeDrawable;
import android.graphics.drawable.shapes.RoundRectShape;
...
float[] outerRadii = new float[]{ 6, 6, 6, 6, 6, 6, 6, 6 };
RectF insetRectangle = new RectF(8, 8, 8, 8);
float[] innerRadii = new float[]{ 6, 6, 6, 6, 6, 6, 6, 6 };
ShapeDrawable rndrect = new ShapeDrawable(
new RoundRectShape(outerRadii, insetRectangle, innerRadii));
rndrect.setIntrinsicHeight(50);
rndrect.setIntrinsicWidth(100);
rndrect.getPaint().setColor(Color.WHITE);
ImageView iView = (ImageView)findViewById(R.id.ImageView1);
iView.setImageDrawable(rndrect);
The resulting round rectangle with an inset rectangle is shown in Figure 22.8.
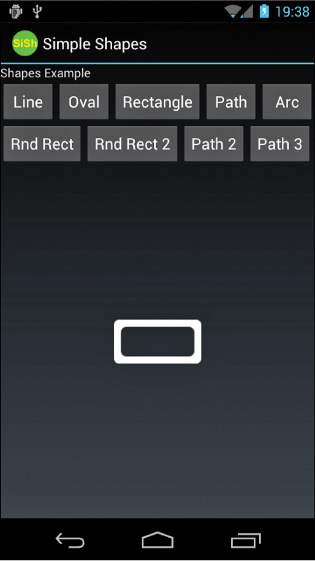
Figure 22.8 A white rectangle ShapeDrawable with rounded corners with an inset rounded rectangle drawn to the View.
Drawing Ovals and Circles
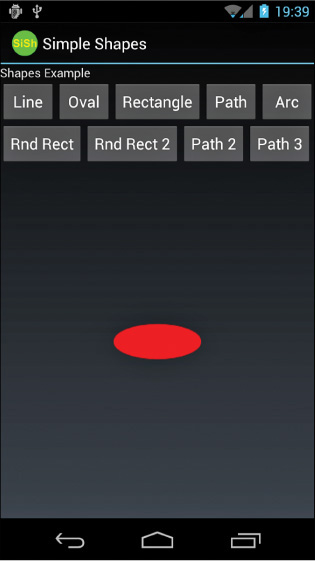
You can create ovals and circles (which are ovals with equal height/width values) by creating a ShapeDrawable using an OvalShape object. The OvalShape object has no dimensions but is bound by the container object—in this case, the ShapeDrawable. You can set some basic properties of the ShapeDrawable, such as the Paint color and the default size. For example, here we create a red oval that is 40 pixels high and 100 pixels wide, which looks like a Frisbee:
import android.graphics.drawable.ShapeDrawable;
import android.graphics.drawable.shapes.OvalShape;
...
ShapeDrawable oval = new ShapeDrawable(new OvalShape());
oval.setIntrinsicHeight(40);
oval.setIntrinsicWidth(100);
oval.getPaint().setColor(Color.RED);
ImageView iView = (ImageView)findViewById(R.id.ImageView1);
iView.setImageDrawable(oval);
The resulting red oval is shown in Figure 22.9.
Drawing Arcs
You can draw arcs, which look like pie charts or Pac-Man, depending on the sweep angle you specify. You can create arcs by creating a ShapeDrawable using an ArcShape object. The ArcShape object requires two parameters: a startAngle and a sweepAngle. The startAngle begins at 3 o’clock. Positive sweepAngle values sweep clockwise; negative values sweep counterclockwise. You can create a circle by using the values 0 and 360.
The following code creates an arc that looks like a magenta Pac-Man:
import android.graphics.drawable.ShapeDrawable;
import android.graphics.drawable.shapes.ArcShape;
...
ShapeDrawable pacMan = new ShapeDrawable(new ArcShape(45, 270));
pacMan.setIntrinsicHeight(100);
pacMan.setIntrinsicWidth(100);
pacMan.getPaint().setColor(Color.MAGENTA);
ImageView iView = (ImageView)findViewById(R.id.ImageView1);
iView.setImageDrawable(pacMan);
The resulting arc is shown in Figure 22.10.
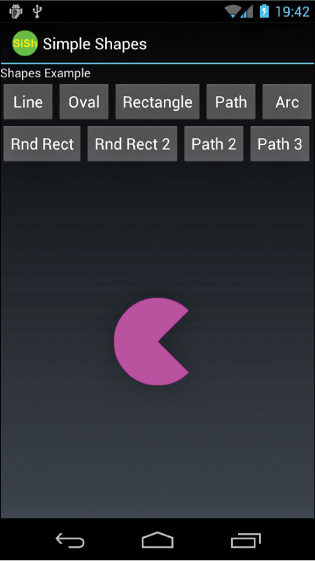
Figure 22.10 A magenta arc ShapeDrawable of 270 degrees, starting at 45 degrees (resembling Pac-Man or a pie chart with 75 percent showing), drawn to the View.
Drawing Paths
You can specify any shape you want by breaking it down into a series of points along a path. The android.graphics.Path class encapsulates a series of lines and curves that make up some larger shape.
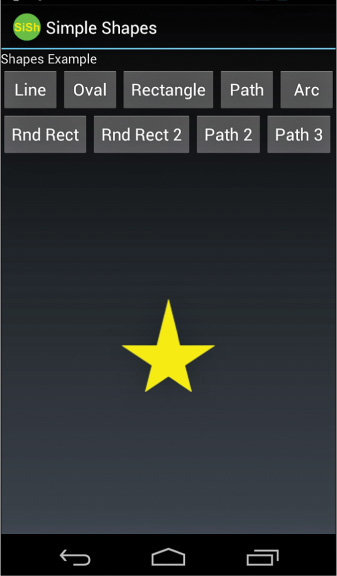
For example, the following Path defines a rough five-point star shape:
import android.graphics.Path;
...
Path p = new Path();
p.moveTo(50, 0);
p.lineTo(25,100);
p.lineTo(100,50);
p.lineTo(0,50);
p.lineTo(75,100);
p.lineTo(50,0);
You can then encapsulate this star Path in a PathShape, create a ShapeDrawable, and paint it yellow:
import android.graphics.drawable.ShapeDrawable;
import android.graphics.drawable.shapes.PathShape;
...
ShapeDrawable star = new ShapeDrawable(new PathShape(p, 100, 100));
star.setIntrinsicHeight(100);
star.setIntrinsicWidth(100);
star.getPaint().setColor(Color.YELLOW);
By default, this generates a star shape filled with the Paint color yellow (see Figure 22.11).
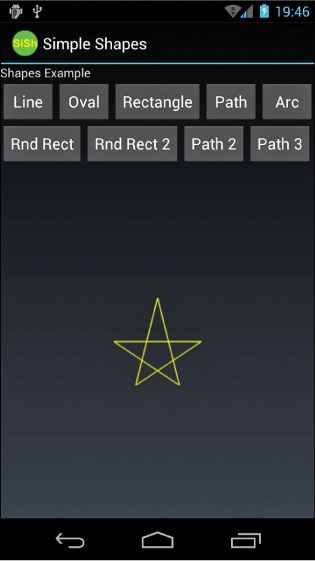
Or, you can set the Paint style to STROKE for a line drawing of a star:
star.getPaint().setStyle(Paint.Style.STROKE);
The resulting star would look something like Figure 22.12.
![]() Tip
Tip
The graphics support available in the Android SDK could be the subject of an entire book. After you have familiarized yourself with the basics, we recommend that you check out the APIDemos application provided with the Android SDK legacy samples.
Leveraging Hardware Acceleration Features
Just about every Android application draws on the screen in some form or another. Whether you’re using standard View controls or custom drawing, 2D hardware acceleration can improve your application. Android developers can easily harness the built-in hardware acceleration features added to the Android platform in Android 3.0 from within their applications. These newer versions of the Android platform boast an improved OpenGL rendering pipeline for common 2D graphics operations.
There’s little reason not to leverage hardware acceleration for a smoother, more responsive experience for your users. You can simply take advantage of the default features, or you can fine-tune your application graphics acceleration at the application, Activity, Window, or View level, if required.
Controlling Hardware Acceleration
Hardware acceleration is available on devices running Android 3.0 and higher. In fact, if your application has a minSdkVersion or targetSdkVersion set to API Level 14 or greater, hardware acceleration is enabled for all windows. You may still want to control acceleration in your application, though. This can be done directly in the manifest file in the <application> and <activity> tags. Set the android:hardwareAccelerated attribute to true or false, depending on your needs. To control acceleration at the Window or even for a specific View instance, you need to do this programmatically. For the Window, use the setFlags() method with WindowManager.LayoutParams.FLAG_HARDWARE_ACCELERATED to enable acceleration. There is no programmatic way to disable acceleration. For a View control, use the setLayerType() method with the appropriate layer type, such as View.LAYER_TYPE_HARDWARE. For more information on layers, see the Android documentation at http://d.android.com/guide/topics/graphics/hardware-accel.html#layers.
Fine-Tuning Hardware Acceleration
If you’ve got custom drawing operations or work with the Canvas and Paint classes in your application, you need to pay attention to which features are available in Android hardware acceleration at this time. Certain Canvas and Paint operations are not currently supported, whereas others behave differently depending on hardware versus software acceleration. Notably, the methods clipPath(), clipRegion(), drawPicture(), drawVertices(), drawPosText(), and drawTextOnPath() are not supported in the Canvas class. In the Paint class, setLinearText(), setMaskFilter(), and setRasterizer() are not supported. The Android documentation has a list of specific drawing operations not fully supported by hardware acceleration at this time, available at http://d.android.com/guide/topics/graphics/hardware-accel.html#unsupported.
Test your app thoroughly, and if you run into problems, you’ve got a couple of options. You can work around any problems by re-implementing your drawing code using supported functionality. You can also turn off hardware acceleration on that Activity, Window, or specific View control and rely on the default software acceleration instead.
You can determine whether a View is leveraging hardware acceleration at runtime using the View.isHardwareAccelerated() method. You can disable hardware acceleration on a specific View control at runtime using the following method call:
setLayerType(View.LAYER_TYPE_SOFTWARE, null);
For more details about hardware acceleration on the Android platform, see the references section at the end of this chapter.
Summary
The Android SDK comes with the android.graphics package, which includes powerful classes for drawing graphics and text to the screen in a variety of different ways. Some features of the graphics library include Bitmap graphics utilities, Typeface and font style support, Paint colors and styles, different types of gradients, and a variety of primitive and not-so-primitive shapes that can be drawn to the screen. You also learned different ways of working with and optimizing bitmaps in your applications. Hardware acceleration is now enabled on the platform and may affect drawing operations.
Quiz Questions
1. True or false: One way to retrieve a valid Canvas object is by extending the View class and implementing the onDraw() method.
2. What are the two methods used for retrieving the size of a Canvas object?
3. What does anti-aliasing do to a graphic and how do you perform anti-aliasing to a Paint object?
4. True or false: The reconfigure() method allows you to re-initialize a Bitmap to a new configuration without affecting the memory allocated for a particular Bitmap.
5. What are the different layers for which you are able to control hardware acceleration in your application?
Exercises
1. Use the Android documentation to determine the variety of forms that drawables may take.
2. Modify the DrawBitmapActivity of the SimpleDrawing application that accompanies this chapter so that the Bitmap is loaded off the UI thread.
3. Modify the sample applications that accompany this chapter so that they make use of the hardware acceleration features of Android.
References and More Information
Android SDK Reference documentation for the android.graphics package:
http://d.android.com/reference/android/graphics/package-summary.html
Android SDK Reference documentation for the Bitmap class:
http://d.android.com/reference/android/graphics/Bitmap.html
YouTube Android Developers Channel: “DevBytes: Bitmap Allocation”:
http://www.youtube.com/watch?v=rsQet4nBVi8
YouTube Android Developers Channel: “Bitmap Scaling”:
http://www.youtube.com/watch?v=12cB7gnL6po
Android API Guides: “Hardware Acceleration”:
http://d.android.com/guide/topics/graphics/hardware-accel.html