
Some Pi projects are best served with a simple LCD display. The associated touch control frees you from a keyboard and mouse. This chapter will examine one example of a 5-inch 800x480 pixel LCD touchscreen and describe how to set it up.
The Display Unit

The 5 Inch HDMI Display kit with stylus, DVD, and LCD unit (with plastic covering still attached). USB power cable is not included.
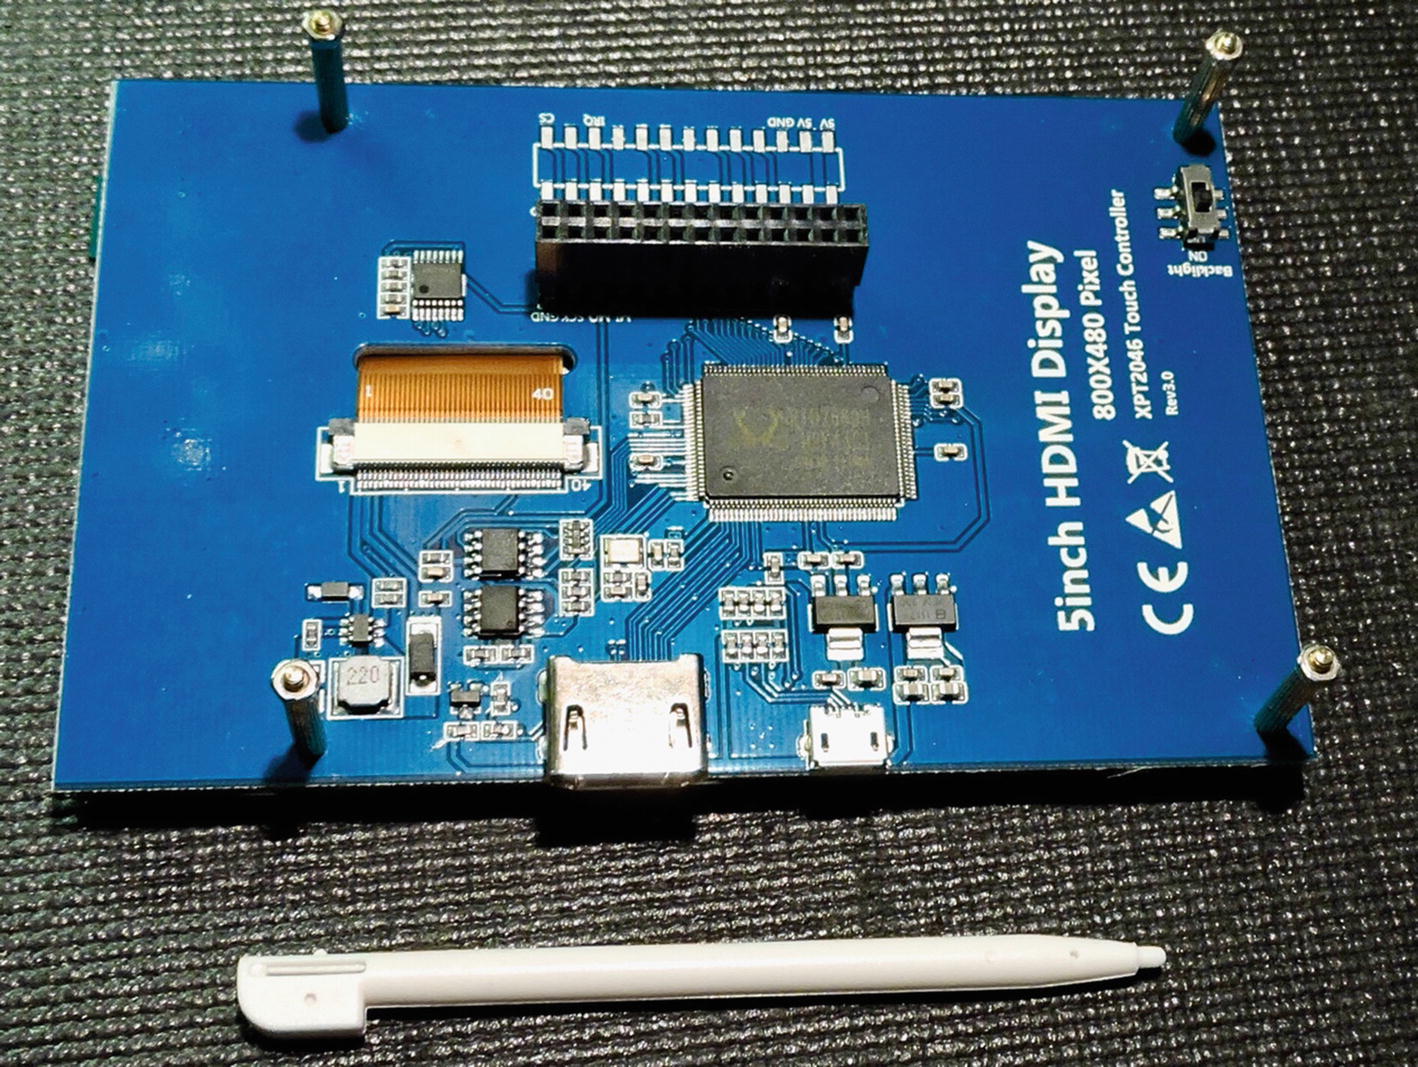
The backside of the 5 Inch HDMI Display with four stand-offs screwed in
If you read the included DVD instructions, you are expected to run a script named LCD5-show but don’t run it—it is out of step with the current releases of Raspbian Linux. In fact, the script may leave your Pi unbootable after it is run. This chapter will use the script for a guide, with the corrections applied.
Installation
Install Script
Provided LCD5-show install script (do not run!)
Backup
To restore your original configuration, you merely need to copy these back and reboot.
File 40-libinput.conf
The install script in Listing 24-1, line 2 attempts to delete a file that does not exist (there is no /etc/X11/xorg.conf.d directory provided by Raspbian Linux). But there is a file in /usr/share/X11/xord.conf.d/40-libinput.conf. You may find that you can leave it there but I recommend that you rename it, to avoid any possible conflict. You’ll need to undo this later, if you choose to restore your system to its original state.
Edit /boot/config.txt
If you think you have messed up badly, you can recover by copying the backup file over it and start over.
When making changes, you can sometimes just uncomment a line. In other cases you will need to add lines (at the end of the file is best). If you have a directive in conflict, you can comment it out with a hash (#) character in the first column and simply add your change at the end of the file.
Save your changes. This step replaces line 3 of the install script.
Edit /boot/cmdline.txt
Save the changes.
File 99-fbturbo.conf
Line 9 of the Listing 24-1 install script no longer applies. For better or for worse, Raspbian Linux, like Debian, uses systemd. There is no longer a /etc/inittab file so that step can be skipped.
File 99-calibration.conf-5
Script line 11 does not apply (directory /etc/X11/xorg.conf.d is not searched) and should be skipped.
The script used target directory /etc/X11, but the correct directory name is /usr/share/X11 in the command above.
Driver Install
- 1.
This is a Raspberry Pi (lines 16–17), and
- 2.
The version of the Raspbian Linux (lines 18–19).
Test #1 depends upon the host name of your Pi being “raspberrypi.” If you had already customized the host name and ran that script, it would have installed the wrong driver, thinking it was not a Pi. Oops!
The version number in this example is 1110. Line 21 indicates that no driver install is required if your Raspbian version is less than 970. In that case it is time to simply reboot (perform a shutdown and power off instead). On the other hand, a recent version of Raspbian, version 1023 or later requires that a driver be installed.
Shutdown
The shutdown procedure will normally perform the sync command for you, but I like the comfort of knowing it has been done (it flushes out your unwritten disk cache).
Plugging In

The 5 inch LCD 13x2 connector being attached to the GPIO strip, at the end opposite of the USB connectors (Pi 3 B+). The connector is not yet fully seated.

The LCD attached to the Pi using the supplied HDMI to HDMI side adapter
If the HDMI adapters don’t seem to be aligned, recheck that you have the 13x2 connector plugged into the GPIO strip correctly.
With the power cables in inserted, power the unit on. The LCD should display a brief flicker of light as the backlighting starts up. If you see no activity at all, it might be wise to immediately power off and recheck connections.
Boot
Recheck the mating of connections. A bad connection or misplaced connection will affect the touch control.
Recheck the /boot/config.txt and /boot/cmdline.txt files.
Check the power usage (next section).
- Check the revision of the LCD panel. Older units used GPIO 22 for the penirq. This is specified in the /boot/config.txt file, underlined below:dtoverlay=ads7846,cs=1,penirq=25,penirq_pull=2,speed=50000,ke
Power
The unit I have consumes about 242 mA with backlight on and 168 mA when off. Be sure that your Pi and LCD panel are adequately supplied. A 2.5 A supply is recommended for the Pi 3 B+ but with the LCD plugged into a USB port, you might run out of current capacity during peak usage.
Connections
Connections of the 13x2 LCD Connector
Description | Pin | # | # | Pin | Description |
|---|---|---|---|---|---|
Power (+5V) | +5V | 2 | 1 | +3.3V | |
Power (+5V) | +5V | 4 | 3 | ||
Ground | Gnd | 6 | 5 | ||
NC | 8 | 7 | |||
NC | 10 | 9 | Gnd | Ground | |
NC | 12 | 11 | |||
Gnd | Gnd | 14 | 13 | ||
NC | 16 | 15 | |||
NC | 18 | 17 | +3.3V | ||
Gnd | Gnd | 20 | 19 | MI | MOSI |
Pen IRQ | GPIO 25 | 22 | 21 | MO | MISO |
NC | 24 | 23 | SCK | SCK | |
Pen Chip Select | GPIO-7 | 26 | 25 | Gnd | Ground |
Summary
One problem that often occurs is that hardware gets sale priced when the software becomes stale. This happens as the operating systems are updated and the software remains static. This can work in your favor, if you can work through the details of the install manually, as was done in this chapter.
The LCD screen presented provides you with a flavor of what to expect in similar offerings. One thing to be careful of is to make sure that any necessary driver support exists for your version of Linux before you buy.
A touch-sensitive LCD screen opens many new possibilities for your imagination.