
The Raspbian Linux console is configured (or assumed) by the kernel command line at boot time. Before we examine serial console access however, let’s step through the challenges of setting up the Pi Zero or Zero W. The main challenge is working with the single USB port and having the correct adapters. Then we’ll examine the option of a serial device console.
Pi Zero / Zero W
- 1.
The ssh access is disabled on new Raspbian images.
- 2.
There is only one USB port to attach a keyboard and mouse to.
And to see what you’re doing, you’re going to need a mini HDMI to HDMI adapter.
The reason that ssh is disabled by default is that the Pi’s image comes with a default password for the Pi account. Everybody knows it, especially the hackers. The unwitting user could start up a Pi and leave it connected to the network, inviting all kinds of nasty business. So the Raspbian image comes with ssh disabled.
What you really need is a USB hub that is supported by Raspbian. I tried an old Apple hub with no luck. So I switched to a more recent one. Some keyboards provide an extra USB port or two. That can be useful, provided that Raspbian Linux supports it.
If you’re patient, you might be able to get by without a hub at all. Power up the Zero and plug only the mouse into the USB adapter cable. Then mouse around to your system preferences. When you need to type in something, you can unplug the mouse and plug in the keyboard. You may not need the keyboard for much of the initial configuration.
Adapters Needed
Power adapter (black plug plugged into Zero at right).
USB 2.0 Micro B 5-pin to female USB 2.0 type A adapter cable (white cable in middle).
HDMI mini adapter (white adapter at Pi left).
Optional USB to ethernet adapter (far right, white).

Photo of a Pi Zero with mini HDMI adapter, USB adapter cable, and optional USB Ethernet adapter
If you use the serial port console later in this chapter, you can get away without the USB and mini HDMI adapters.
Enabling ssh and VNC Access
Enable SSH
Enable VNC
Optionally enable Serial Port (enabled by default)
Optionally enable Serial Console (enabled by default)
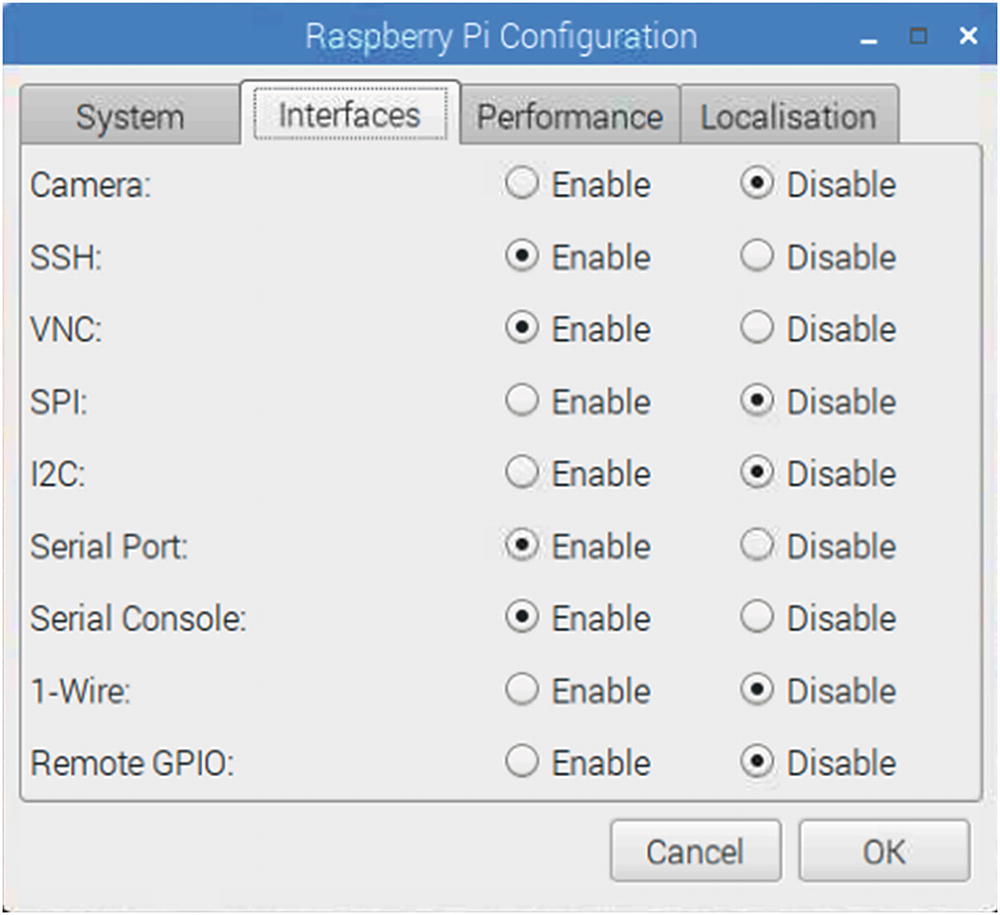
The Raspberry Pi Configuration, Interfaces panel
- 1.
Unplug your mouse (if not using a hub).
- 2.
Plug in your USB to ethernet adapter.
- 3.
Plug in your ethernet cable to a router.
- 4.
Scan your network to discover the assigned IP address.

Displaying your USB to ethernet address in the terminal window, using the ifconfig command
In this example, I knew that the Pi would be assigned a 192.168.1.* address because of the router that the ethernet cable was plugged into. I discovered by experimentation that the Pi Zero had the address 192.168.1.15.
Serial Console
If the mouse and HDMI approach isn’t suitable, perhaps because you lack the adapters, you might try the serial console approach instead. The Raspbian Linux image has the serial console enabled by default. It uses the baud rate of 115200 baud, without hardware flow control.
It is crucial, however, that you use a serial adapter that works at the 3.3 V level. Do not use 5 V serial adapters because they can cause damage to the Pi. Some adapters can operate at either level, configured by a jumper.
Pi +3.3 V (P1-01) supply to adapter +3.3 V (may be labeled VCC).
Pi ground (P1-06) to the adapter ground (usually labeled Gnd).
Pi TX (P1-08) to the adapter TX.
Pi RX (P1-10) to the adapter RX.
Caution
Do not connect a 5 Volt TTL serial adapter. This can cause damage. Some adapters have a jumper to choose a 3.3 or 5 volt operation.
If you find that this doesn’t work, try connecting TX to RX and RX to TX. Some adapters may be labeled according to the DCE (data communication equipment) perspective, while others will use the DTE (data terminal equipment) convention.
155200 baud
8-Bits, no parity and 1 stop bit (8-N-1)
Hardware flow control off
Summary
The serial port console can be very helpful when you lack all of the other devices: keyboard, mouse, and screen. This is often all you need to get a Pi Zero or Pi Zero W initialized for your special project.
The patient user can get by with just one USB adapter cable and a mini HDMI adapter for initial setup. The keyboard and mouse can be swapped in and out as needed. Once ssh or VNC is enabled, you can operate from the comfort of your favorite desktop.