An interactive visualization allows additional information to be presented when a user triggers actions through the mouse or keyboard. Roassal proposes a number of pluggable and extensible interactions, presented in this chapter.
So far, you have used three main interactions: RSPopup, RSDraggable, and RSCanvasController. Consider the following example, which involves these three interactions:
canvas := RSCanvas new.
shapes := RSCircle models: (1 to: 100).
canvas addAll: shapes.
shapes @ RSPopup @ RSDraggable.
RSGridLayout on: shapes.
canvas @ RSCanvasController.
canvas open
An interaction can be set by using the @ message and the interaction as an argument. RSPopup enables shapes with models to have a popup window that shows the model as a string representation. The window appears by moving the mouse above it. In this example, each number is displayed in the popup window since each circle has a number as a model. RSDraggable makes the shape draggable with the mouse. RSCanvasInteraction is an interaction for the canvas that augments the canvas with the following interactions:
Zooming in/out using the mouse wheel or the I and O keys.
Moving the canvas by dragging it with the mouse or using the arrow keys.
Searching for particular shapes using the S and R keys.
Maximizing the window using the M key.
Adding a Help menu that summarizes the available shortcuts.
These three interactions are frequently used in this book.
Using Any Shape in a Popup
The default behavior of the RSPopup class is to create popup windows with labels in them. However, the popup may be freely customized. For example (see Figure 11-1):
canvas := RSCanvas new.
shapes := RSLabel models: (1 to: 10).
canvas addAll: shapes.
RSGridLayout on: shapes.
popup := RSPopup new.
popup shapeBuilder: [ :aNumber |
| g |
g := RSGroup new.
g addAll: (RSCircle models: (1 to: aNumber)).
RSGridLayout on: g.
g asShape
color: Color white darker darker;
padding: 5.
].
shapes @ popup.
shapes @ RSHighlightable red.
canvas zoomToFit.
canvas open
Figure 11-1
Customized popup
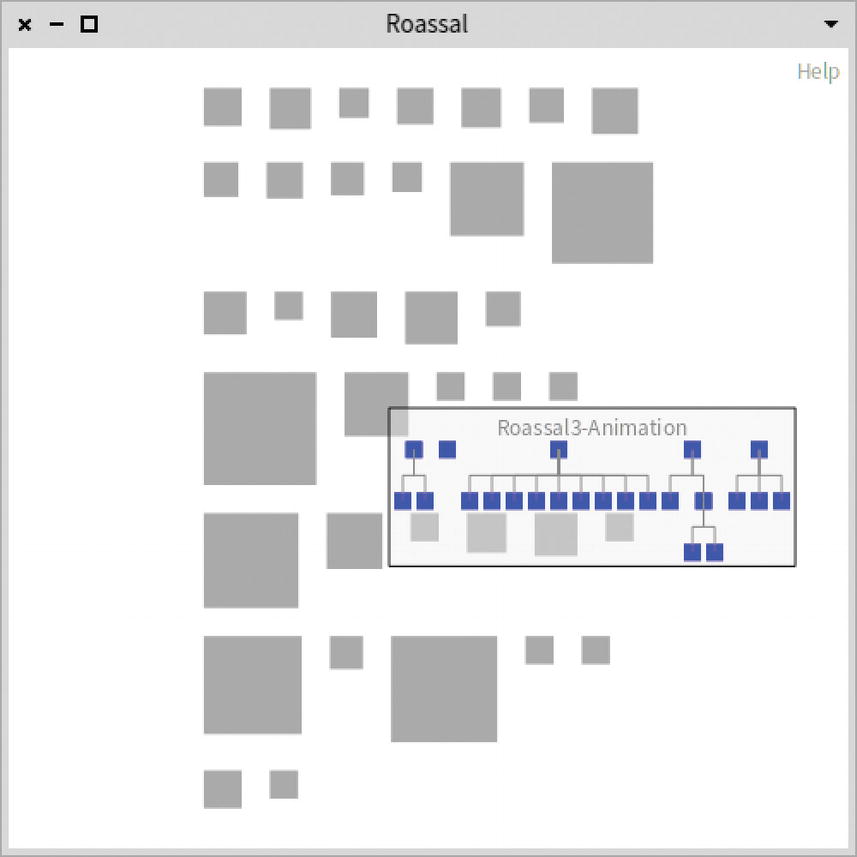
The shapeBuilder: method lets you customize the way the popup is generated. The method accepts as an argument a block that takes the model object as an argument. It has to return a shape or a composite shape. Consider a slightly more sophisticated example in the following code (see Figure 11-2):
The visualization shows the Pharo packages that define the Roassal3 application. The size of each package indicates the number of classes it contains. Moving the mouse above a package shows the classes and their inheritance in a popup window. The block provided to the shape builder adds nodes, lines, and a label giving the name of the package.
RSLabeled
The RSLabeled interaction is useful to set a title to some shapes. Consider the following code (see Figure 11-3):
canvas := RSCanvas new.
shapes := RSCircle models: (1 to: 9).
canvas addAll: shapes.
shapes @ RSLabeled.
RSGridLayout new gapSize: 40; on: shapes.
canvas @ RSCanvasController.
canvas open
Figure 11-3
Adding an RSLabeled interaction
The RSLabeled interaction associates a label to a shape. By default, the label is located above the shape, as shown in Figure 11-3. Note that the interaction does not create a composite shape, and as a consequence, the layout does not take the label into account (as explained in the chapter about shape composition).
The label produced by RSLabeled can be customized using text (see Figure 11-4):
By setting RSLabeled as highlightable, the color of the label, initially very light gray, is darkened when the mouse is above the shape. The next section deals with highlightable shapes.
RSHighlightable
The RSHighlightable interaction allows users to highlight shapes when the mouse cursor is above a shape. The shape pointed by the mouse may be highlighted, but other shapes that are semantically related can as well. Consider this simple example (see Figure 11-5):
canvas := RSCanvas new.
shapes := RSEllipse models: (1 to: 30).
shapes @ RSPopup @ RSDraggable.
canvas addAll: shapes.
shapes @ RSHighlightable red.
RSGridLayout on: shapes.
canvas @ RSCanvasController.
canvas open
Figure 11-5
The effect of highlighting a shape
The interaction is set using the shapes @ RSHighlightable red expression. The color used for highlighting can be manually set using highlightColor:. For example:
canvas := RSCanvas new.
shapes := RSEllipse models: (1 to: 30).
shapes @ RSPopup @ RSDraggable.
canvas addAll: shapes.
shapes @ (RSHighlightable new highlightColor: Color green).
RSGridLayout on: shapes.
canvas @ RSCanvasController.
canvas open
Shapes to be highlighted can be specified using highlightShapes:. Consider the following example (see Figure 11-6):
canvas := RSCanvas new.
shapes := RSEllipse models: (1 to: 30).
shapes @ RSPopup @ RSDraggable.
canvas addAll: shapes.
highlightable := RSHighlightable new.
highlightable highlightColor: Color green.
highlightable highlightShapes: [ :aShape |
shapes select: [ :s | (-1 to: 1) includes: (s model - aShape model) ] ].
shapes @ highlightable.
RSGridLayout on: shapes.
canvas @ RSCanvasController.
canvas open
Figure 11-6
Selecting shapes to be highlighted
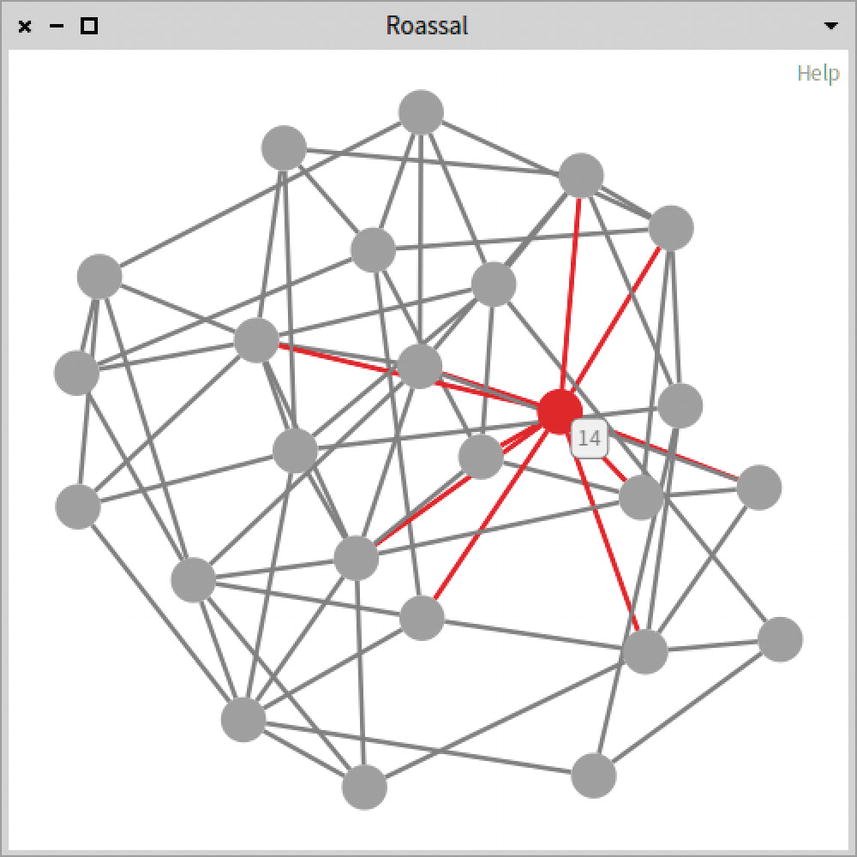
Lines can be highlighted using the withEdges method. For example (see Figure 11-7):
Two highlightable interactions are set on the shapes contained in nodes. The first interaction, highlightable, highlights the edges in red, while the second interaction, highlightable2, highlights the connected shapes.
What Have You Learned in This Chapter?
This chapter covered a number of essential interactions provided by Roassal. These interactions are intended to let you collect more relevant information through simple actions triggered by moving the mouse. The chapter covers the following: