© Alexandre Bergel 2022
A. BergelAgile Visualization with Pharohttps://doi.org/10.1007/978-1-4842-7161-2_7

7. Shapes

Alexandre Bergel1  
(1)
Santiago, Chile
 

Shapes are visual elements meant to be added to a canvas. A shape may be configured using various aspects, including color, border, line thickness, and many other parameters. This chapter details a number of shapes supported by Roassal.

All the code provided in this chapter is available at https://github.com/bergel/AgileVisualizationAPressCode/blob/main/02-03-Shapes.txt.

Box

A box is modeled with the RSBox class. For example, the following script adds a box to a canvas:
c := RSCanvas new.
box := RSBox new.
c add: box.
c open

Without any settings, as in this example, a box is gray and has a default size of 10 pixels per side. Its position is (0, 0), which corresponds to the center of the canvas when open.

The width and the height of a box can be set using width: and height:. Both expect a positive number (a float or integer). The size: message takes a number as a parameter and sets the height and the width. The extent: message, expecting a point, can be used to set the height and width in one message.

The color is set using color: and taking a Color object as an argument.

A box may have a corner radius, which gives it rounded corners. The cornerRadius: method expects a positive number greater than or equal to 0. Consider the following example, which sets a color, a corner radius, and a size (see Figure 7-1):
c := RSCanvas new.
r := Random seed: 42.
40 timesRepeat: [
    box := RSBox new width: (r nextInteger: 80); height: (r nextInteger: 80); cornerRadius: 10.
    box color: Color random translucent.
    box translateTo: (r nextInteger: 200) @ (r nextInteger: 200).
    c add: box.
].
c @ RSCanvasController.
c open
../images/489192_1_En_7_Chapter/489192_1_En_7_Fig1_HTML.jpg
Figure 7-1

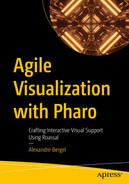
Some random boxes with a corner radius

Circle and Ellipse

A circle is modeled using RSCircle and an ellipse is modeled using RSEllipse. Consider the following example (see Figure 7-2):
c := RSCanvas new.
(30 to: 150 by: 10) do: [ :nb |
    b := RSCircle size: nb.
    c add: b ].
RSFlowLayout on: c nodes.
c @ RSCanvasController.
c open
../images/489192_1_En_7_Chapter/489192_1_En_7_Fig2_HTML.jpg
Figure 7-2

Some circles

The RSCircle and RSEllipse classes are similar to RSBox, since classes are subclasses of RSBoundingShape. Obviously, the height: and width: methods cannot be invoked on a circle. Furthermore, RSCircle and RSEllipse do not provide the method cornerRadius: as RSBox does .

Label

Labels are used to link visual elements to what they actually represent. Labels make a visualization interpretable and connected to a particular domain. The following example adds a label to a canvas:
c := RSCanvas new.
c add: (RSLabel text: 'Hello World').
c @ RSCanvasController.
c open
Labels are complex visual elements. For example, a label can have a particular font, a font size, and some visual attributes. The size of the font may be set using fontSize:. The following example uses a random font size for each word (see Figure 7-3):
words := String loremIpsum substrings.
c := RSCanvas new.
r := Random seed: 42.
words do: [ :w |
    label := RSLabel text: w.
    label fontSize: (r nextInteger: 30).
    label @ RSHighlightable red.
    c add: label ].
RSFlowLayout on: c shapes.
c @ RSCanvasController.
c open
../images/489192_1_En_7_Chapter/489192_1_En_7_Fig3_HTML.jpg
Figure 7-3

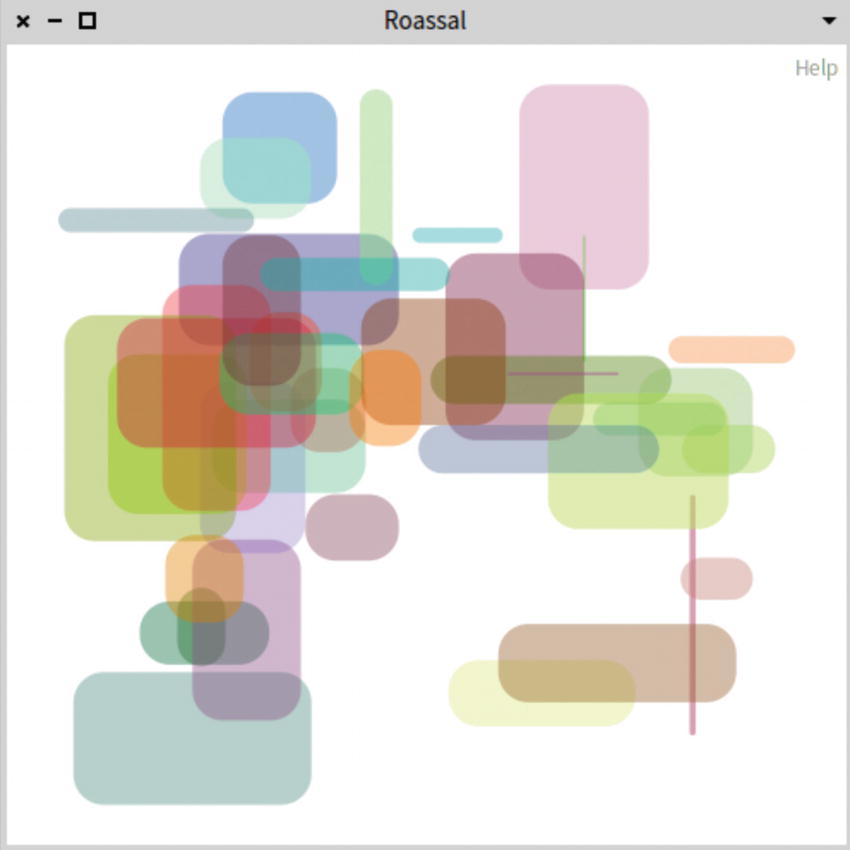
Labels of different sizes

The loremIpsum method defined on the class size of String gives a lorem ipsum, a classical placeholder text. Sending substrings to this text provides a list of words.

Most of the time, a shape cannot be considered a simple rectangular bounded area. In particular, a label has a baseline, which is useful when aligning textual shapes (see Figure 7-4). The baseline is the line that most letters “sit” on.
../images/489192_1_En_7_Chapter/489192_1_En_7_Fig4_HTML.png
Figure 7-4

Baseline of a label

Some layouts of Roassal take the baseline into consideration. The flow and horizontal layout can be configured using alignLabel to align labels along their baseline, for example:
words := String loremIpsum substrings.
c := RSCanvas new.
r := Random seed: 42.
words do: [ :w |
    label := RSLabel text: w.
    label fontSize: (r nextInteger: 30).
    label @ RSHighlightable red.
    c add: label ].
RSFlowLayout new alignLabel; on: c shapes.
c @ RSCanvasController.
c open
../images/489192_1_En_7_Chapter/489192_1_En_7_Fig5_HTML.jpg
Figure 7-5

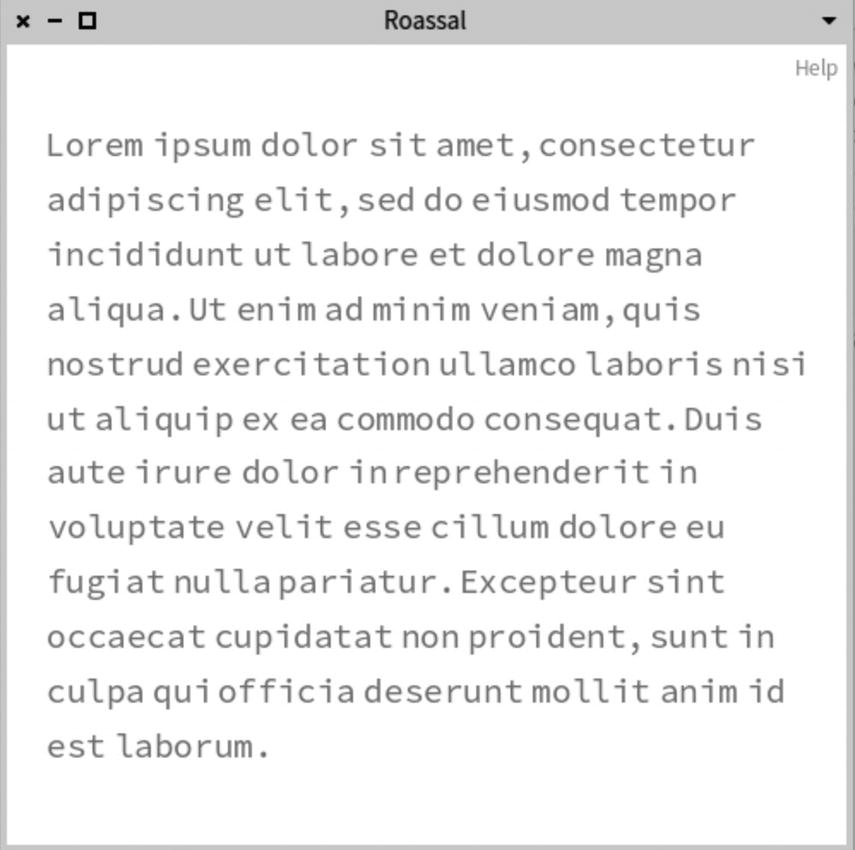
Layout along the label baselines

Roassal offers various strategies to compute the shape of a label. Such a strategy may have an impact when applying a layout or when composing shapes. The RSMetricsProvider class is the root class of the supported strategy and may be set in a RSLabel using the metricsProvider: method.

Each label is associated with a font. It may be set using the font: method. Consider the following example (see Figure 7-6):
c := RSCanvas new.
font := LogicalFont familyName: 'Source Code Pro' pointSize: 20.
words := String loremIpsum splitOn: ' '.
c addAll: (words collect: [ :word |
 RSLabel new
  font: font;
  text: word;
  yourself ]).
RSFlowLayout new gapSize: 10; on: c shapes.
c shapes @ RSHighlightable red.
c shapes @ RSDraggable.
c @ RSCanvasController.
c open
../images/489192_1_En_7_Chapter/489192_1_En_7_Fig6_HTML.jpg
Figure 7-6

Setting a font

Obviously, this script will work as expected if the Source Code Pro font is locally installed on your operating system. The list of available font names may be obtained by inspecting the following expression:
FreeTypeFontProvider current updateFromSystem families
Some font provides attributes can be used in a label. Consider the following example (see Figure 7-7):
styles := #(#italic #bold #normal #struckOut #underline).
c := RSCanvas new.
styles do: [ :aStyle |
    label := RSLabel text: aStyle asString.
    label perform: aStyle.
    c add: label ].
RSVerticalLineLayout on: c shapes.
c @ RSCanvasController.
c open
../images/489192_1_En_7_Chapter/489192_1_En_7_Fig7_HTML.jpg
Figure 7-7

Font attributes

Polygon

Polygons can be defined using the RSPolygon class. A polygon is defined as a set of controlled points. Consider the following example (see Figure 7-8):
c := RSCanvas new.
polygon := RSPolygon new
            points: { 0 @ -50 . 50 @ 0 . -50 @ 0 };
            color: 'FFAE0B'.
polygon cornerRadii: 5.
polygon @ RSDraggable.
polygon2 := RSPolygon new
            points: { 0 @ -50 . 50 @ 0 . -50 @ 0 };
            color: Color red translucent.
polygon2 @ RSDraggable.
polygon2 rotateByDegrees: 90.
polygon2 translateBy: 0 @ -50.
c add: polygon.
c add: polygon2.
c zoomToFit.
c open
../images/489192_1_En_7_Chapter/489192_1_En_7_Fig8_HTML.jpg
Figure 7-8

Example of two polygons

You can round a polygon’s corners using cornerRadii:, which expects a positive integer as an argument.

SVG Path

SVG is an expressive format to define a complex visual element. Roassal offers the RSSVGPath class to represent the SVG path as a shape. Consider the following example (see Figure 7-9):
c := RSCanvas new.
svgPath := 'M 10 80 C 40 10, 65 10, 95 80 S 150 150, 180 80'.
svg := RSSVGPath new svgPath: svgPath.
c add: svg.
c @ RSCanvasController.
c open
../images/489192_1_En_7_Chapter/489192_1_En_7_Fig9_HTML.jpg
Figure 7-9

Example of a SVG path

A SVG shape requires a string describing its path, itself encoded into some commands. For example, the token M is the command moveto, C is curveto, and S is smooth curveto. A description of these tokens can easily be found online. w3schools.com is a reliable source of documentation.

Numerous online services offer SVG paths ready to be consumed. Most search engines will indicate online resources to obtain paths. SVG paths can be used to define complex transformable icons. A slightly more complex example is shown in the following code (see Figure 7-10):
c := RSCanvas new.
svgPaths :=
    #('M17.46,22H6.54a4.55,4.55,0,0,1-3.42-7.54L9,7.75V4a1,1,0,0,1,2,0V
    8.12a1,1,0,0,1-.25.66l-6.12,7A2.54,2.54,0,0,0,6.54,20H17.46a2.54,
    2.54,0,0,0,1.91-4.22l-6.12-7A1,1,0,0,1,13,8.12V6.5a1,1,0,0,1,2,
    0V7.75l5.88,6.71A4.55,4.55,0,0,1,17.46,22Z'
    'M15,4.12H9a1,1,0,0,1,0-2h6a1,1,0,0,1,0,2Z'
    'M19,15H10a1,1,0,0,1,0-2h9a1,1,0,0,1,0,2Z'
    'M7,18a1,1,0,0,1-1-1,1,1,0,0,1,.08-.38.93.93,0,0,1,.21-.33,1,1,0,0,
    1,1.42,0,1,1,0,0,1,.21.33A.84.84,0,0,1,8,17a1,1,0,0,1-1,1Z'
    'M11,21a1,1,0,0,1-.38-.08.93.93,0,0,1-.33-.21,1,1,0,0,1,
    0-1.42.93.93,0,0,1,.33-.21,1,1,0,0,1,1.09.21A1,1,0,0,1,11,21Z'
    'M15,18l-.19,0a.6.6,0,0,1-.19-.06.76.76,0,0,
    1-.18-.09l-.15-.12A1.05,1.05,0,0,1,14,17a1,1,0,0,1,.08-.38.93.93,0,0,1,
    .21-.33,1.58,1.58,0,0,1,.15-.12.76.76,0,0,1,.18-.09.6.6,0,0,1,
    .19-.06,1,1,0,0,1,.9.27.93.93,0,0,1,.21.33A1,1,0,0,1,16,17a1,1,0,0,1-1,1Z'
    'M12,12a1.05,1.05,0,0,1-.71-.29,1.15,1.15,0,0,1-.21-.33.94.94,0,0,
    1,0-.76,1,1,0,0,1,.21-.33A1,1,0,0,1,12.2,
    10l.18.06.18.09.15.12a1.15,1.15,0,0,1,.21.33A1,1,0,0,1,13,11a1,1,
    0,0,1-1,1Z'
    ).
25 timesRepeat: [
    aRandomColor := Color random translucent.
    svg := svgPaths collect: [ :path | RSSVGPath new svgPath: path ] as: RSGroup.
    svg color: aRandomColor.
    shape := svg asShape.
    c add: shape.
].
RSGridLayout new lineItemsCount: 5; on: c shapes.
c @ RSCanvasController.
c open
../images/489192_1_En_7_Chapter/489192_1_En_7_Fig10_HTML.jpg
Figure 7-10

Example of SVG-based icons

These SVG paths are from svgrepo.com and are distributed under the public domain license.

Common Features

All the shapes described so far inherit from the RSBoundingShape class. Therefore, a number of common features are supported for all these shapes.

Color may be set using color:, which accepts either a color object (e.g., Color blue or Color r: 0.5 g: 0.3 b: 0.2) or a symbol (e.g., #red, #cyan). If a symbol is provided, it is executed on the Color class. Methods defined on the class side of Color represent valid symbols to be provided to color:.

As mentioned, each shape has a position, which can be modified at will. A shape can be translated using:
  • translateBy: aDeltaPoint, which moves a shape by a given step expressed as a point.

  • translateTo: aPoint, which moves a shape to a new position.

These two methods move a shape according to its center. A shape may be translated by considering a reference point as a corner. The following methods may be executed: translateTopLeftTo:, translateTopRightTo:, translateBottomRightTo:, and translateBottomLeftTo:. For example, translateTopLeftTo: aPoint moves the top-left corner of a shape to a particular location. These methods help you easily fine-tune the shapes’ positions. As an illustration, the following script locates a label on the top-left corner of the window:
c := RSCanvas new.
lbl := RSLabel text: 'Top left corner'.
c add: lbl.
lbl setAsFixed.
lbl translateTopLeftTo: 0 @ 0.
c open
Each shape contains a transformation matrix that is useful to express geometrical operations. In particular, a shape offers the scaleBy: and rotateByDegrees: methods. Here is an example of rotating a shape (see Figure 7-11):
c := RSCanvas new.
(0 to: 90 count: 10) do: [ :rotation |
    lbl := RSLabel text: 'Hello world'.
    lbl color: Color gray translucent.
    lbl rotateByDegrees: rotation.
    lbl @ RSHighlightable red.
    lbl translateTopLeftTo: 0 @ 0.
    c add: lbl ].
c @ RSCanvasController.
c open
../images/489192_1_En_7_Chapter/489192_1_En_7_Fig11_HTML.jpg
Figure 7-11

Rotating a shape

A border can be set on a shape by using borderColor:, which accepts a color (object or symbol) as an argument. Consider the example in the following code (see Figure 7-12):
c := RSCanvas new.
r := Random seed: 42.
40 timesRepeat: [
    box := RSBox new
            width: (r nextInteger: 80);
            height: (r nextInteger: 80);
            color: Color gray;
            cornerRadius: 10.
    box borderColor: #black.
    box color: Color random translucent.
    box translateTo: (r nextInteger: 200) @ (r nextInteger: 200).
    c add: box.
].
c @ RSCanvasController.
c open
../images/489192_1_En_7_Chapter/489192_1_En_7_Fig12_HTML.jpg
Figure 7-12

Rounded boxes with a thin black border

Borders are modeled with the RSBorder class, which offers many possibilities. For example, a dashed pattern can be provided using dashArray:. Consider the following example, which sets an animation on the dash (see Figure 7-13):
c := RSCanvas new.
b := RSBorder new color: Color blue.
b dashArray: #(5 1 5).
(30 to: 60 by: 5) do: [ :nb |
 box := RSBox new size: nb; cornerRadius: 10.
 ellipse := RSEllipse new width: nb; height: nb + 10.
 box border: b.
 ellipse border: b.
 c add: box; add: ellipse ].
RSFlowLayout on: c shapes.
c @ RSCanvasController.
c newAnimation
 from: 0;
 to: 40;
 on: b set: #dashOffset:.
c open
../images/489192_1_En_7_Chapter/489192_1_En_7_Fig13_HTML.jpg
Figure 7-13

Dashed borders

I encourage you to browse the definition of the RSBorder class to see an exhaustive list of how borders are handled.

Model

A shape can have a model object that it is intended to represent. All the shapes defined in this chapter do not have a model object. Setting a model in a shape is useful to define lines, use a normalizer, and set interactions. Having shapes that support a model object is a significant advantage that Roassal has over other visualization engines.

A model is simply set on a shape using model:. For example, you can define a group of circles, each representing a number, as follows:
c := RSCanvas new.
numbers := 1 to: 9.
numbers do: [ :nb |
    circle := RSCircle new.
    circle model: nb.
    circle @ RSPopup.
    c add: circle ].
RSGridLayout on: c shapes.
c zoomToFit.
c open

The script creates nine circles in a canvas. Each circle has a number, and the represented numbers range from 1 to 9. Each circle has a popup interaction, which makes a little window appear when the mouse is above a circle. The popup interaction obtains a textual representation of each model object to define the small window’s content.

This revision of the previous example uses a normalizer to assign a particular size and color to each circle (see Figure 7-14):
c := RSCanvas new.
numbers := 1 to: 9.
numbers do: [ :nb |
    circle := RSCircle new.
    circle model: nb.
    circle @ RSPopup.
    c add: circle ].
RSNormalizer size
    shapes: c nodes;
    from: 5; to: 20;
    normalize: #yourself.
RSNormalizer color
    shapes: c nodes;
    from: Color gray; to: Color red;
    normalize: [ :aNumber | aNumber raisedTo: 3 ].
RSFlowLayout on: c shapes.
c zoomToFit.
c open
../images/489192_1_En_7_Chapter/489192_1_En_7_Fig14_HTML.jpg
Figure 7-14

Normalizing the size and color using models

Another significant benefit of using a model object is to enjoy the support of the Pharo’s Inspector. Chapter 13 is dedicated to that topic.

Line

Although apparently simple, representing lines remains a complex task. As any other shape, a line has many visual attributes (e.g., width, color, style, and shapes as extremities). Difficulties in handling lines include the way they are built and how to react to user interactions. In its simplest form, a line may be set between two points. However, the way a line has to be configured becomes more complex when a line connect two shapes. For example, the line needs to be adapted when one of its extremities is translated.

Lines are defined by RSAbstractLine and its subclasses:
  • RSLine describes a direct line between two points or shapes.

  • RSPolyline represents a line with multiple control points.

  • RSBezier represents a Bezier line with two, three, or four control points.

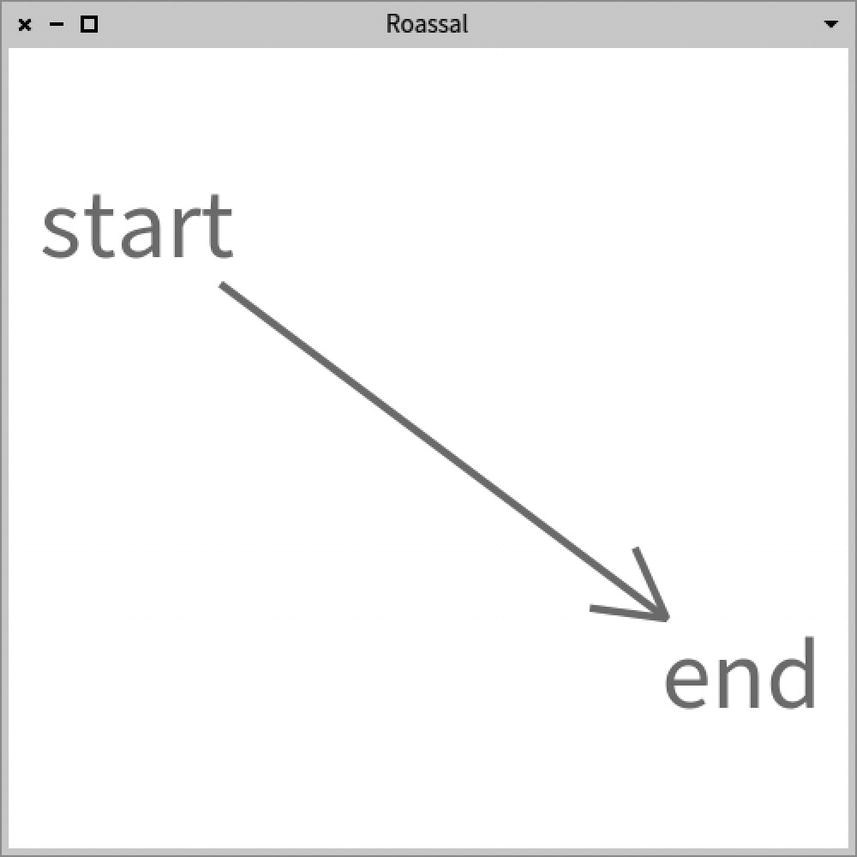
  • RSArrowedLine models a straight arrowed line between two points.

RSLine is the most commonly employed line. Consider the following example:
c := RSCanvas new.
line := RSLine new.
line from: 30 @ 40.
line to: 150 @ 120.
c add: line.
c open
In this example, the two extremities of the line are specified as points. A line is drawn from the point (30, 40) to (150, 120). A line can also connect two shapes. In this case, a shape can be provided when invoking from: and to:. Consider the following example:
c := RSCanvas new.
box := RSBox new.
circle := RSCircle new.
c add: box; add: circle.
box @ RSDraggable.
circle @ RSDraggable.
circle translateTo: 50 @ 40.
line := RSLine new.
line from: box.
line to: circle.
c add: line.
c open

The two shapes—box and circle—are draggable. Moving one of these leaves the line properly attached to the shape.

Line Attach Point

The junction between a line and a shape is driven by a particular object, called an attach point. An attach point can be set in a line by simply sending attachPoint: to it with the attach point as the parameter. Consider the example in the following code (see Figure 7-15):
c := RSCanvas new.
box := RSBox new.
circle := RSCircle new.
c add: box; add: circle.
box @ RSDraggable.
circle @ RSDraggable.
"We make the box and circle translucent"
{ box . circle } asGroup translucent.
circle translateTo: 50 @ 40.
line := RSLine new.
line color: Color red.
line from: box.
line to: circle.
line attachPoint: RSBorderAttachPoint new.
c add: line.
c zoomToFit.
c open
../images/489192_1_En_7_Chapter/489192_1_En_7_Fig15_HTML.jpg
Figure 7-15

Using a border attach point

The previous example uses a border attach point as a way to make the extremities stick to the border of those shapes. The RSAttachPoint class is the root of the attach point class hierarchy. It may happen that some layout requires particular attach points. For example, a vertical tree layout may be combined with a vertical attach point.

The RSAbstractLine class provides useful shortcut methods, including withBorderAttachPoint, withCenteredAttachPoint, withHorizontalAttachPoint, and withVerticalAttachPoint. In the previous script, you can replace the line attachPoint: RSBorderAttachPoint new expression with line withBorderAttachPoint.

Line Marker

A marker is a decoration that can be set on a line. A line may have zero, one, or more markers, located at a position anywhere between the two extremities. Any shape could serve as a marker by simply sending asMarker to it. Consider the following example (see Figure 7-16):
c := RSCanvas new.
box := RSBox new.
circle := RSCircle new.
c add: box; add: circle.
box @ RSDraggable.
circle @ RSDraggable.
circle translateTo: 50 @ 40.
line := RSLine new.
line withBorderAttachPoint.
line marker: (RSCircle new size: 5; color: #red) asMarker.
line from: box.
line to: circle.
c add: line.
c zoomToFit.
c open
../images/489192_1_En_7_Chapter/489192_1_En_7_Fig16_HTML.jpg
Figure 7-16

Line with a marker

The RSAbstractLine class offers an API to define and configure markers. A shape is converted to a marker by simply sending asMarker to it, returning an instance of the class RSMarker. A marker is added to a line shape using one of these messages:
  • markerStart: To set the provided marker at the origin of the line, i.e., where the line starts.

  • markerEnd: To set the marker at the target, i.e., where the line ends.

  • marker: To set the marker at both extremities of the line.

To see the effect of positioning the marker, consider the following code snippet (see Figure 7-17):
c := RSCanvas new.
markerShape := RSPolygon new
        privatePoints: { -5@9 . 0@0 . 5@9 . 0@0 };
        border: (RSBorder new width: 1);
        asMarker.
labelStart := RSLabel text: 'start'.
labelEnd := RSLabel text: 'end'.
labelStart @ RSDraggable.
labelEnd @ RSDraggable.
c add: labelStart.
c add: labelEnd.
labelEnd translateBy: 80 @ 60.
line := RSLine new.
line from: labelStart.
line to: labelEnd.
line withBorderAttachPoint.
line markerEnd: markerShape.
c add: line.
c zoomToFit.
c open
../images/489192_1_En_7_Chapter/489192_1_En_7_Fig17_HTML.jpg
Figure 7-17

Line with a marker

Since arrowed line are commonly used, a dedicated class, called RSArrowedLine , is provided for that purpose. The previous script can be rewritten using an arrowed line, as follows:
c := RSCanvas new.
labelStart := RSLabel text: 'start'.
labelEnd := RSLabel text: 'end'.
labelStart @ RSDraggable.
labelEnd @ RSDraggable.
c add: labelStart.
c add: labelEnd.
labelEnd translateBy: 80 @ 60.
line := RSArrowedLine new.
line from: labelStart.
line to: labelEnd.
line withBorderAttachPoint.
c add: line.
c zoomToFit.
c open
The RSArrowedLine class can be used to produce arrowed lines without explicitly defining markers. In addition to configuring the visual shape of a marker, the position of a marker on the line may be set using two methods:
  • offset: Sets a fixed number of pixels between the extremity and the marker.

  • offsetRatio: Sets a ratio, between 0.0 and 1.0, to determine the position of the marker.

Moving the marker away from the extremity is very useful to avoid arrow cluttering (see Figure 7-18):
c := RSCanvas new.
markerShape := RSPolygon new
        privatePoints: { -3 @ 9 . 0 @ 0 . 3 @ 9 . 0 @ 0 };
        border: (RSBorder new width: 1);
        asMarker.
markerShape offsetRatio: 0.3.
target := RSLabel text: 'target'.
c add: target.
starts := RSCircle models: (1 to: 20).
starts @ RSDraggable.
c addAll: starts.
starts do: [ :startShape |
    line := RSLine new.
    line from: startShape.
    line to: target.
    line withBorderAttachPoint.
    line markerEnd: markerShape.
    c add: line.
].
RSForceBasedLayout new charge: -300; on: c nodes.
c zoomToFit.
c open
../images/489192_1_En_7_Chapter/489192_1_En_7_Fig18_HTML.jpg
Figure 7-18

Offset on arrow markers

Removing the markerShape offsetRatio: 0.3. line has the effect of having all the markers on the border of the label target. All the markers superimpose each other, which defeats the purpose of having markers. Having distance between the marker and the target is useful to avoid clutter.

Line with Control Points

The RSLine and RSArrowedLine classes represent a straight line between two extremities. RSBezier and RSPolyline are two kinds of lines that accept control points. Consider the following example (see Figure 7-19):
canvas := RSCanvas new.
canvas add: (RSBezier new
                color: Color red;
                controlPoints: { (0 @ 0). (100 @ 100). (200 @ 0). (300 @ 100)}).
canvas open
../images/489192_1_En_7_Chapter/489192_1_En_7_Fig19_HTML.jpg
Figure 7-19

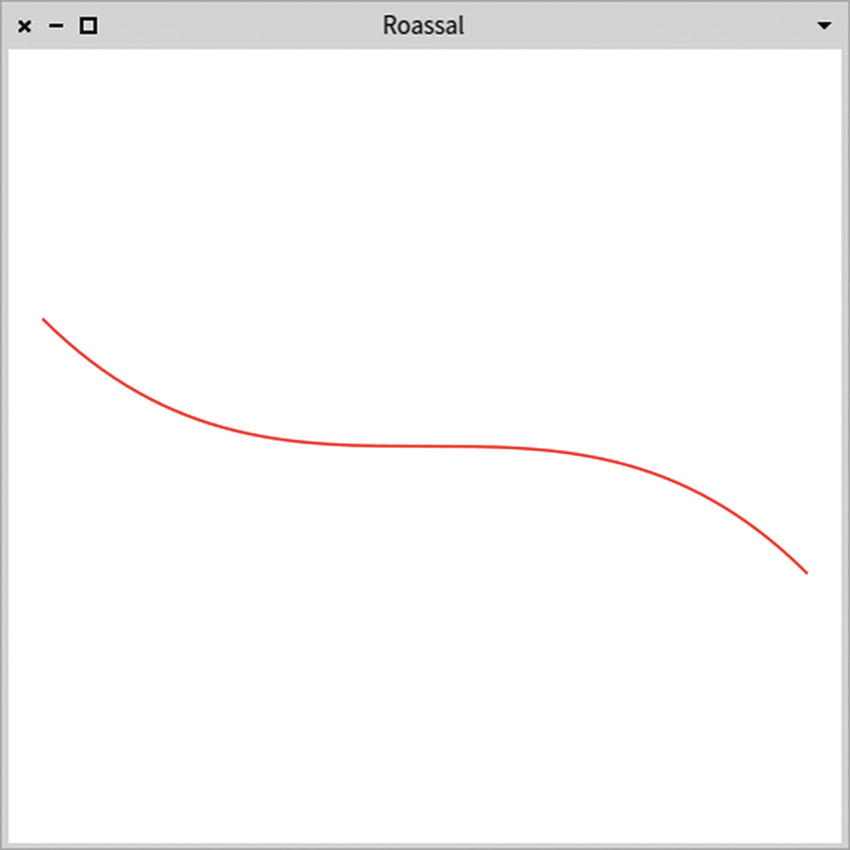
A simple Bezier line

In the previous example, the control points are explicitly provided and remain static. If the extremities of a Bezier line can be dragged, the control points cannot be static anymore and must be determined. For that purpose, Roassal offers a class hierarchy for controlled points and its root class is RSAbstractCPController. Consider the following example (see Figure 7-20):
canvas := RSCanvas new.
box1 := RSBox new color: Color blue.
box2 := RSBox new color: Color red.
box2 translateTo: 100 @ -200.
box1 @ RSDraggable.
box2 @ RSDraggable.
canvas add: box1; add: box2.
bezierLine := RSBezier new
    withVerticalAttachPoint;
    from: box1;
    to: box2;
    controlPointsController: (
            RSBlockCPController new
                block: [ :aLine |
                    | mid |
                       mid := (box1 position + box2 position) / 2.
                    {(box1 position) .
                    (box1 position x @ mid y) .
                    (box2 position x @ mid y) .
                    (box2 position)} ];
                yourself);
  yourself.
canvas add: bezierLine.
canvas zoomToFit.
canvas open
../images/489192_1_En_7_Chapter/489192_1_En_7_Fig20_HTML.jpg
Figure 7-20

A Bezier line with dynamic controlled points

Control points are computed at each translation of the extremities when using RSBlockCPController. The block takes a line as an argument and has to return an array of three or four points. A number of controllers are provided. For example, the previous script can be rewritten:
canvas := RSCanvas new.
box1 := RSBox new color: Color blue.
box2 := RSBox new color: Color red.
box2 translateTo: 100 @ -200.
box1 @ RSDraggable.
box2 @ RSDraggable.
canvas add: box1; add: box2.
bezierLine := RSBezier new
    withVerticalAttachPoint;
    from: box2;
    to: box1;
    controlPointsController: RSVerticalCPAPController new;
  yourself.
canvas add: bezierLine.
canvas zoomToFit.
canvas open

The RSVerticalCPAPController controller replaces the control points that are manually specified. Similarly, RSHorizontalCPAPController defines control points that are adequate for an horizontal alignment.

What Have You Learned in This Chapter?

This chapter presents the essential shapes provided by Roassal. It focuses on the following:
  • Simple shapes, including boxes, circles, ellipses, and labels

  • The benefits of having a model behind a shape

  • A line may be set between two points or two shapes

  • Bezier lines and polylines can have controlled points, statically or dynamically computed

The coming chapters will build on top of the notions presented in this chapter.

..................Content has been hidden....................

You can't read the all page of ebook, please click here login for view all page.
Reset
52.15.147.20