
You may have heard about “rooting” your device. You’ve already probably done it and are enjoying its benefits. In this chapter, we will take a look at what it means to root your device, what benefits you can get out of it, and how to actually root a device. We also take a look at some of the things we normally do on an emulator, but this time on the device proper.
The Internet is full of forums where hapless users bemoan their failed efforts at rooting. The perils of a bad rooting session could mean the infamous “bricking” of your device, essentially rendering it completely useless save for securing loose papers on your desk during a windy day where you’ve left your windows open. I insist that if you wish to follow along with our rooting exercise, you do it on a phone that is not your daily driver where you save all your data. If you have the means and are so inclined, I recommend you pick up a cheap used Android phone and use that instead. I’ll talk you through the steps on how I rooted my Google Pixel XL in this chapter. The process should be the same for other devices as well. Samsung’s will be trickier, and I do not recommend that you use my technique if you have a Samsung. I will expand on the rooting processes as I gather more data. I will make these available on my companion site to this book which is www.aas2book.com.
What Is Root?
Root refers to the Linux or Unix administrator account. Often called the superuser, the root user is able to modify all parts of a Unix system. It has the highest access rights and allows a user to do things like create and delete other users, read and change any part of the filesystem or configuration, install and remove software on the system, and view all network traffic and process-related information on that system. Essentially, if you have root on a Unix system, you can do anything to it as the root user.
On a Linux system, to switch to the root user, you can invoke the su command which is called the substitute user command. If you know the root password, invoking su will first prompt you for the root password and then drop you into a root shell. You will know you are in a root shell because the prompt usually changes to a #.
Why Root?
There are many reasons you may want to root your device. Some that come to mind include the desire to customize your device how you want to. For example, if you’re not satisfied with how the system fonts look, or how nav buttons look, then you can easily change that when you have root on your device. Similarly, you may want to remove OEM bundled system applications that take up unnecessary space on your device. You may want to take a look at the data that apps are writing to the file system, or you may want to debug your system. There are also many malicious reasons why someone would want to root an Android device. Some of the most popular reasons are for downloading and running cracked software without paying for it or watching content that has DRM or digital rights management encryption on it – pirating.
The first character indicates if the entry is a directory. If it is, it will have a d in the first character space. The next three characters tell you if the owner and creator (in the third column) of the file can read (r), write (w), or execute (x) the file. The next three tell you the access permissions of the group (in the fourth column). The last three characters tell you what permissions others or “the world” has. If you look at the preceding entry called symbols, you will see that the owner of the file, root, has read and write access to the file. The root group has read, and the world also has read access to the file.
The two app bundle names are com.redteamlife.aas2.aas2client and com.redteamlife.aas2.aas2obfuscate. You will notice that aas2client has user and group id u0_a178, and aas2obfuscate has user and group id u0_a187. Notice that the world or other users can only execute (x) or list the directory of that app. They cannot actually read or write to those directories and files. As root, this restriction is lifted, and you can look in every app’s files and directories. We should pause here and understand why it is a bad idea to store any sensitive data like API keys and back-end system passwords on the filesystem of your app. If the owner of the phone roots his device, then he can go into your app data directory and read all the files that you have written.
Sometimes, you may want to run, test, and debug apps that do not run on the emulator. By rooting your device, you can run and debug these apps on your device. You may also want to do malware analysis, and in cases where malware can detect and refuse to run in an emulator, you can run them on a rooted device. I don’t recommend doing this unless you have set the device up properly where the malware cannot escape your device and network and proceed to wreak havoc elsewhere.
Rooting Safely
Unless you are very well aware of Android internals, you will have to rely on a third party to help root your phone. Here, again, it is important to know how your third-party app will root your device. Downloading root apps willy-nilly can get you into hot water, especially if the author has embedded some malicious backdoor code that allows him to return to your device whenever he wants and gain full control of it. The most popular mechanism of rooting that is out there presently is called Magisk. I will take you through the rooting process that Magisk uses. Magisk is an open source project which you can build yourself. You have the freedom to inspect the code to see exactly what it is doing and, therefore, can gain some reasonable confidence that no malicious intent exists. You can find Magisk here: https://github.com/topjohnwu/Magisk.
As I stressed earlier, I highly recommend getting a separate device to test your root first. You can of course use an Android emulator, but in some cases, there are apps that will verify you are running on an emulator by doing simple things like fetching the default Bluetooth adapter which will always be undefined or null if run on an emulator. If you absolutely have to root on your own device, then it goes without saying that you need to take a backup of all your data. The rooting method I outline will wipe your data partition anyway, so a backup is essential.
The Rooting Process
- 1.
Download the matching AOSP (Android Open Source Project) images that match our device
- 2.
Install Magisk Manager on the device via adb
- 3.
Extract the boot image from the AOSP image
- 4.
Patch the boot image through Magisk on the device
- 5.
Unlock the bootloader
- 6.
Flash the boot image that we patched onto the device
For the purposes of this chapter, the device I will use is the Google Pixel XL. Its codename is marlin, and it is running the latest OS version 10.0.0 (QP1A.191005.007.A3, Dec 2019). I will not be able to cover other devices’ rooting in this chapter. I do intend to test other devices with root and upload the write-ups to a companion website for this book [https://aas2book.com].
Getting the Factory Image
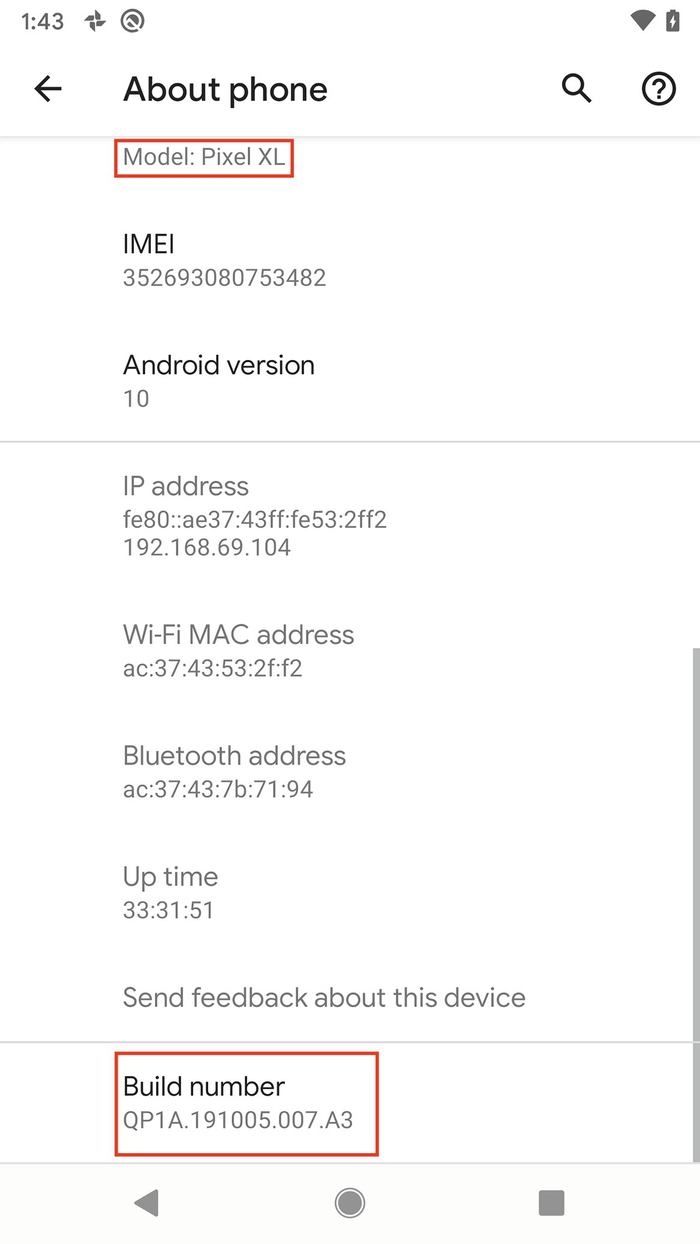
Getting the build number and the device model

The downloaded image and location of the files when decompressed

The decompressed structure of the factory image
Installing Magisk Manager

Downloading Magisk Manager v 7.51
Patching the boot.img File
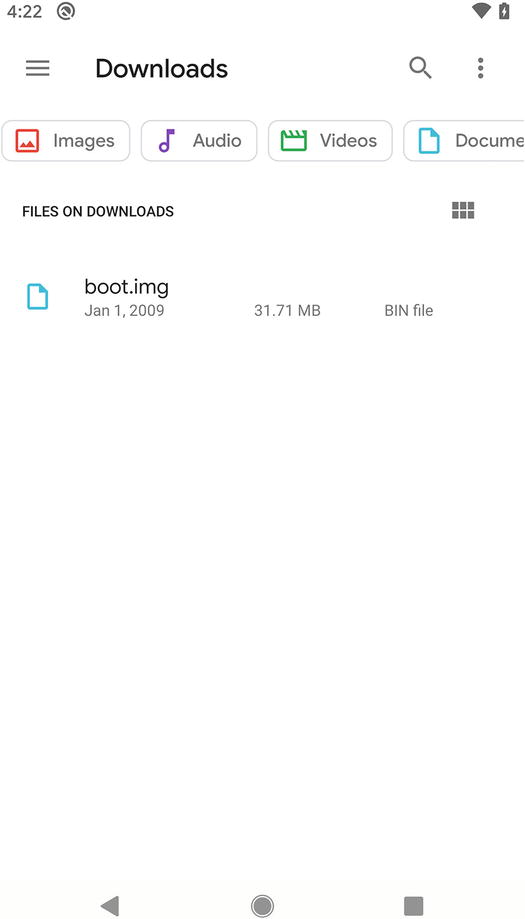
The uploaded boot.img file on the device

The Magisk Manager main screen when Magisk isn’t installed
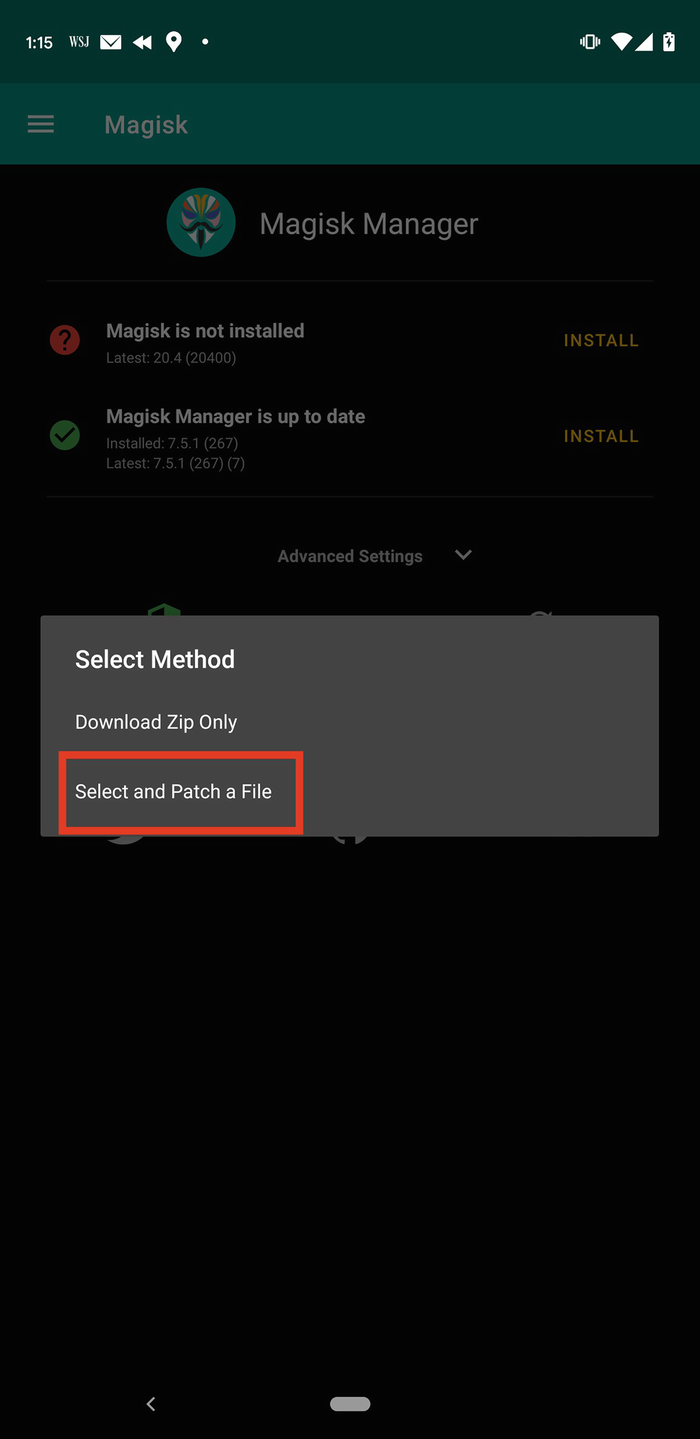
Selecting which method to use when installing Magisk

boot.img has been successfully patched
Unlock the Device Bootloader
Android devices have several partitions on their filesystems. Each partition will perform a specific function. The Android bootloader contains a set of instructions that help the device find and boot up the Android kernel. It contains a very minimal user interface and USB interface that allows you to interact with it (as you will soon see). It also permits users to flash further or additional partitions onto the device. Generally, the bootloader is always locked by the vendor of a device. This is to prevent users from arbitrarily flashing additional or different partitions onto the device to alter their behavior (typically rooting). The bootloader effectively offers up some level of protection (almost like write protection) where you can’t either accidentally or purposely flash images onto the device. Some vendors allow you to unlock the bootloader (which you need to flash our modified boot.img file); some do not. You may thus read about specific brands of phones being ideal candidates for rooting. These ideal candidates typically allow easy unlocking of their bootloader. In the absence of bootloader unlocking, the next available mechanism of gaining root access is to rely on a known vulnerability that gets you root by exploiting a weakness in the code to elevate privileges. These do not stay active for very long, however, as vendors typically find and patch these flaws in subsequent versions of their Android updates. On the Google Pixel range of phones, the bootloader is very easy to unlock as you will see. First, we have to reboot our device into the bootloader mode. Then we issue a command to unlock the bootloader itself.
As a matter of security, since an unlocked bootloader effectively gives an attacker much easier access to compromise a device by bypassing a security pin, whenever a bootloader is locked or unlocked, it wipes the entire data partition to safeguard the user’s private data.
PROCEEDING WITH THE BOOTLOADER UNLOCK IN THIS NEXT SECTION WILL WIPE ALL YOUR DATA!!! MAKE BACKUPS!

The Android bootloader screen

Confirmation on whether to unlock the bootloader
Flashing the Modified boot.img

The warning that the bootloader has been unlocked

The Google startup screen with unlocked padlock icon
Completing the Rooting Process

Magisk now shows up as installed

The Magisk superuser permission request window
You will notice that Magisk tells you that if you’re not sure, you should deny permission. In case you were rooted without your knowledge using Magisk, then you will get this notification each time a program wants root access. It’s kind of a safety mechanism. That’s it, you now have root on your device!
Looking a Little Bit Deeper
So what does Magisk actually do under the hood? I took a closer look at what Magisk does for the Google Pixel, and essentially, it boils down to a few main things.
Magisk will patch the ramdisk and copy over the magiskinit binary to the ramdisk. It will extract the magisk binary from within the magiskinit file. It then configures the boot process of the device so that it runs itself first, does some setup tasks required for staying active as a service, and then calls the normal boot process.

The patch that Magisk made from skip_initramfs to want_initramfs
Further details can be found on the Magisk website (https://topjohnwu.github.io/Magisk/details.html and https://topjohnwu.github.io/Magisk/tools.html).
Other Ways of Rooting
If we are purely after rooting for the purposes of being able to debug our applications and not so much for customizing the look and feel of the device, then it is possible to build an Android image from scratch using the AOSP source code. I state it here as an option, but will not be going into depth in this book.
Testing Frida
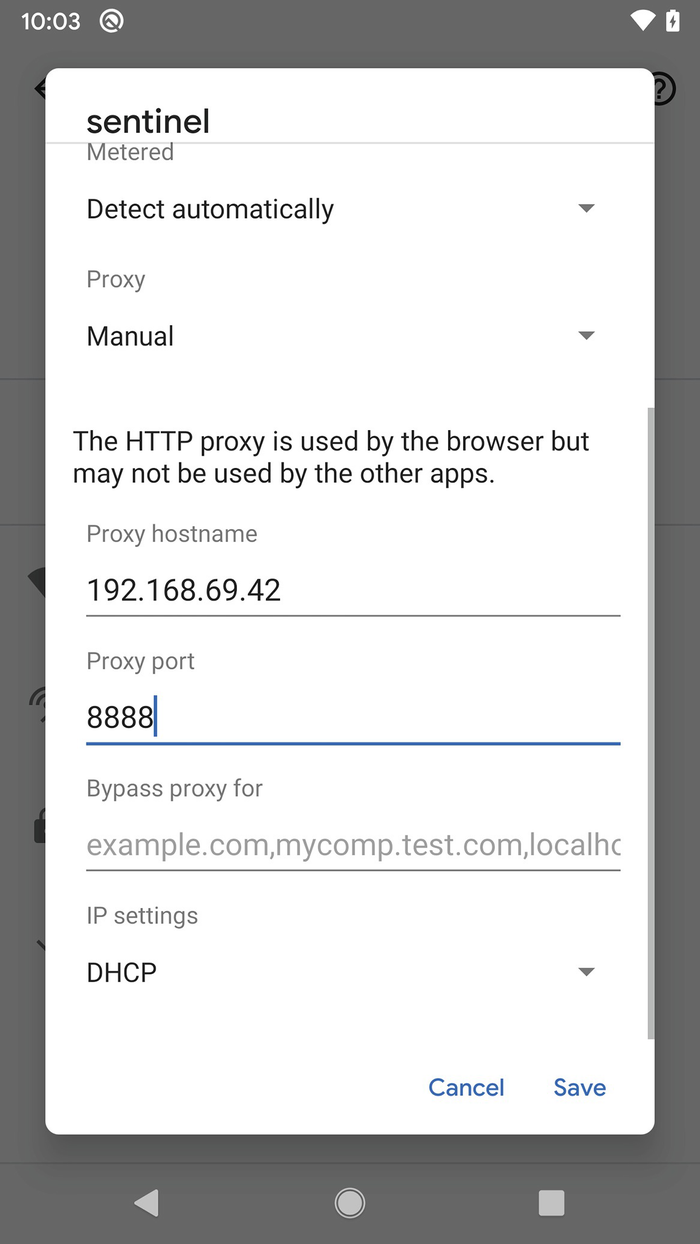
Configuring the proxy for your device’s Wi-Fi connection
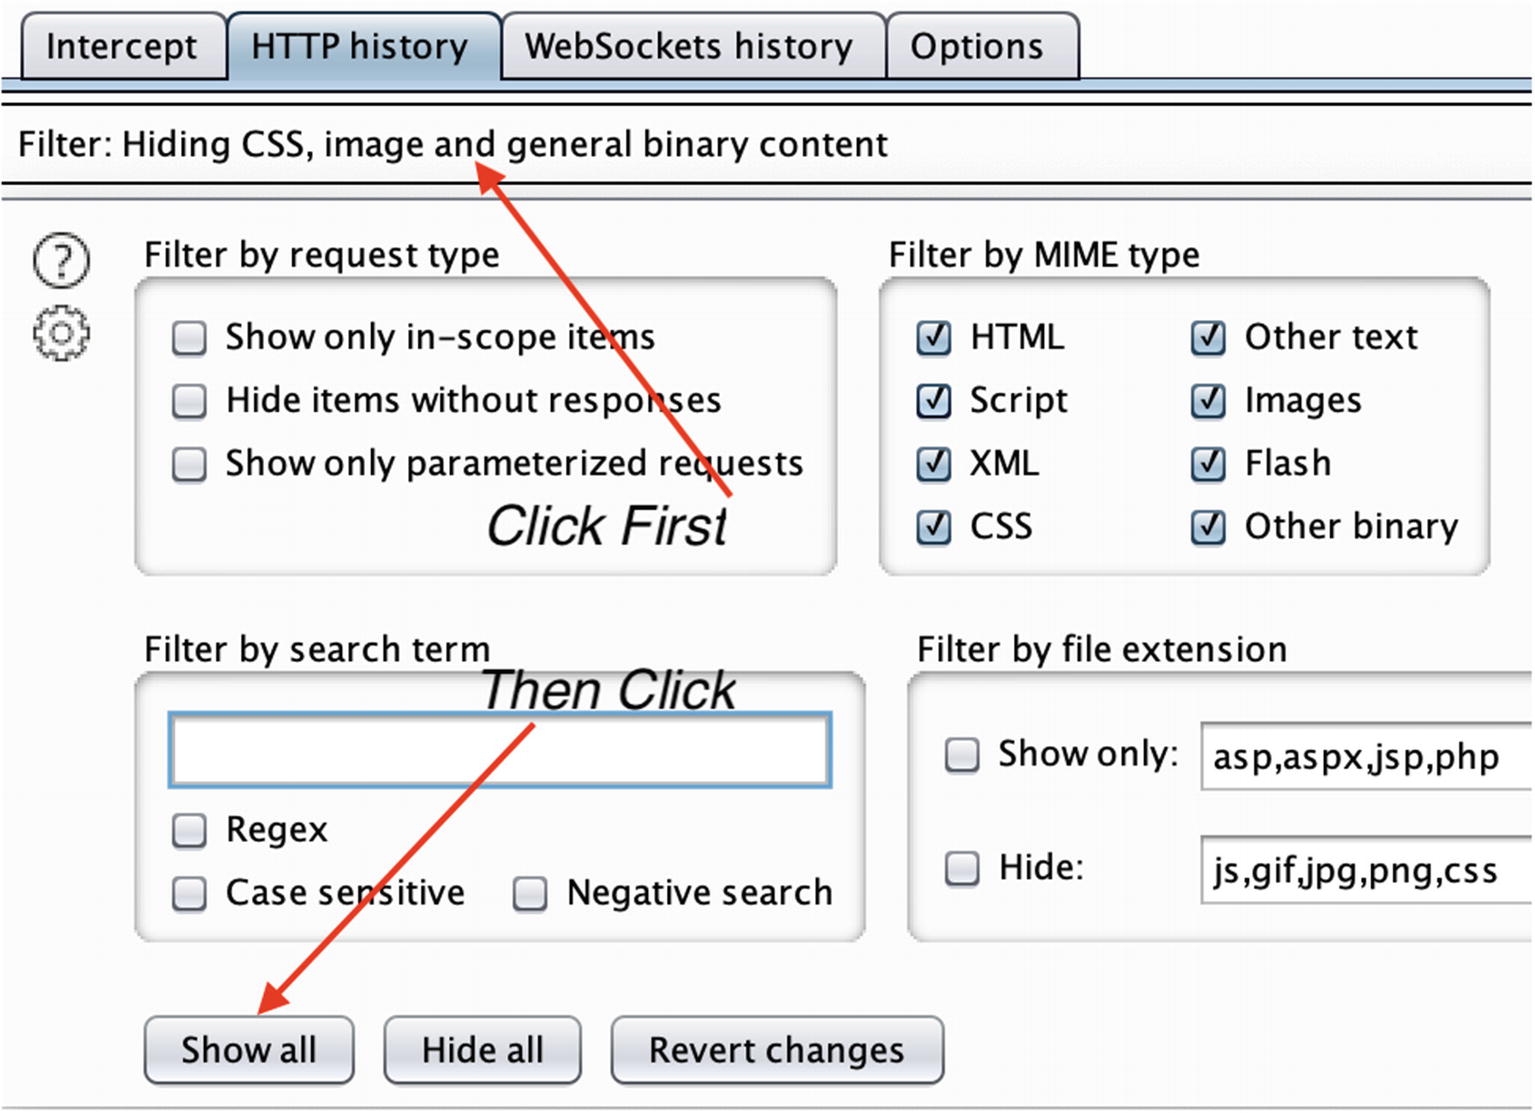
Changing Burp Proxy’s filter settings to show all traffic

HTTPS traffic requests going from the device and Google Play Store

HTTPS traffic responses returned from Google Play Store
Examining the Filesystem
A note about the no_backup directory: You will notice this directory inside all app data directories. Files that are placed in this directory do not get backed up. During an app or full backup of data, these files will be skipped over and ignored. Therefore, if there is sensitive data that you don’t want to go into a user’s backup, then you would place those files here. In Kotlin, you access the directory by using Context.getNoBackupDir [https://developer.android.com/reference/android/content/Context#getNoBackupFilesDir()] like this:
val noBackupDir = applicationContext.noBackupFilesDir
Then you can write or read files from this directory as you would normally using getFilesDir() [https://developer.android.com/reference/android/content/Context#getFilesDir()].
Hmm, that Crosswords.db looks interesting. Let’s take a look at that. Some device manufacturers will include the sqlite3 binary in your device. Some do not. My Google Pixel doesn’t come with it so I will copy the database file to my Mac and work on it there. I will first copy it over to /data/local/tmp and then use adb pull to download it to my Mac:
Look at that! All our clues and answers are stored in this database. In our previous hacking chapter, we pulled this data out the hard way even though I knew all along that you could pull it from the database, but the point I was trying to make is that there are other ways in which you can fetch data that an app uses.
You will see how Android designates the type of each of the key-value pairs as well. You can see strings, Booleans, long, and int values in the XML file. By altering these key-value pairs, you can, in most cases, affect the way the app works.
The databases and shared_prefs directories are usually places that I go to frequently because they contain a wealth of data that not only tells you about the inner workings of the app but also gives you an opportunity to change how an app behaves.
Detecting and Hiding Root
Rooting your device is all well and good, but you must keep in mind that there are others as well who will be rooting their devices. Then, when your apps run on those devices, they remain at the mercy of whatever the rooted device’s owner throws at it. Therefore, it makes sense to learn about detecting if a device is rooted or not. Banking applications often rely on root detection of Android devices. If a rooted device is detected, then the app will quit before any further communication or interaction takes place.
Looking for specific files that have been installed, for example, looking for the su command or even attempting to execute it. Looking for directories that may not originally exist on the Android system partition. The SuperSU root package would create an xbin directory.
Looking for installed packages by listing all the packages and looking for known names like com.topjohnwu.magisk for Magisk or other known root packages. Another thing that is done is a substring comparison where the detector will search for certain words in packages or in the filesystem.
Looking for test keys that Google ships with their testing or developer units. This is normally done by checking build tags on Android.
Looking for a writeable /system partition. The /system partition is not meant to be writeable and is always mounted read-only on non-rooted devices.
Defeating Root Detection
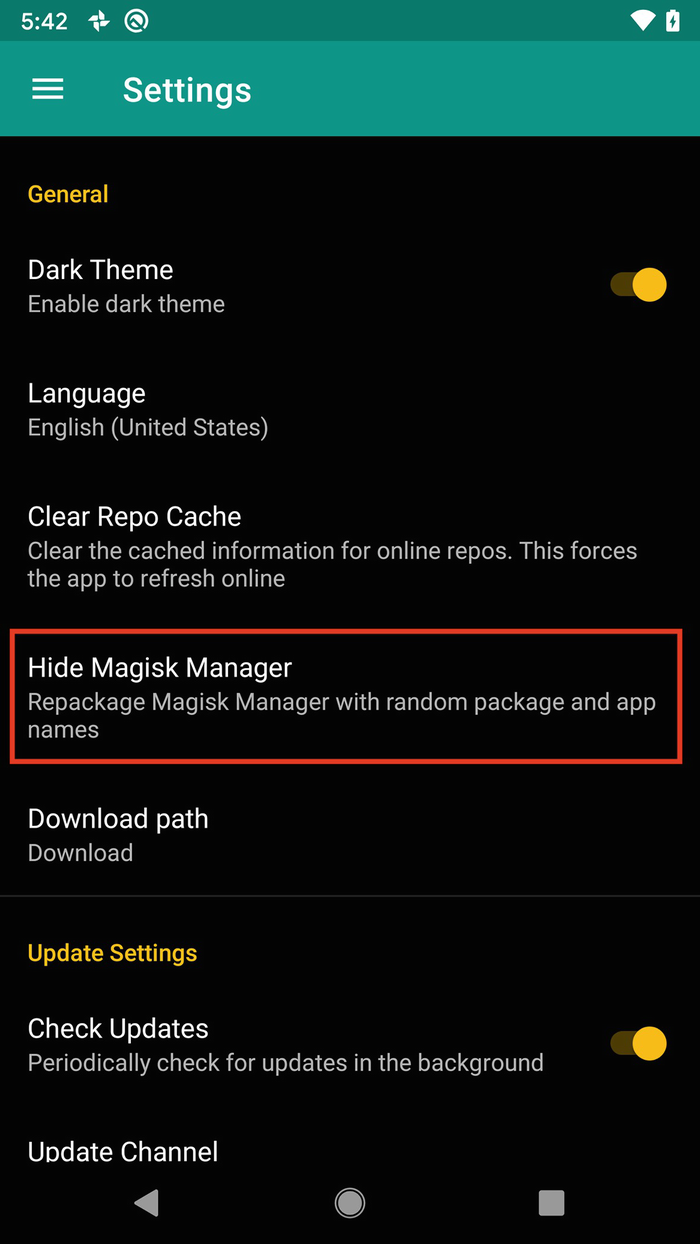
The setting to hide Magisk Manager

Renaming the Magisk Manager from Manager to a name of your choosing
Boom! No root detected! Our magiskhide cloaking did the trick. So, what have we learned? Well, once again, as the root user, you are all powerful. You can craft the entire look and feel of the device masking processes that you don’t want visible in however way you want to. The apps that run on the device that is rooted usually don’t stand a chance – yet another example of why you want to rethink what data you store on the device through your app.
There you have it. The line in bold shows that RootBeer has not detected that the device has been rooted.
Further Tools to Help Debugging
Breaking down the parameters we used for strace, the -e trace=openat means we want to only trace the openat syscall, the -f means follow any child processes or threads that the original app creates, and the -p is the PID or process id of the app. Using this approach, you can examine what apps installed on the device are doing, where they read from or write to, and which network hosts they communicate with.
One more app that’s similar to strace but is more Android aware is jtrace. jtrace [http://newandroidbook.com/tools/jtrace.html] is an app that is written by Jonathan Levin. Jonathan Levin is well known for his research in iPhone and Android internals, and his books are an absolute must read for anyone interested in the inner workings of Android. He developed jtrace to be more Android aware. It works in much the same way as strace. To get it running on your device, just download the archive, decompress it, and copy over the 64 bit ARM version of jtrace to your /data/local/tmp directory and run it from there. It takes the same -f and -p flags.
Summary
This chapter was a bit of a heavy one, but I feel like I have only scratched the surface of the rooting topic. For the purposes of this book, I will not go into further depth, but I will look toward covering a bit more about rooting in this book’s companion my site [https://aas2book.com].
The rooting process is an essential technique to learn if you are to truly move to testing your applications in depth. With a rooted device, you can really explore the full reaches of your device and then subject your app to stresses and attacks that can help to further strengthen it. With device rooting being made almost point and click, and the tools for breaking SSL Pinning or breaking encryption are again very much within reach of many, it makes sense to go this far in your security testing.