
Chapter 10. Data Persistence
Data persistence is a wide subject area. In this chapter we focus on selected topics, including:
-
Filesystem topics relating to the app-accessible parts of the filesystems (/sdcard and friends)—but we assume you know the basics of reading/writing text files in Java.
-
Persisting data in a database, commonly but not exclusively SQLite.
-
Reading data from the database, and doing various conversions on it.
-
Reading and writing the Preferences data, used to store small per-application customization values.
-
Some data format conversions (e.g., JSON and XML conversions) that don’t fit naturally into any of the other chapters.
-
The Android
ContentProvider, which allows unrelated applications to share data in the form of a SQLite cursor. We’ll focus specifically on the Android Contacts provider. -
Drag and drop, which might seem to be a GUI topic but typically involves using a
ContentProvider. -
FileProvider, a simplification of theContentProviderthat allows unrelated applications to share individual files. -
The
SyncAdaptermechanism, which allows data to be synchronized to/from a backend database; we discuss one example, that of synchronizing “todo list” items. -
Finally, we cover a new cloud database called Firebase from Google.
10.1 Reading and Writing Files in Internal and External Storage
Ian Darwin
Discussion
Every Android device features a fairly complete Unix/Linux filesystem hierarchy. Parts of it are “off-limits” for normal applications, to ensure that the device’s integrity and functionality are not compromised. Storage areas available for reading/writing within the application are divided into “internal” storage, which is private per application, and “public” storage, which may be accessed by other applications.
Internal storage is always located in the device’s “flash memory” area—part of the 8 GB or 32 GB of “storage” that your device was advertised with—under /data/data/PKG_NAME/. External storage may be on the SD card (which should technically be called “removable storage,” as it might be a MicroSD card or even some other media type). However, there are several complications.
First, some devices don’t have removable storage. On these, the external storage directory always exists—it is just in a different partition of the same flash memory storage as internal storage.
Second, on devices that do have removable storage, the storage might be removed at the time your application checks it. There’s no point trying to write it if it’s not there.
On these devices, as well, the storage might be “read-only” as most removable media memory devices have a “write-protect” switch that disables power to the write circuitry.
The Files API
Internal storage can be accessed using the Context methods openFileInput(String filename), which returns a FileInputStream object, or openFileOutput(String filename, int mode), which returns a FileOutputStream. The mode value should either be 0 for a new file, or Context.MODE_APPEND to add to the end of an existing file. Other mode values are deprecated and should not be used.
Once obtained, these streams can be read using standard java.io classes and methods (e.g., wrap the FileInputStream in an InputStreamReader and a BufferedReader to get line-at-a-time access to character data). You should close these when finished with them.
Alternatively, the Context method getFilesDir() returns the root of this directory,
and you can then access it using normal java.io methods and classes.
Example 10-1 shows a simple example of writing a file into this area and then reading it back.
Example 10-1. Writing and reading internal storage
try(FileOutputStreamos=openFileOutput(DATA_FILE_NAME,Context.MODE_PRIVATE)){os.write(message.getBytes());println("Wrote the string "+message+" to file "+DATA_FILE_NAME);}catch(IOExceptione){println("Failed to write "+DATA_FILE_NAME+" due to "+e);}// Get the absolute path to the directory for our app's internal storageFilewhere=getFilesDir();println("Our private dir is "+where.getAbsolutePath());try(BufferedReaderis=newBufferedReader(newInputStreamReader(openFileInput(DATA_FILE_NAME)))){Stringline=is.readLine();println("Read the string "+line);}catch(IOExceptione){println("Failed to read back "+DATA_FILE_NAME+" due to "+e);}
Accessing the external storage is, predictably, more complicated. The mental model of external storage is a removable flash-memory card such as an SD card. Initially most devices had an SD card or MicroSD card slot. Today most do not, but some still do, so Android always treats the SD card as though it might be removable, or might be present but the write-protect switch might be enabled. You should not access it by the directory name /sdcard, but rather through API calls. On some devices the path may change when an SD card is inserted or removed. And, Murphy’s Law being what it is, a removable card can be inserted or removed at any time; the users may or may not know that they’re supposed to unmount it in software before removing it.
Be prepared for IOExceptions!
For external storage you will usually require the READ_EXTERNAL_STORAGE or WRITE_EXTERNAL_STORAGE permission (note that WRITE implies READ, so you don’t need both):
<uses-permissionandroid:name="android.permission.WRITE_EXTERNAL_STORAGE"/>
The first thing your application must do is check if the external storage is even available. The method static String Environment.getExternalStorageState() returns one of almost a dozen String values, but unless you are writing a File Manager–type application, you only care about two: MEDIA_MOUNTED and MEDIA_MOUNTED_READ_ONLY. Any other values imply that the external storage directory is not currently usable. You can verify this as follows:
Stringstate=Environment.getExternalStorageState();println("External storage state = "+state);if(state.equals(Environment.MEDIA_MOUNTED_READ_ONLY)){mounted=true;readOnly=true;println("External storage is read-only!!");}elseif(state.equals(Environment.MEDIA_MOUNTED)){mounted=true;readOnly=false;println("External storage is usable");}else{println("External storage NOT USABLE");}
Once you’ve ascertained that the external storage is usable, you can create files and/or directories in it.
The Environment class exposes a bunch of public directory types, such as DIRECTORY_MUSIC for playable
music, DIRECTORY_RINGTONES for music files that should only be used as telephone ringtones, DIRECTORY_MOVIES
for videos, and so on. If you use one of these your files will be placed in the correct directory for the
stated purpose. You can create subdirectories here using File.mkdirs():
// Get the external storage folder for MusicfinalFileexternalStoragePublicDirectory=Environment.getExternalStoragePublicDirectory(Environment.DIRECTORY_MUSIC);// Get the directory for the user's public pictures directory.// We want to use it, for example, to create a new music album.FilealbumDir=newFile(externalStoragePublicDirectory,"Jam Session 2017");albumDir.mkdirs();if(!albumDir.isDirectory()){println("Unable to create music album");}else{println("Music album exists as "+albumDir);}
You could then create files in the subdirectory that would show up as the “album” “Jam Session 2017.”
The final category of files is “private external storage.” This is just a directory with your
package name in it, for convenience, and offers zero security—any application with the
appropriate EXTERNAL_STORAGE permission can read or write to it.
However, it has the advantage that it will be removed if the user uninstalls your app.
This category is thus intended for use for configuration and data files that are specific to your
application, and should not be used for files that logically “belong” to the user.
Directories in this category are accessed by passing null to the getExternalStorageDirectory() method,
as in Example 10-2.
Example 10-2. Reading and writing “private” external storage
// Finally, we'll create an "application private" file on /sdcard,// Note that these are accessible to all other applications!finalFileprivateDir=getExternalFilesDir(null);FilesemiPrivateFile=newFile(privateDir,"fred.jpg");try(OutputStreamis=newFileOutputStream(semiPrivateFile)){println("Writing to "+semiPrivateFile);// Do some writing here...}catch(IOExceptione){println("Failed to create "+semiPrivateFile+" due to "+e);}
The sample project FilesystemDemos includes all this code plus a bit more. Running it will produce the result shown in Figure 10-1.
See Also
For getting information about files, and directory listings, see Recipe 10.2. To read static files that are shipped (read-only) as part of your application, see Recipe 10.3. For more information on data storage options in Android, refer to the official documentation.
Source Download URL
The source code for this example is in the Android Cookbook repository, in the subdirectory FilesystemDemos (see “Getting and Using the Code Examples”).

Figure 10-1. FilesystemDemos in action
10.2 Getting File and Directory Information
Ian Darwin
Discussion
The File class has a number of “informational” methods. To use any of these, you must construct a File object containing the name of the file on which it is to operate. It should be noted up front that creating a File object has no effect on the permanent filesystem; it is only an object in Java’s memory. You must call methods on the File object in order to change the filesystem; there are numerous “change” methods, such as one for creating a new (but empty) file, one for renaming a file, and so on, as well as many informational methods. Table 10-1 lists some of the informational methods.
| Return type | Method name | Meaning |
|---|---|---|
|
|
|
|
|
Full name |
|
|
Relative filename |
|
|
Parent directory |
|
|
|
|
|
|
|
|
File modification time |
|
|
File size |
|
|
|
|
|
|
|
|
List contents if it’s a directory |
|
|
List contents if it’s a directory |
You cannot change the name stored in a File object; you simply create a new File object each time you need to refer to a different file.
Note
Standard Java as of JDK 1.7 includes java.nio.Files, which is a newer replacement for the File class,
but Android does not yet ship with this class.
Example 10-3 is drawn from desktop Java, but the File object operates the same in Android as in Java SE.
Example 10-3. A file information program
importjava.io.*;importjava.util.*;/*** Report on a file's status in Java*/publicclassFileStatus{publicstaticvoidmain(String[]argv)throwsIOException{// Ensure that a filename (or something) was given in argv[0]if(argv.length==0){System.err.println("Usage: FileStatus filename");System.exit(1);}for(inti=0;i<argv.length;i++){status(argv[i]);}}publicstaticvoidstatus(StringfileName)throwsIOException{System.out.println("---"+fileName+"---");// Construct a File object for the given fileFilef=newFile(fileName);// See if it actually existsif(!f.exists()){System.out.println("file not found");System.out.println();// Blank linereturn;}// Print full nameSystem.out.println("Canonical name "+f.getCanonicalPath());// Print parent directory if possibleStringp=f.getParent();if(p!=null){System.out.println("Parent directory: "+p);}// Check our permissions on this fileif(f.canRead()){System.out.println("File is readable by us.");}// Check if the file is writableif(f.canWrite()){System.out.println("File is writable by us.");}// Report on the modification timeDated=newDate();d.setTime(f.lastModified());System.out.println("Last modified "+d);// See if file, directory, or other. If file, print size.if(f.isFile()){// Report on the file's sizeSystem.out.println("File size is "+f.length()+" bytes.");}elseif(f.isDirectory()){System.out.println("It's a directory");}else{System.out.println("So weird, man! Neither a file nor a directory!");}System.out.println();// Blank line between entries}}
Take a look at the output produced when the program is run (on MS Windows) with the three command-line arguments shown, it produces the output shown here:
C:javasrcdir_file> java FileStatus / /tmp/id /autoexec.bat
---/---
Canonical name C:
File is readable.
File is writable.
Last modified Thu Jan 01 00:00:00 GMT 1970
It's a directory

---/tmp/id---
file not found

---/autoexec.bat---
Canonical name C:AUTOEXEC.BAT
Parent directory:
File is readable.
File is writable.
Last modified Fri Sep 10 15:40:32 GMT 1999
File size is 308 bytes.
As you can see, the so-called canonical name not only includes a leading directory root of C:, but also has had the name converted to uppercase. You can tell I ran that on an older version of Windows. On Unix, it behaves differently, as you can see here:
$ java FileStatus / /tmp/id /autoexec.bat
---/---
Canonical name /
File is readable.
Last modified October 4, 1999 6:29:14 AM PDT
It's a directory

---/tmp/id---
Canonical name /tmp/id
Parent directory: /tmp
File is readable.
File is writable.
Last modified October 8, 1999 1:01:54 PM PDT
File size is 0 bytes.

---/autoexec.bat---

file not found

$
This is because a typical Unix system has no autoexec.bat file. And Unix filenames (like those on the filesystem inside your Android device, and those on a Mac) can consist of upper- and lowercase characters: what you type is what you get.
The java.io.File class also contains methods for working with directories. For example, to list the filesystem entities named in the current directory, just write:
String[]list=newFile(".").list()
To get an array of already constructed File objects rather than strings, use:
File[]list=newFile(".").listFiles();
You can display the result in a ListView (see Recipe 8.2).
Of course, there’s lots of room for elaboration. You could print the names in multiple columns across or down the screen in a TextView in a monospace font, since you know the number of items in the list before you print. You could omit filenames with leading periods, as does the Unix ls program, or you could print the directory names first, as some “file manager"–type programs do. By using listFiles(), which constructs a new File object for each name, you could print the size of each, as per the MS-DOS dir command or the Unix ls -l command. Or you could figure out whether each object is a file, a directory, or neither. Having done that, you could pass each directory to your top-level function, and you would have directory recursion (the equivalent of using the Unix find command, or ls -R, or the DOS DIR /S command). Quite the makings of a file manager application of your own!
A more flexible way to list filesystem entries is with list(FilenameFilter ff). FilenameFilter is a tiny interface with only one method: boolean accept(File inDir, String fileName). Suppose you want a listing of only Java-related files (*.java, *.class, *.jar, etc.). Just write the accept() method so that it returns true for these files and false for any others. Example 10-4 shows the Ls class warmed over to use a FilenameFilter instance.
Example 10-4. Directory lister with FilenameFilter
importjava.io.*;/*** FNFilter - directory lister modified to use FilenameFilter*/publicclassFNFilter{publicstaticString[]getListing(StringstartingDir){// Generate the selective list, with a one-use File objectString[]dir=newjava.io.File(startingDir).list(newOnlyJava());java.util.Arrays.sort(dir);// Sorts by namereturndir;}/** FilenameFilter implementation:* The accept() method only returns true for .java , .jar, and .class files.*/classOnlyJavaimplementsFilenameFilter{publicbooleanaccept(Filedir,Strings){if(s.endsWith(".java")||s.endsWith(".jar")||s.endsWith(".dex"))returntrue;// Others: projects, ... ?returnfalse;}}
We could make the FilenameFilter a bit more flexible; in a full-scale application, the list of files returned by the FilenameFilter would be chosen dynamically, possibly automatically, based on what you were working on. File chooser dialogs implement this as well, allowing the user to select interactively from one of several sets of files to be listed. This is a great convenience in finding files, just as it is here in reducing the number of files that must be examined.
For the listFiles() method, there is an additional overload that accepts a FileFilter. The only difference is that FileFilter’s accept() method is called with a File object, whereas FileNameFilter’s is called with a filename string.
See Also
See Recipe 8.2 to display the results in your GUI. Chapter 11 of Java Cookbook, written by me and published by O’Reilly, has more information on file and directory operations.
10.3 Reading a File Shipped with the App Rather than in the Filesystem
Rachee Singh
Problem
The standard file-oriented Java I/O classes can only open files stored on “disk,” as described in Recipe 10.1. If you want to read a file that is a static part of your application (installed as part of the APK rather than downloaded), you can access it in one of two special places.
Solution
If you’d like to read a static file, you can place it either in the assets directory or in res/raw.
For res/raw, open it with the getResources() and openRawResource() methods, and then read it normally.
For assets, you access the file as a filesystem entry (see Recipe 10.1); Android maps this directory to file:///android_asset/ (note the triple slash and singular spelling of “asset”).
Discussion
We wish to read information from a file packaged with the Android application, so we will need to put the relevant file in the res/raw directory or the assets directory (and probably create the directory, since it is often not created by default).
If the file is stored in res/raw, the generated R class will have
an ID for it, which we pass into openRawResource(). Then we will read
the file using the returned InputStreamReader wrapped in a
BufferedReader. Finally, we extract the string from the
BufferedReader using the readLine() method.
If the file is stored in assets, it will appear to be in the file:///android_asset/ directory, which we can just open and read normally.
In both cases the IDE will ask us to enclose the readLine() function within a try-catch block since there is a possibility of it throwing an IOException.
For res/$$raw the file is named samplefile and is shown in Example 10-5.
Example 10-5. Reading a static file from res/raw
InputStreamReaderis=newInputStreamReader(this.getResources().openRawResource(R.raw.samplefile));BufferedReaderreader=newBufferedReader(is);StringBuilderfinalText=newStringBuilder();Stringline;try{while((line=reader.readLine())!=null){finalText.append(line);}}catch(IOExceptione){e.printStackTrace();}fileTextView=(TextView)findViewById(R.id.fileText);fileTextView.setText(finalText.toString());
After reading the entire string, we set it to the TextView in the Activity.
When using the assets folder, the most common use is for loading a web resource into a WebView.
Suppose we have samplefile.html stored in the assets folder;
the code in Example 10-6 will load it into a web display.
Example 10-6. Reading from assets
webView=(WebView)findViewById(R.id.about_html);webview.loadUrl("file:///android_asset/samplefile.html");
Figure 10-2 shows the result of both the text and HTML files.

Figure 10-2. File read from application resource
Source Download URL
The source code for this example is in the Android Cookbook repository, in the subdirectory StaticFileRead (see “Getting and Using the Code Examples”).
10.4 Getting Space Information About the SD Card
Amir Alagic
Discussion
Here is some code that obtains the information:
StatFsstatFs=newStatFs(Environment.getExternalStorageDirectory().getPath());doublebytesTotal=(long)statFs.getBlockSize()*(long)statFs.getBlockCount();doublemegTotal=bytesTotal/1048576;
To get the total space on the SD card, use StatFs in the android.os package. Use Environment.getExternalStorageDirectory().getPath() as a constructor parameter.
Then, multiply the block size by the number of blocks on the SD card:
(long)statFs.getBlockSize()*(long)statFs.getBlockCount();
To get size in megabytes, divide the result by 1048576. To get the amount of available space on the SD card, replace statFs.getBlockCount() with statFs.getAvailableBlocks():
(long)statFs.getBlockSize()*(long)statFs.getAvailableBlocks();
If you want to display the value with two decimal places you can use a DecimalFormat object from java.text:
DecimalFormattwoDecimalForm=newDecimalFormat("#.##");
10.5 Providing a Preference Activity
Ian Darwin
Discussion
Android will happily maintain a SharedPreferences object for you in semipermanent storage. To retrieve settings from it, use:
sharedPreferences=PreferenceManager.getDefaultSharedPreferences(this);
This should be called in your main Activity’s onCreate() method, or in the onCreate() of any Activity that needs to view the user’s chosen preferences.
You do need to tell Android what values you want the user to be able to specify, such as name, Twitter account, favorite color, or whatever. You don’t use the traditional view items such as ListView or Spinner, but instead use the special Preference items. A reasonable set of choices are available, such as Lists, TextEdits, CheckBoxes, and so on, but remember, these are not the standard View subclasses. Example 10-7 uses a List, a TextEdit, and a CheckBox.
Example 10-7. XML PreferenceScreen
<PreferenceScreenxmlns:android="http://schemas.android.com/apk/res/android"><ListPreferenceandroid:key="listChoice"android:title="List Choice"android:entries="@array/choices"android:entryValues="@array/choices"/><PreferenceCategoryandroid:title="Personal"><EditTextPreferenceandroid:key="nameChoice"android:title="Name"android:hint="Name"/><CheckBoxPreferenceandroid:key="booleanChoice"android:title="Binary Choice"/></PreferenceCategory></PreferenceScreen>
The PreferenceCategory in the XML allows you to subdivide your panel into labeled sections. It is also possible to have more than one PreferenceScreen if you have a large number of settings and want to divide it into “pages.” Several additional kinds of UI elements can be used in the XML PreferenceScreen; see the official documentation for details.
The PreferenceActivity subclass can consist of as little as this onCreate() method:
@OverrideprotectedvoidonCreate(BundlesavedInstanceState){super.onCreate(savedInstanceState);addPreferencesFromResource(R.layout.prefs);}
When activated, the PreferenceActivity looks like Figure 10-3.
When the user clicks, say, Name, an Edit dialog opens, as in Figure 10-4.
In the XML layout for the preferences screen, each preference setting is assigned a name or “key,” as in a Java Map or Properties object. The supported value types are the obvious String, int, float, and boolean. You use this to retrieve the user’s values, and you provide a default value in case the settings screen hasn’t been put up yet or in case the user didn’t bother to specify a particular setting:
StringpreferredName=sharedPreferences.getString("nameChoice","No name");

Figure 10-3. Preferences screen
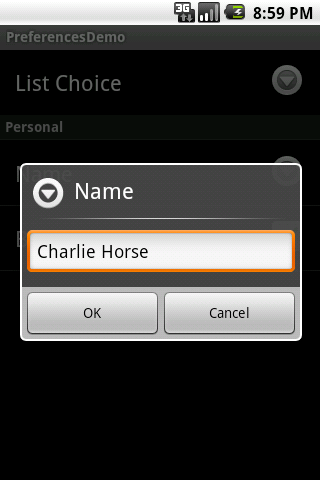
Figure 10-4. String edit dialog
Since the preferences screen does the editing for you, there is little need to set preferences from within your application. There are a few uses, though, such as remembering that the user has accepted an end-user license agreement, or EULA. The code for this would be something like the following:
sharedPreferences.edit().putBoolean("accepted EULA", true).commit();
When writing, don’t forget the commit()! And, for this particular use case, the EULA option should obviously not appear in the GUI, or the user could just set it there without having a chance to read and ignore the text of your license agreement.
Like many Android apps, this demo has no Back button from its preferences screen; the user simply presses the system’s Back button. When the user returns to the main Activity, a real app would operate based on the user’s choices. My demo app simply displays the values. This is shown in Figure 10-5.
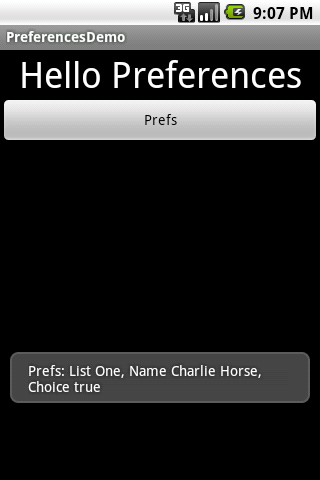
Figure 10-5. Values the main Activity uses
There is no “official” way to add a Done button to an XML PreferenceScreen,
but some developers use a generic Preference item:
<Preferenceandroid:title="@string/done"android:key="settingsDoneButton"/>
You can then make this work like a Button just by giving it an OnClickListener (from Preference,
not the normal one from View):
// Set up our Done preference to function as a ButtonPreferencebutton=findPreference("settingsDoneButton");// NOI18Nbutton.setOnPreferenceClickListener(newPreference.OnPreferenceClickListener(){@OverridepublicbooleanonPreferenceClick(Preferencearg0){finish();returntrue;}});
When building a full-size application, I like to define the keys used as strings, for stylistic reasons and to prevent misspellings. I create a separate XML resource file for these strings called, say, keys.xml:
<?xml version="1.0" encoding="utf-8"?><resources><stringtranslatable="false"name="key_enable_sync">KEY_ENABLE_SYNC</string><stringtranslatable="false"name="key_sync_interval">KEY_SYNC_INTERVAL</string><stringtranslatable="false"name="key_username">KEY_USERNAME</string><stringtranslatable="false"name="key_password">KEY_PASSWORD</string>...</resources>
Note the use of translatable="false" to prevent translation accidents.
I can use these strings directly in the prefs.xml file, and in code using the Activity method getString():
<PreferenceScreen xmlns:android="http://schemas.android.com/apk/res/android">

    <PreferenceCategory android:title="Synchronization">
        <CheckBoxPreference
            android:key="@string/key_enable_synch"
            android:title="Enable Sync"
            android:hint="Sync"
            />

        <EditTextPreference
            android:key="@string/key_sync_interval"
            android:title="Sync Interval (minutes)"
            android:inputType="number"
            android:defaultValue="60"
        />
    ...
</PreferenceScreen>
Basically, that’s all you need: an XML PreferenceScreen to define the properties and how the user sets them; a call to getDefaultSharedPrefences(); and calls to getString(), getBoolean(), and so on on the returned SharedPreferences object. It’s easy to handle preferences this way, and it gives the Android system a feel of uniformity, consistency, and predictability that is important to the overall user experience.
10.6 Checking the Consistency of Default Shared Preferences
Federico Paolinelli
Problem
Android provides a very easy way to set up default preferences by defining a PreferenceActivity and providing it a resource file, as discussed in Recipe 10.5. What is not clear is how to perform checks on preferences given by the user.
Solution
You can implement the PreferenceActivity method onSharedPreferenceChanged():
publicvoidonSharedPreferenceChanged(SharedPreferencesprefs,Stringkey)
You perform your checks in this method’s body. If the check fails you can restore a default value for the preference. Be aware that even though the SharedPreferences will contain the right value, you won’t see it displayed correctly; for this reason, you need to reload the PreferenceActivity.
Discussion
If you have a default PreferenceActivity that implements On SharedPreferenceChangeListener, your PreferenceActivity can implement the on SharedPreferenceChanged() method, as shown in Example 10-8.
Example 10-8. PreferenceActivity implementation
publicclassMyPreferenceActivityextendsPreferenceActivityimplementsOnSharedPreferenceChangeListener{publicvoidonCreate(BundlesavedInstanceState){super.onCreate(savedInstanceState);Contextcontext=getApplicationContext();prefs=PreferenceManager.getDefaultSharedPreferences(context);addPreferencesFromResource(R.xml.userprefs);}
The onSharedPreferenceChanged() method will be called after the change is committed, so every other change you perform will be permanent.
The idea is to check whether the value is appropriate, and if not replace it with a default value or disable it.
To arrange to have this method called at the appropriate time, you have to register your Activity as a valid listener. A good way to do so is to register in onResume() and unregister in onPause():
@OverrideprotectedvoidonResume(){super.onResume();prefs.registerOnSharedPreferenceChangeListener(this);}@OverrideprotectedvoidonPause(){super.onPause();prefs.unregisterOnSharedPreferenceChangeListener(this);}
Now it’s time to perform the consistency check. For example, if you have an option whose key is MY_OPTION_KEY, you can use the code in Example 10-9 to check and allow/disallow the value.
Example 10-9. Checking and allowing/disallowing the supplied value
publicvoidonSharedPreferenceChanged(SharedPreferencesprefs,Stringkey){SharedPreferences.EditorprefEditor=prefs.edit();if(key.equals(MY_OPTION_KEY)){StringoptionValue=prefs.getString(MY_OPTION_KEY,"");if(dontLikeTheValue(optionValue)){prefEditor.putString(MY_OPTION_KEY,"Default value");prefEditor.commit();reload();}}return;}
Of course, if the check fails the user will be surprised and will not know why you refused his option. You can then show an error dialog and perform the reload action after the user confirms the dialog (see Example 10-10).
Example 10-10. Explaining rejection
privatevoidshowErrorDialog(StringerrorString){StringokButtonString=context.getString(R.string.ok_name);AlertDialog.Builderad=newAlertDialog.Builder(context);ad.setTitle(context.getString(R.string.error_name));ad.setMessage(errorString);ad.setPositiveButton(okButtonString,newOnClickListener(){publicvoidonClick(DialogInterfacedialog,intarg1){reload();}});ad.show();return;}
In this way, the dontLikeTheValue() “if” becomes:
if(dontLikeTheValue(optionValue)){if(!GeneralUtils.isPhoneNumber(smsNumber)){showErrorDialog("I dont like the option");prefEditor.putString(MY_OPTION_KEY,"Default value");prefEditor.commit();}}
What’s still missing is the reload() function, but it’s pretty obvious. It relaunches the Activity using the same Intent that fired it:
privatevoidreload(){startActivity(getIntent());finish();}
10.7 Using a SQLite Database in an Android Application
Rachee Singh
Discussion
SQLite is used in many platforms, not just Android. While SQLite provides an API, many systems (including Android) develop their own APIs for their particular needs.
Getting started
To use a SQLite database in an Android application, it is necessary to create a class that inherits from the SQLiteOpenHelper class, a standard Android class that arranges to open the database file:
publicclassSqlOpenHelperextendsSQLiteOpenHelper{
It checks for the existence of the database file and, if it exists, it opens it; otherwise, it creates one.
The constructor for the parent SQLiteOpenHelper class takes in a few arguments—the context, the database name, the CursorFactory object (which is most often null), and the version number of your database schema:
publicstaticfinalStringDBNAME="tasksdb.sqlite";publicstaticfinalintVERSION=1;publicstaticfinalStringTABLE_NAME="tasks";publicstaticfinalStringID="id";publicstaticfinalStringNAME="name";publicSqlOpenHelper(Contextcontext){super(context,DBNAME,null,VERSION);}
To create a table in SQL, you use the CREATE TABLE statement. Note that Android’s API for SQLite assumes that your primary key will be a long integer (long in Java). The primary key column can have any name for now, but when we wrap the data in a ContentProvider in a later recipe (Recipe 10.15) this column is required to be named _id, so we’ll start on the right foot by using that name now:
CREATETABLEsome_table_name(_idINTEGERPRIMARYKEYAUTOINCREMENTNOTNULL,nameTEXT);
The SQLiteOpenHelper method onCreate() is called to allow you to create (and possibly populate) the database.
At this point the database file exists, so you can use the passed-in SQLiteDatabase object to invoke SQL
commands, using its execSql(String) method:
publicvoidonCreate(SQLiteDatabasedb){createDatabase(db);}privatevoidcreateDatabase(SQLiteDatabasedb){db.execSQL("create table "+TABLE_NAME+"("+ID+" integer primary key autoincrement not null, "+NAME+" text "+");");}
The table name is needed to insert or retrieve data, so it is customary to identify it in a final String field named TABLE or TABLE_NAME.
To get a “handle” to write to or read from the SQL database you created, instantiate the SQLiteOpenHelper subclass, passing the Android Context (e.g., Activity) into the constructor, then call its getReadableDatabase() method for read-only access or getWritableDatabase() for read/write access:
SqlOpenHelperhelper=newSqlOpenHelper(this);SQLiteDatabasedatabase=helper.getWritableDatabase();
Inserting data
Now, the SQLiteDatabase database methods can be used to insert and retrieve data. To insert data, we’ll use the SQLiteDatabase insert() method and pass an object of type ContentValues.
ContentValues is similar to a Map<String,Object>, a set of key/value pairs. Android does not provide an object-oriented API to the database; you must decompose your object into a ContentValues. The keys must map to the names of columns in the database. For example, NAME could be a final string containing the key (the name of the “Name” column), and Mangoes could be the value. We could pass this to the insert() method to insert a row in the database with the value Mangoes in it. SQLite returns the ID for the newly created row in the database (id):
ContentValuesvalues=newContentValues();values.put(NAME,"Mangoes");longid=(database.insert(TABLE_NAME,null,values));
Reading data
Now we want to retrieve data from the existing database. To query the database, we use the query() method along with appropriate arguments, most importantly the table name and the column names for which we are extracting values (see Example 10-11). We’ll use the returned Cursor object to iterate over the database and process the data.
Example 10-11. Querying and iterating over results
ArrayList<Food> foods = new ArrayList();
Cursor listCursor = database.query(TABLE_NAME,
    new String [] {ID, NAME},
    null, null, null, null, NAME);
while (listCursor.moveToNext()) {
    Long id = listCursor.getLong(0);
    String name= listCursor.getString(1);
    Food t = new Food(name);
    foods.add(t);
}
listCursor.close();
The moveToNext() method moves the Cursor to the next item and returns true if there is such an item,
rather like the JDBC ResultSet.next() in standard Java (there is also moveToFirst() to move back to
the first item in the database, a moveToLast() method, and so on).
We keep checking until we have reached the end of the database Cursor. Each item of the database is added to an ArrayList.
We close the Cursor to free up resources.
There is considerably more functionality available in the query() method, whose most common signature is:1
Cursorquery(StringtableName,String[]columns,Stringselection,String[]selectionArgs,StringgroupBy,Stringhaving,StringorderBy)
The most important of these are the selection and orderBy arguments.
Unlike in standard JDBC, the selection argument is just the selection part of the SELECT statement.
However, it does use the ? syntax for parameter markers, whose values are taken from the following selectionArgs parameter,
which must be an array of Strings regardless of the underlying column types.
The orderBy argument is the ORDER BY part of a standard SQL query, which causes the database to return the results in sorted order
instead of making the application do the sorting.
In both cases, the keywords (SELECT and ORDER BY) must be omitted as they will be added by the database code.
Likewise for the SQL keywords GROUP BY and HAVING, if you are familiar with those; their values without
the keywords appear as the third-to-last and second-to-last arguments, which are usually null.
For example, to obtain a list of customers aged 18 or over living in the US state of New York,
sorted by last name, you might use something like this:
CursorcustCursor=db.query("customer","age > ? AND state = ? and COUNTRY = ?",newString[]{Integer.toString(minAge),"NY","US"},null,null,"lastname ASC");
I’ve written the SQL keywords in uppercase in the query to identify them; this is not required as SQL keywords are not case-sensitive.
10.8 Performing Advanced Text Searches on a SQLite Database
Claudio Esperanca
Discussion
By following these steps, you will be able to create an example Android project with a data layer where you will be able to store and retrieve some data using a SQLite database:
-
Create a new Android project (
AdvancedSearchProject) targeting a current API level. -
Specify
AdvancedSearchas the application name. -
Use
com.androidcookbook.example.advancedsearchas the package name. -
Create an Activity with the name
AdvancedSearchActivity. -
Create a new Java class called
DbAdapterwithin the packagecom.androidcookbook.example.advancedsearchin the src folder.
To create the data layer for the example application, enter the Example 10-12 source code in the created file.
Example 10-12. The DbAdapter class
publicclassDbAdapter{publicstaticfinalStringAPP_NAME="AdvancedSearch";privatestaticfinalStringDATABASE_NAME="AdvancedSearch_db";privatestaticfinalintDATABASE_VERSION=1;// Our internal database version (e.g., to control upgrades)privatestaticfinalStringTABLE_NAME="example_tbl";publicstaticfinalStringKEY_USERNAME="username";publicstaticfinalStringKEY_FULLNAME="fullname";publicstaticfinalStringKEY_EMAIL="email";publicstaticlongGENERIC_ERROR=-1;publicstaticlongGENERIC_NO_RESULTS=-2;publicstaticlongROW_INSERT_FAILED=-3;privatefinalContextcontext;privateDbHelperdbHelper;privateSQLiteDatabasesqlDatabase;publicDbAdapter(Contextcontext){this.context=context;}privatestaticclassDbHelperextendsSQLiteOpenHelper{privatebooleandatabaseCreated=false;DbHelper(Contextcontext){super(context,DATABASE_NAME,null,DATABASE_VERSION);}@OverridepublicvoidonCreate(SQLiteDatabasedb){Log.d(APP_NAME,"Creating the application database");try{// Create the FTS3 virtual tabledb.execSQL("CREATE VIRTUAL TABLE ["+TABLE_NAME+"] USING FTS3 ("+"["+KEY_USERNAME+"] TEXT,"+"["+KEY_FULLNAME+"] TEXT,"+"["+KEY_EMAIL+"] TEXT"+");");this.databaseCreated=true;}catch(Exceptione){Log.e(APP_NAME,"An error occurred while creating the database: "+e.toString(),e);this.deleteDatabaseStructure(db);}}publicbooleandatabaseCreated(){returnthis.databaseCreated;}privatebooleandeleteDatabaseStructure(SQLiteDatabasedb){try{db.execSQL("DROP TABLE IF EXISTS ["+TABLE_NAME+"];");returntrue;}catch(Exceptione){Log.e(APP_NAME,"An error occurred while deleting the database: "+e.toString(),e);}returnfalse;}}/*** Open the database; if the database can't be opened, try to create it** @return {@link Boolean} true if database opened/created OK, false otherwise* @throws {@link SQLException] if an error occurred*/publicbooleanopen()throwsSQLException{try{this.dbHelper=newDbHelper(this.context);this.sqlDatabase=this.dbHelper.getWritableDatabase();returnthis.sqlDatabase.isOpen();}catch(SQLExceptione){throwe;}}/*** Close the database connection* @return {@link Boolean} true if the connection was terminated, false otherwise*/publicbooleanclose(){this.dbHelper.close();return!this.sqlDatabase.isOpen();}/*** Check if the database was opened** @return {@link Boolean} true if it was, false otherwise*/publicbooleanisOpen(){returnthis.sqlDatabase.isOpen();}/*** Check if the database was created** @return {@link Boolean} true if it was, false otherwise*/publicbooleandatabaseCreated(){returnthis.dbHelper.databaseCreated();}/*** Insert a new row i3n the table** @param username {@link String} with the username* @param fullname {@link String} with the fullname* @param email {@link String} with the email* @return {@link Long} with the row ID or ROW_INSERT_FAILED (value < 0) on error*/publiclonginsertRow(Stringusername,Stringfullname,String){try{// Prepare the valuesContentValuesvalues=newContentValues();values.put(KEY_USERNAME,username);values.put(KEY_FULLNAME,fullname);values.put(KEY_EMAIL,);// Try to insert the rowreturnthis.sqlDatabase.insert(TABLE_NAME,null,values);}catch(Exceptione){Log.e(APP_NAME,"An error occurred while inserting the row: "+e.toString(),e);}returnROW_INSERT_FAILED;}/*** The search() method uses the FTS3 virtual table and* the MATCH function from SQLite to search for data.* @see http://www.sqlite.org/fts3.html to know more about the syntax.* @param search {@link String} with the search expression* @return {@link LinkedList} with the {@link String} search results*/publicLinkedList<String>search(Stringsearch){LinkedList<String>results=newLinkedList<String>();Cursorcursor=null;try{cursor=this.sqlDatabase.query(true,TABLE_NAME,newString[]{KEY_USERNAME,KEY_FULLNAME,KEY_EMAIL},TABLE_NAME+" MATCH ?",newString[]{search},null,null,null,null);if(cursor!=null&&cursor.getCount()>0&&cursor.moveToFirst()){intiUsername=cursor.getColumnIndex(KEY_USERNAME);intiFullname=cursor.getColumnIndex(KEY_FULLNAME);intiEmail=cursor.getColumnIndex(KEY_EMAIL);do{results.add(newString("Username: "+cursor.getString(iUsername)+", Fullname: "+cursor.getString(iFullname)+", Email: "+cursor.getString(iEmail)));}while(cursor.moveToNext());}}catch(Exceptione){Log.e(APP_NAME,"An error occurred while searching for "+search+": "+e.toString(),e);}finally{if(cursor!=null&&!cursor.isClosed()){cursor.close();}}returnresults;}}
Now that the data layer is usable, the AdvancedSearchActivity can be used to test it.
To define the application strings, replace the contents of the res/values/strings.xml file with the following:
<?xml version="1.0" encoding="utf-8"?><resources><stringname="label_search">Search</string><stringname="app_name">AdvancedSearch</string></resources>
The application layout can be set within the file res/layout/main.xml. This contains the expected EditText (named etSearch), a Button (named btnSearch), and a TextView (named tvResults) to display the results, all in a LinearLayout.
Finally, Example 10-13 shows the AdvancedSearchActivity.java code.
Example 10-13. AdvancedSearchActivity.java
publicclassAdvancedSearchActivityextendsActivity{privateDbAdapterdbAdapter;@OverridepublicvoidonCreate(BundlesavedInstanceState){super.onCreate(savedInstanceState);setContentView(R.layout.main);dbAdapter=newDbAdapter(this);dbAdapter.open();if(dbAdapter.databaseCreated()){dbAdapter.insertRow("test","test example","[email protected]");dbAdapter.insertRow("lorem","lorem ipsum","[email protected]");dbAdapter.insertRow("jdoe","Jonh Doe","[email protected]");}Buttonbutton=(Button)findViewById(R.id.btnSearch);finalEditTextetSearch=(EditText)findViewById(R.id.etSearch);finalTextViewtvResults=(TextView)findViewById(R.id.tvResults);button.setOnClickListener(newView.OnClickListener(){publicvoidonClick(Viewv){LinkedList<String>results=dbAdapter.search(etSearch.getText().toString());if(results.isEmpty()){tvResults.setText("No results found");}else{Iterator<String>i=results.iterator();tvResults.setText("");while(i.hasNext()){tvResults.setText(tvResults.getText()+i.next()+" ");}}}});}@OverrideprotectedvoidonDestroy(){dbAdapter.close();super.onDestroy();}}
See Also
See the SQLite website to learn more about the Full-Text Search 3 extension module’s capabilities, including the search syntax, and localizeandroid to learn about a project with an implementation of this search mechanism.
10.9 Working with Dates in SQLite
Jonathan Fuerth
Discussion
This recipe demonstrates the advantages of using SQLite timestamps over storing raw millisecond values in your database, and shows how to retrieve those timestamps from your database as java.util.Date objects.
Background
The usual representation for an absolute timestamp in Unix is time_t, which historically was just an alias for a 32-bit integer. This integer represented the date as the number of seconds elapsed since UTC 00:00 on January 1, 1970 (the Unix epoch). On systems where time_t is still a 32-bit integer, the clock will roll over partway through the year 2038.
Java adopted a similar convention, but with a few twists. The epoch remains the same, but the count is always stored in a 64-bit signed integer (the native Java long type) and the units are milliseconds rather than seconds. This method of timekeeping will not roll over for another 292 million years.
Android example code that deals with persisting dates and times tends to simply store and retrieve the raw milliseconds since the epoch values in the database. However, by doing this, it misses out on some useful features built into SQLite.
The advantages
There are several advantages to storing proper SQLite timestamps in your data: you can default timestamp columns to the current time using no Java code at all; you can perform calendar-sensitive arithmetic such as selecting the first day of a week or month, or adding a week to the value stored in the database; and you can extract just the date or time components and return those from your data provider.
All of these code-saving advantages come with two added bonuses: first, your data provider’s API can stick to the Android convention of passing timestamps around as long values; second, all of this date manipulation is done in the natively compiled SQLite code, so the manipulations don’t incur the garbage collection overhead of creating multiple java.util.Date or java.util.Calendar objects.
The code
Without further ado, here’s how to do it.
First, create a table that defines a column of type timestamp:
CREATETABLEcurrent_list(item_idINTEGERNOTNULL,added_onTIMESTAMPNOTNULLDEFAULTcurrent_timestamp,added_byVARCHAR(50)NOTNULL,quantityINTEGERNOTNULL,unitsVARCHAR(50)NOTNULL,CONSTRAINTcurrent_list_pkPRIMARYKEY(item_id));
Note the default value for the added_on column. Whenever you insert a row into this table, SQLite will automatically fill in the current time, accurate to the second, for the new record (this is shown here using the command-line SQLite program running on a desktop; we’ll see later in this recipe how to get these into a database under Android):
sqlite> insert into current_list (item_id, added_by, quantity, units)
   ...> values (1, 'fuerth', 1, 'EA');
sqlite> select * from current_list where item_id = 1;
1|2020-05-14 23:10:26|fuerth|1|EA
sqlite>
See how the current date was inserted automatically? This is one of the advantages you get from working with SQLite timestamps.
How about the other advantages?
Select just the date part, forcing the time back to midnight:
sqlite> select item_id, date(added_on,'start of day')
   ...> from current_list where item_id = 1;
1|2020-05-14
sqlite>
Or adjust the date to the Monday of the following week:
sqlite> select item_id, date(added_on,'weekday 1')
   ...> from current_list where item_id = 1;
1|2020-05-17
sqlite>
Or the Monday before:
sqlite> select item_id, date(added_on,'weekday 1','-7 days')
   ...> from current_list where item_id = 1;
1|2020-05-10
sqlite>
These examples are just the tip of the iceberg. You can do a lot of useful things with your timestamps once SQLite recognizes them as such.
Last, but not least, you must be wondering how to get these dates back into your Java code. The trick is to press another of SQLite’s date functions into service—this time strftime(). Here is a Java method that fetches a row from the current_list table we’ve been working with:
Cursorcursor=database.rawQuery("SELECT item_id AS _id,"+" (strftime('%s', added_on) * 1000) AS added_on,"+" added_by, quantity, units"+" FROM current_list",newString[0]);longmillis=cursor.getLong(cursor.getColumnIndexOrThrow("added_on"));DateaddedOn=newDate(millis);
That’s it: using strftime()’s %s format, you can select timestamps directly into your Cursor as Java milliseconds since the epoch values. Client code will be none the wiser, except that your content provider will be able to do date manipulations for free that would otherwise take significant amounts of Java code and extra object allocations.
10.10 Exposing Non-SQL Data as a SQL Cursor
Ian Darwin
Discussion
It is common to have data in a form other than a Cursor, but to want to present it as a Cursor for use in a ListView with an Adapter or a CursorLoader.
The AbstractCursor class facilitates this. While Cursor is an interface that you could implement directly, there are a number of routines therein that are pretty much the same in every implementation of Cursor, so they have been abstracted out and made into the AbstractCursor class.
In this short example we expose a list of filenames with the following structure:
-
_idis the sequence number. -
filenameis the full path. -
typeis the filename extension.
This list of files is hardcoded to simplify the demo.
We will expose this as a Cursor and consume it in a SimpleCursorAdapter.
First, the start of the DataToCursor class:
/*** Provide a Cursor from a fixed list of data* column 1 - _id* column 2 - filename* column 3 - file type*/publicclassDataToCursorextendsAbstractCursor{privatestaticfinalString[]COLUMN_NAMES={"_id","filename","type"};privatestaticfinalString[]DATA_ROWS={"one.mpg","two.jpg","tre.dat","fou.git",};
As you can see, there are two arrays: one for the column names going across,
and one for the rows going down. In this simple example we don’t have to track
the ID values (since they are the same as the index into the DATA_ROWS array) or the file types (since they are the same as the filename extension).
There are a few structural methods that are needed:
@OverridepublicintgetCount(){returnDATA.length;}@OverridepublicintgetColumnCount(){returnCOLUMN_NAMES.length;}@OverridepublicString[]getColumnNames(){returnCOLUMN_NAMES;}
The getColumnCount() method’s value is obviously derivable from the array, but since it’s constant,
we override the method for efficiency reasons—probably not
necessary in most applications.
Then there are some necessary get methods, notably getType() for getting the type
of a given column (whether it’s numeric, string, etc.):
@OverridepublicintgetType(intcolumn){switch(column){case0:returnCursor.FIELD_TYPE_INTEGER;case1:case2:returnCursor.FIELD_TYPE_STRING;default:thrownewIllegalArgumentException(Integer.toString(column));}}
The next methods have to do with getting the value of a given column in the current row.
Nicely, the AbstractCursor handles all the moveToRow() and related methods,
so we just have to call the inherited (and protected) method getPosition():
/*** Return the _id value (the only integer-valued column).* Conveniently, rows and array indices are both 0-based.*/@OverridepublicintgetInt(intcolumn){introw=getPosition();switch(column){case0:returnrow;default:thrownewIllegalArgumentException(Integer.toString(column));}}/** SQLite _ids are actually long, so make this work as well.* This direct equivalence is usually not applicable; do not blindly copy.*/@OverridepubliclonggetLong(intcolumn){returngetInt(column);}@OverridepublicStringgetString(intcolumn){introw=getPosition();switch(column){case1:returnDATA_ROWS[row];case2:returnextension(DATA_ROWS[row]);default:thrownewIllegalArgumentException(Integer.toString(column));}}
The remaining methods aren’t interesting; methods like getFloat(), getBlob(), and
so on merely throw exceptions as, in this example, there are no columns of those types.
The main Activity shows nothing different than the other ListView examples in Chapter 8: the data from the Cursor is loaded into a ListView using
a SimpleCursorAdapter (this overload of which is deprecated, but works fine for this example).
The result is shown in Figure 10-6.
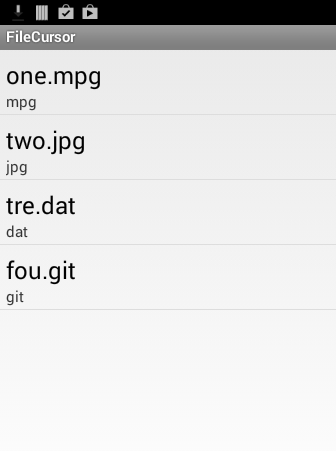
Figure 10-6. Main Activity with synthetic Cursor data
We have successfully shown this proof-of-concept of generating a Cursor without using SQLite.
It would obviously be straightforward to turn this into a more dynamic file-listing utility,
even a file manager. You’d want to use a CursorLoader instead of a SimpleCursorAdapter to make it complete, though;
CursorLoader is covered in the next recipe.
10.11 Displaying Data with a CursorLoader
Ian Darwin
Solution
Use a CursorLoader.
Discussion
Loader is a top-level class that provides a basic capability for loading almost any type of data.
AsyncTaskLoader<T> provides a specialization of Loader to handle threading.
Its important subclass is CursorLoader, which is used to load data
from a database Cursor and, typically in conjunction with a Fragment or Activity, to display it.
The Android documentation for AsyncTaskLoader<T> shows a comprehensive example of loading the list of all
applications installed on a device, and keeping that information up-to-date as it changes.
We will start with something a bit simpler, which reads (as CursorLoader classes are expected to)
a list of data from a ContentProvider implementation, and displays it in a list.
To keep the example simple, we’ll use the preinstalled Browser Bookmarks content provider. (Note that this content provider is not available in Android 7 or later).
The application will provide a list of installed bookmarks, similar to that shown in Figure 10-7.
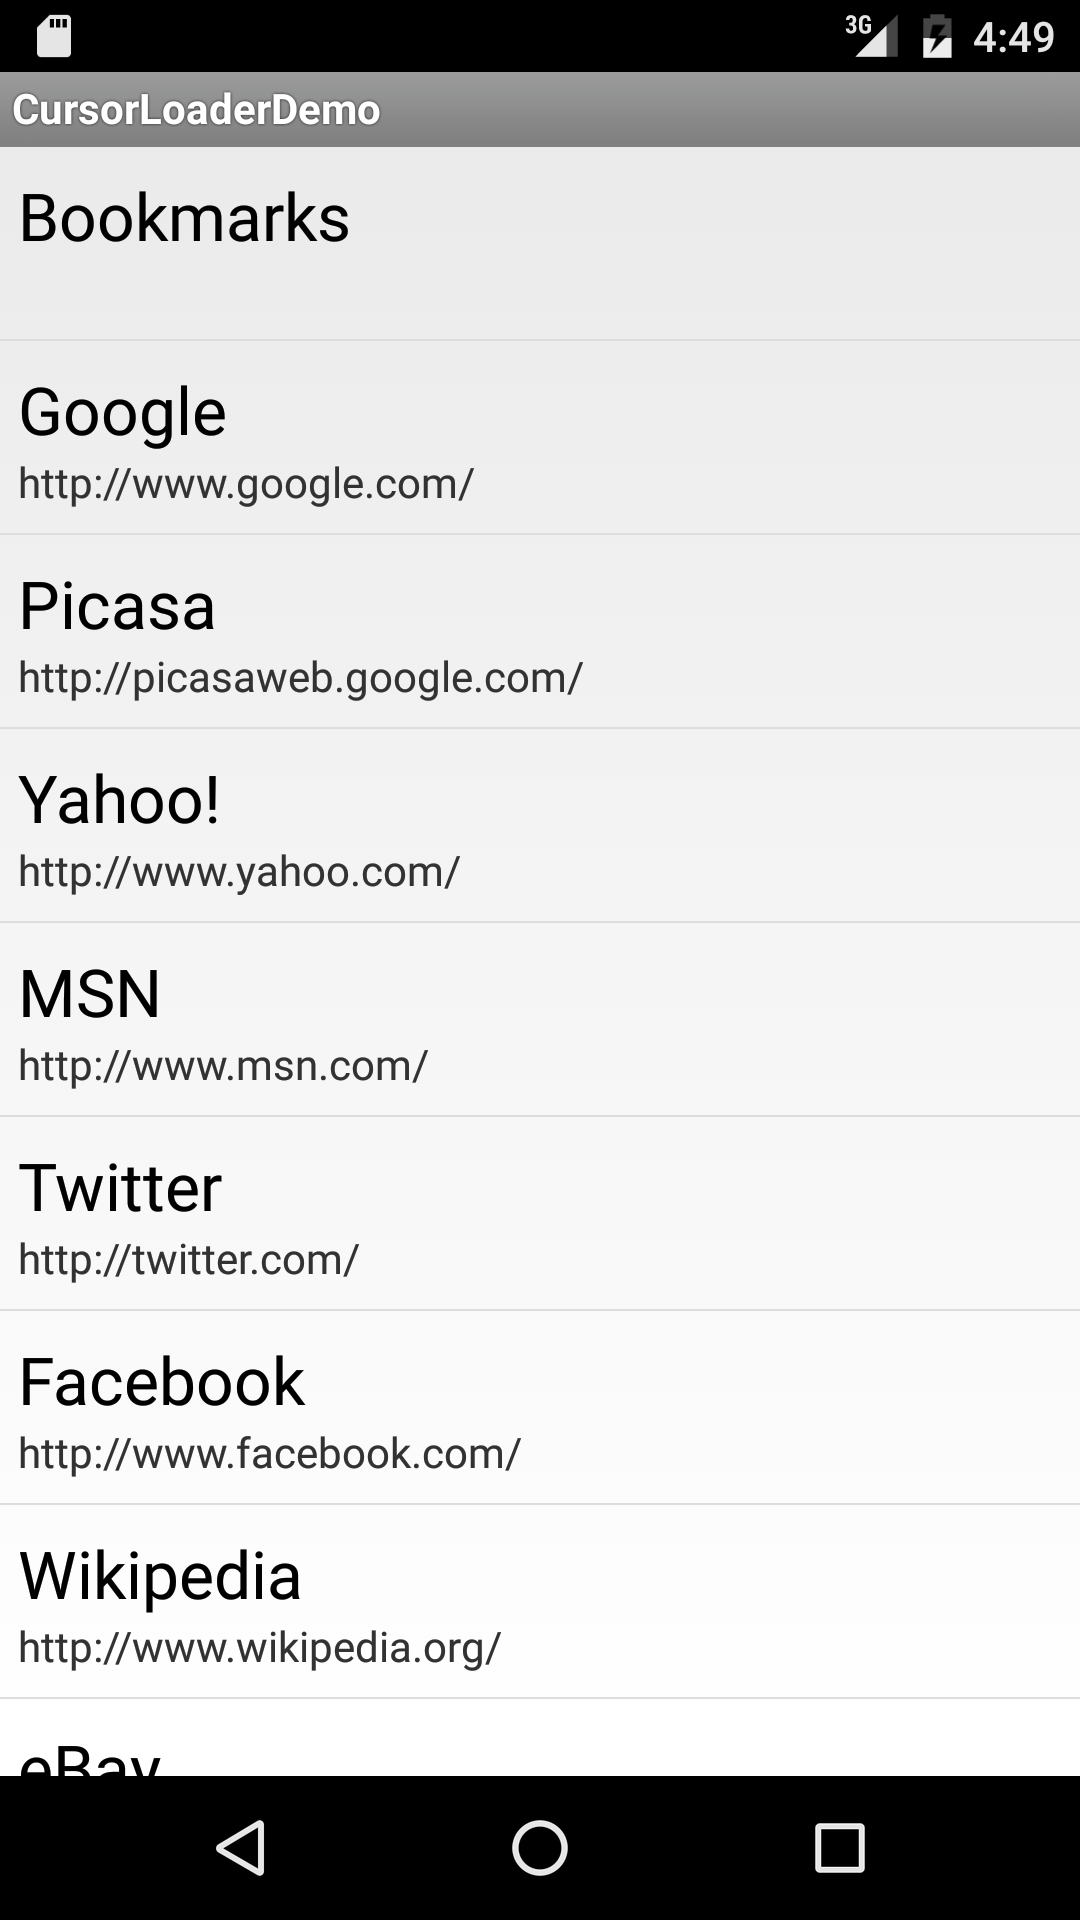
Figure 10-7. CursorLoader showing Browser Bookmarks
To use the Loader, you have to provide an implementation of the LoaderManager.LoaderCallbacks<T> interface,
where T is the type you want to load from; in our case, Cursor.
While most examples have the Activity or Fragment directly implement this, we’ll make it an inner class
just to isolate it, and make more of the argument types explicit.
We start off in onCreate() or onResume() by creating a SimpleCursorAdapter.
The constructor for this adapter—the mainstay of many a list-based application in prior releases of Android—is now deprecated, but calling it with an additional flags argument (the final 0 argument here)
for use with the Loader family is not deprecated.
Other than the final flags arg, and passing null for the Cursor, the code is largely the same as
our non-Loader-based example, ContentProviderBookmarks, which has been left in the Android Cookbook repository to show “the old way.”
With the extra flags argument the Cursor may be null, as we will provide it later,
in the LoaderCallbacks code (Example 10-14):
@OverrideprotectedvoidonCreate(BundlesavedInstanceState){super.onCreate(savedInstanceState);setContentView(R.layout.activity_main);String[]fromFields=newString[]{Browser.BookmarkColumns.TITLE,Browser.BookmarkColumns.URL};int[]toViews=newint[]{android.R.id.text1,android.R.id.text2};mAdapter=newSimpleCursorAdapter(this,android.R.layout.simple_list_item_2,null,fromFields,toViews,0);setListAdapter(mAdapter);// Prepare the loader: reconnects an existing one or reuses onegetLoaderManager().initLoader(0,null,newMyCallbacks(this));}
Note also the last line, which will find a Loader instance and associate our callbacks with it.
The callbacks are where the actual work gets done. There are three required methods in the LoaderCallbacks object:
onCreateLoader()-
Called to create an instance of the actual loader; the framework will start it, which will perform a
ContentProviderquery onLoadFinished()-
Called when the loader has finished loading its data, to set its cursor to the one from the query
onLoaderReset()-
Called when the loader is done, to disassociate it from the view (by setting its cursor back to
null)
Our implementation is fairly simple. As we want all the columns and don’t care about the order, we
only need to provide the bookmarks Uri, which is predefined for us (see Example 10-14).
Example 10-14. The LoaderCallbacks implementation
classMyCallbacksimplementsLoaderCallbacks<Cursor>{Contextcontext;publicMyCallbacks(Activitycontext){this.context=context;}@OverridepublicLoader<Cursor>onCreateLoader(intid,Bundlestuff){Log.d(TAG,"MainActivity.onCreateLoader()");returnnewCursorLoader(context,// Normal CP query: url, proj, select, where, havingBrowser.BOOKMARKS_URI,null,null,null,null);}@OverridepublicvoidonLoadFinished(Loader<Cursor>loader,Cursordata){// Load has finished, swap the loaded cursor into the viewmAdapter.swapCursor(data);}@OverridepublicvoidonLoaderReset(Loader<Cursor>loader){// The end of time: set cursor to null to prevent bad endingmAdapter.swapCursor(null);}}
The Loader family is quite sophisticated; it lets you load a Cursor in the background then
adapt it to the GUI. The
AsyncTaskLoader<T>, as the name implies, uses an AsyncTask (see Recipe 4.10) to do the data loading
on a background thread and runs the updating on the UI thread.
Its subclass, the CursorLoader, is now the tool of choice for loading lists of data.
Source Download URL
The source code for this example is in the Android Cookbook repository, in the subdirectory CursorLoaderDemo (see “Getting and Using the Code Examples”).
10.12 Parsing JSON Using JSONObject
Rachee Singh
Solution
While there are a couple of dozen Java APIs for JSON listed on the JSON website, we’ll
use the built-in JSONObject class to parse JSON and retrieve the data values contained in it.
Discussion
For this recipe, we will use a method to generate JSON code. In a real application you would likely obtain the JSON data from some web service. In this method we make use of a JSONObject class object to put in values and then to return the corresponding string (using the toString() method). Creating an object of type JSONObject can throw a JSONException, so we enclose the code in a try-catch block (see Example 10-15).
Example 10-15. Generating mock data in JSON format
privateStringgetJsonString(){JSONObjectstring=newJSONObject();try{string.put("name","John Doe");string.put("age",newInteger(25));string.put("address","75 Ninth Avenue, New York, NY 10011");string.put("phone","8367667829");}catch(JSONExceptione){e.printStackTrace();}returnstring.toString();}
We need to instantiate an object of class JSONObject that takes the JSON string as an argument. In this case, the JSON string is being obtained from the getJsonString() method. We extract the information from the JSONObject and print it in a TextView (see Example 10-16).
Example 10-16. Parsing the JSON string and retrieving values
try{StringjsonString=getJsonString();JSONObjectjsonObject=newJSONObject(jsonString);Stringname=jsonObject.getString("name");Stringage=jsonObject.getString("age");Stringaddress=jsonObject.getString("address");Stringphone=jsonObject.getString("phone");StringjsonText=name+" "+age+" "+address+" "+phone;json=(TextView)findViewById(R.id.json);json.setText(jsonText);}catch(JSONExceptione){// Display the exception...}
See Also
For more information on JavaScript Object Notation, see the JSON website.
There are about two dozen JSON APIs for Java alone. One of the more powerful ones—which includes a data-binding package that will automatically convert between Java objects and JSON—is JackSON.
Source Download URL
The source code for this project is in the Android Cookbook repository, in the subdirectory JSONParsing (see “Getting and Using the Code Examples”).
10.13 Parsing an XML Document Using the DOM API
Ian Darwin
Discussion
Example 10-17
is the code that parses the XML document containing the list of recipes in this book, as discussed in Recipe 12.1. The input file has a single recipes root element, followed by a sequence of recipe elements, each with an id and a title with textual content.
The code creates a DOM DocumentBuilderFactory, which can be tailored, for example, to make schema-aware parsers. In real code you could create this in a static initializer instead of re-creating it each time. The DocumentBuilderFactory is used to create a document builder, a.k.a. parser. The parser expects to be reading from an InputStream, so we convert the data that we have in string form into an array of bytes and construct a ByteArrayInputStream. Again, in real life you would probably want to combine this code with the web service consumer so that you could simply get the input stream from the network connection and read the XML directly into the parser, instead of saving it as a string and then wrapping that in a converter as we do here.
Once the elements are parsed, we convert the document into an array of data (the singular of data is datum, so the class is called Datum) by calling tDOM API methods such as getDocumentElement(), getChildNodes(), and getNodeValue(). Since the DOM API was not invented by Java people, it doesn’t use the standard Collections API but has its own collections, like NodeList. In DOM’s defense, the same or similar APIs are used in a really wide variety of programming languages, so it can be said to be as much a standard as Java’s Collections.
Example 10-17 shows the code.
Example 10-17. Parsing XML code
/** Convert the list of Recipes in the String result from the* web service into an ArrayList of Datum objects.* @throws ParserConfigurationException* @throws IOException* @throws SAXException*/publicstaticArrayList<Datum>parse(Stringinput)throwsException{finalArrayList<Datum>results=newArrayList<Datum>(1000);finalDocumentBuilderFactorydbFactory=DocumentBuilderFactory.newInstance();finalDocumentBuilderparser=dbFactory.newDocumentBuilder();finalDocumentdocument=parser.parse(newByteArrayInputStream(input.getBytes()));Elementroot=document.getDocumentElement();NodeListrecipesList=root.getChildNodes();for(inti=0;i<recipesList.getLength();i++){Noderecipe=recipesList.item(i);NodeListfields=recipe.getChildNodes();Stringid=((Element)fields.item(0)).getNodeValue();Stringtitle=((Element)fields.item(1)).getNodeValue();Datumd=newDatum(Integer.parseInt(id),title);results.add(d);}returnresults;}
In converting this code from Java SE to Android, the only change we had to make was to use getNodeValue() in the retrieval of id and title instead of Java SE’s getTextContent(), so the API really is very close.
See Also
The web service is discussed in Recipe 12.1. There is much more in the XML chapter of my Java Cookbook (O’Reilly).
Should you wish to process XML in a streaming mode, you can use the XMLPullParser, documented in the online version of this Cookbook.
10.14 Storing and Retrieving Data via a Content Provider
Ian Darwin
Solution
One way is to create a Content Uri using constants provided by the ContentProvider and use Activity.getContentResolver().query(), which returns a SQLite Cursor object.
Another way, useful if you want to select one record such as a single contact, is to create a PICK Uri, open it in an Intent using startActivityForResult(), extract the URI from the returned Intent, then perform the query as just described.
Discussion
This is part of the contact selection code from TabbyText, my SMS-over-WiFi text message sender (the rest of its code is in Recipe 10.17).
First, the main program sets up an OnClickListener to use the Contacts app as a chooser, from a Find Contact button:
b.setOnClickListener(newView.OnClickListener(){@OverridepublicvoidonClick(Viewarg0){Uriuri=ContactsContract.Contacts.CONTENT_URI;System.out.println(uri);Intentintent=newIntent(Intent.ACTION_PICK,uri);startActivityForResult(intent,REQ_GET_CONTACT);}});
The URI is predefined for us; it actually has the value content://com.android.contacts/contacts. The constant REQ_GET_CONTACT is arbitrary; it’s just there to associate this Intent start-up with the handler code, since more complex apps will often start more than one Intent and they need to handle the results differently. Once this button is pressed, control passes from our app out to the Contacts app. The user can then select a contact she wishes to send an SMS message to. The Contacts app then is backgrounded and control returns to our app at the onActivityResult() method, to indicate that the Activity we started has completed and delivered a result.
The next bit of code shows how the onActivityResult() method converts the response from the Activity into a SQLite cursor (see Example 10-18).
Example 10-18. onActivityResult()
@OverrideprotectedvoidonActivityResult(intrequestCode,intresultCode,Intentdata){if(requestCode==REQ_GET_CONTACT){switch(resultCode){caseActivity.RESULT_OK:// The Contacts API is about the most complex to use.// First retrieve the Contact, as we only get its URI from the Intent.UriresultUri=data.getData();// E.g., content://contacts/people/123Cursorcont=getContentResolver().query(resultUri,null,null,null,null);if(!cont.moveToNext()){// Expect exactly one rowToast.makeText(this,"Cursor has no data",Toast.LENGTH_LONG).show();return;}...
There are a few key things to note here. First, make sure the request Code is the one you started, and the resultCode is RESULT_OK or RESULT_CANCELED (if not, pop up a warning dialog). Then, extract the URL for the response you picked—the Intent data from the returned Intent—and use that to create a query, using the inherited Activity method getContentResolver() to get the ContentResolver and its query() method to make up a SQLite cursor.
We expect the user to have selected one contact, so if that’s not the case we error out. Otherwise, we’d go ahead and use the SQLite cursor to read the data. The exact formatting of the Contacts database is a bit out of scope for this recipe, so it’s been deferred to Recipe 10.17.
To insert data, we need to create a ContentValues object and populate it with the fields.
Once that’s done, we use the ContentContracts-provided base Uri value, along with the
ContentValues, to insert the values, somewhat like the following:
mNewUri=getContentResolver().insert(ContactsContract.Contacts.CONTENT_URI,contentValues);
You could then put the mNewUri into an Intent and display it.
This is shown in more detail in Recipe 10.16.
10.15 Writing a Content Provider
Ashwini Shahapurkar, Ian Darwin
Solution
Write a ContentProvider that will allow other applications to access data contained in your app.
Discussion
ContentProviders allow other applications to access the data generated by your app. A custom ContentProvider
is effectively a wrapper around your existing
application data (typically but not necessarily contained in a SQLite database; see Recipe 10.7).
Remember that just because you can do so doesn’t mean that you should; in particular,
you generally do not need to write a ContentProvider just to access your data from within your application.
To make other apps aware that a ContentProvider is available, we need to declare it in AndroidManifest.xml as follows:
<application...><activity.../><providerandroid:authorities="com.example.contentprovidersample"android:name="MyContentProvider"/></application>
The android:authorities attribute is a string used throughout the system to identify your ContentProvider; it should also be
declared in a public static final String variable in your provider class.
The android:name attribute refers to the class MyContentProvider, which extends the ContentProvider class. We need to override the following methods in this class:
onCreate();getType(Uri);insert(Uri,ContentValues);query(Uri,String[],String,String[],String);update(Uri,ContentValues,String,String[]);delete(Uri,String,String[]);
The onCreate() method is for setup, as in any other Android component. Our example just creates a SQLite database in a field:
mDatabase=newMyDatabaseHelper(this);
The getType() method assigns MIME types to incoming Uri values.
This method will typically use a statically allocated UriMatcher to determine whether the incoming Uri refers to a list of values (does not end with a numeric ID) or a single value (ends with a / and a numeric ID,
indicated by “/#” in the pattern argument).
The method must return either ContentResolver.CURSOR_ITEM_BASE_TYPE + "/" + MIME_VND_TYPE for a single item or
ContentResolver.CURSOR_DIR_BASE_TYPE + "/" + MIME_VND_TYPE for a multiplicity, where MIME_VND_TYPE
is an application-specific MIME type string; in our example that’s “vnd.example.item”.
It must begin with “vnd,” which stands, throughout this paragraph, for “Vendor,” as these values
are not provided by the official MIME type committee but by Android.
The UriMatcher is also used in the four data methods shown next to sort out singular from plural requests.
Example 10-19 contains the declarations and code for the matcher and the getType() method.
Example 10-19. Declarations and code for the UriMatcher and the getType() method
publicclassMyContentProviderextendsContentProvider{/** The authority name. MUST be as listed in* <provider android:authorities=...> in AndroidManifest.xml*/publicstaticfinalStringAUTHORITY="com.example.contentprovidersample";publicstaticfinalStringMIME_VND_TYPE="vnd.example.item";privatestaticfinalUriMatchermatcher=newUriMatcher(UriMatcher.NO_MATCH);privatestaticfinalintITEM=1;privatestaticfinalintITEMS=2;static{matcher.addURI(AUTHORITY,"items/#",ITEM);matcher.addURI(AUTHORITY,"items",ITEMS);}@OverridepublicStringgetType(Uriuri){intmatchType=matcher.match(uri);Log.d("ReadingsContentProvider.getType()",uri+" --> "+matchType);switch(matchType){caseITEM:returnContentResolver.CURSOR_ITEM_BASE_TYPE+"/"+MIME_VND_TYPE;caseITEMS:returnContentResolver.CURSOR_DIR_BASE_TYPE+"/"+MIME_VND_TYPE;default:thrownewIllegalArgumentException("Unknown or Invalid URI "+uri);}}
The last four methods are usually wrapper functions for SQL queries on the SQLite database;
note that they have the same parameter lists as the like-named SQLite methods, with the
insertion of a Uri at the front of the parameter list.
These methods typically parse the input parameters, do some error checking,
and forward the operation on to the SQLite database, as shown in Example 10-20.
Example 10-20. The ContentProvider: data methods
/** The C of CRUD: insert() */@OverridepublicUriinsert(Uriuri,ContentValuesvalues){Log.d(Constants.TAG,"MyContentProvider.insert()");switch(matcher.match(uri)){caseITEM:// FailthrownewRuntimeException("Cannot specify ID when inserting");caseITEMS:// OKbreak;default:thrownewIllegalArgumentException("Did not recognize URI "+uri);}longid=mDatabase.getWritableDatabase().insert(TABLE_NAME,null,values);uri=Uri.withAppendedPath(uri,"/"+id);getContext().getContentResolver().notifyChange(uri,null);returnuri;}/** The R of CRUD: query() */@OverridepublicCursorquery(Uriuri,String[]projection,Stringselection,String[]selectionArgs,StringsortOrder){Log.d(Constants.TAG,"MyContentProvider.query()");switch(matcher.match(uri)){caseITEM:// OKselection="_id = ?";selectionArgs=newString[]{Long.toString(ContentUris.parseId(uri))};break;caseITEMS:// OKbreak;default:thrownewIllegalArgumentException("Did not recognize URI "+uri);}// Build the query with SQLiteQueryBuilderSQLiteQueryBuilderqBuilder=newSQLiteQueryBuilder();qBuilder.setTables(TABLE_NAME);// Query the database and get result in cursorfinalSQLiteDatabasedb=mDatabase.getWritableDatabase();CursorresultCursor=qBuilder.query(db,projection,selection,selectionArgs,null,null,sortOrder,null);resultCursor.setNotificationUri(getContext().getContentResolver(),uri);returnresultCursor;}}
The remaining methods, update() and delete(), are parallel in structure and so have been omitted from this book to save space,
but the online example is fully fleshed out.
Providing a ContentProvider lets you expose your data without giving other developers direct access to your database and also reduces the chances of database inconsistency.
Source Download URL
The source code for this recipe is in the Android Cookbook repository, in the subdirectory ContentProviderSample (see “Getting and Using the Code Examples”).
10.16 Adding a Contact Through the Contacts Content Provider
Ian Darwin
Discussion
The Contacts database is, to be sure, “flexible.” It has to adapt to many different kinds of accounts and contact management uses, with different types of data. And it is, as a result, somewhat complicated.
Note
The classes named Contacts (and, by extension, all their inner classes and interfaces) are deprecated, meaning “don’t use them in new development.” The classes and interfaces that take their place have names beginning with the somewhat cumbersome and tongue-twisting ContactsContract.
We’ll start with the simplest case of adding a person’s contact information. We want to insert the following information, which we either got from the user or found on the network someplace:
Name |
Jon Smith |
Home Phone |
416-555-5555 |
Work Phone |
416-555-6666 |
First we have to determine which Android account to associate the data with. For now we will use a fake account name (darwinian is both an adjective and my name, so we’ll use that).
For each of the four fields, we’ll need to create an account operation.
We add all five operations to a List, and pass that into getContentResolver().applyBatch().
Example 10-21 shows the code for the addContact() method.
Example 10-21. The addContact() method
privatevoidaddContact(){finalStringACCOUNT_NAME="darwinian"Stringname="Jon Smith";StringhomePhone="416-555-5555";StringworkPhone="416-555-6666";String="[email protected]";// Use new-style Contacts batch operations.// Build List of ops, then call applyBatch().try{ArrayList<ContentProviderOperation>ops=newArrayList<ContentProviderOperation>();AuthenticatorDescription[]types=accountManager.getAuthenticatorTypes();ops.add(ContentProviderOperation.newInsert(ContactsContract.RawContacts.CONTENT_URI).withValue(ContactsContract.RawContacts.ACCOUNT_TYPE,types[0].type).withValue(ContactsContract.RawContacts.ACCOUNT_NAME,ACCOUNT_NAME).build());ops.add(ContentProviderOperation.newInsert(ContactsContract.Data.CONTENT_URI).withValueBackReference(ContactsContract.Data.RAW_CONTACT_ID,0).withValue(ContactsContract.Data.MIMETYPE,ContactsContract.CommonDataKinds.StructuredName.CONTENT_ITEM_TYPE).withValue(ContactsContract.CommonDataKinds.StructuredName.DISPLAY_NAME,name).build());ops.add(ContentProviderOperation.newInsert(ContactsContract.Data.CONTENT_URI).withValueBackReference(ContactsContract.Data.RAW_CONTACT_ID,0).withValue(ContactsContract.Data.MIMETYPE,ContactsContract.CommonDataKinds.Phone.CONTENT_ITEM_TYPE).withValue(ContactsContract.CommonDataKinds.Phone.NUMBER,homePhone).withValue(ContactsContract.CommonDataKinds.Phone.TYPE,ContactsContract.CommonDataKinds.Phone.TYPE_HOME).build());ops.add(ContentProviderOperation.newInsert(ContactsContract.Data.CONTENT_URI).withValueBackReference(ContactsContract.Data.RAW_CONTACT_ID,0).withValue(ContactsContract.Data.MIMETYPE,ContactsContract.CommonDataKinds.Phone.CONTENT_ITEM_TYPE).withValue(ContactsContract.CommonDataKinds.Phone.NUMBER,workPhone).withValue(ContactsContract.CommonDataKinds.Phone.TYPE,ContactsContract.CommonDataKinds.Phone.TYPE_WORK).build());ops.add(ContentProviderOperation.newInsert(ContactsContract.Data.CONTENT_URI).withValueBackReference(ContactsContract.Data.RAW_CONTACT_ID,0).withValue(ContactsContract.Data.MIMETYPE,ContactsContract.CommonDataKinds..CONTENT_ITEM_TYPE).withValue(ContactsContract.CommonDataKinds..DATA,).withValue(ContactsContract.CommonDataKinds..TYPE,ContactsContract.CommonDataKinds..TYPE_HOME).build());getContentResolver().applyBatch(ContactsContract.AUTHORITY,ops);Toast.makeText(this,getString(R.string.addContactSuccess),Toast.LENGTH_LONG).show();}catch(Exceptione){Toast.makeText(this,getString(R.string.addContactFailure),Toast.LENGTH_LONG).show();Log.e(LOG_TAG,getString(R.string.addContactFailure),e);}}
The resultant contact shows up in the Contacts app, as shown in Figure 10-8. If the new contact is not initially visible, go to the main Contacts list page, press Menu, select Display Options, and select Groups until it does appear. Alternatively, you can search in All Contacts and it will show up.
Source Download URL
The source code for this project is in the Android Cookbook repository, in the subdirectory AddContact (see “Getting and Using the Code Examples”).

Figure 10-8. Contact added
10.17 Reading Contact Data Using a Content Provider
Ian Darwin
Solution
Use an Intent to let the user pick one contact. Use a ContentResolver to create a SQLite query for the chosen contact, and use SQLite and predefined constants in the confusingly named ContactsContract class to retrieve the parts you want. Be aware that the Contacts database was designed for generality, not for simplicity.
Discussion
The code in Example 10-22 is from TabbyText, my SMS/text message sender for tablets. The user has already picked the given contact (using the Contactz app; see Recipe 10.14). Here we want to extract the mobile number and save it in a text field in the current Activity, so the user can post-edit it if need be, or even reject it, before actually sending the message, so we just set the text in an EditText once we find it.
Finding it turns out to be the hard part. We start with a query that we get from the ContentProvider, to extract the ID field for the given contact. Information such as phone numbers and email addresses are in their own tables, so we need a second query to feed in the ID as part of the “select” part of the query. This query gives a list of the contact’s phone numbers. We iterate through this, taking each valid phone number and setting it on the EditText.
A further elaboration would restrict this to only selecting the mobile number (some versions of Contacts allow both home and work numbers, but only one mobile number).
Example 10-22. Getting the contact from the Intent query’s ContentResolver
@OverrideprotectedvoidonActivityResult(intrequestCode,intresultCode,Intentdata){if(requestCode==REQ_GET_CONTACT){switch(resultCode){caseActivity.RESULT_OK:// The Contacts API is about the most complex to use.// First we have to retrieve the Contact, since// we only get its URI from the Intent.UriresultUri=data.getData();// E.g., content://contacts/people/123Cursorcont=getContentResolver().query(resultUri,null,null,null,null);if(!cont.moveToNext()){// Expect 001 row(s)Toast.makeText(this,"Cursor contains no data",Toast.LENGTH_LONG).show();return;}intcolumnIndexForId=cont.getColumnIndex(ContactsContract.Contacts._ID);StringcontactId=cont.getString(columnIndexForId);intcolumnIndexForHasPhone=cont.getColumnIndex(ContactsContract.Contacts.HAS_PHONE_NUMBER);booleanhasAnyPhone=Boolean.parseBoolean(cont.getString(columnIndexForHasPhone));if(!hasAnyPhone){Toast.makeText(this,"Selected contact seems to have no phone numbers ",Toast.LENGTH_LONG).show();}// Now we have to do another query to actually get the numbers!Cursornumbers=getContentResolver().query(ContactsContract.CommonDataKinds.Phone.CONTENT_URI,null,ContactsContract.CommonDataKinds.Phone.CONTACT_ID+"="+contactId,// "selection",null,null);// Could further restrict to mobile number...while(numbers.moveToNext()){StringaNumber=numbers.getString(numbers.getColumnIndex(ContactsContract.CommonDataKinds.Phone.NUMBER));System.out.println(aNumber);number.setText(aNumber);}if(cont.moveToNext()){System.out.println("WARNING: More than 1 contact returned by picker!");}numbers.close();cont.close();break;caseActivity.RESULT_CANCELED:// Nothing to do herebreak;default:Toast.makeText(this,"Unexpected resultCode: "+resultCode,Toast.LENGTH_LONG).show();break;}}super.onActivityResult(requestCode,resultCode,data);}
Source Download URL
You can download the source code for this example from GitHub.
10.18 Implementing Drag and Drop
Ian Darwin
Solution
Use the drag and drop API, supported since Android 3.0 and even in the appcompat library. Register a drag listener on the drop target. Start the drag in response to a UI event in the drag source.
Discussion
The normal use of drag-and-drop is to request a change, such as uninstalling an application, removing an item from a list, and so on.
The normal operation of a drag is to communicate some user-chosen data from one View to another;
i.e, both the source of the drag and the target of the drop must be View objects.
To pass information from the source View (e.g., the list item from where you start the drag) to the drop target, there is a special wrapper object called a ClipData. The ClipData can either hold an Android URI representing the object to be dropped, or some arbitrary data. The URI will usually be passed to a ContentProvider for processing.
The basic steps in a drag and drop are:
-
Implement an
OnDragListener; its only method isonDrag(), in which you should be prepared for the various action events such asACTION_DRAG_STARTED,ACTION_DRAG_ENTERED,ACTION_DRAG_EXITED,ACTION_DROP, andACTION_DRAG_ENDED. -
Register this listener on the drop target, using the
View’ssetOnDragListener()method. -
In a listener attached to the source
View, usually in anonItemLongClick()or similar method, start the drag. -
For
ACTION_DRAG_STARTEDand/orACTION_DRAG_ENTEREDon the drop target, highlight the View to direct the user’s attention to it as a target, by changing the background color, the image, or similar. -
For
ACTION_DROP, in the drop target, perform the action. -
For
ACTION_DRAG_EXITEDand/orACTION_DRAG_ENDED, do any cleanup required (e.g., undo changes made in theACTION_DRAG_STARTEDand/orACTION_DRAG_ENTEREDcase).
In this example (Figure 10-9) we implement a very simple drag-and-drop scenario: a URL is passed from a button to a text field.
You start the drag by long-pressing on the button at the top, and drag it down to the text view at the bottom.
As soon as you start the drag, the drop target’s background changes to yellow, and the “drag shadow”
(by default, an image of the source View object) appears
to indicate the drag position.
At this point, if you release the drag shadow outside the drop target, the drag shadow will find its way back
to the drag source, and the drag will end (the target turns white again).
On the other hand, if you drag into the drop target, its color changes to red.
If you release the drag shadow here, it is considered a successful drop, and the listener is called
with an action code of ACTION_DROP; you should perform the corresponding action (our example just displays the Uri in a toast to prove
that it arrived).
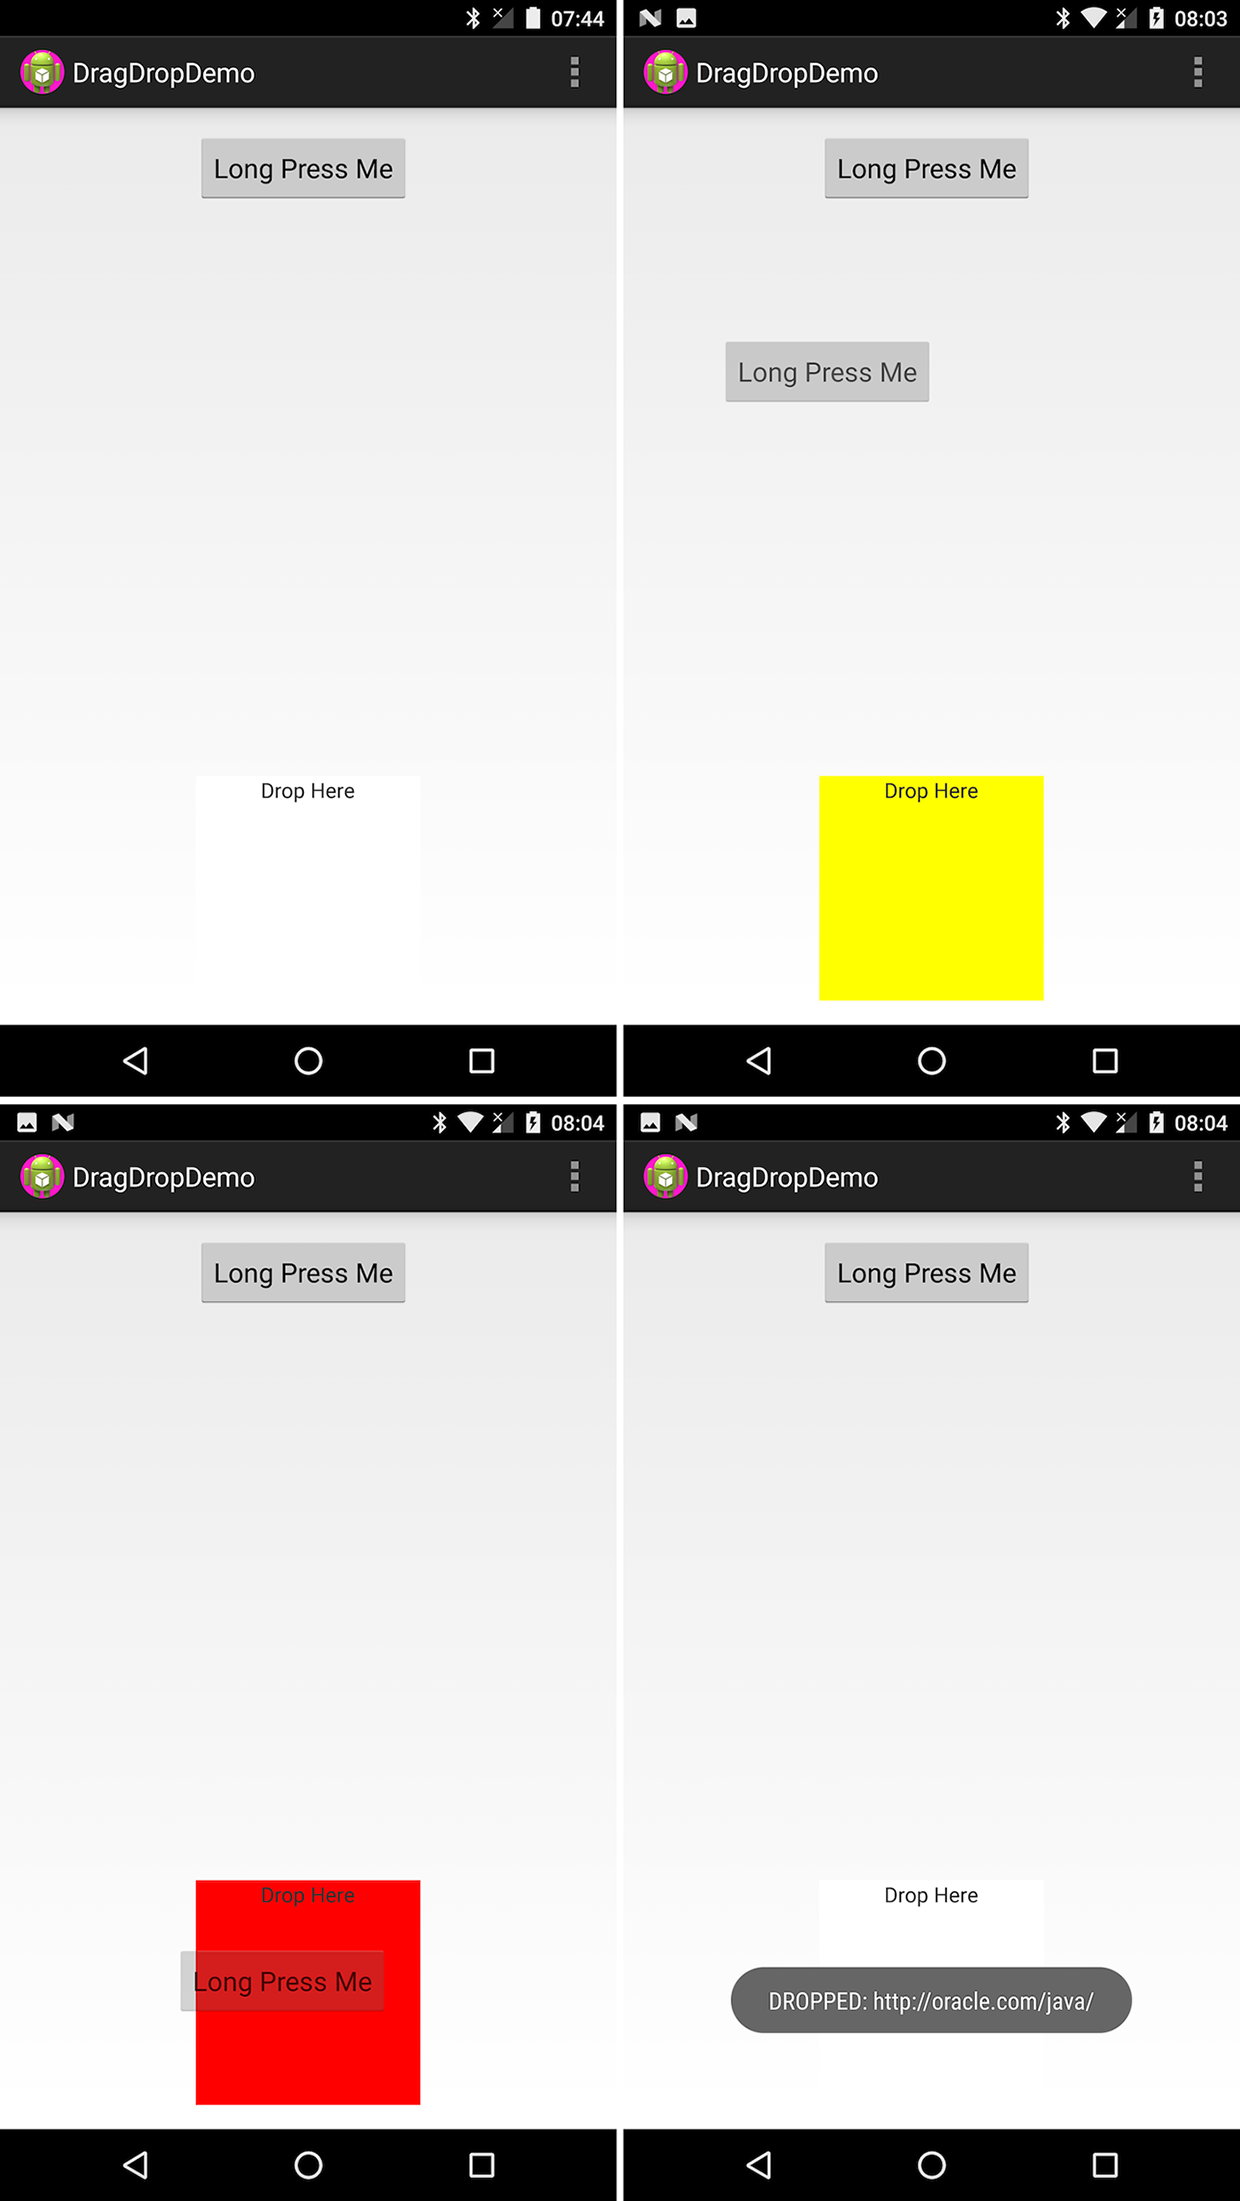
Figure 10-9. Drag and drop sequence
Example 10-23 shows the code in onCreate() to start the drag in response to a long-press on the top button.
Example 10-23. Starting the drag-and-drop operation
// Register the long-click listener to START the dragButtonb=(Button)findViewById(R.id.button);b.setOnLongClickListener(newView.OnLongClickListener(){@OverridepublicbooleanonLongClick(Viewv){UricontentUri=Uri.parse("http://oracle.com/java/");ClipDatacd=ClipData.newUri(getContentResolver(),"Dragging",contentUri);v.startDrag(cd,newDragShadowBuilder(v),null,0);returntrue;}});
This version passes a Uri through the ClipData. To pass arbitrary information, you can use another factory method
such as:
ClipData.newPlainText(Stringlabel,Stringdata)
Then you need to register your OnDragListener with the target View:
target=findViewById(R.id.drop_target);target.setOnDragListener(newMyDrag());
The code for our OnDragListener is shown in Example 10-24.
Example 10-24. Drag-and-drop listener
publicclassMyDragimplementsView.OnDragListener{@OverridepublicbooleanonDrag(Viewv,DragEvente){switch(e.getAction()){caseDragEvent.ACTION_DRAG_STARTED:target.setBackgroundColor(COLOR_TARGET_DRAGGING);returntrue;caseDragEvent.ACTION_DRAG_ENTERED:Log.d(TAG,"onDrag: ENTERED e="+e);target.setBackgroundColor(COLOR_TARGET_ALERT);returntrue;caseDragEvent.ACTION_DRAG_LOCATION:// Nothing to do but MUST consume the eventreturntrue;caseDragEvent.ACTION_DROP:Log.d(TAG,"onDrag: DROP e="+e);finalClipDataclipItem=e.getClipData();Toast.makeText(DragDropActivity.this,"DROPPED: "+clipItem.getItemAt(0).getUri(),Toast.LENGTH_LONG).show();returntrue;caseDragEvent.ACTION_DRAG_EXITED:target.setBackgroundColor(COLOR_TARGET_NORMAL);returntrue;caseDragEvent.ACTION_DRAG_ENDED:target.setBackgroundColor(COLOR_TARGET_NORMAL);returntrue;default:// Unhandled event typereturnfalse;}}}
In the ACTION_DROP case, you would usually pass the Uri to a ContentResolver; for example:
getContentResolver().delete(event.getClipData().getItemAt(0).getUri());
Caution
In some versions of Android, you must consume the DragEvent.ACTION_DRAG_LOCATION event as shown,
or you will get a strange ClassCastException with the stack trace down in the View class.
If you are maintaining compatibility with ancient legacy versions of Android (anything pre-Honeycomb), you must protect the calls to this API with a code guard; it will compile for those older releases with the compatibility library, but calls will cause an application failure.
10.19 Sharing Files via a FileProvider
Ian Darwin
Problem
You want to share internal-storage files (see Recipe 10.1) with another app,
without the bother of putting the data into a Cursor and creating a ContentProvider.
Solution
The FileProvider class allows you to make files available to another application,
usually in response to an Intent.
It is simpler to set up than a ContentProvider (Recipe 10.15), but is actually a subclass of ContentProvider.
Discussion
This example exposes a secrets.txt file from one application to another.
For this example I have created an Android Studio project called FileProviderDemo, which contains two
different applications in two different packages, providerapp and requestingapp.
We’ll start by discussing the Provider app since it contains the actual FileProvider.
However, you have to run the Requester application first, as it will start the Provider app.
Figure 10-10 shows the sequence of the Requester app, then the Provider app,
and finally the Requester app with its request satisfied.

Figure 10-10. FileProviderDemo in action: request, confirmation, completion
Unlike the ContentProvider case, you rarely have to write code for the provider itself;
instead, use the FileProvider class directly as a provider in your AndroidManifest.xml file,
as shown in Example 10-25.
Example 10-25. The provider definition
<providerandroid:name="android.support.v4.content.FileProvider"android:authorities="com.darwinsys.fileprovider"android:grantUriPermissions="true"android:exported="false"><meta-dataandroid:name="android.support.FILE_PROVIDER_PATHS"android:resource="@xml/filepaths"/></provider>
The provider does not have to be exported for this usage, but must have the ability to grant Uri permissions as shown.
The meta-data element gives the name of a simple mapping file, which is required
to map “virtual paths” to actual paths, as shown in Example 10-26.
Example 10-26. The filepaths file
<paths><files-pathpath="secrets/"name="shared_secrets"/></paths>
Finally, there has to be an Activity to provide the Uri to the requested file.
In our example this is the ProvidingActivity, shown in Example 10-27.
Example 10-27. The Provider Activity
/*** The backend app, part of FileProviderDemo.* There is only one file provided; in a real app there would* probably be a file chooser UI or other means of selecting a file.*/publicclassProvidingActivityextendsAppCompatActivity{privateFilemRequestFile;privateIntentmResultIntent;@OverrideprotectedvoidonCreate(BundlesavedInstanceState){super.onCreate(savedInstanceState);mResultIntent=newIntent("com.darwinsys.fileprovider.ACTION_RETURN_FILE");setContentView(R.layout.activity_providing);Toolbartoolbar=(Toolbar)findViewById(R.id.toolbar);setSupportActionBar(toolbar);// The Layout provides a text field with text like// "If you agree to provide the file, press the Agree button"Buttonbutton=(Button)findViewById(R.id.button);button.setOnClickListener(newView.OnClickListener(){@OverridepublicvoidonClick(Viewview){provideFile();}});mRequestFile=newFile(getFilesDir(),"secrets/demo.txt");// On first run of application, create the "hidden" file in internal storageif(!mRequestFile.exists()){mRequestFile.getParentFile().mkdirs();try(PrintWriterpout=newPrintWriter(mRequestFile)){pout.println("This is the revealed text");pout.println("And then some.");}catch(IOExceptione){e.printStackTrace();}}}/*** The provider application has to return a Uri wrapped in an Intent,* along with permission to read that file.*/privatevoidprovideFile(){// The approved target is one hardcoded file in our directorymRequestFile=newFile(getFilesDir(),"secrets/demo.txt");UrifileUri=FileProvider.getUriForFile(this,"com.darwinsys.fileprovider",mRequestFile);// The requester is in a different app so can't normally read our files!mResultIntent.addFlags(Intent.FLAG_GRANT_READ_URI_PERMISSION);mResultIntent.setDataAndType(fileUri,getContentResolver().getType(fileUri));// Attach that to the result IntentmResultIntent.setData(fileUri);// Set the result to be "success" + the resultsetResult(Activity.RESULT_OK,mResultIntent);finish();}}
The important part of this code is in the provideFile() method, which:
-
Creates a
Urifor the actual file (in this trivial example there is only one file, with a hardcoded filename) -
Adds flags to the result Intent to let the receiving app read this one file (only) with our permissions
-
Sets the MIME type of the result
-
Adds the file
Urias data to the result Intent -
Sets the result Intent, and the “success” flags
Activity.RESULT_OK, as the result of this Activity -
Calls
finish()to end the Activity
Note that this Activity is not meant to be invoked by the user directly, so it does not have
LAUNCHER in its AndroidManifest entry.
Thus when you “run” it, you will get an error message, “Could not identify launch activity: Default Activity not found.”
This error is normal and expected.
If it bothers you, build the application and install it, but don’t try to run it.
Or, you could add a dummy Activity with a trivial message onscreen.
Remember that the point of the FileProvider is to share files from one application to another,
running with different user permissions.
Our second application also has only one Activity, the “requesting” Activity.
Most of this is pretty standard boilerplate code. In onCreate(), we create the requesting Intent:
    mRequestFileIntent = new Intent(Intent.ACTION_PICK);
    mRequestFileIntent.setType("text/plain");
The main part of the UI is a text area, which initially suggests that you request a file by pressing the button. That button’s action listener is only one line:
startActivityForResult(mRequestFileIntent, ACTION_GET_FILE);
This will, as discussed in Recipe 4.5, result in a subsequent call to onActivityComplete(), which is
shown in Example 10-28.
Example 10-28. The Requester Activity: onActivityResult()
public class RequestingActivity extends AppCompatActivity {

    private static final int ACTION_GET_FILE = 1;
    private Intent mRequestFileIntent;

    ...

    @Override
    protected void onActivityResult(int requestCode,
    int resultCode, Intent resultIntent) {
        if (requestCode == ACTION_GET_FILE) {
            if (resultCode == Activity.RESULT_OK) {
                try {
                    // get the file
                    Uri returnUri = resultIntent.getData();
                    final InputStream is =
                        getContentResolver().openInputStream(returnUri);
                    final BufferedReader br =
                        new BufferedReader(new InputStreamReader(is));
                    String line;
                    TextView fileViewTextArea =
                        (TextView) findViewById(R.id.fileView);
                    fileViewTextArea.setText(""); // reset each time
                    while ((line = br.readLine()) != null) {
                        fileViewTextArea.append(line);
                        fileViewTextArea.append("
");
                    }
                } catch (IOException e) {
                    Toast.makeText(this, "IO Error: " + e, Toast.LENGTH_LONG).show();
                }
            } else {
                Toast.makeText(this,
                    "Request denied or canceled", Toast.LENGTH_LONG).show();
            }
            return;
        }
        // For any other Activity, we can do nothing...
        super.onActivityResult(requestCode, resultCode, resultIntent);
    }
}
Assuming that the request succeeds, you will get called here with requestCode set to the only valid action,
RESULT_OK, and the resultIntent being the one that the providing Activity set as the Activity result—that is, the Intent wrapping the Uri that we need in order to read the file!
So we just get the Uri from the Intent and open that as an input stream, and we can read the “secret”
file from the providing application’s otherwise-private internal storage.
Just to show that we got it, we display the “secret” file in a text area, shown in
the righthand screenshot in Figure 10-10.
See Also
The official documentation on sharing files.
10.20 Backing Up Your SQLite Data to the Cloud with a SyncAdapter
Solution
Use a SyncAdapter, which lets you synchronize in both directions, providing the infrastructure to run a “merge” algorithm of your own devising.
Discussion
Assuming that you have decided to go the SyncAdapter route, you will first need to make some design decisions:
-
How will you access the remote service? (A REST API, as in Recipe 12.1? Volley, as in Recipe 12.2? Custom socket code?)
-
How will you package the remote service code? (
ContentProvider, as in Recipe 10.15? DAO? Other?) -
What algorithm will you use for ensuring that all the objects are kept up-to-date on the server and on one (or more!) mobile devices? (Don’t forget to handle inserts, updates, and deletions originating from either end!)
Then you need to prepare (design and code) the following:
-
A
ContentProvider(see Recipe 10.15. You’ll need this even if you aren’t using one to access your on-device data, but if you already have one, you can certainly use it. -
An
AuthenticatorService, which is boilerplate code, to start theAuthenticator. -
An
Authenticatorclass, since you must have an on-device “account” to allow the system to control syncing. -
A
SyncAdapterService, which is boilerplate code, to start theSyncAdapter. -
And finally, the actual
SyncAdapter, which can probably subclassAbstractThreadedSyncAdapter.
The following code snippets are taken from my working todo list manager, TodoMore,
which exists as an Android app, a JavaServer Faces (JSF) web application, a JAX-RS REST service used by the
Android app, and possibly others. Each is its own GitHub module, so you can git clone just the parts you need.
In your main Activity’s onCreate() method you need to tell the system that you want to be synchronized.
This consists mainly of creating an Account (the first time; after that, finding it) and requesting synchronization using
this Account. You can start this in your main Activity’s onCreate() method by calling two helper methods shown
in Example 10-29. Note that accountType is just a unique string, such as "MyTodoAccount".
Example 10-29. Sync setup code in main Activity class
publicvoidonCreate(BundlesavedInstanceState){// ...mAccount=createSyncAccount(this);enableSynching(mPrefs.getBoolean(KEY_ENABLE_SYNC,true));}AccountcreateSyncAccount(Contextcontext){AccountManageraccountManager=(AccountManager)context.getSystemService(ACCOUNT_SERVICE);Account[]accounts=accountManager.getAccountsByType(getString(R.string.accountType));// Our account typeif(accounts.length==0){// Haven't created one?// Create the account type and default accountAccountnewAccount=newAccount(ACCOUNT,getString(R.string.accountType));/** Add the account and account type; no password or user data yet.* If successful, return the Account object; else report an error.*/if(accountManager.addAccountExplicitly(newAccount,"top secret",null)){Log.d(TAG,"Add Account Explicitly: Success!");returnnewAccount;}else{thrownewIllegalStateException("Add Account failed...");}}else{// Or we already created one, so use itreturnaccounts[0];}}voidenableSynching(booleanenable){Stringauthority=getString(R.string.datasync_provider_authority);if(enable){ContentResolver.setSyncAutomatically(mAccount,authority,true);// Force immediate syncing at startup - optional featureBundleimmedExtras=newBundle();immedExtras.putBoolean("SYNC_EXTRAS_MANUAL",true);ContentResolver.requestSync(mAccount,authority,immedExtras);Bundleextras=newBundle();longpollFrequency=SYNC_INTERVAL_IN_MINUTES;ContentResolver.addPeriodicSync(mAccount,authority,extras,pollFrequency);}else{// Disabling, so cancel all outstanding syncs until further noticeContentResolver.cancelSync(mAccount,authority);}}
The Authority is that of your ContentProvider, which is why you need one of those even if you are
accessing your data through a DAO (Data Access Object) that, for example, calls SQLite directly.
The Extras that you put in your call to requestSync() control some of the optional behavior
of the SyncAdapter. You can just copy my code for now, but you’ll want to read the full documentation
at some point.
Let’s turn now to the most interesting (and complex) part, the SyncAdapter itself,
which subclasses AbstractThreadedSyncAdapter and
whose central mover and shaker is the onPerformSync() method:
publicclassMySyncAdapterextendsAbstractThreadedSyncAdapter{publicvoidonPerformSync(Accountaccount,Bundleextras,Stringauthority,ContentProviderClientprovider,SyncResultsyncResult){// Do some awesome work heresyncResult.clear();// Indicate success}}
This one method is called automatically by the synchronization subsystem when the specified interval has elapsed,
or when you call requestSync() for an immediate sync (which is optional, but you probably want to do it at application
startup, as we did in our onCreate()).
As the method signature states, it is called with an Account (which you created earlier), a Bundle for arguments,
your Authority string again,
a ContentProvider wrapper called a ContentProviderClient, and a SyncResult (which you have to use to
inform the framework whether your operation succeeded or failed).
When it comes to writing the body of this method, you’re completely on your own. I did something like the following in my todo list application:
-
Fetch the previous update timestamp.
-
Delete remotely any
Tasks that were deleted locally. -
Get a list of all the
Remotetasks. -
Get a list of all the
Localtasks. -
Step through each list, determining which
Tasks need to be sent to the other side (remoteTasks to local database, localTasks to remote database), by such criteria as whether they have a Server ID yet, whether their modification time is later than the previous update timestamp, etc. -
Save any new/modified remote
Tasks into the local database. -
Save any new/modified local
Tasks into the remote database. -
Update the timestamp.
The core of this operation is #5, “step through each list.”
Because this does all the decision making, I extracted it to a separate method,
unimaginatively called algorithm(), which does no I/O or networking, but just works on lists that are passed in.
This was done for testability: I can easily unit test this part without invoking any Android or networking functionality.
It gets passed the remote list and the local list from steps 3 and 4, and populates two more lists
(which are passed in empty) to contain the to-be-copied tasks.
The algorithm() method is called in the middle of the onPerformSync() method—after steps 1–4 have been completed—to prepare the lists for use in steps 6 and 7, in which
the code in onPerformSync() has to do the actual work of updating the local and remote databases.
Here you can use almost any database access method for the local database (such as a ContentProvider, a DAO, direct use of SQLite, etc.),
and almost any network method to add, update, and remove remote objects (URLConnection to the REST service,
the deprecated HttpClient, perhaps Volley, etc.).
I don’t even show the code for onPerformSync() or my inner algorithm() method, as this is something you’ll have to work out on your own; it is in the sample GitHub download if you want to look at mine.
I will say that I used a DAO locally and a URLConnection to the REST service for remote access.
You must have a ContentProvider, even if you’re not using it but are instead using SQLite directly, as mentioned.
A dummy ContentProvider just has to exist, it doesn’t have to do anything if you don’t use it.
All the methods can in fact be dummied out, as long as your dummy content provider in fact subclasses ContentProvider:
publicclassTodoContentProviderextendsContentProvider{/** Always return true, indicating success*/@OverridepublicbooleanonCreate(){returntrue;}/** Return no type for MIME type*/@OverridepublicStringgetType(Uriuri){returnnull;}/** query() always returns no results*/@OverridepublicCursorquery(Uriuri,String[]projection,Stringselection,String[]selectionArgs,StringsortOrder){returnnull;}// Other methods similarly return null// or could throw UnsupportedOperationException(?)}
You will also need a Service to start your SyncAdapter.
This is pretty basic; my version just gets the SharedPreferences because they are needed in the adapter,
and passes that to the constructor. The onBind() method is called by the system
to connect things up:
publicclassTodoSyncServiceextendsService{privateTodoSyncAdaptermSyncAdapter;privatestaticfinalObjectsLock=newObject();@OverridepublicvoidonCreate(){super.onCreate();SharedPreferencesprefs=PreferenceManager.getDefaultSharedPreferences(getApplication());synchronized(sLock){if(mSyncAdapter==null){mSyncAdapter=newTodoSyncAdapter(getApplicationContext(),prefs,true);}}}@OverridepublicIBinderonBind(Intentintent){returnmSyncAdapter.getSyncAdapterBinder();}}
We also need an AccountAuthenticator, which can be dummied out:
publicclassTodoDummyAuthenticatorextendsAbstractAccountAuthenticator{privatefinalstaticStringTAG="TodoDummyAuthenticator";publicTodoDummyAuthenticator(Contextcontext){super(context);}@OverridepublicBundleeditProperties(AccountAuthenticatorResponseresponse,StringaccountType){thrownewUnsupportedOperationException();}@OverridepublicBundleaddAccount(AccountAuthenticatorResponseresponse,StringaccountType,StringauthTokenType,String[]requiredFeatures,Bundleoptions){Log.d(TAG,"TodoDummyAuthenticator.addAccount()");returnnull;}@OverridepublicBundleconfirmCredentials(AccountAuthenticatorResponseresponse,Accountaccount,Bundleoptions){returnnull;}@OverridepublicBundlegetAuthToken(AccountAuthenticatorResponseresponse,Accountaccount,StringauthTokenType,Bundleoptions){thrownewUnsupportedOperationException();}@OverridepublicStringgetAuthTokenLabel(StringauthTokenType){thrownewUnsupportedOperationException();}@OverridepublicBundleupdateCredentials(AccountAuthenticatorResponseresponse,Accountaccount,StringauthTokenType,Bundleoptions){thrownewUnsupportedOperationException();}@OverridepublicBundlehasFeatures(AccountAuthenticatorResponseresponse,Accountaccount,String[]features){thrownewUnsupportedOperationException();}}
And as with the SyncAdapter itself, you need a Service class to start this, which is pretty simple:
publicclassTodoDummyAuthenticatorServiceextendsService{// Instance field that stores the authenticator object,// so we only create it once for multiple usesprivateTodoDummyAuthenticatormAuthenticator;@OverridepublicvoidonCreate(){// Create the Authenticator objectmAuthenticator=newTodoDummyAuthenticator(this);}/** Called when the system binds to this Service to make the IPC call;* just return the authenticator's IBinder*/@OverridepublicIBinderonBind(Intentintent){returnmAuthenticator.getIBinder();}}
The Services that expose the SyncAdapter and the Authenticator, as well as the ContentProvider,
are Android components, so they must all be listed in the Android manifest:
<!-- Sync Adapter--><serviceandroid:name=".sync.TodoSyncService"android:exported="true"android:process=":sync"><intent-filter><actionandroid:name="android.content.SyncAdapter"/></intent-filter><meta-dataandroid:name="android.content.SyncAdapter"android:resource="@xml/synchadapter"/></service><!-- Dummy authenticator - needed by SyncAdapter --><serviceandroid:name=".sync.TodoDummyAuthenticatorService"><!-- Required filter used by the system to launch our account service. --><intent-filter><actionandroid:name="android.accounts.AccountAuthenticator"/></intent-filter><!-- This points to an XML file which describes our account service. --><meta-dataandroid:name="android.accounts.AccountAuthenticator"android:resource="@xml/authenticator"/></service><!-- Dummy ContentProvider also "needed" --><providerandroid:name="TodoContentProvider"android:authorities="@string/datasync_provider_authority"android:exported="false"android:syncable="true"/>
With all the pieces in place, you should see your account type showing up in Settings → Accounts, and selecting it should allow you to trigger a sync, enable/disable syncing, see the time of the last sync, and so on (see Figure 10-11).
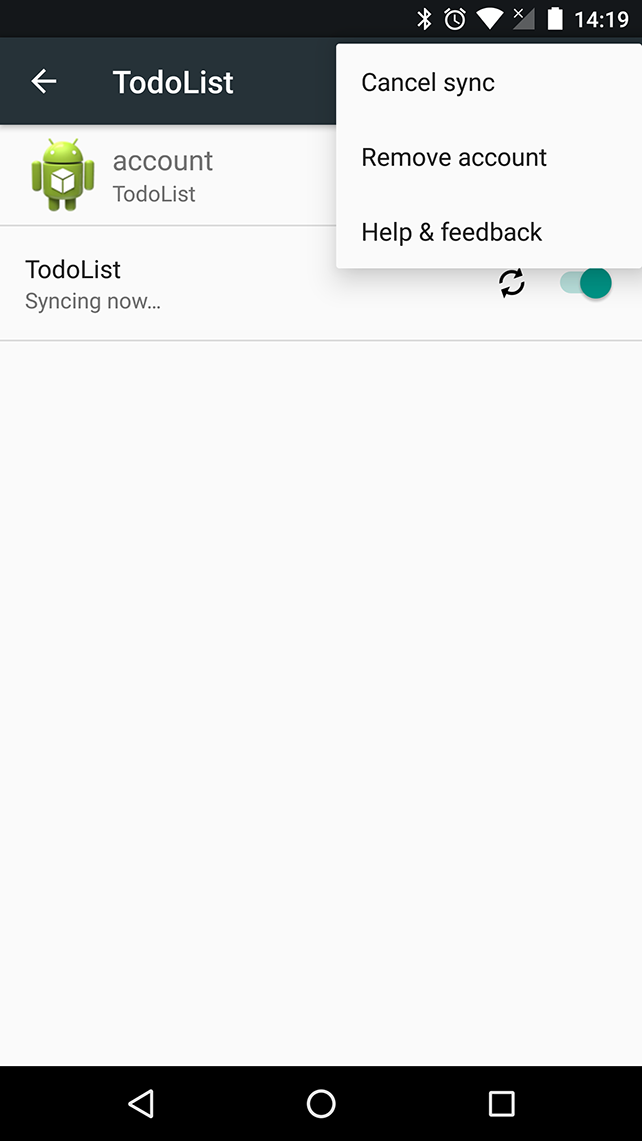
Figure 10-11. SyncAdapter’s user interface: Settings app
See Also
The official documentation on transferring data using sync adapters.
Sample Code
The sample code is available on GitHub.
To use it as a distributed system you would have to set up your own server
(possibly using the TodoREST repository), then configure
the server, credentials, etc. in the Settings Activity and test it out.
10.21 Storing Data in the Cloud with Google Firebase
Ian Darwin
Problem
You need to store data from your app users’ devices into the cloud, and don’t have time to write a SyncAdapter.
You want to have access to your cloud data from Apple iOS devices and/or a web application.
Solution
While the SyncAdapter is fine in its own way, it is a complex beast to use.
Firebase, a Google commercial product, makes it easier to develop your application.
Discussion
Firebase is far from the first solution in this area, but it is the one that Android recommends—unsurprisingly, since Google offers it as a commercial service. We discuss it here not to say that it’s the best or only way to do things, but because it really is the path of least resistance to getting an Android cloud-based database up and running, and it’s a good example of how such things work.
A brief summary of the steps are:
-
Create an account on the Firebase website, which will give you a unique URL to use, of the form https://
nnn.firebase.com/ (thennnwill be provided when you register). -
Decide how to structure the data.
-
Add the Firebase library coordinates to your pom.xml or build.gradle file (or download the JAR and add it to your project the hard way, or use Android Studio to add the Firebase library to your project).
-
Write code in the
onCreate()method of your Activity or application (see Recipe 2.3) to create aFirebaseobject using your unique URL. -
To receive the data, add a listener to the
Firebaseobject. -
To insert, query, update, or delete, invoke methods on the
Firebaseobject, some of which have additional listeners to notify you of completion and/or results.
In this example we will explore a simple “todo list” application, with data stored only in Firebase.
This is an alternate implementation of the example used in the SyncAdapter recipe (Recipe 10.20);
both are part of my “TodoMore” application family, but the two use different backends at this point.
The Firebase version shown here can be downloaded from GitHub.
Creating an account is just a matter of using the website signup. It’s free to sign up and develop your app; see the Pricing page for the various plans available.
My data is quite simple; it consists of a list of Todo Task items for each user.
The Firebase data is basically a hierarchy of data, effectively in JSON format.
The Task class in Java maps directly to the fields of the database. As you can see in Figure 10-12,
there are fields like name (a one-liner describing the item),
description (a longer discussion if needed, may be null),
creationDate (when you entered the task, stored as a lightweight custom Data class, not a java.util.Date),
modified (simple timestamp format),
priority and status (which are enums in the Java code but represented as Strings in the JSON),
and id (a long integer used as a primary key in the relational database, but not used here).

Figure 10-12. Developer console showing data
Initializing the database is done in the onCreate() method of the Application class,
so the database will be available to any Activity classes that need it:
privateStringmBaseUrl;// Loaded from a config fileprivateFirebasemDatabase;// The database connection, has a get method@OverridepublicvoidonCreate(){super.onCreate();Firebase.setAndroidContext(this);StringbaseUrl=getBaseUrl()+TaskListActivity.mCurrentUser+"/tasks/";mDatabase=newFirebase(baseUrl);}
With that out of the way, we can add a Listener to receive the data. In the Todo application we want to download
this user’s complete list of tasks at the start of the application. If you had a larger database and didn’t want it all
on the device, you’d use a Query, discussed in Recipe 10.7.
This is done in the onCreate() method of the main Activity:
((ApplicationClass)getApplication()).getDatabase().addValueEventListener(newValueEventListener(){@OverridepublicvoidonDataChange(DataSnapshotsnapshot){System.out.println("There are "+snapshot.getChildrenCount()+" Todo Tasks(s)");ApplicationClass.sTasks.clear();for(DataSnapshotdnlSnapshot:snapshot.getChildren()){Tasktask=dnlSnapshot.getValue(Task.class);System.out.println(task.getName()+" - "+task.getDescription());StringjsonKey=dnlSnapshot.getKey();ApplicationClass.sTasks.add(newKeyValueHolder<>(jsonKey,task));}Collections.sort(ApplicationClass.sTasks,tasksComparator);mAdapter.notifyDataSetChanged();}@OverridepublicvoidonCancelled(FirebaseErrorerror){Toast.makeText(getBaseContext(),"Task read cancelled!! "+error,Toast.LENGTH_LONG).show();}});
The DataSnapshot object is vaguely analogous to a SQLite Cursor or a JDBC ResultSet.
We iterate over its children, which are magically turned into Task objects when we call getValue(Task.class).
Normally that’s all you’d have to do—it really is that simple!
Except, we will later (to update or delete) need the objects’ Firebase key values—i.e., the -KFq… strings at the top level of each Task.
We don’t want to store these inside the Task class, because otherwise they’d be persisted as fields inside the object
as well as the keys.
So we introduce a wrapper class, the KeyValueHolder (part of our application, not the Firebase API),
to map the Firebase key and the Task object.
We want the data in List format, both for speed and to preserve order; otherwise, the keys and values could be put in a Map.
Speaking of order, once we’ve added them to the list (a field in the Application class, again to share with other Activities),
we sort the list using Collections.sort(), and notify our list adapter (see Chapter 8) that its data has changed, so the list will now show the latest data.
When I was starting I didn’t have a save() method yet and wasn’t quite sure how the data would look, so I created
the first few entries using the “+” button in the developer’s console, to add hierarchical objects.
The “+” and “×” buttons allow you to insert and remove data at any node in the tree.
If you do make changes this way after your app has been set up—even with just the code we’ve shown so far—the list view on the device will reflect the changes almost instantly. Nice!
That’s also why the first entry has a “1” for its key instead of the longer strings that Firebase likes to use for its keys.
Those longer keys are generated client-side, by the way, to allow you to generate them even if the device is offline, but they have
more randomness than the standard UUID format so pretty much guarantee unique key values on the server.
What about updates and deletes? Well, yes. They work, and they’re pretty simple. Let’s take a look at the update and delete code.
This is in the EditActivity; the startup code gets the task to edit by getting its key passed in the Intent.
There is a modelToView() method that puts it into text fields and so on in the UI, and of course viewToModel() does the inverse.
The doSave() method is called from a Button, and doDelete()—hopefully less common—is called from a menu:
privateStringmKey;privateTaskmTask;privateEditTextnameTF,descrTF;@OverrideprotectedvoidonCreate(BundlesavedInstanceState){super.onCreate(savedInstanceState);intindex=getIntent().getIntExtra(TaskDetailFragment.ARG_ITEM_INDEX,0);KeyValueHolder<String,Task>taskWrapper=ApplicationClass.sTasks.get(index);mKey=taskWrapper.key;mTask=taskWrapper.value;setContentView(R.layout.activity_task_edit);nameTF=(EditText)findViewById(R.id.nameEditText);descrTF=(EditText)findViewById(R.id.descrEditText);FloatingActionButtonfab=(FloatingActionButton)findViewById(R.id.fab);fab.setOnClickListener(newView.OnClickListener(){@OverridepublicvoidonClick(Viewview){viewToModel();doSave();}});modelToView();// Copies fields from mTask to the UI components}voiddoSave(){viewToModel();((ApplicationClass)getApplication()).getDatabase().child(mKey).setValue(mTask);finish();}voiddoDelete(){((ApplicationClass)getApplication()).getDatabase().child(mKey).removeValue();finish();}
Figure 10-13 shows how the application looks in action.

Figure 10-13. Simple “todo list” in Firebase
See Also
There are more capabilities in Firebase. The most important one that we didn’t explore is authentication; Google provides a complete and powerful authentication API along with an Access Control–based permissions scheme that you’ll certainly want to enable before you make your app-specific data available to the world. This and other features are documented on the Firebase website.
1 There are other signatures; see the official documentation for details.