
Let's build a Fragment in its simplest possible form so we can understand what is going on, before in later chapters we start producing Fragments all over the place that are of genuine use.
Tip
I urge all readers to go through and build this project. There is a lot of jumping around from file to file, and just reading alone can make it seem more complex than it really is. Certainly, you can copy and paste the code from the download bundle, but please also follow the steps, and create your own projects and classes. Fragments are not too tough, but their implementation, like their name suggests, is a little fragmented.
Create a new project called Simple Fragment using the Basic Activity template and leaving the rest of the settings at their defaults.
Switch to activity_main.xml and delete the default Hello world! TextView.
Now make sure the root ConstraintLayout is selected by left-clicking it in the Component tree window, and then change its id property to fragmentHolder. We will now be able to get a reference to this layout in our Java code and, as the id property implies, we will be adding a Fragment to it.
Now we will create a layout that will define our fragment's appearance. Right-click the layout folder and choose New | Layout resource file. In the File name field, type fragment_layout, and left-click OK. We have just created a new layout of the LinearLayout type.
Add a single Button widget anywhere on the layout and make its id property button.
Now that we have a simple layout for our fragment to use, let's write some Java code to make the actual fragment.
Tip
Note that you can create a Fragment by simply dragging and dropping one from the palette, but doing things this way is much less flexible and controllable, and flexibility and control are the big benefits to fragments, as we will see throughout the next chapter. By creating a class that extends Fragment, we can make as many fragments from it as we like.
In the project explorer, right-click the folder that contains the MainActivity file. From the context menu, choose New | Java class. In the Name field, type SimpleFragment and left-click OK.
In our new SimpleFragment class, change the code to extend Fragment. As you type the code, you will be asked to choose the specific Fragment class to import, as shown in the following screenshot:
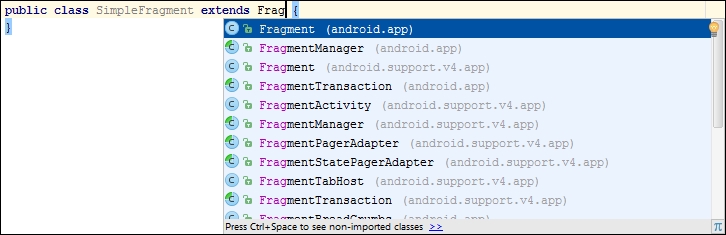
Choose the top option (as shown in the previous screenshot), which is the regular Fragment class.
Now add a single String variable called myString, and a Button variable called myButton, as members.
Now override the onCreate method. Inside the onCreate method, initialize myString to Hello from SimpleFragment. Our code so far (excluding the package declaration and import statements) will look exactly like this next code:
public class SimpleFragment extends Fragment {

   // member variables accessible from anywhere in this fragment
   String myString;
   Button myButton;

    @Override
    public void onCreate(Bundle savedInstanceState){
        super.onCreate(savedInstanceState);

        myString = "Hello from SimpleFragment";
    }
}
In the previous code, we created a member variable called myString, and then, in the onCreate method, we initialized it. This is very much like we do for our previous apps when only using Activity.
The difference, however, is that we did not set the view or attempt to get a reference to our Button member variable, myButton.
When using Fragment, we need to do this in the onCreateView method. Let's override that now and see how we set the view and get a reference to our Button.
Add this code to the SimpleFragment class after the onCreate method:
@Override
public View onCreateView(LayoutInflater inflater, ViewGroup
container, Bundle savedInstanceState) {

   View view = inflater.inflate(R.layout.fragment_layout,
        container, false);

   myButton = (Button) view.findViewById(R.id.button);

   return view;
}
To understand the previous block of code, we must first look at the onCreateView method signature. Observe in the first instance that the start of the method states that it must return an object of the View type:
public View onCreateView...Next, we have the three arguments. Let's look at the first two:
(LayoutInflater inflater, ViewGroup container,...
We need LayoutInflater as we cannot call setContentView because Fragment provides no such method. In the body of onCreateView, we use the inflate method of inflater to inflate our layout contained in fragment_layout.xml and initialize view (an object of the View type) with the result.
We use container, which was passed in to onCreateView, as an argument in the inflate method as well. The container variable is a reference to the layout in activity_main.xml.
It might seem obvious that activity_main.xml is the containing layout, but, as we will see later in the chapter, the ViewGroup container argument allows any Activity with any layout to be the container for our fragment. This is exceptionally flexible and makes our Fragment code reusable to a significant extent.
The third argument we pass in to inflate is false, which means that we don't want our layout added immediately to the containing layout. We will do this ourselves soon from another part of the code.
The third argument of onCreateView is Bundle savedInstanceState, which is there to help us maintain the data that our fragments hold.
Now that we have an inflated layout contained in view, we can use this to get a reference to our Button as follows:
myButton = (Button) view.findViewById(R.id.button);
And use it as the return value to the calling code, as required:
return view;
Now we can add an anonymous class to listen for clicks on our button in the usual manner. In the onClick method, we display a pop up Toast message to demonstrate that everything is working as expected.
Add this code just before the return statement in onCreateView, as highlighted in the following code:
@Override
public View onCreateView(LayoutInflater inflater,
      ViewGroup container,
      Bundle savedInstanceState) {

      View view = inflater.inflate(R.layout.fragment_layout,
      container, false);

      myButton = (Button) view.findViewById(R.id.button);

      myButton.setOnClickListener(
              new View.OnClickListener() {

                            @Override
                             public void onClick(View v) {

                                  Toast.makeText(getActivity(),
                                                     myString ,
                                            Toast.LENGTH_SHORT).
                                            show();
                        }
                  });

      return view;
}We can't run our app just yet; it will not work because there is one more step required. We need to create an instance of SimpleFragment and initialize it appropriately. This is where FragmentManager will get introduced.
This next code creates a new FragmentManager by calling getFragmentManager. It creates a new Fragment, based on our SimpleFragment class using the FragmentManager, and passing in the id of the layout (within the Activity) that will hold it.
Add this code to the onCreate method of MainActivity.java just after the call to setContentView:
// Get a fragment manager
FragmentManager fManager = getFragmentManager();

// Create a new fragment using the manager
// Passing in the id of the layout to hold it
Fragment frag = fManager.findFragmentById(R.id.fragmentHolder);

// Check the fragment has not already been initialized
if(frag == null){

   // Initialize the fragment based on our SimpleFragment
   frag  = new SimpleFragment();
   fManager.beginTransaction()
                .add(R.id.fragmentHolder, frag)
                .commit();

}Now run the app and gaze in wonder at our clickable button that displays a message with the Toast class, and which took two layouts and two whole classes to create:

If you remember doing that way back in Chapter 2, First Contact: Java, XML and the UI Designer, and with far less code, then it is clear that we need a fragment reality check to answer a question; like, WHY!