
In this brief chapter, we will achieve much. We will first go through the theory of adapters and lists. We will then look at how we can extend RecyclerAdapter in Java code and add RecyclerView, which acts as a list to our UI, and then, through the apparent magic of the Android API, bind them together so that RecyclerView displays the contents of RecyclerAdapter and allows the user to scroll through the contents. You have probably guessed that we will be using this technique to display our list of notes in the Note to Self app.
In this chapter, we will do the following:
- Look at the theory of adapters and binding them to our UI
- Implement the layout with
RecyclerView - Lay out a list item for use in
RecyclerView - Implement the adapter with
RecyclerAdapter - Bind the adapter to
RecyclerView - Store notes in
ArrayListand display them inRecyclerView - Discuss how we can improve the Note to Self app further
Soon, we will have a self-managing layout that holds and displays all our notes, so let's get started.
In Chapter 5, Beautiful Layouts with CardView and ScrollView, we used ScrollView and we populated it with a few CardView widgets so we could see it scrolling. We could take what we have just learned about arrays and ArrayList and create an array of TextViews, use them to populate ScrollView, and, within each TextView, place the title of a note. This sounds like a perfect solution for showing each note so that it is clickable in the Note to Self app.
We could create the TextViews dynamically in Java code, set their text property to be the title of a note, and then add the TextViews to a LinearLayout contained in a ScrollView. But this is imperfect.
This might seem fine, but what if there were dozens, hundreds, or even thousands of notes? We couldn't have thousands of TextViews in memory because the Android device might simply run out of memory, or at the very least grind to a halt, as it tries to handle the scrolling of such a vast amount of data.
Now, also consider if we wanted (which we do) each note in the ScrollView to show whether it was important, a to-do, or an idea. And how about a short snippet from the text of the note as well?
We would need to devise some clever code that loads and destroys Note objects and TextViews from an array/ArrayList. It can be done, but to do it efficiently is far from straightforward.
Fortunately, this is a problem faced so commonly by mobile developers that the Android API has a solution built in.
We can add a single widget called a RecyclerView (like an environmentally friendly ScrollView but with boosters too) to our UI layout. RecyclerView was designed precisely as a solution to the problem we have been discussing. In addition, we need to interact with a RecyclerView with a special type of class that understands how RecyclerView works. We will interact with it using an adapter. We will use the RecyclerAdapter class, extend it, customize it, and then use it to control the data from our ArrayList and display it in the RecyclerView.
Let's find out a bit more about how the RecyclerView and RecyclerAdapter classes work.
We already know how to store almost unlimited notes—we can do so in an ArrayList, although we haven't implemented it yet. We also know that there is a UI layout called RecyclerView, which is specifically designed to display potentially long lists of data from an ArrayList. We just need to see how to put it all into action.
To add a RecyclerView to our layout, we can simply drag and drop it from the palette onto our UI in the usual way.
The RecyclerView will look like this in the UI designer:
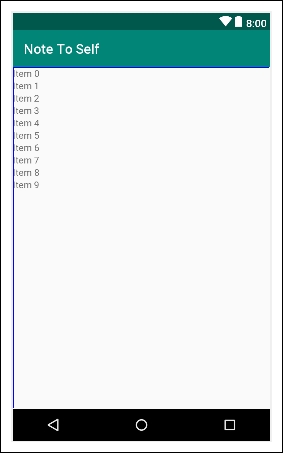
This appearance, however, is more a representation of the possibilities than the actual appearance in an app. If we run the app at once after adding a RecyclerView, we just get a blank screen.
The first thing we need to do to make practical use of RecyclerView is decide what each item in the list will look like. It could be just a single TextView; it could be an entire layout. We will use a LinearLayout. To be clear and specific, we will use a LinearLayout that holds three TextView widgets for each item in our RecyclerView. This will allow us to display the note status (important/idea/to-do), the note title, and a short snippet of text from the actual note contents.
A list item needs to be defined in its own XML file, then the RecyclerView can hold multiple instances of this list item layout.
Of course, none of this explains how we overcome the complexity of managing what data is shown in which list item and how it is retrieved from an ArrayList.
This data handling is taken care of by our own customized implementation of RecyclerAdapter. The RecyclerAdapter class implements the Adapter interface. We don't need to know how Adapter works internally; we just need to override the right methods and then RecyclerAdapter will do all the work of communicating with our RecyclerView.
Wiring up an implementation of RecyclerAdapter to a RecyclerView is certainly more complicated than dragging 20 TextViews onto a ScrollView—but once it is done, we can forget about it and it will keep on working and manage itself regardless of how many notes we add to the ArrayList. It also has built in features for handling things like neat formatting and detecting which item in a list was clicked.
We will need to override some methods of RecyclerAdapter and add a little code of our own.
Look at this outline of the required steps so we know what to expect when we do this next. To get the whole thing up and running, we would do the following:
- Delete the temporary button and related code and then add a
RecyclerViewto our layout with a specificidproperty. - Create an XML layout to represent each item in the list. We have already mentioned that each item in the list will be a
LinearLayoutthat contains 3TextViewwidgets. - Create a new class that extends
RecyclerAdapterand add code to several overridden methods to control how it looks and behaves, including using our list item layout andArrayListfull ofNoteinstances. - Add code in
MainActivityto use theRecyclerAdapterand theRecyclerViewand bind it to ourArrayListinstance. - Add an
ArrayListtoMainActivityto hold all our notes and update thecreateNewNotemethod to add any new notes created in theDialogNewNoteclass to thisArrayList.