10. Ubuntu Development with Cordova
One of the latest additions to the Cordova family is support for the Ubuntu Touch OS. The team at Canonical (www.canonical.com), the makers of the Ubuntu Linux distribution, jumped in and have implemented pretty complete support for Apache Cordova. In this chapter, I show you how to set up and use a Cordova development environment for Ubuntu Touch devices.
Installing the Cordova CLI on Ubuntu
Even though I walked you through all of the steps required to install the Cordova CLI in Chapter 3, “Configuring a Cordova Development Environment,” that chapter covered only the Windows and OS X installations. The Ubuntu development environment is pretty straightforward to install and doesn’t have any of the extra software installation requirements you found in Chapter 3. For that reason, I decided to cover the installation of the Cordova development environment for Ubuntu separately.
The Cordova tools for Ubuntu are supported only on Linux; if you try to execute any of the Cordova commands for Ubuntu Touch on any other operating system, you will receive an error. So, in order to work with Ubuntu Touch devices and Cordova, you’re going to need a system (or virtual machine) running the Ubuntu operating system. The tools may install on other flavors of Linux, but since the tools are from Ubuntu, I decided to try them only on a system running Ubuntu.
Before we get started, I want to share a couple of links with you first. The instructions for how to configure a development environment for Ubuntu Touch can be found in the Ubuntu Platform Guide at http://goo.gl/tIynPO. The Ubuntu team also maintains a Cordova Guide which can be found at http://goo.gl/fN6v0N. There’s even a simple Cordova Camera Application Tutorial located at http://goo.gl/yPCGQv.
To perform the installation, I started by downloading a copy of the latest version of the Ubuntu Linux operating system from www.ubuntu.com/download. I used the 64-bit version and installed the OS on one of my lab systems using the default options.
You could install Cordova by following the steps outlined in Chapter 3. Those steps include installing Git and NodeJS, then installing the Cordova CLI using NPM by opening a terminal window and executing the following command:
npm install –g cordova
The problem is that this will seem to work, but after the installation completes, the cordova command will simply not execute. What you need to do is follow the instructions provided in the Platform Guide linked above. First, you must configure the system with details on the Personal Package Archive (PPA) where the Ubuntu Cordova CLI files are maintained. To do this, open a terminal window and execute the following commands:
sudo add-apt-repository ppa:cordova-ubuntu/ppa
sudo apt-get update
These commands will configure the system for the cordova-ubuntu repository, so the system can install applications from it. The apt-get update command refreshes the local cache of applications so we’ll be able to install the Cordova CLI from the repository. With those steps completed, you install the Cordova Ubuntu tools using the following command:
sudo apt-get install cordova-cli
That’s it—that’s all you have to do to install the Cordova CLI and tools for Ubuntu. Be prepared for this process to take a while as there’s a lot to install. The system will grind and twist for a while and install a whole bunch of stuff needed by the tools. The cool thing about this is that one command installs everything you need, including the tools for testing and debugging your applications.
When the process completes, you can use any of the Cordova CLI commands outlined in Chapter 4, “Using the Cordova Command-Line Interfaces,” to create and manage an Ubuntu application project. To create the simple Lunch Menu application I’ve used as an example before, you would open a terminal window, navigate to the folder where you want the project created, and issue the following commands:
cordova create lunchmenu com.ac4p.lunchmenu "Lunch Menu"
cd lunchmenu
cordova platform add ubuntu
cordova plugin add org.apache.cordova.console
cordova plugin add org.apache.cordova.dialogs
cordova plugin add org.apache.cordova.device
At this point, you can edit or copy in the web application code in the project’s www folder and begin testing. I’ll show you how to run and debug your Ubuntu Cordova application in the next section.
Debugging Ubuntu Applications
When it comes to executing your Cordova application, the Ubuntu platform works the same way as other platforms. Simply open a terminal window, navigate to the Cordova project folder, and execute the following command:
cordova run
That command will execute the application for all platforms that are associated with the project. If Ubuntu is the only platform in your project, executing this command will build the application and launch it; I’ll explain more about what happens in a minute. If you have multiple platforms added to your project and you want to run only the Ubuntu Touch version, simply execute the following command:
cordova run ubuntu
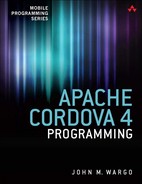
If there’s no device available, the CLI will actually build a desktop version of the app and launch it in the desktop browser. You can see an example of this in Figure 10.1; here I’ve launched a sample debug application I created to help show off the capabilities of debugging tools.
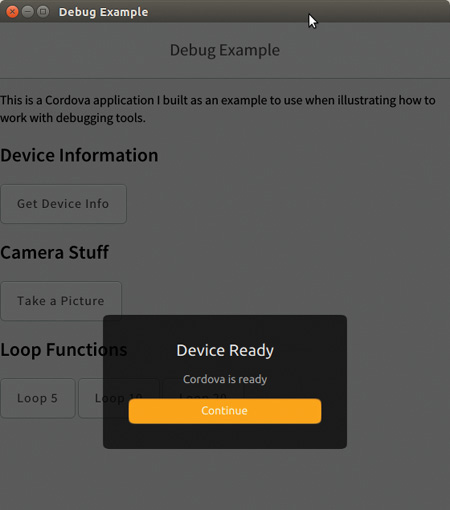
If you take a look at Figure 10.2, you’ll see some more interesting things. First of all, as soon as the application starts running in the simulator, whenever the application writes to the console, the content is automatically displayed in the terminal window as shown in the figure. This makes it much easier for you to see the application’s output; you don’t have to open another tool. To regain control of the terminal window, you can press Ctrl-C in the terminal window or close the simulator window.
Another interesting option available to you is also shown in Figure 10.2. In the middle of the figure you should see text instructing you on how to debug the Cordova application while it’s running in the browser:
Warning: Inspector server started successfully.
Try pointing a WebKit browser to http://127.0.0.1:9222
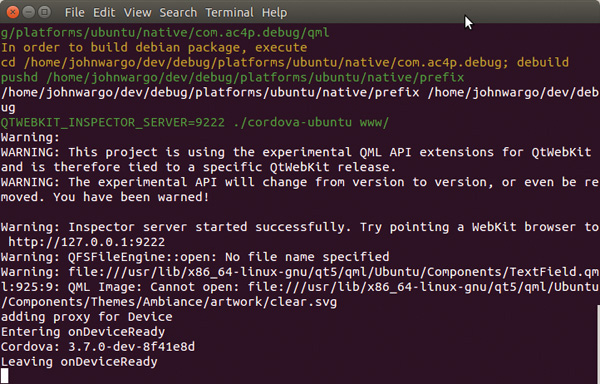
The CLI has automatically launched a debug process for you and connected it to the simulator. So, when you open a compatible browser and point it to the specified URL, you will see a screen similar to what is shown in Figure 10.3. Ubuntu ships Firefox by default, but last I checked it wasn’t running WebKit, so I installed the Google Chrome browser to use for testing the application.
Since there’s only one inspectable application running in the simulator, that’s all that shows up in the figure. I tried running another application on the simulator from another terminal window, but it opened a separate simulator process and failed when I tried to open the Web Inspector server.
When you click the link shown in Figure 10.3, the browser will open the standard web debugger window you’ve already seen in Chapters 5, 7, and 9. Figure 10.4 shows the Web Inspector window for my sample debug application.
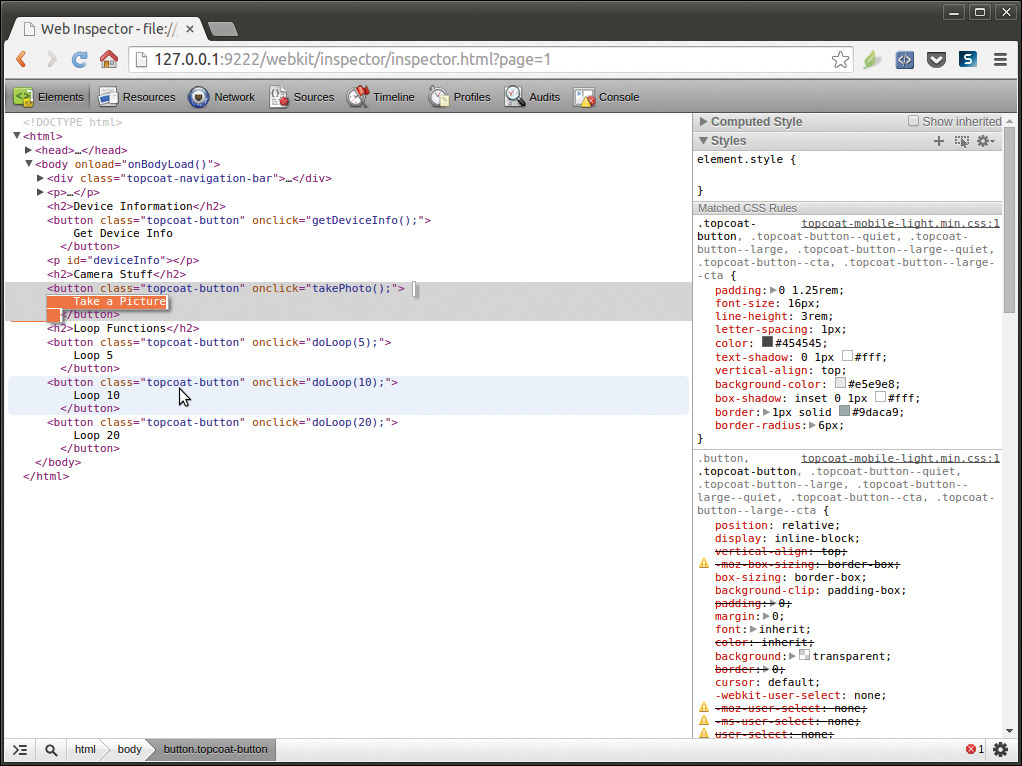
In the Elements pane, you can view the application’s HTML content and even make changes to the content as I’ve shown in the figure. On the right side of the page are style and property panes you can use to edit the page’s content and styling; the changes are immediately reflected in the simulator.
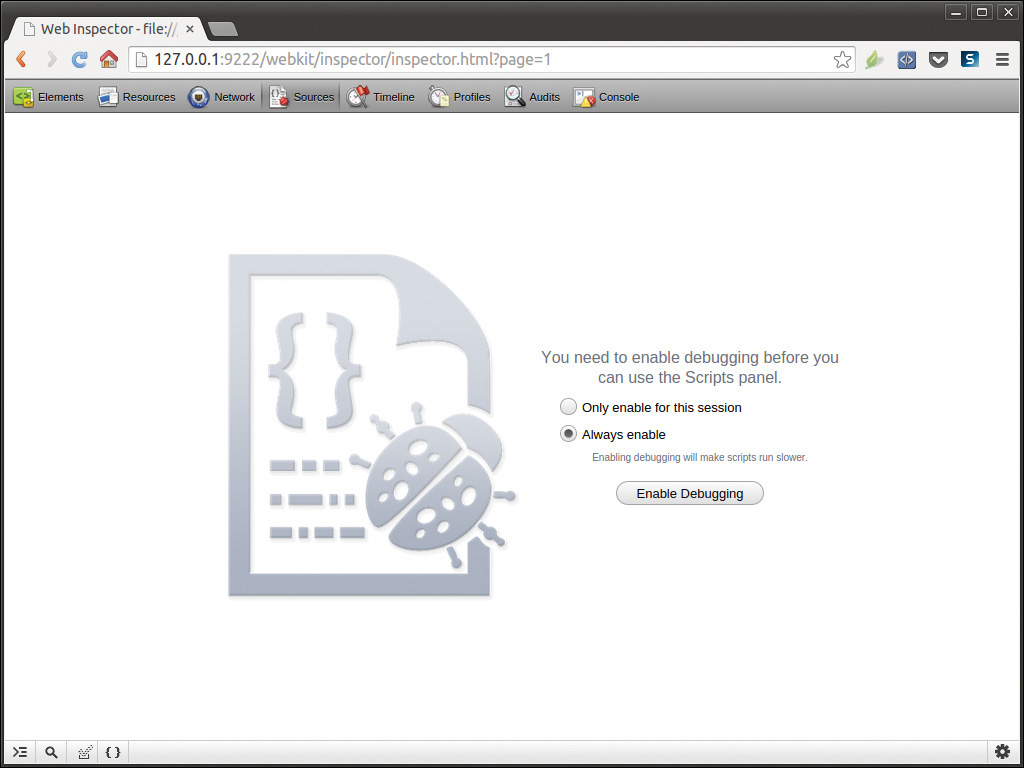
The Sources pane is used to display a pane you can use to interact with the application’s code. Before you can begin poking around in the application’s code, you must first enable debugging as shown in Figure 10.5. Select the option that makes the most sense for you and click the Enable Debugging button to continue. I always select Always enable; I can’t think of a reason to do otherwise.
At this point, the browser will open the pane shown in Figure 10.6. What you’ll see is a navigator on the left that allows you to access the application’s source code files, a main pane that lists the code from the selected file, and a properties pane on the right that allows you to interact with the code at runtime.
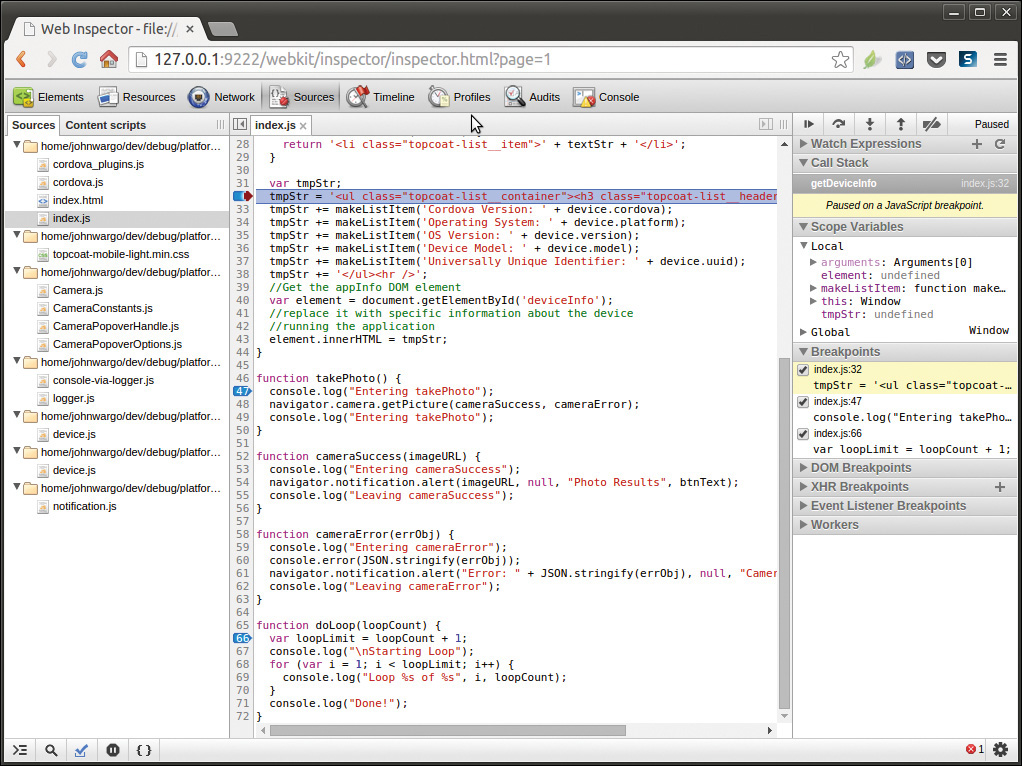
In this example, I’ve set some breakpoints, the symbols next to lines 32, 47, and 66 in the application’s index.js file. Before the application executes one of those lines, the debugger will intercept execution so you can step through the code, evaluate expressions, view properties, and more.
When application execution is halted at a breakpoint, you use the buttons highlighted in Figure 10.7 to manage the execution of the halted code.
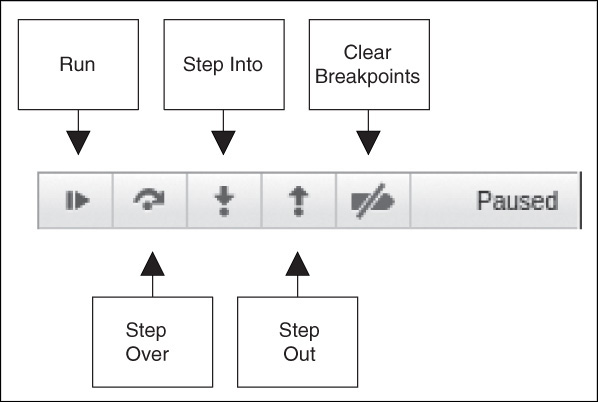
The Run button instructs the debugger to continue execution until the next breakpoint is encountered. The Step Over button causes the debugger to execute the subroutine, then halt at the line of code that follows the call to the subroutine. The Step Into button does the opposite: it executes the subroutine and halts execution at the first line of executable code in the subroutine. When you’re done looking at the subroutine’s code, click the Step Out button to finish executing the subroutine’s code and return to the calling function. To clear all breakpoints, click the Clear Breakpoints button.
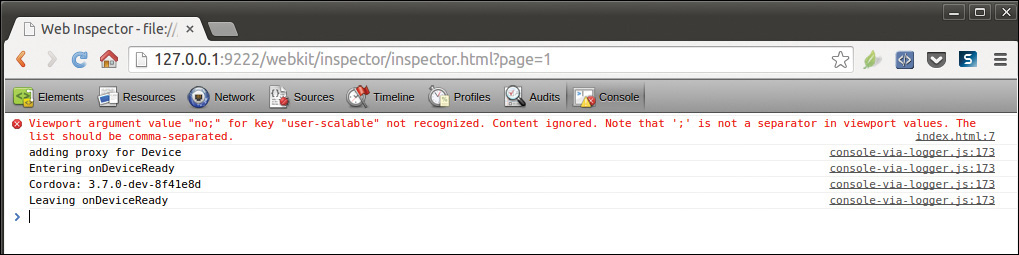
The Console pane allows you to view all of the content written to the console by the application as shown in Figure 10.8. You’ll notice that I’ve got an error in one of my application’s meta tags; I’ve since fixed the error.
You will, of course, want to run the application on a physical device. Before you can do a build for a device, you must install a click chroot. Click chroot is a cross-compilation environment that allows you to build ARM binaries from an Intel desktop. To create one, open a terminal window and execute the following command:
click chroot -a armhf -f ubuntu-sdk-14.10 create
Be prepared to wait a while as this process takes a very long time.
You can also create a click chroot and install the Cordova build dependencies simultaneously:
sudo click chroot -a armhf -f ubuntu-sdk-14.10 maint apt-get install libicu-
dev:armhf qtfeedback5-dev:armhf qtpim5-dev:armhf qtsystems5-dev:armhf
With this in place, you can build the application for the phone using
cordova build --device
To run the application on a connected device, use the following command:
cordova run --device
To run the application on a device in debug mode, use the following:
cordova run --device --debug
The CLI will build the application, then start looking for target devices to run the application on. The folks at Canonical were nice enough to loan me a device to use for testing purposes, but I wasn’t able to get it to work. Apparently there’s a new version of the CLI coming that fixes the problems I encountered, but I was not able to test that version in time.