2. Anatomy of a Cordova Application
In the previous chapter, I provided you with an overview of Apache Cordova; before I start digging into all of the tools, capabilities, APIs, and so on, I want to give you a clear definition of what a Cordova application is. In this chapter, I show you what makes a web application a Cordova application and give you a tour of the sample application the Cordova team provides.
As mentioned at the beginning of the book, a Cordova application can do anything that can be coded in standard, everyday HTML, CSS, and JavaScript. There are web applications and Cordova applications, and the distinctions between them can be minor or can be considerable.
The sections in this chapter highlight different versions of the requisite HelloWorld application found in most any developer book, article, or training class. For the purpose of highlighting aspects of the applications’ web content, rather than how they were created, the steps required to create the applications are omitted here (but covered in subsequent chapters).
Hello World!
As in any developer book, we’re going to start with the default HelloWorld application, then build upon it to highlight different aspects of what makes a web application into a Cordova application. The HTML content shown in Listing 2.1 describes a very simple web page that displays some text; this application could easily run in a desktop or mobile browser.
Listing 2.1 Hello World #1 Application
<!DOCTYPE HTML>
<html>
<head>
<title>Hello World #1</title>
</head>
<body>
<h1>Hello World #1</h1>
<p>This is a sample Apache Cordova application.</p>
</body>
</html>
If you open the web page in the mobile browser on a physical device or on a device emulator or simulator, you will see something similar to what is shown in Figure 2.1 (here it’s running in an Android emulator). The browser simply renders the page the best it knows how to, in this case, trying to render it as if it’s a full web page scaled to fit the smaller screen of the mobile device. Since it’s the browser, the window also displays the browser chrome, the address field, tab controls, and so on from the mobile browser.

This is not a Cordova application; it’s just a web application running in a mobile browser.
If you package that same index.html file into a Cordova application (using the tools I will discuss throughout the book) and run it on a smartphone device or device emulator, the app will display something similar to what is shown in Figure 2.2.

Here, the container seems to understand a bit about the view it’s being rendered within and renders full size, not scaled down, so the whole page fits within the browser window.
In this example, this is a Cordova application because the web application has been packaged into the Cordova native application container. If I hadn’t cropped the image, you would see that the web application consumes the entire screen of the emulated Android device. Even though I’m running a web application, because it’s running within a native application, there’s no browser UI being displayed and no access to browser features. It’s simply a native application rendering web content.
There is, however, nothing Cordova-ish about this application. It’s running in the Cordova native container, but it isn’t leveraging any of the APIs provided with the Cordova framework. Therefore, any web application can be packaged into a Cordova application—there’s nothing forcing you to use the Cordova APIs. If you have a simple web application that simply needs a way to be deployed through a smartphone’s native app store, for example, using Cordova is one way to accomplish that goal.
However, the app’s not very interesting, is it? It’s certainly not very pretty, but I’ll show you how to fix that in Chapter 17, “Using Third-Party UI Frameworks with Cordova.” For me, it needs to do some cool Cordova stuff before it becomes interesting.
Cordova Initialization
Now let’s take the previous example application and add some Cordova-specific stuff to it.
Even though the Cordova container exposes native APIs to the web application running within it, in general (there are a few exceptions) those APIs are not available until the plugin that exposes the API has been added to the project. Additionally, the Cordova container has to do some prep work before any of its APIs can be utilized. To make it easy for developers to know when they can start using APIs exposed by the Cordova container, Cordova fires a specific event, the deviceready event, once it has finished its initialization and it’s ready to go. Any application processing that requires the use of the Cordova APIs should be executed by the application only after it has received its notification that the Cordova container is available through the deviceready event.
The Hello World #2 application shown in Listing 2.2 has been updated to include code that uses a deviceready event listener to determine when the Cordova container application has completed its initialization. In this simple example, the application just displays an alert dialog when the event fires.
Listing 2.2 Hello World #2 Application
<!DOCTYPE html>
<html>
<head>
<title>Hello World #2</title>
<meta charset="utf-8" />
<meta name="format-detection" content="telephone=no" />
<meta name="viewport" content="user-scalable=no, initial-scale=1,
maximum-scale=1, minimum-scale=1, width=device-width,
height=device-height" />
<script src="cordova.js"></script>
<script>
function onBodyLoad() {
console.log("Entering onBodyLoad");
alert("Body Load");
document.addEventListener("deviceready", onDeviceReady, false);
}
function onDeviceReady() {
console.log("Cordova is ready");
navigator.notification.alert("Cordova is ready!");
}
</script>
</head>
<body onload="onBodyLoad()">
<h1>Hello World #2</h1>
<p>This is a sample Cordova application.</p>
</body>
</html>
Warning
If you copy the code from any of the listings in this chapter and try them in your own Cordova applications, you may notice that there are some extra carriage returns in the middle of some of the HTML. This was done to make the code render cleanly in the printed edition of the book. To download clean versions of all of the projects in this book, access the Code section of the book’s web site at www.cordova4programming.com or get them from GitHub at https://github.com/johnwargo/ac4p.
On the iPhone simulator, the application will display the screen shown in Figure 2.3.

Let’s take a look at the sample application as there’s a lot of new stuff in this example.
Within the <head> section of the web page are a few new entries, some meta tags that describe the content type for the application, and some other settings. For the most part, I pulled these meta tags from the default Cordova HelloCordova application described later in the chapter.
The charset tag identifies the character encoding used for the HTML document. What I’ve shown here is the default option; you would change this only if you were using a different character set for the HTML page.
<meta charset="utf-8" />
The next tag disables the embedded web browser’s automatic processing of telephone numbers. With this option disabled, as shown below, the browser won’t automatically turn phone numbers on the page into clickable links. You would need to change telephone=no to telephone=yes to enable this option.
<meta name="format-detection" content="telephone=no" />
Honestly, I’m really not sure why the Cordova team did this in their sample application; you would probably assume the user was running the application on a smartphone and would want phone numbers to be automatically enabled as links.
The viewport settings shown in the following tell the embedded web browser rendering the content how much of the available screen real estate should be used for the application and how to scale the content on the screen:
<meta name="viewport" content="user-scalable=no, initial-scale=1,
maximum-scale=1, minimum-scale=1, width=device-width,
height=device-height" />
In this case, the HTML page is configured to use the maximum height and width of the screen (through the width=device-width and height=device-height attributes) and to scale the content at 100% and not allow the user to change that in any way (through the initial-scale=1, maximum-scale=1, and user-scalable=no attributes).
Note
The viewport and associated attributes are not required. If they’re omitted, the browser will revert to its default behavior, which may (or may not—who knows?) result in the application’s content not consuming the full screen area available to it or zooming beyond it. Because there’s not much content in the Hello World #2 application, it could, for example, consume only the upper half of the screen on some devices. You may also find that on some platforms the settings have no effect—all the more reason to test your Cordova applications on a variety of mobile devices before release.
There’s also a new script tag in the code that loads the Cordova JavaScript library:
<script src="cordova.js"></script>
This loads the core Cordova API library and makes any core Cordova APIs available to the program. This file is also responsible for loading and initializing all of the plugins you have added to your Cordova application. You don’t have to add the cordova.js file to your project; this is done for you automatically by the Cordova CLI (described in Chapter 4, “Using the Cordova Command-Line Interfaces”), but you do need to add this reference to your application.
To set up the deviceready event listener we need for Cordova, the application adds an onload event function to the application’s body tag using the following:
<body onload="onBodyLoad()">
Within the onBodyLoad function, the code registers an event listener that instructs the application to call the onDeviceReady function when the Cordova container is ready, when the Cordova application container has finished its initialization routines and fired its deviceready event:
function onBodyLoad() {
document.addEventListener("deviceready", onDeviceReady, false);
}
In this example application the onDeviceReady function simply displays a Cordova alert dialog (which is different from a JavaScript alert dialog) letting the user know everything’s OK:
navigator.notification.alert("Cordova is ready!")
In production applications this function could update the UI with content created through API calls or do whatever other processing is required by the application. (You’ll see an example of this in Listing 2.4.)
Cordova applications fail silently when they encounter typos or syntax errors in a web application’s code, so when you’re testing an application, sometimes nothing will happen and you’ll have no clue why. If you look at the complete source code for the application, you’ll notice that there are a few things I haven’t described yet that I do in every Cordova application I write to help me troubleshoot the application. These tricks help me more quickly understand what’s happening in an application as it runs.
One of the things I do during testing is use the web browser console to display status messages as the application runs using code similar to the following:
console.log("Entering onBodyLoad");
I’ll show you how this works in Chapter 5, “The Mechanics of Cordova Development.”
In the onBodyLoad function, I also make sure to make a call to the JavaScript alert function so I can easily tell that the onload event has fired:
alert("Body Load");
Note
Unfortunately, the JavaScript alert() function is not available in universal Windows apps, so you will have to adjust your code when running on that platform. This topic is discussed further in Chapter 11, “Windows Development with Cordova.”
As I mentioned earlier, the Cordova container fails silently when it encounters an error with the web application’s source code. So, if I have this alert in the code and it doesn’t fire, I know very quickly (in the very first code the application executes) that something is wrong with the application.
In the deviceready event handler, I always add a call to navigator.notification.alert as shown in the example code. This allows me to confirm visually that the deviceready event has actually fired, plus it allows me to confirm that the Cordova Dialogs plugin has been added to the project and that any other debug alerts I put into the code will be operational. I use the Cordova alert instead of the JavaScript alert because it’s better looking (I can set the title of the dialog, for example, although I didn’t do that here); it also gives me access to callback functions I can use to perform extra steps when something interesting happens.
Remember, most of the Cordova APIs have been removed from the container and implemented as plugins. So, to utilize the Cordova alert method, you must add the Dialogs plugin to your application by opening a terminal window to your Cordova project folder and issuing the following command:
cordova plugin add org.apache.cordova.dialogs
You’ll learn all about how to use the cordova command in Chapter 4. You’ll learn more about the Dialogs plugin in Chapter 14, “Working with the Cordova APIs.”
The deviceready event will fire when the Cordova container finishes initializing, but it will also fire any time a new deviceready event listener is added by the application. Listing 2.3 shows this in action.
Listing 2.3 Hello World #3 Application
<!DOCTYPE html>
<html>
<head>
<title>Hello World #3</title>
<meta charset="utf-8" />
<meta name="format-detection" content="telephone=no" />
<meta name="viewport" content="user-scalable=no, initial-scale=1,
maximum-scale=1, minimum-scale=1, width=device-width,
height=device-height" />
<script src="cordova.js"></script>
<script>
function onBodyLoad() {
console.log("Entering onBodyLoad");
alert("Body Load");
document.addEventListener("deviceready", onDeviceReady, false);
}
function onDeviceReady() {
console.log("Entering onDeviceReady");
navigator.notification.alert("Cordova is ready!");
}
function addSecondDeviceReadyListener() {
console.log("Entering addSecondDeviceReadyListener");
document.addEventListener("deviceready", someOtherFunction, false);
}
function someOtherFunction() {
console.log("Entering someOtherFunction");
navigator.notification.alert("Second deviceready Function Fired.");
}
</script>
</head>
<body onload="onBodyLoad()">
<h1>Hello World #3</h1>
<p>This is a sample Cordova application.</p>
<button onclick="addSecondDeviceReadyListener()">Add deviceready Event Listener</
button>
</body>
</html>
In this example, I’ve added a button to the application’s main page. When the button is tapped, an additional deviceready event listener is defined, and then the callback function for the new listener is immediately executed by the Cordova container. In this case, the onDeviceReady function executes once the container completes its initialization, and then the someOtherFunction function executes only after the second deviceready event listener has been added.
Leveraging Cordova APIs
Now that we know how to configure an application to wait until the Cordova APIs are available, let’s build an application that actually uses some of the Cordova APIs. The Hello World #4 application shown in Listing 2.4 uses the Cordova Device API to allow the application to understand a bit about the environment it is running in.
Listing 2.4 Hello World #4 Application
<!DOCTYPE html>
<html>
<head>
<title>Hello World #4</title>
<meta charset="utf-8" />
<meta name="format-detection" content="telephone=no" />
<meta name="viewport" content="user-scalable=no, initial-scale=1,
maximum-scale=1, minimum-scale=1, width=device-width,
height=device-height" />
<script src="cordova.js"></script>
<script>
var br = "<br />";
function onBodyLoad() {
console.log("Entering onBodyLoad");
alert("Body Load");
document.addEventListener("deviceready", onDeviceReady, false);
}
function onDeviceReady() {
navigator.notification.alert("Cordova is ready!");
console.log("Cordova: " + device.cordova);
//Get the appInfo DOM element
var element = document.getElementById('appInfo'),
//replace it with specific information about the device
//running the application
element.innerHTML =
'Cordova Version: ' + device.cordova + br +
'Platform: ' + device.platform + br +
'Model: ' + device.model + br +
'OS Version ' + device.version;
}
</script>
</head>
<body onload="onBodyLoad()">
<h1>Hello World #4</h1>
<p>This is a Cordova application that makes calls to the Cordova Device API.</p>
<p id="appInfo">Waiting for Cordova Initialization to complete.</p>
</body>
</html>
Figure 2.4 shows the Hello World #4 application running on the Windows Phone 8.1 simulator.

In this version of the HelloWorld application, the code in the onDeviceReady function has been updated so the program updates a portion of the application’s content with an ID of appInfo with information about the device running the application and the version of Cordova used to build the application. Device-specific information is available via the Cordova Device API (http://plugins.cordova.io/#/package/org.apache.cordova.device), and this sample application uses a subset of the available properties in this API.
In order for me to be able to call the Device API, I had to add the Device API plugin to the project using the CLI command:
cordova plugin add org.apache.cordova.device
Note
Remember, Cordova fails silently when it encounters an error in a web application’s code. So, if you forget to add the plugin to your application, the code will seem to execute, but nothing will happen. I can’t tell you how many times I’ve tried to use the Device API’s methods only to see them not work because I simply forgot to add the plugin to the project.
With the Device API in place, the application can access it using the following code:
var element = document.getElementById('appInfo'),
element.innerHTML = 'Cordova Version: ' + device.cordova + br +
'Platform: ' + device.platform + br +
'Model: ' + device.model + br +
'OS Version ' + device.version;
In the figure, you may have noticed that the Cordova version shows that I’m running Cordova 3.6.4. I actually ran this application using Cordova 4.0, but with this release the Cordova CLI, Cordova container, and Cordova APIs have all been broken out into separate releases. So, even though I’m actually running Cordova 4.0, some of the components may be at a different release.
Listing 2.5 shows a slightly modified version of the application; in this case I added some markup to make the device information into an unordered list so it would render more neatly on the page.
Listing 2.5 Hello World #5 Application
<!DOCTYPE html>
<html>
<head>
<title>Hello World #5</title>
<meta charset="utf-8" />
<meta name="format-detection" content="telephone=no" />
<meta name="viewport" content="user-scalable=no, initial-scale=1,
maximum-scale=1, minimum-scale=1, width=device-width,
height=device-height" />
<script src="cordova.js"></script>
<script>
function onBodyLoad() {
alert("Body Load");
document.addEventListener("deviceready", onDeviceReady, false);
}
function onDeviceReady() {
navigator.notification.alert("Cordova is ready!");
console.log("Cordova: " + device.cordova);
//Get the appInfo DOM element
var element = document.getElementById('appInfo'),
//replace it with specific information about the device
//running the application
element.innerHTML =
'<ul><li>Cordova Version: ' + device.cordova +
'</li><li>Platform: ' + device.platform +
'</li><li>Model: ' + device.model +
'</li><li>OS Version ' + device.version + '</li></ul>';
}
</script>
</head>
<body onload="onBodyLoad()">
<h1>Hello World #5</h1>
<p>This is a Cordova application that makes calls to the Cordova Device API.</p>
<p id="appInfo">Waiting for Cordova Initialization to complete.</p>
</body>
</html>
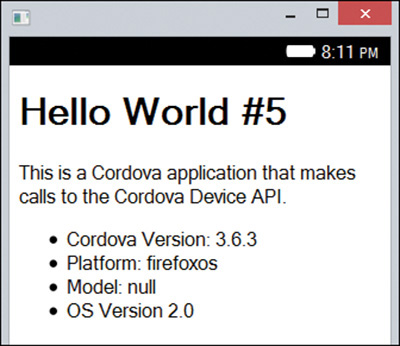
Just so you can see a Cordova application running on yet another device, Figure 2.5 shows the Hello World #5 application running on a Firefox OS simulator.
Structuring Your Application’s Code
The way you structure the code for your web application is a matter of personal style, but for Cordova applications, and for some web applications, there may be a valid reason to use a particular approach. So far in this chapter I’ve set up my example applications so that everything, the HTML content as well as the JavaScript code, is in the same file. Additionally, I’ve broken things up a bit so the examples are simple and easy to read. There are a lot of things a developer can do to write more efficient and compact code—here I’ve deliberately not done them to make the examples as easy to read as possible.
A web developer will usually want to separate an application’s HTML from its JavaScript code. In the simple applications I’ve shown here, there’s not much of each, so it’s not a big deal. But for more complicated applications, when there’s a whole lot of code, separation of the two types of code can make the code easier to maintain and allow multiple developers to work on different parts of the application (UI versus application logic) separately.
There is, however, a Cordova-specific reason why you will likely want to do this. Remember how I explained earlier that the Cordova container needed to initialize itself? Well, if you think about an application that has several Cordova plugins added to it, it might take some time for the Cordova container to initialize itself, and for all of the plugins to initialize themselves as well. What I’ve found in many sophisticated Cordova applications is that large web applications and/or a bunch of plugins can cause a Cordova application to time out during initialization. It takes so long to load and initialize everything that the Cordova container thinks something’s wrong and fails with a timeout error. I’ve seen this happen most frequently with a large web application using jQuery Mobile.
So, what do you do to avoid this? You structure your web application projects so that the web content and the JavaScript code are separated, and then you take some extra steps to arrange the order in which things happen.
Another reason why you would want an application’s JavaScript code broken out into a separate file is to more easily support JavaScript debugging. Throughout the book I’ll show you many different tools you can use to test and debug your Cordova applications. What I found in my testing of these tools is that most of them are able to interact with an application’s JavaScript code only when the code is not embedded inside the application’s HTML content (the application’s index.html file, for example).
Listing 2.6 shows a simple application I’ve created that is structured a little differently from all of the other examples I’ve shown so far. In this example, two things are different: the application loads all of its JavaScript code after all of the application’s HTML has been defined, plus all of the application’s logic has been split out into a separate JavaScript file called index.js.
Listing 2.6 Hello World #6 Application index.html
<!DOCTYPE html>
<html>
<head>
<title>Hello World #6</title>
<meta charset="utf-8" />
<meta name="format-detection" content="telephone=no" />
<meta name="viewport" content="user-scalable=no, initial-scale=1,
maximum-scale=1, minimum-scale=1, width=device-width,
height=device-height" />
</head>
<body>
<header>
<h1>Hello World #6</h1>
</header>
<p>This is a simple Cordova application.</p>
<script src="cordova.js"></script>
<script src="index.js"></script>
</body>
</html>
When the earlier example applications started up, the cordova.js file was loaded before much else happened on the page. If the cordova.js took a while to load, on a slower device, for example, it might delay the rendering of the page’s HTML content while it waited for the JavaScript to load. So, users of the application might see a blank page before the HTML displayed. If this was a large application, and several JavaScript files were being loaded, this might take some time, enough that the user would notice.
In the Hello World #6 application, all of the HTML loads within the browser context before the cordova.js file is loaded. If the index.js file were quite large, or I was loading jQuery Mobile and a bunch of other JavaScript stuff, the user would at least be looking at some sort of UI as the JavaScript was being loaded.
Listing 2.7 shows the application’s index.js. It contains all of the JavaScript code the application is using. In this example, the file defines a simple function that self-initializes when the file is loaded, adds the event listener for the deviceready event, and provides a function that is executed when the event fires.
Listing 2.7 Hello World #6 Application index.js
var cvaReady;
var someOtherFunction = function () {
if (cvaReady) {
//do something
} else {
//tell the user why they can't do that
}
};
(function () {
var onDeviceReady = function () {
console.log("Entering onDeviceReady");
//Let the user know that the deviceReady event has fired
navigator.notification.alert("Cordova is ready", null,
"Device Ready", "Continue");
//Set the variable that lets other parts of the program
//know that Cordova has initialized
cvaReady = true;
//===================================================
//Do whatever other stuff you want to do on startup
//===================================================
console.log("Leaving onDeviceReady");
};
//add an event listener for the Cordova deviceReady event.
document.addEventListener('deviceready', onDeviceReady, false);
}());
I’ve added a new feature in this example as well, a cvaReady object that the application can use to tell whether the onDeviceReady function has executed. If you don’t want to wait to do everything until the deviceready event has fired, you can ignore it and check the cvaReady object as needed to see if you are able to do Cordova stuff. I know this is a clunky way to do this; I’m just trying to give you different options for your applications.
When you run into an issue where the Cordova container times out before loading all of your stuff, what some people recommend doing is setting up a timer in your deviceready event listener that waits a few seconds before loading a new page that then loads your application’s JavaScript files. This allows all of the Cordova initialization to complete before anything else is done by the application. This is supposedly one way people have gotten around timing issues with using jQuery Mobile with a large Cordova application, but I’ve never had the need to use this approach.
The Generated Web Application Files
Now that I’ve shown you how a Cordova application is crafted, let’s take a look at the default application generated by the Cordova CLI. In Chapter 4 you’ll see that when the CLI creates a new application project, by default it creates a simple HelloCordova web application and places it in the project’s www folder. You can override this behavior if you want, but this is the default.
The project folder contains a web application folder structure that is designed to separate the different types of files into separate folders. For example, the web application’s CSS files should be placed in the css folder, JavaScript files in the js folder, and so on.
The application’s index.html file is shown in Listing 2.8; it contains many of the same HTML elements and attributes as the other examples shown throughout the chapter. What the application does is display a simple page with the Cordova logo and some blinking text, “Connecting to Device,” centered beneath the logo.
Listing 2.8 Contents of the HelloCordova index.html File
<!DOCTYPE html>
<!--
Licensed to the Apache Software Foundation (ASF) under one
or more contributor license agreements. See the NOTICE file
distributed with this work for additional information
regarding copyright ownership. The ASF licenses this file
to you under the Apache License, Version 2.0 (the
"License"); you may not use this file except in compliance
with the License. You may obtain a copy of the License at
http://www.apache.org/licenses/LICENSE-2.0
Unless required by applicable law or agreed to in writing,
software distributed under the License is distributed on an
"AS IS" BASIS, WITHOUT WARRANTIES OR CONDITIONS OF ANY
KIND, either express or implied. See the License for the
specific language governing permissions and limitations
under the License.
-->
<html>
<head>
<meta charset="utf-8" />
<meta name="format-detection" content="telephone=no" />
<!-- WARNING: for iOS 7, remove the width=device-width and
height=device-height attributes.
See https://issues.apache.org/jira/browse/CB-4323 -->
<meta name="viewport" content="user-scalable=no,
initial-scale=1, maximum-scale=1, minimum-scale=1,
width=device-width, height=device-height,
target-densitydpi=device-dpi" />
<link rel="stylesheet" type="text/css" href="css/index.css" />
<meta name="msapplication-tap-highlight" content="no" />
<title>Hello World</title>
</head>
<body>
<div class="app">
<h1>Apache Cordova</h1>
<div id="deviceready" class="blink">
<p class="event listening">Connecting to Device</p>
<p class="event received">Device is Ready</p>
</div>
</div>
<script type="text/javascript" src="cordova.js"></script>
<script type="text/javascript" src="js/index.js"></script>
<script type="text/javascript">
app.initialize();
</script>
</body>
</html>
Notice that the application loads the cordova.js and other resources at the end of the file as I explained in the previous section. In this application initialization is done a little differently. Rather than having an index.js file that auto-initializes, the index.js exposes an initialize method that is called manually in a separate script tag in the file.
Listing 2.9 shows the contents of the application’s index.js file.
Listing 2.9 Contents of the HelloCordova index.js File
/*
* Licensed to the Apache Software Foundation (ASF) under one
* or more contributor license agreements. See the NOTICE file
* distributed with this work for additional information
* regarding copyright ownership. The ASF licenses this file
* to you under the Apache License, Version 2.0 (the
* "License"); you may not use this file except in compliance
* with the License. You may obtain a copy of the License at
*
* http://www.apache.org/licenses/LICENSE-2.0
*
* Unless required by applicable law or agreed to in writing,
* software distributed under the License is distributed on an
* "AS IS" BASIS, WITHOUT WARRANTIES OR CONDITIONS OF ANY
* KIND, either express or implied. See the License for the
* specific language governing permissions and limitations
* under the License.
*/
var app = {
// Application Constructor
initialize: function() {
this.bindEvents();
},
// Bind Event Listeners
//
// Bind any events that are required on startup. Common events are:
// 'load', 'deviceready', 'offline', and 'online'.
bindEvents: function() {
document.addEventListener('deviceready', this.onDeviceReady, false);
},
// deviceready Event Handler
//
// The scope of 'this' is the event. In order to call the 'receivedEvent'
// function, we must explicitly call 'app.receivedEvent(...);'.
onDeviceReady: function() {
app.receivedEvent('deviceready'),
},
// Update DOM on a Received Event
receivedEvent: function(id) {
var parentElement = document.getElementById(id);
var listeningElement = parentElement.querySelector('.listening'),
var receivedElement = parentElement.querySelector('.received'),
listeningElement.setAttribute('style', 'display:none;'),
receivedElement.setAttribute('style', 'display:block;'),
console.log('Received Event: ' + id);
}
};
The JavaScript code registers the deviceready listener you’ve seen in many of the other examples in this chapter. When the onDeviceReady function executes, it writes some information to the console (this will be discussed more in Chapter 5) and then updates the page content to indicate that the Cordova container is ready.
This application is much more complicated than it needs to be; as you can see from my previous examples, you can easily do the same thing with much less code. However, it’s apparently the way the Cordova team wants to highlight how to build Cordova applications.
Note
In the examples I have provided throughout the chapter, I deliberately simplified the application code to make it easier to teach you what a Cordova application looks like. The sample application generated by the CLI is structured more like modern HTML5 applications.
The approach you take when building your web applications is up to you; there’s no right or wrong approach. I think the CLI-generated application is more complicated than it needs to be, but as features are added to an application, it may be easier to use the approach highlighted in this section.
Figure 2.6 shows the default Cordova HelloCordova application running on an Android emulator. When building your Cordova applications, you can start with this sample application and add in your custom code, or you can rip out the HTML and CSS files and start from scratch.

Responsive Design and Cordova
When a smartphone or tablet user rotates a device running a web or Cordova application, the browser needs to be able to react to the change and adjust the page’s properties. If it didn’t, when the browser window switches from a portrait to a landscape orientation, much of the available screen real estate would go unused. Designing a web application so it properly renders the application’s content across varying display widths or changing orientations is called responsive design.
Dealing with responsive design is a mobile web development topic, and I’ve always tried to limit these books to Cordova-related subjects only, but in this case it seemed to make sense to cover this topic. It didn’t fit in other areas of the book, so I decided to add it here.
There are several ways you can approach dealing with browser window size and orientation-related challenges. Bootstrap (http://getbootstrap.com/) and other front-end frameworks provide capabilities web developers can leverage to automatically scale and adjust their web applications’ content based on the available screen real estate. Additionally, there are capabilities in CSS and JavaScript that the web developer can leverage directly to accomplish this. I’m not going to cover third-party frameworks in this chapter; I’ll cover some of them in Chapter 17. What I will show you is how to build some of these capabilities into your own applications directly.
Using Cascading Style Sheets, an application has the capability to define specific CSS attributes that apply depending on the orientation of the device. In the following example, you see that I’ve defined two body styles, one that applies when the content is rendered on a screen while the orientation is portrait and the other when rendered on a screen while the orientation is landscape.
/* portrait */
@media screen and (orientation: portrait) {
/* portrait-specific styles */
body {
background-color: blue;
color: white;
}
}
/* landscape */
@media screen and (orientation: landscape) {
/* landscape-specific styles */
body {
background-color: red;
color: black;
}
}
In this case, just so I could demonstrate the changes cleanly, if you add this code to your web application (I’ll show you an example in a minute), you get white text on a blue background while in portrait orientation and black text on a red background in landscape orientation. For your own applications, you’ll want to adjust margins, borders, and so on based on the space available to your application.
Sometimes you want to do a little more when things change; to accommodate this, the web browser exposes events you can listen for and update your application’s UI as needed. Two events that matter for Cordova developers are orientationchange and resize. To add event listeners for these events to your Cordova applications, you can use the following:
//Set the orientation change event listener
window.addEventListener('orientationchange', onOrientationChange);
//For actions that don't fire the orientationchange event
window.addEventListener("resize", onResize, false);
With this code in place, when the device’s orientation changes, the onOrientationChange function is executed, and when the browser window resizes, the onResize function is executed. All your application has to do then is populate those two functions with the code you want executed when those particular events happen. In this example, I simply wrote some screen measurements to the page when the events fire.
To see all of this in action, I’ve created Example 2.7 shown in Listing 2.10. This application implements both the CSS queries and JavaScript events to create a web application that reacts to changes that occur while the application is running.
Listing 2.10 Example 2.7 Application index.html
<!DOCTYPE html>
<html>
<head>
<title>Example 2.7</title>
<meta charset="utf-8" />
<meta name="format-detection" content="telephone=no" />
<meta name="viewport" content="user-scalable=no, initial-scale=1,
maximum-scale=1, minimum-scale=1, width=device-width,
height=device-height" />
<style>
/* portrait */
@media screen and (orientation: portrait) {
/* portrait-specific styles */
body {
background-color: blue;
color: white;
}
}
/* landscape */
@media screen and (orientation: landscape) {
/* landscape-specific styles */
body {
background-color: red;
color: black;
}
}
</style>
<script src="cordova.js"></script>
<script>
br = "<br />";
function onBodyLoad() {
alert("Body Load");
document.addEventListener("deviceready", onDeviceReady, false);
//set the orientationchange event listener
window.addEventListener('orientationchange',
onOrientationChange);
//for devices that don't fire orientationchange
window.addEventListener("resize", onResize, false);
//Fire this at the start to set the initial orientation on
//the page
updatePage();
}
function onDeviceReady() {
navigator.notification.alert("Cordova is ready!");
}
function updatePage(msg) {
//Build an output string consisting of the different screen
//measurement values
var strongStart = "<strong>";
var strongEnd = "</strong>";
//var StrRes, or, sw, sh, ww, wh;
or = strongStart + "Orientation: " + strongEnd +
window.orientation + " degrees";
console.log(or);
strRes = or + br;
sw = strongStart + "Width: " + strongEnd + screen.width;
console.log(sw);
strRes += sw + br;
sh = strongStart + "Height: " + strongEnd + screen.height;
console.log(sh);
strRes += sh + br;
ww = strongStart + "Inner width: " + strongEnd +
window.innerWidth;
console.log(ww);
strRes += ww + br;
wh = strongStart + "Inner height: " + strongEnd +
window.innerHeight;
console.log(wh);
strRes += wh + br;
document.getElementById('appInfo').innerHTML = strRes;
}
function onOrientationChange() {
var msg;
console.log("Orientation has changed");
switch (abs(window.orientation)) {
case 90:
console.log("Device is in Landscape mode");
break;
default:
console.log("Device is in Portrait mode");
break;
}
updatePage();
}
function onResize() {
console.log("Resize event fired");
updatePage();
}
</script>
</head>
<body onload="onBodyLoad()">
<h1>Example 2.7</h1>
<p>This is a Cordova application that responds to device
orientation and resize events.</p>
<p id="appInfo">Waiting for Cordova Initialization to complete.</p>
</body>
</html>
Figure 2.7 shows the application running on an Android device in portrait orientation.

Figure 2.8 shows the application running on an Android device in landscape orientation.

There’s a whole lot more that can be said about responsive design and the tools that address it, but that’s way beyond the scope of this simple Cordova book. I’m a big fan of Smashing Magazine, and they’ve published some nice articles on web design and responsive design that might help you with this topic:
![]() www.smashingmagazine.com/responsive-web-design-guidelines-tutorials/
www.smashingmagazine.com/responsive-web-design-guidelines-tutorials/
![]() www.smashingmagazine.com/2012/03/22/device-agnostic-approach-to-responsive-web-design/
www.smashingmagazine.com/2012/03/22/device-agnostic-approach-to-responsive-web-design/
There are a lot of web design and development books available that cover this topic in much more detail than I can. For example, take a look at the following Pearson titles:
![]() Dutson, Phil. Responsive Mobile Design: Designing for Every Device. Boston: Addison-Wesley, 2014.
Dutson, Phil. Responsive Mobile Design: Designing for Every Device. Boston: Addison-Wesley, 2014.
![]() Kymin, Jennifer. Sams Teach Yourself Responsive Web Design in 24 Hours. Indianapolis, IN: Sams Publishing, 2014.
Kymin, Jennifer. Sams Teach Yourself Responsive Web Design in 24 Hours. Indianapolis, IN: Sams Publishing, 2014.
Wrap-Up
In this chapter, I’ve shown you what makes an application a Cordova application, plus I’ve shown you the sample application that the Cordova CLI creates for you. You now have the building blocks necessary to start building your own Cordova applications.
In the next chapters, I’ll show you how to install Apache Cordova and use the Cordova CLI to create and manage your Cordova projects.
Notice that in this chapter, I didn’t do anything to make my applications visually appealing. You can use CSS to do this, which is not something I really want to cover in a Cordova book. In Chapter 17 I’ll show you how to use third-party frameworks, some of them specifically designed for hybrid applications, to add pizzazz to your Cordova web applications.